
Halo 4 Guide Infinity Infinity Multiplayer
Armor Abilities
Armor abilities are additional hardware components that provide a specific combat ability. When using armor abilities properly and in certain situations, you can gain a huge advantage over your enemies. You can pick one armor ability in your loadout. Each one has a certain amount of time in which it can be used, as well as the time it takes to recharge. Enemies can’t pick up your armor abilities when you die, so don’t worry about them stealing these.
The following reveals the list of armor abilities that you can use, as well as tactics on how to utilize them to your advantage. You’ll unlock the ability to add an armor ability to your loadout at Spartan Rank 3.
| Upgrade Name | Rank Unlocked |
|---|---|
| Ammo | SR-12 |
| Dexterity | SR-12 |
| Awareness | SR-20 |
| Sensor | SR-20 |
| Explosives | SR-26 |
| Ordnance Priority | SR-26 |
| Drop Recon | Complete the Engineer Specialization |
| Nemesis | Complete the Stalker Specialization |
| Gunner | Complete the Pathfinder Specialization |
| Stealth | Complete the Wetwork Specialization |
| Stability | Complete the Rogue Specialization |
Active Camouflage
Unlocked for purchase at Spartan Rank 10.
.jpg)
This guy doesn’t know it, but he’s already dead.
Basic Description: This allows users to generate a visual effect that is astonishingly close to invisibility. You can only stay fully camouflaged if you’re standing still or crouch-walking. When Active Camouflage is in use, motion sensors will display a cluster of dots in the general vicinity of the user, alerting all players that a Spartan is hidden nearby. If you shoot, melee, or throw a grenade, your camouflage will go out for a short period of time.
When to Use: This is excellent to employ in Team Snipers and Free For All. It is also beneficial when sneaking into an enemy base to pull a flag. Active Camouflage is best used for ambushes. Even if the enemy can use their motion sensors to pinpoint a general location, so long as you only move slowly or sit still, they will have a difficult time finding you so long as the ability is active. You should equip Active Camouflage if you’re planning on playing tactically and sneakily.
Counter Strategies: You can easily be seen when you’re moving, so the enemy can spot you the majority of the time unless you’re crouch-walking or standing still. If you want to stay camouflaged, you can’t move around the map at all, which usually isn’t helpful to you, your score, or your team. Pay attention to your Motion Sensor. If you see a mass of blue dots, Active Camouflage is being used. With experience you can get a feel for where the player is in relation to the dots. Check the corners and darkened areas inside the dot cloud.
AutoSentry
Unlocked for purchase at Spartan Rank 16.
Basic Description: This is an automated turret that can be deployed to defend its user or command a key battlefield choke point. The Autosentry can be easily destroyed, but it also damages enemies.
When to Use: The Autosentry is useful when deployed near chokepoints, or when an important location needs to be locked down. It can also turn the tide in a competitive rifle battle, as getting up as little as one shot over your opponent (with your Autosentry damaging them in addition to your shots) can lead to a victory.
If you can get an opponent to round a corner and receive a shot or two from the Autosentry, you’re likely to find yourself ahead in fights. Even the briefest distraction is great for your game.
The Autosentry can also serve as a notification that a foe may be approaching from an area that is currently unwatched. Set up your Autosentry to watch your back, and you’ll have advance notice that an enemy is approaching when you hear it fire or get destroyed.
Counter Strategies: The Autosentry is extremely easy to destroy. Any weapon can take it out with haste. Pop a few shots in it (ideally from a weapon with the most expendable ammunition so you can keep the best bullets for enemy combat) and you’ll be free to slay once more.
Hardlight Shield
Unlocked for purchase at Spartan Rank 10.
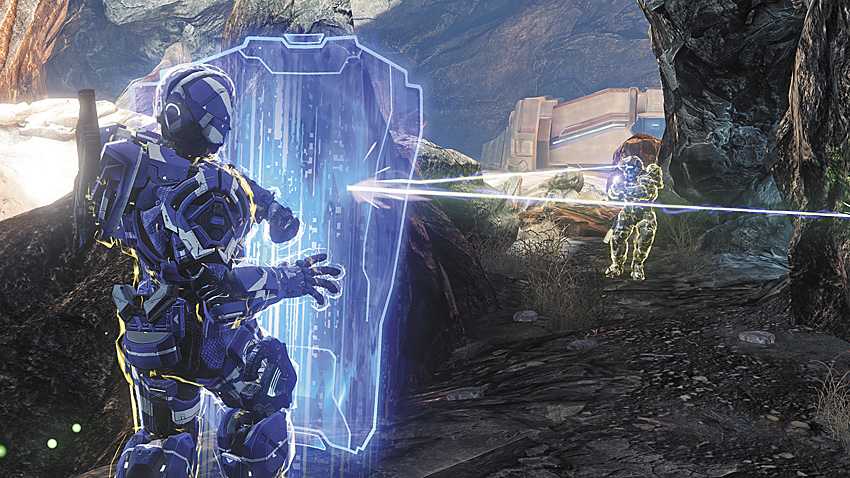
Cheat death for a few seconds longer.
Basic Description: This allows users to generate a protective barrier of hard light that stops most small-arms fire and some explosives. Hardlight Shields block and deflect a huge amount of damage from weapons and vehicles. This is helpful when you’re leading a charge into an area and need to buy time for teammates to come help you. You also can jump once while using the shield: quickly let go of your armor ability button and press Jump before the shield disappears; then hold the armor ability button down again if you need to make a jump while using it.
When to Use: Employ the Hardlight Shield when initiating a charge so you can take the incoming enemy damage for your team. You can also use it to buy a lot of time if your teammates are attempting to come and help you. It is also very beneficial to use in 1v1 matches to deflect Plasma Pistol charges and block grenade explosions.
The Hardlight Shield also serves as a good distraction. Walk into your opponent’s base with the shield active, and your hardened shell may buy enough time for a teammate to sneak behind the unsuspecting or preoccupied foes.
Another great plan is to use it to check rooms without much danger to yourself. If you fear the enemy team may be occupying an area, walk in with your Hardlight Shield active and find out for sure—without risking your life.
Counter Strategies: When someone is using the Hardlight Shield, their normal shields do not recharge, so you can eventually take your enemy out with enough damage and time. Your enemy can’t shoot either and they move a lot slower, so you can easily sprint up to inflict a melee strike, or toss grenades behind them to take them out. A well-placed grenade is the best counter to a Hardlight Shield user.
Hologram
Unlocked for purchase at Spartan Rank 6.
.jpg)
Unfortunately, your Hologram does not come equipped with a brain.
Basic Description: This allows users to generate a nearly identical holographic decoy of themselves to deceive enemies during combat. The Hologram does show up on Motion Sensor, and you can hide inside it. If you drop the Hologram at your feet, you can crouch or just walk inside it to conceal yourself for the short time the Hologram is out.
When to Use: This is very good to use in Team Slayer and it can sometimes help you escape situations in Free For All. It’s also great for baiting ammo out of power weapons or checking areas you might not want to risk entering blind. Send your hologram running into a mystery room and listen for gunfire to see if anyone waits within. If you’re lucky, your Hologram will take the last rocket to the face, allowing you to storm in and pick up the kill.
Counter Strategies: The downside to using the Hologram is experienced players will usually know when you’re a Hologram because it just runs in a straight line, and most players know that running in a straight line is strategically terrible.
Jet Pack
Unlocked for purchase at Spartan Rank 6.
.jpg)
It’s a bird...it’s a plane...it’s actually a sitting duck.
Basic Description: The Jet Pack allows users limited flight through a vertical lift-propulsion system similar to that of EVA reentry packs. You can use the Jet Pack for about three seconds to reach higher platforms or impossible-to-reach places. You can also use it to throw off your enemy’s shot by Jet Packing right before they try to inflict a last headshot on you. Hammering the Crouch button will make it that much more difficult for your opponent to finish you off with a headshot.
When to Use: When you’re in a 1v1 fight and want to force your foes to aim upward, use this ability. It’s also useful when you want to scoot over buildings or walls in order to quickly move around the map. The Jet Pack is excellent for creating unexpected pathways (or exits if you’re spotted or are using it to attract the enemy’s attention!). It also allows you to maneuver around the map much faster, especially on more vertical maps (Adrift, Abandon, etc.).
When moving off a lift or man cannon, turn on your Jet Pack to try some unique movement and routes. You’ll fly off the lifts (especially the man cannons on Adrift), and you might be able to get a jump on an unsuspecting opponent.
The Jet Pack is also great for avoiding power weapons that use splash damage. It’s nearly impossible to kill a Jet Pack user with a Rocket or Incineration Cannon, so if you see this weapon in your enemy’s hands, take to the sky.
Counter Strategies: Take care, as when you use the Jet Pack, you’re opening yourself up to several new angles from which your foes can fire at you, since you’re wide open in the air. It’s also fairly difficult to shoot while operating a Jet Pack. Only activate this armor ability with a purpose in mind, whether it’s to move to a specific place or get a better angle on a fleeing foe. If you see a Jet Packing enemy moving around the map, simply drop them quickly; just keep in mind the foe might be a decoy in team matches.
Promethean Vision
Unlocked for purchase at Spartan Rank 3.
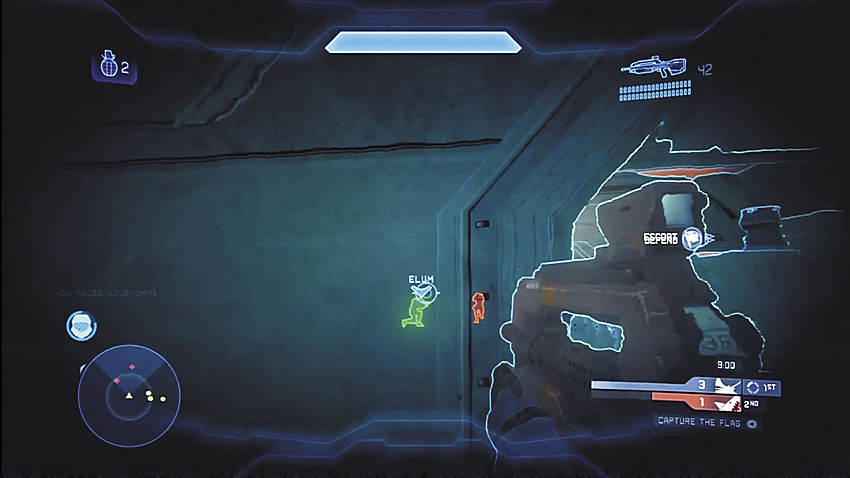
Good luck hiding now, enemy scum....
Basic Description: This allows users to detect enemy signatures through walls and other hard surfaces. When using Promethean Vision, you can see your enemies and across most maps, as the range is extremely long. You can also see grenades being thrown, turrets, and vehicles when using this vision.
When to Use: Promethean Vision is very useful in practically any situation. Use it to see where your opponent is hiding or from which direction grenades are being thrown at you. Knowing your enemy’s exact location can often be half the battle, and it will help eliminate nasty surprises. You can even become the “spotter” for your teammates if the others don’t have this ability equipped, identifying campers and people attempting to ambush you while holding a shotgun or Energy Sword..
Counter Strategies: The only counter to Promethean Vision is the Support Upgrade Stealth, which makes it very hard for your enemy to see you when you’re using this ability. The enemy can also see on their Motion Sensor if you’re using Promethean Vision, so they will probably know you are scanning them. Your opponent’s controller also makes a small vibration when you turn on Promethean Vision, which makes them aware someone used it and is scanning the map. When activated, this armor ability makes a distinct sound to alert others in the area. Additionally, it creates a pulse on motion sensors and keeps the user constantly on the sensors until they shut the ability off. Promethean Vision also has a very long recharge time.
Regeneration Field
Unlocked for purchase at Spartan Rank 16.
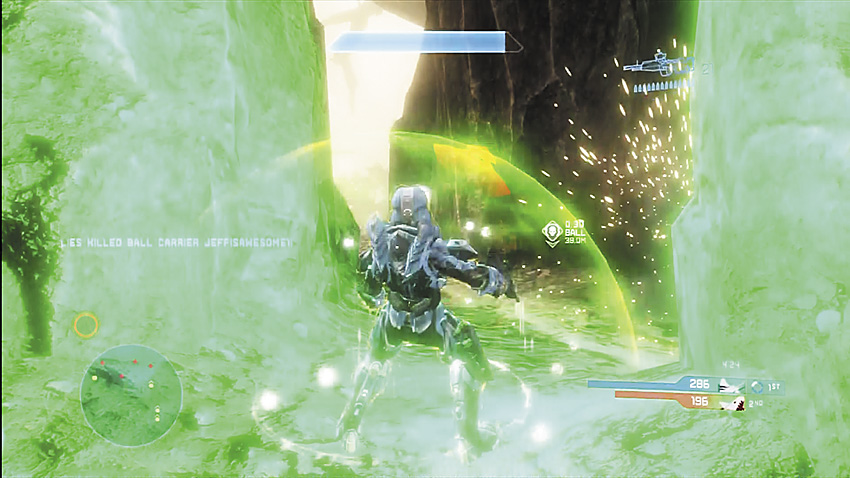
Did someone call for a medic?
Basic Description: The Regeneration Field allows users to release a short-range energy field that heals any nearby Spartans. Your shields will not regenerate if you are getting shot, so you are still vulnerable while in the regeneration zone.
When to Use: This is very effective when used behind cover or as cover itself; hide behind it and let your shields recharge before poking back out to fight. Use this when you have teammates next to you to help them regain their shields as well. Also try staging a Regeneration Field outside of a room prior to a breach. This will allow you and your teammates to retreat if needed and quickly be ready for another engagement.
Counter Strategies: If your opponent uses the Regeneration Field in the open with no cover, you can keep putting shots in them to constantly remove their shields and eventually kill them. Their shields won’t recharge if shots are hitting them. If they’re behind cover, you can focus on banking grenades into their Regen Field or simply wait it out—it won’t last forever, and they can’t hurt you from behind cover.
Thruster Pack
Unlocked for purchase at Spartan Rank 3.
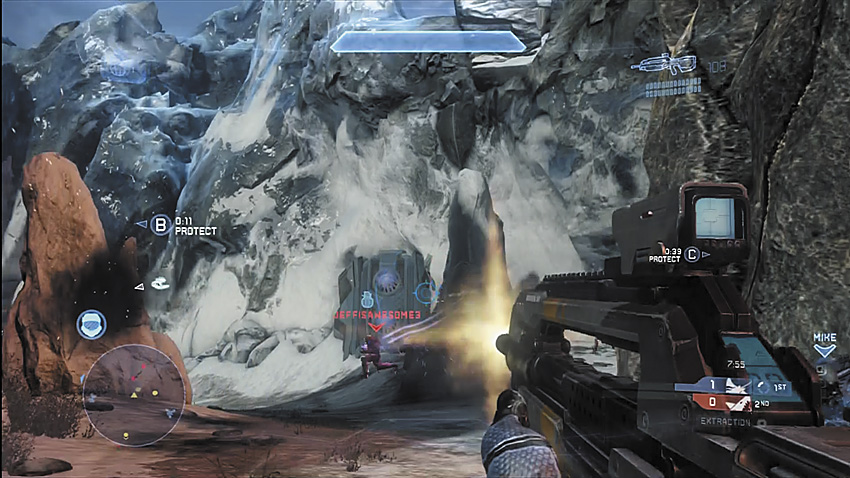
Get out of trouble quickly with a good thrust.
Basic Description: The Thruster Pack enables a powerful burst of movement, allowing you to evade or quickly close the gap. The advantage of the Thruster Pack is that you can use it in midair and really throw off your opponents’ shots. Make sure you jump and mash the Crouch button to get a little extra lift toward your intended direction. If you simply use the Thruster Pack while on the ground to boost your speed, you won’t go as far (but it’s still advisable).
When to Use: Use the Thruster Pack to maneuver around corners more quickly, to grab a flag or ball with more speed than your foes, and to help you immensely during 1v1 battles. This ability is also excellent for backing out of fights that you might be losing. It is best used moving to the sides to dodge precision weapons and support weapons.
Counter Strategies: The downside to the Thruster Pack is that you don’t cover a very long distance when you boost forward, so experienced players can still shoot you (or indeed, know where the boost ends and coincide their shots). However, when used properly with jumping, you can easily throw off the enemy’s shot, causing a distraction, or get the small advantage over them that you need.
Support Upgrades
| Upgrade Name | Rank Unlocked |
|---|---|
| Ammo | SR-12 |
| Dexterity | SR-12 |
| Awareness | SR-20 |
| Sensor | SR-20 |
| Explosives | SR-26 |
| Ordnance Priority | SR-26 |
| Drop Recon | Complete the Engineer Specialization |
| Nemesis | Complete the Stalker Specialization |
| Gunner | Complete the Pathfinder Specialization |
| Stealth | Complete the Wetwork Specialization |
| Stability | Complete the Rogue Specialization |
Ammo
Unlocked for purchase at Rank 12.
The Ammo upgrade gives you double the bullets to reload with for starting weapons and ordnance drops. For example, if you start with the DMR, instead of having 28 bullets to reload with, you have 56. For ordnance weapons, it will depend on which weapon you pick, but the weapon is still likely to have double (or close to double) the normal number of ammunition it usually drops with.
This is great to use if you plan on playing more of a support role and need the extra ammo for sitting back and helping your teammates; then you won’t run out of ammo so quickly. Even power weapon retrieved from ordnance drops will start with more ammo. If you prefer to sit back and shoot a lot, this is a great upgrade to take with you.
Awareness

Unlocked for purchase at Rank 20.
This keeps your Motion Sensor on your screen when looking into a scope. Naturally, this is very useful in Free For All games, or if you plan on being a sniper for your team. If you’re playing the role of the sniper and want to see your Motion Sensor while being scoped in the majority of the game, then take this Support Upgrade.
Dexterity
Unlocked for purchase at Rank 12.
This is one of the best Support Upgrades to have. It can be useful in any game type or map. It really speeds up your reload times and weapon swapping, cutting down on the seconds of downtime you have during the game.
Using Dexterity along with the Battle Rifle/Plasma Pistol combo is very effective since you can switch weapons so much faster. This allows for very fast reloads on all power weapons, which can really be devastating to the enemy when you are sniping, firing rockets, or utilizing any other power weapon that usually has a longer reload time. You will have very little downtime before shooting your next clip.
Having the ability to switch weapons quickly can also be very useful when using melee weapons like the sword so you can quickly pull it out to lunge at your enemy with amazing speed.
Drop Recon

Unlocked after completing the Engineer Specialization.
Drop Recon allows the player to see the Waypoint at which a random ordnance drop will occur about 5 seconds before it actually drops into the map. Having a player on your team with Drop Recon enabled is important because it allows your team to know where to set up for the power weapons and gives you about 5 seconds to reach the location. Drop Recon increases your navpoint display range by 20%. Use on game types with random ordnance drops.
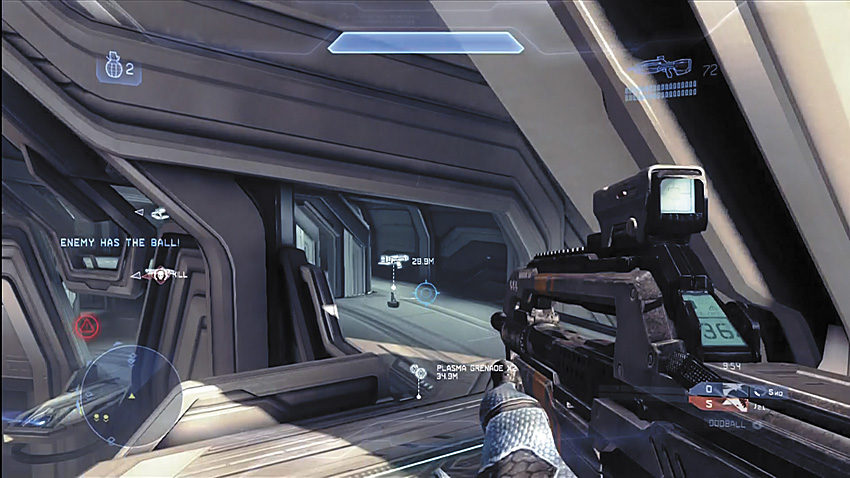
Predict an ordnance drop before it happens.
Explosives

Unlocked for purchase at Rank 26.
This increases your grenade damage, and you receive a little less damage from enemy grenade detonations. Tournament-level players may wish to ignore this upgrade, since it offers only a very small difference in the offense damage a grenade inflicts and the damage you take, compared to normal. Grenades are devastating enough!
If you don’t like dying by grenades, then this upgrade could be for you. However, grenades cause only a small percentage of the damage you take throughout a game, and it is not a big enough difference in damage to be very effective. However, this could be useful when paired with the Hardlight Shield or in game types where you’ll likely be a sitting duck, such as Oddball or King of the Hill.
Gunner
Unlocked after completing the Pathfinder Specialization.
Gunner allows you to fire the Machine Gun and the Plasma Cannon without overheating, so long as they are mounted to their tripods. If you detach a turret from its mount, you suffer no penalty to your walking speed, you just can’t sprint. This is recommended during Big Team Battle game types where there are more turrets to locate and detach. It’s obviously useless for maps that lack turrets.
Your running speed is actually increased quite a bit. This helps you maneuver without being slow and easily dodged or cut down by foes. It also allows you to inflict major damage to the enemy if you run up on them with a detached turret (with the Gunner activated).
You’re also able to dodge grenades much more competently due to your quicker movement, and you can stay alive longer to utilize the turret more effectively.
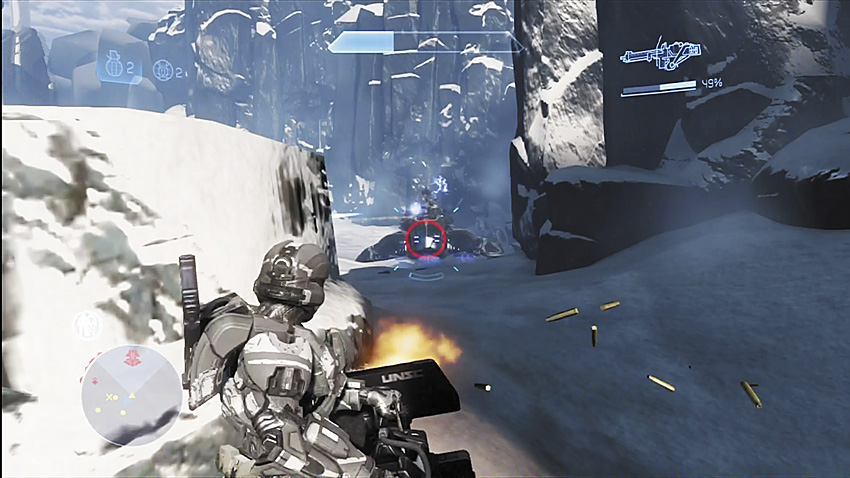
Gunner: Turning the turret into a formidable weapon since the UNSC Infinity started simulations.
Nemesis

Unlocked after completing the Stalker Specialization.
This places a mark on the person who killed you last for the next 4.5 seconds from the moment you respawn.
Having this in a close game or a “standoff” can be really useful, so you can pinpoint exactly where one of the players is on the opposing team. Then you can plan what you want to attempt with your team with a lot more forethought. If you are playing a 1v1, pick this upgrade.
.jpg)
A righteous infliction of retribution manifested by an appropriate agent.
Ordnance Priority

Unlocked for purchase at Rank 26.
This upgrade adds a 40% bonus to the points earned towards an ordnance drop. This is useful only in Infinity Slayer or any other game type with actual ordnance drops.
In a large team game, it’s good to have a few guys running with this upgrade in order to earn more drops for your team.
Sensor

Unlocked for purchase at Rank 20.
This increases your Motion Sensor’s range by about 20 meters. It is very useful in Free For All game types. If you’re playing a game type that has the Motion Sensor on, this upgrade will usually give you the jump on your opponent.
You can also use this upgrade to avoid conflict, as you’ll have a much clearer picture of the map as you choose how to navigate it. You can ensure you won’t walk into areas where multiple enemies are waiting.
Stability

Unlocked after completing the Rogue Specialization.
Normally, when bullets strike you while you are scoped-in on a target, your aim is thrown off. Stability reduces this to a significant degree, making this an option for snipers having trouble with incoming fire. However, you still receive a reasonably hefty big whip upward when you are scoped in and being shot by a sniper rifle; however, it does help a little bit when you are out of scope and being shot at—the reticle only moves a little bit to the right.
This might be worth using if you are having trouble recovering from being shot at, but highly skilled players typically won’t need this, as they can already readjust their aim to compensate for bullet fire.
Stealth

Unlocked after completing the Wetwork Specialization.
Stealth is another Support Upgrade that you can use on any map or game type. It enhances you in three ways: It dampens your footsteps, it makes it a lot harder for your enemy to see you when they are scanning with Promethean Vision, and it increases you assassination speed.
A lot of players use headphones to hear player footsteps. Having this upgrade on can make you a lot sneakier when running around maps. This upgrade is the precise counter to Promethean Vision. When you have Stealth as your Support Upgrade, any enemies that have Promethean Vision won’t be able to see where you are as easily, rendering their armor ability nearly useless! A lot of players are going to choose Promethean Vision, so this upgrade counters this well.
Having the faster assassination speed is a small bonus, as it only gives you a small amount of speed and is hardly even noticeable. Completing assassinations gives you more points, but you put yourself in a vulnerable position by going into the animation of the assassination. In fact, you could end up becoming the subsequent victim if another opponent sees you’re prone during your kill!
Tactical Packages
| Upgrade Name | Rank Unlocked |
|---|---|
| Mobility | SR-7 |
| Shielding | SR-7 |
| AA Efficiency | SR-14 |
| Resupply | SR-14 |
| Firepower | SR-24 |
| Grenadier | SR-24 |
| Fast Track | Complete the Pioneer Specialization |
| Requisition | Complete the Tracker Specialization |
| Wheelman | Complete the Operator Specialzation |
AA Efficiency

Unlocked for purchase at Rank 14.
With this equipped, you can recharge your armor abilities more quickly so you can use them again if needed. If you tend to use your armor ability more frequently than normal, then this Tactical Package is ideal.
For best results, combine this type of package with armor abilities you use constantly, such as Promethean Vision, Hardlight Shield, and Regeneration Field. If you’re playing a vertically oriented map, you may want to pair this with Jet Pack.
Fast Track
Unlocked after completing the Pioneer Specialization.
Do you want to level up your Spartan faster? This package will advance you in level more quickly, thus giving you access to more of the weapons, armor, armor abilities, and other accoutrements such as Emblems! You get this Tactical Package fairly late into the rank progression, which makes this more useful when trying to complete the various Specializations.
If all you do is win matches, then you’re likely to rank up in no time, thus beating your teammates and rivals to all the fanciest upgrades!
Firepower
Unlocked for purchase at Rank 24.
Firepower allows you to use a second primary weapon in your secondary weapon slot. For example, you can place a DMR as your primary weapon and a Battle Rifle as your secondary weapon.
This is a great package! As you’re essentially getting two primary weapons, you receive a large amount of ammo for mid- to long-range shooting. This works especially well with big maps when you’re constantly attempting long-range takedowns.
Also, if you’re playing an objective game type, you can pick the Assault Rifle and Storm Rifle before trying to camp back at your base to kill opponents who go for your flag or objective.
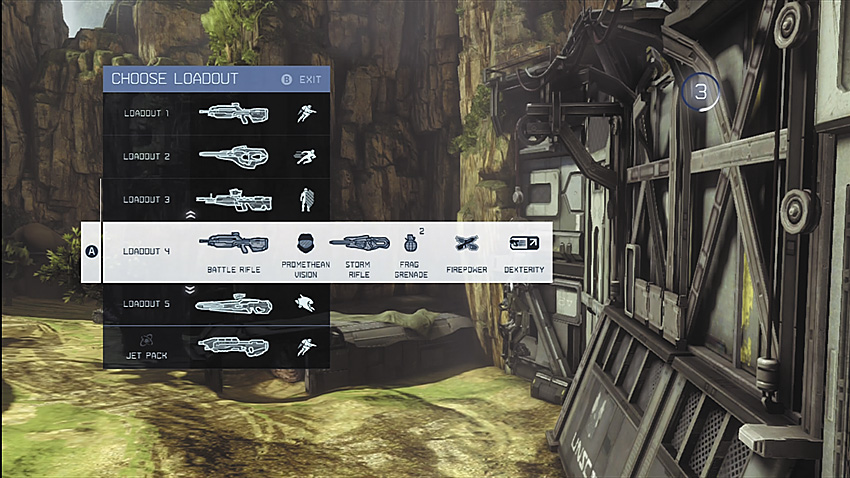
Pack heat with two primary weapons!
Grenadier

Unlocked for purchase at Rank 24.
This increases the amount of grenades you can hold by one. Grenadier also increases the number of grenades you spawn with. Although this might not seem like much, this is a huge advantage: It allows you to keep your enemy pushed back so they can’t charge.
You can surprise a foe (who might have been counting the number of grenades you’ve thrown) with the extra grenade by popping their shields. Having this extra grenade may also become hugely advantageous for your team when making a push.
Mobility

Unlocked for purchase at Rank 7.
This is ideal for the offensive player who goes “heavy” and enjoys barging into enemy bases, as it grants you an unlimited sprint! Sprinting in all battles is obviously a key technique, mostly because it enables you to more quickly travel to and from bases or wherever your destination, and it works in any game type.
Are you the type of player who enjoys getting right back into the fight after losing a frantic battle, or do you just need to race to a location (such as to a flag or ball)? Then this is the Tactical Package for you.
All players begin with a sprint, but only Mobility allows you to continue your fast pushing toward completing an objective or reaching an area of ground that needs to be claimed. This may not be the optimal choice for some Slayer variants, as it can encourage you to become a little more reckless and enter into more battles (with a greater chance of deaths).
.jpg)
All my life...I’ve run so far away.
Requisition

Unlocked after completing the Tracker Specialization.
Requisition allows you to request a new ordnance drop when you have been granted one. This helps because sometimes you receive weapons or power-ups that the situation doesn’t particularly call for. Instead, request a new drop; you receive three new choices to pick from. This also grants you a better chance to receive a power weapon.
Having this additional drop and choice of reward becomes very useful, as the power-ups granting you strength, speed, or shielding can help immensely later into a battle. By using Requisition, you’re essentially doubling your chances of getting a power weapon that might turn the tide of the game.
ReSupply

Unlocked for purchase at Rank 14.
In Halo 4 , you can no longer pick up grenades from enemies to use for yourself, unless you have this package. With Resupply, you simply gather grenades from the dead bodies of foes and add them to your supply, up to your carrying maximum.
If you see bodies lying around, walk over to them and collect the grenades, if only to prevent others from using them. If you like to trash-talk with your enemies, you can mention you’ve killed your rival with his or her own grenades. That usually riles them up into making further mistakes!
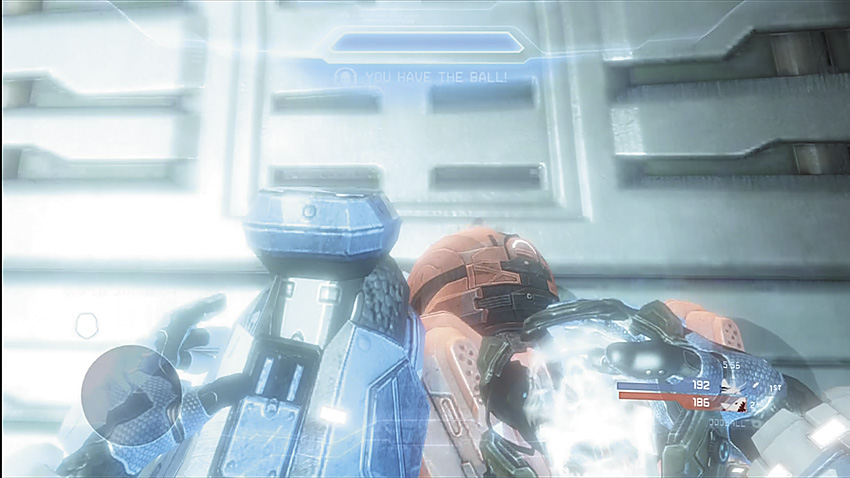
Just tell them you were looting their body, not victory crouching them.
Shielding

Unlocked for purchase at Rank 7.
This simply allows your shields to recharge at a faster rate than normal once they start recharging. If you prefer to be engaged in battle at all times, this will let you get back into the fight quickly.
An example of using this in battle would be when fighting an enemy, you may wish to stay alive and find cover. If a teammate shows up to help, you can return to the fray that much faster once your shields recharge at a more rapid rate.
Combine this with other defensive abilities, such as the Hardlight Shield. Shielding does not allow your shield to recharge while using the Hardlight Shield or while being shot while in a Regeneration Field. It also doesn’t lower the time it takes for the shields to start, just the time it takes for them to recharge.
Use this to buy those few extra seconds so you can escape any battle you might be losing. When your shield starts recharging and shoots up faster than normal, return to combat if you can.
Wheelman

Unlocked after completing the Operator Specialization.
Wheelman increases the long-term durability of your vehicle, by recharging health more quickly as well as how it reacts to EMP charges.
EMP charges will affect your vehicle for a shorter time when you get hit, thus making it easier to recover from it. Use this in a Big Team Battle where vehicles are utilized; otherwise there’s little point in choosing this!
Wheelman is best used to gain that extra protection when you have the enemy flag, and you’re riding in a vehicle (such as a Warthog or Mongoose), and there are other passengers protecting you.
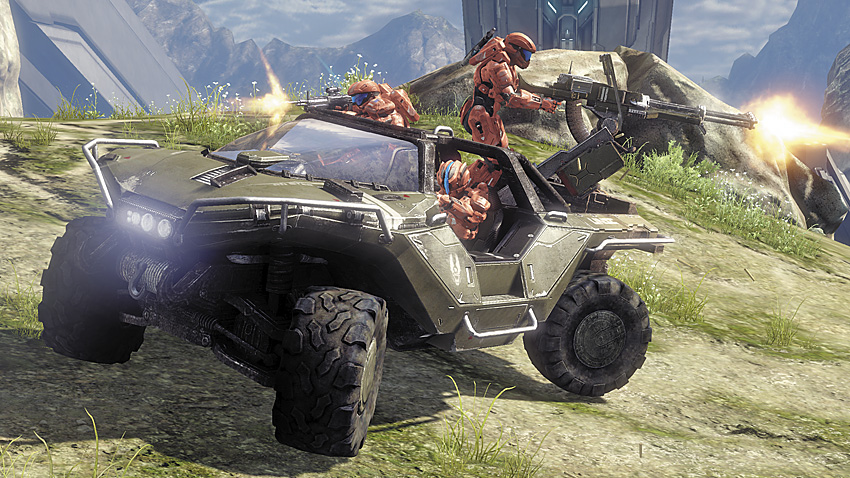
Get in: I’m driving.
Vehicles
On the larger maps and more vehicle-focused game types, expect to drive or pilot any number of vehicles, both recognizable and new. The following data details the merits of each vehicle and how to employ them in the combat zone.
Banshee
The Banshee is a swift and agile airborne Covenant craft with twin plasma cannons and a formidable fuel rod cannon.
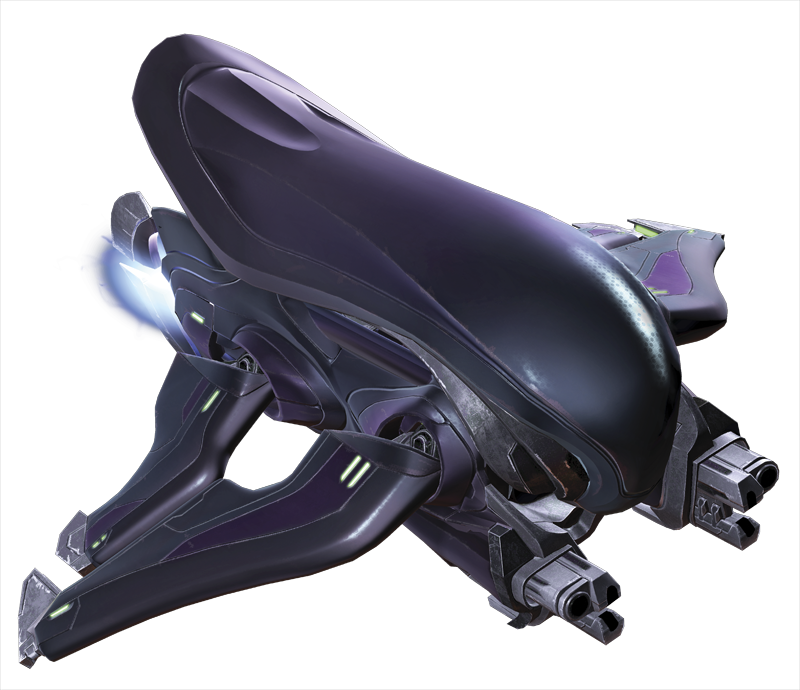
- Crew Capacity: 1 operator
- Description: The Banshee continues to be the Covenant’s primary aerial-engagement vehicle providing efficient ground support from above via its twin-linked plasma cannons and heavy fuel rod weapon. Despite its slight frame, the aircraft is surprisingly resilient in combat, largely due to its incredible maneuverability in atmosphere.
Tactical Notes
- Pilot a Banshee to claim air superiority across a map. The Banshee has a boost function and evasive-maneuver features (such as the barrel roll); employ any or all of these if you start to take heavy damage, and flee the immediate firefight quickly if the craft is becoming damaged.
- The Banshee is perfect for raking the enemy in covering fire while the rest of your team attempts to attack an enemy base or infiltrate a flag.
- The Banshee has two different firing weapons to toggle between (use the button that switches between your regular guns): a Plasma Cannon and Fuel Rod Cannon. The former is useful for spraying the battlefield and causing distracted foes to attack you. The latter is excellent for taking enemies out in a single explosion, if you can line up your bomb drop with accuracy.
- If combat takes a turn for the worse, you can also try flying in low and ramming into foes, splattering ground forces if the opportunity presents itself.
.jpg)
Don’t forget to flip and barrel roll when making a quick escape.
Ghost
The Ghost is the Covenant’s dominant scouting vehicle: fast, mobile, and fully capable of engaging in direct combat with its twin-linked plasma cannons.
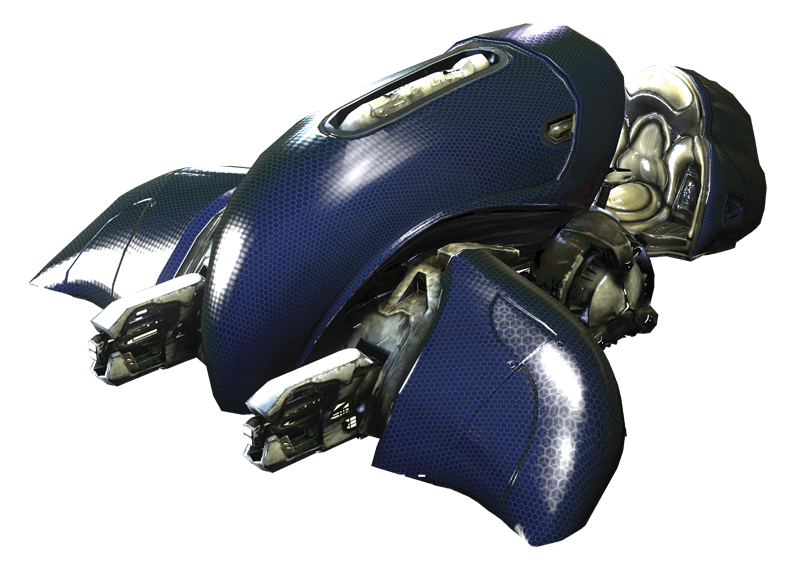
- Crew Capacity: 1 operator
- Description: The Ghost is the Covenant’s dominant, single-manned scouting vehicle used for everything from deep reconnaissance and remote patrol to assault runs and convoy escort. A testament to its field effectiveness, the T-32 has remained largely unchanged for centuries, utilizing a single-mount rear-positioned seat, twin-linked plasma cannons, and excellent mobility, regardless of the terrain it finds itself deployed in.
Tactical Notes
- The Ghost is a very effective vehicle if you’re trying to move to disparate locations on a map, as it can maneuver there quickly thanks to its boost feature. Besides being swift and adept at complex maneuvers, it can also be used to put pressure on the other team if used primarily as an offensive vehicle.
- The Ghost’s weapon inflicts heavy damage on ground units and can tear through them very quickly. Try to force the enemy to jump when you’re facing them down in a Ghost; next, hit your boost so you can slam into them as they drop down, and then mow them over.
- However, there’s always the ever-present danger of being hijacked from an enemy ground unit you’re stalking or one that you miss running over or gunning down.
- The only real downside to the Ghost is that you’re highly exposed; the enemy can take the driver out from a distance, usually with mid- or long-range weapons. This can be done without damaging the vehicle itself, so the Ghost can be commandeered by enemy troops afterward.
.jpg)
A nasty weapon with a crushing boost and a highly exposed driver. Ghost riding is dangerous but productive.
Mantis
The Mantis is a highly classified armor defense system with incredible Firepower and dexterity, despite its impressive size.
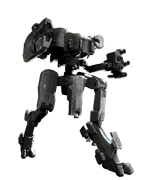
- Crew Capacity: 1 operator
- Description: The Mantis is the result of half a century’s worth of development and iteration, eventually culminating in an incredibly powerful armor system without equal. Utilizing an ultra-heavy four-barrel machine gun on one arm and a viciously potent multilaunch, high-explosive munitions launcher on the other, the Mark IX is an extremely competent arsenal and is currently employed only by the UNSC Infinity and several highly classified ONI teams.
Tactical Notes
- This impressive mech is mainly used to dominate a map: It brings formidable offensive capabilities, including missiles, a turret, and a stomping ability. You’re able to charge up to five missiles with the left trigger and continuously use the turret with the right trigger for around five seconds until the turret overheats.
- Boarding a Mantis takes around four to five seconds before you can control the vehicle. This lengthy mounting time can lead to a large window of opportunity for enemies to fire at you, killing you before you can even take control. Be sure you have covering fire or no nearby foes before entering this vehicle.
- Enemies can hijack you from the rear. Fortunately, once inside the Mantis’s cockpit, you’re completely covered, so you don’t need to worry about being picked off by snipers.
- The Mantis can crouch, allowing for some amusing (and possibly offensive) postures. If an enemy moves close to the Mantis your piloting’s feet, use the stomping ability to take them out instantly.
- Aside from the Mantis’s eventual explosive destruction, your only threat is the Firepower from Scorpion Tanks and Incineration Cannons; these can destroy a Mantis very quickly.
.jpg)
Mantis ground stomp.
Mongoose
The Mongoose is a light all-terrain vehicle used to carry personnel and equipment swiftly through wildly varied terrain.
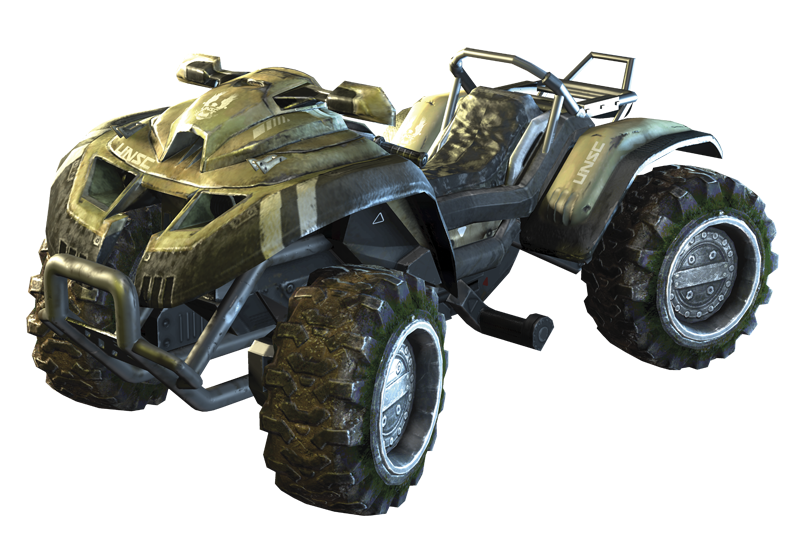
- Crew Capacity: 1 driver + 1 passenger
- Description: The Mongoose is a light all-terrain vehicle used almost exclusively for the transportation of personnel and materiel. However, when rear-positioned passengers are well armed, this vehicle can become particularly formidable in combat, balancing the ATV’s speed and maneuverability with the passenger’s Firepower.
Tactical Notes
- The Mongoose is mainly used to reach locations and transport teammates quickly around a map. To turn corners with greater precision, use the left trigger to stop the movement of your back wheels and drift. Also remember to press your Right Bumper to hit your brake and stop on a dime.
- One great way to utilize a Mongoose is to pick up your flag carrier for a swift route back to your own base to score.
- The Mongoose has a horn; use it by pressing the right trigger (default controls), and employ it so your teammates know when to mount the vehicle you’re driving.
- You’re very vulnerable in this vehicle because you’re exposed at all angles from the driver’s seat. It’s also easy for your foes to hijack the Mongoose, pushing you out of the vehicle.
- Are you transporting a teammate without a flag? Then be sure your friend is attacking from the rear of the vehicle instead of resting!
.jpg)
The Mongoose is great for quick getaways and exceptional jumps.
Scorpion
The Scorpion is an impressive main battle tank that hefts a 90 mm primary cannon and an anti-infantry heavy machine gun.
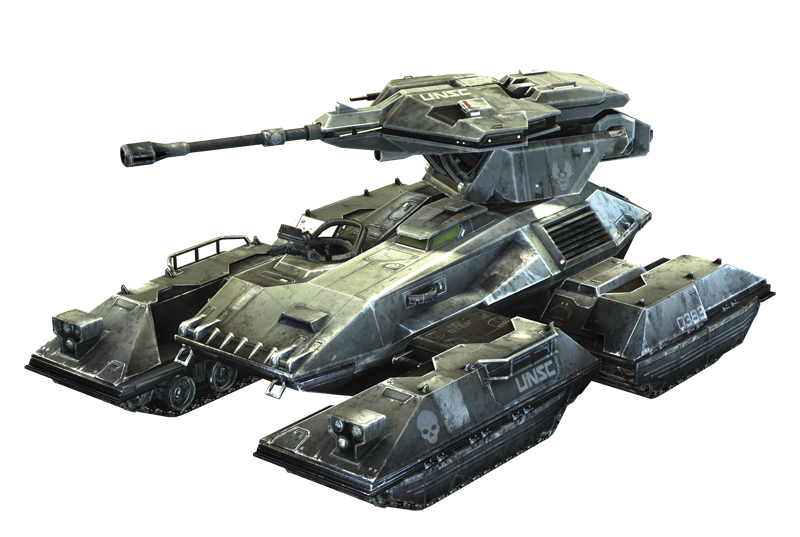
- Crew Capacity: 1 operator, 1 gunner, 4 passengers
- Description: The M808 Scorpion is easily the UNSC’s most prominent main battle tank, offering impressive Firepower and effective anti-infantry suppression as well as substantial resiliency and maneuverability in the field. The Scorpion is usually deployed during asymmetric ground assaults, within escort convoys, or in any circumstance that requires heavy and mobile armor.
Tactical Notes
- The Scorpion is mainly used for dominating the map, mopping up enemies and obtaining quick takedowns with use of its primary cannon and anti-infantry machine gun.
- The driver can fire off a rocket with a cool down period of around two and a half seconds between firings.
- Be sure a teammate has hopped onto the Machine Gun turret to increase the vehicle’s Firepower capabilities. This gun turret has a reticle bloom when shot, so watch your aiming. However, it can be fired for a while before it overheats. The only real drawback is that the turret gunner is extremely exposed.
- When facing down a Scorpion, if you haven’t obtained a Spartan Laser, Rocket Launcher, or an Incineration Cannon, shoot the cockpit hatch off, exposing the driver’s head and then execute him with a headshot. Try having a sniper remove the door with two Sniper Rifle shots, and then eliminate the driver with the third shot.
- Both the back of the tank and the driver’s door can be hijacked.
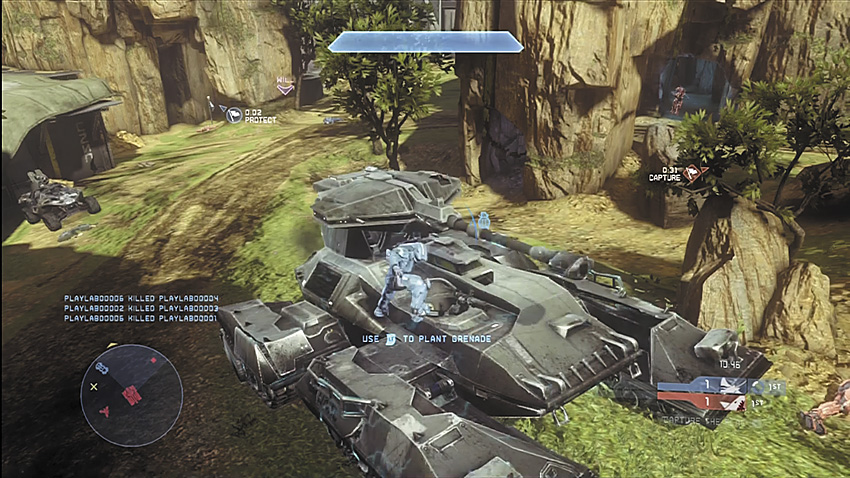
Out of explosive weapons? Snipe off the hatch and pick off the driver to stop this menacing tank.
Warthog (Gauss, Rocket, Machine Gun)
The Warthog is the UNSC’s standard ground transport and is capable of mounting both anti-air and anti-armor weapon systems.
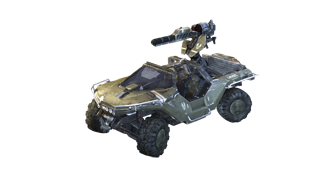
- Crew Capacity: 1 driver, 1 passenger, 1 gunner
- Description: The Warthog is the UNSC’s primary ground transportation vehicle, offering several variants typically differentiated by their bed-mounted weapon systems. Although some Warthogs are designed solely for transportation, most offer extremely versatile anti-aircraft or anti-armor options, which optimize the vehicles’ light armor and deft mobility.
Tactical Notes
- This vehicle is mainly used to transport teammates, inflict damage, and rack up kills with the turret-mounted weapon.
- The Warthog comes in three variants: with a Machine Gun, Gauss Cannon, or Rocket Launcher.
- The “Rocket Hog” has a launcher on the back turret that shoots six rockets, with only a couple of seconds’ cooldown between the shots. This is excellent for taking down vehicles or lone enemies.
- The “Gauss Hog” has a cannon that’s primarily used to take out vehicles but can kill lone enemies as well; each gauss strike requires around a two-second cooldown between shots.
- Just like the Mongoose, the Warthog has the same ability to drift, has a horn, and has similar brake functionality, so employ similar tactics when using them.
- The Warthog is slower than the Mongoose, leading to some dangerous situations: Although you have more cover in a Warthog (in comparison to a Mongoose), enemies armed with Spartan Lasers or Incineration Cannons have an easy time picking off this target.
- It’s time to exit a Warthog when the engine catches fire and the interior begins to flash red; this indicates that the Warthog is dangerous low on health. If a Warthog is abandoned in this state, it will explode around seven to eight seconds later.
- You’re able to hijack all three seats—the driver, side seat, and gunner—and all lead to confusion if the enemy tries this plan! For some amusing moments, hijack a Warthog’s gun while an opposing team’s driver is in control.
.jpg)
Board the Warthog and be ready to dominate!
Wraith
The Wraith is the Covenant’s primary armor, a highly mobile mortar tank with a separately manned anti-infantry cannon.
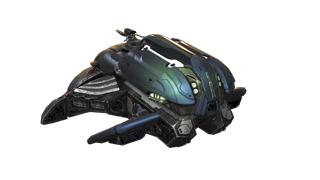
- Crew Capacity: 1 operator, 1 gunner
- Description: The Wraith is a large, heavily armored Covenant mortar tank designed to assault enemy fortifications with unrelenting brutality while maintaining relative safety due to its anti-infantry plasma cannon. Powered by a boosted gravity drive, the vehicle is capable of charging forward in impressive bursts of speed. The Wraith’s primary weapon is its heavy plasma mortar, which lobs highly explosive, concentrated plasma in a parabolic arc, resolving most human battle tanks’ problematic line of sight requirement.
Tactical Notes
- This slick battle tank is more mobile than the Scorpion but fires at a slower rate.
- The Wraith’s main cannon offers strong Firepower and is very useful for bombarding the enemy from a long distance.
- It is advisable to have a teammate jump into the front turret, helping to stop ground units from reaching you as you careen across a map.
- Without someone inside the turret, try the vehicle’s boost function; it becomes handy, as you can run foes over at high speed and slay them.
The biggest concern for a Wraith driver are ground units sneaking around and hijacking the vehicle from the sides or rear; otherwise the vehicle is almost indestructible unless it’s facing a battle with a Scorpion, Mantis, or Banshee.
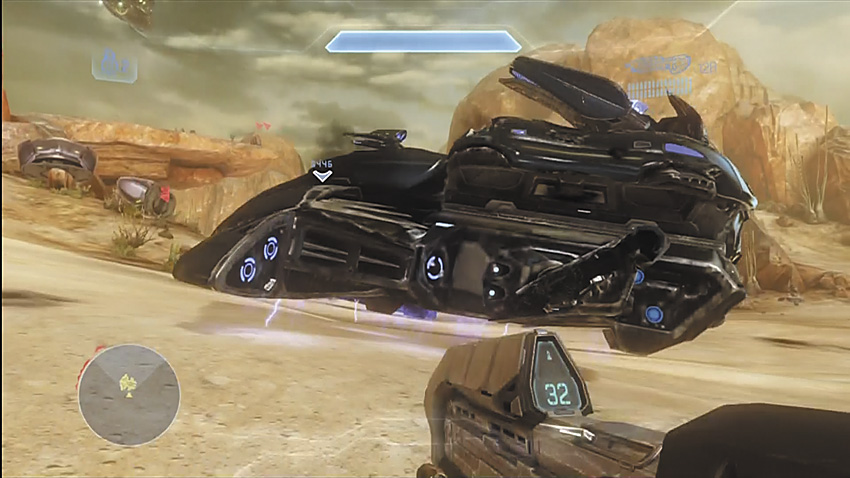
The Wraith is adept at lobbing shots in from a distance and keeping a team contained on large maps.