
Pikmin 3 Guide Characters and Items Characters
Enemies
Standard Enemies
Bulborb
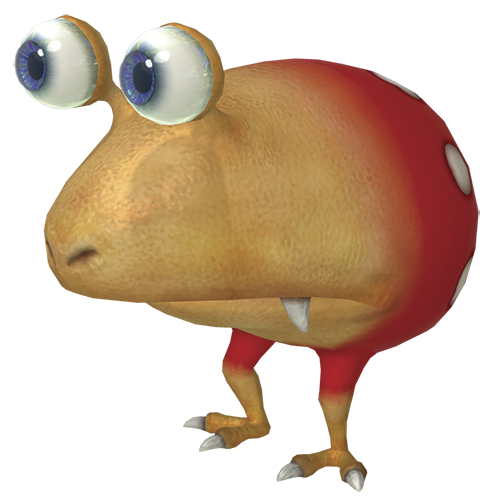
These large creatures use their jaws to gobble up several Pikmin with each bite. Whenever possible, use a large squad of Pikmin to charge the creature from the rear. If brute force isn’t an option, throw Red Pikmin and Rock Pikmin onto the creature’s back. During an extended battle, it’s important to retrieve your Pikmin as the Bulborb shakes them off.
Dwarf Bulborb
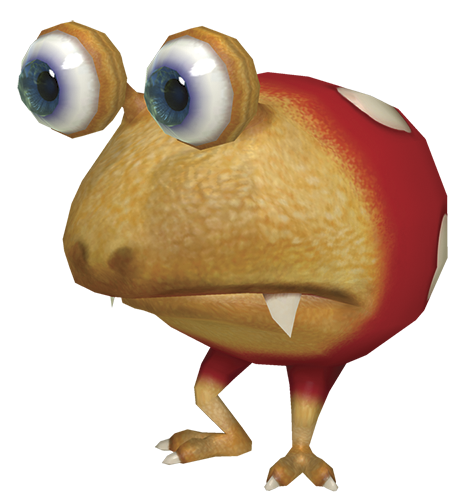
Dwarf Bulborbs are much weaker than their fully grown counterparts. To quickly defeat a Dwarf Bulborb, toss a single Pikmin onto the creature’s back.
Orange Bulborb
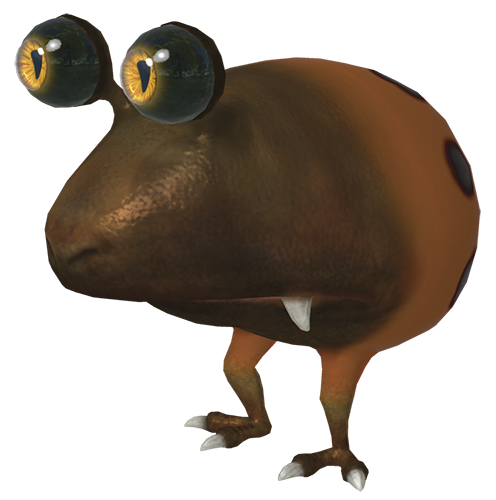
Orange Bulborbs are similar to standard Bulborbs, but they’re considerably tougher. These creatures tend to sleep in tight spaces, making it difficult to flank an Orange Bulborb without it noticing.
Whenever possible, use a Bomb Rock to blast an Orange Bulborb before it has a chance to attack. When that’s not an option, draw an Orange Bulborb into the open, then flank the creature and attack it with a very large squad of Pikmin.
Dwarf Orange Bulborb
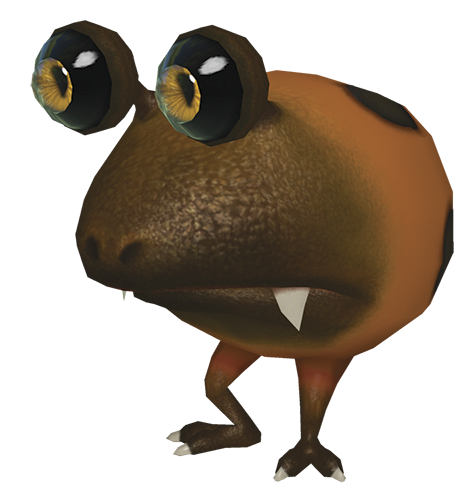
Dwarf Orange Bulborbs aren’t nearly as durable as their as their fully grown counterparts. Toss a single Pikmin onto a Dwarf Bulborb’s back to quickly defeat this enemy.
Whiptongue Bulborb
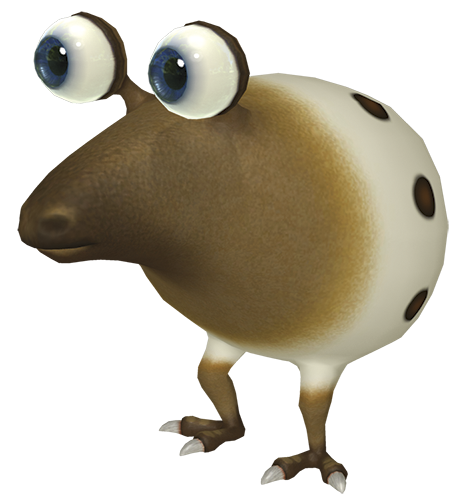
As its name implies, the Whiptongue Bulborb uses its long tongue to snatch up any Pikmin unfortunate enough to be caught in the attack. When you encounter a Whiptongue Bulborb, flank the creature and send your Pikmin charging in to attack.
Spotty Bulbear
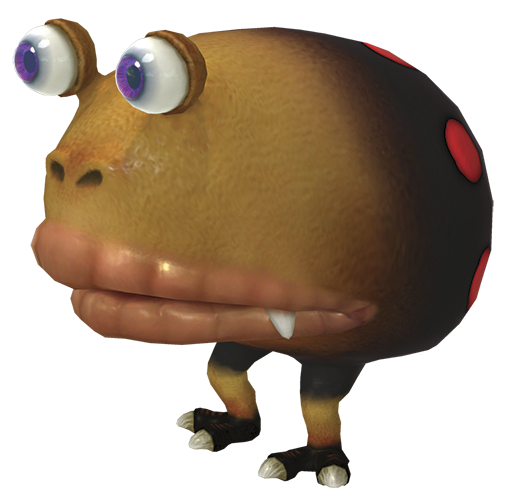
The Spotty Bulbear is extremely durable, and its wide jaws allow it to gobble a great amount of Pikmin with each attack. To avoid a prolonged and costly battle, use Bomb Rocks to attack this creature from a safe distance.
Dwarf Bulbear
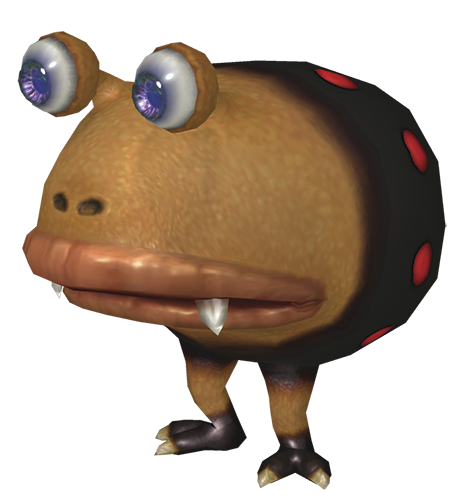
Dwarf Bulbears aren’t nearly as dangerous as their fully grown counterparts. Toss a single Pikmin onto a Dwarf Bulbear’s back to quickly defeat this small enemy.
Fiery Blowhog
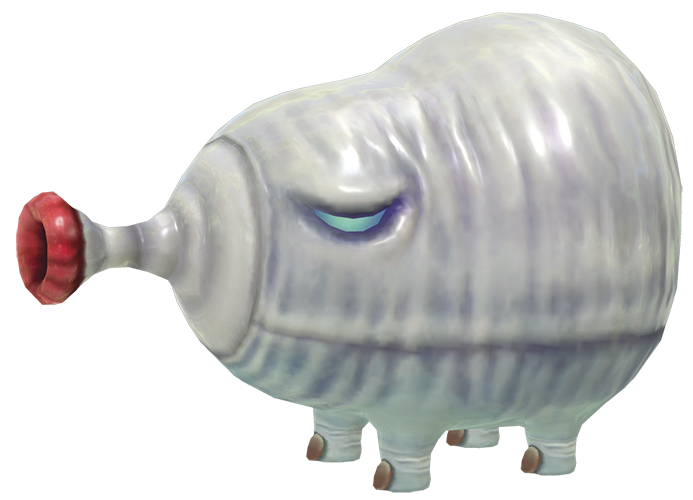
A Fiery Blowhog attacks by shooting flames out of its snout. When you encounter a Fiery Blowhog, use your Red Pikmin to attack the creature without suffering any casualties. If your squad contains only a small amount of Red Pikmin, use them to distract the Fiery Blowhog, then flank the creature and have your more vulnerable Pikmin charge from the rear.
Watery Blowhog
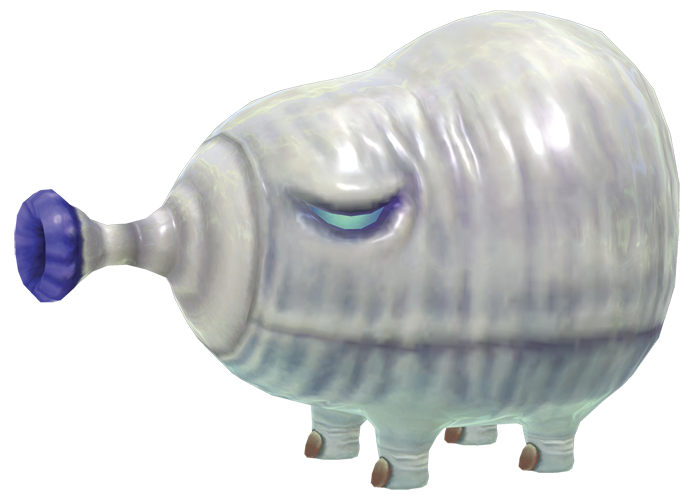
A Watery Blowhog attacks by shooting water out of its snout. When battling one of these creatures, use your Blue Pikmin to attack the Watery Blowhog without suffering any casualties. If your squad contains only a small amount of Blue Pikmin, use them to distract the Watery Blowhog, then flank the creature and have your more vulnerable Pikmin charge from the rear.
Puffy Blowhog
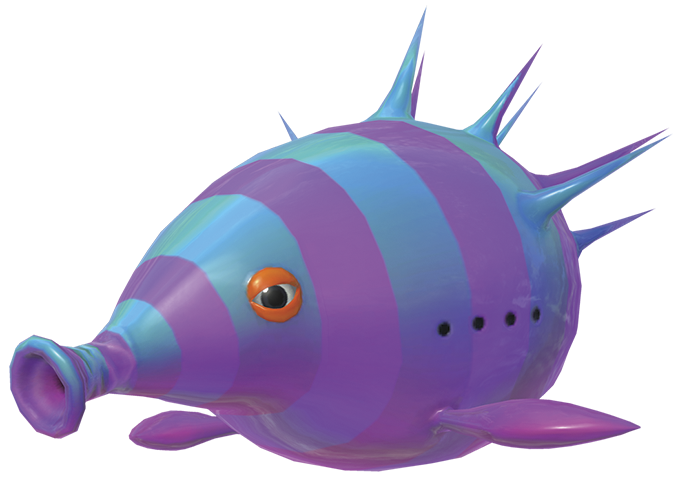
This flying creature attacks by blowing air out of its snout. These attacks alone won’t damage your Pikmin, but they will scatter your squad. Winged Pikmin are exceptional aerial combatants, but all Pikmin types can be helpful when battling a Puffy Blowhog.
Flank the creature to avoid its attacks, then throw your Pikmin onto its side. Whenever the Puffy Blowhog is wrestled to the ground, send your squad charging in to do maximum damage.
Phosbat
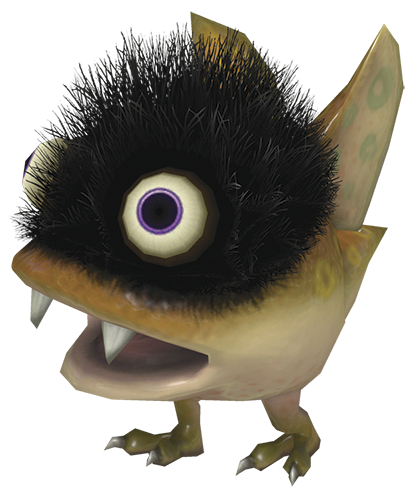
Phosbats aren’t particularly strong, but they tend to appear in large groups. These creatures are very sensitive to light—activate nearby Glowcaps or Light Bulbs to defeat any Phosbats caught in the resulting glow. If no light source is available, toss Pikmin onto individual Phosbats until the area is clear.
Phosbat Pod
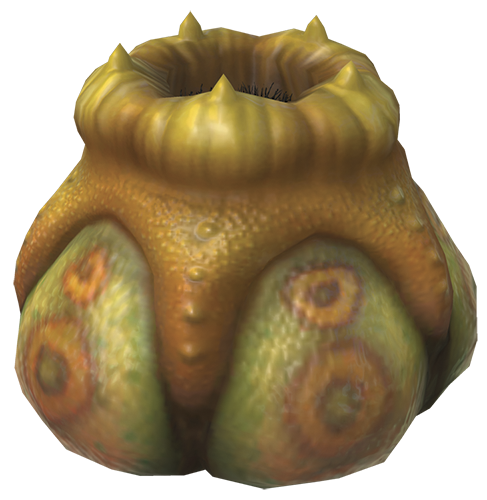
An active Phosbat Pod is capable of producing a new Phosbat every few seconds. Use any Pikmin type to attack these small structures and stop the appearance of additional enemies.
Pyroclasmic Slooch
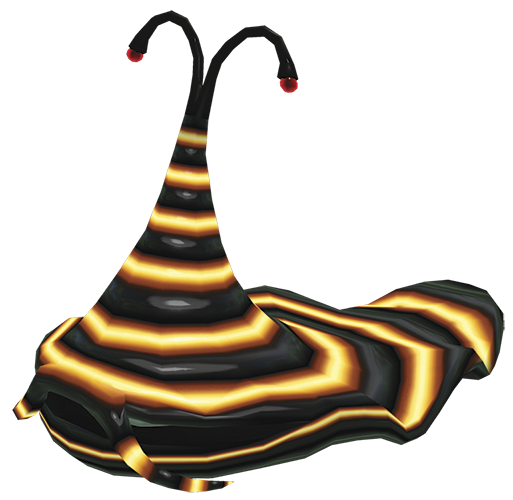
Pyroclasmic Slooches are flame-covered creatures that produce trails of fire as they move around an area. In addition to these very effective defensive qualities, these creatures are able to devour any Pikmin standing directly in front of them. When battling a Pyroclasmic Slooch, use a squad of Red Pikmin to charge the creature from the rear, or throw Red Pikmin onto its back.
Bearded Amprat
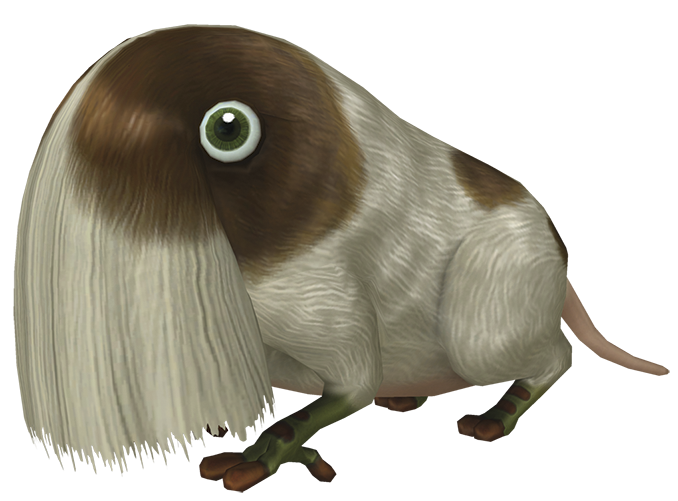
When a Bearded Amprat feels threatened, it rubs its face to build up a static charge. When the Bearded Amprat releases the charge, its whiskers lift up, exposing its sharp teeth. While its teeth are exposed, this enemy uses its front paws to feed nearby Pikmin into its mouth.
When you attack a Bearded Amprat, use Yellow Pikmin to overcome the electrical charge. If you’re not able to defeat the creature before it releases the charge, call your Pikmin away before they’re eaten. Whenever possible, flank the creature to attack from the rear.
Skutterchuck
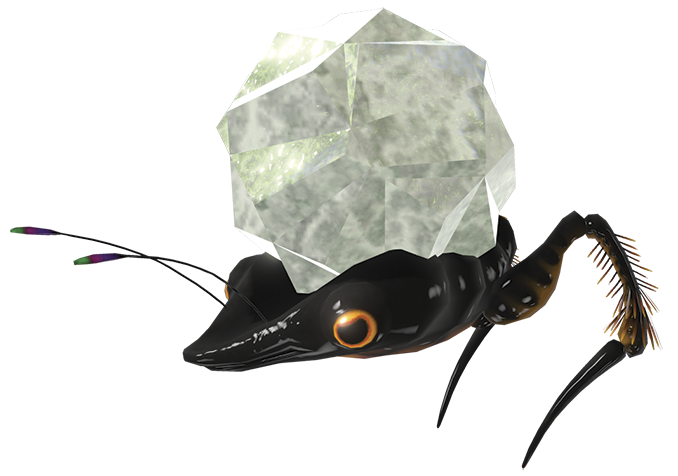
Skutterchucks attack by launching crystal projectiles from their backs. When you encounter a Skutterchuck, use one Rock Pikmin to shatter the Crystal Nodules, then toss another Rock Pikmin onto the creature’s exposed back.
Skitter Leaf
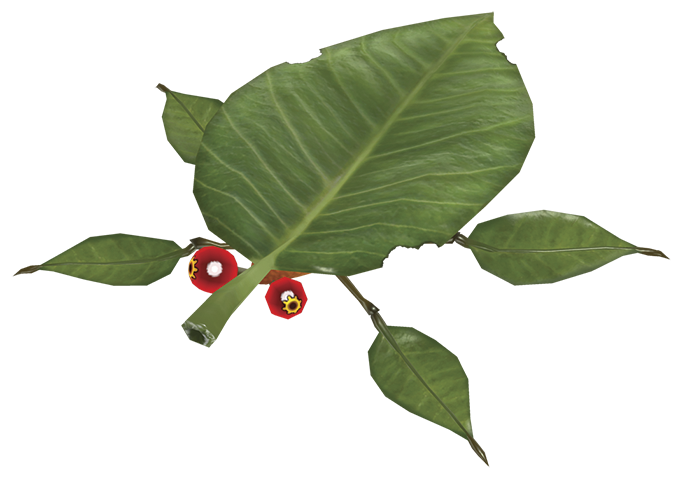
The Skitter Leaf is a harmless creature that uses its leaf-shaped body to blend into the environment. When threatened, a Skitter Leaf jumps out of hiding and attempts to flee from its attackers. You can simply ignore these enemies, but they can prove useful when Pikmin cultivation is a priority. To defeat a Skitter Leaf, simply toss a single Pikmin onto its back.
Desiccated Skitter Leaf
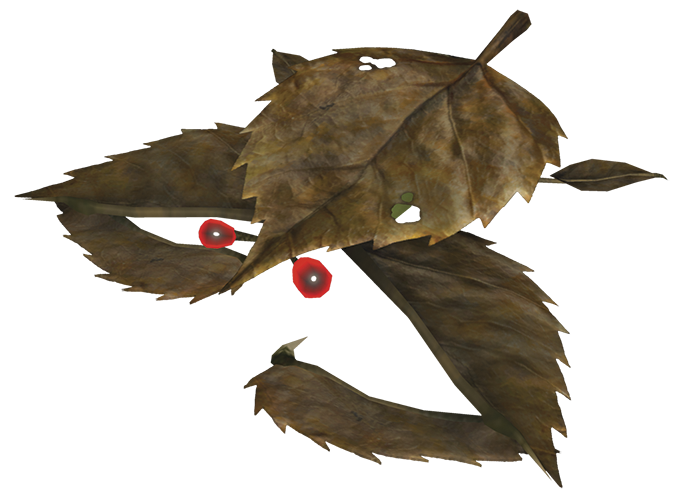
Like the standard Skitter Leaf, the Desiccated Skitter Leaf uses its leaf-shaped body to blend into the environment. However, this enemy not only utilizes much better camouflage, it uses its spiked forelegs to slice through any Pikmin it manages to capture.
When you spot a Desiccated Skitter Leaf, toss a single Pikmin on its back to defeat the creature before it manages to attack. Each time you reach a patch of brown leaves, take a moment to search for any enemies that might be hiding within it.
Male Sheargrub
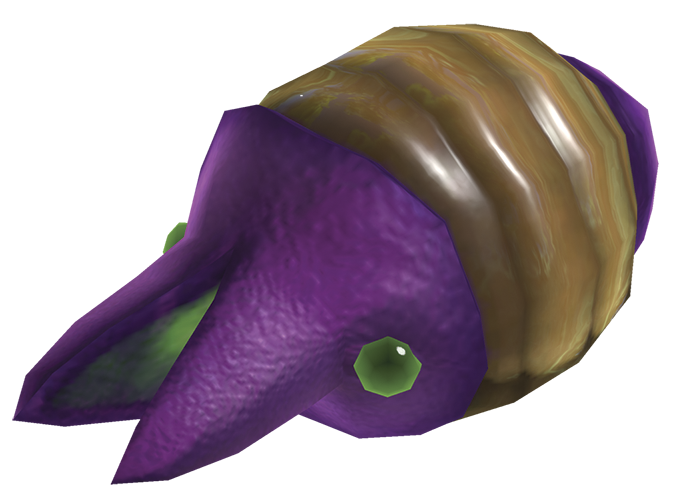
These burrowing creatures spend most of their time underground, showing themselves only when a potential meal wanders by. When Male Sheargrubs emerge from the ground, they use their pincers to tear through their unfortunate prey. When you encounter a group of Male Sheargrubs, retreat to a safe distance and throw one Pikmin directly onto each enemy. During prolonged battles, Male Sheargrubs will shake their attackers by burrowing underground. Don’t let your guard down until you’re sure the area is clear of enemies.
Female Sheargrub
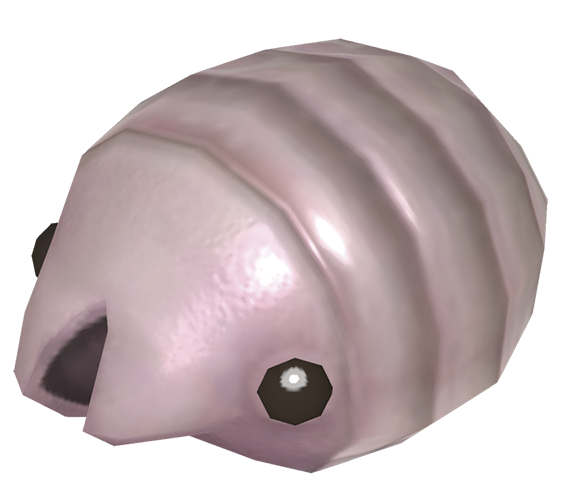
Like Male Sheargrubs, Female Sheargrubs spend most of their time underground. Unlike their male counterparts, however, Female Sheargrubs aren’t equipped with pincers. When you uncover a group of Female Sheargrubs, throw one Pikmin onto each enemy.
Swarming Sheargrub
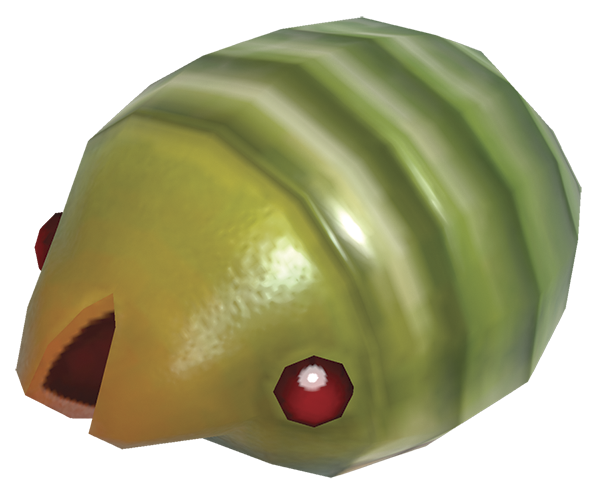
As the name implies, these fast-moving enemies travel in relatively large groups. Swarming Sheargrubs patrol established paths, jostling any Pikmin they encounter along the way. These pests often latch onto fruit while it’s being transported. This essentially increases the weight of the fruit, making it more difficult for your Pikmin to carry.
Shearwig
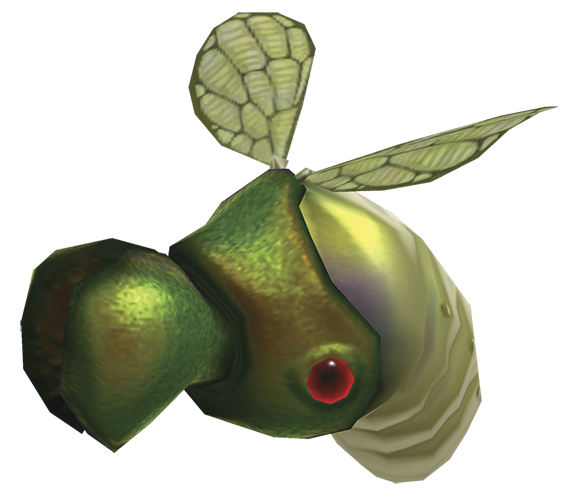
These creatures behave much like Male Sheargrubs, burrowing underground and waiting to attack unsuspecting prey. Once above ground, however, Shearwigs fly into the air and attack your Pikmin from above. When you encounter a group of Shearwigs, move out of range and attack the enemies from a distance. During prolonged battles, Shearwigs will shake their attackers by burrowing underground. Don’t let your guard down until you’re sure the area is clear of enemies.
Joustmite
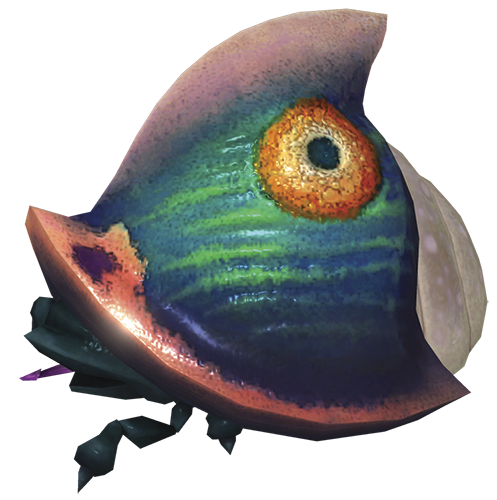
The Joustmite spends most of its time partially buried with its colorful shell protruding from the ground. When it senses nearby prey, this well-armored creature emerges and uses its retractable beak to skewer nearby victims.
Rock Pikmin cannot be damaged by the Joustmite’s attacks, making them a very good option when facing this enemy. When you’re leading a large squad, however, any combination of Pikmin can make short work of this enemy. Approach the Joustmite from the rear and attack the creature’s fleshy body until you defeat it.
Flighty Joustmite
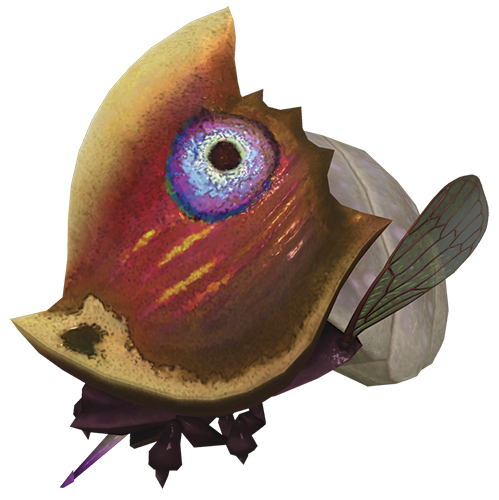
Like the standard Joustmite, the Flighty Joustmite spends most of its time partially buried. When it senses nearby prey, this low-flying enemy emerges from the ground and attacks its victims from above.
Rock Pikmin cannot be damaged by the Flighty Joustmite’s attacks, making them an excellent choice when dealing with this enemy. Flank the creature and attack from the rear, throwing your Pikmin onto the Flighty Joustmite’s soft body.
Arctic Cannon Larva Larva Larva
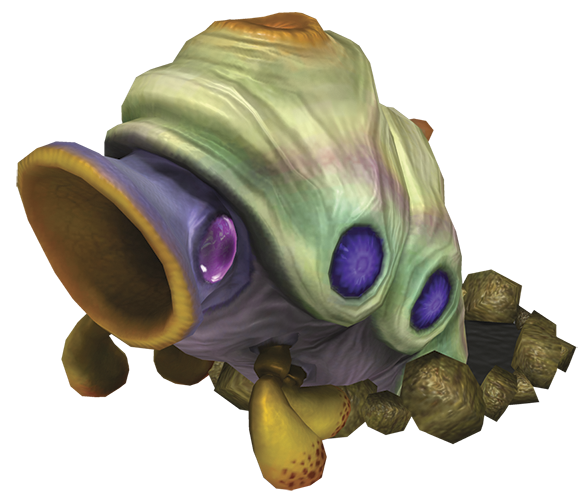
The Arctic Cannon Larva is a large, burrowing creature that attacks by launching large Snowballs at its enemies. These Snowballs won’t damage your Pikmin directly, but they are capable of incapacitating your Pikmin or carrying them into hazards. When you encounter an Arctic Cannon Larva, dodge its attacks and flank the creature. Throw a steady stream of Rock Pikmin into the creature’s back, or send your entire squad charging in to attack.
Armored Cannon Larva
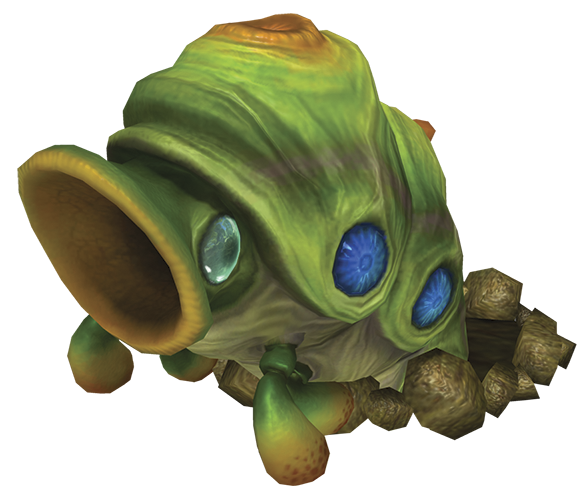
The Armored Cannon Larva is another large, burrowing creature. Like the Arctic Cannon Larva, this creature attacks by firing projectiles at its enemies. Unlike the Snowballs utilized by its counterpart, however, the Armored Cannon Larva’s projectiles are capable of crushing most Pikmin.
The Armored Cannon Larva’s projectiles cannot damage Rock Pikmin, but they will incapacitate them for a short time. When you attack one of these enemies, do so with a fairly large squad of Rock Pikmin. Flank the creature, then attack by throwing each of your Rock Pikmin for maximum damage.
Burrowing Snagret
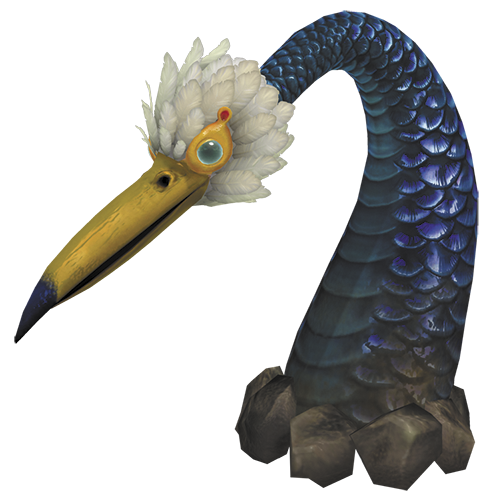
As its name implies, the Burrowing Snagret spends most of its time underground. When it senses potential prey, however, this creature emerges and uses its powerful beak to snatch up any victims in range. The Burrowing Snagret’s body is protected by scales, making the creature’s head its only weak point.
Each time a Burrowing Snagret emerges from the ground, there’s a brief pause just after the creature’s beak appears—this brief window is the only opportunity you’ll have to execute a successful charge. If your Pikmin can latch onto the creature’s head before it’s fully exposed, they’ll be able to do a significant amount of damage in a very short time. Winged Pikmin can charge the the Burrowing Snagret’s head whenever it’s above ground, but you’ll need a large squad to compensate for the Winged Pikmin’s low attack power.
If you can’t seem to land a successful charge attack, flank the Burrowing Snagret’s side and toss your Pikmin directly onto the creature’s head. This method makes it fairly difficult to keep your squad out of harm’s way, but it does allow you to deal reliable damage for the duration of the battle.
Shaggy Long Legs
.png)
The Shaggy Long Legs is a very large creature that crushes any Pikmin unfortunate enough to be caught under its large feet. To defeat this creature, your Pikmin must first pluck all of the Shaggy Long Legs’ hair.
When you encounter a Shaggy Long Legs, throw several Pikmin onto each of the creature’s limbs. As your Pikmin climb the creature, they’ll rip out any hair they find. Once your Pikmin pluck the hair from each of the Shaggy Long Legs’ joints, they’ll move onto the longer hair covering the creature’s body.
The Shaggy Long Legs frequently shakes its attackers loose, so it’s important to gather your Pikmin as they fall to the ground. When all of the creature’s hair is gone, use your Pikmin to attack its exposed body.
Red Pikmin, Yellow Pikmin, and Blue Pikmin are all well suited to battle these enemies. When you prepare to face a Shaggy Long Legs, use the hazards near the battleground to determine which Pikmin types to bring.
Arachnode
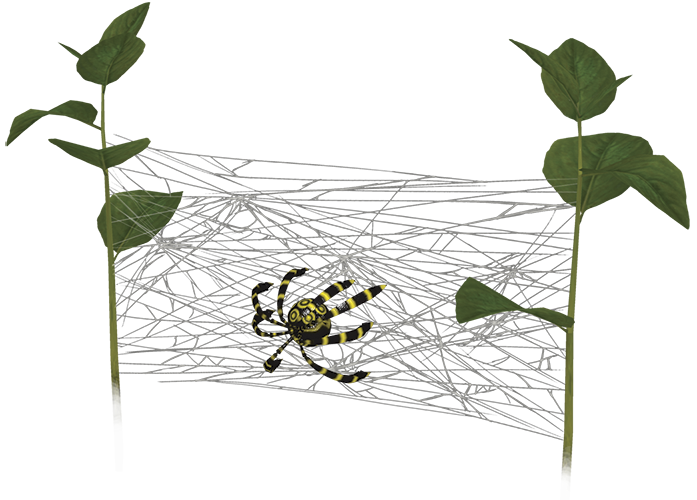
The Arachnode is only able to attack Pikmin that become tangled in its web. When you first encounter a web, look for the attached Arachnode. To defeat the enemy quickly, throw a few Rock Pikmin directly at an Arachnode. You can also use a squad of Winged Pikmin to overwhelm an Arachnode with a single charge attack.
Because the Arachnode’s web is fairly tall, the creature often moves out your standard throwing range. Use Yellow Pikmin or Winged Pikmin to attack an Arachnode when it retreats to the top of its web. If any of your Pikmin become ensnared in the web, use the whistle to rescue them. When you defeat an Arachnode, its web unravels.
Medusal Slurker
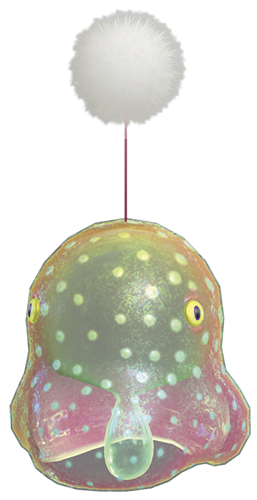
The Medusal Slurker is a low-flying enemy that uses a sticky appendage to absorb any Pikmin that wander below it. When you encounter a Medusal Slurker, throw your Pikmin at the creature’s soft outer shell. Rock Pikmin are particularly effective, but all Pikmin types can be used to deal with this enemy. When you defeat a Medusal Slurker, any Pikmin it managed to absorb are set free.
Swooping Snitchbug
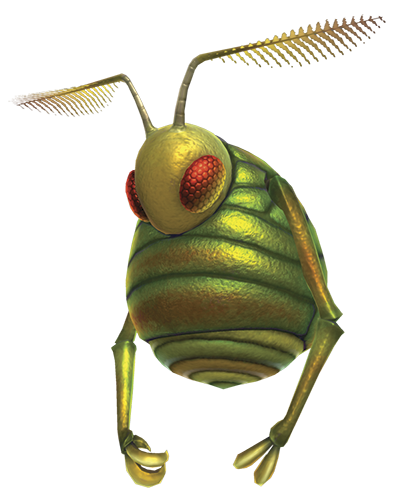
A Swooping Snitchbug attacks by snatching its enemies and throwing them to the ground. When a Swooping Snitchbug does this to a Pikmin, the force is enough to bury its victim—this essentially causes the Pikmin to revert to a sprout.
When you encounter a Swooping Snitchbug, use your Winged Pikmin to attack the creature until it falls to the ground, then use your squad to finish the vulnerable enemy. If you don’t have any Winged Pikmin, just wait for the Swooping Snitchbug to stop moving before you attack with whatever Pikmin are available.
Scornet
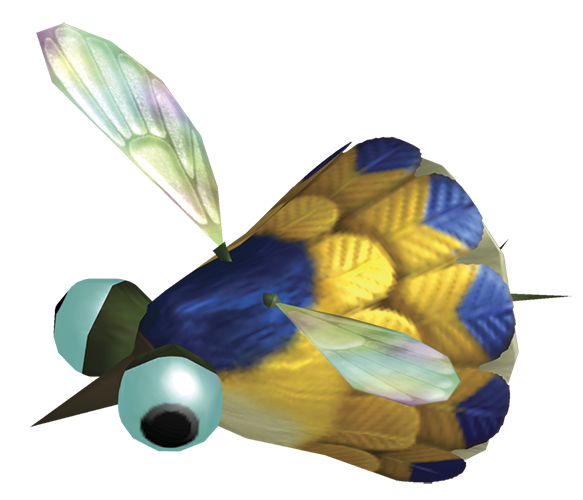
Scornets are flying creatures that congregate in large swarms. When Scornets attack, they move into a tight formation and fly toward their enemies. Any Pikmin unfortunate enough to be skewered by a Scornet will be carried around the area until they succumb to their injuries.
Use a large squad of Winged Pikmin to quickly clear out a Scornet Swarm. Gather your Pikmin each time the Scornets move into formation, then resume your attacks when the enemies separate. If any of your Pikmin are skewered by a Scornet, use your Winged Pikmin to defeat the enemy before the skewered Pikmin expires.
Yellow Wollywog
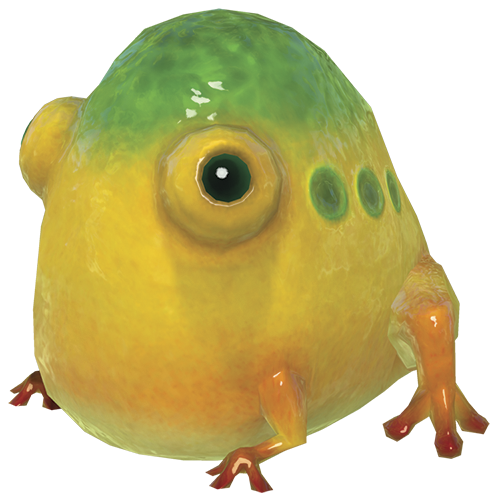
The Yellow Wollywog is a frog-like amphibious creature. This enemy attacks by leaping into the air and crushing its victims. Rock Pikmin cannot be damaged by this attack, making them a good option when facing one of these creatures. Because Yellow Wollywogs tend to stick close to water, Blue Pikmin are often your safest alternative.
When you’re leading a more diverse squad, toss Red Pikmin or Blue Pikmin onto a Yellow Wollywog to weigh the creature down, then throw your Rock Pikmin at the enemy to deal heavy damage.
Wogpole
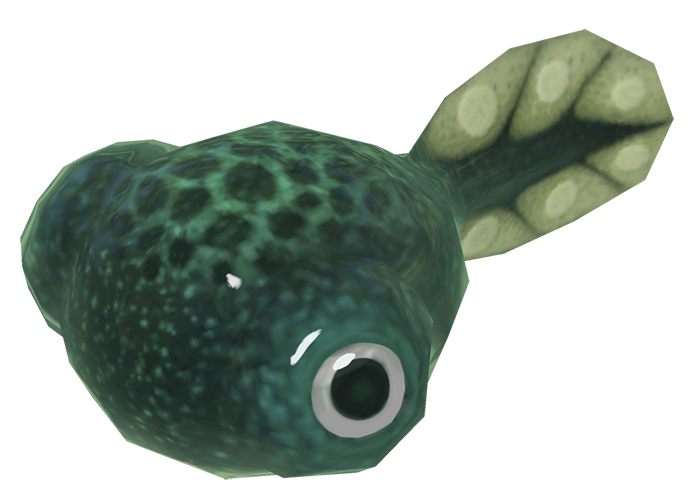
Wogpoles are harmless aquatic creatures that retreat any time they feel threatened. If you’re determined to defeat a Wogpole, it’s usually best to send a squad of Blue Pikmin charging in to attack the creature. Most of the time, however, it’s not worth the time it takes for your Pikmin to chase down a fleeing Wogpole.
Waddlepus
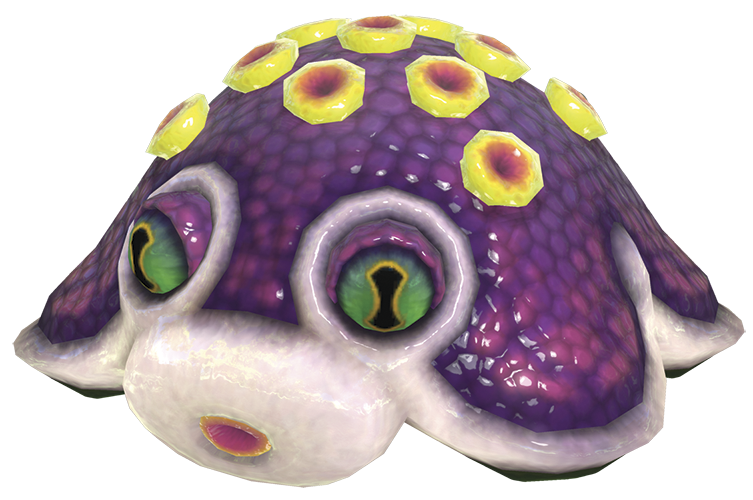
The Waddlepus is a relatively large amphibious creature. This enemy uses bubbles to temporarily incapacitate nearby attackers. When you encounter this creature on dry land, flank the Waddlepus and have your squad charge the enemy from the rear. If any of your Pikmin become trapped in a bubble, attack the bubble to instantly free the Pikmin.
The same tactics apply when you encounter this enemy in the water—just make sure your squad only contains Blue Pikmin.
Peckish Aristocrab
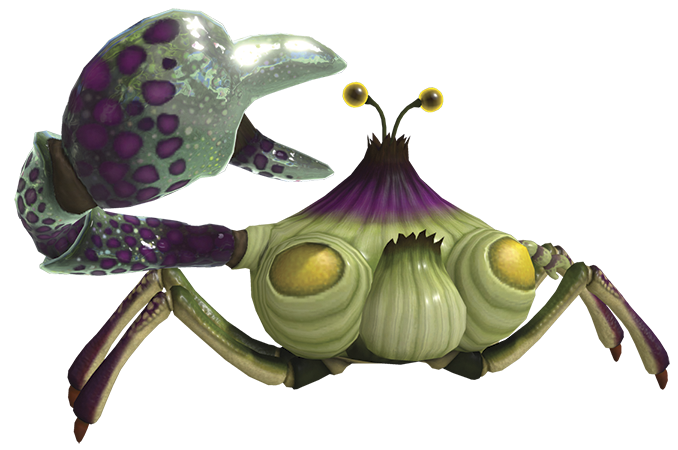
The Peckish Aristocrab is fairly large amphibious creature. Like the Waddlepus, this enemy uses bubbles to capture nearby attackers. In addition to this defensive ability, the Peckish Aristocrab uses its large claw to snatch up multiple enemies during a single attack.
Peckish Aristocrabs are able to dodge most charge attacks, so it’s best to throw your Pikmin directly onto this enemy. To keep your squad safe from this enemy’s attacks, you can either use Rock Pikmin to break a Peckish Aristocrab’s claw, or you can flank the creature and attack from behind. Peckish Aristocrabs have difficulty turning, but they can move from side to side very quickly.
Hermit Crawmad
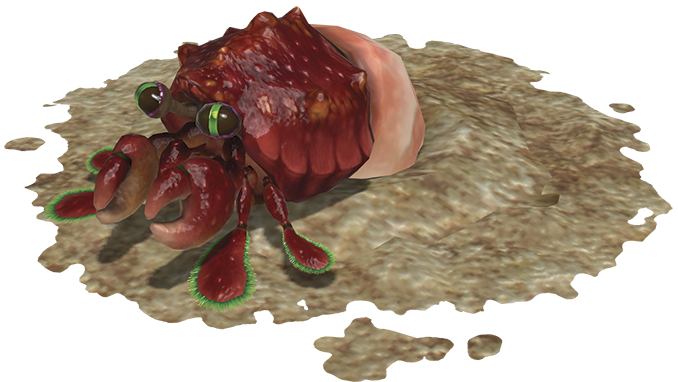
The Hermit Crawmad is a burrowing amphibious creature. When you approach this enemy’s hiding spot, it pops out of the ground and lunges toward your squad. If the enemy manages to snatch any of your Pikmin, it drags its prey back underground.
After you coax a Hermit Crawmad out of its hole, flank the creature to keep your Pikmin out of harm’s way, then send your squad charging in to attack the Hermit Crawmad’s fleshy body. Since these enemies tend to lurk in the water, it’s best to use only Blue Pikmin during these encounters.
Bug-Eyed Crawmad
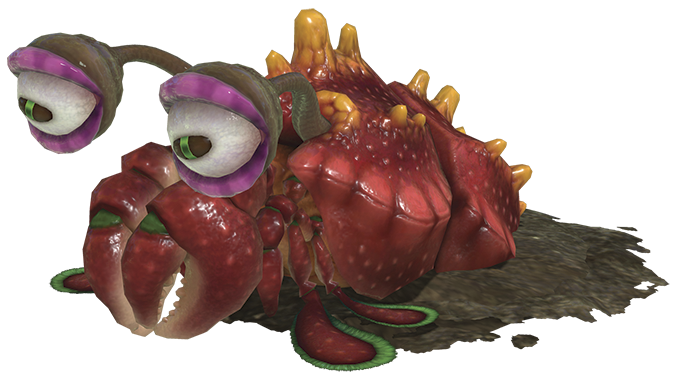
The Bug-Eyed Crawmad is a large, burrowing creature. This heavily armored enemy attacks by lunging straight ahead and snapping its powerful claws. Any Pikmin it captures are fed directly into the creature’s mouth, so it’s important to keep your squad out of the Bug-Eyed Crawmad’s path.
After you coax this creature out of its hole, throw your Pikmin at its retractable eyes. When both eyes have pulled back into its head, the Bug-Eyed Crawmad flips onto its back. Throw your Pikmin onto the creature’s fleshy underbelly to deal damage until it recovers. Repeat the process until you defeat the Bug-Eyed Crawmad.
Calcified Crushblat
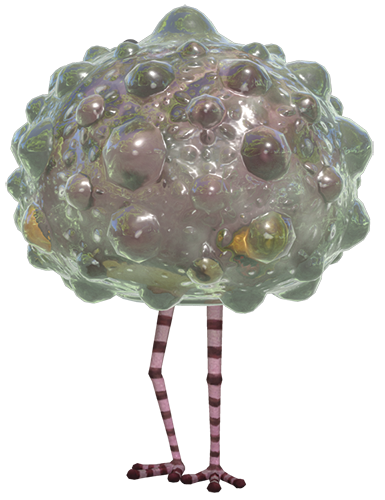
The Calcified Crushblat is a large amphibious creature. This well-armored enemy attacks by leaping into the air and crushing its victims.
When you encounter a Calcified Crushblat, toss Rock Pikmin at the creature’s armor to expose the soft flesh beneath it. Once its armor is destroyed, this enemy inflates its body to knock back any attackers. Since the Calcified Crushblat tends to stick close to the water, your Blue Pikmin are well suited to survive these knock-back attacks. Unlike the Rock Pikmin, however, your Blue Pikmin are vulnerable to the creature’s crushing attacks.
Throw your Blue Pikmin onto the creature’s exposed flesh, and recall any Pikmin that are knocked to the ground. As you continue the battle, keep your squad clear of the Calcified Crushblat’s attacks.
Puckering Blinnow
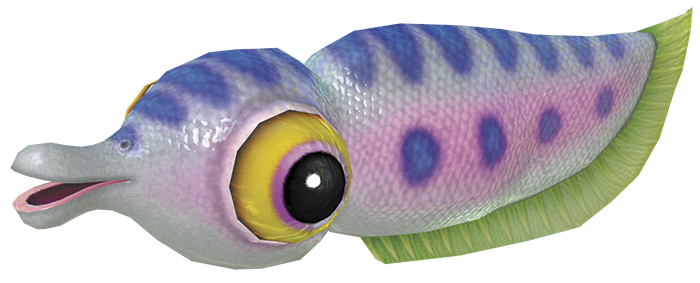
Puckering Blinnows are small aquatic creatures that use their narrow bills to skewer unsuspecting victims. Puckering Blinnows tend to congregate; as you attack one Puckering Blinnow, there’s a good chance a second enemy will attack your squad. Even so, it’s usually best to focus on one enemy at a time.
When you encounter a Puckering Blinnow, use a squad of Blue Pikmin to charge the creature. When a Puckering Blinnow skewers one of your Pikmin, make that enemy your primary target—if you’re lucky, at least part of your squad will automatically follow the enemy as it retreats. A skewered Pikmin can survive for a few seconds. Move quickly to defeat a Puckering Blinnow before its victim succumbs to its injuries.
Sputtlefish
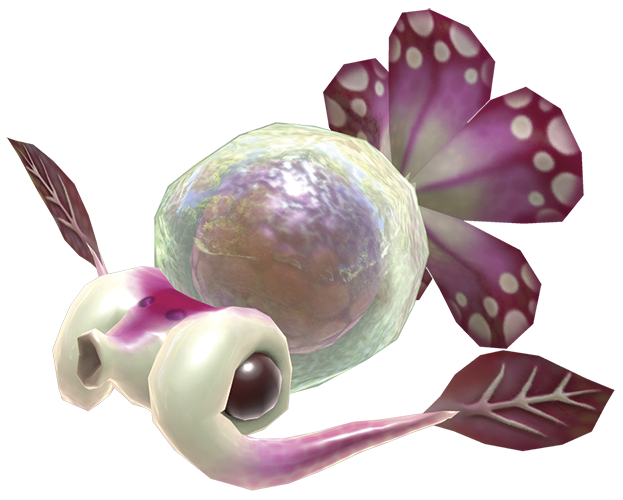
Sputtlefish are small aquatic creatures that release ink when attacked. When you encounter a Sputtlefish, lock onto the creature and send a squad of Blue Pikmin charging in to attack. With a reasonably large squad, you shouldn’t have any trouble defeating a Sputtlefish before it has a chance to retaliate.
If the creature does manage to release its ink, however, any Pikmin caught in the cloud will panic. Use your whistle to calm your scattered Pikmin and send them charging in for another attack.
Skeeterskate
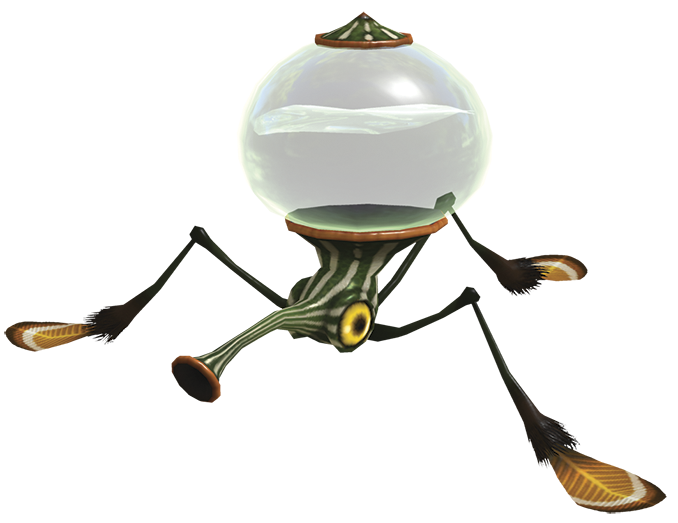
The Skeeterskate is a spindly aquatic creature that skims along the surface of the water. This creature utilizes long-range water attacks to drown its targets from an impressive distance.
To defeat a Skeeterskate, toss a Blue Pikmin onto its head, or use a squad of Blue Pikmin to charge the creature. When that’s not an option, use Winged Pikmin to attack a Skeeterskate above the water—just be prepared to rescue any Winged Pikmin that get caught in the enemy’s attack.
Water Dumple
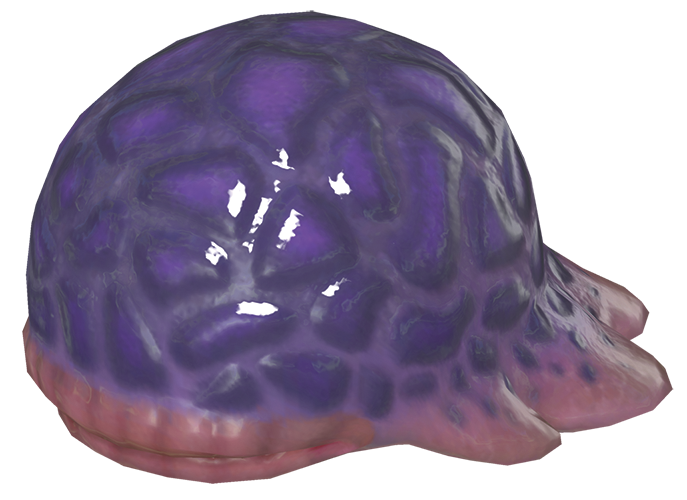
Water Dumples are compact aquatic creatures capable of quickly devouring a small group of Pikmin. Given their size, these enemies are surprisingly powerful, so it’s best to overwhelm them before they have a chance to attack.
When you encounter a Water Dumple, flank the creature and send a squad of Blue Pikmin charging in from the rear.
Toady Bloyster
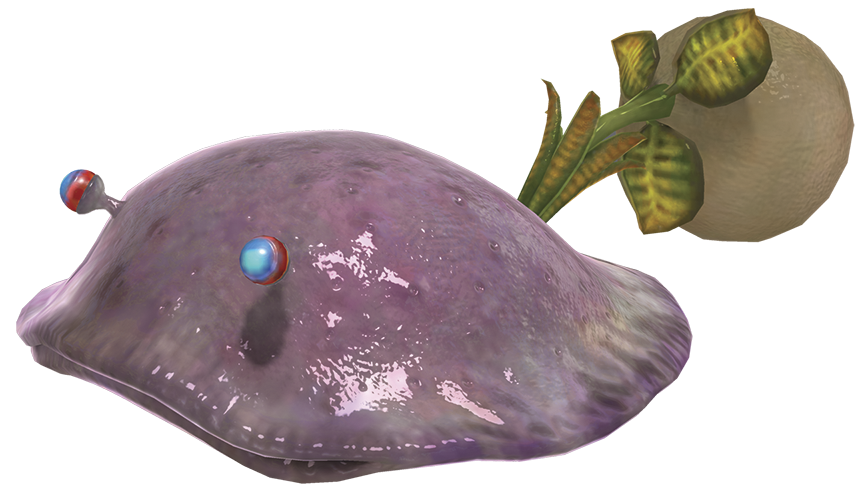
The Toady Bloyster is a large, slow moving aquatic creature. This creature uses retractable tendrils to pull its victims into its mouth. Like the Sputtlefish, the Toady Bloyster releases a cloud of ink when it feels threatened.
When you encounter a Toady Bloyster, flank the creature and use a squad of Blue Pikmin to attack its bulbous tail. While clinging to the tail, your Pikmin should be able to avoid the Toady Bloyster’s ink clouds. However, if any of your Pikmin are caught in the attack, use your whistle to calm them down.
Iridescent Flint Beetle
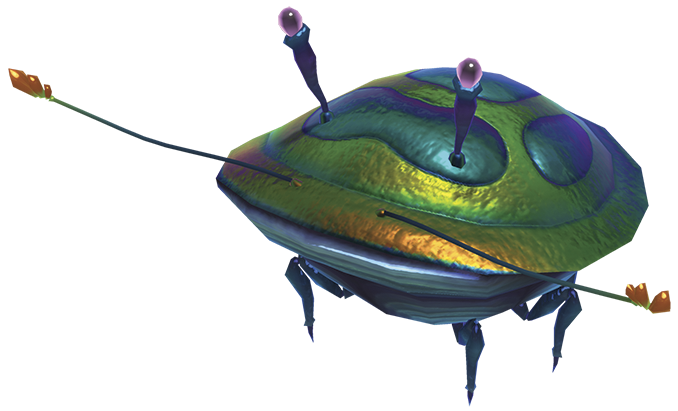
The Iridescent Flint Beetle is a harmless burrowing creature. Attacking this enemy generally yields a nice supply of pellets and Nectar.
The Iridescent Flint Beetle is a fast-moving enemy. When the creature emerges, allow it to scurry around the area. When the creature stops moving, you have a brief window to attack. Toss a single Pikmin directly onto the Iridescent Flint Beetle to flip the creature and earn a reward. Repeat the process as many times as possible before the Iridescent Flint Beetle burrows back underground.
White Spectralids
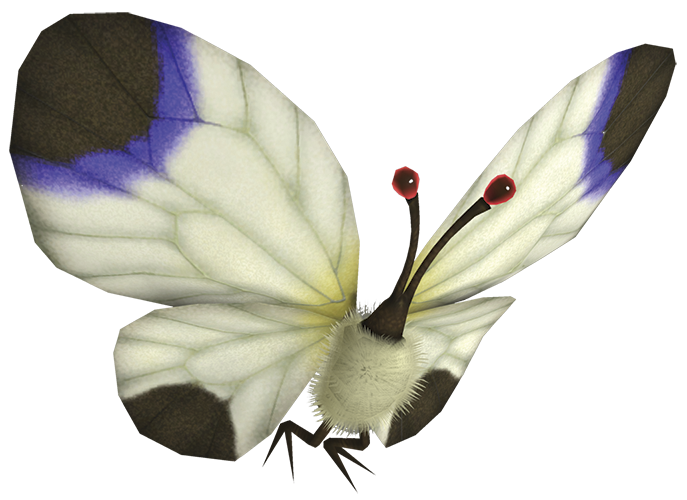
The White Spectralids is a harmless flying creature. Unless Pikmin cultivation is your priority, it’s usually best to ignore these enemies.
If you choose to attack a White Spectralids, use Winged Pikmin to defeat the creature with ease. If that’s not an option, wait for the White Spectralids to land, then toss a single Pikmin onto its back.
Yellow Spectralids
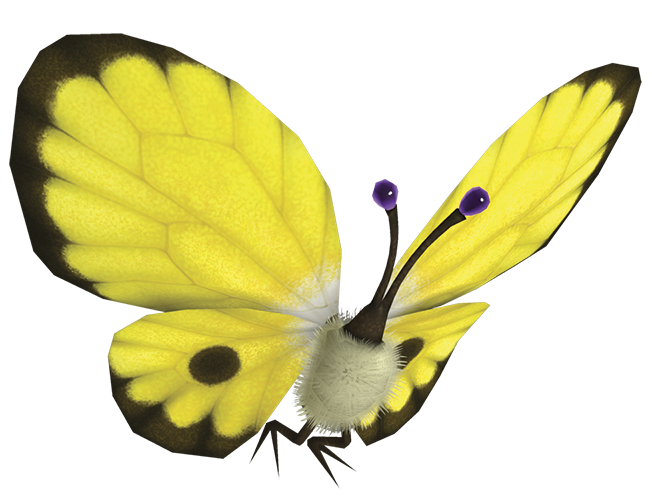
Like the White Spectralids, the Yellow Spectralids is a harmless flying creature. However, when you defeat a Yellow Spectralids, it drops a bit of Nectar. If you choose to attack a Yellow Spectralids, use your Winged Pikmin to ensure a short battle.
Red Spectralids
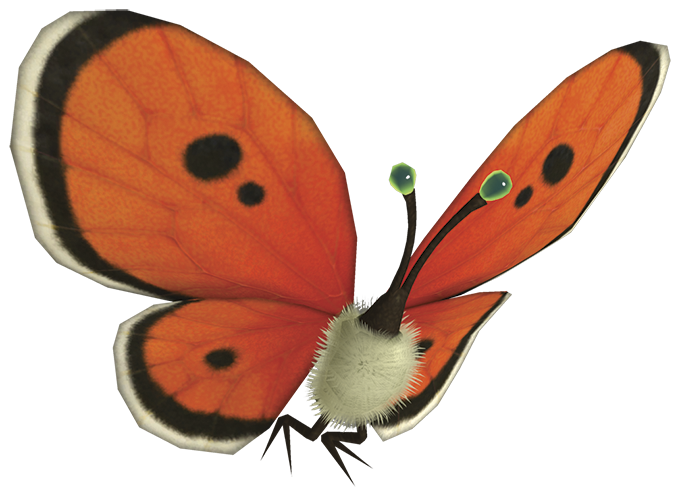
The Red Spectralids is another harmless flying creature. When you defeat this enemy, it drops a bit of Ultra-Spicy Nectar. If you choose to attack a Red Spectralids, use your Winged Pikmin to quickly defeat the enemy.
Nectarous Dandelfly
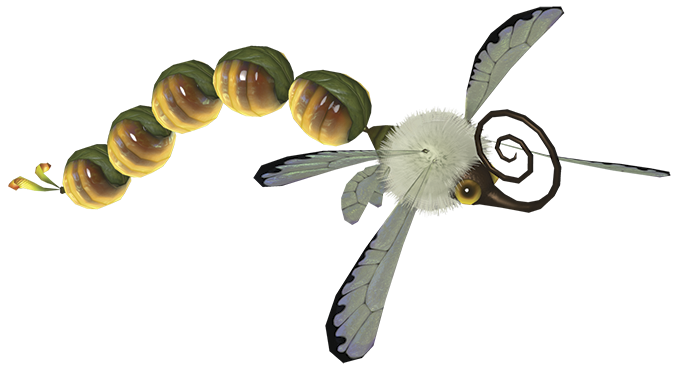
The Nectarous Dandelfly is a harmless flying creature that carries a large amount of Nectar in its segmented body. When you encounter a Nectarous Dandelfly, use your Winged Pikmin to attack the creature. To yield the maximum amount of Nectar, focus your attacks on the Nectarous Dandelfly’s head.