
Pikmin 3 Guide Characters and Items Characters
Bosses
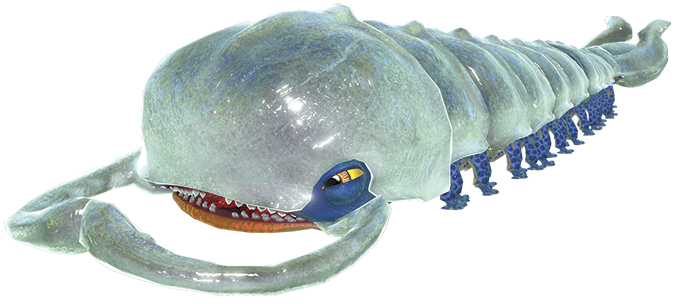
Armored Mawdad
Walkthrough Coverage: Day 3
The Armored Mawdad is located in the Garden of Hope. This creature is protected by the segmented armor covering its back. The Armored Mawdad uses its massive pincers to trap and devour any victims caught in its path.
This Armored Mawdad is surprisingly agile, so it’s important to keep your squad moving. Use Rock Pikmin to break through the creature’s armor, then use Red Pikmin to latch onto the exposed flesh.
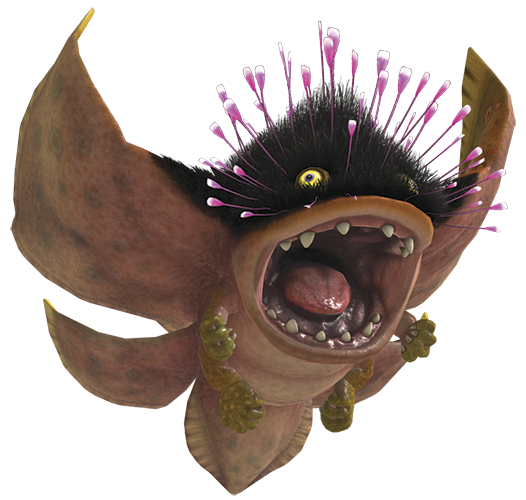
Vehemoth Phosbat
Walkthrough Coverage: Day 5
The Vehemoth Phosbat is located in the Distant Tundra. This creature attacks by flying into the air and inhaling its victims. On their own, these attacks are relatively easy to avoid. However, the Vehemoth Phosbat uses a cloaking ability to approach its hapless victims without being detected.
The Vehemoth Phosbat is very sensitive to light. Use Yellow Pikmin to activate the Light Bulbs scattered around the area. Once you’ve illuminated the entire cave, the Vehemoth Phosbat loses its cloaking ability. Keep your squad away from the Vehemoth Phosbat’s mouth as you use your Pikmin to attack.
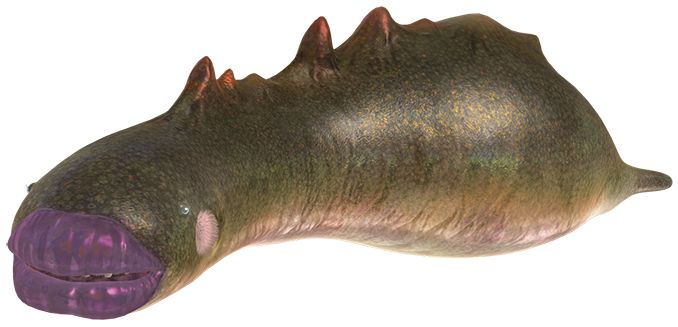
Sandbelching Meerslug
Walkthrough Coverage: Day 8
The Sandbelching Meerslug is located in the Tropical Wilds. This creature has two basic attacks. While burrowed in the sand, the Sandbelching Meerslug creates a large pit that traps its victims until they can be devoured. When the creature emerges from the sand, it attacks its targets by spitting large projectiles.
When the Sandbelching Meerslug emerges from the sand, send a large squad of Pikmin charging in to attack. When the creature takes enough damage, it’s launched into the air and temporarily incapacitated.
When the Sandbelching Meerslug creates a large pit, you can either avoid the attack or toss a Bomb Rock into the creature’s mouth to temporarily incapacitate the creature.
Whenever you manage to incapacitate the Sandbelching Meerslug, send your Pikmin charging in to deal heavy damage.
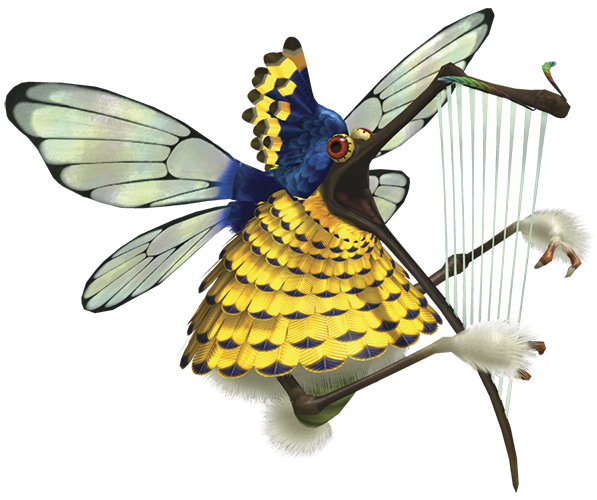
Scornet Maestro
Walkthrough Coverage: Day 13
The Scornet Maestro is located in the Twilight River. As its name implies, this creature attacks by controlling a swarm of Scornets.
The Scornet Maestro is well defended by its minions. Avoid attacking while the Scornets are in the area. Each time the Scornets move into a tight formation, avoid their attack and allow them to fly out of the area. When it’s safe, use your Winged Pikmin to wrestle the vulnerable Scornet Maestro to the ground, then have the rest of your squad charge in to attack. When the Scornets return to the area, gather your Pikmin and repeat the process.
Each time a Scornet manages to impale one of your Pikmin, defeat the enemy before your Pikmin succumbs to its injuries.
Quaggled Mireclops
Walkthrough Coverage: Day 16
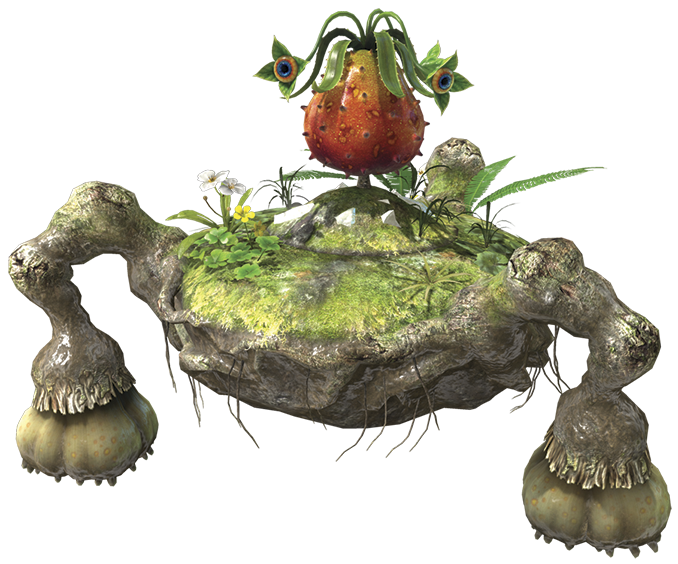
The Quaggled Mireclops is located in the Garden of Hope. When you encounter this creature, throw Rock Pikmin at its Mireclops Crystal until the creature wakes up.
Once active, the Quaggled Mireclops creature stomps around its enclosure, creating pools of water in the soft mud. Use your Blue Pikmin to attack one of the creature’s feet until the Quaggled Mireclops collapses. When it does, use your Rock Pikmin to destroy the Mireclops Crystal and expose the enemy’s spike-covered bulb. Although the Mireclops is vulnerable from this position, it’s not helpless. When the creature sweeps its giant tongue around the area, make sure all of your Pikmin are safely out of its path.
When the Quaggled Mireclops recovers, use your Blue Pikmin to attack one of its feet. Once the creature collapses, use your Blue Pikmin (and/or Winged Pikmin) to attack the Quaggled Mireclops’ spiked bulb. Repeat the process until you defeat the creature.
The Quaggled Mireclops grows more aggressive as the battle progresses. Take care to keep your Pikmin safe as the creature charges around the enclosure.
Plasm Wraith

Walkthrough Coverage: Day 25
The Plasm Wraith is located in the Formidable Oak. This resilient creature uses spiked appendages to skewer its victims, and is capable of summoning hazardous Elemental Plasms. All Pikmin types are useful against this enemy, so assemble a well-balanced squad before you enter this battle.
When you encounter the Plasm Wraith, use Rock Pikmin to attack the creature from a distance. When the Plasm Wraith begins to fall apart, destroy the puddles of loose plasm before the creature is able to reclaim them.
Rock Pikmin are immune to the Plasm Wraith’s direct attacks, so they’re your best option for the bulk of the encounter. Once the creature begins summoning Elemental Plasms, however, use the corresponding Pikmin to destroy each hazard. Use Winged Pikmin to attack the Plasm Wraith each time it flies into the air.
Attack the Plasm Wraith to weaken the creature, then destroy the loose plasm to prevent the creature from regaining its strength.