Medal of Honor: Warfighter Guide Multiplayer Multiplayer Maps
Tungawan Jungle
Tungawan Jungle
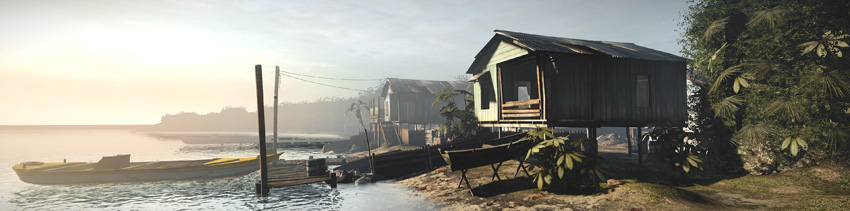
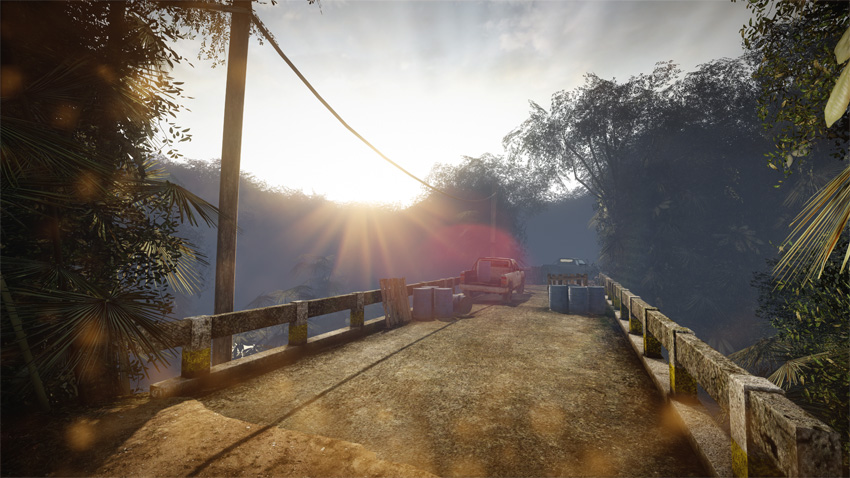
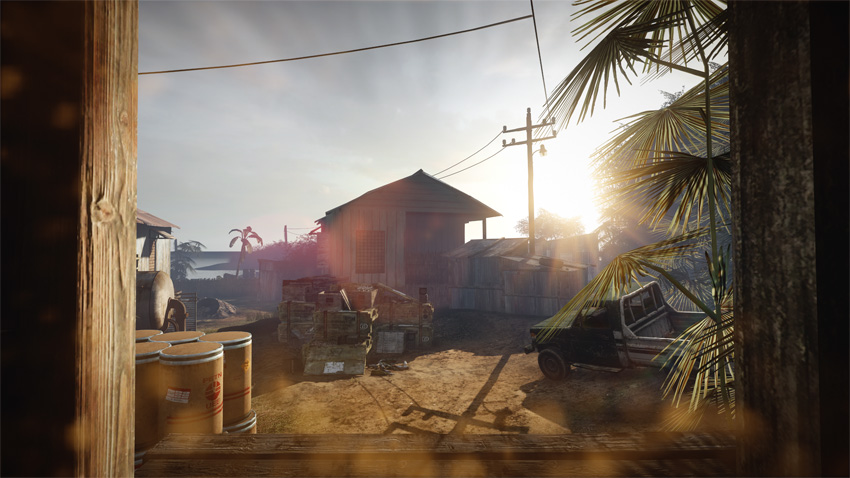
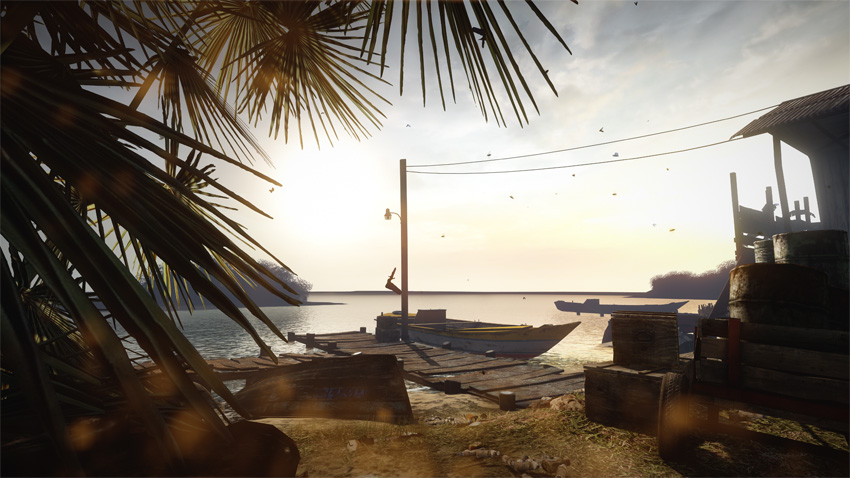
Located on the south Philippines mainland, this jungle section is walled along its shoreline by a dense mangrove forest. The area plays a critical role in the supply route connecting the local region to the north of the country. A small jungle outpost is the only thing that guards the single bridge in the area, and underplays the considerable strategic value of this region.
Tactical Overview
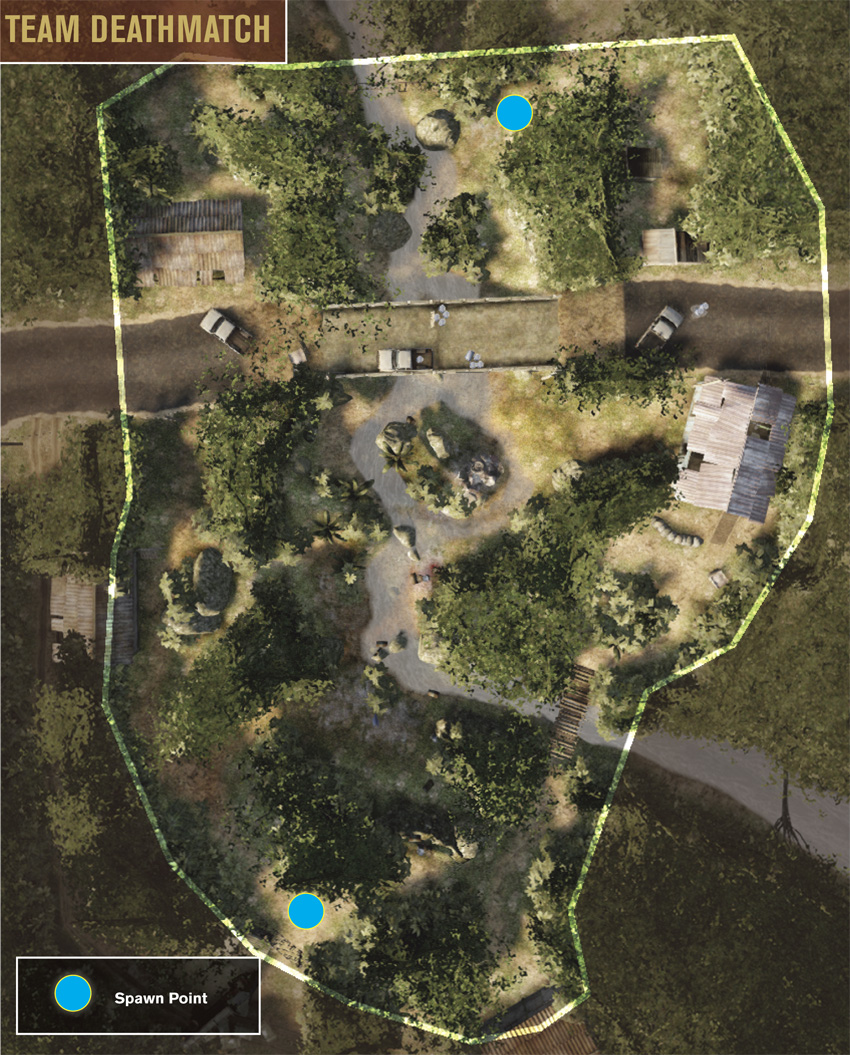
The humidity and threat of malaria are the least of your worries in this sweltering jungle environment. Fighting among the dense foliage and bamboo houses offers a good variety of action across all game modes, requiring constant analysis of your chosen class and weapon. In some areas, close-quarters weapons are best and in other areas you’ll want more long-range capability. The abandoned fishing village on the south side of the map is home to some intense house-to-house fighting, particularly during Combat Mission and Sector Control. All paths funnel toward the center of the map where teams often clash near a tank, situated near a few houses—expect a mix of close-quarters and long-range combat here. Then there’s the bridge to the north, the site of much fighting during Team Deathmatch and Combat Mission. The long sight lines afforded by this location make it a popular area for snipers and other sharpshooters. If you don’t feel like switching classes often, you can never go wrong with the assaulter class on this map. The assault rifles offered by this class are ideal for engaging targets at any range.
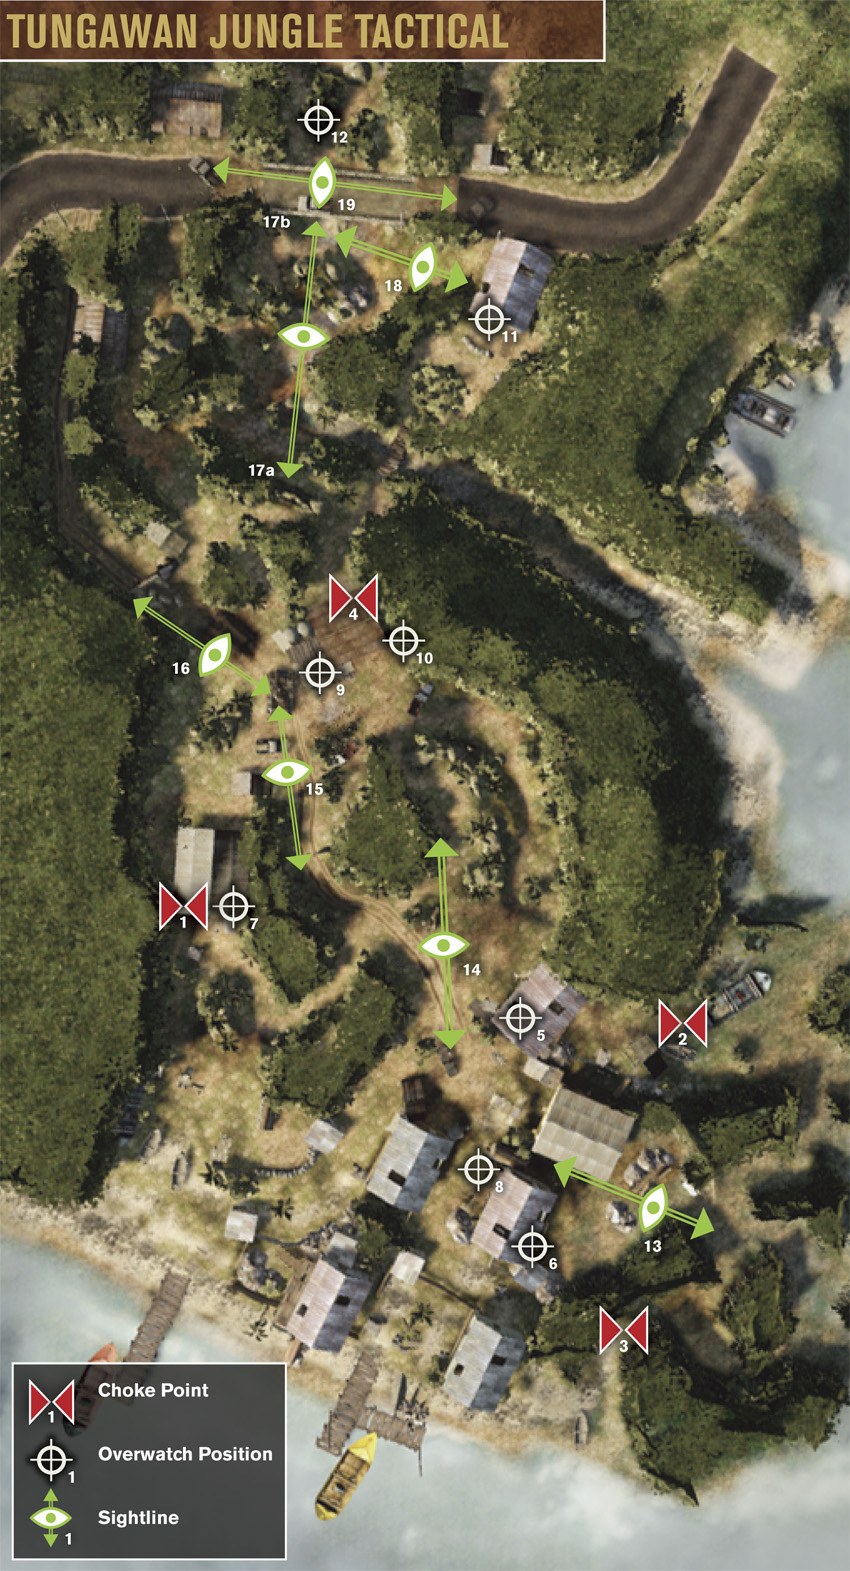
Choke Points
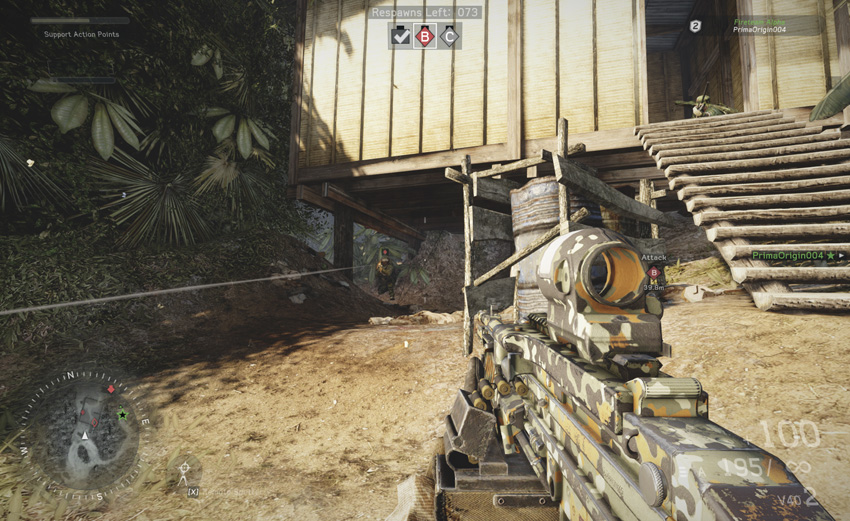

Recommend Weapons: SMG, Shotgun, Proximity Mines
During Combat Mission, Sector Control, and Hotspot, this space beneath the house creates a tight spot to lay proximity mines or to circle around behind an enemy. It’s dark enough to be used as a point of ambush if you’ve managed to go undetected, but your flanks are exposed enough to be taken out quickly. Use close-quarters weapons to tackle any enemies within or around the house, but try to use mid- to long-range weapons for anyone down range of the water.


Recommend Weapons: LMG, Sniper Rifle (supported)
During Combat Mission, set up the bipod with either a sniper rifle or LMG to take out enemies approaching from the left path. Attackers will have just enough cover to move up, so be patient when taking them out. You can be flanked from the rear, but it’s unlikely unless the enemies have already stormed the point, in which case you’re probably already dead.
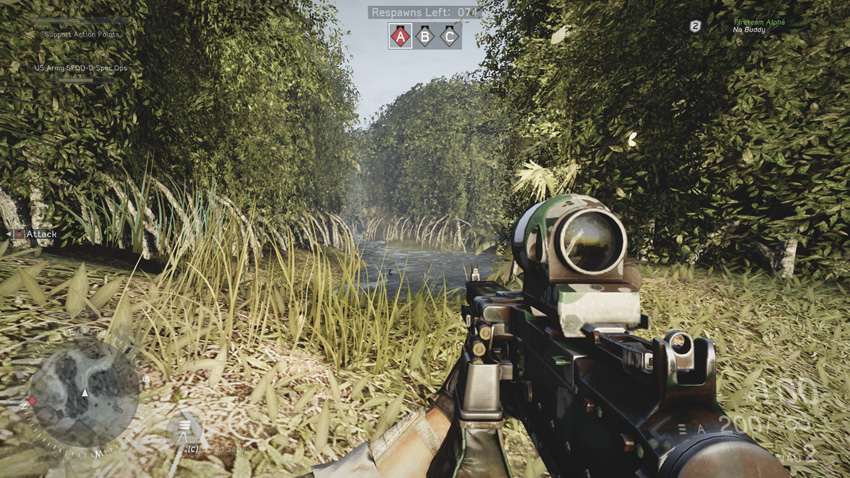

Recommended Weapons: LMG (supported), Grenades, Proximity Mines
This choke point is a path less travelled within Combat Mission, Sector Control, Home run, and Hotspot, as it’s fairly indirect. Assume the prone position within the blades of grass, deploy your bipod, and spray anyone wandering into the opening. Once you’ve gathered a couple kills, fall back as you are sure to be taken by a volley of grenades.
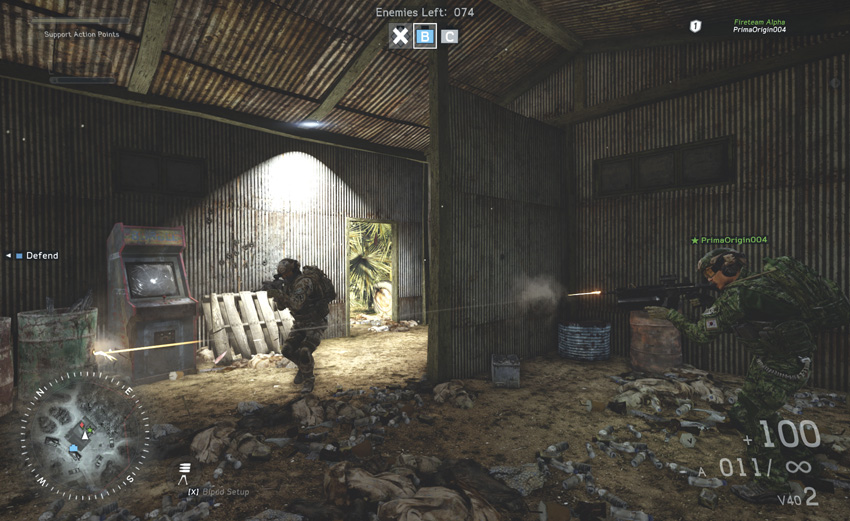

Recommended Weapons: Explosives, SMG, Shotgun, LMG, Assault Rifle
During Combat Mission, Sector Control, and Hotspot, this building is a high-traffic area primed for proximity mines as it is close quarters and dark, and has two doors with a wall partition in the middle. Move through here with your fireteam buddy using primarily short-range weapons to take out any lurking enemies. Do not linger long within as a couple of cooked grenades through the doors will ruin your day.
Overwatch Positions
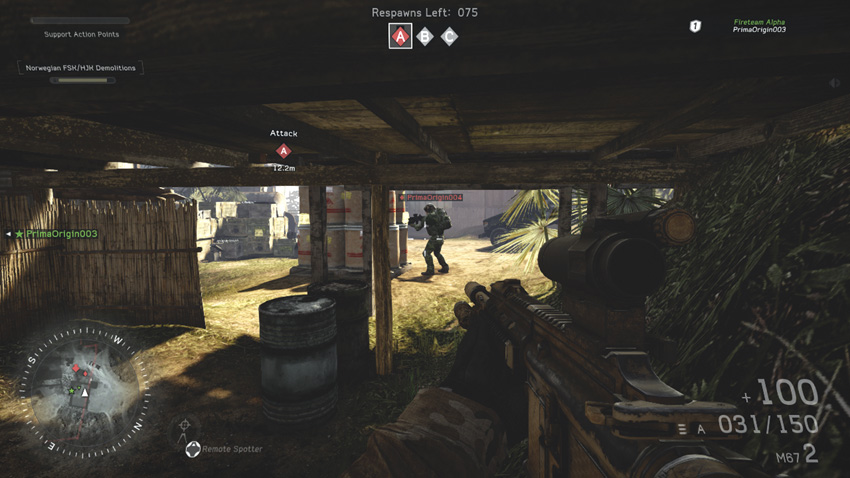

Recommended Weapons: Explosives, SMG, LMG, Assault Rifle
During Combat Mission, there’s a space beneath this building just large enough and dark enough to lay an ambush for anyone trying to arm or disarm the bomb site. Spray anyone with any short- to mid-range weapons to dispatch them quickly. You’ll have a 90-degree field to protect, so always try to observe your flanks when possible. This is also an extremely good location to place proximity mines.
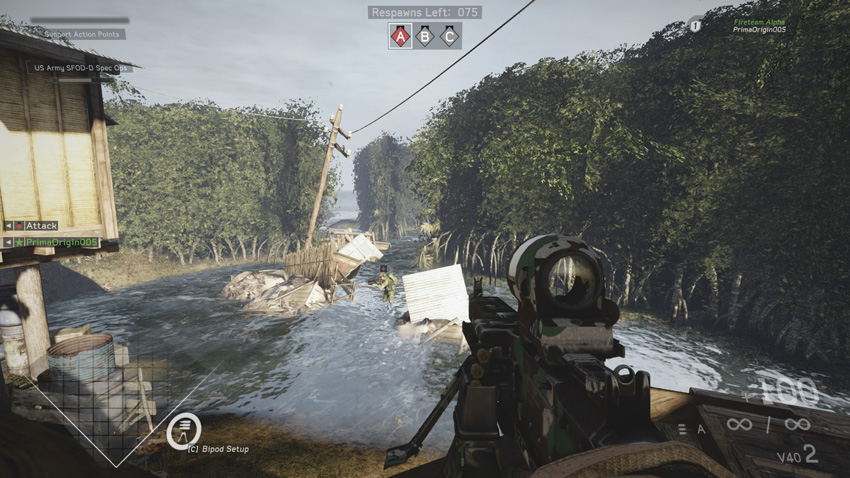

Recommended Weapons: LMG, Proximity Mines, Grenades
During Combat Mission, deploy your bipod in this window to lay down suppressive fire and mow through attackers. During Sector Control, this looks directly over the South Base. You’ll be flanked from the door behind you, so it’s important to have your six covered with proximity mines or your buddy watching the bomb site from the door. Have your buddy throw a few grenades into this overwatch to chase enemies out of cover so you can finish them off.
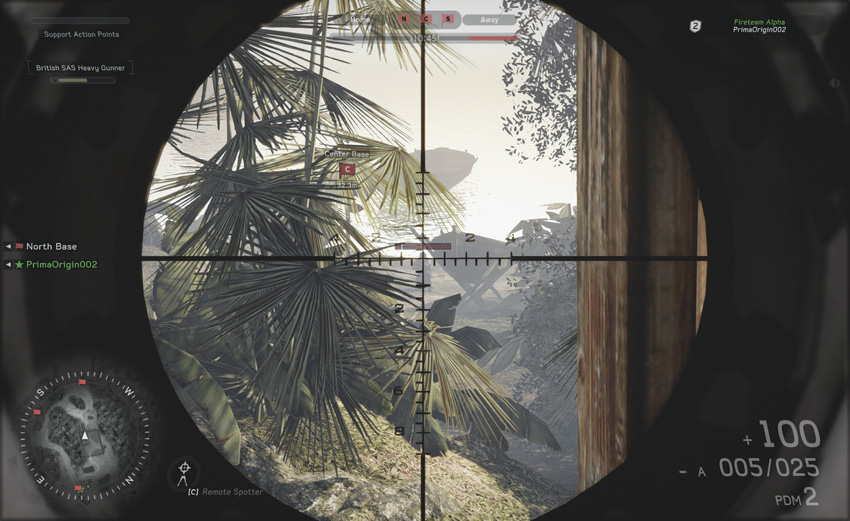

Recommended Weapons: Explosives, Sniper Rifle, LMG, Assault Rifle
During Combat Mission and Sector Control, this building is highly trafficked between two objectives. During Hotspot, as a potential target, it is highly contested. Firing prone from the doorway toward the beach offers a longer sight line, but little cover. There are several entrances to the west, north, and east with a small wall division. Place proximity mines near the entrances to cover your flanks. Moving in on this position should often be conducted with a fireteam buddy while wielding short- to mid-range weapons from the east, and mid- to long-range weapons from the west. If enemies have advanced on this position, prepare for a close-quarters engagement.
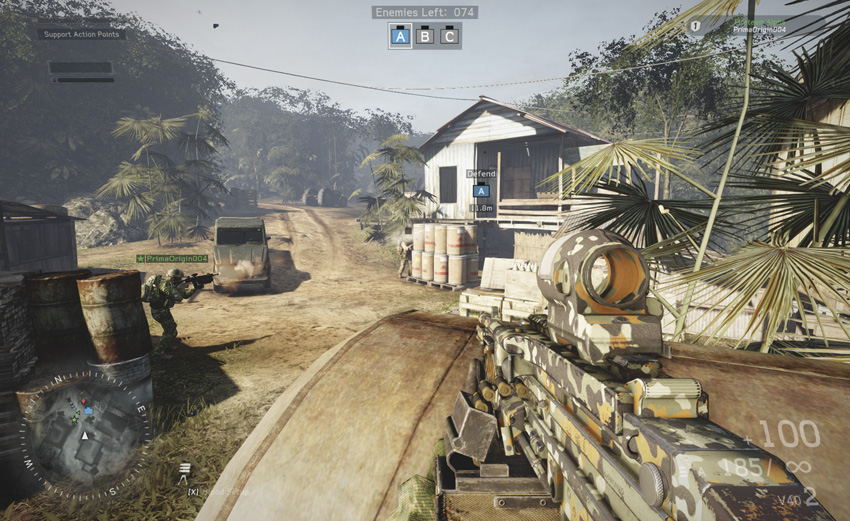

Recommended Weapons: Explosives, LMG, Assault Rifle, Sniper Rifle
During all game modes besides Team Deathmatch, this overwatch is likely to receive enemies passing through the village courtyard often. It’s a major thoroughfare between objectives and to be considered a valuable position with adequate cover. Combat Mission, in particular, overlooks the first bomb plant site. Watch for enemies flanking fairly quickly from the western side of the building or through the southern door of the building. Patrol often to ensure this position is a fairly clear place to engage the enemy. Use the LMG or assault rifle to cover the courtyard or possibly a sniper rifle to cover the roads and nearer choke points.
.jpg)
.jpg)

Recommended Weapons: Grenades, Assault Rifle, LMG (supported)
During Combat Mission and Hotspot, this location is a superb elevated defensive position with plenty of cover to protect the bomb site from enemies approaching from the roads. During Sector Control, these positions cover the North Base. The cover is exceptional and deploying your bipod is essential for accuracy. Having a buddy covering the middle road and northern path to protect your flanks would be ideal.
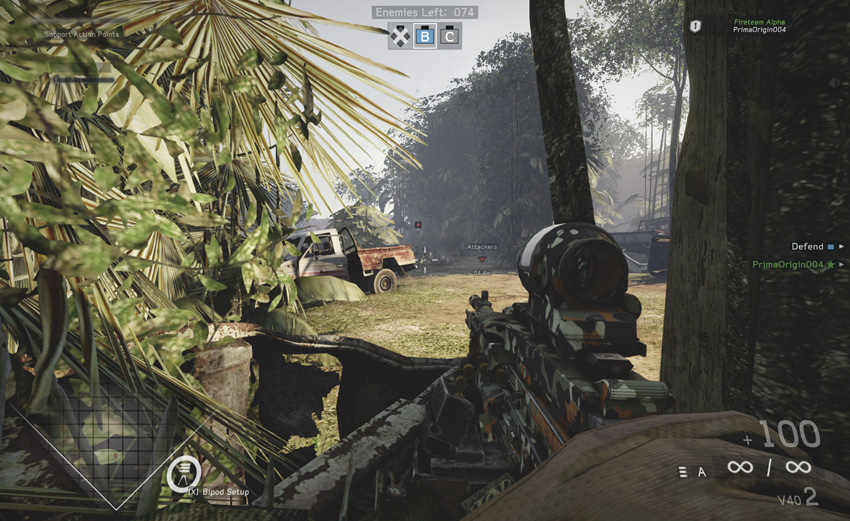

Recommended Weapons: LMG (supported), Assault Rifle
During Combat Mission, in between the house and jungle there is a well hidden in a bit of cover. Climb over the scrap metal, mount an LMG or break out an assault rifle, and wait in ambush. The jungle overgrowth will provide enough camouflage to keep your body hidden until it’s too late for the enemy to react.
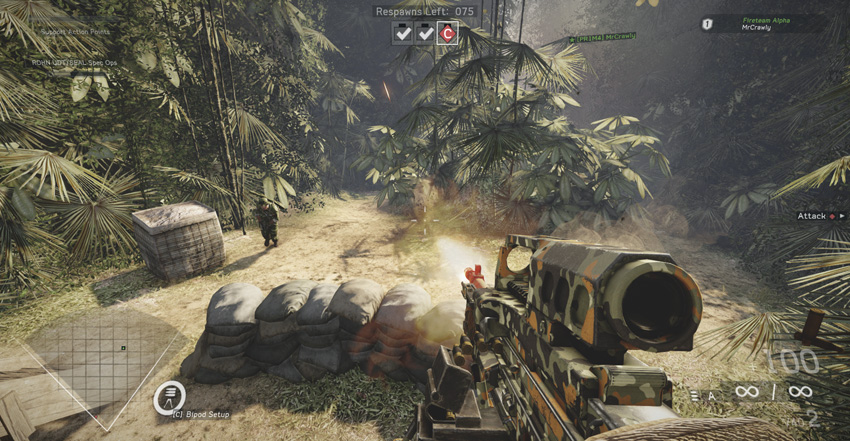

Recommended Weapons: Explosives, Assault Rifle, LMG (supported)
During Combat Mission, this small house overwatch covers a small path that leads to bomb site C. Shut down this path by setting up the bipod in the window. For further coverage, have your fireteam buddy take cover in front of this position to fire down the opposite path. Be aware of the side door, as enemies can flank quickly. Any snipers in the area should booby trap this house to protect anyone holding this position. This spot can also be effective in Team Deathmatch, but don’t hang around here too long.
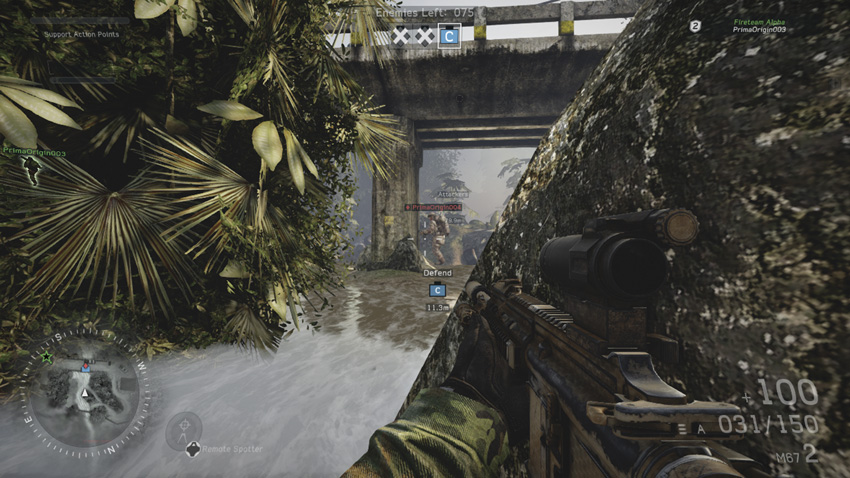

Recommended Weapons: Assault Rifle, Grenades
During Combat Mission, this rock near the defenders’ spawn point makes for great cover while defending the last bomb site. Enemies are unable to flank. Hold this position using LMGs and assault rifles. However, it’s a tight spot and enemies might try to flush you out of it by lobbing grenades, so be sure everyone is dead before they can target you.
Sight Lines
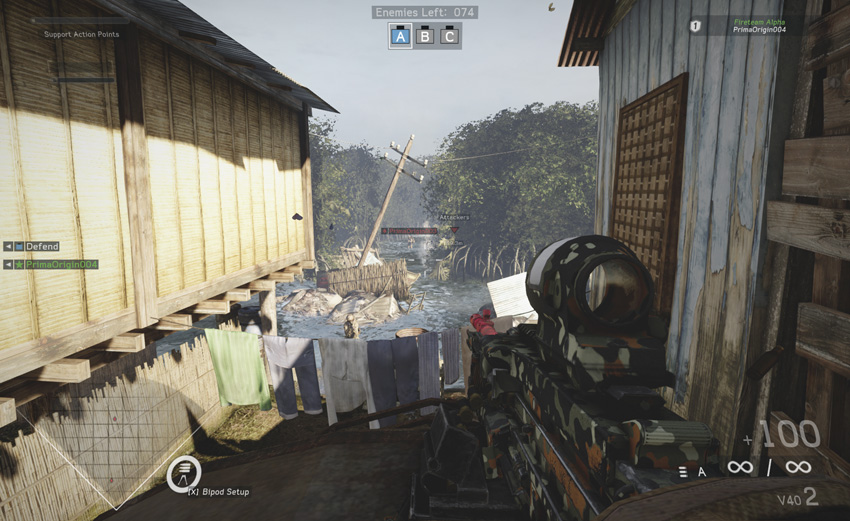

Recommended Weapons: LMG or Sniper Rifle (supported)
During all game modes aside from Team Deathmatch, this site line looks directly down the middle lane into the southern spawn area. Deploy a bipod while prone with either the sniper rifle or the LMG to pick off incoming enemies. Cover-wise you are fairly exposed from behind. If anyone is using the other window of this building, there should be a good crossfire going that should cause enemies to consider alternate paths.
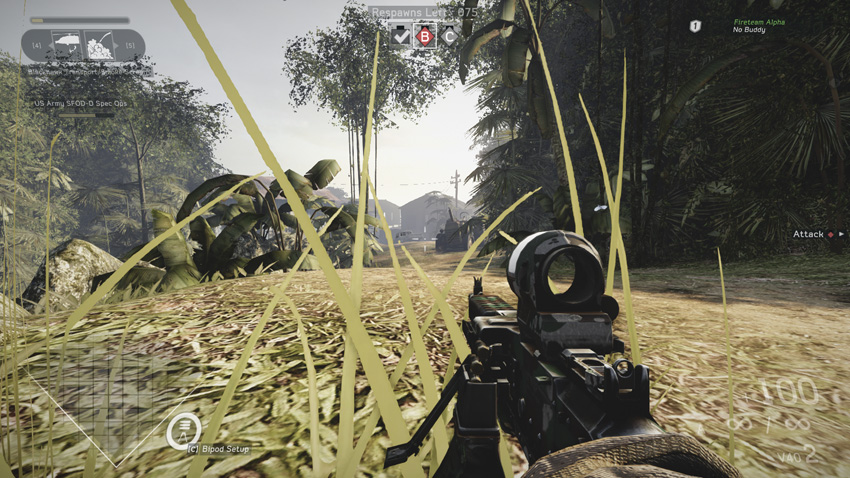

Recommended Weapons: LMG, Sniper Rifle (supported)
During Hotspot, Sector Control, and Combat Mission, this path is good impromptu prone placement for supported LMGs or sniper rifles looking down into the village to take out any unaware enemies. Since the middle road and village courtyard is an open thoroughfare, this position can be good while advancing or falling back for a couple assists or kills. The major down side is that the rear is totally exposed to flankers.
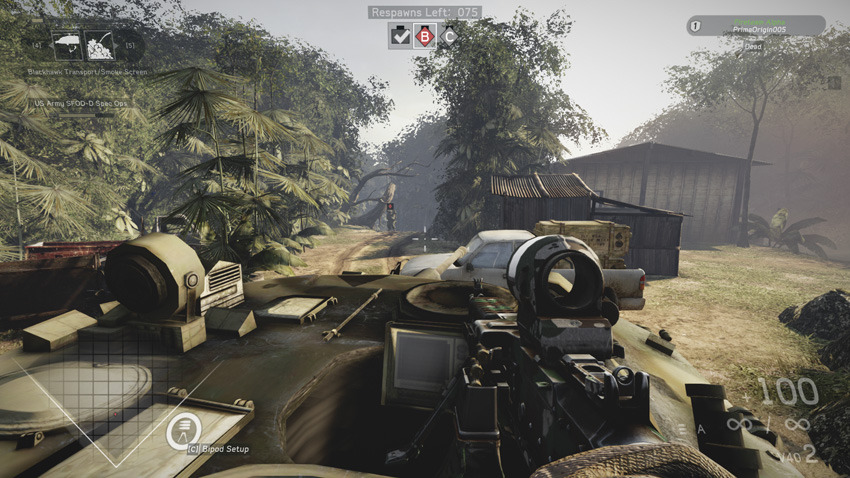

Recommended Weapons: Sniper Rifle (supported), LMG, Mk19
During Combat Mission, Sector Control, and Hotspot, as a defensive position climb up onto the tank, go prone, set up any bipod weapon or perhaps the Mk19, and fire down the center road upon any unsuspecting enemy. Be advised: snipers may pick you off. Your immediate left and the house to your right may flank this position quickly. Use this position with discretion and ensure your teammates are covering those flanks.


Recommended Weapons: LMG, 40mm Grenade Launcher, Sniper Rifle
Use this as a fallback position during Combat Mission. If you can manage to get behind these ammo crates you’ll be nearly invisible, and provided a fantastic view of anyone attempting to plant a bomb on the northern side of the tank. During Sector Control or Combat Mission, any enemies approaching from the northern path into this open space won’t expect to be fired on from here.
.jpg)
.jpg)

Recommended Weapons: Sniper Rifle, LMG
This is a great sight line for supported sniper rifles for both the attackers and defenders in Combat Mission or Team Deathmatch. Any sniper in possession of either of these positions is likely to determine the outcome of the match, however they can be flanked from left and right and mortared fairly easily. Snipers can easily take out any enemies rushing or diffusing the bomb site. Have your fireteam buddy cover you with LMG suppressive fire to hold these points.
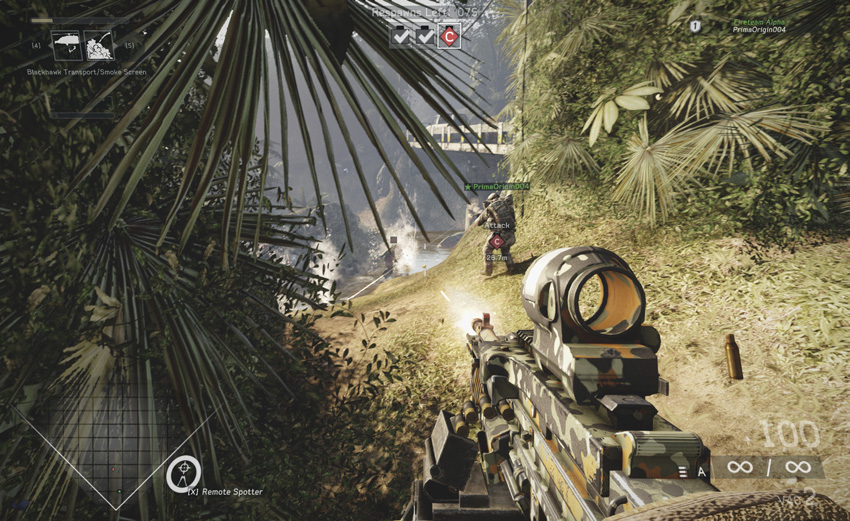

Recommended Weapons: Explosives, Assault Rifle, Sniper Rifle, LMG
This line of site is best for protecting the bomb site during Combat Mission. The area will often be contested with your teammates meeting enemy forces during Team Deathmatch as well. Deploy the LMG or sniper rifle bipod on the provided window and fire upon anyone in sight. An assault rifle will also suffice for greater mobility. Proximity mine the door that flanks your six. Have a teammate cover the west window. If your buddy is taken out, quickly dismount and avenge him.
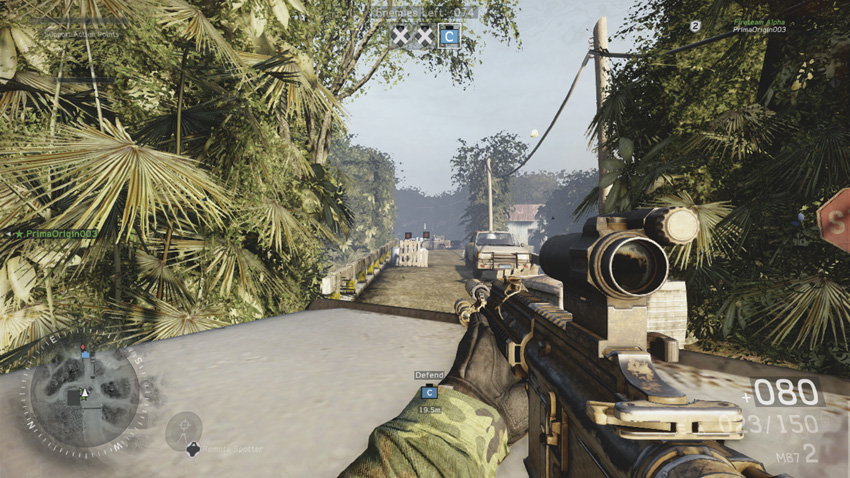

Recommended Weapons: Sniper Rifle, LMG, Assault Rifle
Combat Mission’s third objective point (bomb site C) and Team Deathmatch will often have people clamoring to take position on the bridge. Each side flank of the bridge has trucks to support your rifle while you take out any snipers and campers. Flanking the bridge leaves your own flanks completely exposed, so get in and get out.
Combat Mission
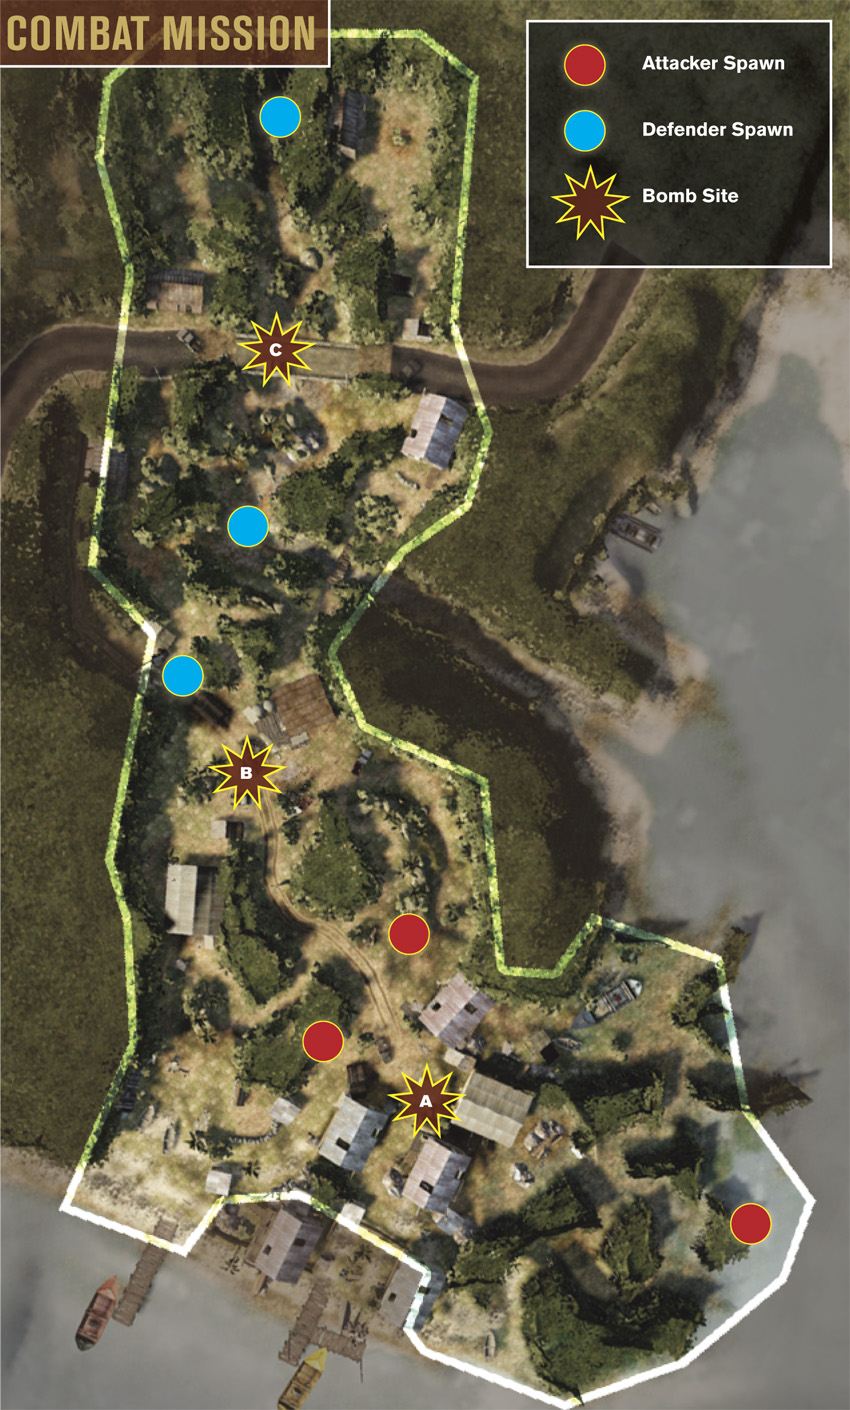
Early during this battle, the attackers start off in water, just off the coast from the fishing village. This gives the defenders a great opportunity to stop the attack before it starts. However, there are many paths the attackers can utilize to infiltrate the village—a frontal assault on bomb site A is not advised. The second bomb site (B) is located near the tank at the center of the map. Once again, the defenders have a good shot at ending the battle here by simply guarding the few approaches from the fishing village. When attacking here, always attempt to flank from the east or west—charging down the main dirt road is suicide. In the final phase of the battle, the defenders must prevent the attackers from destroying the bridge on the north side of the map. Here the bomb must be planted on the vertical supports beneath the bridge, posing yet another challenge for the attackers. This area can be watched by snipers from both sides, making it extremely difficult to arm or disarm a charge in this open area.
Hotspot
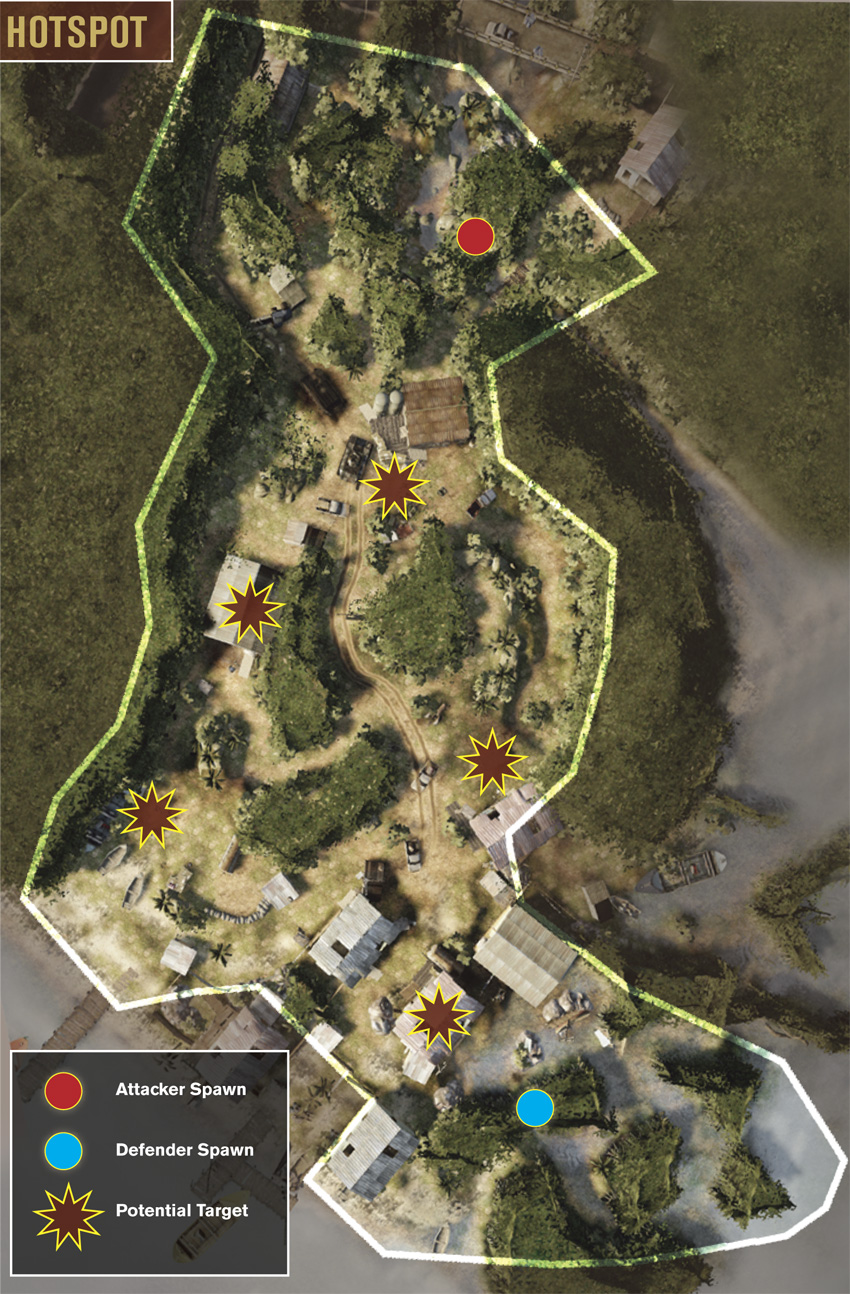
In Hotspot, the attackers start out near the bridge on the north side of the map while the defenders spawn at the fishing village to the south. The five potential targets are spread out between these two locations. The attackers must move out quickly to avoid being pinned down near their spawn point. When attacking, try to establish an early presence near the tank in the center of the map. Taking control of this area early on grants the attackers easy access to two potential targets. The nearby structures also offer decent overwatch positions as well as cover when your fireteam buddy is waiting to spawn. Unless notified of a potential target in the center, the defending team should consider consolidating their forces around the three potential targets near the fishing village. Although it’s a rather large area to defend, if the defending team can lock down this area, they can practically guarantee a victory, even if the two targets near the center are destroyed.
Sector Control
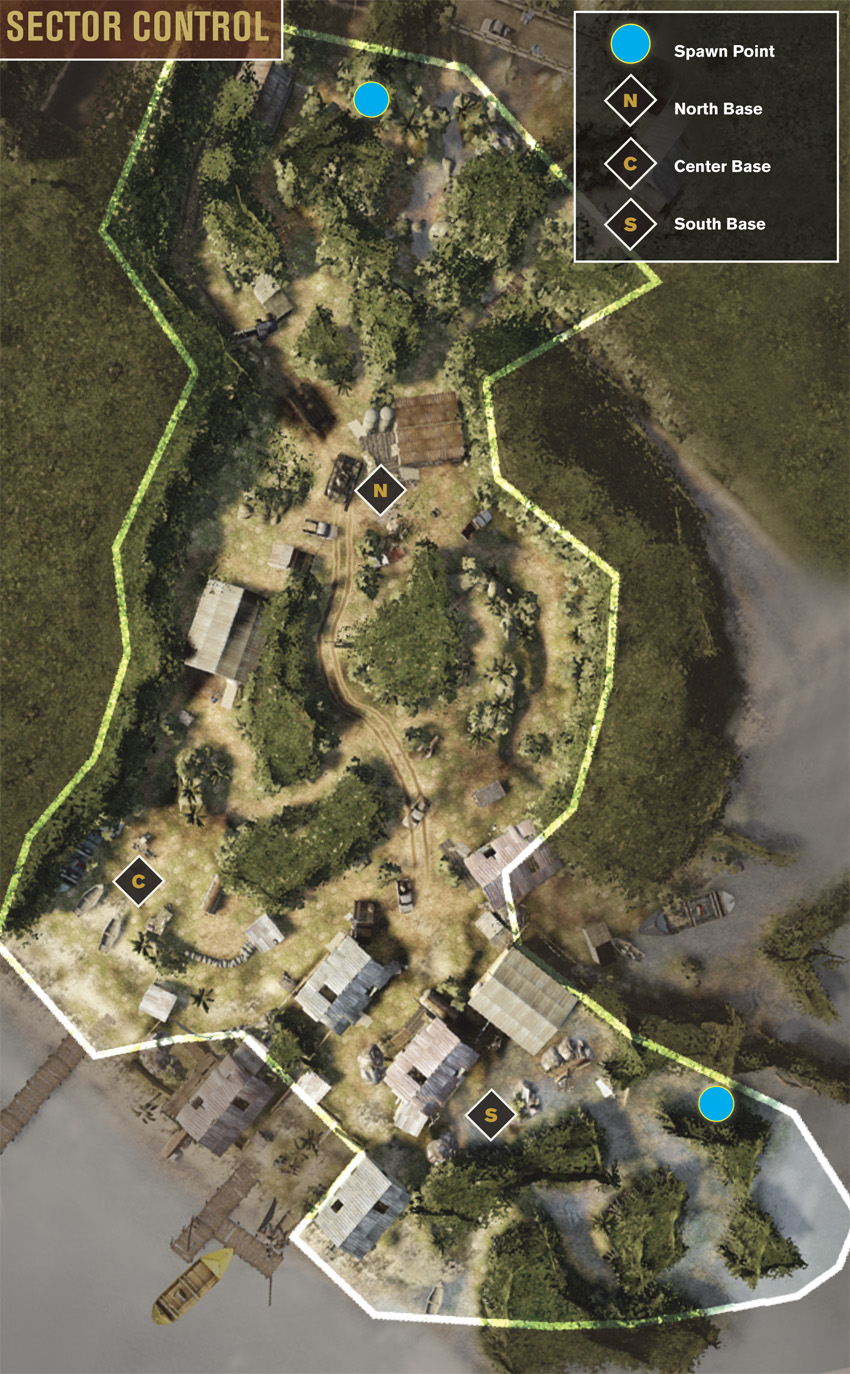
This is a relatively large-scale Sector Control map, with the three bases spread over a wide area. This offers plenty of room to maneuver, particularly when moving between the North Base (by the tank) and South Base (at the fishing village). The entire east side of the map is usually clear of threats as most players are drawn to the intense firefights raging around the Center Base to the west. As a result, you and your fireteam buddy can spend most of the match shuttling between the North and South Bases along the east side without encountering much resistance. But don’t expect to hold the base farthest from your spawn point very long—once you capture it, either dig in and defend the flag or retreat before the inevitable counterattack. If you choose to grind against the hotly contested Center Base, make an effort to attack from the narrow northeastern path. This allows you to flank the cross-traffic funneling in from the north and south.
Home Run
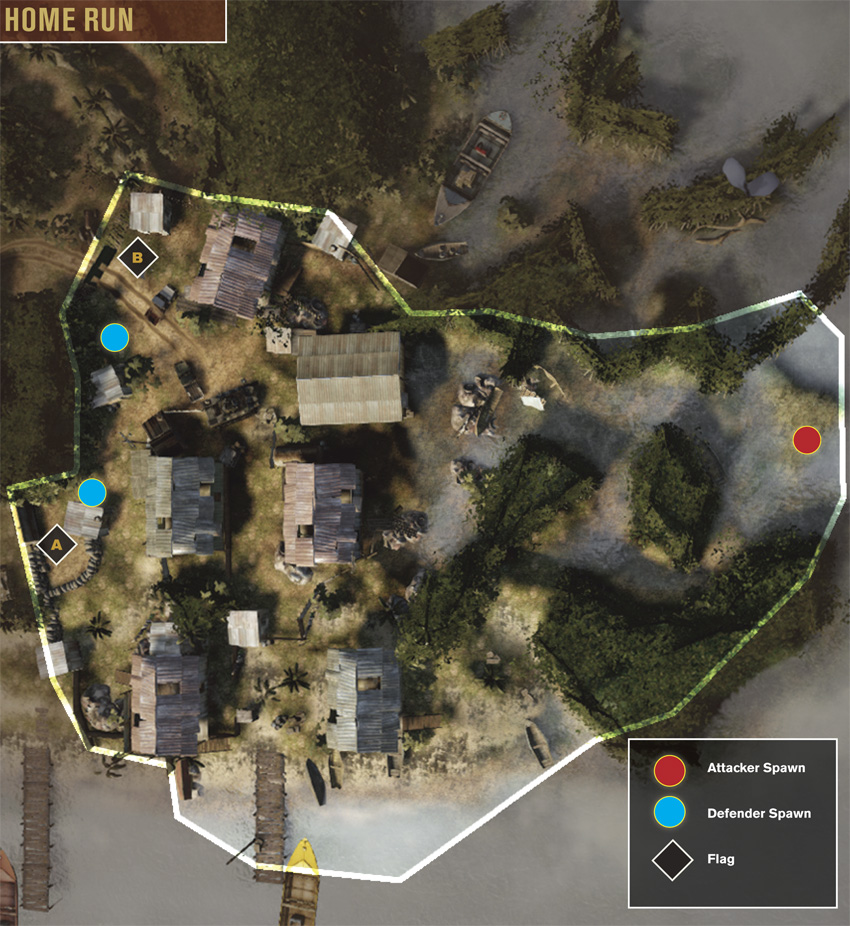
Home run takes place entirely within the confines of the fishing village, leading to some intense house-to-house fighting as both teams attempt to secure the flags. The attackers start off in the water on the east side, much like Combat Mission. If the defenders hurry, they can intercept the attackers as they emerge from the shallow water, but it’s best to consolidate forces around the two flags. Both flags are situated in relatively open areas that can easily be covered from the nearby bamboo houses. By sneaking along the north edge of the map, the attackers have a good chance of securing Flag B without drawing too much attention. Flag A is a much tougher one to approach unless the attackers stage an aggressive frontal assault, sweeping the nearby structures before making a move on the flag. In the event of a flag capture, defenders need to be ready to hunt down the flag carrier. Try to hit the flag carrier before the attacker can enter the maze-like swamp to the east.
Team Deathmatch