
Medal of Honor: Warfighter Guide Multiplayer Multiplayer Bootcamp
Heavy Gunner
Heavy Gunner
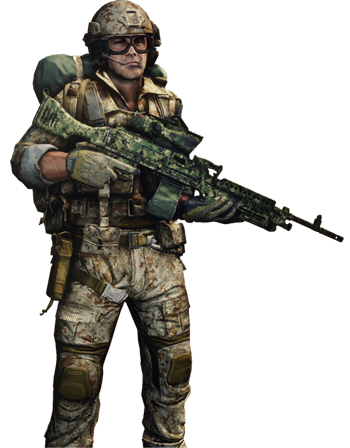
A high rate of fire and large ammo supply make the Heavy Gunner a welcome addition to any fireteam. The ability to deploy a bipod for supported shooting and increased accuracy only sweetens the deal.

Performance

- Sidearm: Heckler & Koch 45CT
- Grenade: Mini Frags
Support Actions
| Level | Points Req. | Offensive | Defensive |
| 1 | 400 | Blackhawk Transport | Smoke Screen |
| 2 | 900 | Mk19 | Fireteam Replenish |
| 3 | 1,500 | MH-60L DAP Blackhawk | RQ-7 Shadow |
| 4 | 2,300 | Apache Pilot | Apache Pilot |
The heavy gunner lugs around a massive light machine gun capable of sustained rapid fire, ideal for suppressing opponents or defending fixed positions. Due to the LMG’s size, slow reload speed, and dreadful hip accuracy, the heavy gunner is a difficult class to play when your team is on the offensive. When possible, find a open sight line that allows you to cover your teammates from a distance. The heavy gunner is most effective in a defensive role, using their LMG’s bipod to establish coverage of choke points and other narrow avenues of attack. When carrying the weapon, always take aim through the attached scope or iron sights to improve accuracy—you won’t hit a thing firing from the hip. Sometimes it’s better to equip your pistol when maneuvering in tight spaces. In addition to the light machine gun, the heavy gunner also carries a couple of Mini Frags. These unique fragmentation grenades are thrown in clusters of three, breaking apart and scattering before detonating in unison. This allows the grenades to cover a much wider area than a standard frag grenade. Although their individual blast radius is much smaller, their ability to saturate a wide area with shrapnel can be devastating to opposition fireteams.
Class Ability: Support Stance
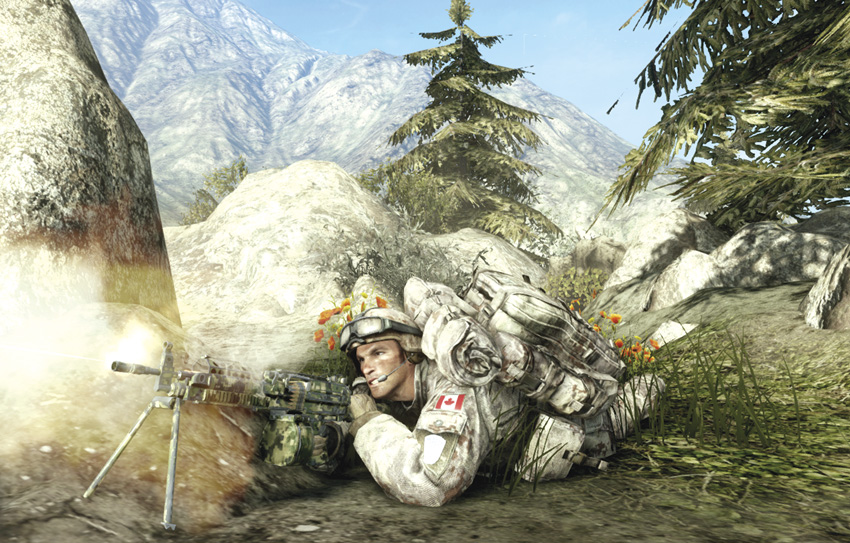
By deploying the bipod, the otherwise cumbersome and recoil-heavy light machine gun becomes noticeably stable and accurate, even when firing prolonged automatic bursts. The support stance ability also has another powerful benefit. While the bipod is deployed, the light machine gun has infinite ammo and does not need to be reloaded. While this may seem too good to be true, there are several major drawbacks to this ability. For one, the bipod locks you in a fixed position, either when prone or while crouched behind low cover. From this stationary position, you’re vulnerable to flanking attacks, not to mention snipers. The bipod also locks the weapon down, only allowing it to rotate a few degrees, covering a rather narrow firing arc. As a result, only deploy when aiming down narrow sight lines and choke points. Once deployed, aim the weapon to the left and right to test the firing arc, ensuring you can cover all suitable angles. While reloading is unnecessary while the bipod is deployed, you do need to monitor your rate of fire to prevent the weapon’s barrel from overheating. If the muzzle begins glowing red, ease off on the trigger until it cools down. You can prevent overheating by firing in short, controlled bursts.
Unique Support Actions
Blackhawk Transport
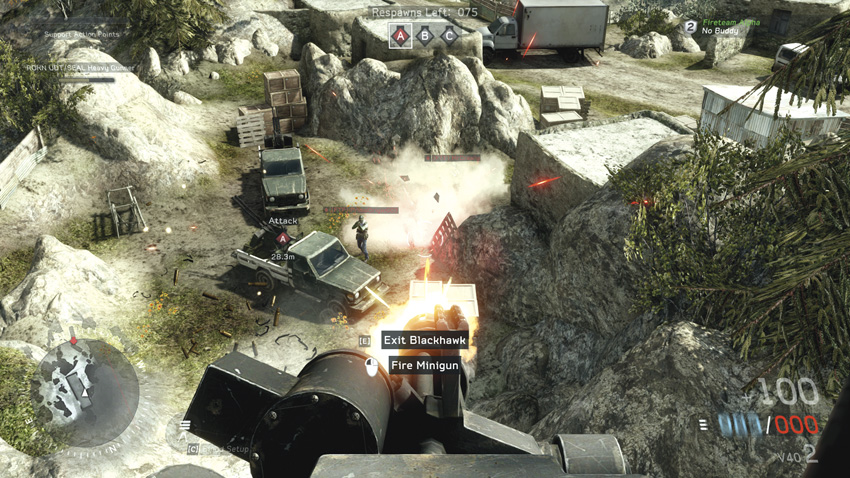
Support Action Points: 400
Calling in this support action summons the arrival of a Blackhawk helicopter at your position. Once the chopper arrives, you’re immediately put behind the controls of its door-mounted minigun. The minigun has an incredible rate of fire, allowing you to mow down all opponents within view, racking up kill after kill. While in play, the Blackhawk also serves as a temporary spawn point for your teammates. When spawning on the Blackhawk, you enter the game on a fast rope line, sliding down to the battlefield. Since the Blackhawk hovers in one spot, it’s a sitting duck for incoming fire, so if you’re manning the minigun, don’t expect to live very long. Enemy snipers and other opponents will most likely focus their fire on the gunner first before targeting the chopper itself. The chopper remains in play for approximately 60 seconds unless it sustains heavy damage, at which point it automatically retreats—it can’t be destroyed outright. When calling in this support action, do so near your team’s spawn point or along the perimeter of the map. This gives you the best view of the map from the gunner’s position, allowing you to pick off targets at long range.
Mk19
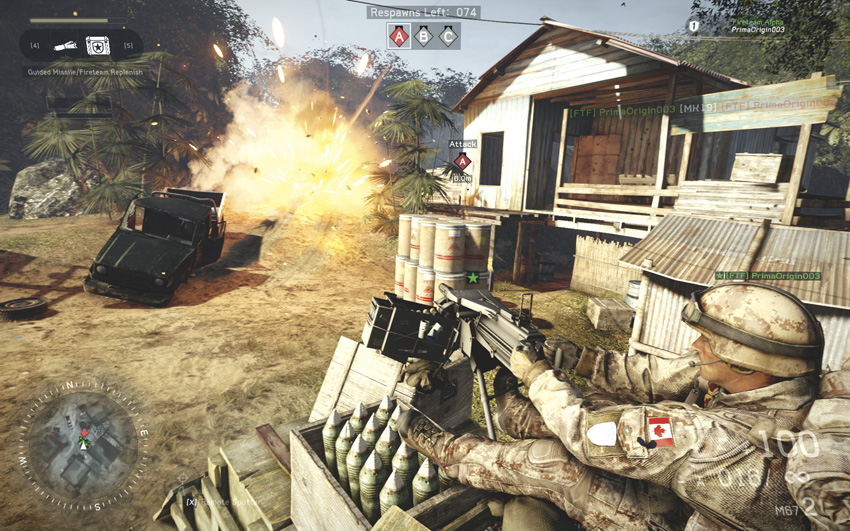
Support Action Points: 800
The Mk19 is an automatic 40mm grenade launcher that must be deployed from a stationary position. Before activating this support action, find a good defensible position where you’re unlikely to be flanked. Consider backing up into a corner where you have a good view of an objective or another high-traffic area of the map. When activated, the Mk19 is automatically deployed on the ground, prompting your character to automatically sit down behind it. While behind the controls, you can pan and tilt the weapon to cover generous firing arc, but go easy on the trigger as this weapon fires explosives rounds at a rapid pace. Usually one grenade is more than enough to take out a single opponent. You can leave the weapon at any point, but once you leave, you can’t resume control of it, so be sure to fire as many rounds as possible to rack up some kills before you leave. If you suspect you’re about to be flanked (or tomahawked from behind) don’t get greedy. Leave the weapon behind and defend yourself. Or better yet, ask your fireteam buddy to watch your back while you’re busy slinging an oppressive barrage of explosive rounds down range—it’s the least they can do.
MH-60L DAP Blackhawk
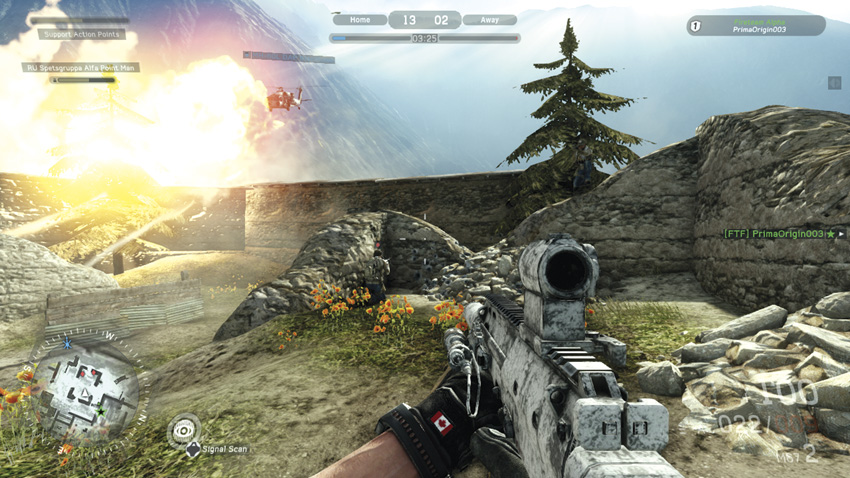
Support Action Points: 1,200
Unlike the Blackhawk Transport, this support action is an air strike performed by a heavily armed Blackhawk variant equipped with high-explosive rockets and rapid-firing gun pods. This action is initiated much like a mortar strike through the use of a laser target designator. But instead of just pinpointing the target location, you must also designate the direction the Blackhawk should approach from as indicated by the green conical icon in the center of the sight. Setting the Blackhawk’s approach vector can make a big difference in how the air strike plays out. For instance, if initiating a strike down a narrow street, it’s best to have the Blackhawk fly over parallel with the street so it can focus its ordnance along a narrow corridor. Take a moment to determine the best angle of attack before designating the approach vector. Once the strike has begun, kick back and watch the fireworks. These Blackhawks may draw the fire of your opponents, but no amount of incoming fire will prevent the chopper from making its devastating strafing run.
Unit Profiles
Australian SAS-R Heavy Gunner
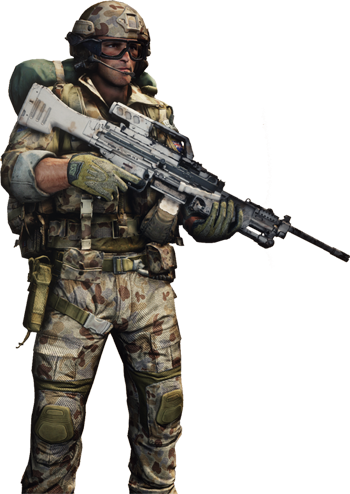
Quick and deadly, their motto is “Who Dares Wins.” Formed in 1957 with just one company, and now boasting three Sabre Squadrons, OZ SAS-R are experts in reconnaissance missions, surveillance, and counterterrorism.
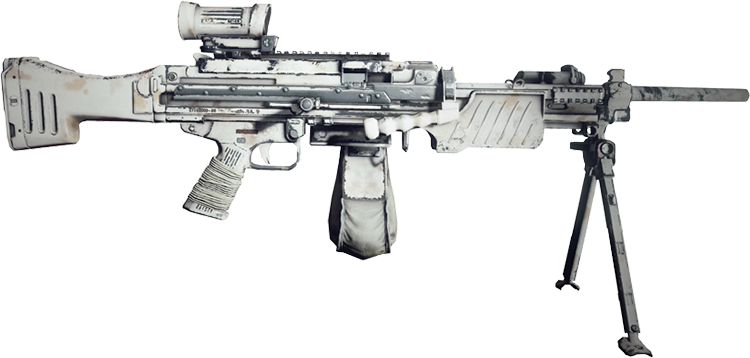
Heckler & Koch MG4 SAS-R
Weapon Stats
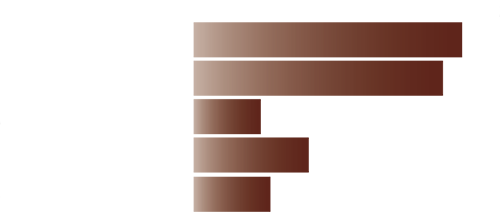
Weapon Attachments
| Attachment | Type | ER | MS | A | M | S |
| Standard Stock | Standard Receiver | — | — | — | — | — |
| SAS-R Muzzle Brake | Standard Muzzle | — | — | — | — | — |
| Heavy Barrel +PEQ- 15 | Precision Barrel | 20% | — | –10% | — | — |
| 100-Round 5.56mm Magazine | Standard Magazine | — | — | — | — | — |
| M145 | Low-Power Scope | — | — | –8% | 40% | — |
| Kangaroo | Paint | — | — | — | — | — |
British SAS Heavy Gunner
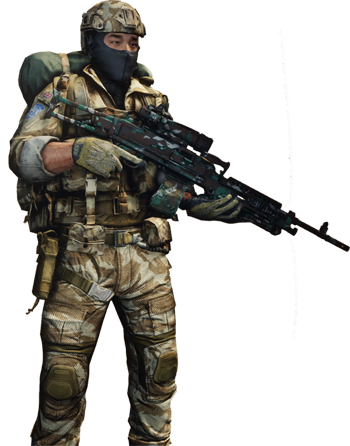
“What color is the boathouse in Hereford?” These guys would know. Their tactics, training, and equipment have been the model for many other country’s Special Forces including the U.S. Army’s Delta Force. Their motto is “Who Dares Wins.” These guys dare.
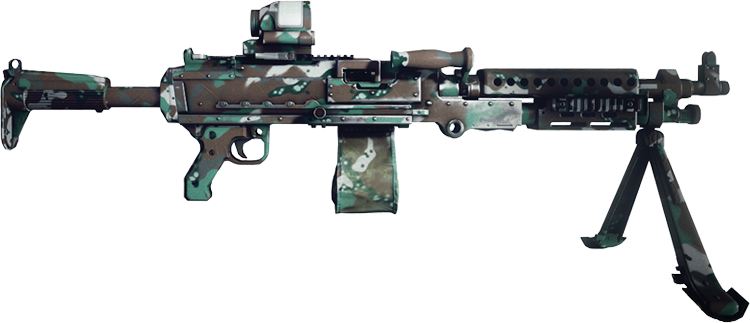
M240b
Weapon Stats
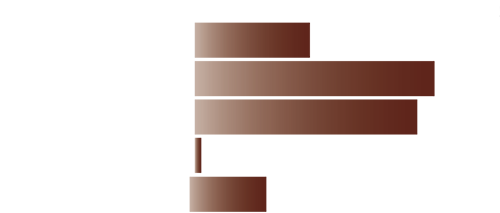
Weapon Attachments
| Attachment | Type | ER | MS | A | M | S |
| Flash Hider | Standard Muzzle | — | — | — | — | — |
| Lightweight Barrel | Close-Quarters Barrel | –15% | — | 15% | — | — |
| Lightweight Stock | Close-Quarters Receiver | –10% | — | 20% | — | — |
| SAS 100-Round 7.62mm Magazine | Standard Magazine | — | — | — | — | — |
| Trijicon SRS02 | Reflex Sight | — | — | –5% | — | — |
| South African 2000 | Paint | — | — | — | — | — |
Canadian JTF-2 Heavy Gunner
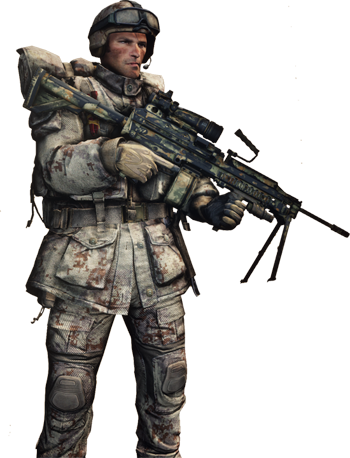
JTF-2 is an elite special operations force of the Canadian military specializing in counterterrorism. Although small in number, they make up for their size with relentless and aggressive suppressive firepower. These guys have your six.
M249 JTF-2
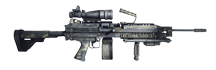
Weapon Stats
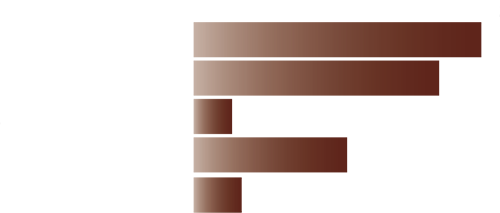
Weapon Attachments
| Attachment | Type | ER | MS | A | M | S |
| Lightweight Barrel +m700v | Close-Quarters Barrel | –15% | — | 15% | — | — |
| 100-Round Ammo Bag | Standard Magazine | — | — | — | — | — |
| Muzzle Brake | Standard Muzzle | — | — | — | — | — |
| Trijicon TA11MGO-M249 + RMR | Low-Power Sight | — | — | –8% | 40% | — |
| JTF-2 Stock (Extended) | Precision Receiver | 15% | — | –15% | — | — |
| GROM Pixel | Paint | — | — | — | — | — |
German KSK Heavy Gunner
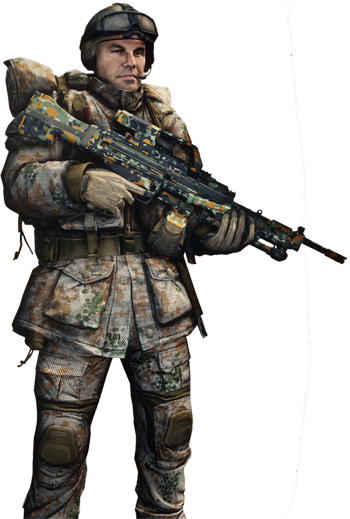
This highly specialized, elite unit consists of the best of the best of Germany’s special operations soldiers. Their small numbers are testament to a rigorous selection process. The KSK’s five platoons can take the fight anywhere in the world—mountain to sea, pole to pole.
Heckler & Koch MG4KE
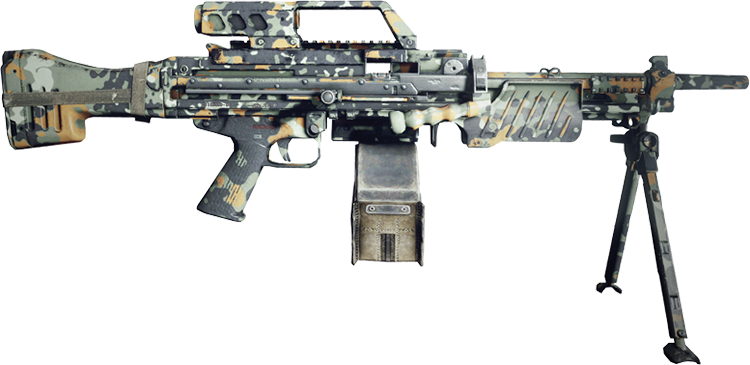
Weapon Stats
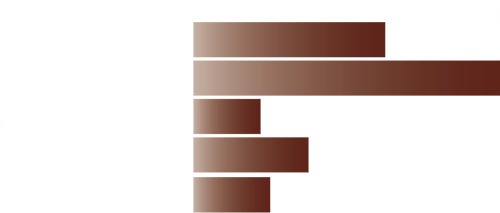
Weapon Attachments
| Attachment | Type | ER | MS | A | M | S |
| KSK Muzzle Brake | Standard Muzzle | — | — | — | — | — |
| MG4 Scope | Low-Power Sight | — | — | –8% | 40% | — |
| 150-Round 5.56mm Box Magazine | Extended Magazine | –15% | 30% | — | — | — |
| Standard Stock + Sling Strap | Standard Receiver | — | — | — | — | — |
| Lightweight Barrel + Handguard | Close-Quarters Barrel | –15% | — | 15% | — | — |
| Flecktarn | Paint | — | — | — | — | — |
Norway FSK/HJK Heavy Gunner
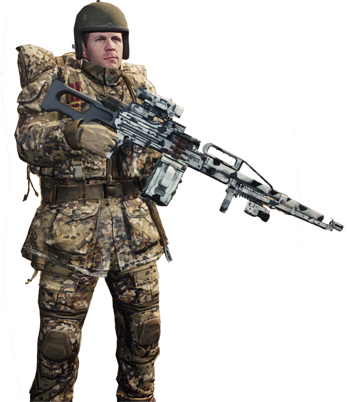
Although relatively new, these two units of Norway’s Special Forces were born to counter terrorist threats to their nation. Since inception, they have been active in campaigns around the world, including Bosnia, Kosovo, and Afghanistan.
M240 FSK/HJ
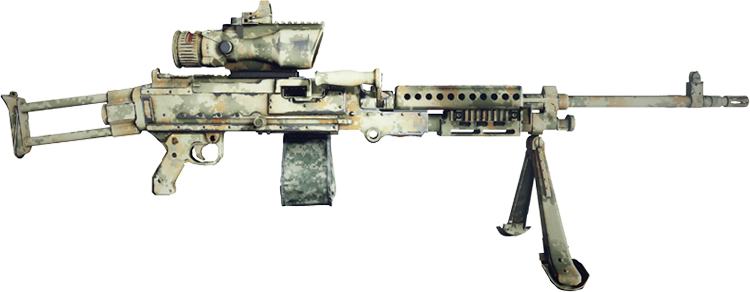
Weapon Stats
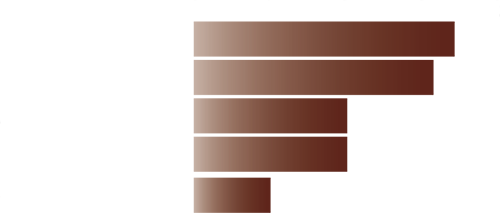
Weapon Attachments
| Attachment | Type | ER | MS | A | M | S |
| M240 Para Stock | Close-Quarters Receiver | –10% | — | 20% | — | — |
| Heavy Barrel w/Surefire M952V Light | Precision Barrel | 20% | — | –10% | — | — |
| Trijicon TA648MGO-M240 ACOG + RMR | Low-Power Sight | — | — | –12% | 50% | — |
| FSK/HJK 100-Round 7.62mm Magazine | Standard Magazine | — | — | — | — | — |
| Compensator | Standard Muzzle | — | — | — | — | — |
| Desert Spots | Paint | — | — | — | — | — |
Polish GROM Heavy Gunner
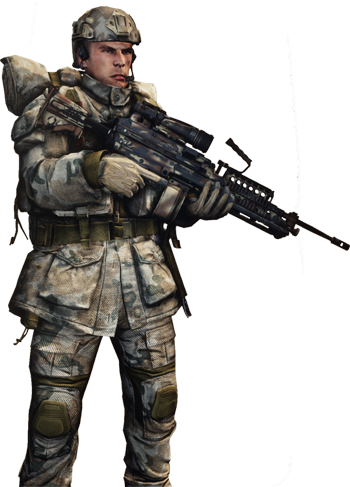
GROM is Polish for “thunder.” And that is what this SF unit brings to the table: they hit hard. Formed in 1990, they have earned the respect of every operator around the world for their tenacity.
M249 GROM
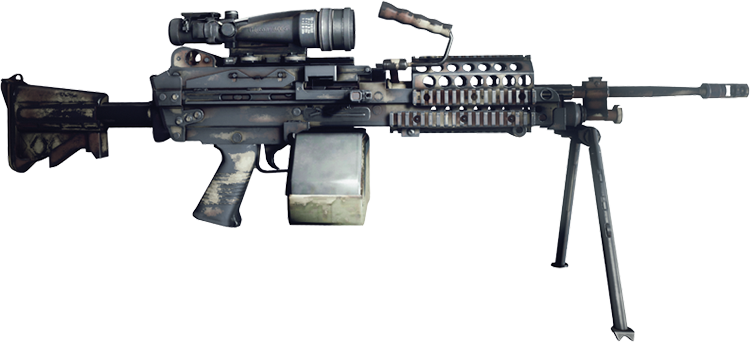
Weapon Stats
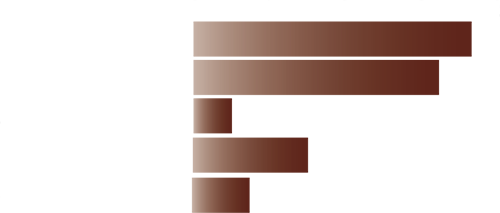
Weapon Attachments
| Attachment | Type | ER | MS | A | M | S |
| Lightweight Barrel | Close-Quarters Barrel | –15% | — | 15% | — | — |
| Muzzle Brake | Standard Muzzle | — | — | — | — | — |
| Trijicon TA11MGO-M249 ACOG | Low-Power Sight | — | — | –8% | 40% | — |
| GROM Stock (Collapsed) | Standard Receiver | — | — | — | — | — |
| GROM 50-Round Ammo Box | Standard Magazine | — | — | — | — | — |
| Desert Spray | Paint | — | — | — | — | — |
ROKN UDT/SEAL Heavy Gunner
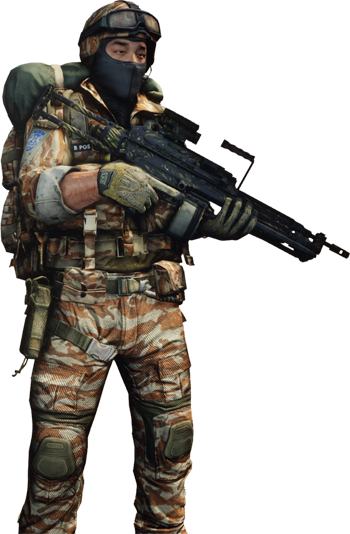
This Special Forces unit is part of the Republic of Korea Naval Special Warfare Flotilla. This unit is heavily modeled after the U.S. Navy’s SEALs in training and tactics. They have already proved their skill in a number of successful maritime hostage rescues.
K3 SAW
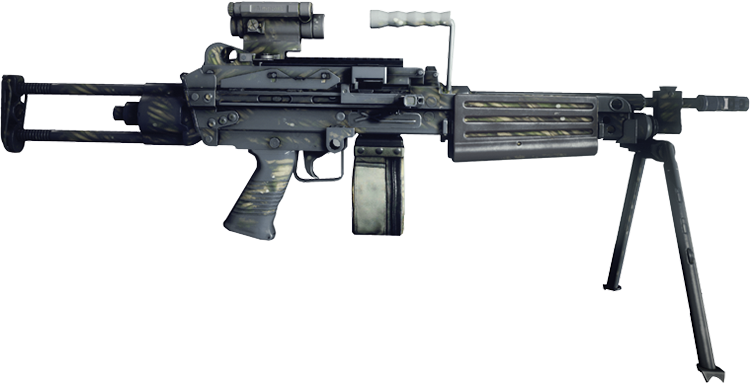
Weapon Stats
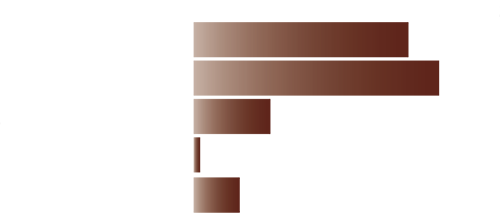
Weapon Attachments
| Attachment | Type | ER | MS | A | M | S |
| M249 Para Stock (Extended) | Precision Receiver | 15% | — | –15% | — | — |
| 100-Round Ammo Pouch | Standard Magazine | — | — | — | — | — |
| Muzzle Brake | Standard Muzzle | — | — | — | — | — |
| Aimpoint CompM4 | Reflex Sight | — | — | –5% | — | — |
| Heavy Barrel + Handguard | Precision Barrel | 20% | — | –10% | — | — |
| Jungle Path | Paint | — | — | — | — | — |
RU Spetsgruppa Alfa Heavy Gunner
While there are many branches of the Russian Special Forces, the most famous is the Alpha Group. Specializing in counterterrorism, their training is some of the most rigorous in the military. Alphas are at home in a variety of environments and constantly conduct drills to hone their skills.
PKP SPETSNAZ
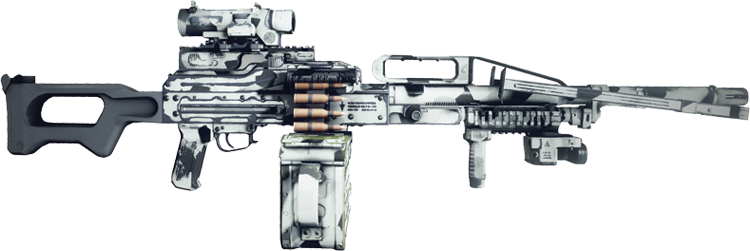
Weapon Stats
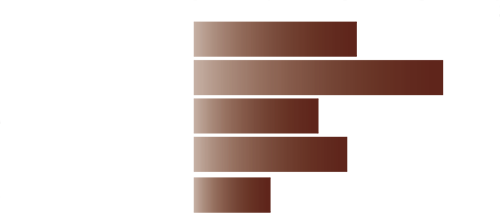
Weapon Attachments
| Attachment | Type | ER | MS | A | M | S |
| etsnaz Stock | Standard Receiver | — | — | — | — | — |
| Spetsnaz 100-Round 7.62mm Box Magazine | Standard Magazine | — | — | — | — | — |
| Lightweight Barrel + VFG & LLM01 | Close-Quarters Barrel | –15% | — | 15% | — | — |
| SpecterDR | Low-Power Dual Sights | — | — | –12% | 50% | — |
| Muzzle Brake | Standard Muzzle | — | — | — | — | — |
| Snow Cell | Paint | — | — | — | — | — |
Swedish SOG Heavy Gunner
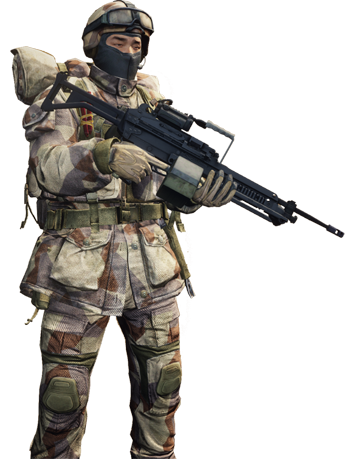
Formed by the merging of the SSG (Special Protection Group) and SIG (Special Reconnaissance Group) in 2011 to provide a variety of strategic applications across many disciplines. In addition to conducting small-scale, low-profile ops, SOG operators can also be inserted as a component of large-scale conventional warfare operations.
Ksp 90
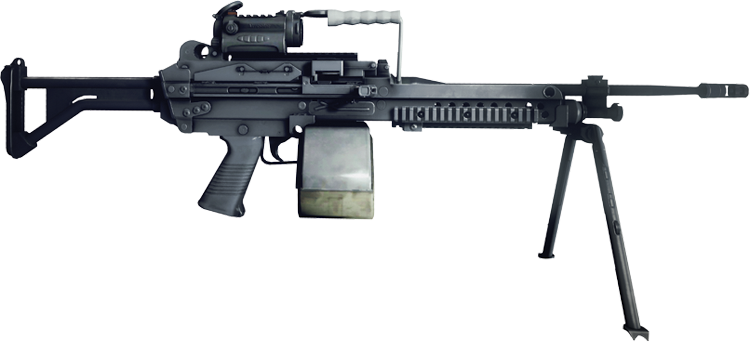
Weapon Stats
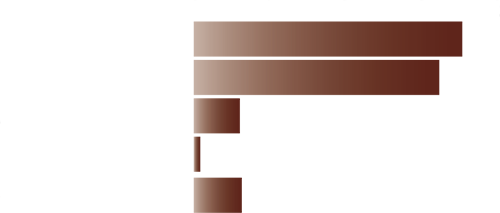
Weapon Attachments
| Attachment | Type | ER | MS | A | M | S |
| SOG Stock | Standard Receiver | — | — | — | — | — |
| Muzzle Brake | Standard Muzzle | — | — | — | — | — |
| SOG 50-Round Ammo Box | Standard Magazine | — | — | — | — | — |
| Aimpoint CompCS | Reflex Sight | — | — | –5% | — | — |
| Heavy Barrel | Precision Barrel | 20% | — | –10% | — | — |
| Black Spray | Paint | — | — | — | — | — |
U.S. Army SFOD-D Heavy Gunner
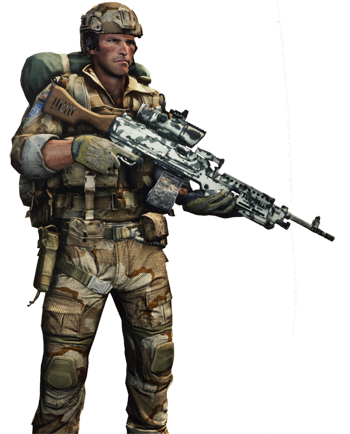
SFOD-D is one of the United States’ secretive Tier 1 counter-terrorism and Special Mission Units. Commonly known as The Unit, it was formed under the designation 1st SFOD-D, and has been involved in every U.S. ground operation since its inception.
M240 Mk243 Mod
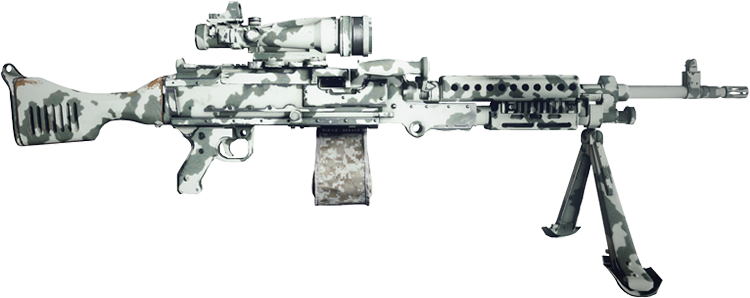
Weapon Stats
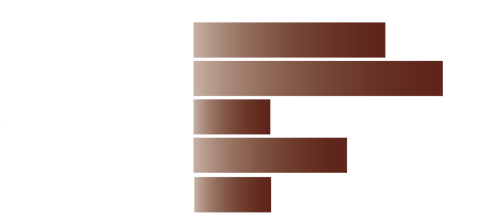
Weapon Attachments
| Attachment | Type | ER | MS | A | M | S |
| Trijicon TA11H-308 + RMR | Low-Power Sight | — | — | –12% | 50% | — |
| SFOD 100-Round 7.62mm Magazine | Standard Magazine | — | — | — | — | — |
| Wooden Stock | Standard Receiver | — | — | — | — | — |
| Standard Barrel w/PEQ-15 | Standard Barrel | — | — | — | — | — |
| Compensator | Standard Muzzle | — | — | — | — | — |
| Finnish Snow | Paint | — | — | — | — | — |
US Navy SEAL Heavy Gunner
Frogmen have the most grueling selection process in the military. Those who make it through become highly trained experts in assaults, hostage rescue, and counterterrorism. And expert snipers—just ask a pirate.
M240L
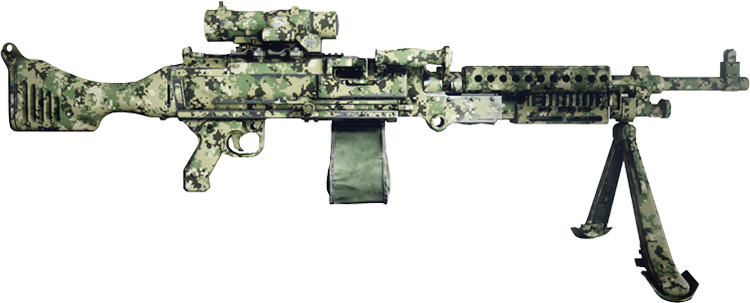
Weapon Stats
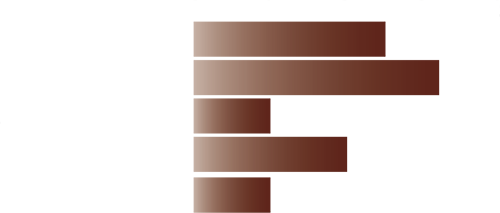
Weapon Attachments
| Attachment | Type | ER | MS | A | M | S |
| Flash Hider | Standard Muzzle | — | — | — | — | — |
| SpecterDR | Low-Power Dual Sights | — | — | –12% | 50% | — |
| EAL 100-Round 7.62mm Magazine | Standard Magazine | — | — | — | — | — |
| Standard Stock | Standard Receiver | — | — | — | — | — |
| Standard Barrel w/PEQ-2 | Standard Barrel | — | — | — | — | — |
| AOR2 | Paint | — | — | — | — | — |
U.S. OGA Heavy Gunner
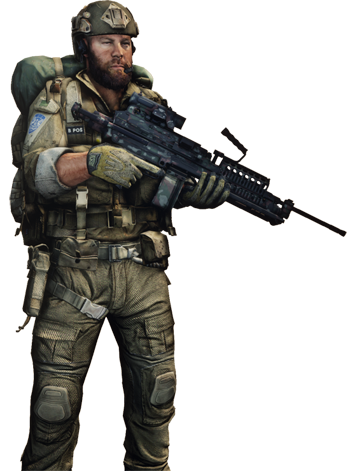
Other Government Agency (OGA) Operators are recruited from the military’s special operations community. They’re nimble and use technology to their advantage in direct action and intelligence gathering.
M249 Mk46 Mod 1
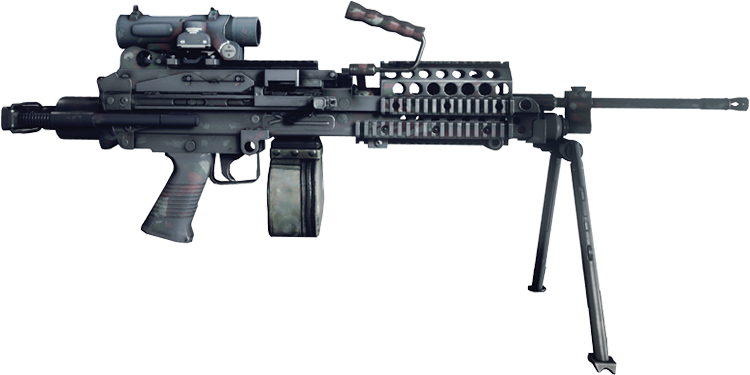
Weapon Stats
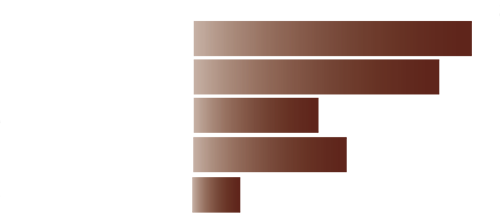
Weapon Attachments
| Attachment | Type | ER | MS | A | M | S |
| M249 Para Stock (Collapsed) | Close-Quarters Receiver | –10% | — | 20% | — | — |
| 100-Round Ammo Bag | Standard Magazine | — | — | — | — | — |
| Flash Hider | Standard Muzzle | — | — | — | — | — |
| SpecterDR | Low-Power Dual Sights | — | — | –12% | 50% | — |
| Lightweight Barrel + PEQ- 15 | Close-Quarters Barrel | –15% | — | 15% | — | — |
| Brazilian Lizard | Paint | — | — | — | — | — |