
Medal of Honor: Warfighter Guide Multiplayer Multiplayer Maps
Sarajevo Stadium
Sarejevo Stadium
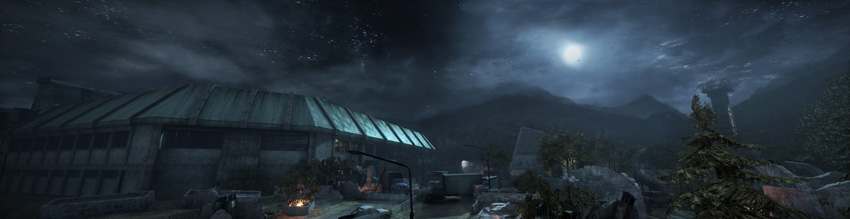
Once a great monument to the spirit of competition, now the stadium stands as a testament to the horrors of the 1990s civil war that ravaged the country that was once Yugoslavia. Ethnic cleansing and fighting has reduced this arena of sport to nothing more than a tattered mess of concrete and steel. Competition still rages here, but of a different kind.
Tactical Overview
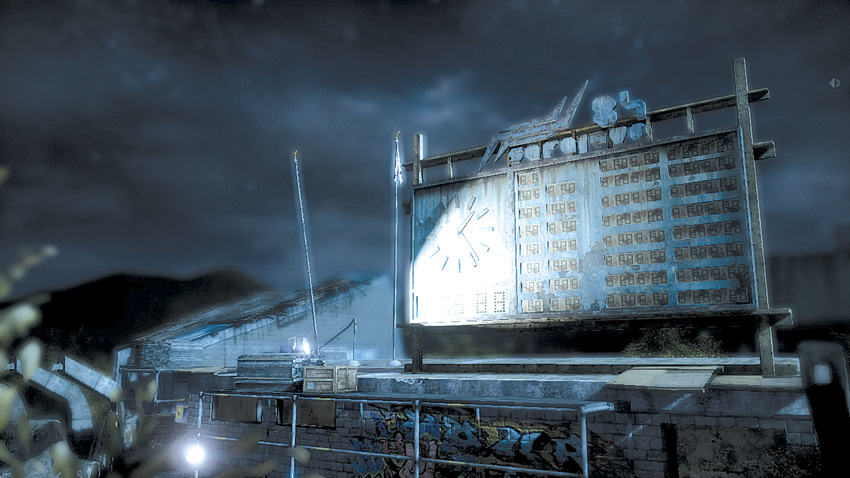
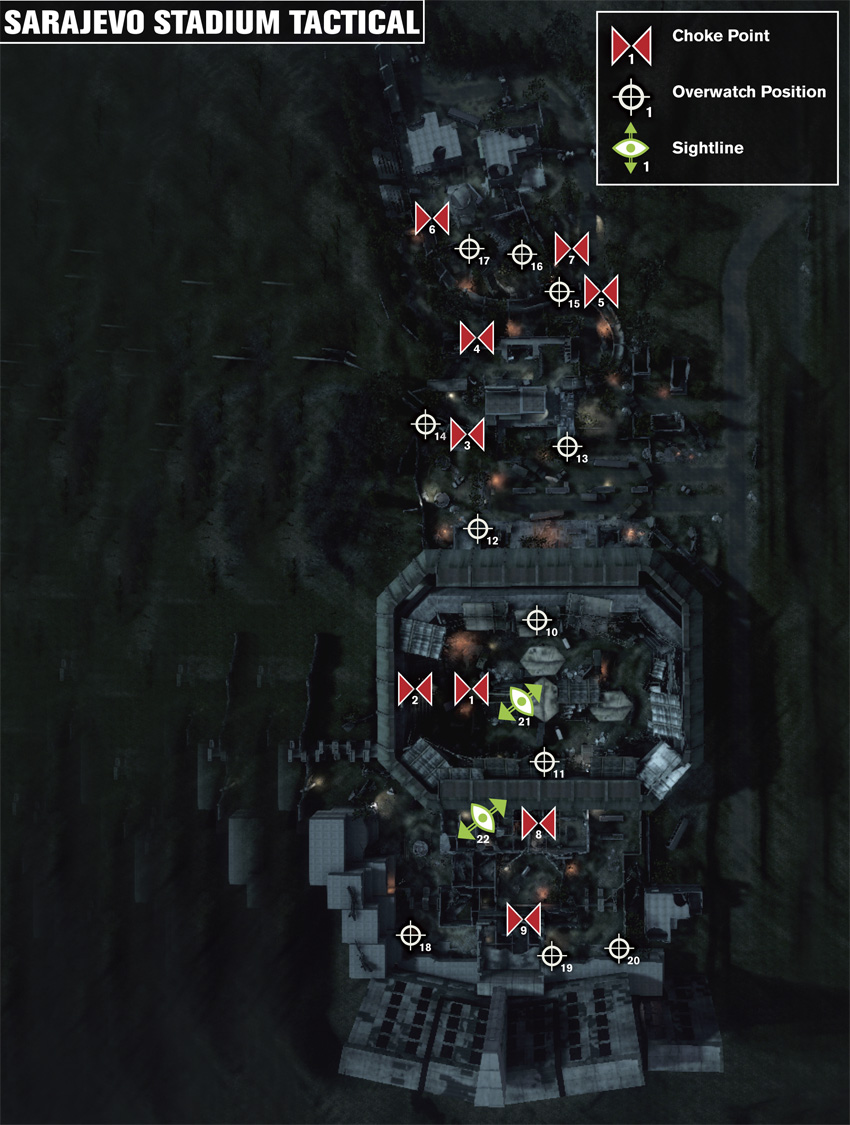
Like Novi Grad Warzone, this is another map set in the war-torn city of Sarajevo. While there’s no fires or smoke, the action does take place at night, making visibility a challenge. The fighting is centered around an old sports complex featuring a stadium and heavily damaged bobsled track. The stadium occupies much of the map’s south side, giving fights here an arena-like feel during Team Deathmatch and Combat Mission. At the center of the map is a small building topped with an old scoreboard. As a central location, the scoreboard structure sees plenty of action during Combat Mission, Hotspot, and Sector Control—use the less-traveled east and west flanking paths when moving to or past this contentious location. A damaged tower dominates the debris-filled landscape on the north side of the map—unfortunately, you cannot climb the tower for a better view of the map. One of the most unique features on this map is the bobsled track, which twists and turns from the stadium on the south side all the way to the tower to the north. This damaged concrete track often serves as highway, funneling traffic from one end to the other. Cracks and holes in the track also provide some wonderful overwatch positions and sight lines. But avoid loitering in the track too long as it’s a high-traffic thoroughfare.
Choke Points

Recommended Weapons: Explosives, Assault Rifle, Grenade Launcher, SMG, LMG
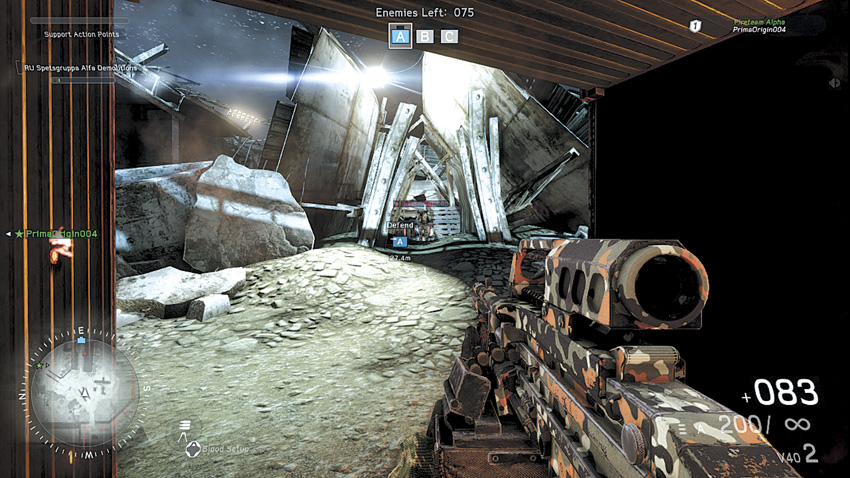
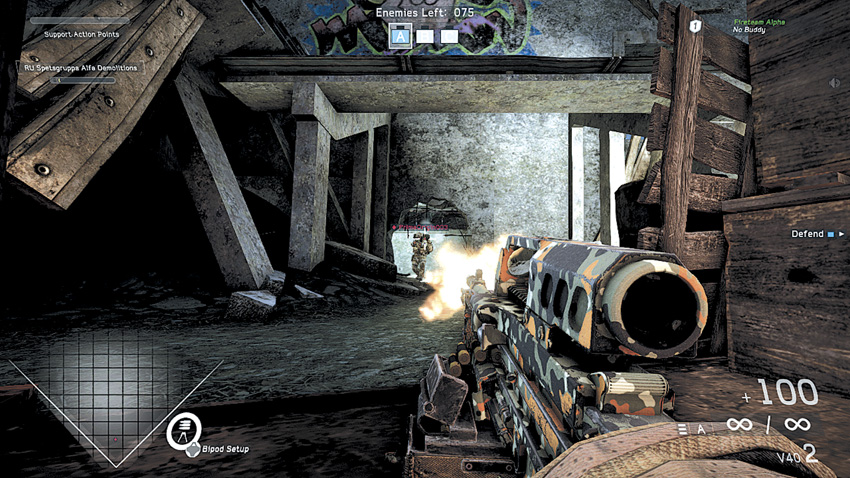
During Combat Mission, looking toward bomb site A from the shipping container, there’s a narrow path created by rubble within the stadium. From here you’ll have a good view of the bomb site, but no cover while within the path. It’s a high-traffic area, so proximity mines and grenade launchers are very effective. Mow down enemies caught in the path using an LMG, but be careful as you could be flanked from the rear. It’s not the range of the gun here that really matters, but how you use it. This spot is also effective during Team Deathmatch, but don’t loiter here very long.

Recommended Weapons: Explosives, Shotgun, SMG, LMG
During Combat Mission and Team Deathmatch, this small opening, offering little in the way of cover, is useful for keeping attackers from using the path as a flank. Stay here long and you’ll be flanked from the rear and from the left. Use an LMG, or another short- to mid-range weapon, to dispatch would-be flankers. Have your fireteam buddy close for support.

Recommended Weapons: Explosives, Assault Rifle, SMG, LMG
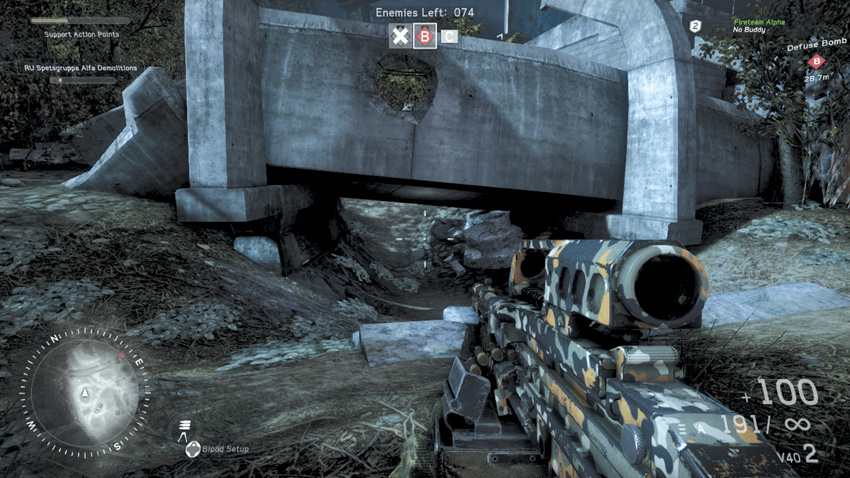
During Combat Mission and Hotspot, be careful passing under here. The ditch is a great dark place to hide a proximity mine or remote charge, or to wait for someone to walk in as you’ll see them before they see you. If you intend on ambushing someone from here, then be aware of your flanks. There’s also a hole in the cement that an enemy can fire on from. Use short- to mid-range weapons when engaging.

Recommended Weapons: Explosives, Assault Rifle, SMG
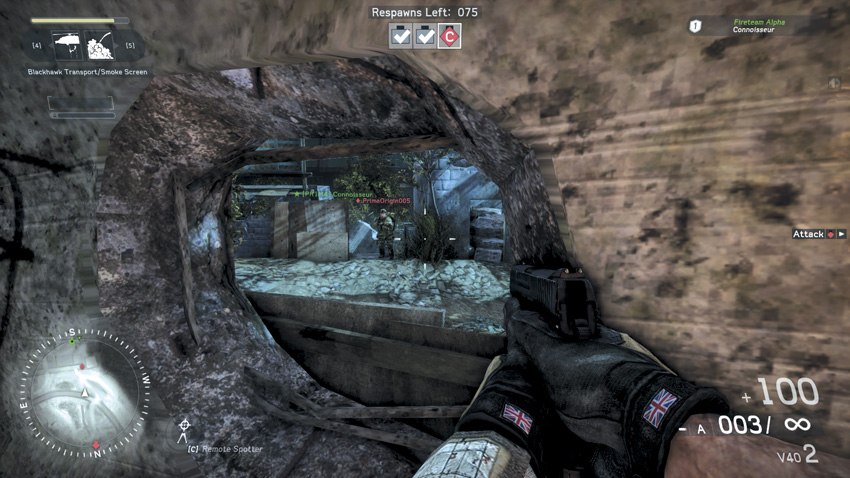
During Combat Mission, Hotspot, and Sector Control, this break in the wall makes an excellent, well-covered ambush point to take out enemies as they come up the adjacent high-traffic path. Even though you’ll be directly in front of an enemy, they likely won’t see you aiming through this hole in the bobsled track. Put a proximity mine or remote charge at the opening. SMGs and short, controlled rifle bursts will work well to finish enemies off. Watch your left and right flanks along the track.

Recommended Weapons: Explosives, Assault Rifle, LMG (supported)
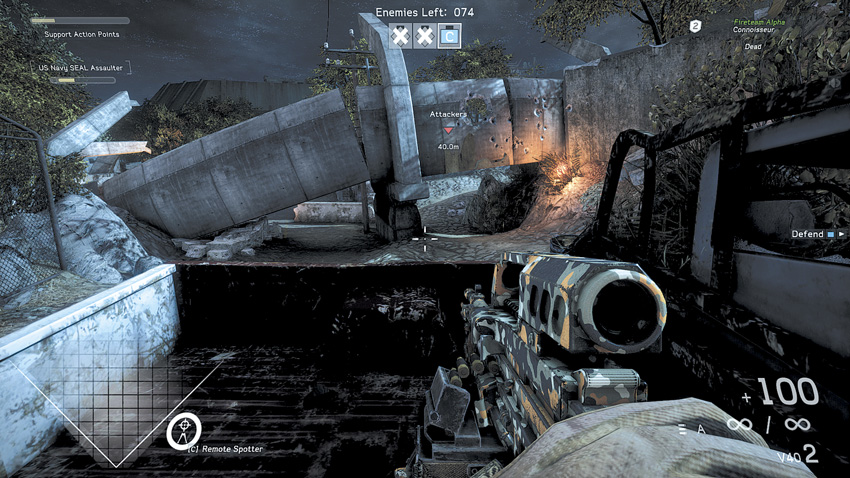
During Combat Mission, Sector Control, and Hotspot, this path under the broken bobsled track will become highly trafficked in an effort to reach objectives— toss a proximity mine under the track. There’s plenty of cover among the broken-down trucks. Enemies may engage from the track, firing between the cracks, so take on enemies from cover. Use the truck to mount an LMG for a wide field of fire to take out advancing enemies. Keep watch of the flank on your right while here.
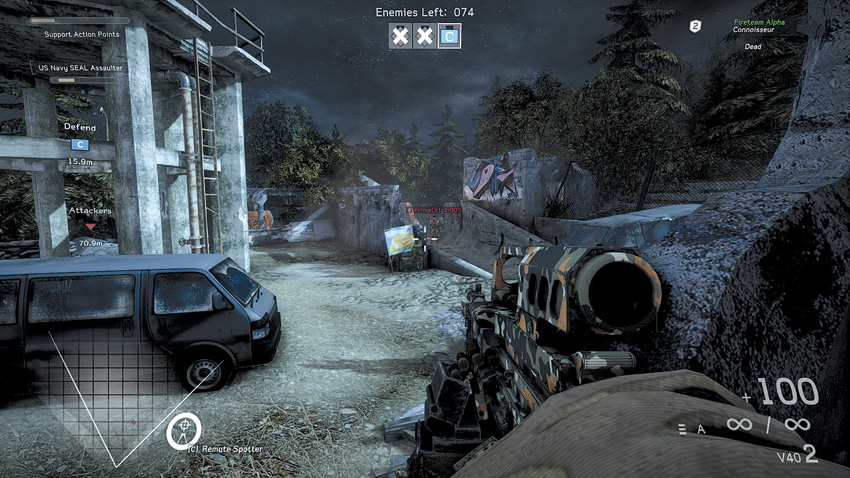

Recommended Weapons: Explosives, Assault Rifle, SMG, LMG, Sniper Rifle
This choke point within Combat Mission, Sector Control, and Hotspot is a constant nuisance, with opponents coming through fairly quickly, so pay attention to the minimap and sounds of footsteps to avoid getting flanked. Attacking demolitions soldiers on the track area should throw remote charges over the wall to take out enemies waiting in ambush on the other side. Cover the broken track as much as possible, without exposing your flank to it, if you’re distracted by an enemy coming from another direction. Cover the area with medium- to long-range weapons.
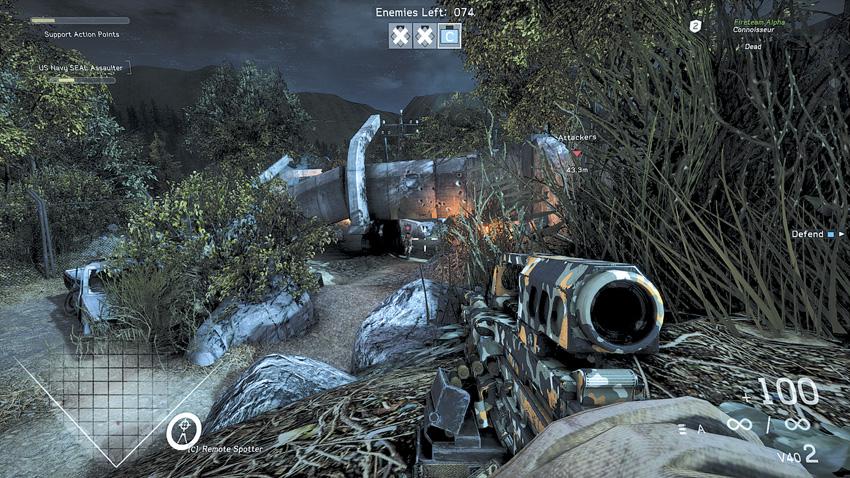

Recommended Weapons: Explosives, Shotgun, SMG
While playing Home Run and Team Deathmatch move through the destroyed bathroom area carefully. Check your corners and lay plenty of remote charges or proximity mines. Use short-range weapons within these close quarters. Be careful of enemies flanking by way of the inner area that circles around.
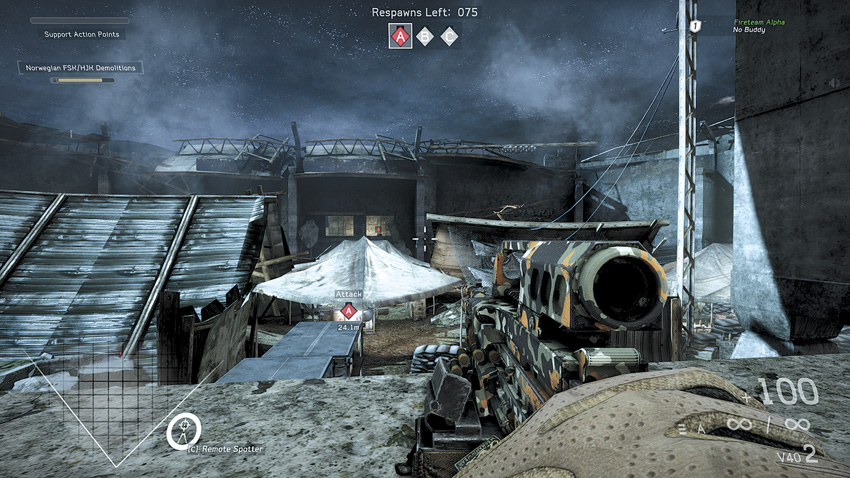

Recommended Weapons: Explosives, Assault Rifle, Shotgun, SMG
During Home Run, while moving through the southern broken building check your corners, throw plenty of grenades, and watch your six as enemies can easily escape your vision. Through here spec ops are key to knowing where the enemy may be and taking them out before they can ambush. Use short-range weapons moving through the walls. Approach Flag B ready for more short- to long-range engagements.
Overwatch Positions
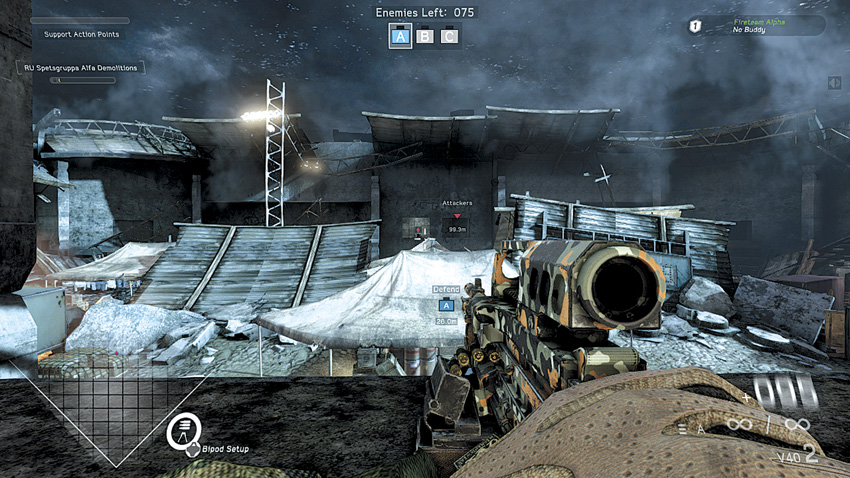

Recommended Weapons: Explosives, LMG, Sniper Rifle (supported)
In Combat Mission, Sector Control, and Hotspot, have your fireteam buddy set up with an LMG on the nearby truck while you drop prone on this small hill for a little more concealment. From here a sniper can fire a few rounds before the enemy is too close to notice. You’ll also have a clear view of the hole in the track wall enemies may use to fire from. Be careful not to be flanked from the left, from the truck, or from behind.
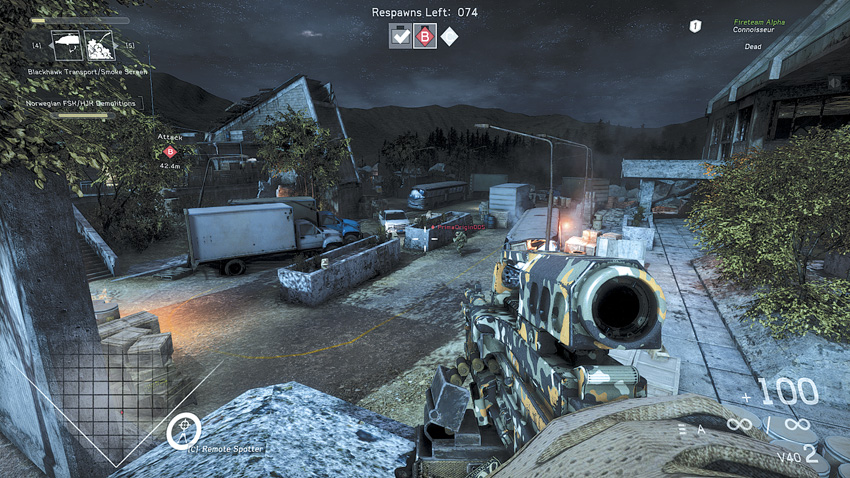

Recommended Weapons: Explosives, LMG, Sniper Rifle (supported)
During Combat Mission, this stadium overwatch spot is well suited for taking out opponents in the adjacent overwatch window and for dropping enemies near bomb site A. From here, it’s best to use long-range weaponry to engage distant targets. Enemies can flank this position from the right and throw grenades up through the window. Jump off this ledge to land on the scaffolding if you need to get closer to bomb site A while maintaining an elevated position. Enemies probably won’t notice your transition if you stay low. This spot is also accessible during Team Deathmatch, but don’t hold here long—take a few shots at opponents on the stadium floor and then move on before they can return fire.
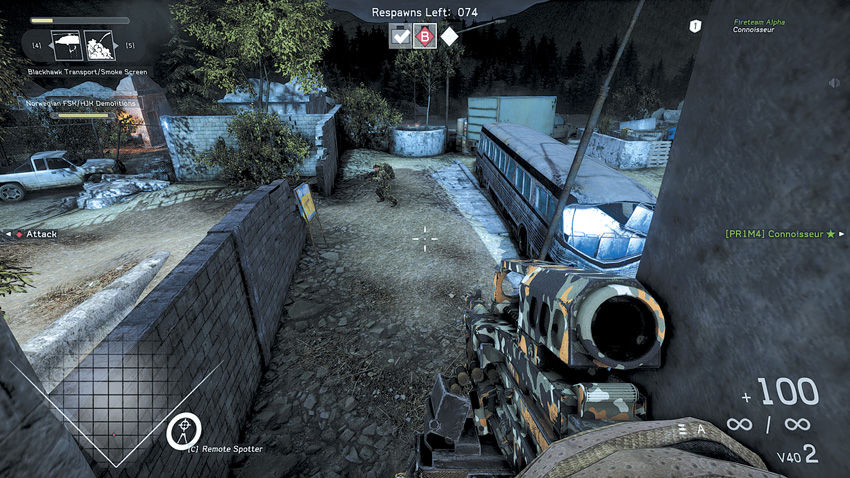

Recommended Weapons: Explosives, LMG, Sniper Rifle (supported)
During Combat Mission, this overwatch position has about the same vantage point over bomb site A as the previous window overwatch, only from the opposite angle. Monitor the other window, and take out any enemies that show up in its frame. Take out any enemies that are planting or disarming a charge from here. This overwatch perch is also available in Team Deathmatch, serving as an ideal spot for monitoring enemy movement along the stadium floor.
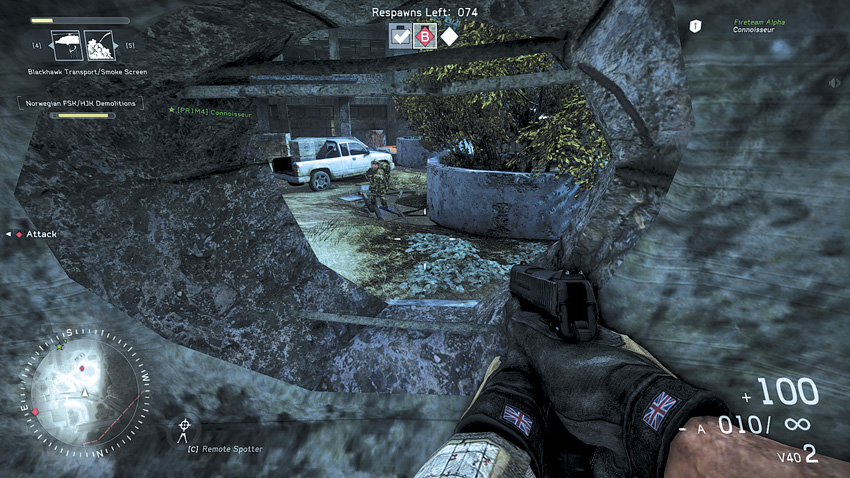

Recommended Weapons: Grenades, Assault Rifle, LMG, Sniper Rifle (supported)
During Combat Mission, Sector Control, and Hotspot, this spot mainly defends a high-traffic area mostly near the stadium. It’s also a decent spot for snipers when covering a Hotspot potential target or Combat Mission’s bomb site B. It’s hard to be flanked from here, but there’s a wall behind this spot that acts like a backboard for grenades. Try not to linger long and be ready to scoot if you take incoming sniper fire.
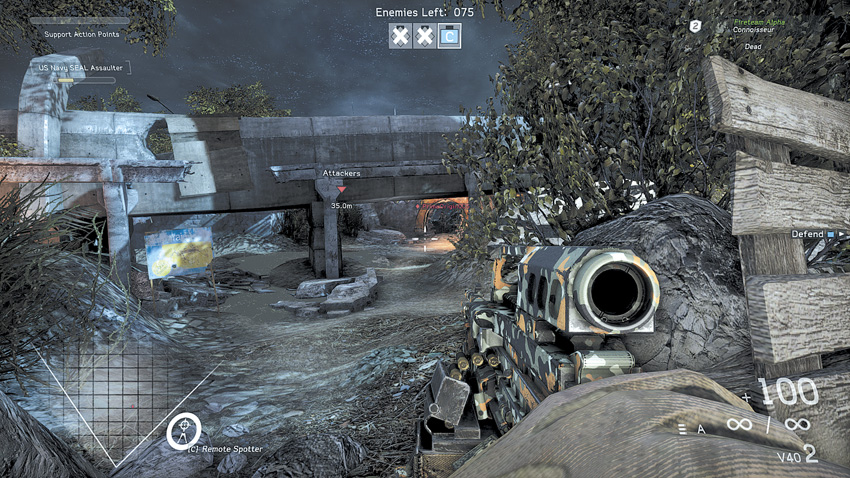

Recommended Weapons: Explosives, Assault Rifle, LMG (supported)
During Combat Mission, get up to this elevated position within the scoreboard structure to look down on this high-traffic area. You’ll have good enough cover to surprise enemies as they walk toward bomb site B via the eastern flank, but don’t hang out for long because enemies will likely flank the door right behind you. This is a prime position to fire your rifle or grenade launcher from.
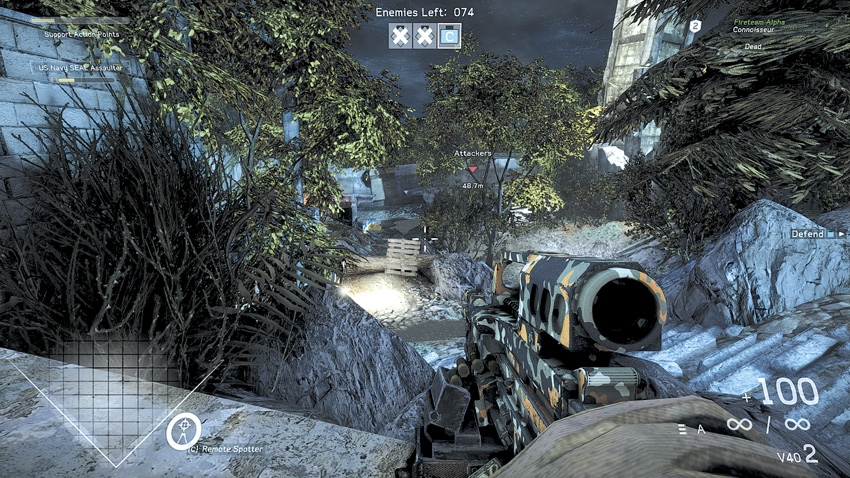

Recommended Weapons: Explosives, Assault Rifle, SMG
While playing Combat Mission, Sector Control, and Hotspot, this is a good point to cover a potential target or possible flanking paths. Look through this hole in the bobsled track for some major cover as enemies attempt to run through the tight area. Strafe left and right to adjust your view through the hole, or simply to avoid incoming fire. Use assault rifles in this area for greater versatility, particularly when it comes to engaging opponents at longer ranges.
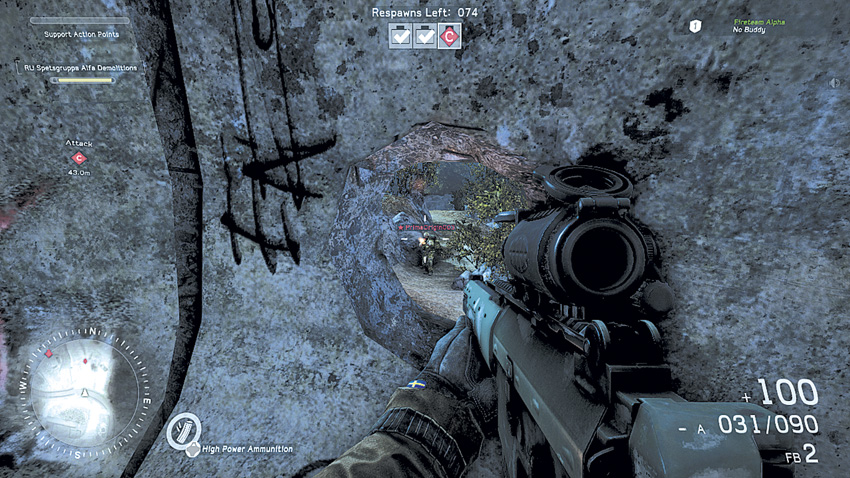

Recommended Weapons: Explosives, Assault Rifle, Grenade Launcher, LMG, Sniper Rifle
This major path sees heavy traffic during Combat Mission, Team Deathmatch, and Hotspot due to its direct passage among the various objectives. This is a long walk for anyone passing through without a fireteam buddy. The path is fairly open with narrower side branches opponents are likely to attack from. There’s plenty of opportunities to flank and be flanked by snipers, LMGs, and grenade launchers while walking through here. Check holes in the bobsled track and walls for enemies, observe proximity mines in the tight spots, and maintain a line of sight with your fireteam.
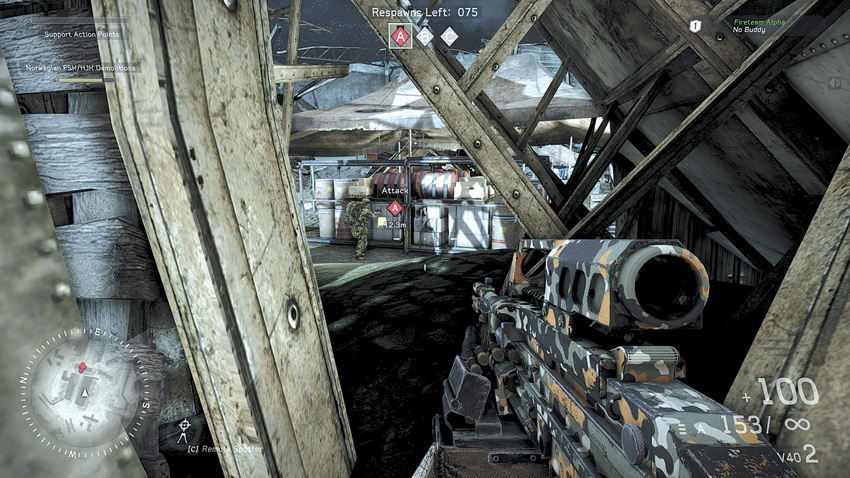

Recommended Weapons: Explosives, Assault Rifle, LMG, Sniper Rifle (supported)
This position is a little bit of everything in Combat Mission, Sector Control, and Hotspot. Near the bomb site C area in Combat Mission, lay down here for cover and deploy the bipod for long-distance shots. The path has a long sight line and covers an often-used approach. Use mid- to long-range weapons to cover the path, but be careful here because enemies can flank your rear from the left and right paths behind this position.
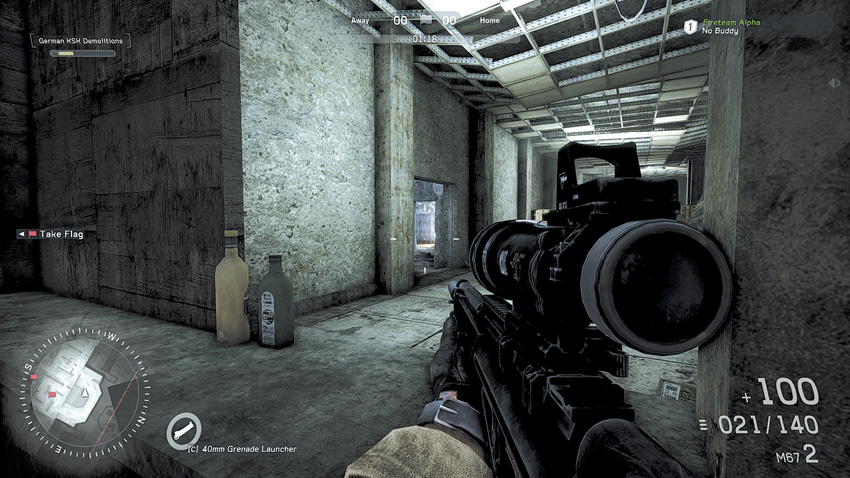

Recommended Weapons: Assault Rifle, Sniper Rifle
While in Combat Mission, Hotspot, or Sector Control, if any enemies are on the eastern path, defending an objective or passing through, sneak up to this hole in the track’s wall and go for some headshots. The hole provides exceptional cover, but you can be flanked easily from the left and right sides if enemies are on the track with you. It’s best to use rifles here for cleaner kills.
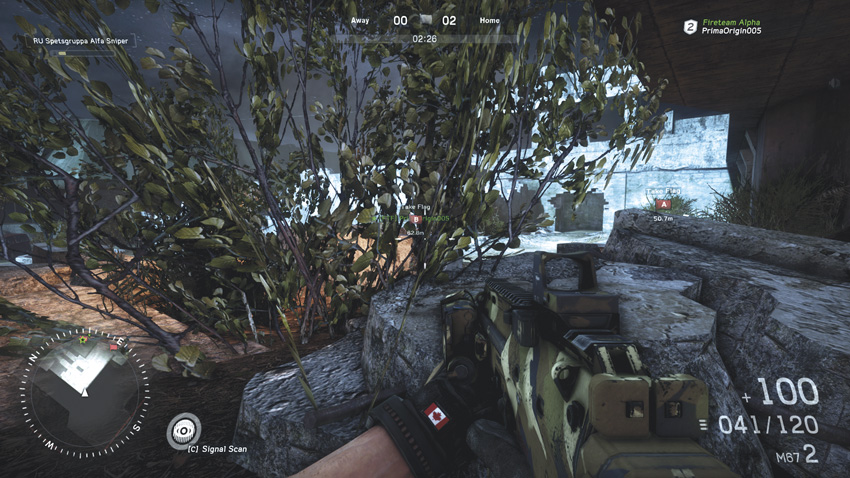

Recommended Weapons: Assault Rifle, Sniper Rifle
During Home Run, as an attacker, if your teammates have taken Flag A and they’re on the final stretch, try to crouch in this corner behind some bushes and rubble. From here you should be substantially camouflaged while given a clear view of the entrance enemies might pursue your teammates from as well as a clear line of sight of the finish line. There’s little cover here, so make your shot count with long-range weapons.
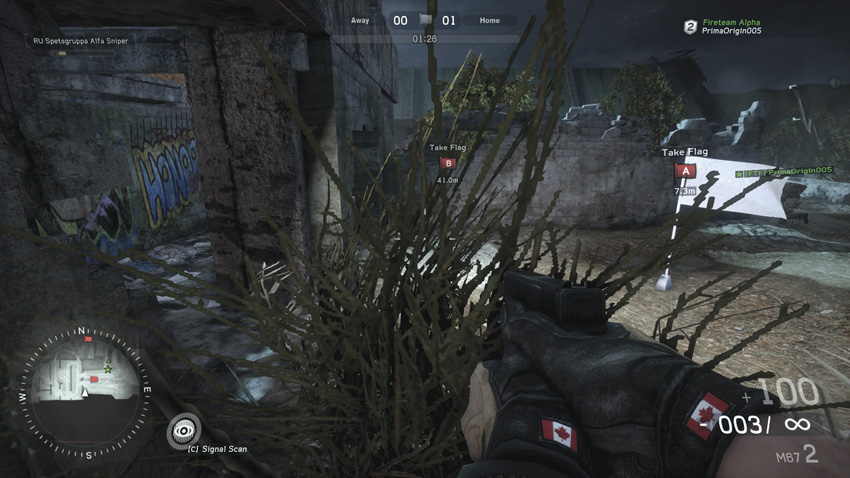

Recommended Weapons: Explosives, Shotgun, SMG
During Home Run, guard the flag from a distance by hiding in the camouflage of bushes. From here you’ll have a clear view of Flag A and the lower open area. Watch the door and wait until enemies come out in the open for a clear shot. It is advisable to go prone with long-range supported weapons, but it’s also wise to remain unsupported just in case you need to move out quickly. Watch your right as enemies might come from the stairs if they’ve cleared out your teammates.
Sight Lines
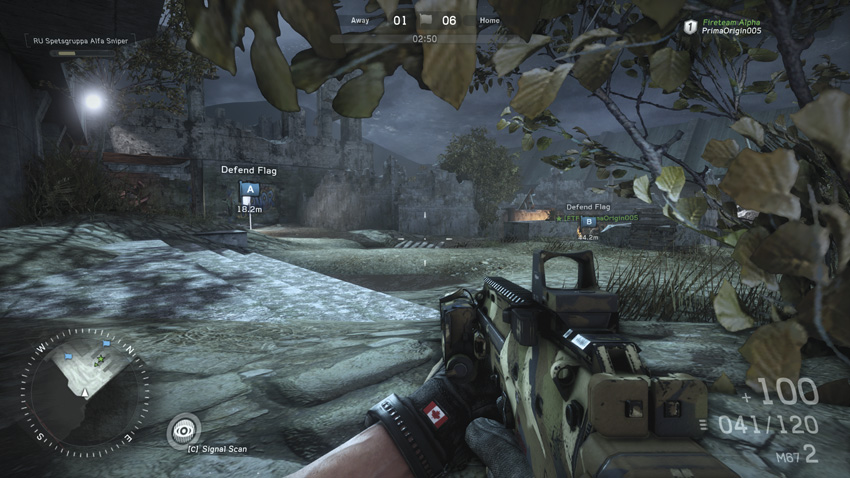

Recommended Weapons: Explosives, Assault Rifle, SMG, LMG, Sniper Rifle
During Combat Mission, quickly hide in the rubble for a direct line of sight on bomb site A to flank anyone arming or disarming the charge. Movement is minimum here, and you can be flanked easily, but you’re pretty concealed. Get in and get out once you’ve made your kill. At this close range, any weapon should be acceptable to take out opponents at the bomb site.
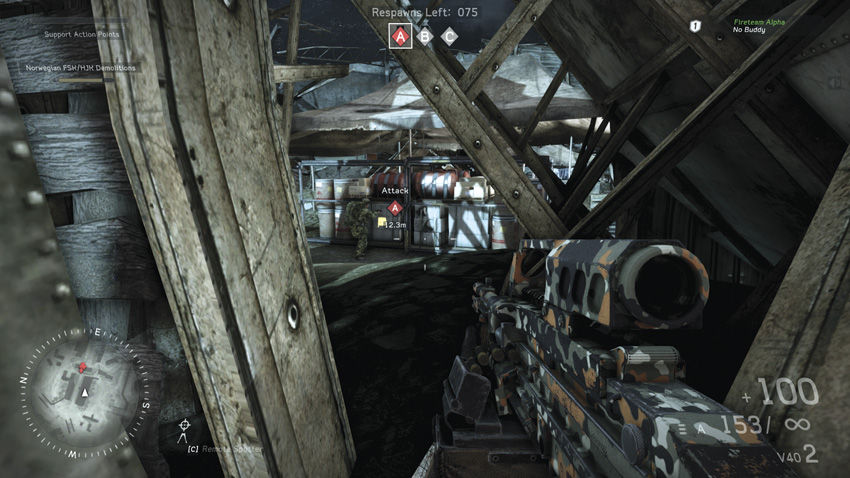

Recommended Weapons: Proximity Mines, Assault Rifle, LMG, Sniper Rifle
Exclusive to Home Run, this sight line provides an excellent defensive position looking through the northern door in the wall. From here, you’re fairly concealed in darkness and have some cover behind the counter. Pick off attackers as they walk through the door or attempt to take the flag back to their base. You can be flanked from behind if you aren’t paying attention. Place proximity mines along the blind corners leading up to the flag to cover your back and score some sneaky kills.
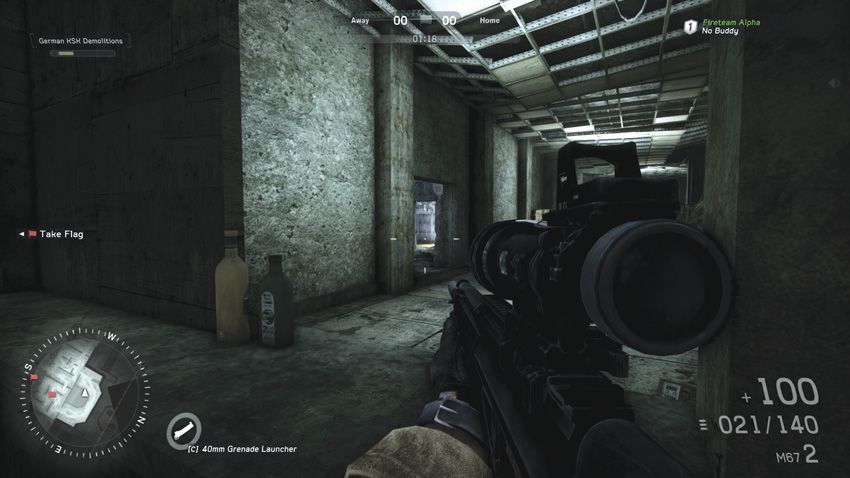

Recommended Weapons: Proximity Mines, Assault Rifle, LMG, Sniper Rifle
Exclusive to Home Run, this sight line provides an excellent defensive position looking through the northern door in the wall. From here, you’re fairly concealed in darkness and have some cover behind the counter. Pick off attackers as they walk through the door or attempt to take the flag back to their base. You can be flanked from behind if you aren’t paying attention. Place proximity mines along the blind corners leading up to the flag to cover your back and score some sneaky kills.
Combat Mission
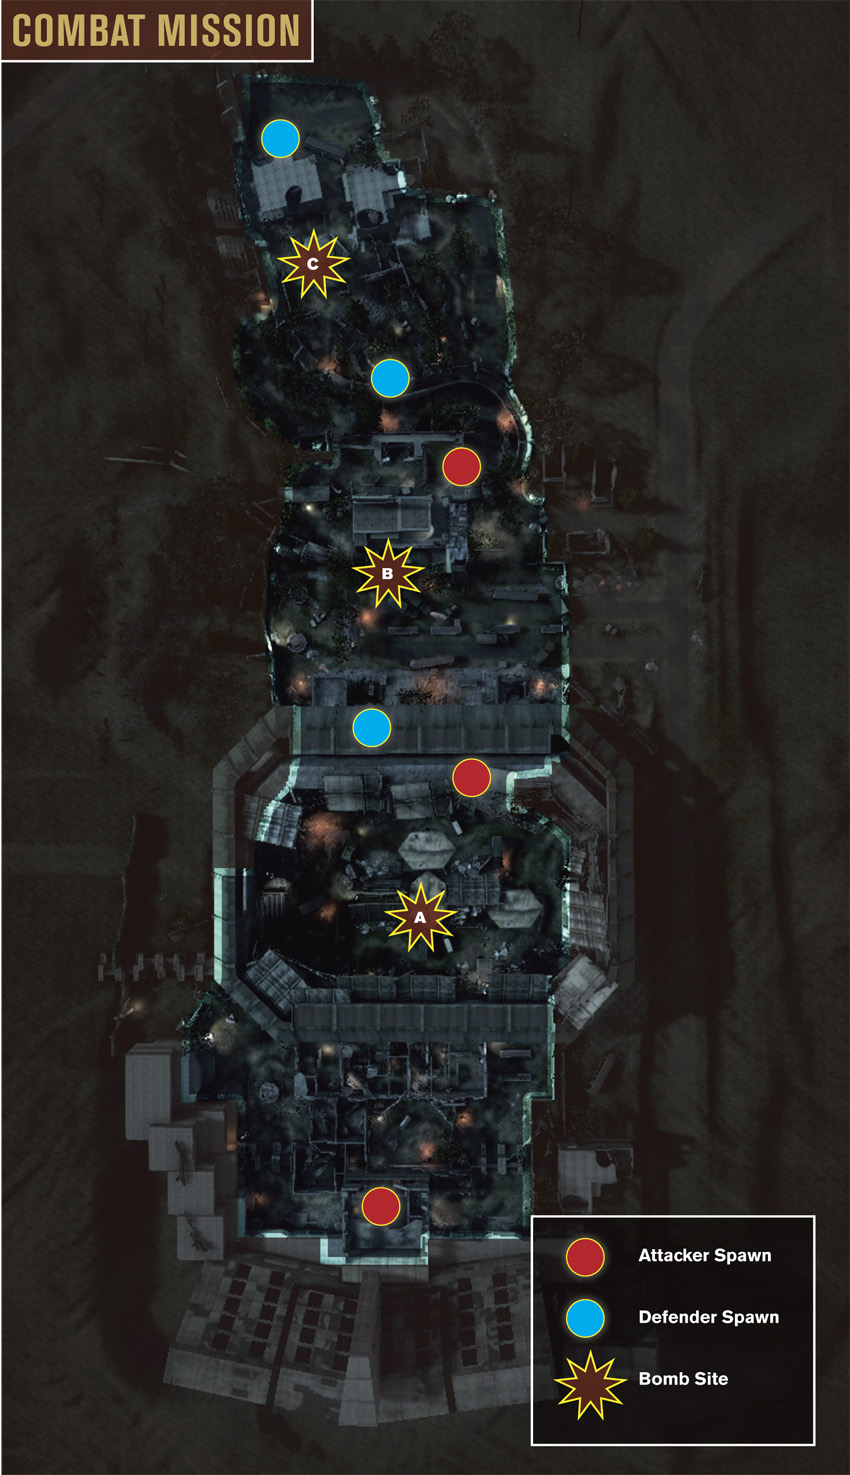
The first bomb site (A) is located in the center of the stadium, making it a tough spot to reach for the attackers. Here the defenders can lock down the stadium by covering all the southern entry points—don’t forget to cover that sneaky flanking path on the west side too. An early push by the attackers allows them to infiltrate the stadium before the defenders can dig in. If an early attack isn’t successful, the attackers should attempt to flank from the west instead of grinding against the stadium’s southern entrances. In the second phase of the battle, bomb site B is located within the building beneath the scoreboard. With numerous approaches available, the attackers have an easier time of reaching this bomb site—flank from the east or west when possible to catch the defenders off-guard. If possible, the defenders should try to ambush the attackers when they exit the stadium. This is much easier than defending the numerous paths leading to bomb site B. The final bomb site (C) is located beneath the tower on the north side of the map. Once again, the attackers should utilize the east and west flanking paths when approaching this location. The majority of the defending team should stay near the tower and babysit the bomb site while a couple of fireteams secure the flanking paths.
Hotspot
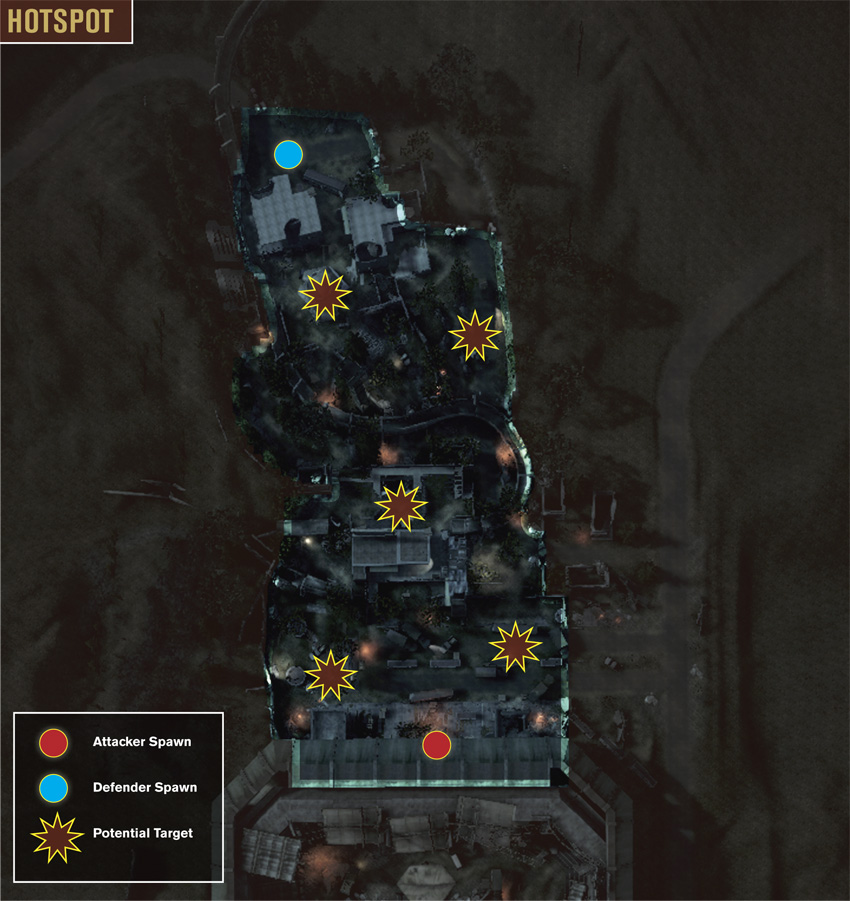
In Hotspot, the stadium is cordoned off, limiting the action to the areas around the scoreboard and tower. As in all Hotspot matches, the defenders should make a beeline toward the first target and secure it before the attackers arrive. The attackers shouldn’t waste much time either. They should make an effort to establish a presence near the map’s center. The centrally located scoreboard structure makes a perfect base of operations given its close proximity to all five potential targets. This structure can also serve as a good cut-off point for either side when attempting to contain the opposing team to its starting side of the map. This tactic can serve the attackers well, especially if either of the two potential targets near the stadium are randomly chosen—the same can be said for the defenders if the two targets near the tower become active. Whichever targets are chosen, utilize the map’s various paths as well as the bobsled track to approach each target from unique angles. This is particularly important for the attackers, since the defending team is likely prepared for any direct assaults.
Sector Control
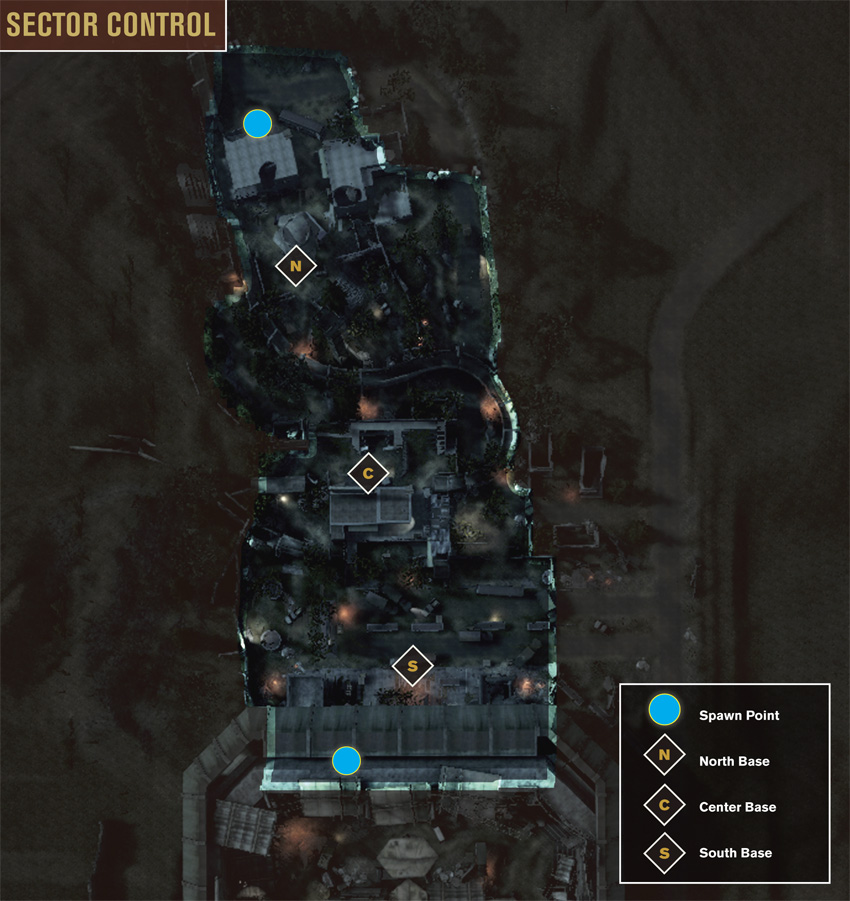
The Sector Control map is approximately the same size as the Hotspot variant, with bases located at the stadium’s entrance, the scoreboard structure, and the tower. The North Base at the tower and the South Base at the stadium’s entrance are only a few meters away from each team’s respective spawn point. As a result, these two bases probably won’t change hands much during the course of the battle. The real fight occurs at the Center Base as both teams jockey for control of the scoreboard. The team approaching from the north has a good chance of rushing this base first. However, those approaching from the south have a better chance of occupying the scoreboard structure, giving them a distinct advantage when it comes to converting the flag. Since the North and South Bases are rarely defended, look for opportunities to slip past the fighting at the scoreboard and make a move for one of these oft-neglected flags. But don’t expect to hold the flag closest to the opposing team’s spawn point unless you have some serious backup. Two fireteams working together can usually lock down the North or South Base, effectively trapping the opposing team at its spawn point.
Home Run
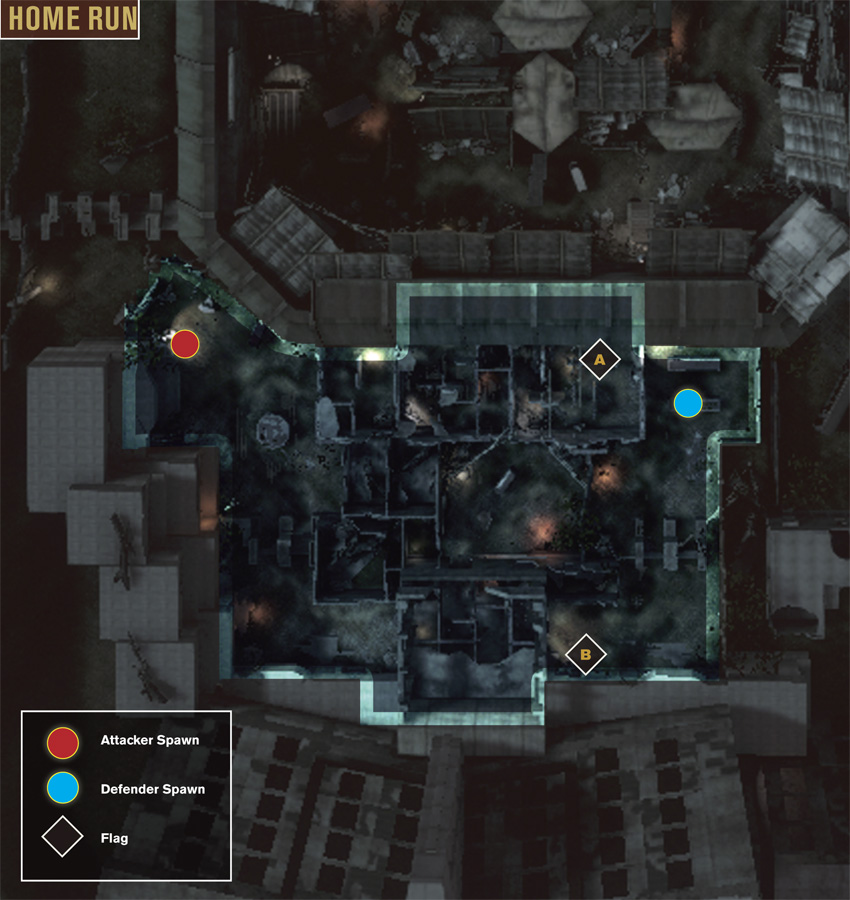
Home Run features a unique area of the map located on the south side of the stadium. The attacking team spawns on the west side of the map, while the defenders and flags are located to the east. Flag A is located on the north side, not far from the stadium. Players here should prepare for close-quarters engagements as there’s plenty of debris and blind corners, giving the defending team many opportunities to ambush. The area around Flag B is a bit more open, offering some good sight lines. Given the numerous hiding spots around each flag, neither one is particularly easy to capture. Instead of rushing toward any specific flag, attackers should attempt to draw out the defenders by rushing down the center of the map. This is the best way to whittle away the defenders, leaving at least one of the flags open to capture. When rushing the flag back to your team’s base, always use the paths on the north or south sides of the map, as they offer the most cover, especially if defenders are chasing you. However, defenders can prevent a capture by camping the southwest corner of the map, gunning down the flag carrier and any escorts just before they can reach safety.
Team Deathmatch
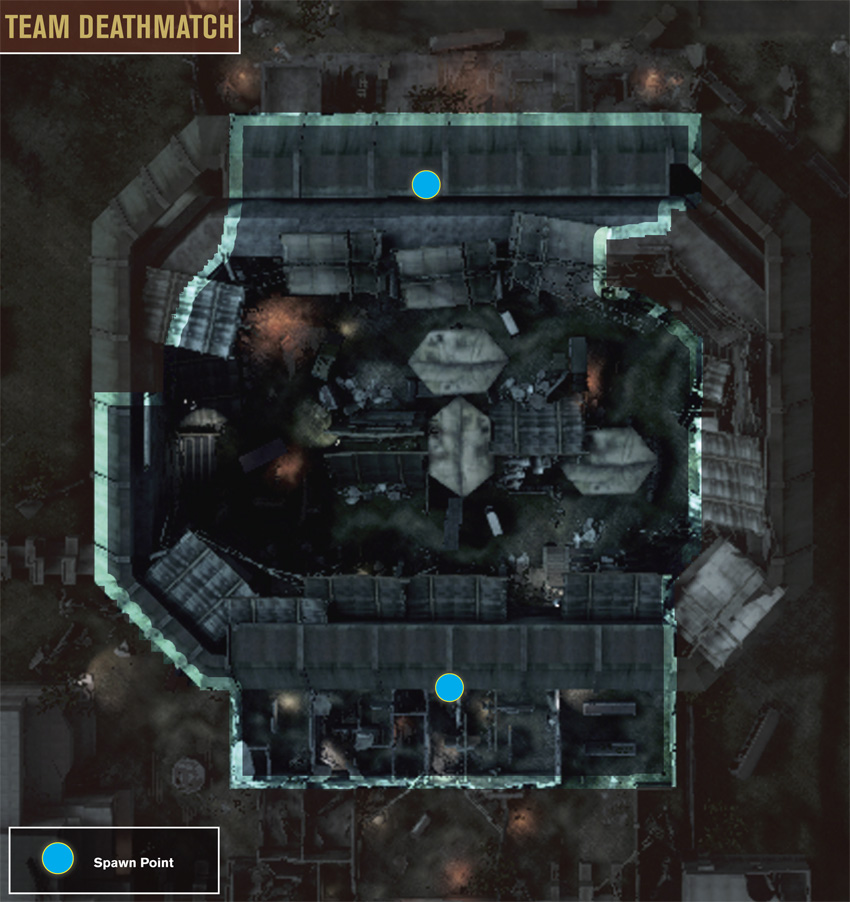
Team Deathmatch takes place entirely within the stadium, making for a truly chaotic gameplay experience when playing on a full server with 20 players. There really are no safe spots to hold out on this map, so staying alive often comes down to staying mobile and having quick reflexes. While the stadium floor may look open, it’s actually filled with all sorts of cover, offering decent protection while limiting sight lines. Fighting on the cluttered stadium floor often occurs at short to medium range, so consider bringing along an assault rifle or SMG. The corridors on the north and south sides of the stadium are also accessible. Instead of trying to dominate the stadium floor, try to control the stadium entrances adjacent to the opposing team’s spawn point. The entry points into the stadium are deadly choke points, and if properly covered, your team can score multiple kills at each spot—grenades, proximity mines, and remote charges are all effective in these narrow doorways. Locking down these choke points is far more preferable than running around the map looking for random targets.