
Medal of Honor: Warfighter Guide Multiplayer Multiplayer Bootcamp
Multiplayer Bootcamp
Multiplayer Bootcamp
Medal of Honor Warfighter multiplayer puts two teams of ten players against each other within a variety of hostile environments scattered across the globe. As both teams clash, your skill and determination will help win the day. This chapter covers all aspects of multiplayer, helping familiarize you with the unique interface, features, and game modes. So whether or not you’re new to Medal of Honor, take a few minutes to review the basics.
Beginner’s Guide: Getting Started
You’re only a few seconds away from starting your multiplayer career. So if you’d prefer to jump into the action immediately, follow these quick and easy steps to get started. However, you may want to browse through this entire chapter at least once before taking the fight online. The online action is fast-paced and can be a bit intimidating to a first-time player. But if you’re experienced with online first-person shooters, you should have no problem picking up the gameplay.
1: Choose Multiplayer
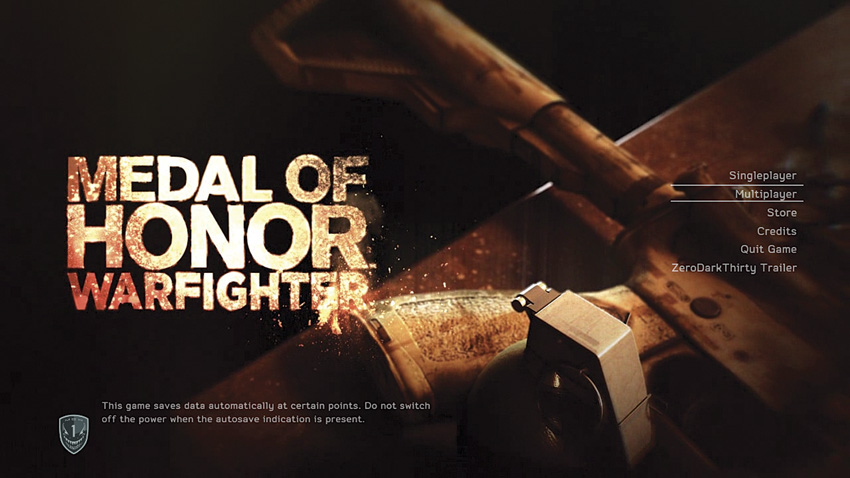
When you first launch the game, you’re prompted to chose between the single-player campaign and multiplayer. Each game mode is separate and loads independently of one another. At this point, select Multiplayer to load the online component of Medal of Honor Warfighter. Also, if playing on a console, make sure you’re signed in with your Playstation Network or Xbox Live Gold account.
2: Activate Origin Online Pass
Before you can join a multiplayer match for the first time, you must first login with your Origin account profile and enter your online pass. If you already have an Origin account, simply enter your e-mail address and password to proceed. If you aren’t registered with Origin yet, you can do it all from this screen. Simply enter your e-mail address and create a password. Agree with the terms and conditions to continue, then enter the online pass code included with your game to proceed.
3: Select Nation/Unit
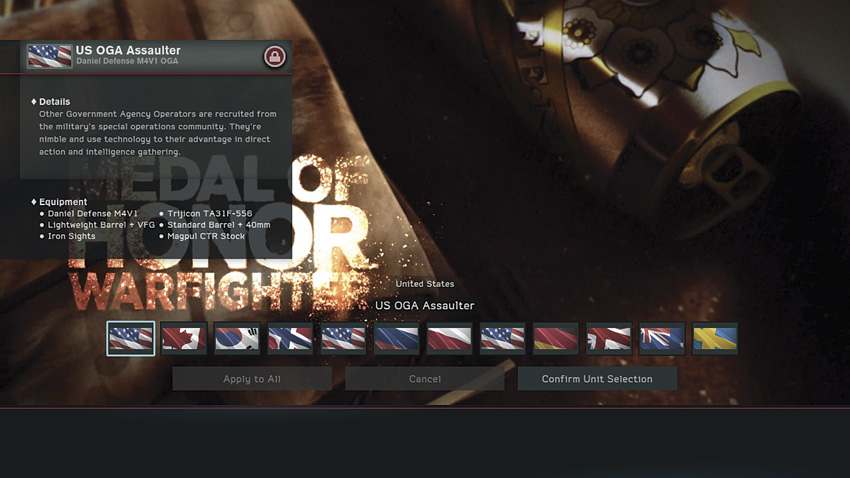
Your decision here determines which unit in the assaulter class you unlock first. Carefully look at all options indicated by the flag icons to determine which weapons and attachments are associated with each unit. The assaulter unit you choose here will be the first and only class made available to you at the start of your career. But you’ll soon unlock other classes and units as you make progress and rise through the ranks.
4: Find Game
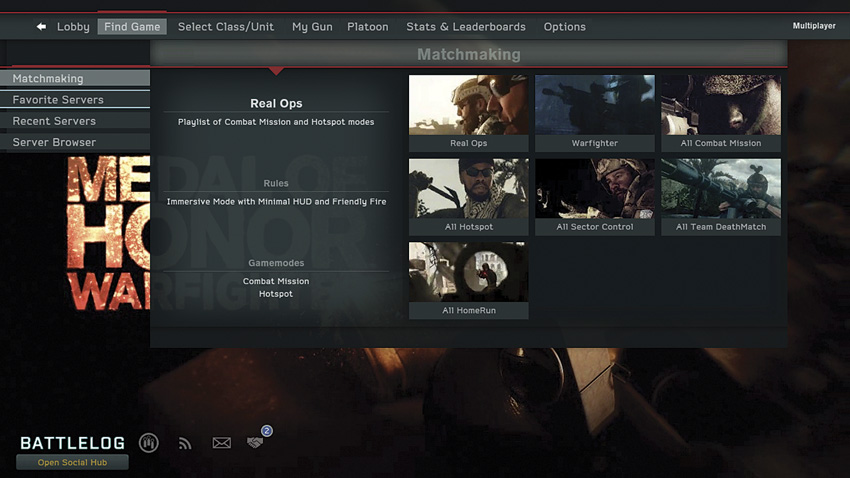
After selecting your starting unit, you are then dropped into the multiplayer lobby where you can choose from a variety of options. Feel free to browse through them, but since you’re new, you haven’t accrued any stats or unlocked any new weapons or units. It’s time to get busy. From the lobby screen it’s possible to join a Quick Match already in progress—this is the quickest way to jump into battle. If you want to look for a more specific map or game mode, choose the Find Game option and open the Server Browser. This lists all available multiplayer servers showing the current map, game mode, and number of players. The Matchmaking feature allows you to make a more general selection, choosing from servers running a particular game mode.
5: Select Class and Play!
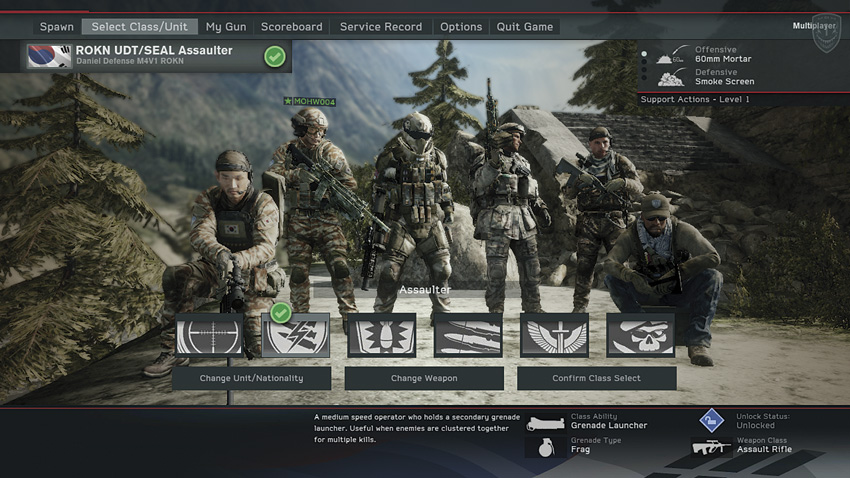
You’ve most likely joined a match in progress and are automatically assigned to the team with the least players. But before you spawn on the map, you must choose the class you’d like to play. The assaulter class is the most versatile, making perfect sense why it’s the only class made available to beginners. But don’t worry, you’ll unlock more classes, units, and weapons soon enough as you rack up points and advance through the ranks. You can also customize your primary weapon from this screen, but if this is your first match, you have no customization options yet. Finally, you’re ready to join a match. Press the deploy button shown at the bottom of the screen to enter the match. You’re now ready to begin your online career.
Interface
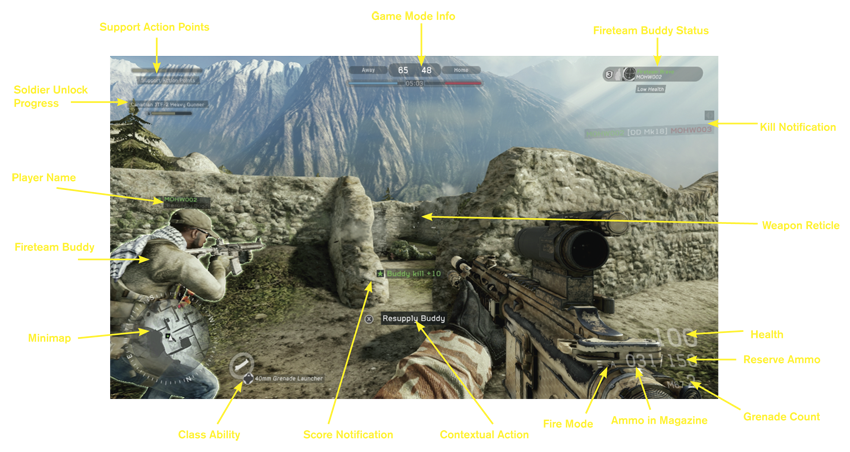
- Fire Mode: This icon represents the selected fire mode of your primary weapon. Most weapons have different fire modes, allowing you to choose from automatic, semi-automatic, or burst.
- Ammo in Magazine: This number represents how many rounds are remaining in your weapon’s current magazine.
- Reserve Ammo: This is how much extra ammo you’re carrying, not including the bullets in your currently loaded magazine. You can receive more ammo from your fireteam buddy.
- Grenade Count: The type and how many grenades you’re currently carrying. All soldiers can carry a maximum of two grenades, but the type of grenade carried differs based on your chosen class. In this image the player has two M67 fragmentation grenades.
- Health: This number, ranging from zero to 100, represents your health. If your health drops below 100, you’ll slowly recover over time. Your fireteam buddy can also heal you, instantly restoring you to full health.
- Weapon Reticle: Place this reticle over your target and fire to score a hit. Reticles expand and contract based on your movement and stance. A small reticle reflects improved accuracy, so always try to fire from a stable, crouched or prone position. Using a weapon’s iron sights or scope yields even better accuracy.
- Kill Notification: Every time you kill an opponent, a string of text appears on the bottom of the screen identifying the name of your victim as well as the weapon used to score the kill. Similar kill notifications appear below the minimap when teammates kill or are killed by opponents.
- Fireteam Buddy Status: Look here to see your fireteam’s designation as well as your buddy’s name, current location, and overall status. If your fireteam buddy is injured or running low on ammo, you’ll be notified here. Get to them fast to heal and resupply.
- Game Mode Info: Each game mode features specific information at the top of the HUD. This may include items such as a timer, team health, team scores, available objectives, and other items specific to each game mode.
- Support Action Points: This meter represents your progress toward achieving a support action. Support actions are awarded at 400-point intervals as long as you stay alive—if you die, the meter is reset. The available offensive and defensive support actions also appear here, differing based on your achieved scorechain level and selected class. You can only choose one support action per level, offensive or defensive, so choose carefully. Support actions remain available until selected, even if you die.
- Unit Unlock Progress: This meter shows your progress toward unlocking the next unit. There are a total of 72 different units consisting of 12 nationalities and six classes. Each unit has a specific point threshold that must be met before it is unlocked. In this image the player is close to unlocking the Canadian JTF-2 heavy gunner.
- Player Name: Every player’s name appears directly above his or her character’s head, making it easy to identify your fireteam buddy (green text), teammates (blue text), and opponents (red text).
- Fireteam Buddy: Your fireteam buddy always appears on the HUD, outlined by a green silhouette, even when your buddy is outside your line of sight. This makes your buddy easy to spot, even if on the opposite side of the map. Make an effort to stay near your fireteam buddy so you can support, resupply, and heal each other.
- Minimap: The circular minimap is your own personal satellite view of the battlefield, complete with compass readings on the outer rim. Teammates appear as blue dots while opponents appear as red dots—your fireteam buddy appears as a green star. Opponents appear on the map whenever they fire their unsuppressed weapon or move nearby. Gunshots fired beyond the view of the minimap appear as white flashes on the perimeter, helping you easily locate firefights.
- Class Ability: All six classes have a unique ability, indicated by this icon to the right of the minimap. This icon identifies the class ability as well as the key/button press required to activate it. In this image, the player’s chosen assaulter class is equipped with a grenade launcher.
- Score Notification: Every point you earn appears here, just below the weapon reticle and in white text. Points are earned by killing opponents, capturing/destroying objectives, and completing a variety of other actions. You also earn points for actions performed by your fireteam buddy—these point notifications appear in green text.
- Contextual Action: A white line of text accompanied by a button/key icon appears here any time you’re next to an interactive object. This is how you heal and resupply your fireteam buddy as well as arm/disarm charges in Combat Mission or Hotspot.
Contextual Actions
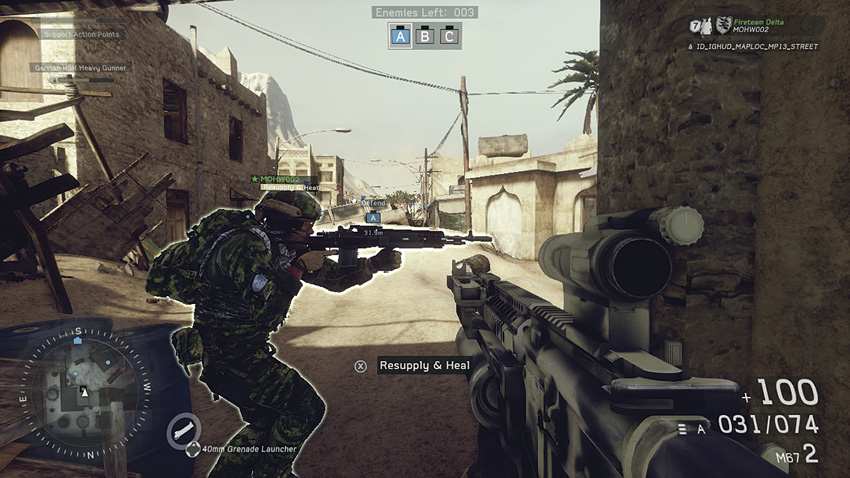
Press the button/key shown on screen to resupply and heal your fireteam buddy.
During gameplay, you have the opportunity to interact with a few objects as well as your fireteam buddy. At these times, instructions appear on the screen. For example, when you are near an interactive object, a note appears in the middle of the screen stating which button you need to press to place an explosive charge, pick up a flag, or resupply your fireteam buddy. Interacting with objectives (in Combat Mission and Hotspot) makes you initiate a timed explosive charge used to destroy them. In Home run, you must interact with the flag before you can carry it back to your team’s base. Resupplying or healing your fireteam buddy works the same way. Just make sure you’re close enough to interact with them.
Health
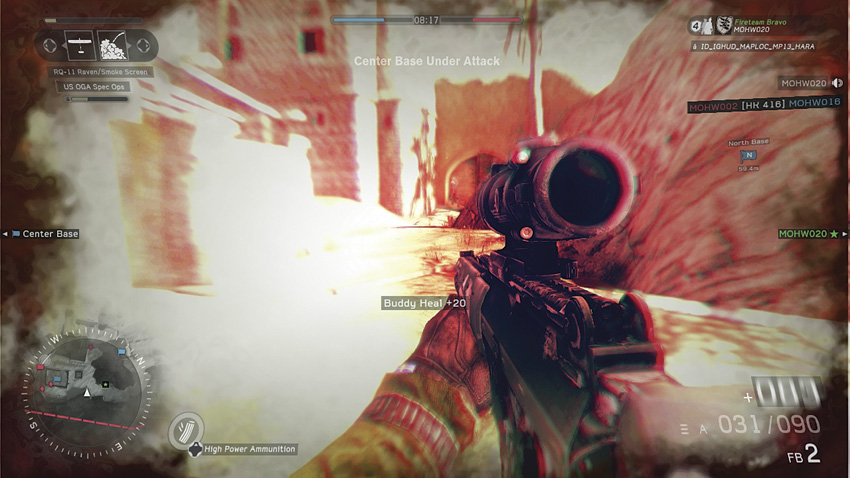
If this is what your screen looks like, find cover fast!
During multiplayer there is a health counter in the bottom right corner of the screen, starting at 100. As you take damage, the number decreases and the HUD’s perimeter turns red with splotches of blood as your vision blurs. If the health counter reaches zero, you’re dead and must respawn into the match after waiting a few seconds. Whenever you take damage, seek cover immediately before you die—dropping prone is a good way to avoid taking subsequent hits if cover isn’t readily available. While in cover, you slowly heal over time and the HUD returns to its default pristine condition. But reaching cover before dying is easier said than done. The weapons in multiplayer inflict heavy damage, rarely giving you the chance to take evasive actions. If you do survive the first barrage, find cover immediately instead of trying to seek out your attacker.
Minimap
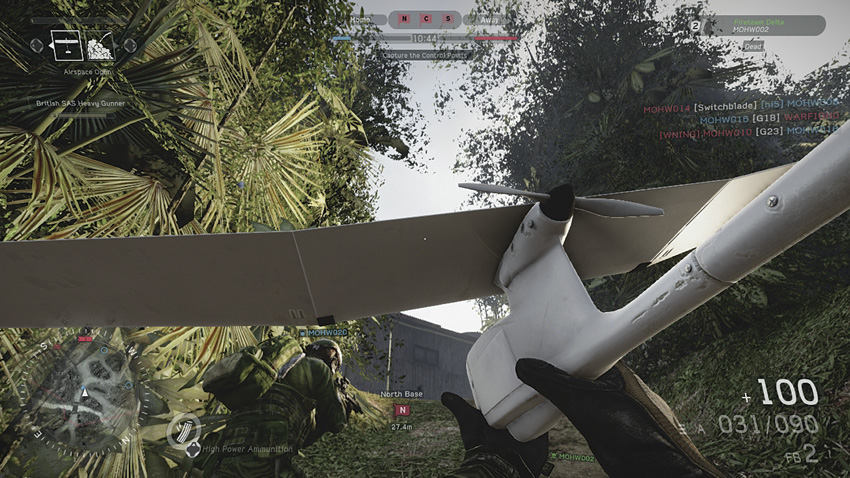
Activating the point man’s UAV support action reveals the locations of enemies on your minimap.
The minimap is your best friend. Not only does it give you a top-down view of your surroundings, but it also relays vital real-time information including the positions of your teammates and enemies. The blue dots on the minimap represent your teammates—the green star icon is your fireteam buddy. Knowing where your friends are at all times is a vital tool in any combat situation. Try to stay in an area where there are several blue dots around you. If you see no blue dots on the minimap, find a good hiding spot as this indicates you’re potentially deep in enemy territory—this is particularly important during Team Deathmatch. It’s safe to assume areas that aren’t occupied by friendly forces contain enemies. The minimap is a great way to gauge the distance between you and your teammates. While it’s a good idea to stay within sight of your buddies, clustering too tightly together can make you vulnerable to explosive attacks such as mortar strikes. Keep an eye on the minimap to make sure you’re not presenting the enemy with a tempting target for offensive support actions.
Red dots on the minimap represent enemies. These icons appear briefly whenever your opponents fire unsuppressed weapons. Watch for these red dot icons popping up on the minimap and use this information to hunt down nearby opponents. Activating the point man’s UAV support action also reveals the locations of all enemies within a wide radius. This information is shared with all members of your team via their minimaps. If your team has a UAV in the air, there’s nowhere for the enemies to hide. Take advantage of this intelligence while the UAV is still active.
Fireteams
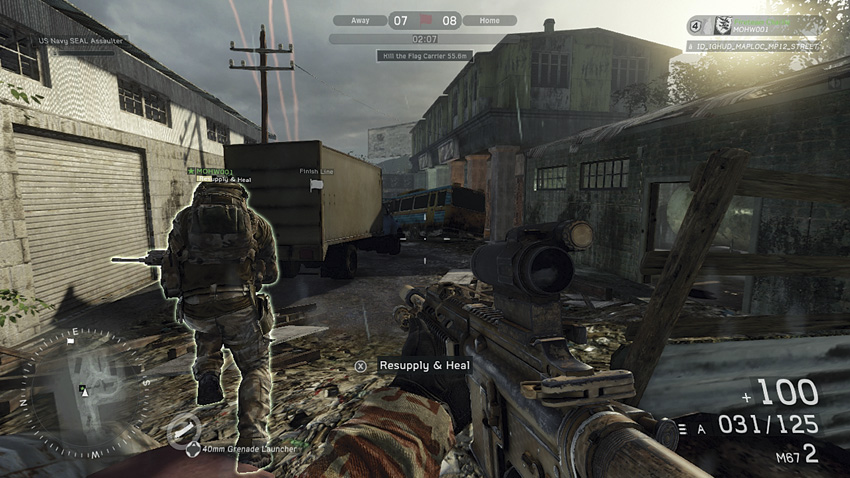
Stay close to your fireteam buddy at all times so you can support, resupply, and heal each other.
During multiplayer each team is made up of multiple fireteams comprised of two players. The other player on your fireteam is known as your fireteam buddy. Your fireteam buddy always appears on your HUD, represented by a green silhouette. Even if your fireteam buddy is out of sight, you can still see their green silhouette on the HUD. This helps you identify the location of your fireteam buddy at all times, allowing you to stay close and provide support to one another. In addition to watching each other’s backs, you can also heal and resupply your fireteam buddy. Simply move next to your fireteam buddy until a contextual action box appears in the center of the HUD, then press the button/key shown on screen to hand over ammo or patch up your buddy. Your fireteam buddy is also a source for health and ammo, so never wander too far away. When you’ve been resupplied by your buddy, you not only gain ammo for your primary weapon, but you also are restocked with grenades.
If you die, you can also spawn directly on your fireteam buddy by choosing the Buddy Spawn option from the respawn screen. Spawning on your fireteam buddy is a great way to stay together, even following a death. However, you can only spawn on your fireteam buddy if he is in a safe location and hasn’t been spotted by opponents. If your buddy is waiting to spawn on you, move to a safe location and wait, otherwise your buddy may be forced to wait or spawn at a different location.
Respawning
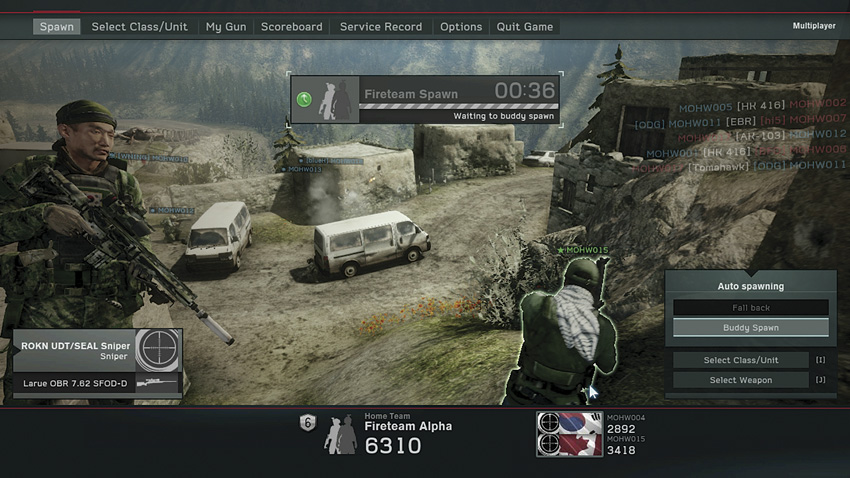
From the spawn screen it’s possible to spawn directly at your fireteam buddy’s location.
The combat in multiplayer is brutal. You will die, and you’ll probably die often. But no worries—your death is little more than a brief time-out during which time you can change your class, weapons, and even select your spawn location. By default there are usually two spawn options, Fall Back and Buddy Spawn. The Fall Back option puts you at a neutral location on the map, depending on the current game mode. Fall Back always puts you in a safe location, practically guaranteeing you won’t encounter opponents nearby. But if you want to spawn closer to the action, choose the Buddy Spawn option. This spawns you into the match directly behind your fireteam buddy. If your fireteam buddy also is dead, the Buddy Spawn option is not available.
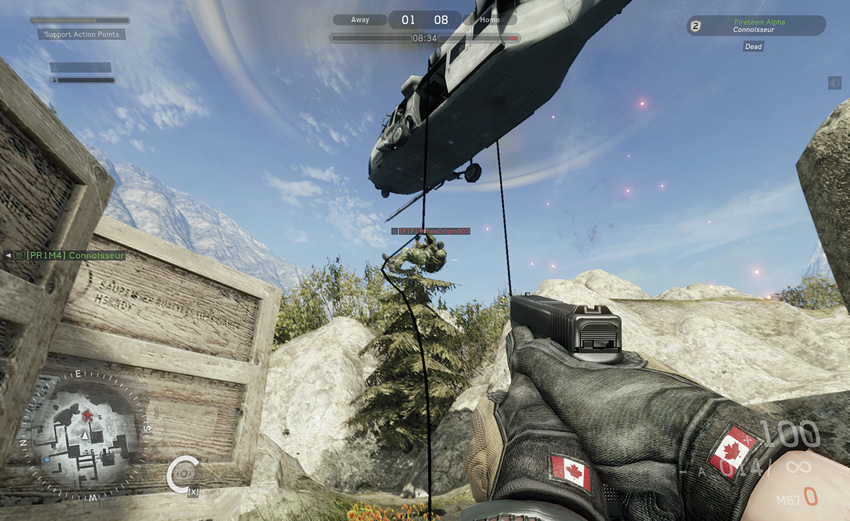
Spawning in the Blackhawk is risky. Consider spawning on your buddy or the Fall Back position instead.
If a teammate has activated the Blackhawk Transport support action, you can also choose to spawn from a hovering helicopter, automatically fast-roping to the ground. Spawning on the Blackhawk can be dangerous since it’s such a highly visible target. You’re invulnerable while sliding down the rope, but there’s a good chance you may be ambushed when your feet hit the ground. Fortunately, the Blackhawk is equipped with a minigun operated by the player who initiated the support action. The gunner usually takes the brunt of all incoming fire, but don’t be surprised if a few rounds zip past your head as you slide down the rope. When activating this support action during Combat Mission and Hotspot, the Blackhawk always hovers near the current objective, allowing for a steady supply of reinforcements at the most contentious point on the map.
Movement
Moving around the battlefield is fairly straightforward. On consoles, the left stick controls forward and backward movement as well as strafing to the left and right. Strafing is a lateral move where the direction you are facing does not change. It is useful for moving out from cover to fire, and then moving back behind cover for protection. The right stick controls where you look or aim—turning left and right as well as looking up and down. The peek and lean feature from single-player now carries over to multiplayer, allowing you to peek around objects without exposing your entire body.
It’s possible to jump and vault over small objects like sandbags and low walls. This is a great way to continue forward movement when pushing toward an objective or other location. But use the jump action sparingly. Executing a series of jumps will slow you down, tiring your soldier until the soldier’s movement is reduced significantly. Avoid bunny-hopping if you come under fire—you will only move slower and become an easier target for your opponents.
Crouch, Prone, and Sprinting
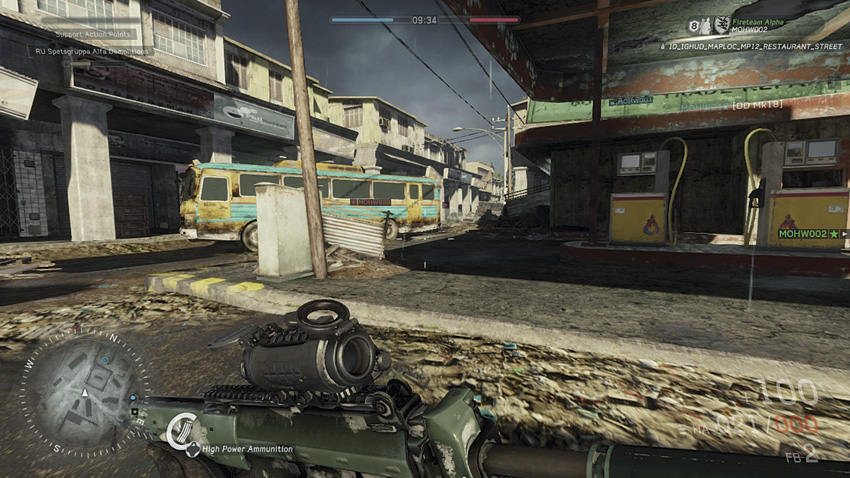
Your weapon is lowered while sprinting, preventing you from firing. However, you can reload your weapon while sprinting.
There is more to movement than just walking. Try crouching or dropping prone for greater stealth and stability. While crouched, you move slower. However, since you are lower, you make a smaller target for the enemy to hit and you can more easily duck behind cover. Dropping prone makes your soldier hit the dirt, lying belly-down. This makes you an even smaller target while providing you with the most stable firing position—the sniper and heavy gunner can deploy their bipod for increased stability while prone. When advancing against an enemy position, it is usually best to move crouched, as it is harder for the enemy to detect you. Crouching also causes the reticle to tighten up, indicating an increase in weapon accuracy. Make a habit of dropping to a knee (and aiming) before firing a shot. While it’s possible to crawl around while prone, movement is sluggish, making you vulnerable to attack. Avoid crawling around unless you simply need to shift firing positions.
At times, it is better to move fast. Hold down the left stick while moving to sprint. You can’t use weapons or equipment while sprinting, but you are much more difficult for the enemy to hit. Sprint when you have to cross a dangerously open piece of ground as you move from one position of cover to another, but sprint sparingly. If you suspect opponents are nearby, it’s always best to keep your weapon raised and ready to fire. If you happen to sprint directly in front of an opponent, you won’t have enough time to retaliate before the enemy empties a magazine into your body.
Combat
While moving about the battlefield is a major part of gameplay, the sole purpose of movement is to place you in a position where you can use your weapons to engage and eliminate the enemy. As a Tier 1 operator in training, you have access to different types of weapons. However, the controls for using these weapons are fairly common. For specifics on weapons, see the Classes and Weapons section, which covers this topic in greater detail.
Firearms
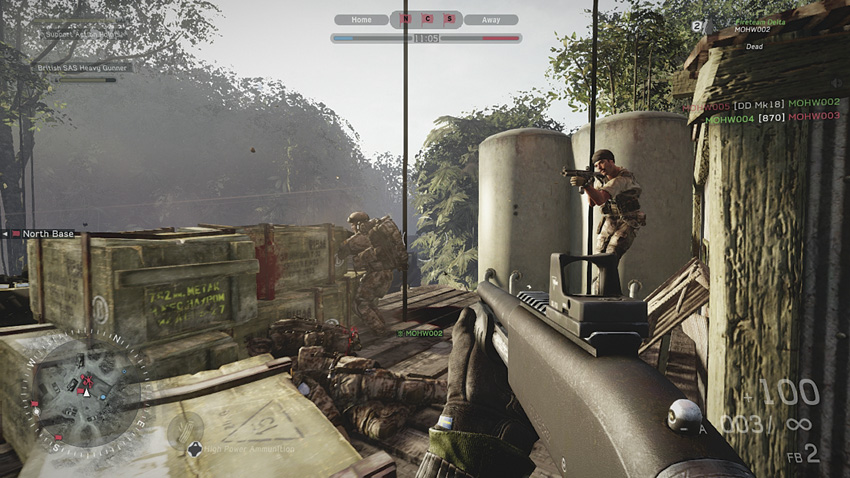
Firing from the hip is not advised unless engaging targets at extreme close range…preferably with a shotgun.
As mentioned earlier, the reticle in the center of the screen is your aiming point for using weapons. Most of the weapons you use are direct fire, meaning that the projectile you fire travels in a straight line from your weapon to the target. Using these weapons is simple. Place the reticle directly over the target and then press the fire button. For semi-automatic or single-shot weapons such as pistols, shotguns, and sniper rifles, each time you press the fire button, you fire a single round. However, for automatic weapons such as submachine guns, assault rifles, and light machine guns, they will continue to shoot as you hold down the fire button until they are empty. When firing automatic weapons, the longer the burst, the less accurate your fire. Therefore, to maintain greater accuracy and still put out a lot of lead, fire in short bursts. You are more likely to kill your target, especially at medium to long range, with a few accurate rounds rather than an entire clip spread all over. In addition, most weapons have fire select modes, allowing you to switch between automatic and semi-automatic. If recoil becomes a problem, switch to semi-automatic, particularly when engaging targets at long range.
Iron Sights and Scopes
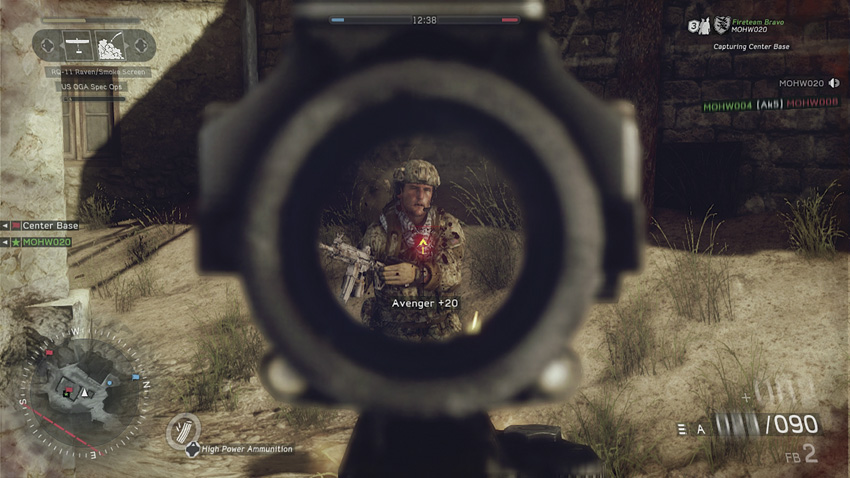
Accuracy increases dramatically when taking aim through your weapon’s iron sights or scope.
When you fire a weapon using the reticle to aim, you are essentially firing from the hip, with the butt of your weapon in the crook of your arm. This is not very accurate and should only be used at close range. To increase your accuracy, press the zoom button. This will bring up the scope or iron sights view, where you are actually looking through the weapon’s sight to aim. The butt of the weapon is brought up to your shoulder, giving you greater stability and accuracy. Simply put the sight’s front post over your target and squeeze the trigger to score a hit. If your weapon is equipped with a scope, the zoom button provides a view through the scope rather than iron sights. Scopes are often magnified, helping you get a closer view of the target before firing. Always aim for your opponent’s head to maximize damage.
Grenades
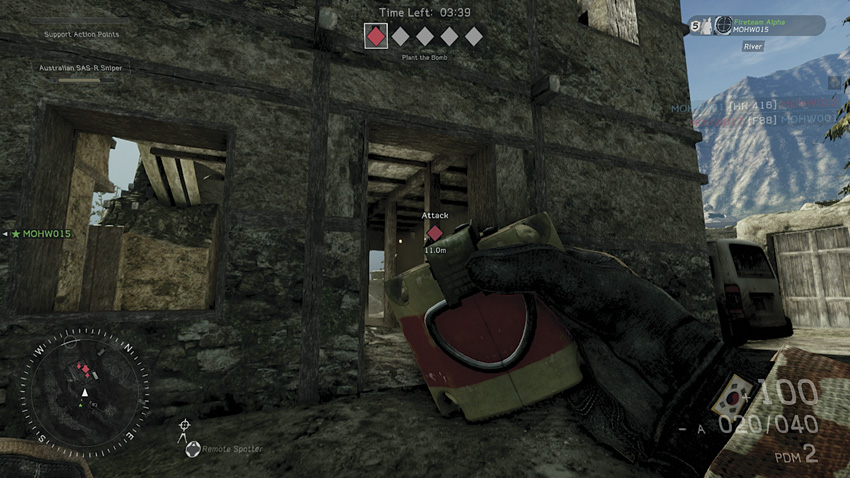
If you suspect an opponent is hiding in a building or other confined space, toss a grenade inside before entering.
Grenades require a bit more skill to use effectively since they are thrown. Unlike a bullet or rocket which travels in a straight line, grenades travel in a parabolic arc due to their lower speed and the effect of gravity. When throwing a grenade, the reticle on the screen turns into a tiny white dot—use this to adjust your aim before letting go of the grenade. When deploying a grenade, first take into account what kind of grenade you’re throwing, depending on your chosen class. Snipers carry a proximity mine which is placed on the ground and explodes when enemies pass within a few feet—ideal for defending objectives or choke points. The assaulter and spec ops class carries a standard fragmentation grenade that explodes and scatters shrapnel across a wide radius. The demolitions class deploys a remote charge, a powerful explosive manually triggered by a remote control device. The heavy gunner is equipped with mini frags, three small fragmentation grenades that are thrown simultaneously and scatter before detonating. The point man carries flashbangs, non-lethal grenades that emit a bright flash and loud bang, temporarily blinding anyone nearby. Each grenade type has its own strengths and weaknesses, so take some time getting used to the characteristics of the grenade type carried by each class.
The frag grenades and mini frags can be cooked by holding down the grenade button. Cooking a grenade is a great way score kills as it gives your opponents less time to run away. As soon as you begin holding down the button, the grenade’s fuse starts—if you hold the button down too long, it will explode in your face, leading to an embarrassing death. For best results, wait no longer than two seconds before releasing the grenade button. If you time it just right, grenades can explode in the air, just above your intended target. This is a great way to take out opponents hiding behind walls and other pieces of cover.
Grenade and Rocket Launchers
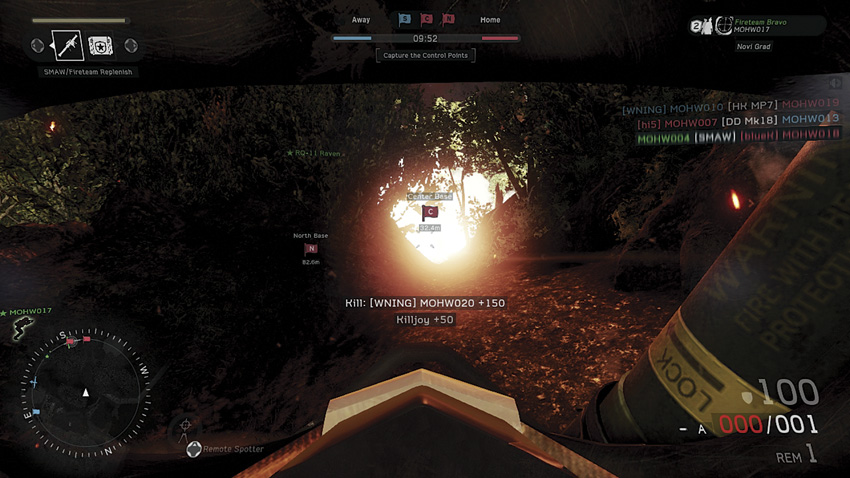
The demolition class’s M32 and SMAW offensive support actions are great for softening defensive positions.
Grenade and rocket launchers can only be equipped by the assaulter and demolitions classes. The assaulter class automatically has an under-barrel grenade launcher as their class ability, but the demolitions class must work to get their special weapons—both the M32 grenade launcher and SMAW rocket launcher are awarded as offensive support actions. Unlike the hand-tossed grenades, these weapons launch explosive munitions great distances. In the case of a grenade launcher, the farther away you are from the target, the higher you need to aim. That is why the reticle for a grenade launcher has several horizontal line aiming points. For a short-range shot, use the top line. The farther away your target, use the lower lines. By using a lower aiming point, you are essentially aiming the weapon up higher to lob the grenade toward the target. Unlike the assaulter class’s single-shot grenade launcher, the demolition class’s M32 is capable of firing up to six grenades in rapid succession. The M32 is also equipped with a scope for easier target acquisition. Still, even when using the M32’s scope, you need to aim high to compensate for range.
The SMAW rocket launcher is carried exclusively by the demolitions class. While the SMAW is equipped there is a small reticle icon on the HUD, but to fire this weapon accurately, always aim through the weapon’s iron sights. When properly aimed, the rockets have surprising range and accuracy, flying in a relatively straight line from the weapon to the point of impact. You don’t need to compensate for drop, so aim directly at your target to increase the chances of scoring a hit. The SMAW is particularly effective against large groups of opponents gathered around flags and other objectives. Try to score more than one kill with each shot, because you only get two rockets per support action.
Explosives
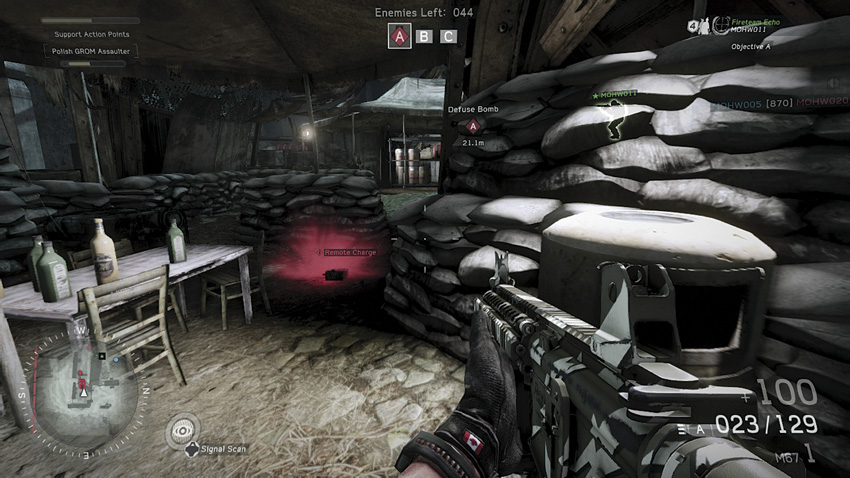
Remote charges and proximity mines are often placed near objectives—watch your step.
The demolitions class is the explosive expert in Medal of Honor Warfighter, each carrying a few remote charges. Simply press the grenade button to throw one down—these remote charges can also be stuck to surfaces such as walls and even ceilings. Pressing the grenade button a second time detonates the explosives, so make sure you’re a safe distance away to avoid blowing yourself up. Explosives are great for staging ambushes at narrow choke points, such as bridges and alleyways, or you can use them to defend critical positions, like flags in Sector Control or objectives in Hotspot.
The sniper class’s proximity mine is another nasty explosive device ideal for booby trapping objectives. Like the remote charge, press the grenade button to toss one of these devices down. Once placed, there is a slight delay before the proximity mine becomes active, indicated by a faint clicking sound. Proximity mines are only triggered by opponents—teammates and your fireteam buddy will not detonate these explosives if they walk over them. If you encounter an enemy remote charge or proximity mine, it will appear on the HUD as a red icon. The only way to clear out these explosives is with explosives of your own. Toss a grenade or deploy another explosive weapon to detonate the opposing team’s booby traps—you’ll get a 50-point EOD score for making the map safer for your teammates.
Melee Combat
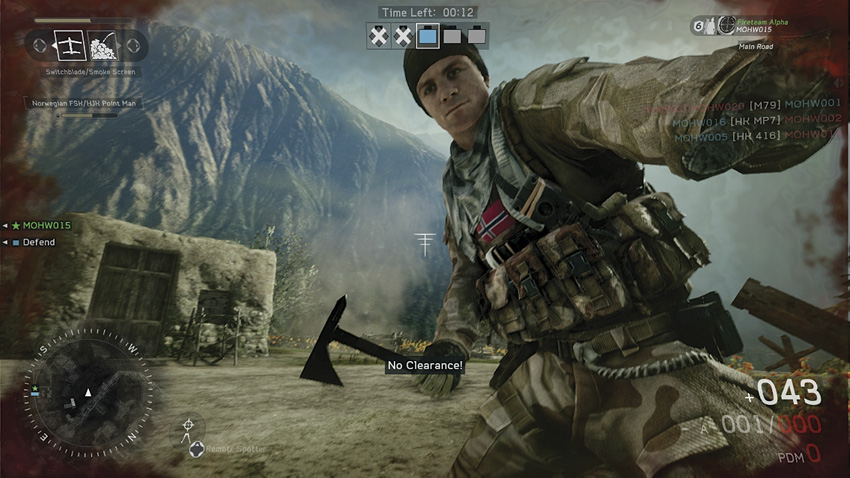
This isn’t the way you want to die. Try using the tomahawk on opponents who are distracted, with their backs turned to you.
In Medal of Honor Warfighter, all classes and units are equipped with a tomahawk, serving as a brutal (and lethal) melee weapon. However, never go charging at an opponent while swinging this small, bladed instrument unless you want to get shot in the face. For best results, always attack opponents from behind for a quick melee kill. If you attack an opponent from the front or side, it requires two swings to take them down. But don’t get greedy. If you’re busy trailing an enemy from behind, there’s a good chance another opponent will shoot you in the back…or take you down with a tomahawk of their own. So if your target starts running away from you, settle for shooting the enemy in the back instead of chasing your foe halfway across the map like a crazed, axe-wielding lunatic.
Scoring & Stats
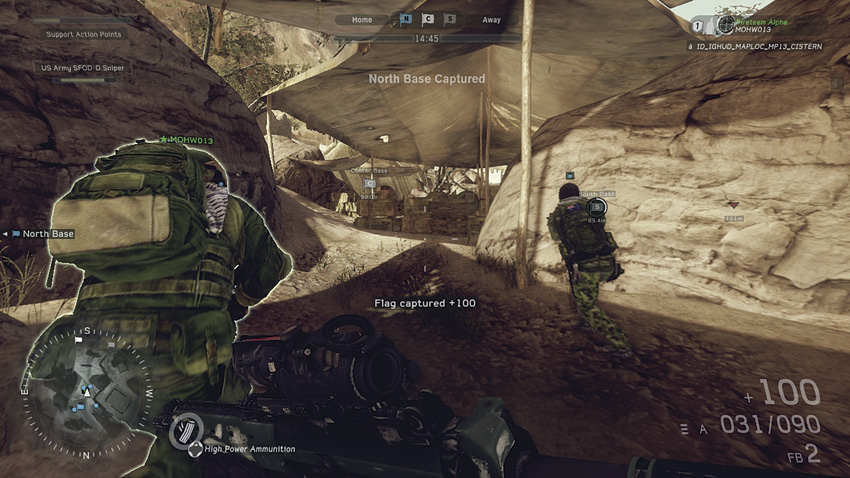
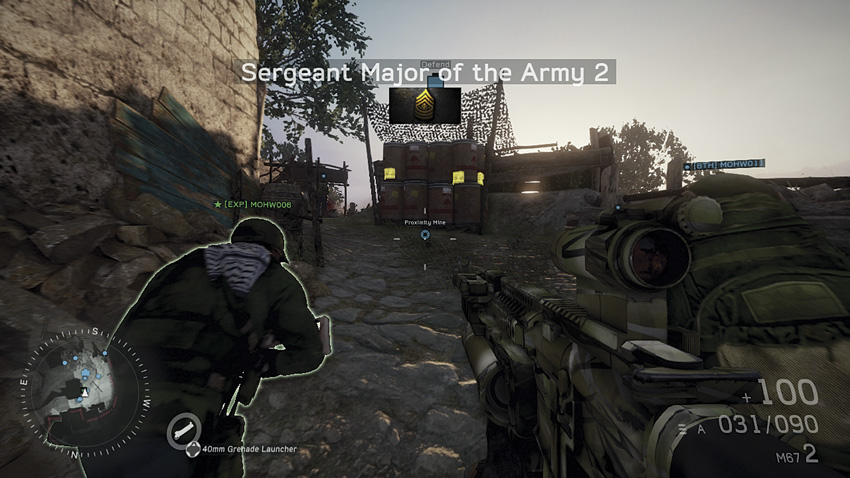
There’s more ways to earn points than scoring kills. Each action performed (and points awarded) appears in white text below the reticle on the HUD.
Almost every action you perform in multiplayer earns you points. The points you earn are tallied from round to round, accumulating over time, ultimately determining your overall rank and class progression. Players gain experience by performing actions that result in points on the field of battle. Points are gained by performing a wide range of actions and by completing certain game mode-specific goals, such as destroying or capturing objectives. You even gain points for actions performed by your fireteam buddy. Leveling up unlocks new units along with weapons and attachments. The classes, including their progression and unlocks, are covered in detail in the Classes and Weapons section. For a complete scoring breakdown, flip to The Warfighter Compendium section at the back of the guide.
Scoreboard & Leaderboards
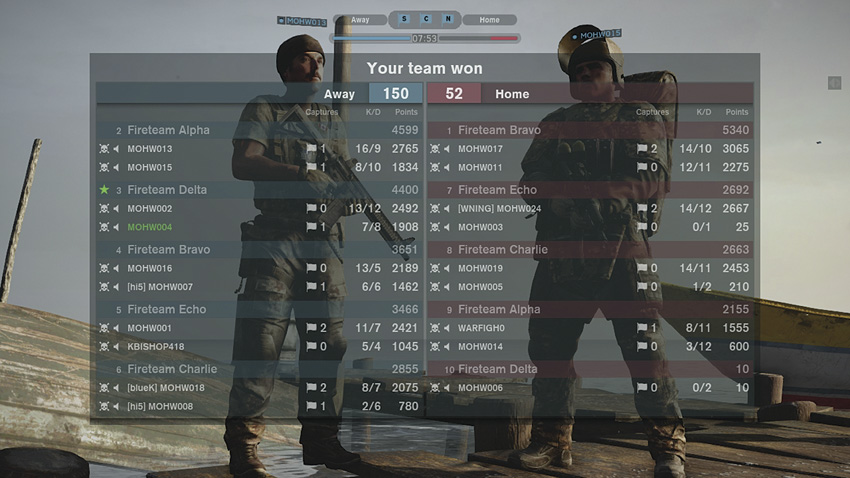
The scoreboard can be viewed at any time during a match and is always displayed at the end of each round.
Want to see how you stack up against the competition? During a match you can access the Scoreboard at any time. This shows your ranking within your team based on your points earned. It also shows your kill/death ratio. The Leaderboard offers a much broader view of the competition, ranking every player on each respective platform. Select the Stats and Leaderboards option in the Main menu to sort through this dynamic collection of data. By default, the player with the highest points appears atop the Top Players leaderboard. But these rankings are fluid and can also be sorted to show the player with the highest score, kills, or play time—recorded in days, hours, and minutes.
Service Record
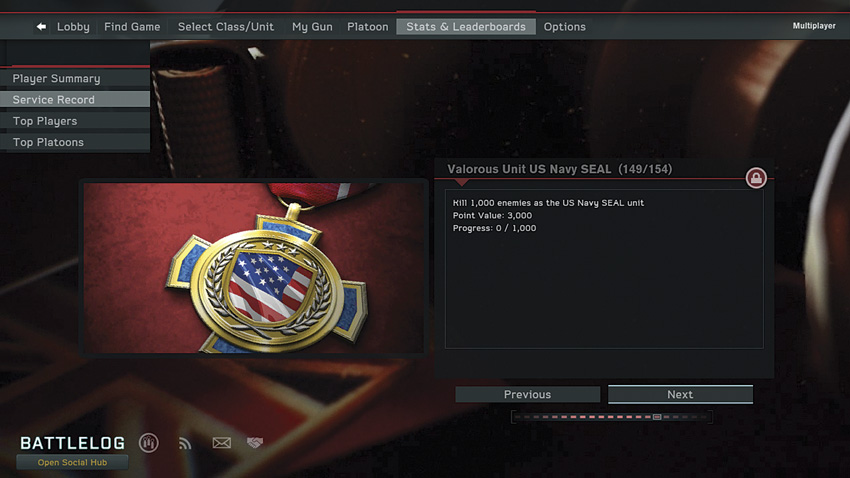
Check out the Service Record screen to learn exactly what you must do to earn new equipment and awards.
For greater detail on personal performance during your multiplayer career choose the Service Record option under Stats & Leaderboards from the Main menu. The Service Record screen shows you more specifics about your profile pertaining to unlocks and progression. Here you can browse through all available unlocks, ranging from nationalities, ribbons, and medals. In all, there are 154 unlocks, each with their own specific criteria. From the Service Record screen you can browse through all available unlocks and check your progress toward attaining each.
Scorechain & Support Actions
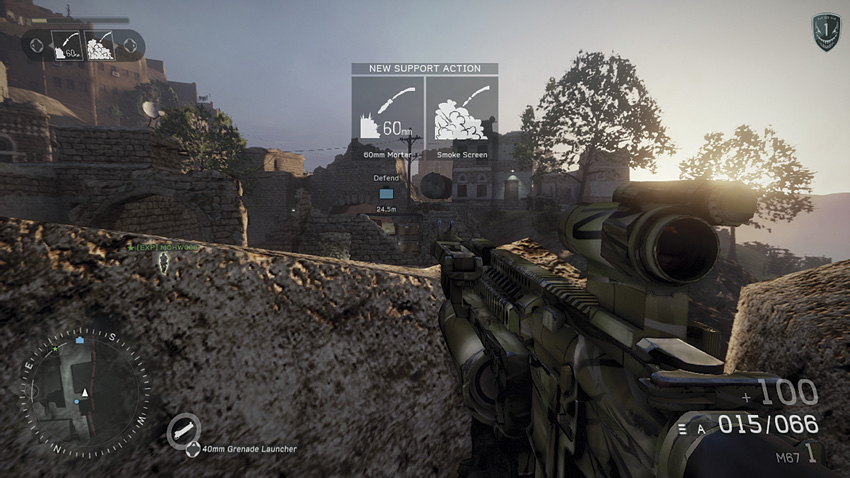
All points earned apply to your scorechain. Each scorechain level allows you to choose an offensive or defensive support action. If you die, the scorechain resets to zero.
The scorechain system rewards skilled players with an increasing powerful array of offensive and defensive support actions. You earn points by shooting other players or by performing certain in-game actions, as described in the previous section. Once you begin accruing points, the scorechain begins. The scorechain builds as long as you remain alive, but is reset to zero when you die. However, if you die before using a support action, the earned support actions can still be used upon respawn. At 400-point intervals, players are awarded support actions, which can be activated to provide an offensive or defensive boost to the team. There are a variety of support actions to choose from based on your selected class—all classes have different offensive support actions but the defensive support actions are the same. Here’s a quick breakdown of the support actions available to each class.
Support Actions
Assaulter
| Level | Points Req. | Offensive | Defensive |
| 1 | 400 | 60mm Mortar | Smoke Screen |
| 2 | 900 | Guided Missile | Fireteam Replenish |
| 3 | 1,500 | Cluster Bomb | RQ-7 Shadow |
| 4 | 2,300 | Apache Pilot | Apache Pilot |
Demolitions
| Level | Points Req. | Offensive | Defensive |
| 1 | 400 | M32 | Smoke Screen |
| 2 | 900 | SMAW | Fireteam Replenish |
| 3 | 1,500 | MUSA Robot | RQ-7 Shadow |
| 4 | 2,300 | Apache Pilot | Apache Pilot |
Heavy Gunner
| Level | Points Req. | Offensive | Defensive |
| 1 | 400 | Blackhawk Transport | Smoke Screen |
| 2 | 900 | Mk19 | Fireteam Replenish |
| 3 | 1,500 | MH-60L DAP Blackhawk | RQ-7 Shadow |
| 4 | 2,300 | Apache Pilot | Apache Pilot |
Point Man
| Level | Points Req. | Offensive | Defensive |
| 1 | 400 | RQ-11 Raven | Smoke Screen |
| 2 | 900 | Airburst Mortar | Fireteam Replenish |
| 3 | 1,500 | AH-6J Little Bird | RQ-7 Shadow |
| 4 | 2,300 | Apache Pilot | Apache Pilot |
Sniper
| Level | Points Req. | Offensive | Defensive |
| 1 | 400 | Switchblade | Smoke Screen |
| 2 | 900 | 81mm Mortar | Fireteam Replenish |
| 3 | 1,500 | Rocket Artillery | RQ-7 Shadow |
| 4 | 2,300 | Apache Pilot | Apache Pilot |
Spec Ops
| Level | Points Req. | Offensive | Defensive |
| 1 | 400 | Radar Jammer | Smoke Screen |
| 2 | 900 | 120mm Dragon Fire | Fireteam Replenish |
| 3 | 1,500 | A-10 Warthog | RQ-7 Shadow |
| 4 | 2,300 | Apache Pilot | Apache Pilot |
Support actions are extra military assets that can be used against the opposition, such as artillery or air strikes. If you die while you have a support action that has not yet been activated, you may use it when you respawn. If you want to gain a different support action, you must rebuild your scorechain to the necessary level. A meter in the top left corner of the HUD displays the current level of your scorechain and the requirement for the next level. Using a granted support action will not cancel your scorechain, and you will keep getting better ones as long as you manage to stay alive. Make a habit of using your support actions as soon as they’re awarded. The points earned through activating these support actions can help build up the points required to achieve the next scorechain level.
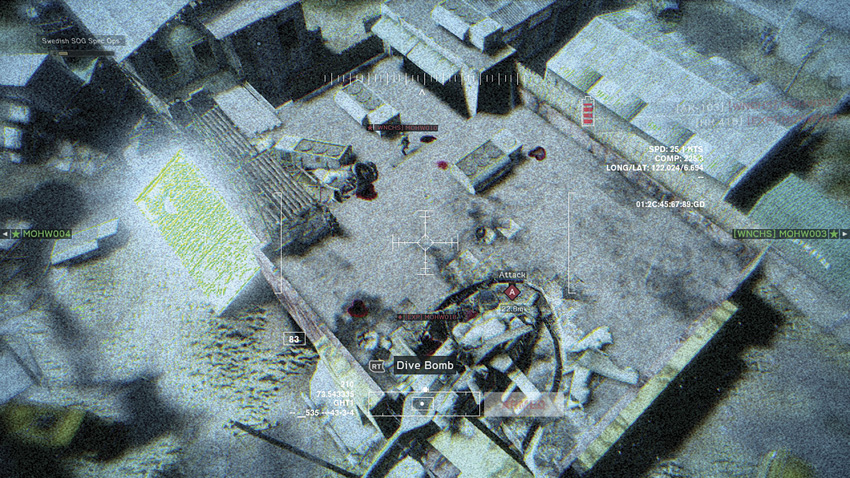
Offensive support actions like the sniper’s Switchblade or assaulter’s Guided Missile allow you to manually guide airborne weapons toward your opponents on the ground.
There are two types of support actions, offensive and defensive. Offensive support actions are usually different forms of artillery, like mortars or close air support, provided by fighter aircraft. Defensive support actions help you and your entire team by supplying intel and ammo. Most offensive support actions require you to designate a target area with a set of binoculars—just aim where you want the incoming munitions to hit and press the fire button. Defensive support actions are called in using your radio or cell phone—equip it and press fire. The defensive support actions influence all members of your team, but they don’t stack. Offensive support actions give you extra points if you manage to kill enemies with it but defensive actions guarantee you a specific amount of extra points with each deployment. For specifics on each class’s support actions, flip ahead to the Classes and Weapons section.
Game Modes
Medal of Honor Warfighter offers five multiplayer gameplay modes that support up to twenty players for ten-on-ten combat. Each mode is accessible via pre-set playlists residing on a dedicated server. Playlists are set by the server’s host and can be composed of several gameplay modes, which are cycled during online matches.
If there are not enough players present on a server, the match begins with a preround. During this period, all players are frozen and cannot move around the map. This is a good time to make adjustments to your class by selecting weapons, attachments, and camo patterns. After the preround is complete, or if no preround was needed, players proceed to the warmup. While warming up, players can still select their load-out and get ready to go into combat. Players remain frozen in place until the match is ready to begin. After a brief countdown, the players unfreeze and are able to begin the battle. While playing, if the number of players drops below the minimum threshold, the match will return to the preround to give other players a chance to join and repopulate the match. This ensures that every server is appropriately populated for combat.
Combat Mission
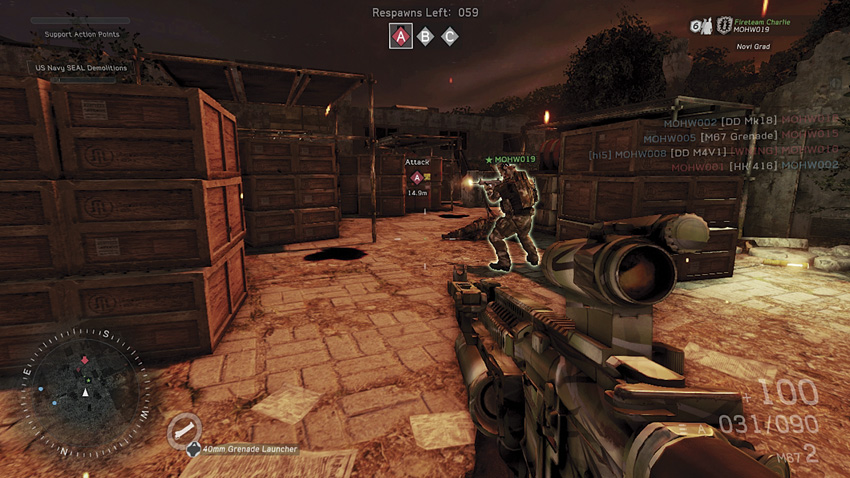
The area around objectives is extremely dangerous, so be ready to cover your buddy or teammate as they set or defuse a charge.
In Combat Mission, the away team are the attackers and the home team are the defenders. The attackers must destroy three consecutive objectives to win. The defenders are tasked with stopping the attackers at any cost. As the away team clears objectives, new areas of the map are unlocked, which then reveals the next objective of the attackers. After each round, the sides switch, allowing both teams to have a chance to be on the offensive. The counter at the top of the HUD represents the remaining reinforcements for the away team. If this counter reaches zero, the match ends and the attackers are stopped in their tracks. However, if the attackers destroy all three objectives before the counter reaches zero, they claim victory. The counter resets after each objective is destroyed, giving the attackers more reinforcements with each objective they destroy.
Sector Control
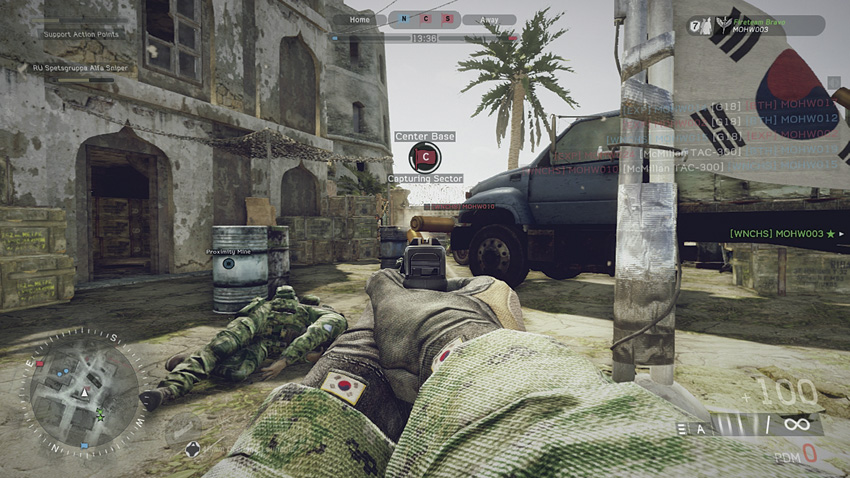
Capturing flags is a quick way to earn a lot of points. But don’t forget to defend them as well.
Sector Control forces two sides to fight for possession of three sectors: North Base, South Base, and Center Base. These sectors are represented by flags. Holding an objective causes your team to accrue control points, tracked within the blue and red meters at the top of the HUD. The first team to fill their meter wins. If time expires before either meter is completely full, the team the fullest meter wins. Stand close to flags to capture them. The more friendly units nearby, the faster the capturing process goes—and the more flags your team holds, the faster your team’s meter fills. Sectors can be lost and recaptured as the match goes on. During the match, study the team meters at the top of the HUD—the blue meter represents your team’s score and the red meter shows the opposing team’s score. If your team is trailing behind, capture and hold more flags. Once a flag is captured, take efforts to defend it. Leaving a flag undefended just makes it easier for the opposing team to capture it.
Hotspot
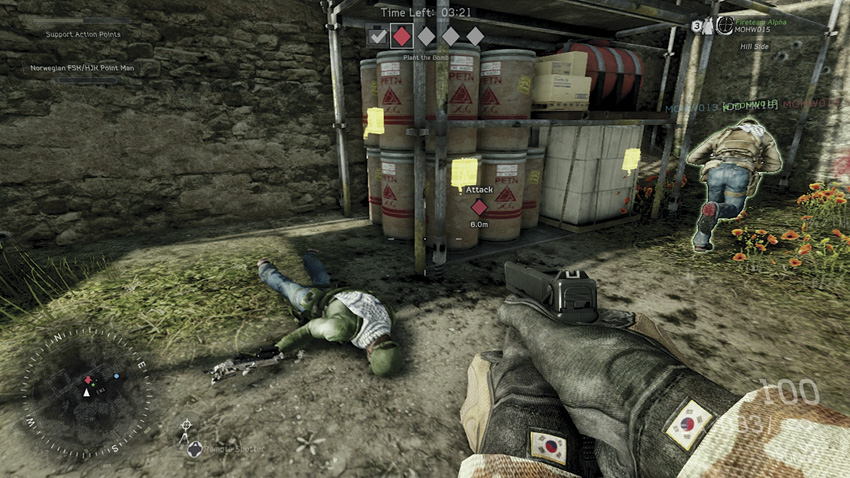
In Hotspot, there are multiple spots where you can plant a charge at the target location as indicated by the yellow charge markers.
Hotspot plays similar to Combat Mission, but with a twist. There are a total of five potential targets on the map. Soon after the match begins, one of five targets is chosen at random, prompting both teams to race to the location—the attacking team must plant a charge and the defending team must prevent the destruction of the target. Once the attackers have planted a charge, they must then defend the target, preventing the opposing team from defusing the charge. Each target must be destroyed within three minutes, or else the defenders gain a point. If the attackers destroy three targets, they win the round. If the defenders stop the attackers three times, they win the round. After each target is destroyed or successfully defended, there’s a brief cool-down period before the next target is randomly selected, prompting another race to the new location. Since all potential target locations are known (and shown on the HUD as gray icons) it’s a good idea to position your team somewhere near the center of the map so they can quickly react when the next target location is identified.
Home run
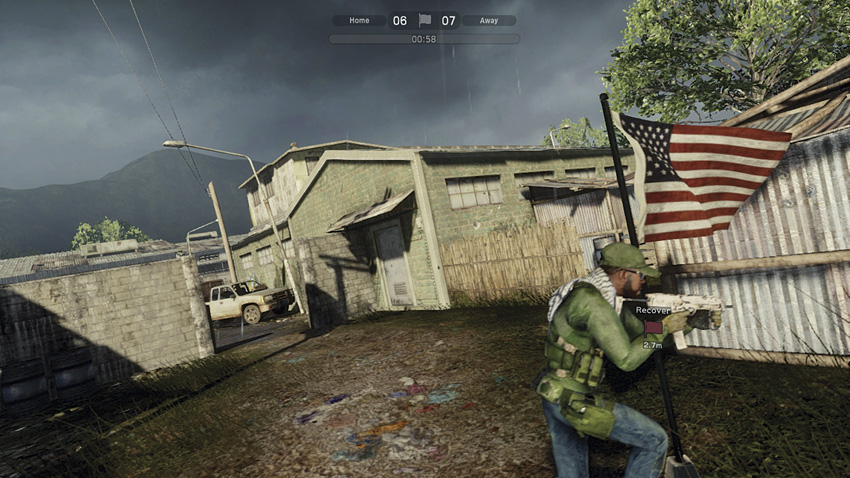
You can’t respawn in Home run. But if you die, you can still watch your teammates from a tracking camera view—and let them know if an opponent is chasing them!
Home Run is a six-on-six capture-the flag-style game mode with the away team playing as the attacker and the home team as the defender. There are two flags on the map that must be defended by the home team. Each player only gets one life per round, with no respawns. This makes the game mode rather intense, particularly as the number of players dwindles. It’s the job of the away team to sneak in, grab a flag, and rush it back to their team’s initial spawn point. Only one of the two flags must be captured to win each round, but since there are two flags, the defenders must keep an eye on both of them. The defenders can win the round by killing all the attackers or preventing a flag capture within the round’s timed duration. Once a flag is captured, the other flag disappears, making the captured flag the sole target of the defenders—they must kill the flag carrier before the flag carrier can escape. If the flag carrier is killed, the flag is dropped and remains stationary unless picked up by another attacker. Each team plays five rounds as the attacker and five rounds as the defender. The team who wins the most number of rounds is declared the winner of the match. Support actions are not available during Home Run matches.
Home Run Scoring
| Event | Points |
| Eliminate Attackers | 1 |
| Eliminate Defenders (Attackers do not have flag) | 1 |
| Eliminate Defenders (Attackers have flag) | 2 |
| Capture flag | 2 |
Team Deathmatch
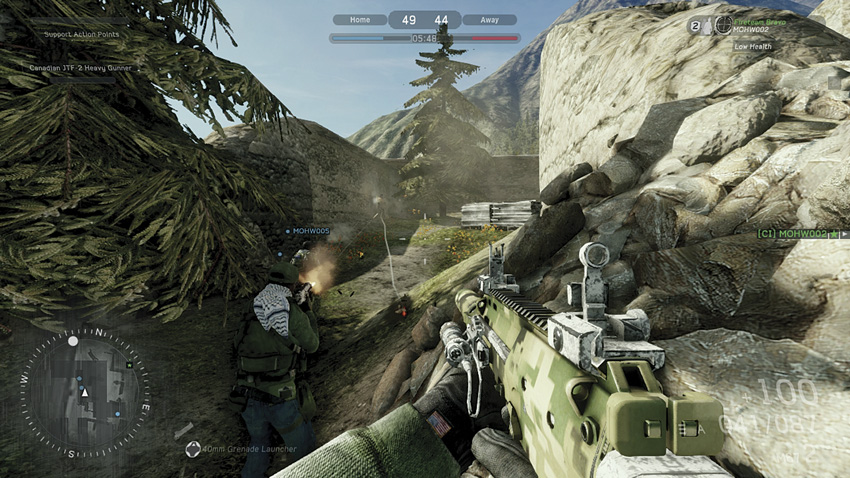
Safety in numbers definitely applies to Team Deathmatch, so move around with a small group of teammates and support each other.
Team Deathmatch is a ten-on-ten no-holds-barred battle in a confined area where you fight for kills and points. The two teams struggle to score 75 kills to win the match. Each kill earns your team a point, so take down your enemies to increase your team’s points, represented by the kill count number at the top of the HUD. If time runs out before either team scores 75 kills, the team with the most kills wins the match. It’s your choice whether to stick with your team or to go on a solo hunt. But be warned, the tempo is high and enemies can pop up from behind almost any corner. At the very least, stick close to your fireteam buddy so you can heal and resupply each other.
Real Ops
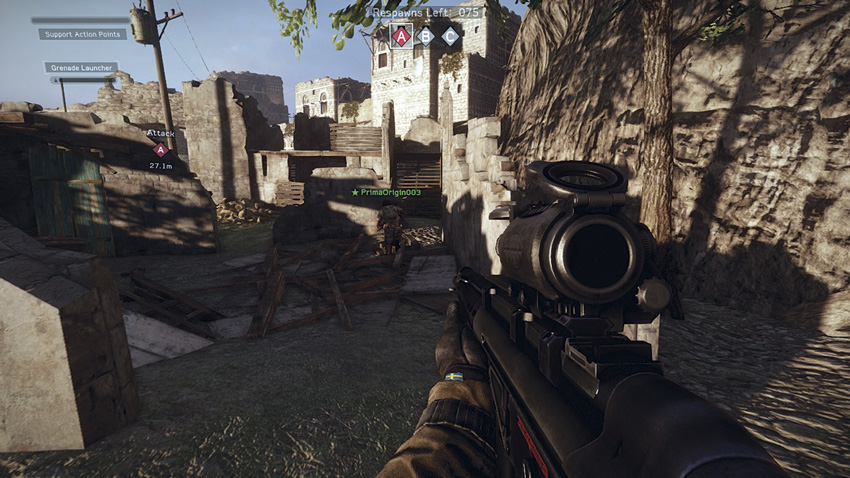
When playing with the Real Ops setting, nearly all HUD elements are removed, including the minimap and weapon reticle.
Multiplayer Tactics
Tactics is the combining of maneuvers and firepower to achieve an objective. Both movement and weapons have already been covered, so this section focuses on using the two together.
Plan Ahead
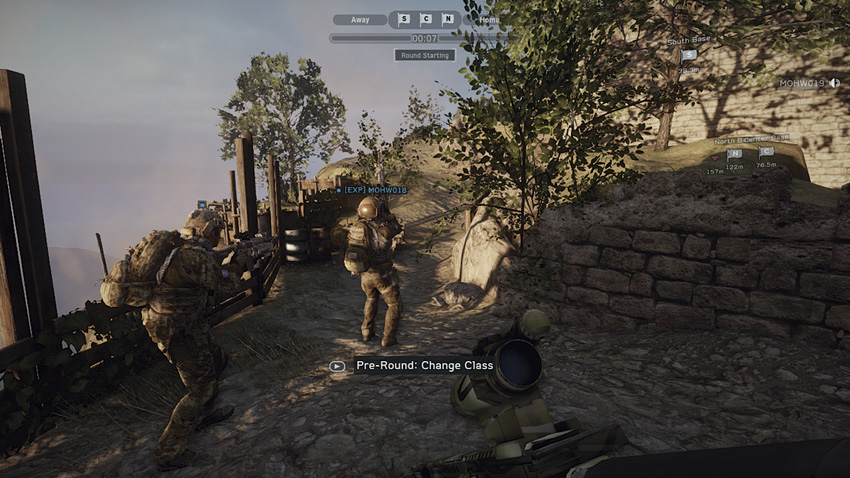
Before a round begins, take a few seconds to discuss tactics with your teammates. Any game plan is better than none.
There is an old saying that those who fail to plan, plan to fail. You need to come up with a plan before the bullets start flying. The best place to start is to look at your game mode’s objectives, since those determine victory or defeat. While killing the enemy is always a goal, it is often a means to an end. Instead, focus on the objectives. Do you have to destroy a target, defend a position, or just get to a certain point on the map?
Once you know what you must do, look at the map and examine the terrain. Where are you located? Where is the objective? How will you get there? These are all questions you need to ask yourself. Once you have determined how to get to the target, you must then consider how to accomplish your orders. Will you need to get in close to plant an explosive charge on the target? If so, how will you secure the perimeter? Finally, you need to take into account your opposition. What does the enemy have and where are they located? Usually you will not know that type of information until you get in close to the target and can see the enemy with your own eyes. Therefore, planning continues on the fly as you learn new information about enemy positions and actions. Stay in close contact with your fireteam buddy and teammates over headsets. The team that communicates is most likely to come out on top.
Cover
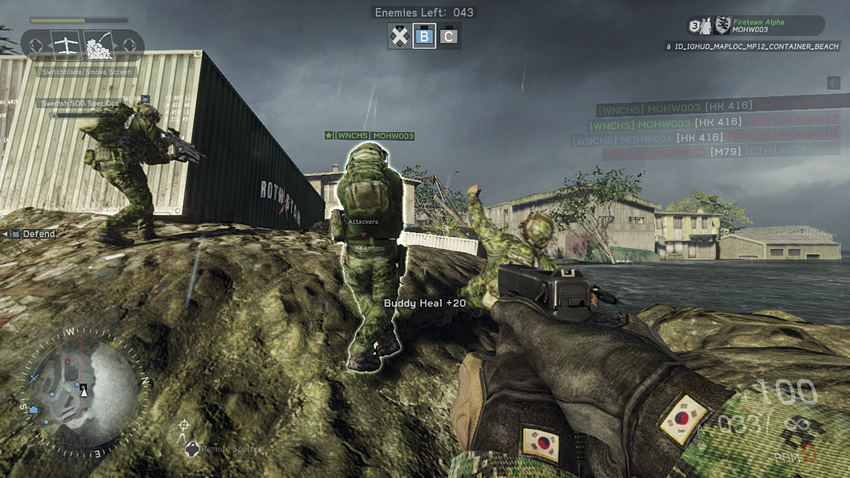
Objects made from metal, concrete, and rock provide the best protection against small arms fire. These metal shipping containers on Basilan Aftermath are ideal for absorbing incoming bullets.
Combat is very dangerous. Bullets and other deadly projectiles fly through the air and can kill you outright if they make contact. The concept of cover is to place something solid between you and the enemy that will stop those projectiles and keep you safe. The multiplayer maps are filled with objects that you can use as cover—buildings, walls, trees, rocks, earthen mounds, and so on. Some types of cover will stop small arms fire such as rifle bullets, but not stop the heavier machine gun fire. Walls of buildings will stop machine gun fire, but not rockets or grenade launchers. Therefore, pick cover that will protect you from the current threat—objects constructed from wood or flimsy sheet metal won’t stop a bullet.
Cover should become ingrained in your combat thinking. In addition to looking for enemies, you also need to be looking for cover. During a firefight, always stay behind cover. The only reason you leave cover is to move to another position with cover. If the cover is low, you may need to crouch down or drop prone behind it, standing only to fire over it. When moving from cover to cover, sprint to get there quicker. While you want to stay behind cover, you also want to try to deny the benefit of cover to your enemies. Destroying their cover is a way to do that. Another way is to reduce the effect of their cover by moving to hit them from a direction for which they have no cover. This is called flanking. For example, if an enemy is taking cover behind a wall, move around to the side of the wall so that the wall is no longer between you and your target. In the single-player campaign, your squad is great at holding an enemy’s attention, giving you the chance to flank, surprising threats from the side or rear. Try the same tactics in multiplayer, using teammates to provide support fire while you flank or vice versa.
Long-Range Combat
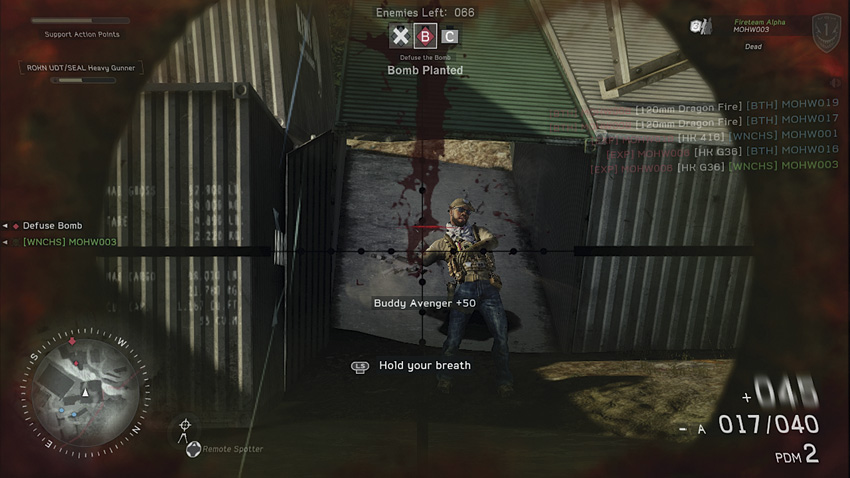
When sniping, try to focus your fire down narrow choke points. Also, be sure to hold your breath to steady your aim—you can hold your breath for approximately seven seconds.
If possible, it is best to try to attack the enemy at long range before they’re even aware of your presence. While sniper rifles work great for this type of combat, you can even use assault rifles, light machine guns, or rocket launchers to hit targets at long range. The key to winning at long range is to take your time. Drop prone, stay still, and use iron sights or scopes to increase your magnification and accuracy. As always, make sure you have some good cover in case the enemy decides to shoot back—if you can see them, they can see you. Also remember to fire in short bursts to ensure that more of your bullets hit the target.
Close-Quarters Combat
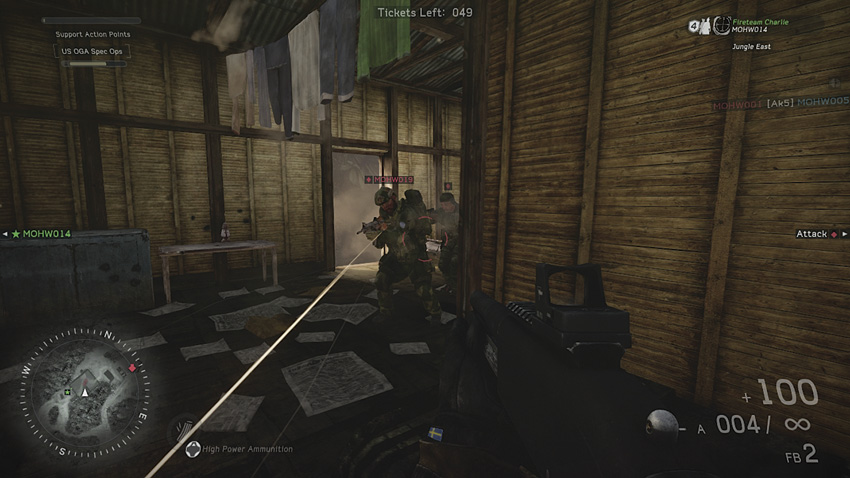
Quick reflexes trump accuracy in close-quarters gun battles like this. This is why shotguns are so effective.
This type of combat is the exact opposite of long-range combat. In close quarters, such as in a town or even within a building, you don’t have a lot of time to aim before shooting. However, at such short ranges, accuracy is not really a factor. Instead, you need a weapon that puts out a lot of firepower with some spread so you are more likely to get a hit while moving. Shotguns and submachine guns are great for close-quarters combat. Your minimap is also an important tool, especially if a friendly UAV is in the air. Since you can see where enemies are located, use this info to set up shots while strafing around a corners. Your weapon will already be aimed at the target as it appears on the minimap, which saves you just enough time to have the advantage and make the kill rather than be killed. Don’t forget to use grenades, which can be thrown around corners or over walls to hit enemies who think they are safe behind cover.
Community
Everything about Medal of Honor Warfighter’s multiplayer is designed to be played and enjoyed with friends. Even if your current friend list is nonexistent, there’s always the opportunity to make new friends while playing the game. Thanks to the Social Hub, platoons, and Battlelog, finding friends and starting games is fast and easy.
Social Hub
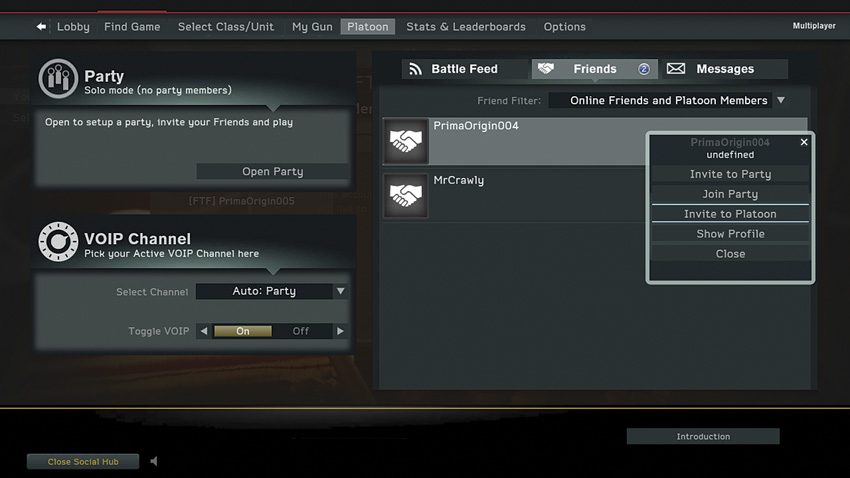
The Social Hub is the one-stop interface for managing friends and all invites.
The Social Hub overlay is available at any point during multiplayer, even during matches. Through this interface it’s possible to set up a party and invite friends. You can also change your VOIP channel, interact with the Battlelog feed, manage friends, and even set up platoons.
Friends
Need some friends to play with? Can’t seem to find a good server to play on? Select the Friends tab. Here you can find all your online friends or platoon mates connected to your Origin, Xbox Live, or PSN accounts. By selecting a friend from the list you can invite that friend to a party, game, or even a platoon. If a friend is already in a match, you can even join the server your friend is playing on.
Party Management
When opened, the party widget will let you set up your fireteams before even joining the game. Do you have the ultimate fireteam pairings already figured out? In here you can manage all of that. Are you the natural leader? Invite your friends and you get to be the party leader—which means you are the one selecting where and what mode to play. Once satisfied with your fireteam slot, both you and your fireteam buddy have the ability to lock yourself in. If you do this, nobody can swap fireteam slots with you.
Platoon Parties
Once you join a platoon, you need to represent them. The way you play platoon vs. platoon is via the special Platoon Party. To get playing all you need is four to six platoon mates online. Invite them to your party or join others. Once formed, you enter the Platoon Challenges screen where you can find opponents.
VOIP Channels
During multiplayer there are a couple of VOIP channels to choose from. By default the auto channel option is selected. The auto channel allows you to speak with your party members when not in a game. While playing, the auto channel only allows you to speak with your fireteam buddy. This default option is often preferred, allowing clear and concise communication between yourself and your fireteam buddy. If you want to keep talking to everyone in your party during a match, you can override the auto channel and select the party channel. This allows you to speak with everyone in your party, regardless of whether you’re in a game or not.
Battlelog Feed
Did you earn that hard-to-get medal? Did you beat your friend to get the first sniper unlock? The Battlelog feed is your way to keep tabs on your friends—and show them who’s boss. Share your achievements or show your appreciation by liking your friends’ achievements. The game is highly connected to the Battlelog website—this feed is just the tip of the iceberg. Go to the Battlelog website for much more content.
Messages
Got invited to that awesome platoon? Did that latest round with your best kill/death ratio pay off? Maybe one of your friends just invited you to his or her party? This is where you take action on those kind of things. Keep in mind that joining another platoon will have you leave your current one, so make your choice carefully.
Platoons
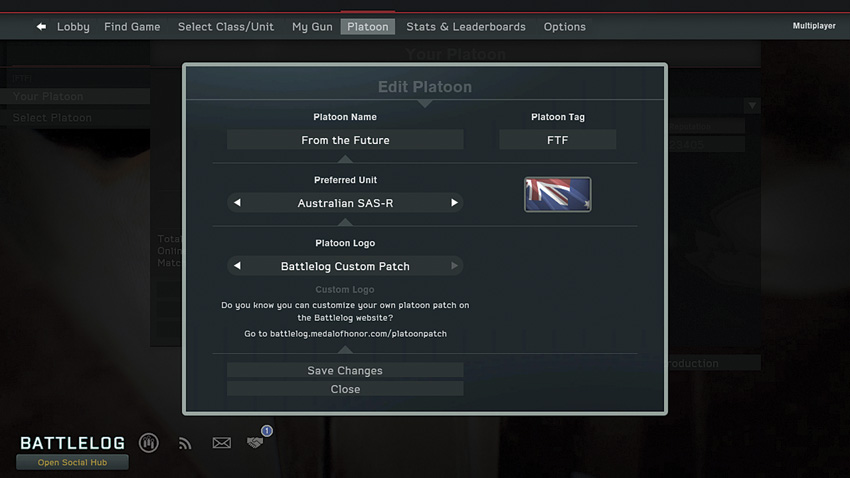
Creating a platoon is easy. But you’ll need to leave your current platoon before creating one of your own.
If you prefer playing with a tight group of friends who are serious about winning, you should always join a platoon or form one of your own. But when joining a platoon, choose carefully, because you can only be the member of one platoon at a time. You can find the Platoon Directory under the Platoon Browser, accessible from main Multiplayer menu. This interface allows you to open each platoon’s card for more detail. If you can’t find a suitable platoon to join, why don’t you create one? Use the Create Platoon option to start a new platoon. When creating a platoon, you must first select a name as well as a platoon tag—the platoon tag will appear next to your name on leaderboards and during the game. Next, choose your platoon’s unit—all 12 units can be selected. Finally, choose a platoon patch. You can choose from a variety of stock images for your platoon’s patch or you can create your own on the Battlelog website: battlelog.medalofhonor.com/platoonpatch
Battlelog
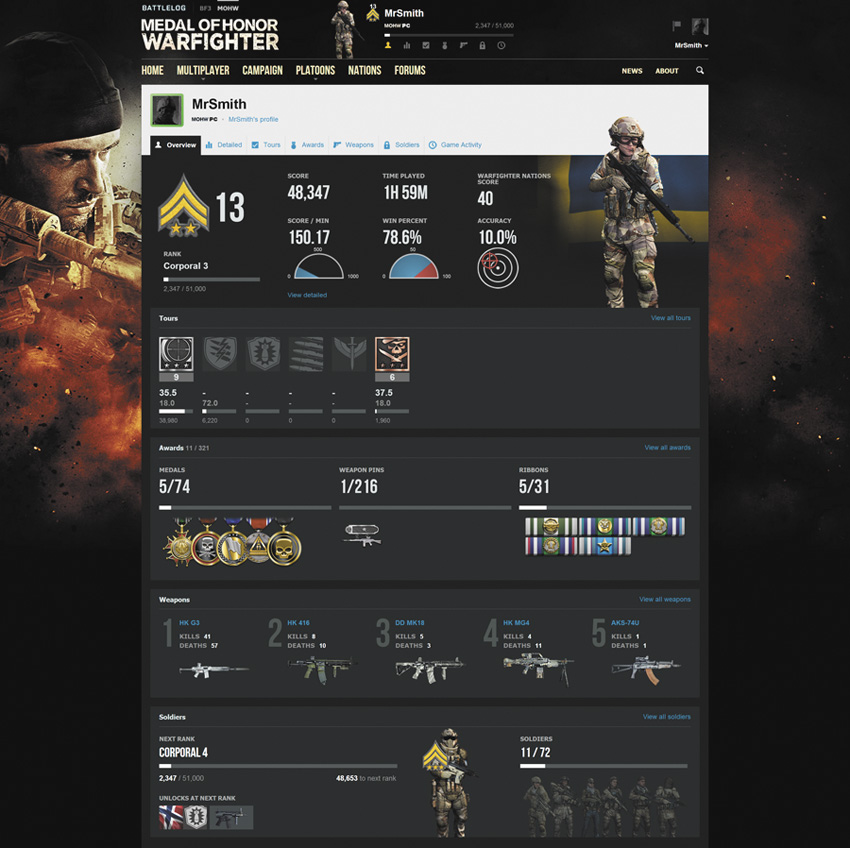
The Battlelog website offers a detailed breakdown of your multiplayer performance as well as the performance of your friends and platoon mates.
- URL: battlelog.medalofhonor.com
Battlelog is the center of your online experience, tracking nearly every action performed during multiplayer matches. Here you can find out exactly how accurate you are as well as boast or lament over your kill/death ratio. Awards and unlocks are also available to browse here, keeping you informed of how much work you need to do to unlock that next weapon or medal. If you’re familiar with Battlelog introduced by Battlefield 3, you’ll be pleasantly surprised by all the new features offered by Medal of Honor Warfighter. Most notable is the new Warfigher Nations meta game, allowing players to show their national pride by competing against other gamers around the globe. To access Battlelog, log in to the website using your Origin account. If playing on a console, you will need to link your Xbox Live or PSN account to your Origin account before you can access Battlelog.
Other Resources
Medal of Honor Website
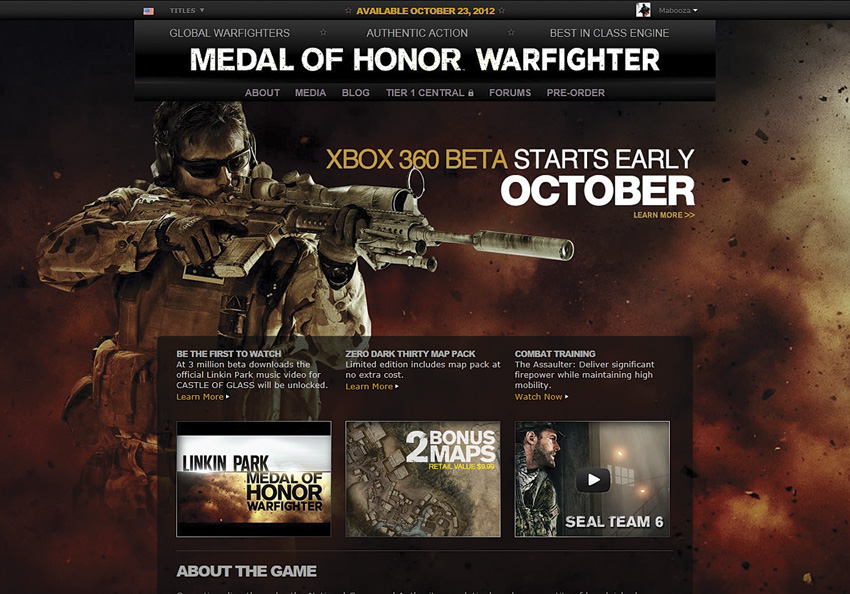
- URL: www.medalofhonor.com
This is the official Medal of Honor website. The forums here are a great way to connect with other players as well as get information directly from the developers.
Medal of Honor Blog
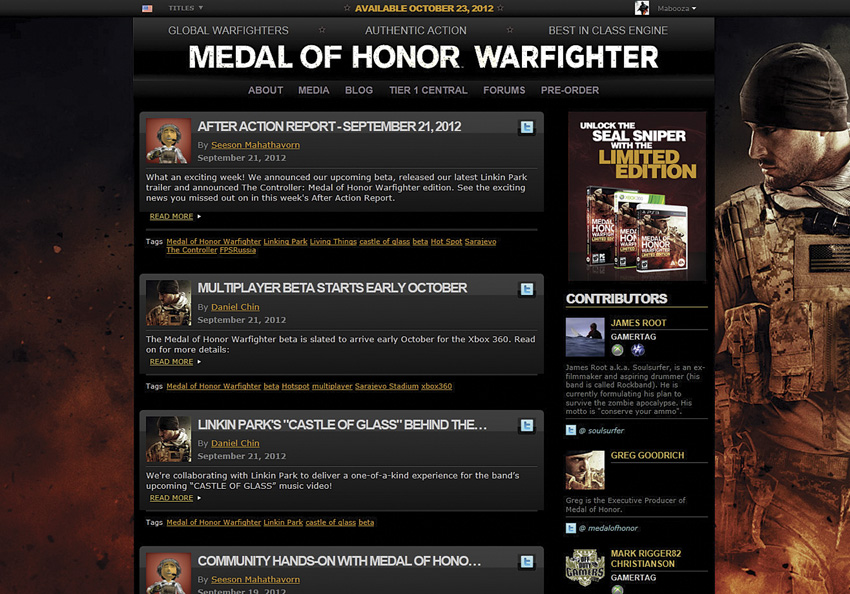
- URL: www.medalofhonor.com/blog
The Medal of Honor blog is updated regularly, and maintained by EA/Danger Close employees. This is your go-to stop for all news for everything related to Medal of Honor.
Off Duty Gamers
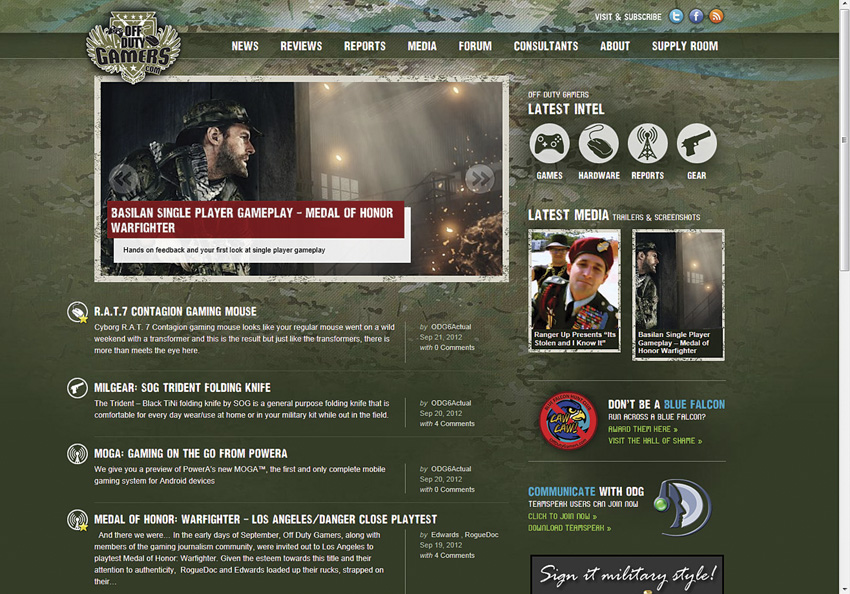
- URL: www.offdutygamers.com
This site is for all the active duty military and prior service veterans who enjoy video games and the associated hardware. This site is about delivering all the same news, reviews, and sense of community coupled with a collective bond of service and unique point of view.
MP1st
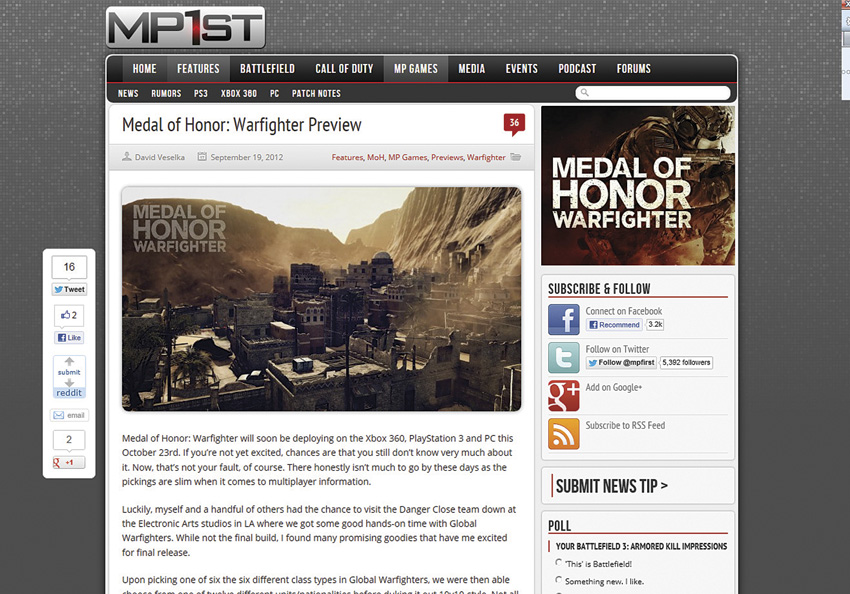
- URL: mp1st.com
This is what MP1st is all about: community and the games that bring us together. MP1st strives to create a place where online gamers can view some of the best gaming content on the web, as well as get the latest news about the games they love.
Evil Source Gaming
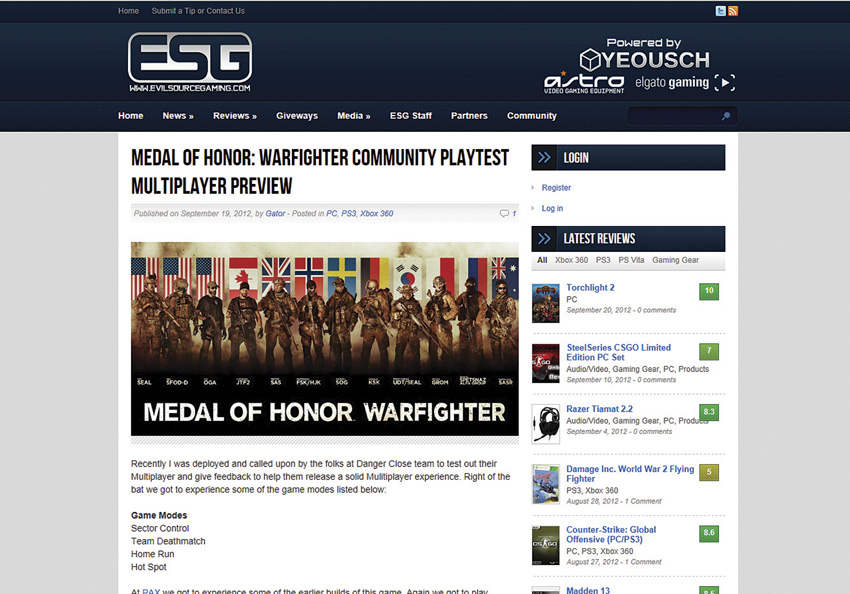
- URL: www.evilsourcegaming.com
Tune into ESG for the best gaming news, reviews, gameplay, giveaways, and more! From indie games to major publishers, the team at ESG will keep you informed on the things you want to know about.
Warfighter Nations Meta-Game
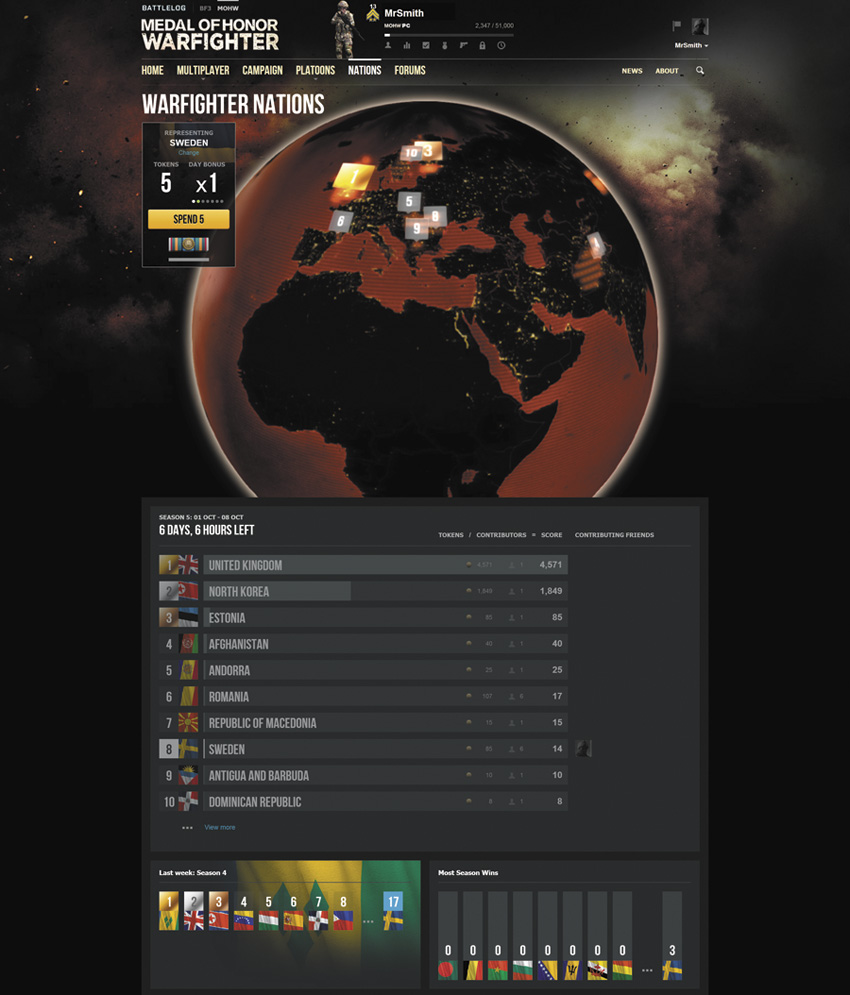
Tokens are earned while playing multiplayer matches, giving you the chance to represent your real-world country in an online battle for su- premacy and national pride. Tokens give players additional XP and are spent in the Warfighter Nations meta-game on Battlelog. When redeem- ing a total of ten tokens for their given nation, players earn a ribbon and XP—all 10 tokens don’t need to be handed in on the same day, or at the same time. The number of tokens each nation receives in a given time period are tracked on Battlelog. At regular intervals, Battlelog will declare a winning nation based on how many tokens were handed in for that nation during the time period. The winner is strictly for bragging rights/national pride. Players who hand in tokens on multiple days in a row will earn extra tokens. You don’t have to affiliate with the nation you live in—you can switch your affiliation at any point.
WARFIGHTER NATIONS SCORING SYSTEM
| Action | Tokens Awarded |
| Finish a Round | 1 |
| Win a Round | 2 |
| Featured Fireteam | 2 |
| Win Streak (3+ wins) | 1 |
| Win Streak (5+ wins) | 3 |
| Win Streak (10+ wins) | 5 |