
Medal of Honor: Warfighter Guide Multiplayer Multiplayer Maps
Novi Grad Warzone
Novi Grad Warzone
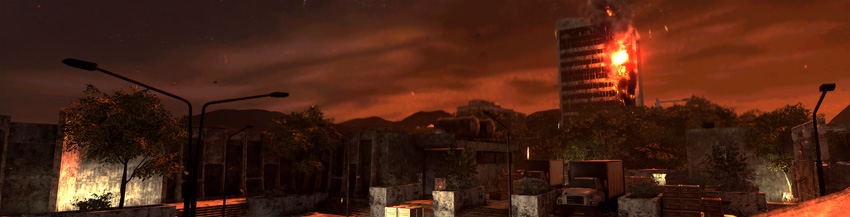
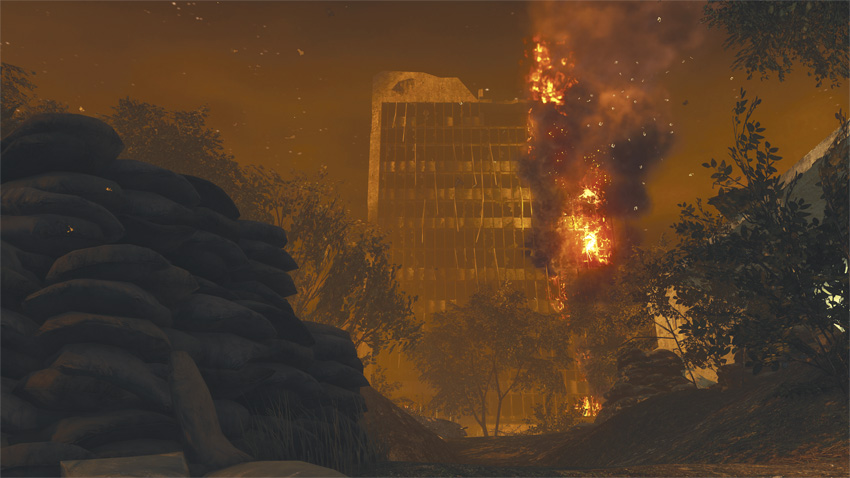
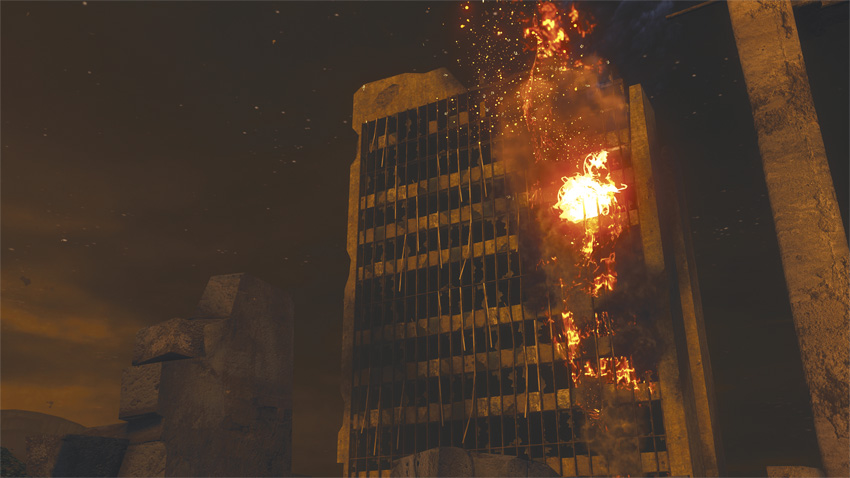
Sarajevo paid dearly during the war that ravaged the populace and surrounding region. Blatant disregard for collateral damage spared no district or neighborhood from the systematic destruction applied through the civil war. Recently, fires continue to destroy what little is left of its structures and history.
Tactical Overview
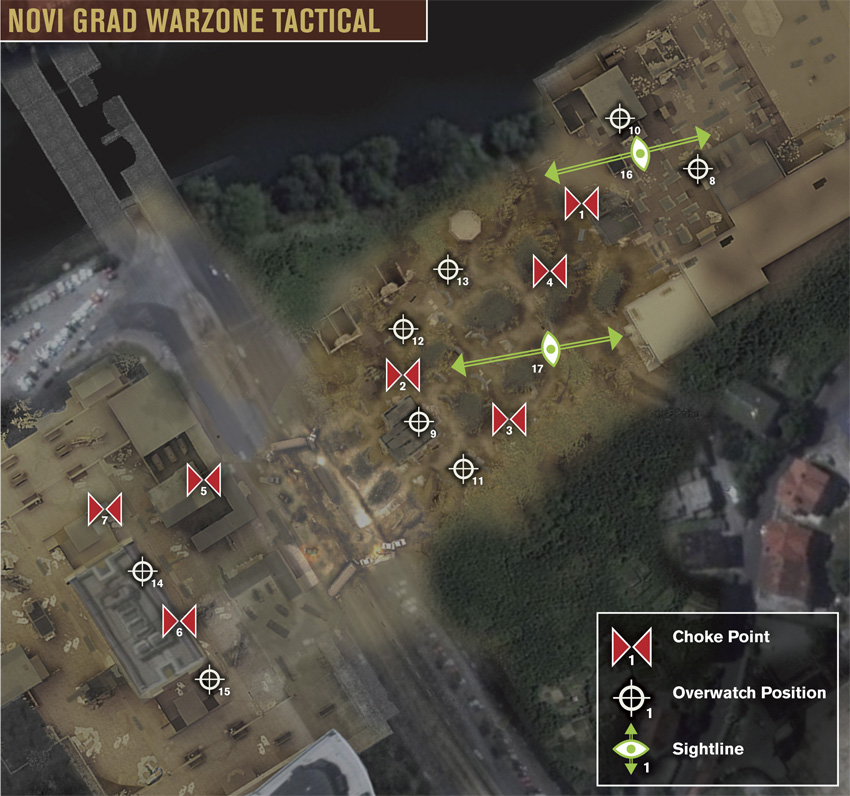
Smoldering fires and a smoke-filled sky cast an eerie red glow across this war-torn part of the city, giving it the feel of a nightmarish underworld. The fighting here takes place at night, further reducing visibility as both teams attempt to exert control over this urban wasteland. What is not apparently clear by looking at the map is the shift in elevation between the three distinct areas. To the east is a warehouse complex situated around a large, outdoor loading dock filled with numerous crates. This is the lowest spot on the map—everything to the west is uphill, giving teams that spawn on the west side of the map a significant advantage. At the center of the map is a small, damaged restroom, once part of the surrounding park. This structure sits atop the hill and is often the site of some intense close-quarters battles, particularly during Combat Mission and Hotspot. To the west is a large office park dominated by a skyscraper engulfed in flames. The fire is contained to the upper floors, leaving the bottom two floors accessible during Combat Mission and Team Deathmatch.
Choke Points
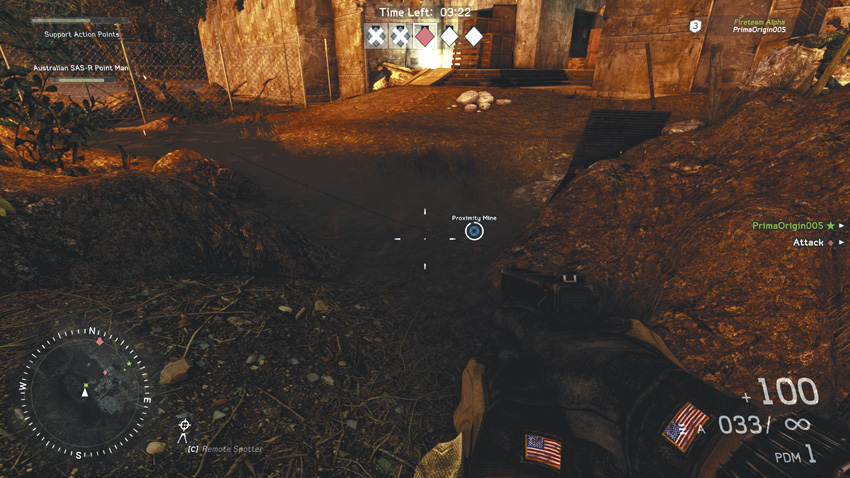

Recommended Weapons: Remote Charges, Proximity Mines, SMG, Sniper Rifle
During Combat Mission, Sector Control, and Hotspot, there is little cover along the small trails. Throw down proximity mines in the darker choke points. Sections of these dark paths funnel together, making unnoticed proximity mines unavoidable. If you backed up a bit to monitor the proximity mine, take out any stragglers that survive the explosion. Alternatively, the demolition class’s remote charge also works well.
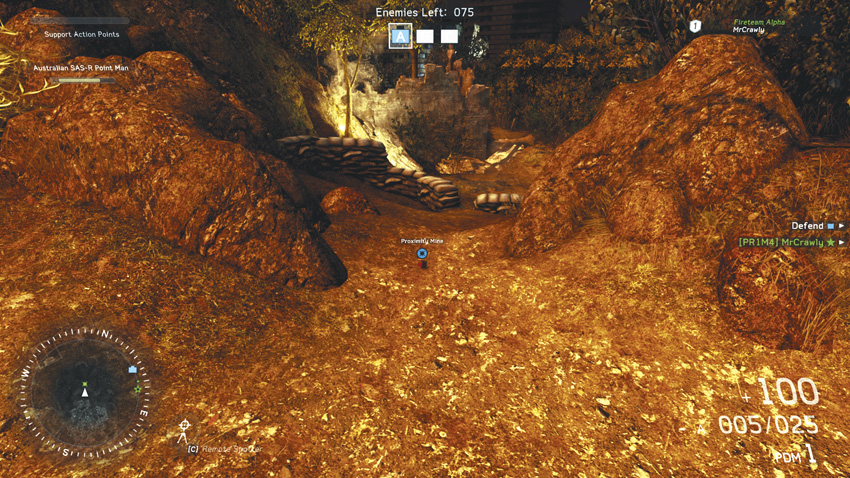

Recommended Weapons: Remote Charges, Proximity Mines, Assault Rifle, SMG, Sniper Rifle
This often trekked path is useful in Combat Mission, Sector Control, and Hotspot. Booby trap the path choke points between two bases, potential targets, or paths used to flank bomb site C. Your fireteam buddy and you should distract enemies enough as they advance for them to not notice any proximity mines or charges. Pick off survivors of the explosive blast.
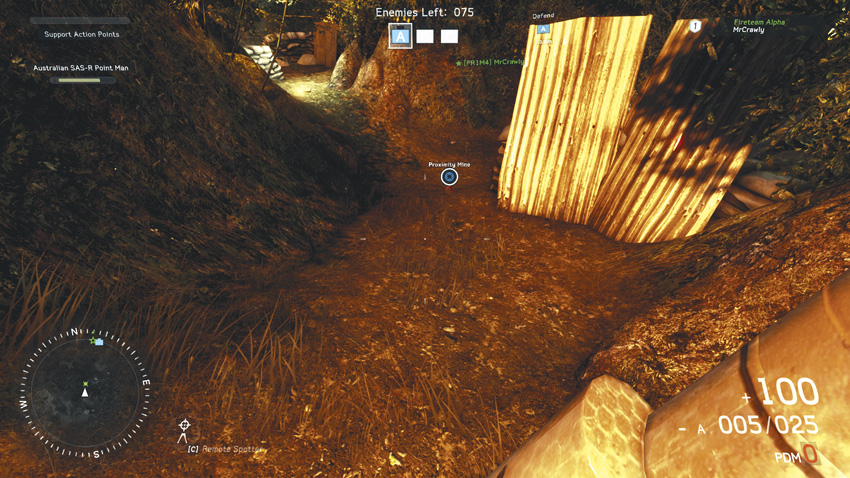

Recommended Weapons: Explosives, Assault Rifle, LMG, SMG, Sniper Rifle
Much like the last point, this choke point in Combat Mission, Sector Control, and Hotspot is a great place to throw down a proximity mine. This specific point bears a mention as it’s a high-traffic, three-way intersection while teams are defending Combat Mission’s bomb site B and a potential target during Hotspot. A mine placed directly in front of this spot will go completely unnoticed as enemies come around the sandbags. While moving through these trails, use mid- to long-range weapons as enemies can be far off behind cover.
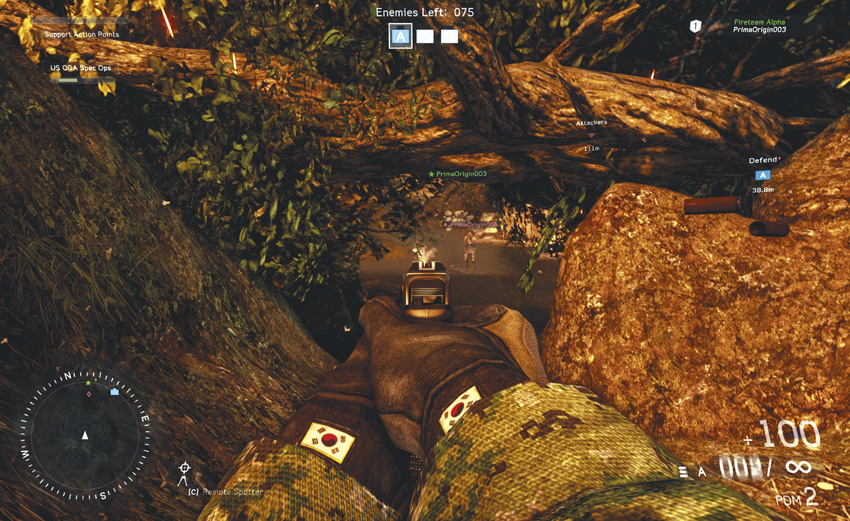

Recommended Weapons: Explosives, SMG, LMG, Sniper Rifle
While playing Combat Mission, Sector Control, or Hotspot, this little path is a particularly nasty proximity mine spot. Throw proximity mines under the fallen tree and they’re practically invisible. Enemies within the open area are exposed while you may have better cover. While crouched, lean and peek around the rock for cover or wait for enemies to come through for an ambush. Be careful of enemies flanking your six.
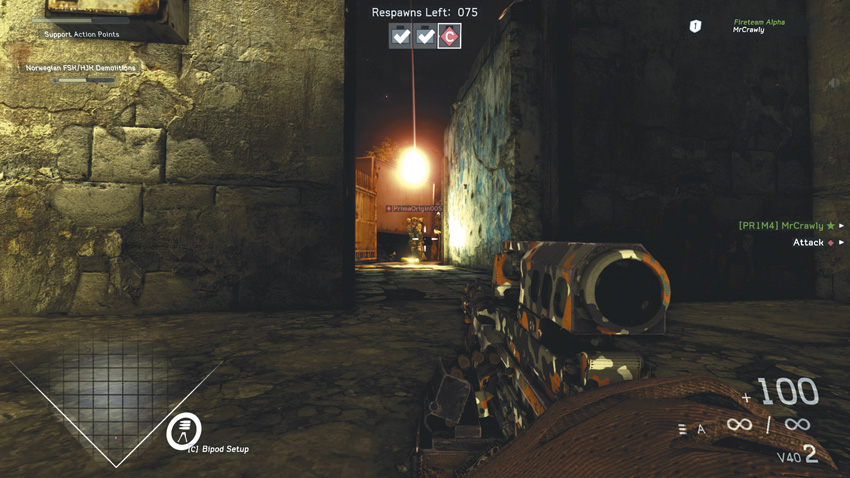

Recommended Weapons: Explosives, Assault Rifle, SMG, LMG (supported)
While defending Combat Mission’s bomb site C, hold the hallway by laying prone with a supported LMG in the dark for enemies flanking the defending team’s left side. Fire at will as enemies charge in. Have your fireteam buddy cover your exposed rear with perhaps an SMG or assault rifle. Once you’ve fired, enemies will know your position and likely throw grenades from around the corner.
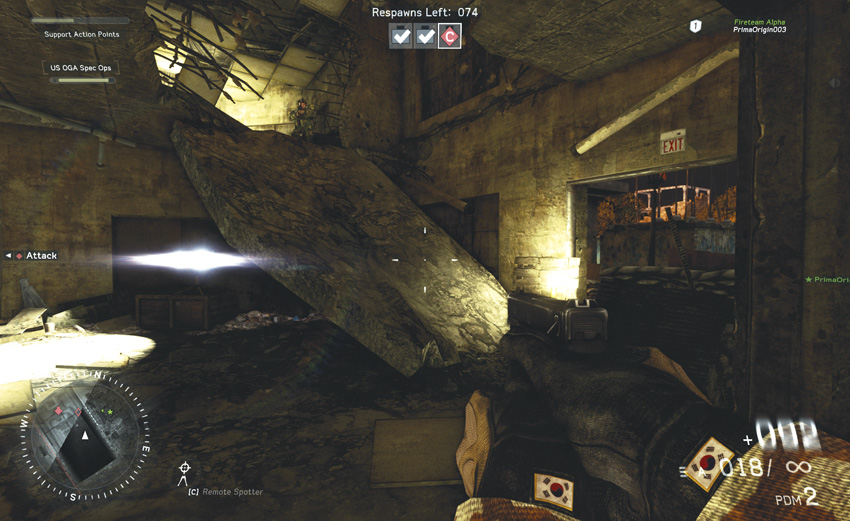

Recommended Weapons: Explosives, Shotgun, SMG, LMG
During Combat Mission’s bomb site C or in Team Deathmatch, this ramp will be a constant source of enemies, so bomb site defenders will have to cover this heavily. Its openness is great for throwing grenades up to and down from. Anyone caught on the ramp won’t have any cover, so be reasonably sure enemies aren’t within the area before climbing up or down. Alternate paths may be more efficient when assaulting bomb site C.
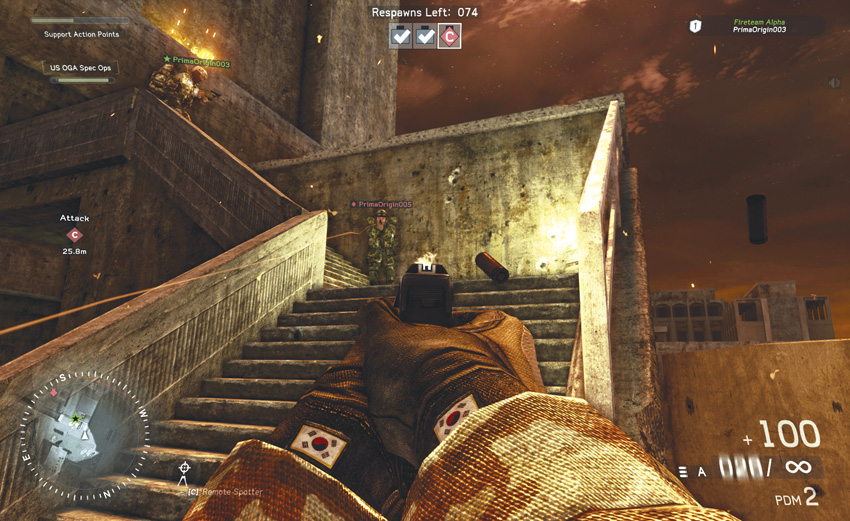

Recommended Weapons: Explosives, Assault Rifle, LMG, Shotgun, SMG
During Combat Mission, this staircase will be essential for defenders to hold. Attackers assaulting this position will have poor cover, while defenders will have a good overwatch of incoming enemies. Attackers will want to use this staircase due to the proximity of the bomb site directly at the top. Attackers can roll grenades down the stairs while defenders may be able to flank opponents with grenades. Defenders should use medium- to long-range weapons to defend against enemies coming from a distance, while attackers that have made it this far will likely want to use short-range weapons for pushing up the staircase.
Overwatch Positions
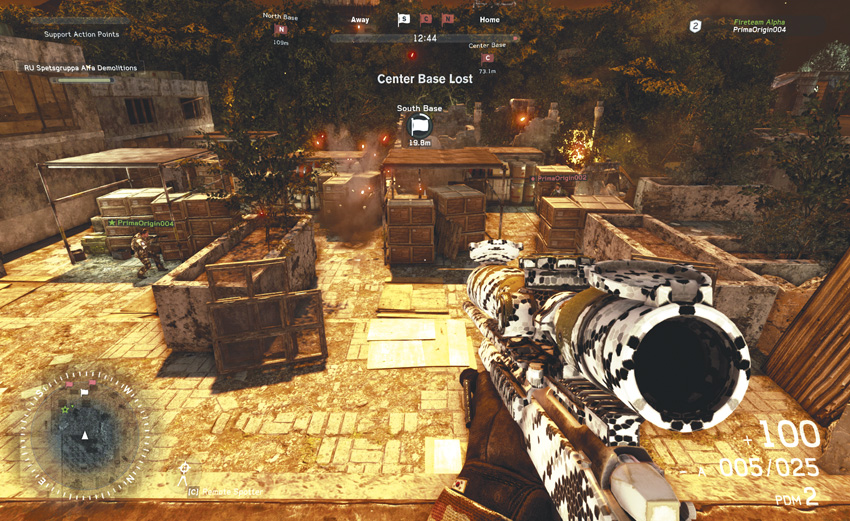

Recommended Weapons: Grenades, Sniper Rifle, LMG (supported)
This overwatch is useful during Combat Mission, Sector Control, and Hotspot. During Combat Mission and Sector Control, a supported sniper rifle or LMG has a clear view of the entire area. Post up here for a superb view of bomb site A during Combat Mission or to defend South Base during Sector Control. The window provides good cover as enemies become easy to pick off if they are too engaged with your teammates. Use grenades to flank anyone in this position. During Hotspot, it can look over two potential target areas.
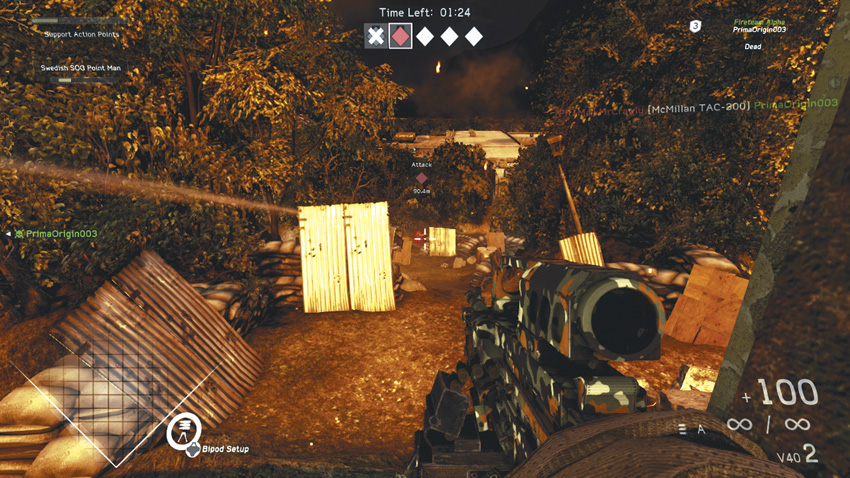

Recommended Weapons: Sniper Rifle, LMG (supported)
While within the restroom during Combat Mission, Sector Control, or Hotspot, climb on the TV below this window to get a clear view of anyone running up or across this center path. Enemies will have some cover using this uphill climb, but from this position any supported sniper rifle or LMG will have enough time to take them out. This position can be flanked from the left or right alternate paths into the building, so plant proximity mines.
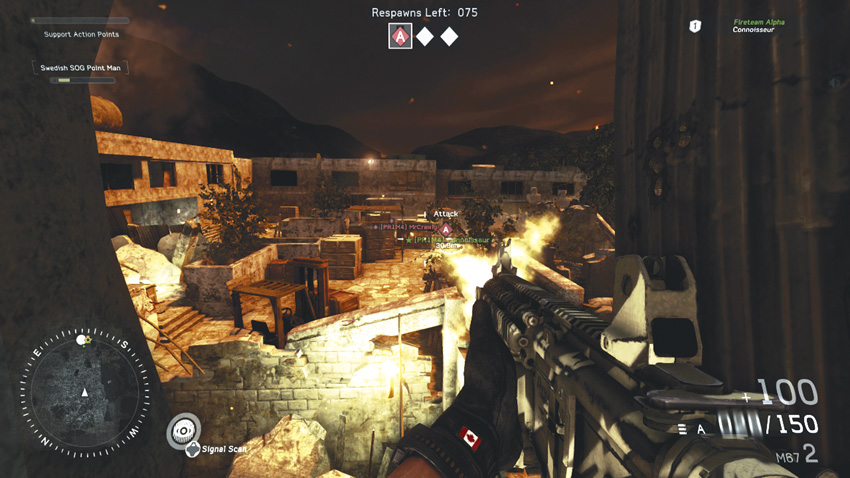

Recommended Weapons: Explosives, LMG, Sniper Rifle (supported)
This window overwatch near the loading dock is a viable option for defending or attacking two of Hotspot’s potential targets. During Combat Mission and Sector Control, it can be useful while attacking bomb site A or the South Base. Deploy a sniper rifle or LMG bipod for optimal results. Anyone using this window can be flanked from the stairs behind or simply shot from the first floor of the building. Place proximity mines to protect your flanks.
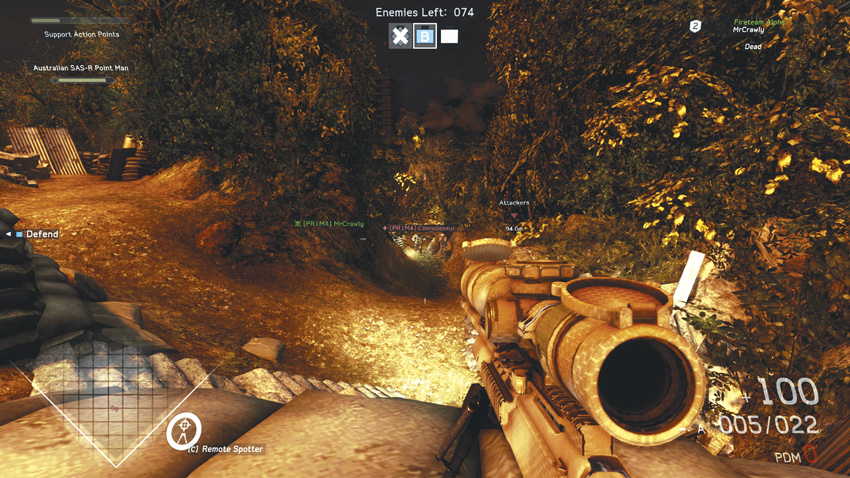

Recommended Weapons: Explosives, Assault Rifle, LMG, Sniper Rifle (supported)
While defending bomb site B in Combat Mission or the North Base in Sector Control, take up a position on the sandbags looking down this path to keep an eye on this intersection. The cover is good and provides a supported fire position, and the uphill advantage should be enough to defend the point. Enemies can flank on the left. Use mid- to long-range weapons if your teammate is deployed at this position.
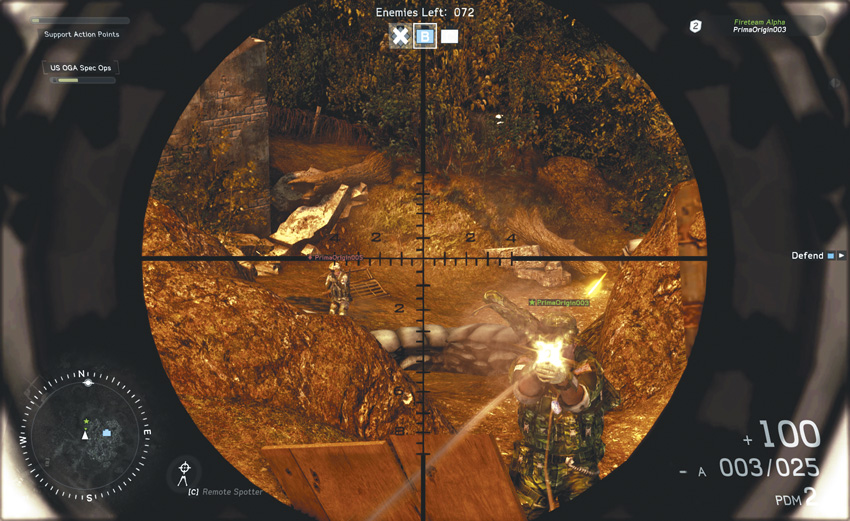

Recommended Weapons: Explosives, Assault Rifle, LMG, Sniper Rifle (supported)
During Combat Mission, Sector Control, and Hotspot, defend bomb site B, the North Base, or a potential target in Hotspot using this sandbag. Enemies on the path below can be seen from a good distance, so deploy a bipod for either a sniper rifle or LMG. The sandbags should provide enough cover from enemies attempting to run the gauntlet up the hill.
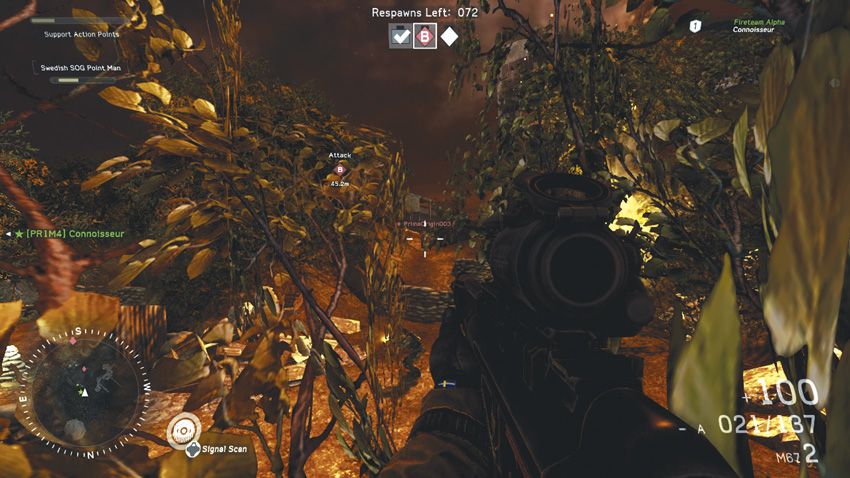

Recommended Weapons: All Weapons
During Combat Mission and Sector Control, this position provides a camouflaged view of an open area near bomb site B or the Center Base. In the open area, climb up the dirt mountainside among the bush, and you’ve become nearly invisible to the enemy. If the enemy happens to be aware, they may flank from the left or from the path in front. Any range weapon is good for an ambush from here. Throw a grenade while the enemy’s back is turned so you won’t give away your position.
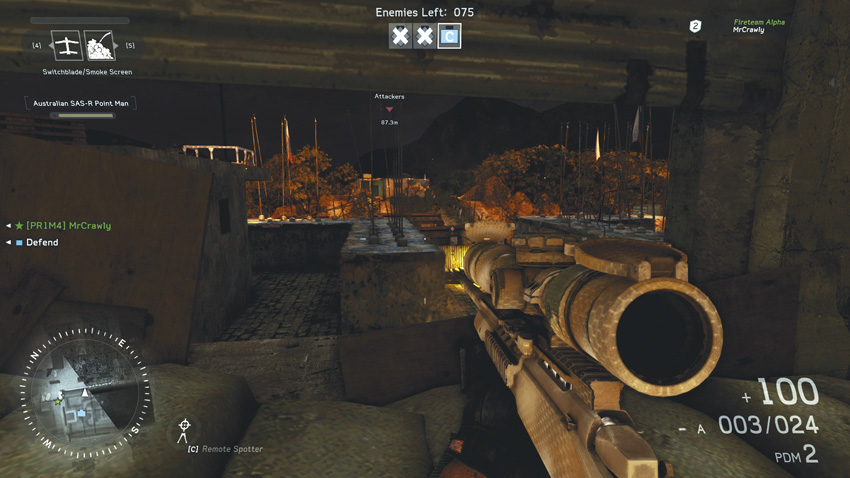

Recommended Weapon: LMG (supported)
During Combat Mission or Team Deathmatch, there is a small break in the wall good for defending bomb site C or to take out anyone in the area. A bipod is a viable option for longer-range shots or LMG suppressive fire. Enemies will come from the left and behind. During Combat Mission, watch out for enemy snipers in the building across the way.
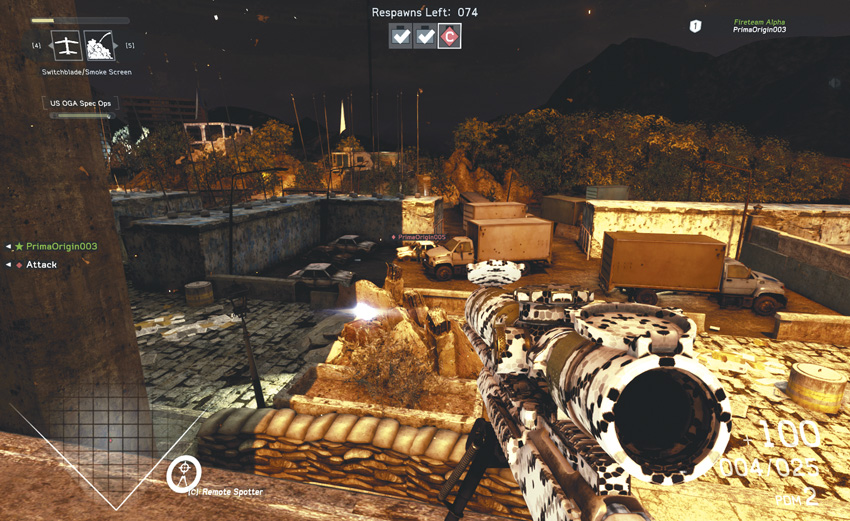

Recommended Weapons: LMG, Sniper Rifle (supported)
During Combat Mission and Team Deathmatch, deploy a bipod-supported sniper rifle or LMG on the staircase opposite of bomb site C. It’s a clear view of the parking lot for the LMG to handle, while a sniper rifle can pick off enemies beyond the parking lot. Move on quickly as it’s easily flanked from the left and right. Countersnipers will be aware of your position once you’ve taken a few shots, so move out quickly. Have a fireteam buddy nearby for support.
Sight Lines
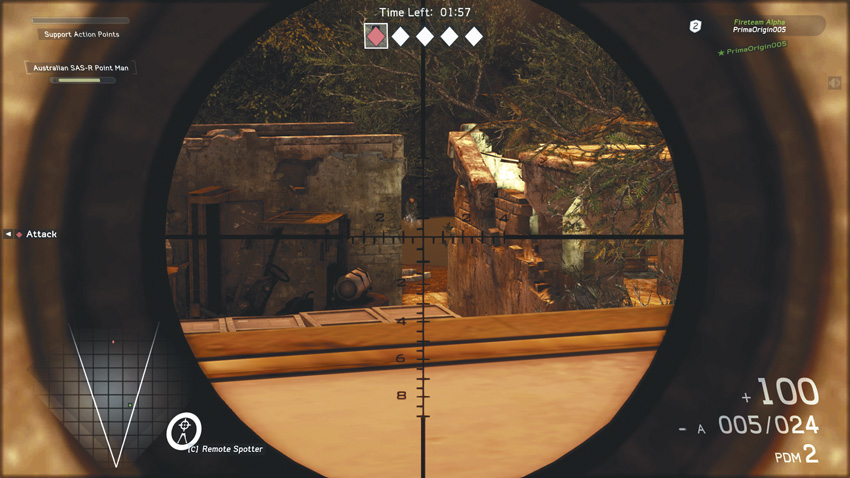

Recommended Weapons: LMG, Sniper Rifle (supported)
During Combat Mission, Sector Control, or Hotspot, hop up this truck’s bumper and climb up to the roof. Lay prone with a bipod on top of the truck for a good sight looking toward the path coming from Combat Mission’s bomb site A, a potential target in Hotspot, or Sector Control’s South Base. The distance is such that any enemies coming from the paths beyond the buildings won’t even see anyone on the truck. The down side is that once enemies see you, you’ll be flanked by enemy fire from everywhere.
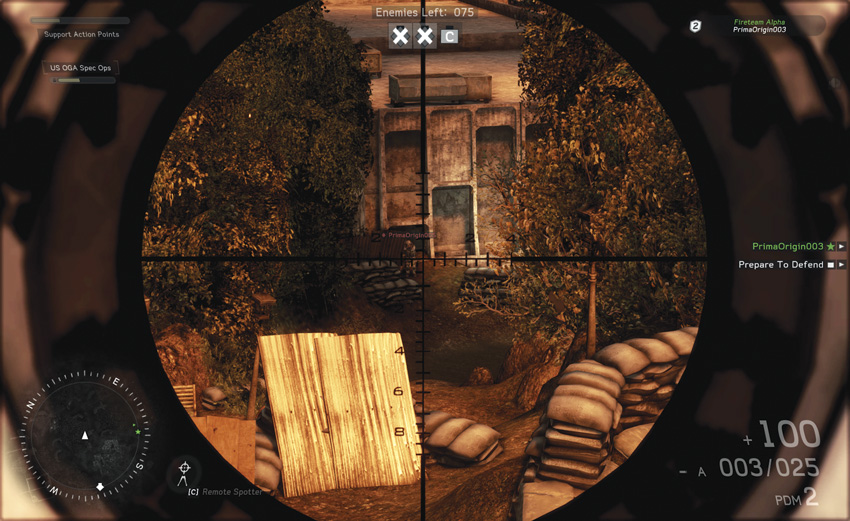

Recommended Weapon: Sniper Rifle
During Combat Mission, Sector Control, or Hotspot, while in the middle path, there’s a clear sight line looking far down the middle path and little to the right. While looking down the center path toward the South Base, climb up onto the centered sandbags to the left. You’re given a little cover, but not much. The elevated position is great for taking out enemies moving on a potential target or while defending bomb site B from enemies just leaving their spawn point. Don’t stay exposed for long, as you’ll likely be flanked from the left and right paths.
Combat Mission
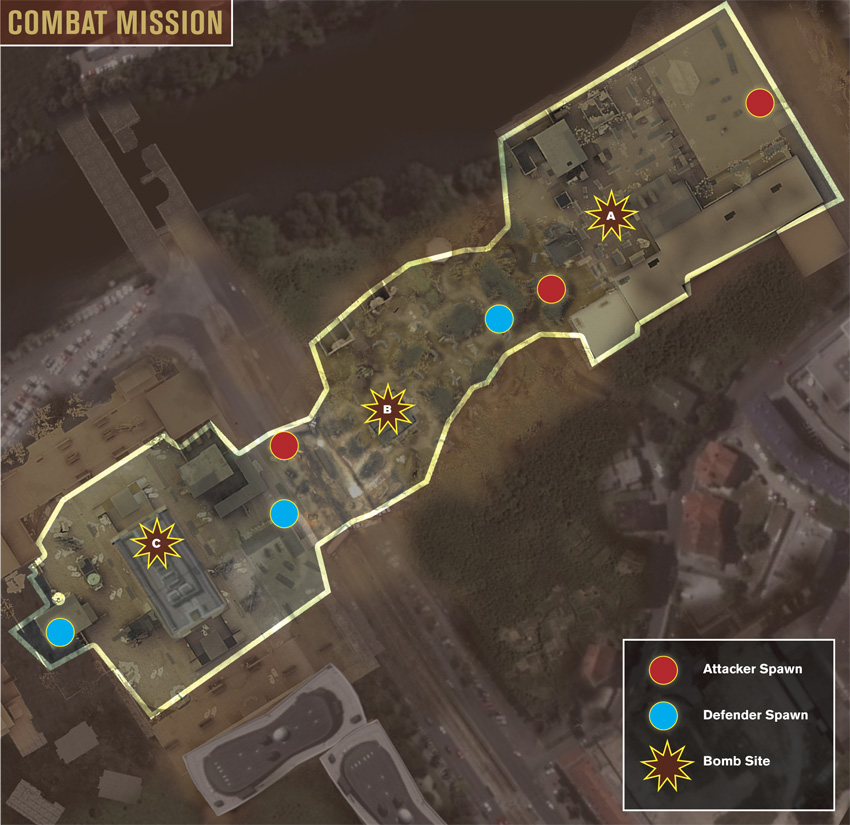
This battle starts out on the east side of the map, with bomb site A located on the large loading dock area. The maze of crates surrounding the bomb site often leads to point-blank engagements. If they fail to rush the site early on, the attackers must conduct a coordinated attack in an effort to overwhelm the defenders here before they can plant a charge. Deploying a Smoke Screen and/or UAV can definitely aid both teams in their effort to secure the loading dock. In the second phase of the battle, bomb site B is located within the restroom at the center of the map. Here the defenders have the upper hand, holding the high ground as the attackers charge up the crooked hillside paths. These narrow paths serve as excellent choke points for the defenders, ideal for stopping the attackers once and for all. Instead of charging up the center path, the attackers should look for flanking paths along the north or south sides. If the attackers manage to detonate bomb site B, the final fight takes place at the skyscraper to the west. Bomb site C is located on the second floor of this building, prompting heated firefights along the stairways and ramps leading up to this floor. While long-range engagements are frequent outside the building, the fighting that takes place indoors is point-blank, often benefiting from the close-quarters weapons of the point man or spec ops class.
Hotspot
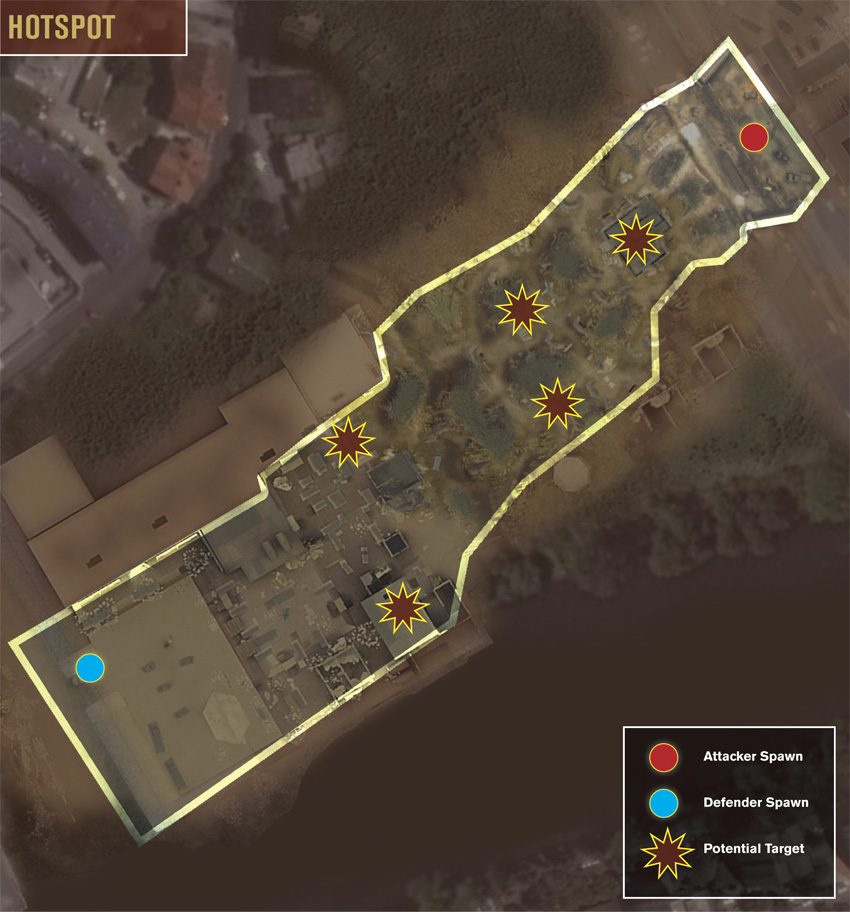
In HotspotHotspot, the office park to the west is off-limits, with the bulk of the fighting occurring between the hilltop restroom and the warehouse complex’s loading dock to the east. Given their nearby spawn point, the attackers have a good chance of securing the two potential targets near the loading dock. But the attackers can’t assume either of these nearby targets will be randomly chosen, particularly at the beginning of the match. As a result, they should try to break out of the loading dock and establish a presence near the potential targets on the hillside and restroom. If the defending team manages to lock down the hill, reaching these three potential targets can be extremely difficult. Early on the defenders should work on securing the hillside while establishing a perimeter around the first potential target. If the first target is located near the loading dock, it will be difficult to get in position as the attackers stream from their spawn point toward the hill. Consider holding back on the hillside and let the attackers take out the first target if it’s near their team’s spawn point. Controlling the hill (and its three potential targets) is more important than defending the two targets near the loading dock.
Sector Control
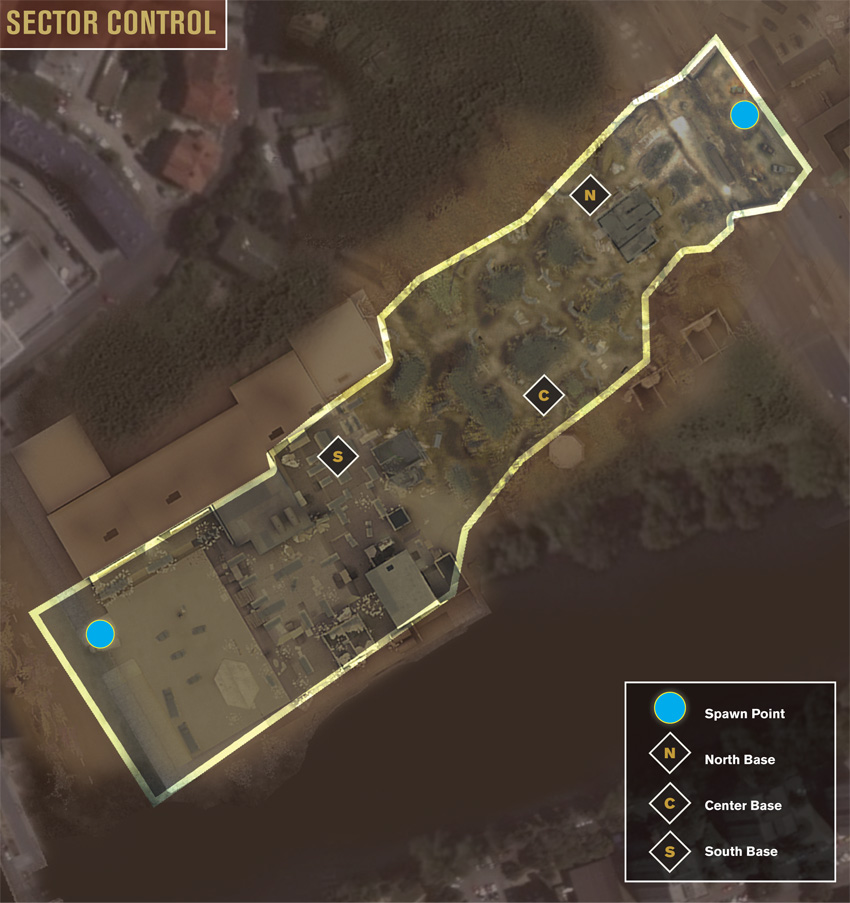
Sector Control takes place within the same boundary as Hotspot, with the majority of the fighting taking place on the hillside between the restroom and the loading dock. The North Base is located only a few meters from the restroom, giving the team who spawns nearby a good chance of controlling this base throughout the match. The South Base is located at the loading dock, well within striking distance of the other team’s spawn point. That leaves the Center Base on the hillside in the middle of the map as the most contentious spot during this battle. The team that spawns near the restroom has the best chance of controlling the Center Base, since they attack downhill. For those spawning near the loading dock, capturing the Center Base is literally an uphill battle. Instead of trying to charge up the hill toward this base, consider flanking along the path to the south. If you want to avoid the constant grind at the Center Base, consider moving along the south side of the hill in an attempt to move between the North Base and South Base. There is far less traffic along this side of the hill, making it easy to sneak in and capture the base closest to the opposing team’s spawn point.
Team Deathmatch
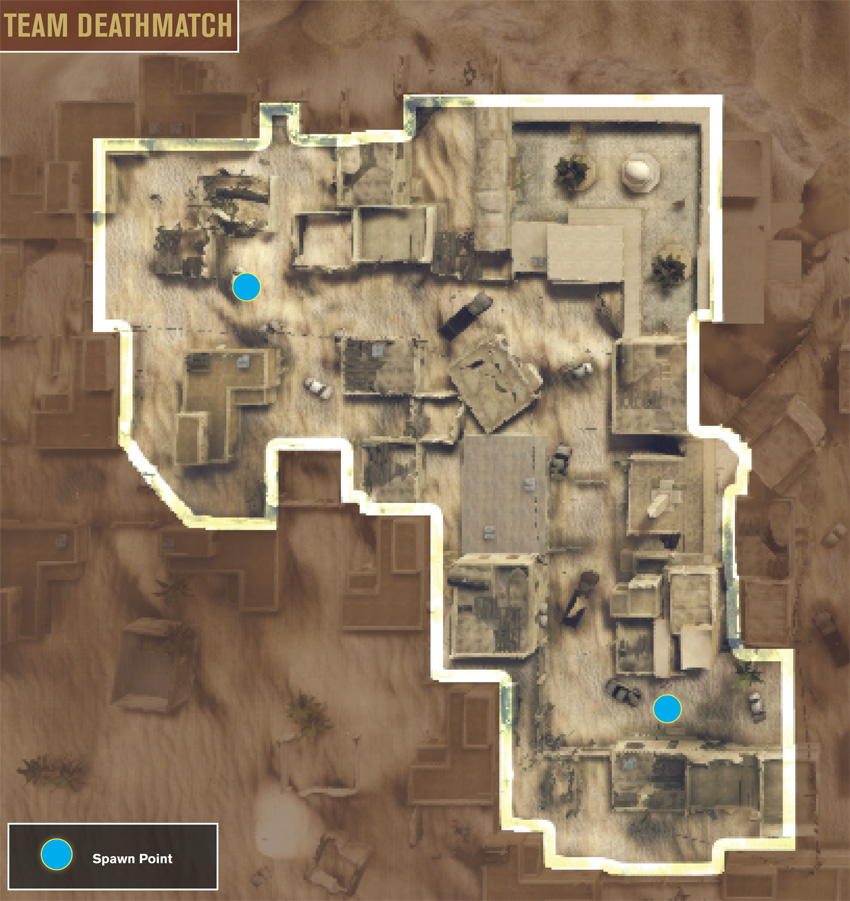
In Team Deathmatch, the battle is contained within the office park on the west side of the map. The obvious focal point on this map is the skyscraper, with both teams attempting to take control of this landmark. Holding out at the skyscraper isn’t a bad strategy, especially if your team can lock down the second floor. This means defending the various staircases and ramps leading upstairs—these spots are deadly choke points ideal for scoring large numbers of kills. But maintaining control of the second floor for any significant duration is extremely difficult unless the entire team is on the same page. If this is your team’s strategy, consider opening VOIP to the whole team so you can stay in constant contact with your teammates. While most of the fighting takes place in and around the skyscraper, the open areas to the east and west lend themselves to long-range combat, where assault and sniper rifles are very effective. Consider holding near your team’s spawn point and engage the chaotic traffic raging around the skyscraper. You can also look for spots to engage cross-traffic as opponents rush from their team’s spawn point toward the skyscraper.