Medal of Honor: Warfighter Guide Multiplayer Multiplayer Maps
Somalia Stronghold
Somalia Stronghold
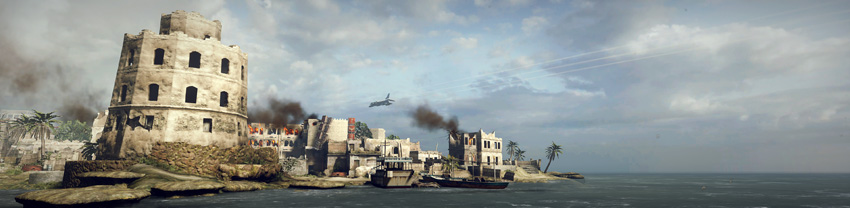
The seas surrounding Somalia have long been the feeding grounds of local pirates. Using inland strongholds and hideouts they have been able to run unchallenged, until now. Task Force Atlas has been dispatched to address this international problem. Their orders are clear; penetrate as far inland as necessary and destroy any and all threats, assets, and personnel associated to this band of criminals.
Tactical Overview
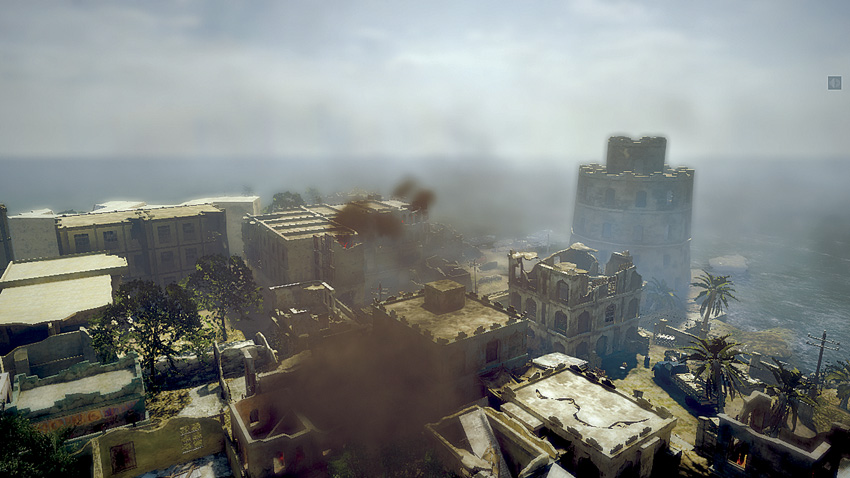
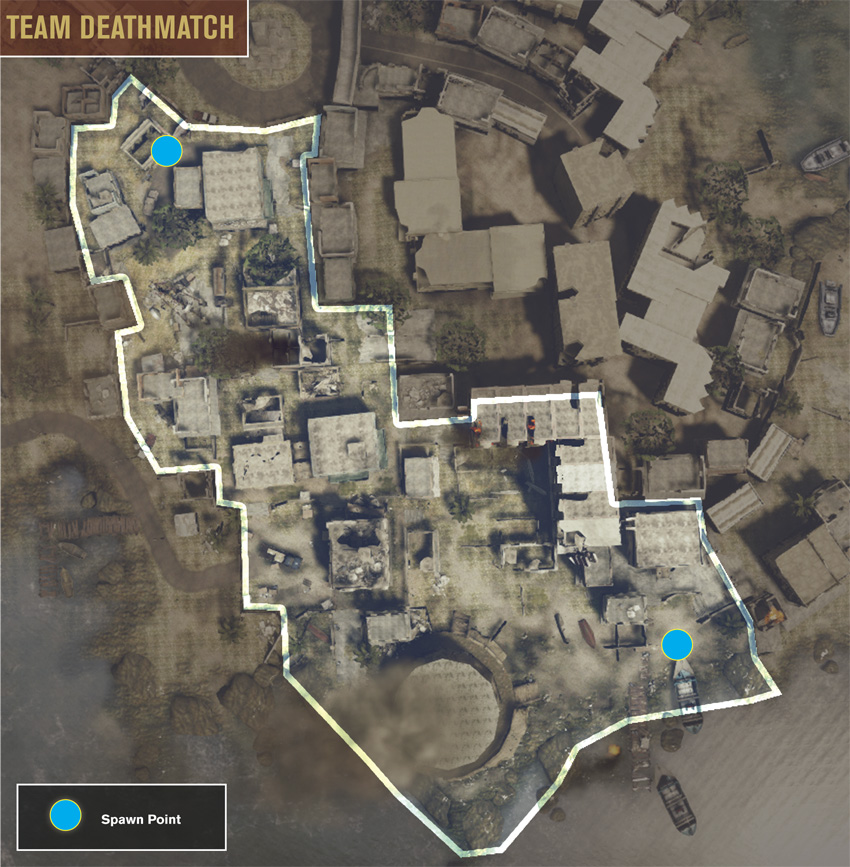
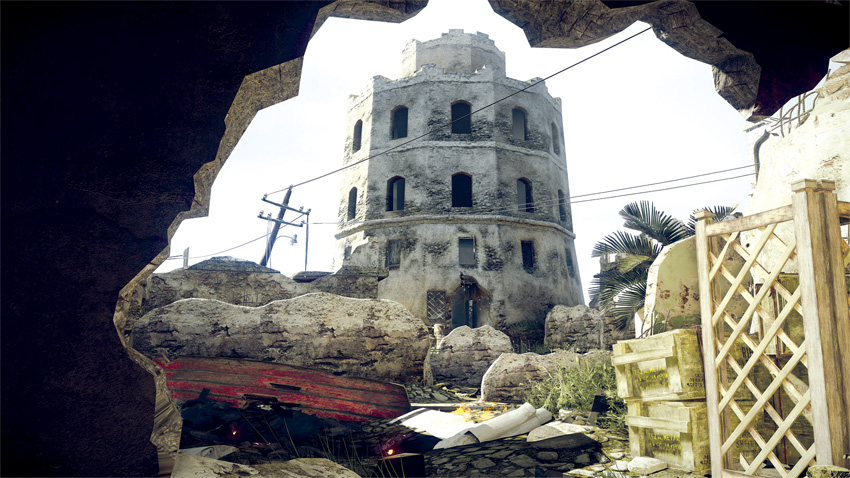
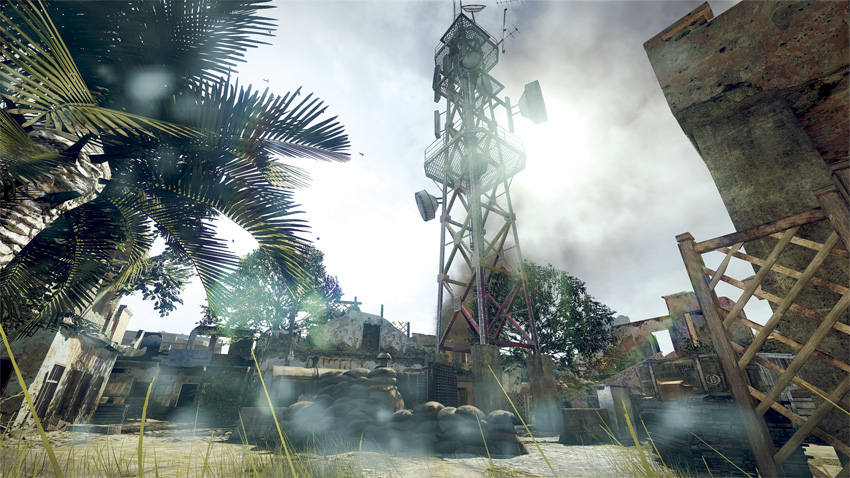
This crumbling town is dominated by a massive lighthouse situated on the southern coast. But modern sailors should steer clear, as they won’t find safe harbor in this pirate haven. There are three core areas of this map: the lighthouse to the south, the supply truck to the west, and the antenna to the north. Given the long sight lines and elevated windows, sniper duels are common around the lighthouse—the small windows on the lighthouse’s second floor are almost always occupied as are those of the nearby burning building. The courtyard where the supply truck is located is another high-traffic area likely to see plenty of action across most game modes. This area is dominated by tight choke points, making it a popular ambush spot. The antenna site to the north is another area to familiarize yourself with if you’re looking for more choke points as well as some significant sight lines and overwatch positions. Overall, the combat on this map is varied, with engagements occurring at various ranges. If you don’t have an assault or sniper rifle, stay away from the wide open spaces, particularly around the lighthouse.
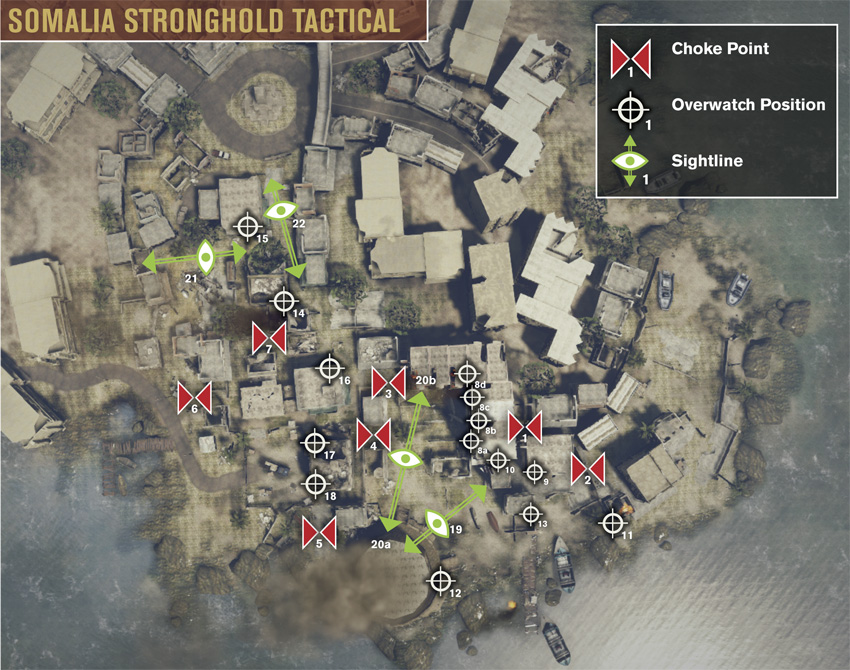
Choke Points
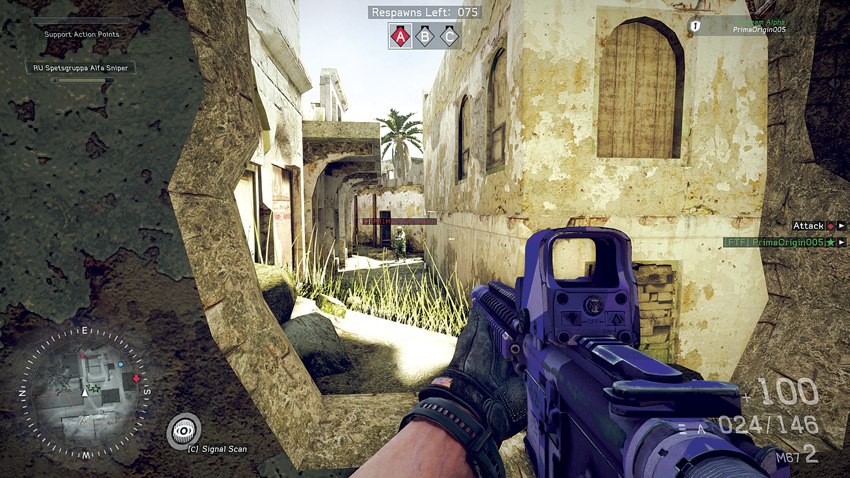

Recommended Weapons: Remote Charge, Proximity Mines, Assault Rifle, LMG
While playing Combat Mission, defenders should cover this path to prevent the attackers from flanking bomb site A. Firing from the broken wall provides considerable cover while crouching or leaning, but loitering can result in being flanked quickly from behind. Use assault rifles and LMGs for optimal results. If you’re demolitions or sniper class, lay a charge or proximity mine at the edge of the corner, get back to the hole, and detonate when someone rounds the corner.
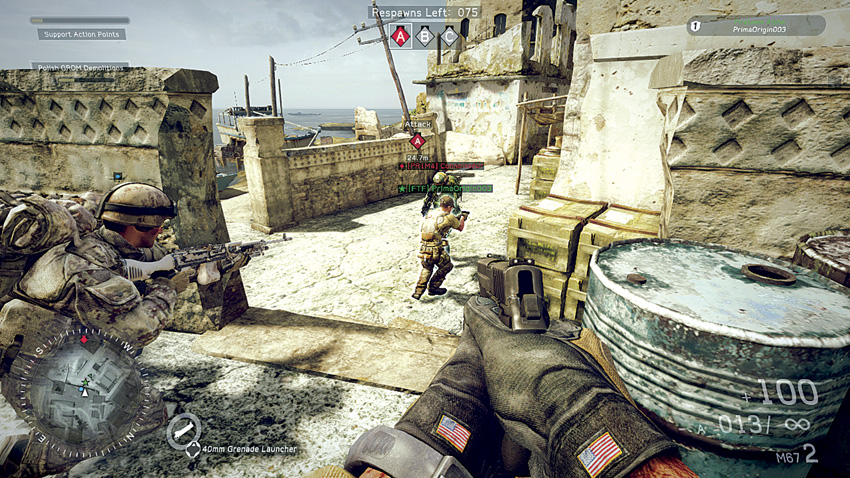

Recommended Weapons: Explosives, Assault Rifle, Shotgun, SMG
During Combat Mission, there is a small staircase with a wall to hide behind for exceptional cover as your team pushes back enemies that overextend on this path. Use short- to mid-range weapons to help support your team while taking this path. As an attacker, you won’t be flanked from this position, but bear in mind attackers can still receive grenades and mortar fire.
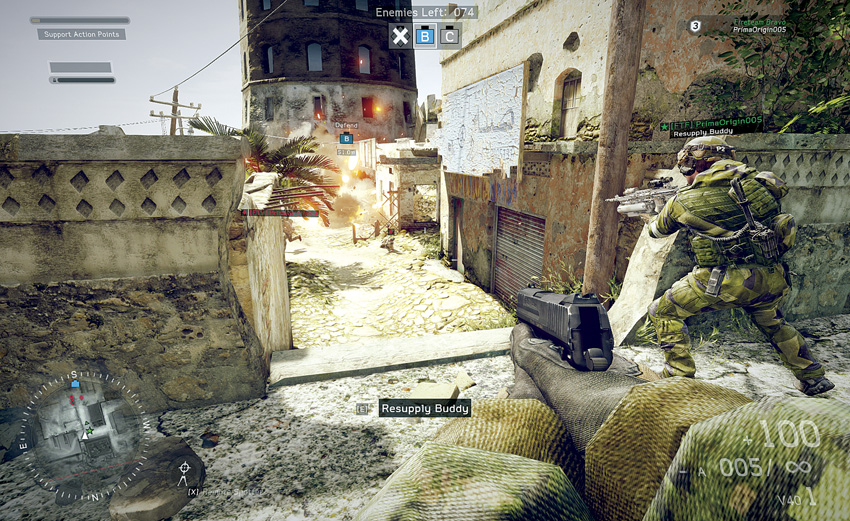

Recommended Weapons: Explosives, Assault Rifle, LMG, SMG
During all game modes aside from Home run, use these walls as temporary cover to flank enemies running through the path, but don’t leave your body completely exposed. Lean out from the sides of the walls before engaging the enemy. Firing from this position will leave the left and right flanks completely exposed to the enemy. Enemies using the open road are easy pickings, so lay down as much fire and grenades as possible.
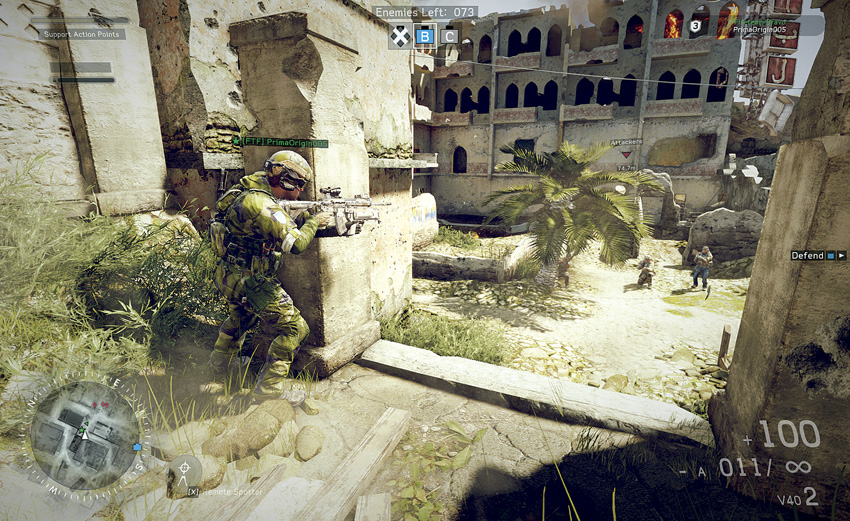

Recommended Weapons: Explosives, Assault Rifle, LMG, SMG
Within this path or around the open area, this path covers every game mode except Home run. With a fireteam buddy, this position should be good for catching enemy teams passing through the open area unaware. Firing from this position provides moderate corner cover. Coordinate with another fireteam located in another position to get a good crossfire going. Lingering too long may result in being flanked from the right.
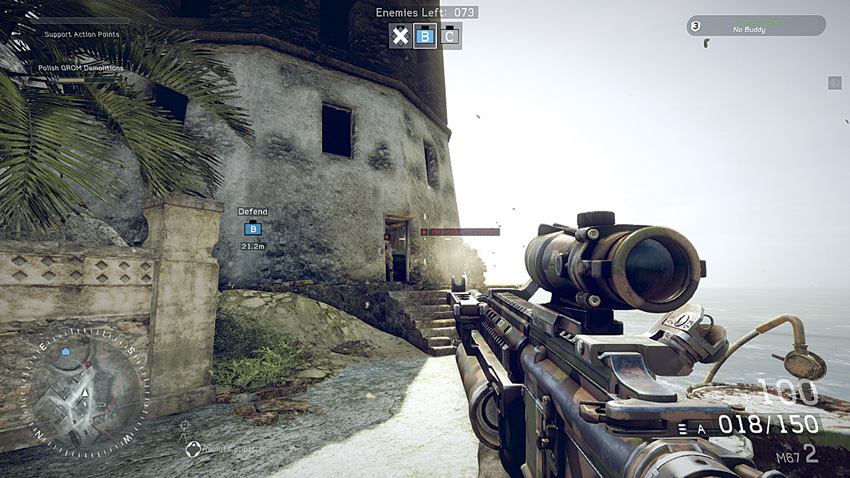

Recommended Weapons: Grenades, Assault Rifle, LMG
The lighthouse will be a hotly contested area, and vied for as a firing position in Team Deathmatch, Sector Control, Combat Mission, and Hotspot. Enemies defending the lighthouse will have a clear overwatch to take out advancing enemies. Grenades and support actions will dominate the area, so when pushing in move in as a team. One to three defenders can hold the position well, so lob grenades through the doors before entering to plant a charge. Use of LMG and rifles will work very well within this area. While attacking this point, enemies may flank from the left side.
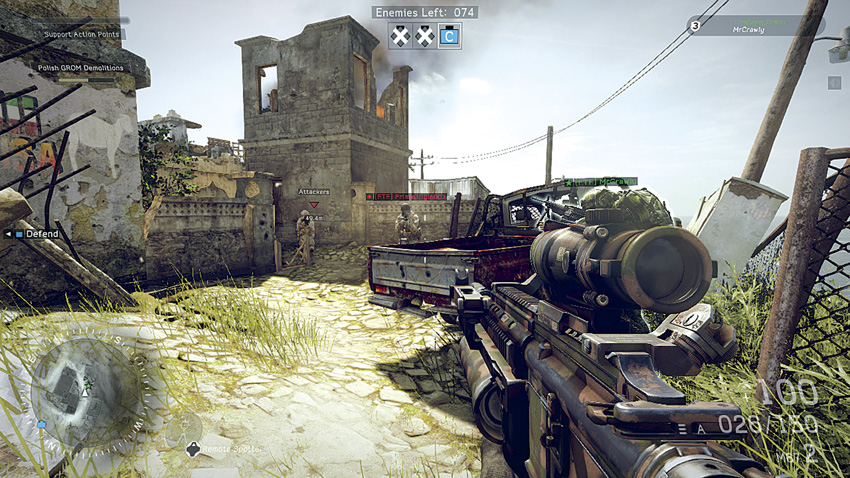

Recommended Weapons: Grenades, Assault Rifle, Shotgun, SMG, LMG
During Combat Mission, Team Deathmatch, Sector Control, and Hotspot, this tight path, providing plenty of cover using the corners, debris, and a burned-out truck, will be a good pathway to lay in ambush for approaching enemies. Lob grenades over short walls toward the enemy. An LMG can hold this path well enough, but enemies can counter with grenades easily, so keep that in mind.
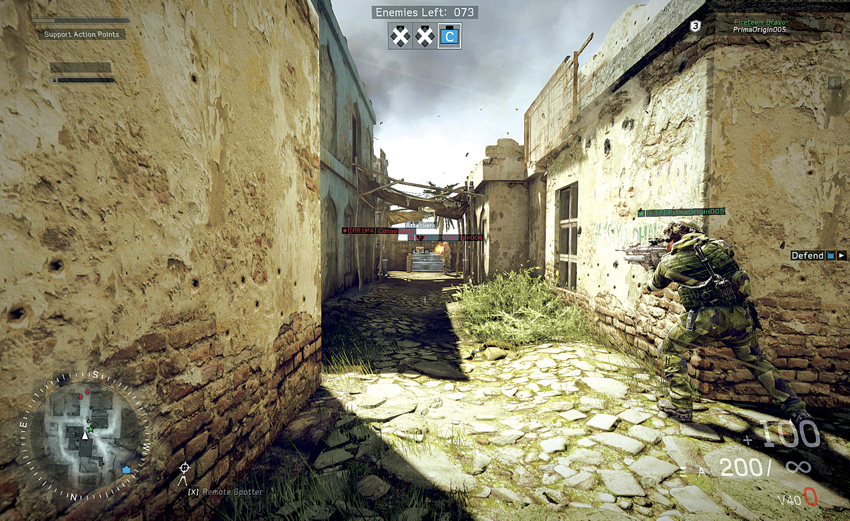

Recommended Weapons: Explosives, Assault Rifles, LMG, Sniper Rifle
During all game modes, this becomes a tight passage where proximity mines can easily be undetected in a rush. Ambush passing enemies from the windows. Lean around the corners if enemies are approaching. By engaging the enemy from this firing position, you can be flanked on the right side. Enemies at the other end of the passage can be flanked from either the left or right. Let your buddy engage as you resupply him from behind. When he needs to reload, switch places.
Overwatch Positions
.jpg)
.jpg)
.jpg)
.jpg)

Recommended Weapons: Proximity Mines, Assault Rifles
During all modes other than Home run, there are four windows within the burning building. Use all of these windows for a clear view of the surrounding area. The windows and darkness provide excellent cover to fire from. Use medium- to long-range weapons to take care of anyone off in the distance, inside the lighthouse, or moving through the open area. Enemies will use the south staircase or the northern entrance to flank anyone within this burning building, so take care to lay proximity mines if you’re planning to camp.
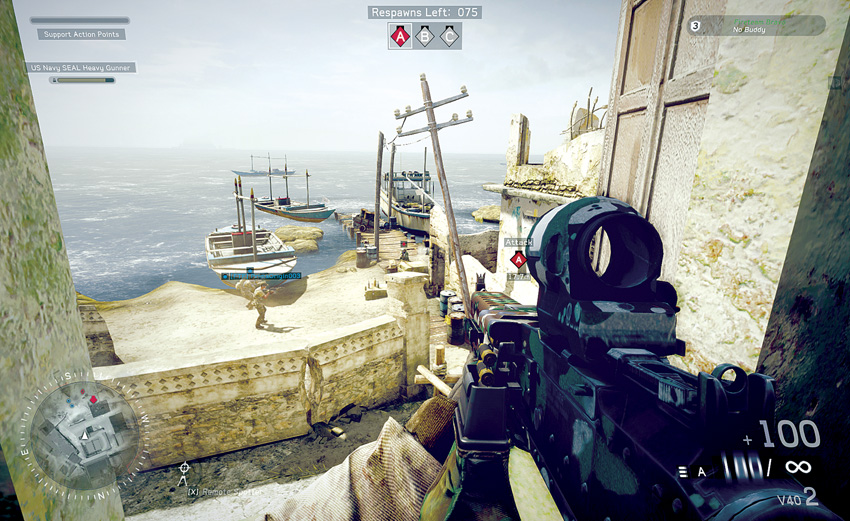

Recommended Weapons: Explosives, Assault Rifle, LMG, SMG
This position will likely be most useful during Combat Mission, looking over bomb site A. Use the window for cover by crouching or leaning. This position is ideal for attackers to provide elevated cover fire while assaulting bomb site A. Defenders can use this position to wipe out attackers. While in the window, be mindful of incoming grenades. Use rapid-fire assault rifles or LMGs.
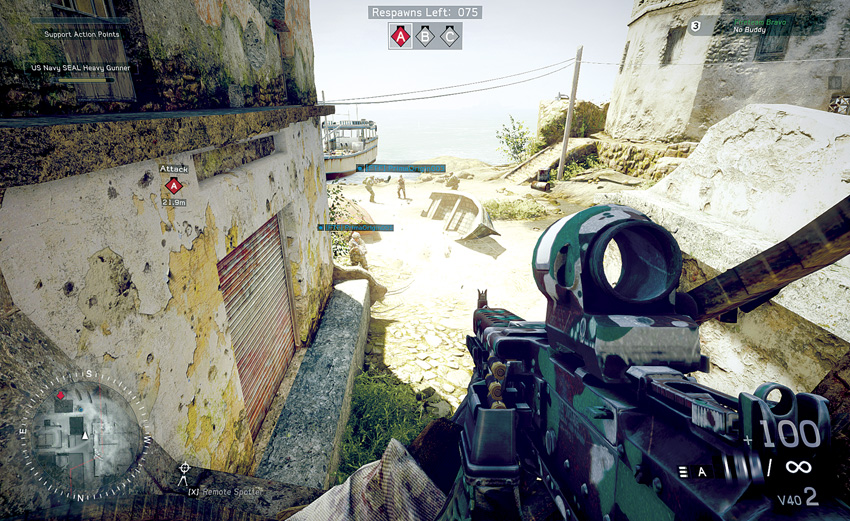

Recommended Weapons: Explosives, Assault Rifles, LMG, Sniper Rifle
This window within the burning building overlooks Combat Mission’s bomb site A. Crouch behind the hole in the wall for some cover, then mount an LMG or simply use an assault or sniper rifle to take out enemies extending too far from the bomb site or while enemies attack bomb site B. Attackers can use this position as well to clean shop on any defenders on bomb site A. Keep in mind that anyone can flank from behind.
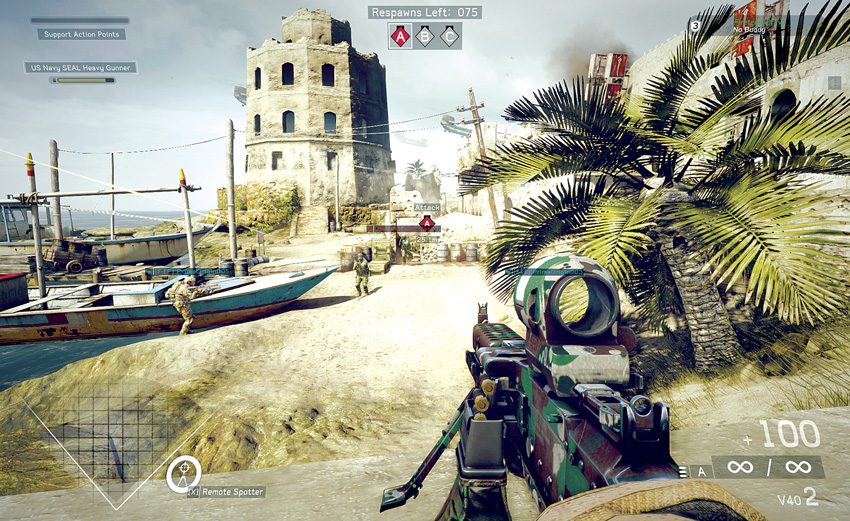

Recommended Weapons: LMG, Sniper Rifle (supported)
During Combat Mission, deploy a bipod with your LMG or sniper rifle on this wall for suppressive fire for teammates to move up onto the point. Continue suppressive fire until the bomb detonates. Keep in mind that snipers can pick you off from a good distance. Enemies can come flanking from the right, but it’s unlikely if teammates are keeping up pressure.
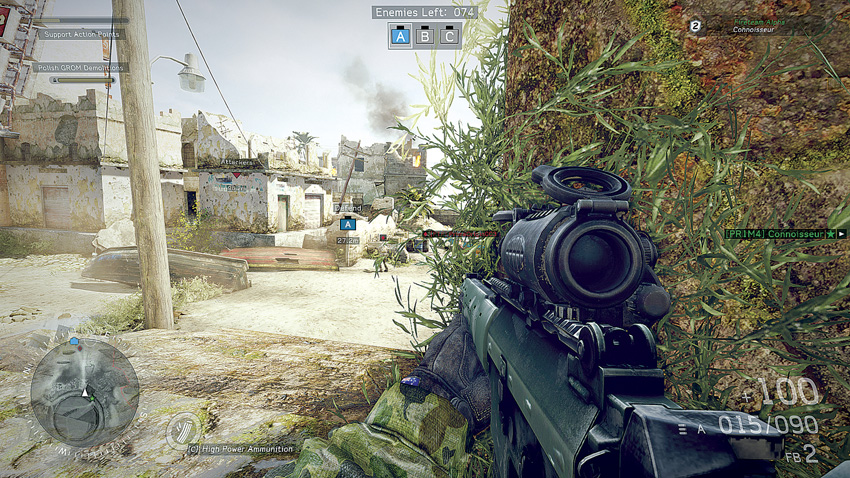

Recommended Weapons: Assault Rifle, Sniper Rifle
During Combat Mission, drop prone and deploy your sniper rifle’s bipod behind the wall surrounding the lighthouse to score some kills at bomb site A. Enemies are hard pressed to see you at such a distance all the while dealing with the more forward defenders. You might also use an assault rifle to provide some fire for more medium-range targets.
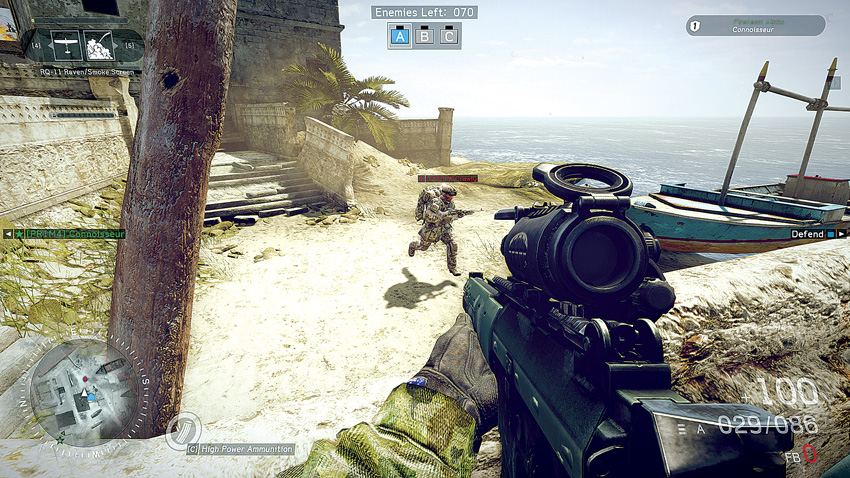

Recommended Weapons: Explosives, Assault Rifle, SMG, Shotgun, LMG
While defending bomb site A in Combat Mission, hop over the rubble and onto the side of the building to look over the wall to lay down some suppressive fire to keep attackers from rushing the bomb site. Crouch behind the wall for cover. Do not stay long as you can be flanked from the rear or become an easy target for sniper fire. Use short- or mid-range weaponry to fire down from the wall.
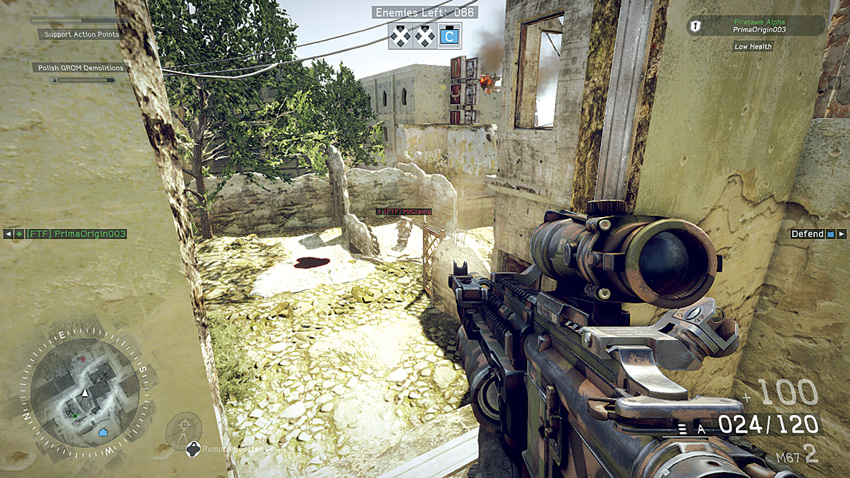

Recommended Weapons: Proximity Mines, LMG (supported)
During all game modes, access this house, break the window open, deploy the LMG’s bipod, and use it for a second-story ambush on anyone passing through this high-traffic area. They might have some walls for cover, but it’ll be too late unless they already know you’re there. Proximity mine the staircase or throw down grenades on enemies flanking from the stairs.
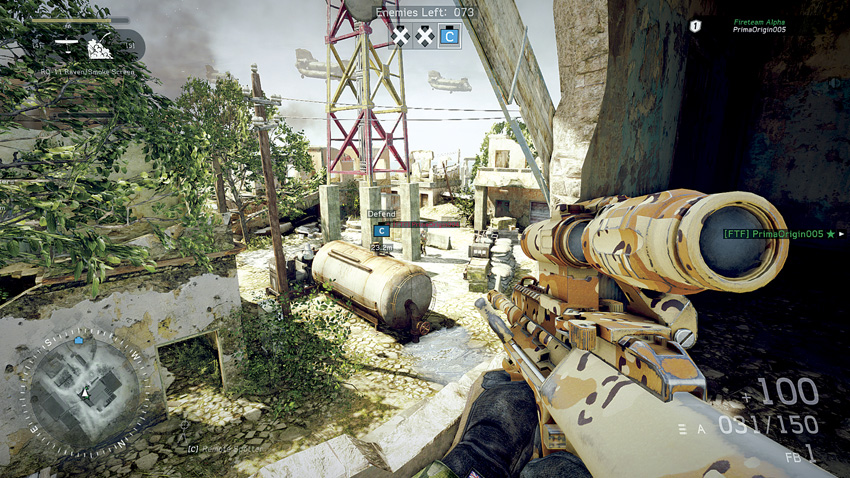

Recommended Weapons: Explosives, Assault Rifle, LMG, Sniper Rifle (supported)
During all modes but Home run, this torn-down wall will provide an excellent elevated position to take out anyone near the antenna. Go prone as a sniper with a bipod for headshots on anyone planting or defusing the bomb. Set up proximity mines at the stairs as enemies might flank them. Enemies can shoot you out of the hole in the wall if you’ve leaned too far out over it. Have your fireteam buddy cover the ground level on the left to avoid unwanted company.
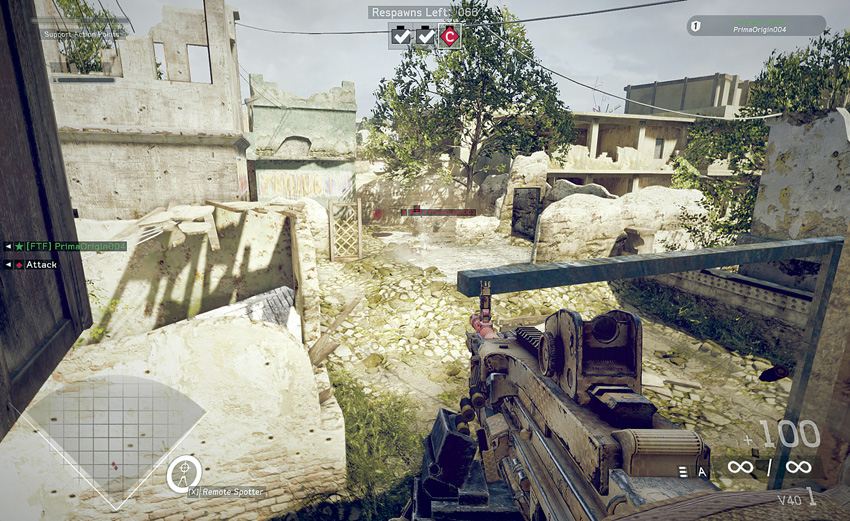

Recommended Weapons: Explosives, Assault Rifle, SMG, LMG, Sniper Rifle (supported)
During all modes, this window covers a well-tread path that also leads toward another second-story overwatch. Deploy the LMG’s bipod and fire at unsuspecting enemies below. Keep proximity mines or your buddy at the top of the stairs and be aware of your six while up here. Be advised, the bar in front of your view is not destructible, so it may stop bullets from reaching your target.
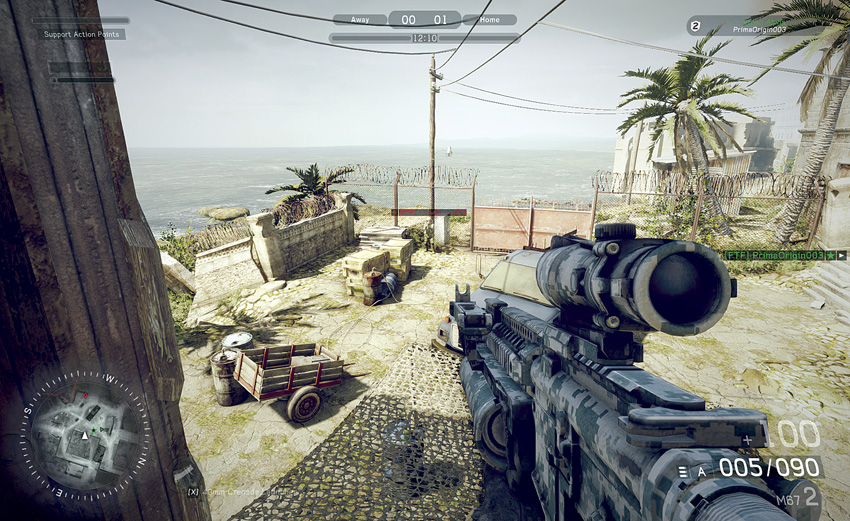

Recommended Weapons: Explosives, Assault Rifle, LMG, Sniper Rifle
During Sector Control and Hotspot, this second-story overwatch covers Center Base and a supply truck potential target. The window provides exceptional cover while firing on anyone moving within the area. Tangos can be brought down with mid- to long-range weapons fire. During Combat Mission, use this as a fallback position after attackers have taken out bomb site B. Enemies will be passing through to reach bomb site C, and using this window will catch a few enemies off guard.
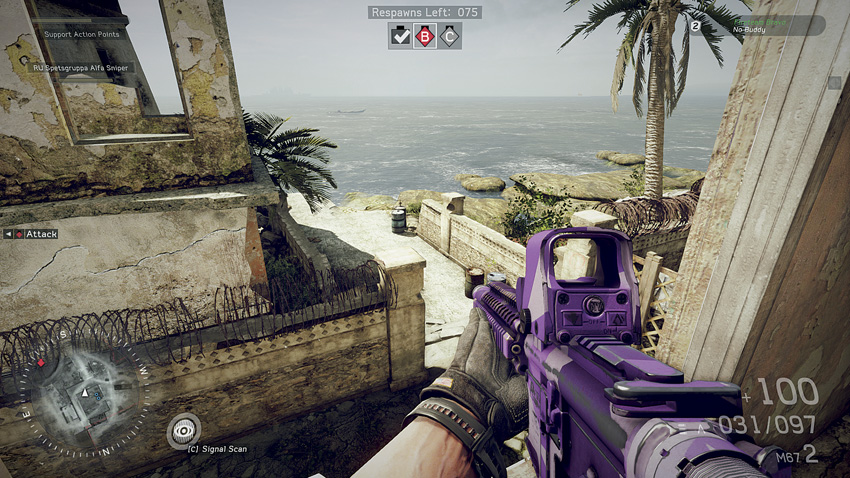

Recommended Weapons: Grenades, Assault Rifle, LMG (supported), SMG
This position is available in all modes except Home run. This upstairs window overlooks a path that is often used to pass from one objective to the next. During Combat Mission, use this as a defensive position to take out enemies coming from bomb site B to bomb site C. Supported LMGs are ideal for this situation. Enemies will flank from the staircase to the right.
Sight Lines
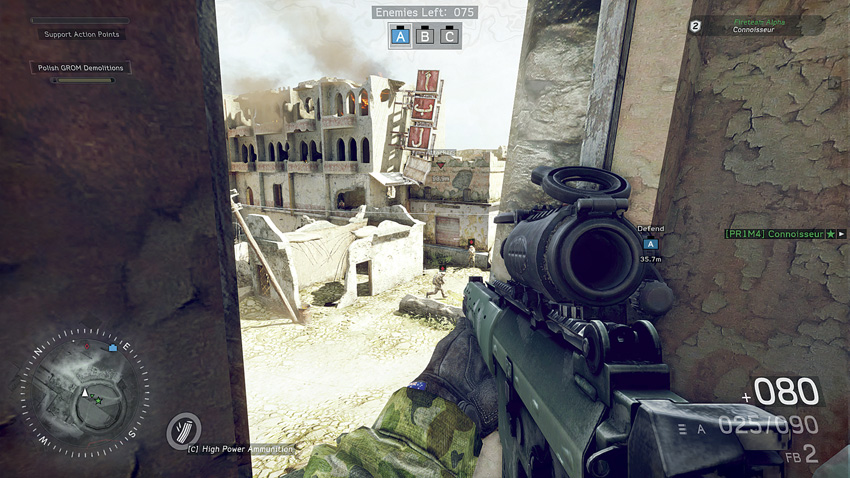

Recommended Weapons: Sniper Rifle, LMG (supported)
During Sector Control and Hotspot, this point covers the South Base or two potential targets. The window provides great advantage in height while maintaining a good deal of cover. Snipers will find this site ideal for taking out other snipers in the burning building across the way, while LMGs will be able to lay down suppressing fire. Enemies have two ways to flank, so use proximity mines as a warning.


Recommended Weapons: Sniper Rifle, Assault Rifle
During all game modes but Home run, the burning building and the lighthouse have a clear view of one another. Both landmarks provide excellent sniping positions for either attacking or defending an objective or while enemies move between points. The first priority is to take out other enemy snipers in the windows. The second priority is to take out enemies on the ground. A sniper rifle is recommended for the long-range shots, but a good marksman can also use a single-shot assault rifle to take down enemies.
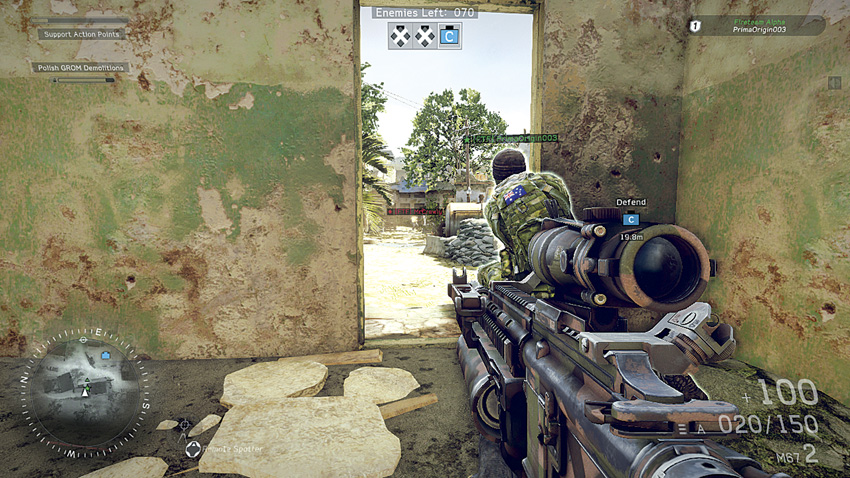

Recommended Weapons: Sniper Rifle, LMG (supported)
During all modes except Home run, a prone supported sniper rifle is given a clear view of objectives located at the antenna site while hiding within a house. From this point, the sight line extends to the eastern path, so any enemy attempting to flank along this path, provided they’ve made it without dying, can be put down quickly. Move out from the house a little more to have a wider field of view to cover the rest of the area. Alternatively, lie down with an LMG to provide suppressive fire to defend the site. This building can be flanked from the left quickly.
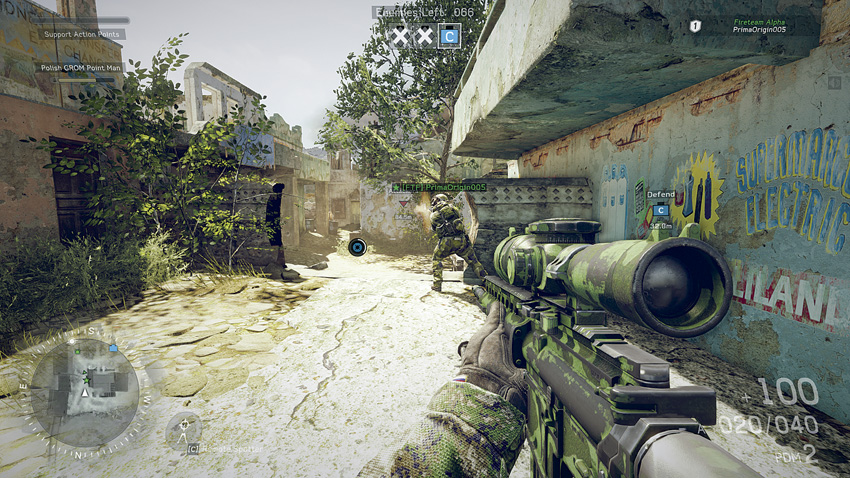

Recommended Weapons: Sniper Rifle, LMG (supported)
Available in Combat Mission, Sector Control, and Hotspot, this sight from the northern spawn point looks down a heavily trafficked path often used as a flank. Go prone with a bipod to lay down suppressive with an LMG or use a sniper rifle for a more precise shot.
Combat Mission
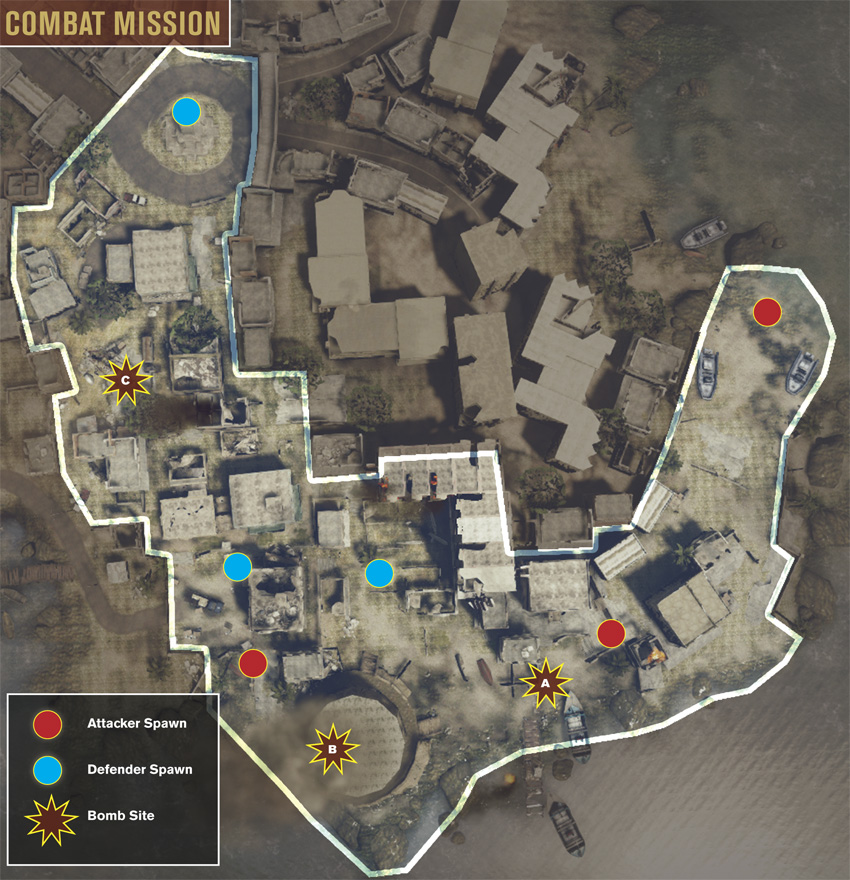
During the opening phase of this battle, the attackers start on the far east side of the map, pushing along the coast toward the first bomb site (A). It’s easy to get bogged down at the choke points between the spawn point and the bomb site. With few flanking paths, the attackers must simply muscle their way through to gain a foothold near the bomb site. Likewise, the defenders must coordinate to lock down the few paths that can be utilized by the attackers. In the second phase of the battle, the next bomb site (B) is located within the lighthouse. With only two entrances, attacking the lighthouse can be a nightmare, especially if it’s well defended. When defending here, keep one fireteam buddy on the second floor at all times to serve as a spawn point. This allows the defenders to apply pressure on this location. For the attackers, the best solution for cracking this nut is by establishing a perimeter and conducting aggressive coordinated assaults on the interior—sending one soldier in at a time won’t get the job done. If the attackers can take out the first two bomb sites, they’ll have a much easier time securing the final one located at the antenna to the north. Still, it’s important to sweep the nearby buildings before attempting to plant a charge.
Hotspot
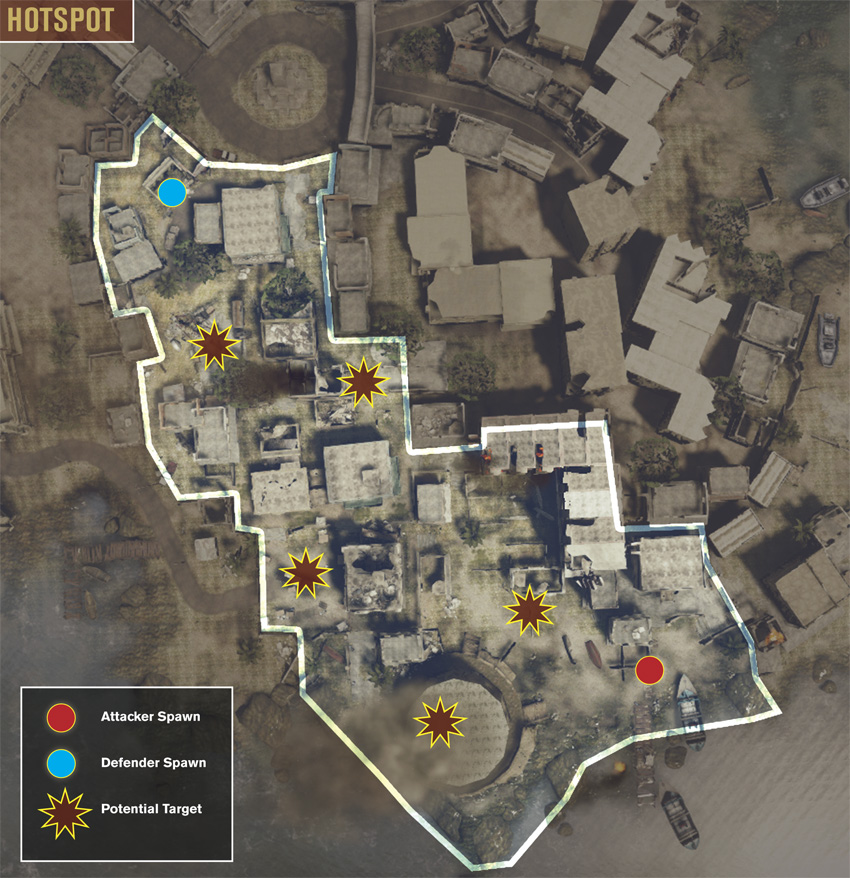
During Hotspot, almost the entire map is open for both teams, but the action stays focused around the five potential targets, leading to some intense close-quarters firefights. Early on, the attackers have no clue what the first target will be, but this is no time for the attackers to loiter around their spawn point. Instead, they should try to establish a foothold near the center of the map. Structures like the lighthouse, burning building, and the houses near the supply truck or antenna all serve as good temporary bases from which its easy to respond to any of the potential targets. With the targets spread out across the map, the defenders should focus on guarding the current target instead of trying to lock down any particular portion of the map. Defenders have the easiest time securing the targets at the lighthouse, supply truck, and antenna, since these locations offer great sight lines and overwatch positions that can be leveraged to engage attackers. As the fight shifts from one location to another, don’t forget to alter your tactics and weaponry. Long-range weapons are best suited around the antenna and lighthouse, while close-quarters weapons are more effective in the map’s center.
Sector Control
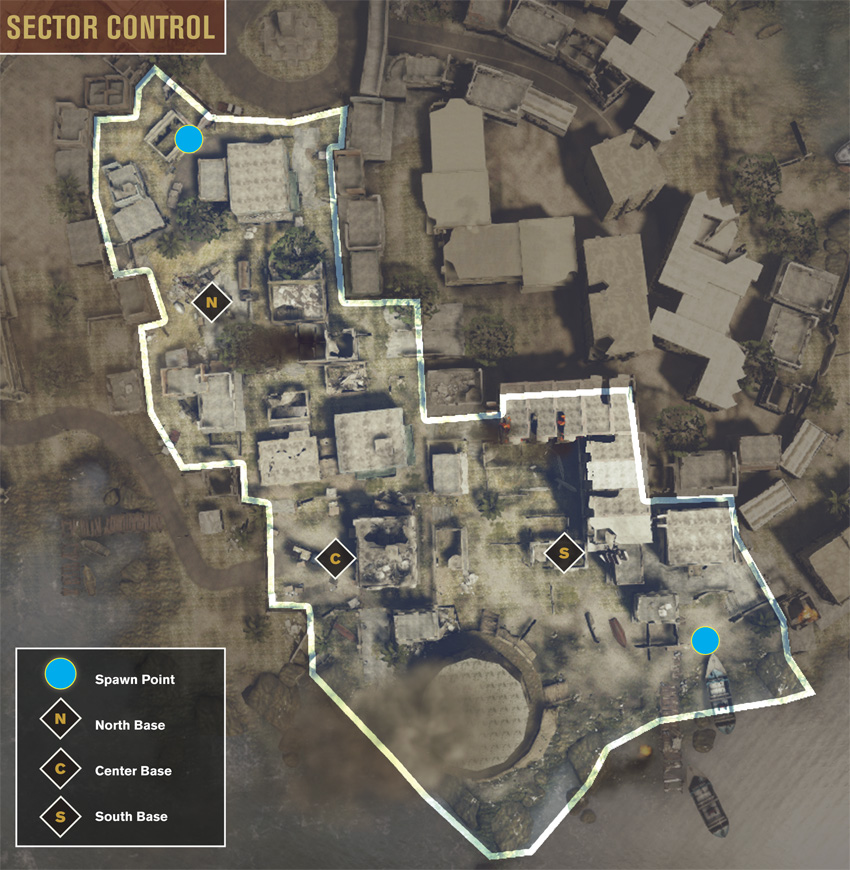
In Sector Control, the bases are spread out among the lighthouse, supply truck, and antenna, making for a highly transient match as both teams race about the map capturing flags. While the North Base and South Base are likely to be held by the teams spawning nearby, the Center Base is always up for grabs, making it the hottest point on the map. Here the flag is located in the courtyard next to the supply truck. Capturing and maintaining control of this base is difficult since all fighting occurs at close range within the cramped courtyard. Watch out for incoming grenades and offensive support actions if you choose to linger here very long. While the battle rages at the Center Base, consider making a move for the North or South Base. The east side of the map isn’t necessarily safe, but it’s far less congested than the area around the supply truck. By sticking to this less-traveled side of the map, you’ll have an easier time capturing the base closest to the opposing team’s spawn point. If your team manages to capture all three bases, it’s relatively simple to pin the opposing team at their spawn point. Such spawn camping tactics are usually frowned upon, but you must prepare yourself for this possibility.
Home run
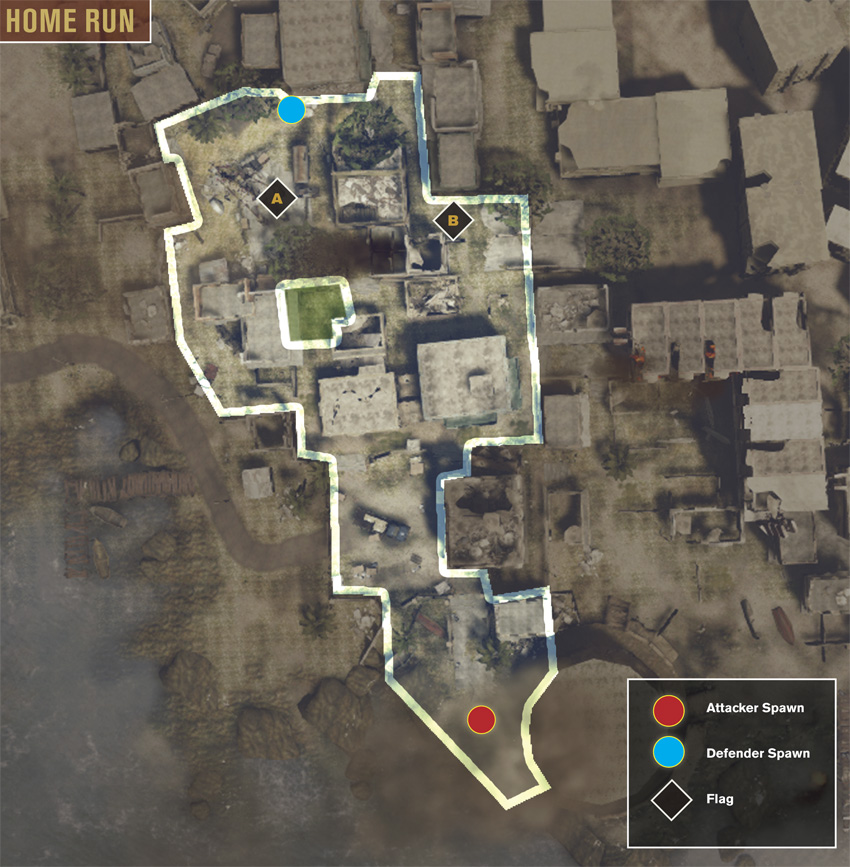
In Home run, the two flags are located on the north side of the map, not far from the antenna. The attacking team spawns to the south, between the lighthouse and supply truck. From here they only have a few options when it comes to approaching the flags. The central path is never a good idea as it’s often watched by defenders. Always take one of the flanking paths: west if you’re heading for Flag A or east if you’re heading for Flag B. Regardless of which direction you choose, gird yourself for some close-quarters engagements as you fight in the narrow alleys between your spawn point and the flags. With only three paths to cover, the defending team is most effective when locking down these approaches. Greet the attackers with proximity mines, remote charges, and focused fire on these narrow choke points surrounding each flag. Due to the tight quarters and minimal approaches, matches here are often decided before anyone touches a flag. Such tactics often work well for the attackers—instead of trying to capture a flag, simply hunt down and wipe out all the defenders.
Team Deathmatch