
Company of Heroes 2 Guide Advanced Tactics On the Battlefield
On the Battlefield
Field Defenses
Field defenses primarily make use of a resource that isn’t consciously considered by most players—time. Barbed wire and sandbags are free to construct, so their only true cost is the time it takes a unit to build them. Other field defenses, like mines, require Munitions, and in this way might be compared with abilities like grenades, but key differences remain.
- You can build field defenses when preparing for an attack, while abilities require your attention during a fight. You can defend an area of the map with a unit even when no enemies are there by placing field defenses that persist even after your unit moves elsewhere.
- Field defenses have no upkeep and are unlimited, meaning you won’t need to worry about the cooldown time as you would with an ability, or your decreased Manpower income as you would with a unit.
Mines
German forces viewed minefields as a critical part of their defensive actions, and even made use of them in offensive actions as a means of protecting open flanks. German minefields were well sited and concealed. Germans were masters of trickery: Mines were booby-trapped, anti-lift measures were employed, antipersonnel mines were liberally sprinkled around, and minefields were covered by machine guns to deter mine clearing attempts.
Mines can be used alongside other battlefield fortifications to increase their chance of causing damage. For example, try placing a mine behind Soviet sandbags that you’ve recently overrun; the next time your opponent tries to retake the area, he’s likely to try to take cover in exactly that spot and run into an unfortunate surprise.
It’s also a good idea to place anti-vehicle mines behind barbed wire because your opponent will likely load his infantry into a Half-track or Scout Car to get them through the barbed wire more easily.
Another fun thing to do with barbed wire is use it to funnel enemy infantry rather than block off an entire area: Leave a small path in the wire open and place a mine there. After your opponent falls for this once, rebuild a mine in exactly the same spot, as he’s likely to think that the area is clear now. The next time this happens during the same game, do not build the mine but move a unit to the area to kill the inevitable minesweeper squad. You can do this as a bluff also: Leave a gap in your wire but don’t bother laying a mine. If you’ve already done this multiple times to your opponent, he’s bound to be wary. This allows you to control your opponent’s movement with just the fear of mines, even though none are present.
When placing mines, it’s usually a bad idea to place them directly adjacent to one another because if one triggers it will also detonate the others to less effect than if they were detonated independently. However, if you specifically desire to completely destroy a light vehicle with mines to avoid any repair opportunity, as Soviets you need to place two mines side by side such that the vehicle will contact both simultaneously (i.e., two mines in a line perpendicular to the vehicle’s path). If you place just one mine, or place the line parallel to the vehicle’s path, you’re likely to only damage its engine before it reverses away to repair.
Look at the multiplayer map section to get a few ideas for mine placement.
Completing only a portion of the anti-personal minefield available to the Germans is an acceptable tactic – you will only be charged based on the number of mines placed. In other words, if you only complete half of the minefield it will cost you 40 Munitions rather than 80. The Pioneer squad will build the mine section closest to the unit first, so it is possible to only build a small portion of the minefield by order the placement of a section directly over the area you desire so long as the Pioneer squad is closest to that corner, allowing you to complete that section alone and canceling creation of the rest. You will be refunded Munitions if for some reason part of the mine field cannot be built to do environmental obstacles. However, in all cases the initial 80 Munitions is needed to begin constructing the minefield.
Other Field Defense Ideas
- If you must clear a mine and have no way of using a minesweeper, grenade, or Attack Ground with a cannon, you can Retreat a squad such that its path back to your Headquarters will cross the mine and detonate it. Due to the defensive bonus granted by Retreat, this is safer than walking directly into the mine with your squad.
- Barbed wire does not stop enemy infantry if they have a Pioneer or Combat Engineer squad with wire-cutters with them, but it does slow their progress. This is quite useful if you have sight over the area and a Mortar within range, as its likelihood of causing damage is significantly increased.
- Barbed wire can also be placed around areas of cover to prevent enemy units from using it. Infantry must stand directly adjacent to cover, like a sandbag wall, to gain its benefit, and the width of barbed wire is sufficient to block attempts at gaining this defensive bonus.
- Terrain features like hedgerows, fences, and walls can be destroyed early in the game to open up movement paths, expand line of sight, or deny cover to the enemy. Light vehicles can crush weak terrain, like wooden fences, you can set a mine and detonate it with a grenade , and you can use Attack Ground with a flamethrower to burn down wooden fences. (Remember infantry can vault over them, but not weapon teams like HMGs and Mortars.)
- When fighting during the winter, build Campfires in less-used areas of the map to facilitate unexpected flank attacks during blizzards. You can alternatively build sandbag walls with Conscript squads to act as a “cover highway” during blizzards because a unit’s temperature does not drop while it is in cover.
- You can place the Soviet Trip Wire Flares alongside Demolition Charges so that you know when to detonate them. This avoids the need to keep another unit of yours nearby to provide sight over the area.
Garrisoning Buildings
Units in buildings have increased survivability against everything but flamethrowers and grenades. It’s especially useful to put units in buildings if they’re under attack by an MG, as they can’t be suppressed or pinned. Vehicles cannot crush units in buildings and their explosive shots are far less dangerous.
A Few Things to Note About Buildings
If the building’s HP is reduced to zero, it will collapse, completely destroying any unit garrisoned within. Artillery and Mortars are both well suited to destroying buildings, so pay attention because your squad might be relatively undamaged even though the building itself is about to be destroyed.
Units in buildings must fire out of windows, holes in the walls, or from the roof. Some buildings have blind spots, meaning an area without a window or hole, in which an attacking unit can position itself to attack the unit in the building without worrying about reprisal. When selecting a building to garrison, be aware of any blind spots and how these might affect the tactical situation.
Company of Heroes 2’s terrain deformation extends to buildings, meaning that units like tanks and artillery can blow holes in buildings that the garrisoned unit can then use as firing points. Be careful not to eliminate blind spots if you’re attacking a building. As the defender, you might think about using Attack Ground with a tank to intentionally create holes (after removing your unit from the building, of course, and then reoccupy it to use the holes you made as firing points).
The best units to place in buildings are HMGs, Snipers, and mainline infantry units like Grenadiers, Guards Rifle Infantry, and Panzergrenadiers with Panzerschrecks—units that have strong long-range weapons and that may be susceptible to assault units and/or vehicles.
HMGs must still set up and then pack up when moving from window to window, so keep this in mind if you order one to attack a unit outside of the field of fire of its current window position.
Snipers can also excel in buildings, but they lose their ability to camouflage in exchange for increased survivability. Remember that some units can use their activated abilities while in buildings, like the German MG42 team’s Incendiary Armor Piercing Rounds, if you select the unit individually (not the building)—you can purchase weapon upgrades for a unit while it’s garrisoned in the same manner.
When exiting buildings you can either click on the building itself and then click on the Leave Building button and select a destination for the unit to move to (using the hotkey U, ideally), or you can select the unit individually and give it a movement order somewhere outside of the building.
Unlike other games that allow garrisoning, there are often multiple doors to each building. As with windows, the location of these doors is important. If you order a unit to leave a building, it will use the door closest to the destination you select—you can use this to have a unit exit on the side farthest from enemy units. You can also use buildings with multiple doors to escape attacking units: enter on one side and exit by the other to get a step ahead and avoid fire for a little while. If you want to Retreat a unit garrisoned in a building, order it to exit by the door closest to your base.
When ordering an HMG to exit a building, be careful not to click directly outside of the building because it will immediately deploy upon exiting, which could lead to its death if you need to get away—instead, click farther away from the building, just to be safe.
The larger the building, the more difficult it is to destroy, so these are the ones you want to garrison, other things being equal. Also note that grenades generally do more damage against units in smaller buildings, because the squad members inside are clumped up more during the blast.
The best buildings have fields of fire that cover multiple capture points, a single important point, or key movement routes.
If an HMG squad just barely beats one of your infantry squads into a building, not all is lost! You can do the circle strafe “dance” around the building by constantly moving around it in circles while your unit fires, causing the MG to constantly switch windows and never get a chance to shoot (currently buildings give such a major defensive bonus that this isn’t a viable way to actually kill the HMG, but you can use this technique to delay while researching Molotovs or while waiting for the grenade ability to recharge).
Terrain
TrueSight
Watch the in-game “TrueSight” tutorial. Enemy units are briefly revealed in the fog of war when they fire at one of your units. Because the ranges of many units extend beyond their sight radius, sometimes two units that cannot normally see each other exchange fire through the fog of war because one of the units revealed itself by firing at a third unit that it can see. This is exacerbated by the auto-attack unit AI, meaning that one of your units, like a T-34, can attack an enemy unit, like a Pioneer squad, and in doing so reveal itself to an enemy that wouldn’t normally have the sight to attack, like an AT gun. One way to avoid this is by ordering a unit to Attack Ground, to ensure that it doesn’t accidently reveal itself by engaging enemies directly.
TrueSight Tips
- Take care not to grant your opponent sight of any more of your units than is necessary. For example, only send one unit in to decap a sector so that it appears to be mere harassment, even though you have four or five units in the area.
- Smoke can be used in several ways to obstruct your opponent’s line of sight, which is further detailed in the Mortar Smoke section.
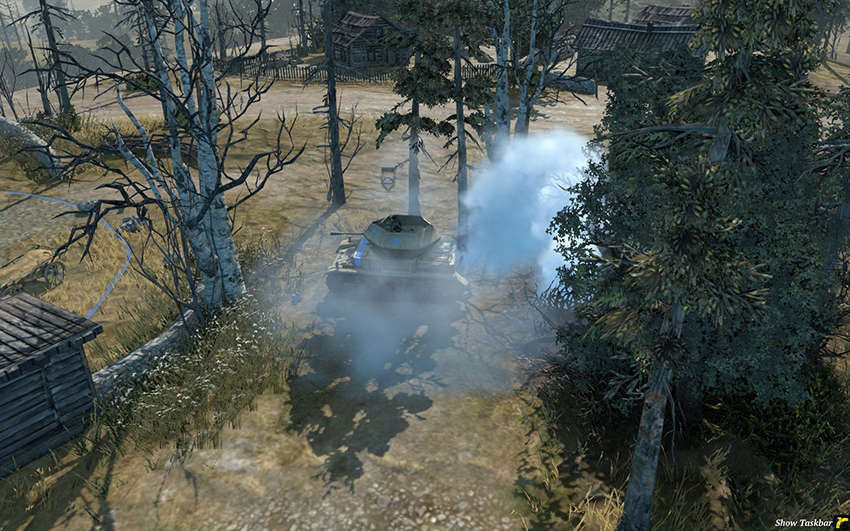
Initial use of smoke canisters from an Ostwind.
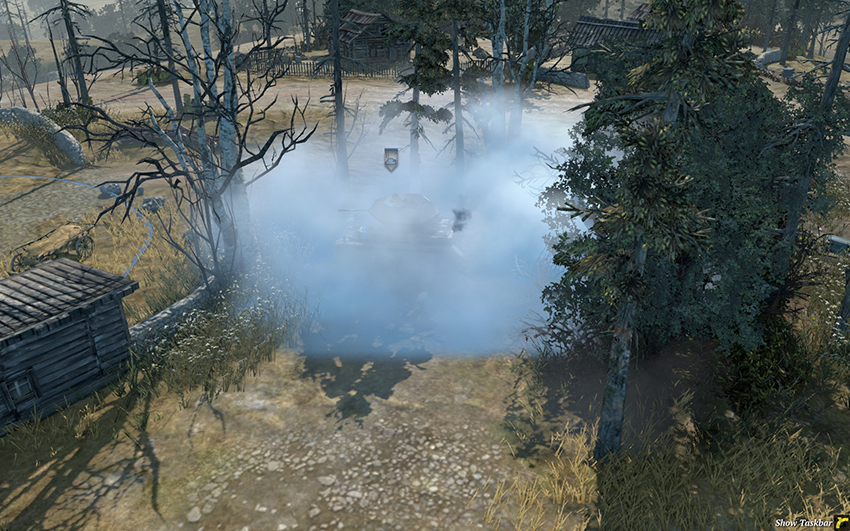
The Ostwind is visibly concealed by a cloud of smoke.
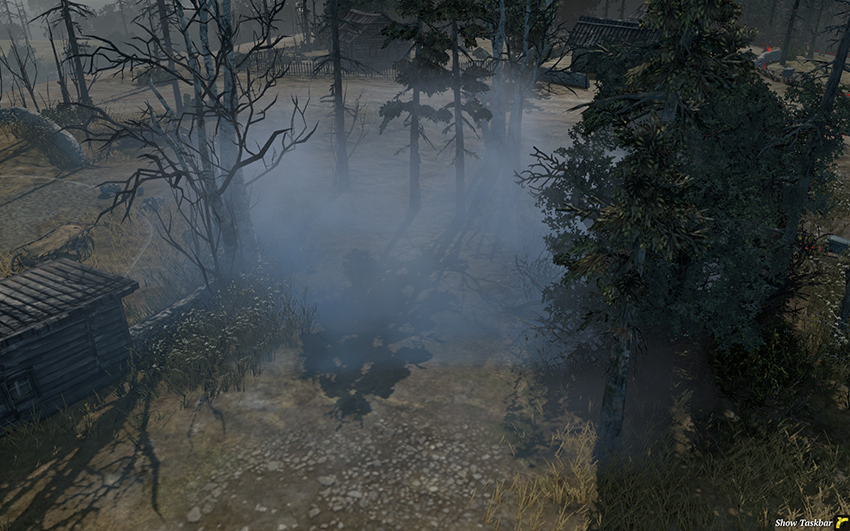
Your opponent’s view of the Ostwind after the smoke canisters deploy.
- Make your force seem larger than it is. To do this, decap a point with an infantry squad (without revealing your Half-track), then load it into the Half-track and move to decap another point. Your opponent will expect you to fully capture a single point before moving on, so if he sees you decapping several points soon after each other, he’s going to assume that you have several infantry squads in that area of the map.
- Many units have ranges that exceed their line of sight. Mortars, artillery, and AT guns are a few prime examples. To make the most of these units, use one of your other units to gain line of sight of the enemy, allowing your long-range units to fire from safety. Snipers excel in this spotting role, as they can be moved in camouflage from cover to cover toward the enemy, with Hold Fire on so their presence isn’t revealed. When you use the Sniper as a spotter, your opponent won’t be expecting accurate Mortar and artillery fire from your far-off units.
Cold, Snow, and Ice
Watch the in-game “Cold, Snow, and Ice” tutorial. Winter can be advantageous for you if you plan ahead to keep your units warm and consider how you want to behave during blizzards, depending on the composition of your army. For example, if you rely on long-range, less mobile units, you’ll want to scout ahead more than usual during blizzards. By contrast, if your army consists of versatile assault units, you should be as aggressive as you can without allowing units to freeze because your infantry will be able flank HMGs that would normally suppress them if they had sight and your tanks will be able to bypass the fire arcs of AT guns unharmed.
Winter Tips
- Use light vehicles in the early game to crush Campfires on your opponent’s side of the map. This will threaten his units with freezing during blizzards.
- If you have idle AT guns, tanks, or artillery, you might target neutral buildings with the intent of denying your opponent use of them.
- Create craters using Attack Ground with Mortars, artillery, tanks, or grenades to avoid the effects of cold temperature in areas with no natural cover.
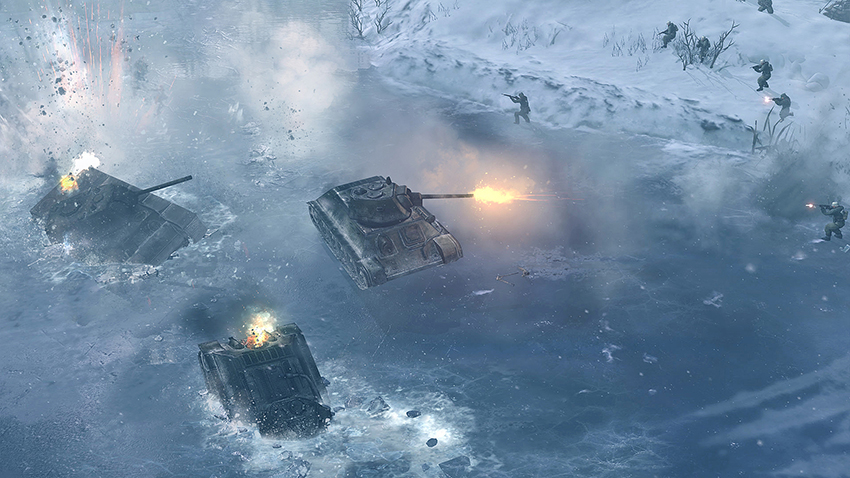
Use Attack Ground and target the ice beneath enemy tanks. Normal attacks targeting tanks will sometimes cause the ice to collapse as well.
- Vehicles can provide cover to infantry, which is useful in open field fights and especially useful during blizzards, as infantry squad temperature stabilizes while they’re in cover. This means a builder unit like a Combat Engineer or Pioneer squad can repair a tank during a blizzard without suffering any hypothermia casualties.
- Heavy weapons like tank cannons, artillery, and Mortars can break holes in the ice, causing units to fall into the freezing water and perish, as well as making the area impassable for other units.
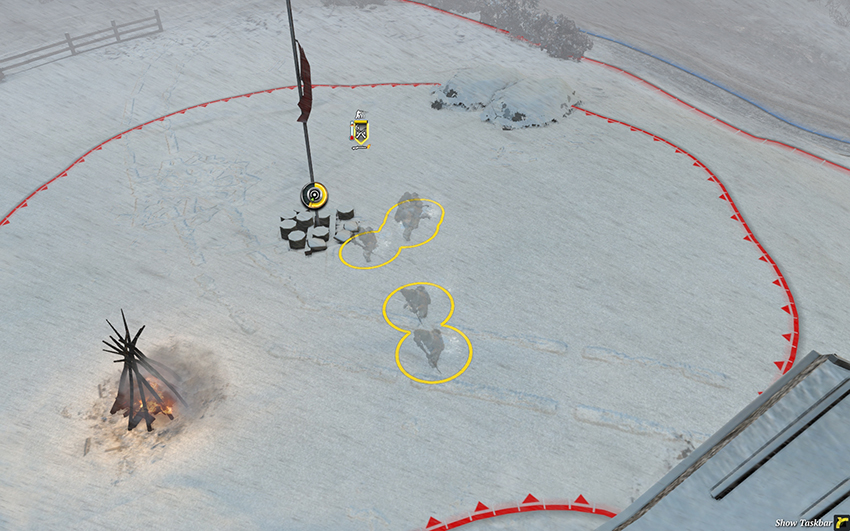
Infantry moving through deep snow during blizzards gain camouflage. Note that this Conscript squad managed to acquire a dropped Flamethrower.
- Want to know if there’s a squad hiding in deep snow or behind a building, waiting for you? Look at the snow for any tracks. This can tell you whether to expect a Sniper or a Conscript squad, infantry or vehicles. Note that tracks are covered over during blizzards.
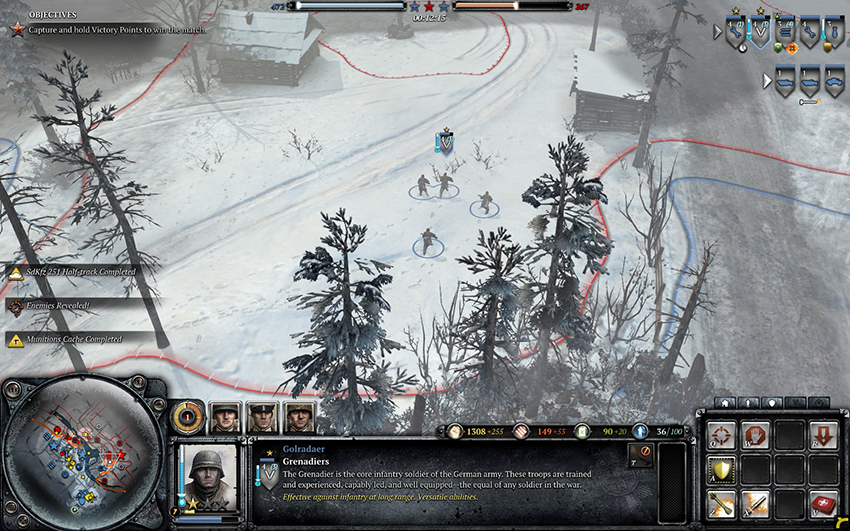
Footprints left behind by a grenadier squad moving through deep snow.
Sound Effects
You can listen to unit sound effects through the fog of war to get advanced warning about your opponent’s units and intentions. For example, you may here the rumble of a heavy tank, the engine of a light vehicle, the shot of a Sniper, the thwunk of a Mortar firing, or the roar of a Howitzer. You can also hear infantry, to some extent.
Production Buildings
Place production buildings near to the edge of the base, as you can reinforce squad members while walking between your HQ and the building, shaving several seconds off the unit’s trek back to the front line. Speed up construction of buildings using multiple builders (Combat Engineer or Pioneer squad).
Resource Expenditure
In RTS games, it’s a bad idea to stockpile resources unless you’re saving to purchase a specific unit. It’s better to have units on the field than resources in the bank. However, due to Company of Heroes 2’s upkeep mechanic (the process by which Manpower income decreases as your population increases), it’s advantageous to keep your population cap as low as you can without sacrificing battlefield superiority.
One effect of upkeep functioning in this way is that battlefield fortifications and resource caches become far more powerful. For example, you might think that a 200 Manpower Fuel Cache is equivalent to a 200 Manpower unit, but the unit will reduce your Manpower income over the course of the game whereas the Fuel Cache will not, meaning that units have hidden Manpower costs associated with them. For example, compare a bunker with an MG emplacement to an MG42: The first is 150 Manpower and 60 Munitions while the second is 240 Manpower plus upkeep. In the early game the MG42 is a better choice due to its lack of Munitions cost, but in mid game and in the late game, you’ll want to build MG bunkers to lock down areas rather than more MG42s.