
Xenoblade Chronicles X Guide Data Secret Files
Rise of the Blood Lobster
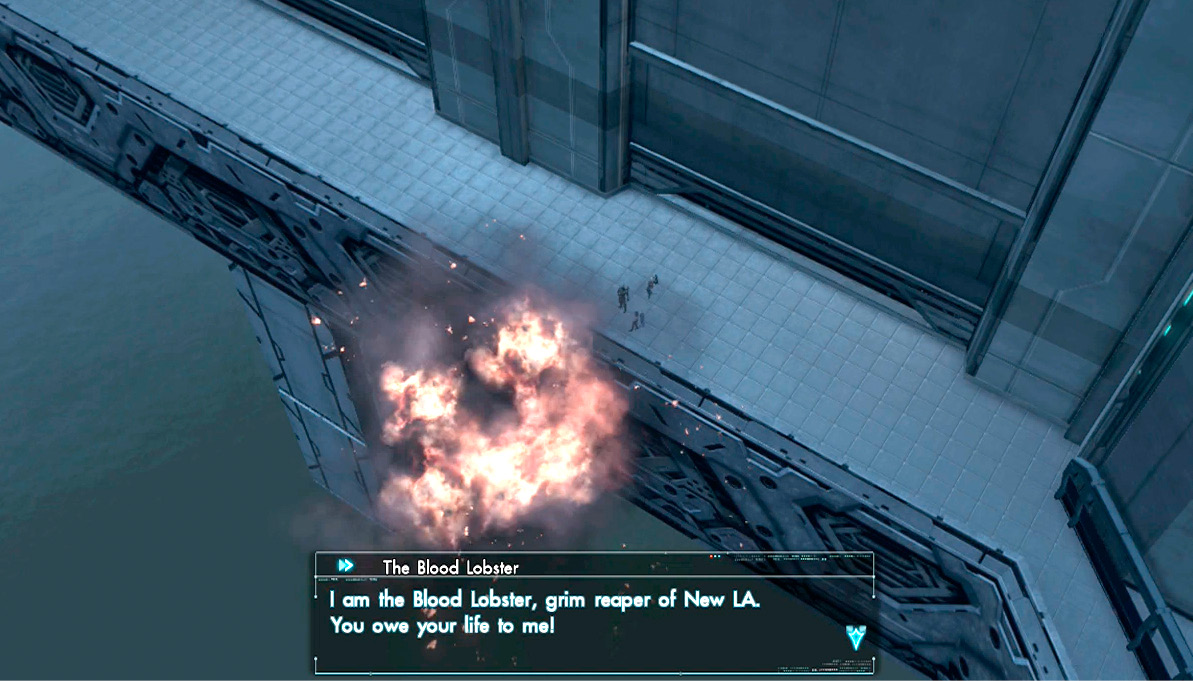
After finishing Chapter 3, as well as completing the “A Hero’s Ride” normal mission, head to the left of the Outfitters test hangar entrance to find a cute but curious stuffed lobster.
Watch out, though—these lobsters hide explosives! The Blood Lobster makes his debut here, threatening to blow up New LA unless you find all of his little toys. In addition the one you’ve just found, there are 100 stuffed lobsters in all. Use the locations provided below to save the city!
While you can start the quest after Chapter 3, you cannot complete this mission until Chapter 11, at the earliest. Finding all of the stuffed lobsters will require the use of a Skell, and a flying Skell makes things much easier.
Lobsters – First Half
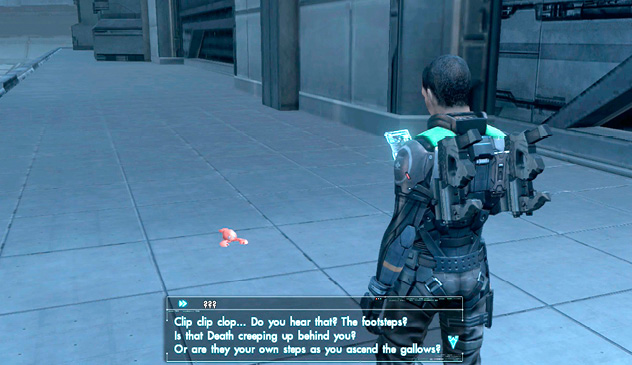
Stuffed Lobster 0: Industrial District
Left from the Outfitters Test Hangar entrance. This is the stuffed lobster that begins the quest.
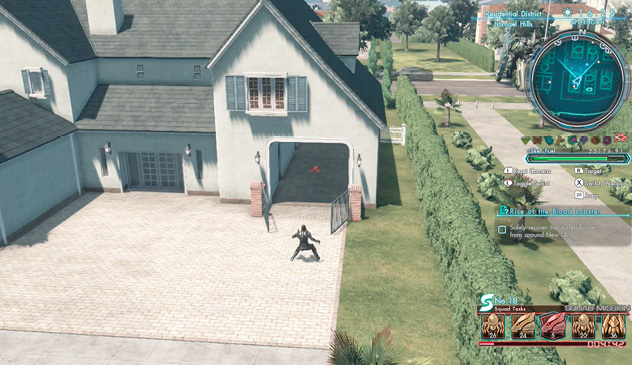
Stuffed Lobster 1: Residential District/Ishmael Hills
White-painted, gray-roofed house at the border of Ishmael Hills. Check the garage.
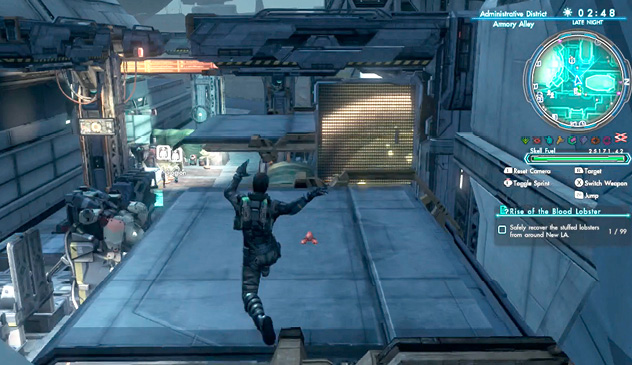
Stuffed Lobster 2: Administrative District/Armory Alley
On the roof left of the Shop Terminal.
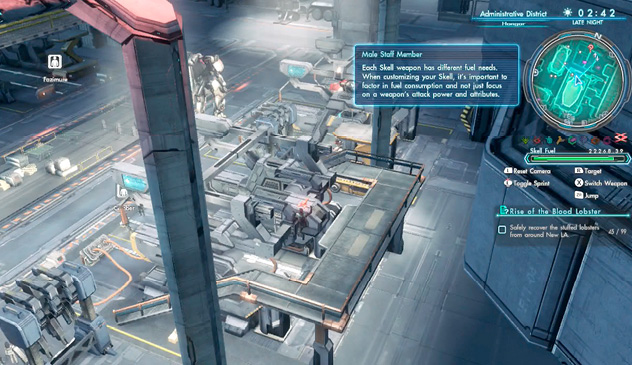
Stuffed Lobster 3: Administrative District/Hangar
Skell maintenance area, close to Camber, near the steps.
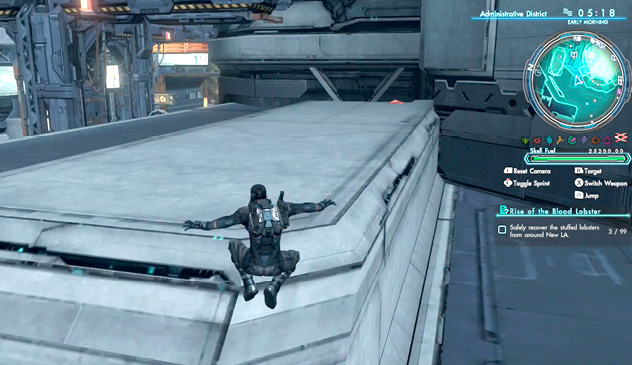
Stuffed Lobster 4: Administrative District/Armory Alley
Left side of BLADE Tower (slightly west of the warp to the Ma-Non Ship).
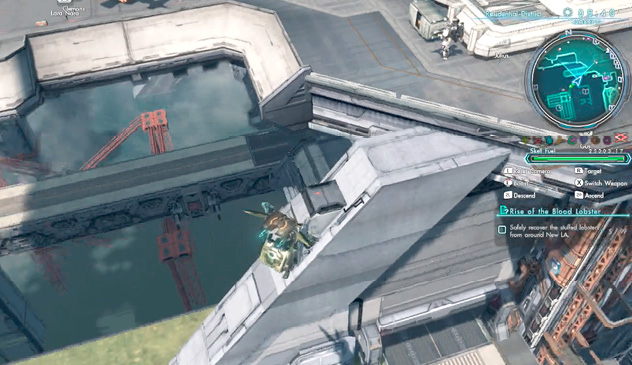
Stuffed Lobster 5: Administrative District/BLADE Tower
Elevator side of BLADE Tower. Head past the edge, onto the slanted ramp.
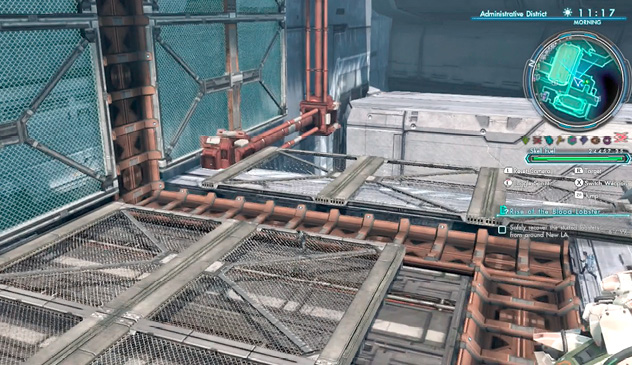
Stuffed Lobster 6: Administrative District
Across from the Mimeosome Maintenance Center, at the bottom of the red staircase. Check the end of the red pipe.
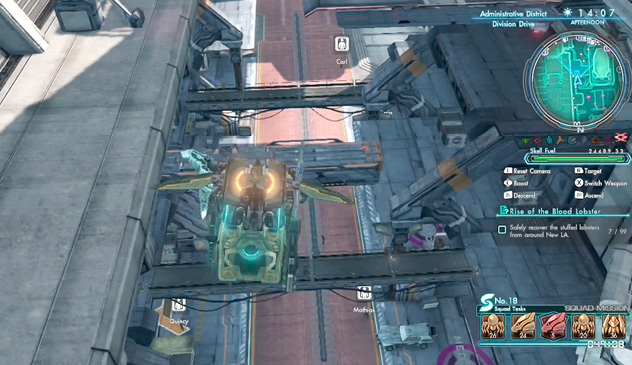
Stuffed Lobster 7: Administrative District/Division Drive
Bridge above the Mediators.
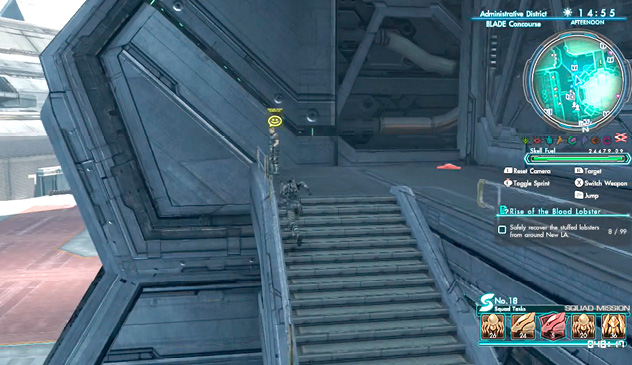
Stuffed Lobster 8: Administrative District/BLADE Concourse
At the top of the stairs to the far left of Mission Control.
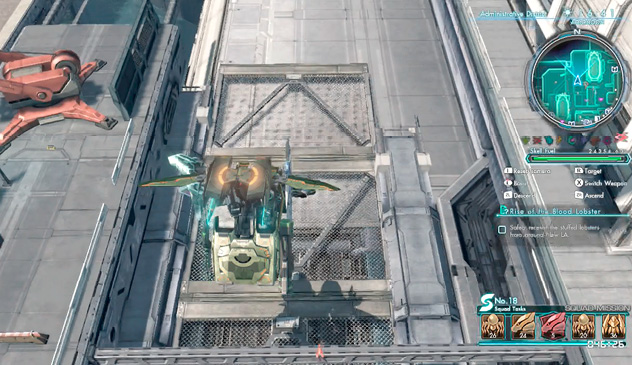
Stuffed Lobster 9: Administrative District/Division Drive
Face Division Drive’s elevator, then head past it completely. You’ll see a thin steel frame over some wire mesh with the lobster on it.
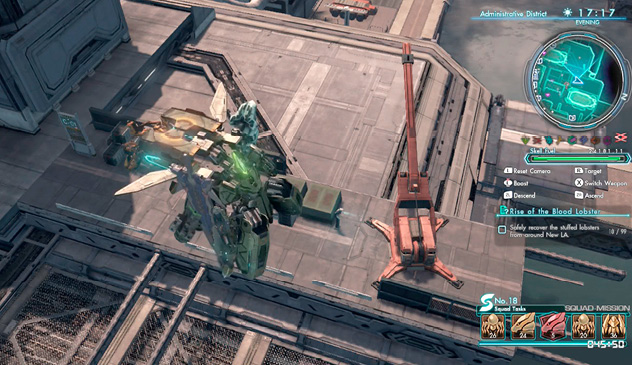
Stuffed Lobster 10: Administrative District/Division Drive
Atop the crane close to where you picked up lobster 9.
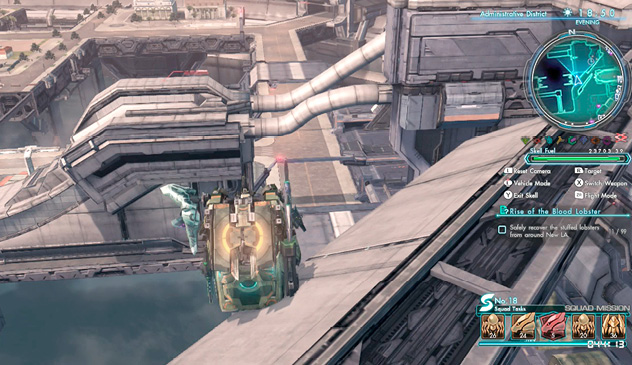
Stuffed Lobster 11: Administrative District
Above the highway running along the lower end of the Administrative District (close to the hangar). Look for the large pipes!
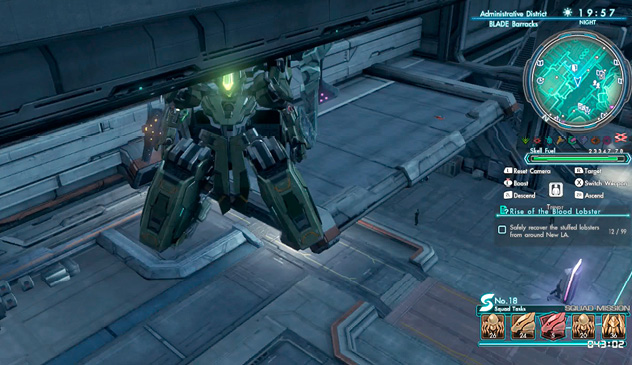
Stuffed Lobster 12: Administrative District/BLADE Barracks
Roof above the BLADE Barracks entrance.
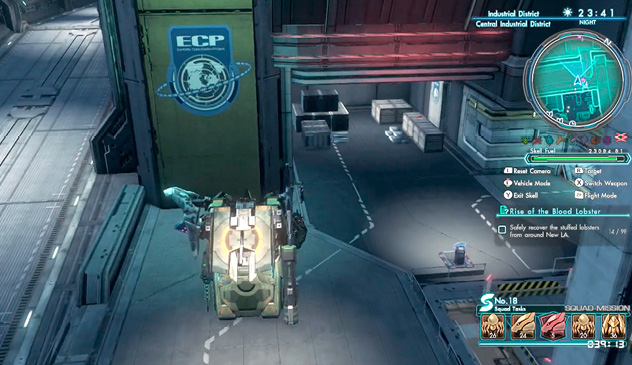
Stuffed Lobster 13: Industrial District
On top of a container near the lower part of the West Gate’s elevator.
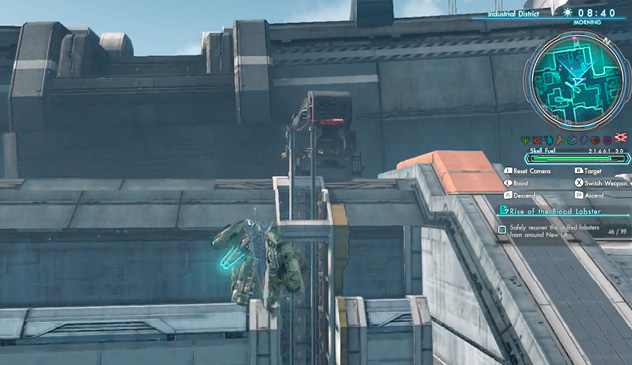
Stuffed Lobster 14: Industrial District
Atop a brace in the upper part of the West Gate’s elevator.
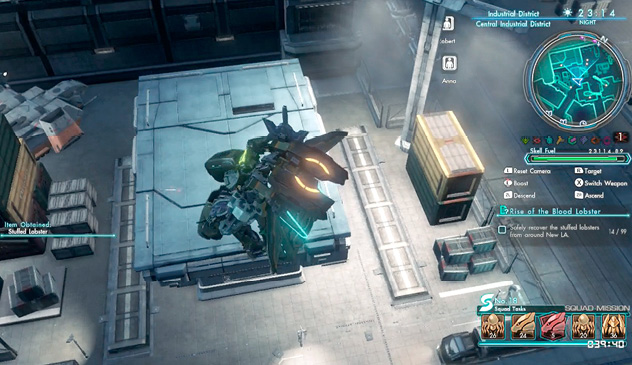
Stuffed Lobster 15: Industrial District
On top of the small building on the west side of the crossroads in front of the West Gate.
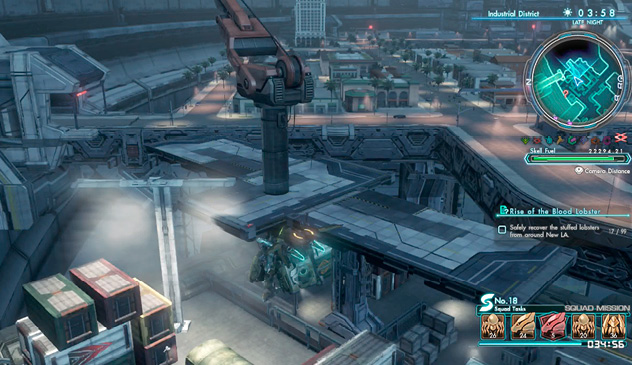
Stuffed Lobster 16: Industrial District
Just under the crane near and above Professor B’s research lab.
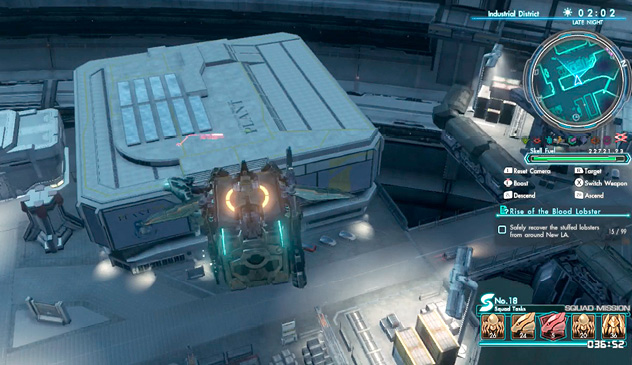
Stuffed Lobster 17: Industrial District/Integrated Production Plant
Survey the Industrial District from above with your Skell, and look for the big building with “PLANT” written on it in big letters. It’s hard to miss, trust us.
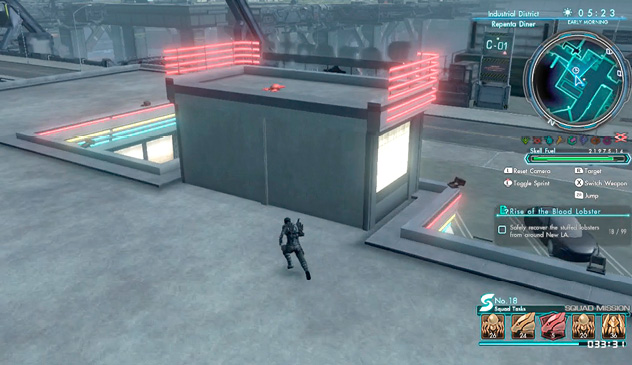
Stuffed Lobster 18: Industrial District/Repenta Diner
Above the diner entrance, behind the “Repenta” sign.
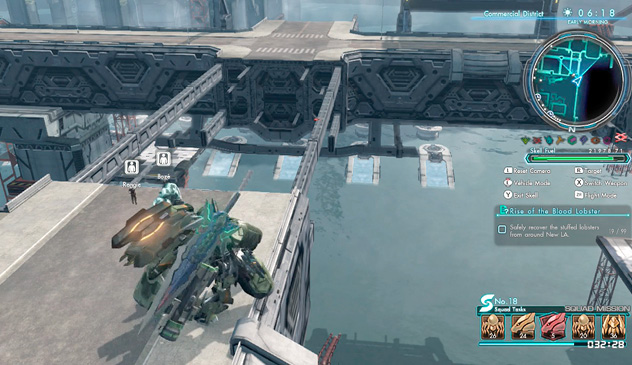
Stuffed Lobster 19: Commercial District
On the thin steel frame in front of where Bozé Lowes hangs out.
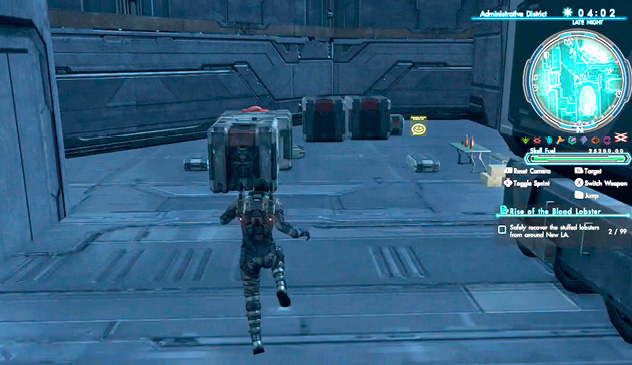
Stuffed Lobster 20: Administrative District/Hangar
East from the door in front of the Hangar. Check the box near the area where BLADEs can often be seen fighting.
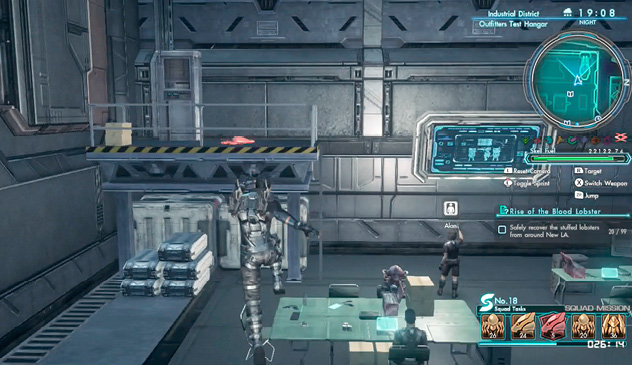
Stuffed Lobster 21: Industrial District/Outfitters Test Hangar
Small balcony near Alan.
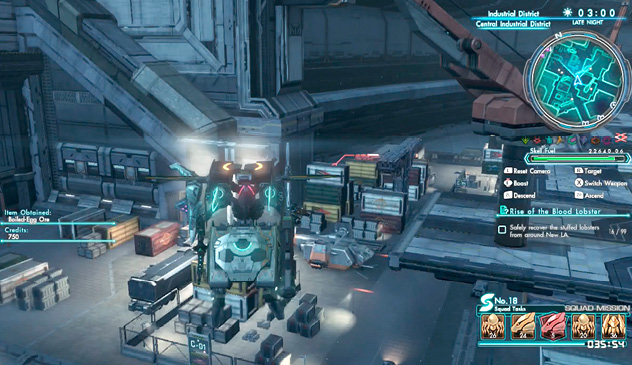
Stuffed Lobster 22: Industrial District/Central Industrial District
On top of the container between Professor B’s Lab and the transport.
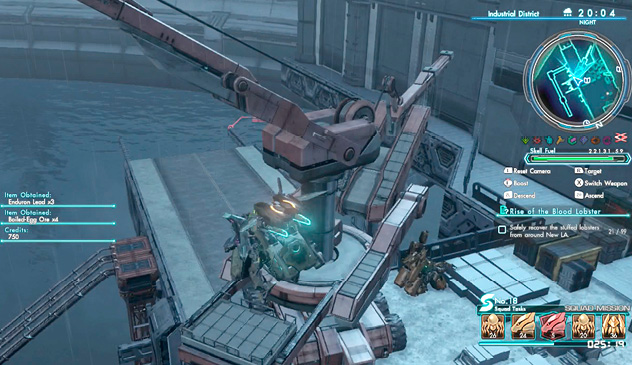
Stuffed Lobster 23: Industrial District/Outfitters Test Hangar
Past the big crane, where the road ends.
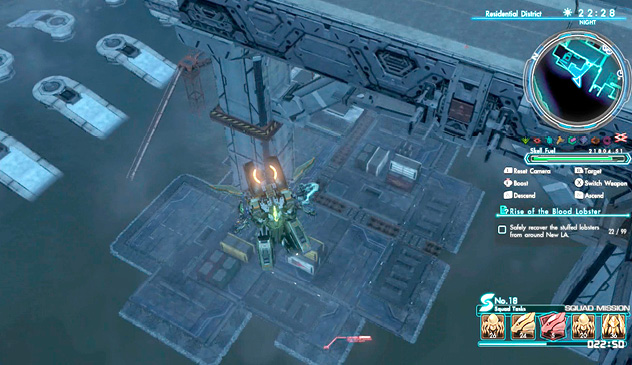
Stuffed Lobster 24: Residential District/Lower Area
The northwest area of the Residential District, to the lower left of the open area after you descend the stairs.
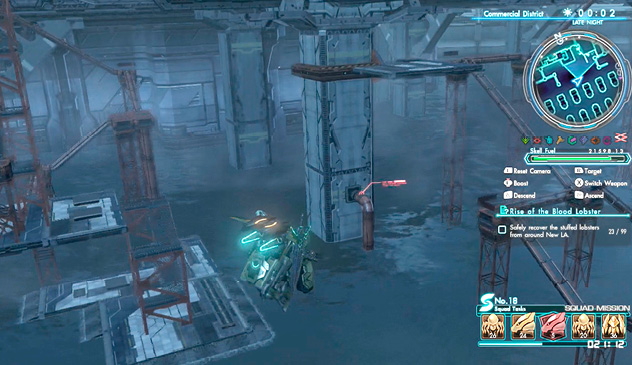
Stuffed Lobster 25: Commercial District/Lower Area
On top of a pipe below the point where the road stops in the south center area.
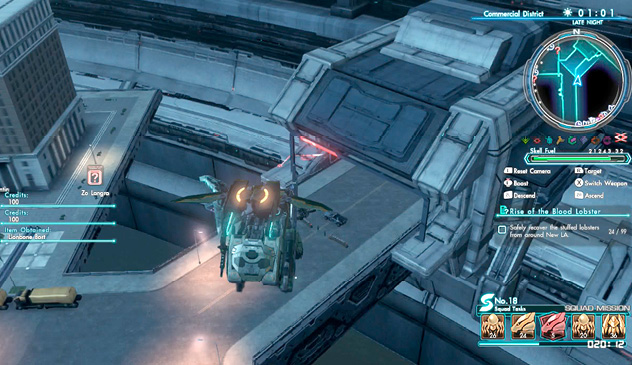
Stuffed Lobster 26: Commercial District
East side, near the barricade by the entrance/exit.
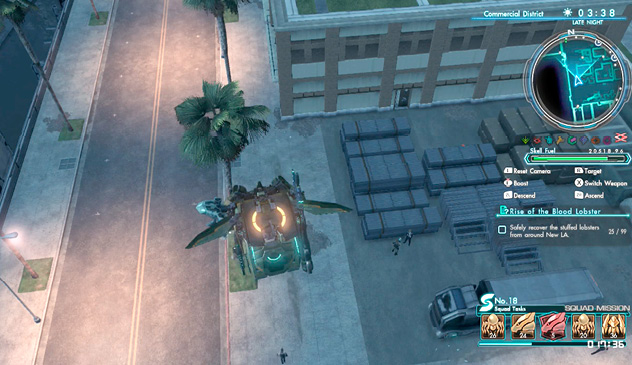
Stuffed Lobster 27: Commercial District
Southwest area, near the large truck atop the pile of metal and materials.
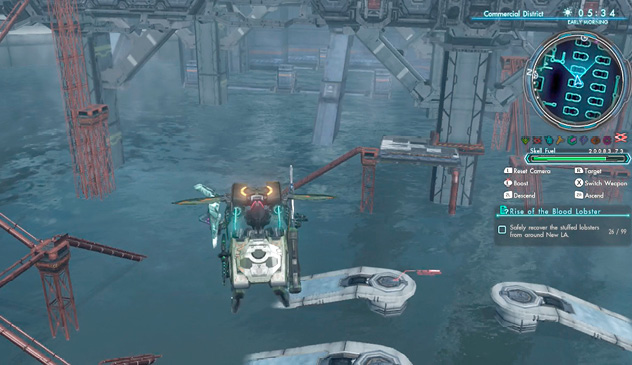
Stuffed Lobster 28: Commercial District
The pillars on the waters between the Commercial and Residential Districts.
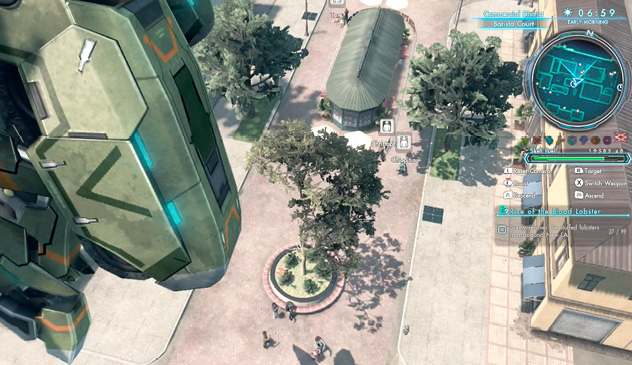
Stuffed Lobster 29: Commercial District/Barista Court
Check the tree in the very midst of Barista Court.
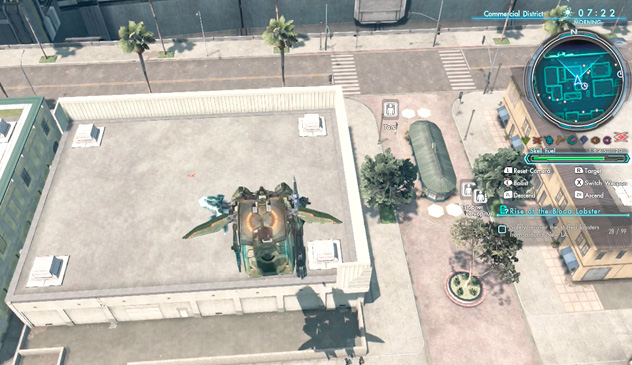
Stuffed Lobster 30: Commercial District/Barista Court
Directly to the side of Lobster 29, on top of the large building.
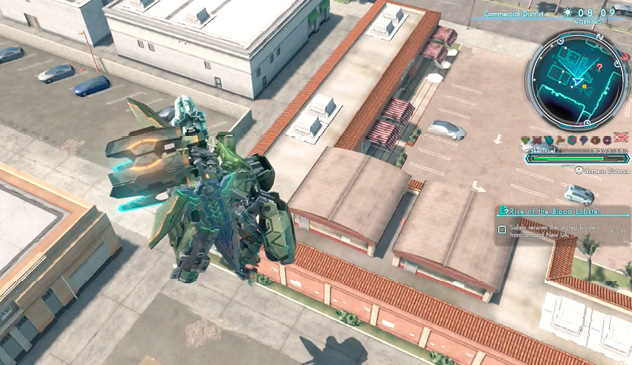
Stuffed Lobster 31: Commercial District
Atop the orange L-shaped building in the southeastern section of the district.
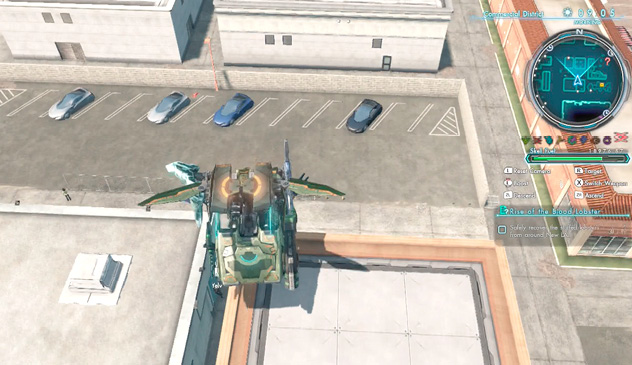
Stuffed Lobster 32: Commercial District
Directly west of the L-shaped building where you found lobster 31, in the middle of the parking lot.
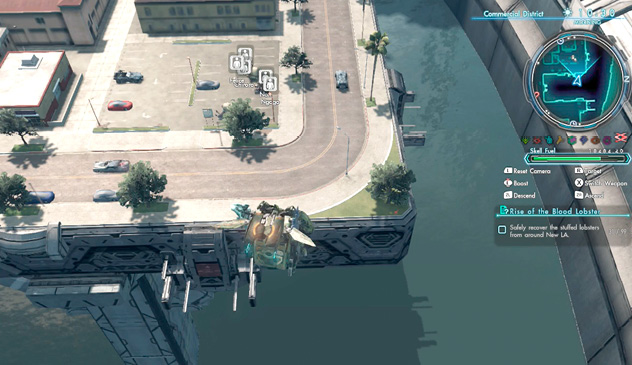
Stuffed Lobster 33: Commercial District
Northeast sector of the district, under a corner tree not far from where the Nopon Bazaar sets up.
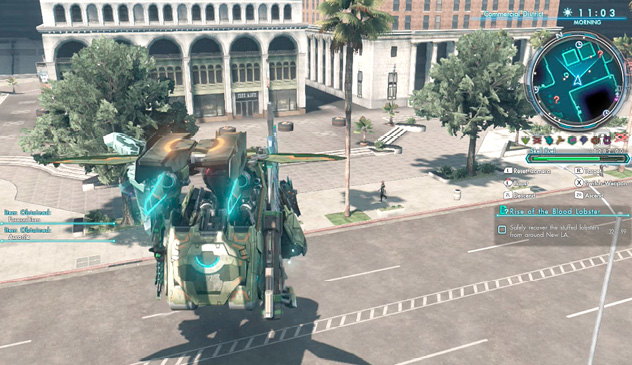
Stuffed Lobster 34: Commercial District
Northeast sector of the district, at the base of the tree that intersects the path leading between two large buildings. (In the picture, it’s the tree shown directly next to the mini-map.)
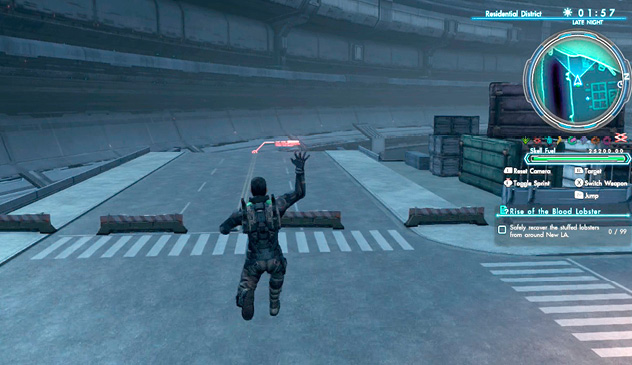
Stuffed Lobster 35: Residential District
Southwest corner, where the road comes to an end.
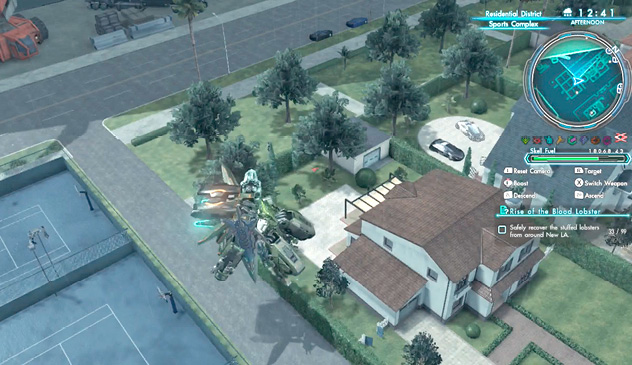
Stuffed Lobster 36: Residential District
Backyard of a house directly across from the tennis courts.
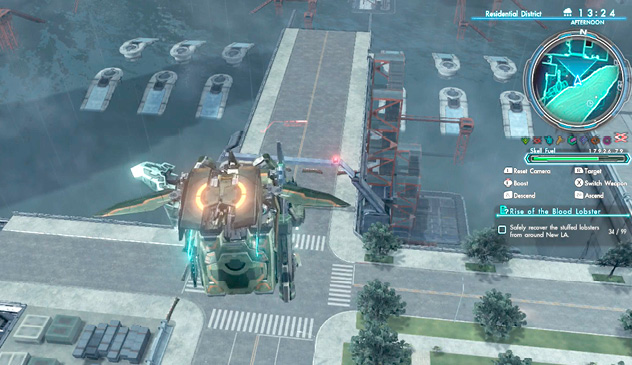
Stuffed Lobster 37: Residential District
Northwest, near the barricade and end of the road.
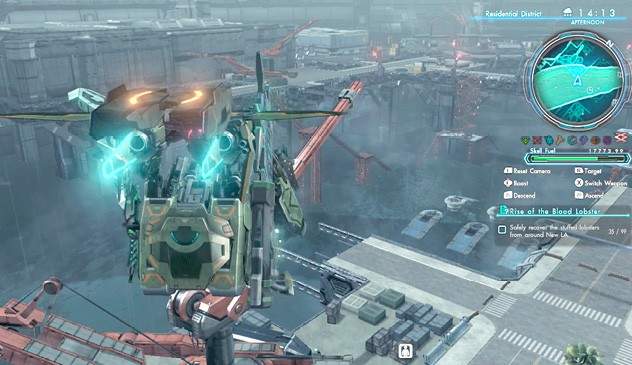
Stuffed Lobster 38: Residential District
The large crane directly next to Phog’s hangout (and over Phog’s head).
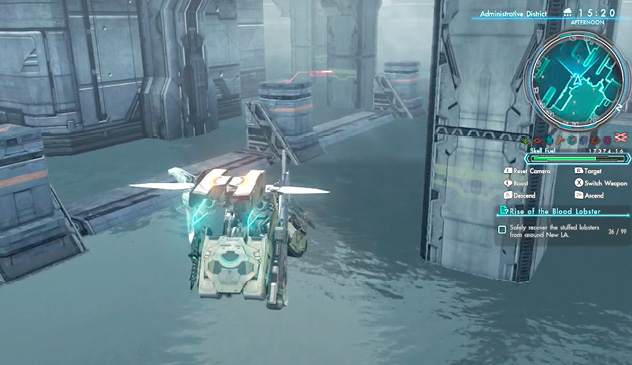
Stuffed Lobster 39: Residential District/Lower Area
Underneath the Water Purification Plant. Use the nearby drop-offs to go to the lower area and find it.
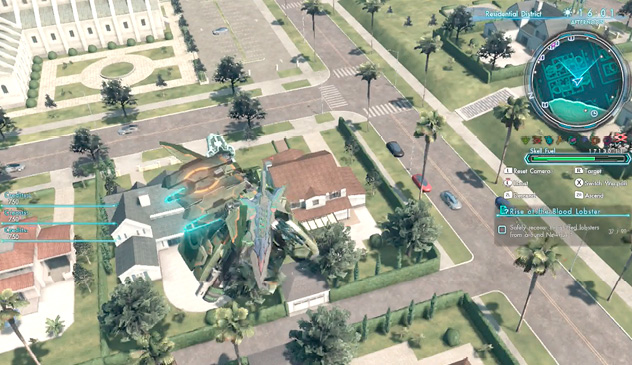
Stuffed Lobster 40: Residential District
Brown roof of the house directly across the street from the cathedral’s parking lot.
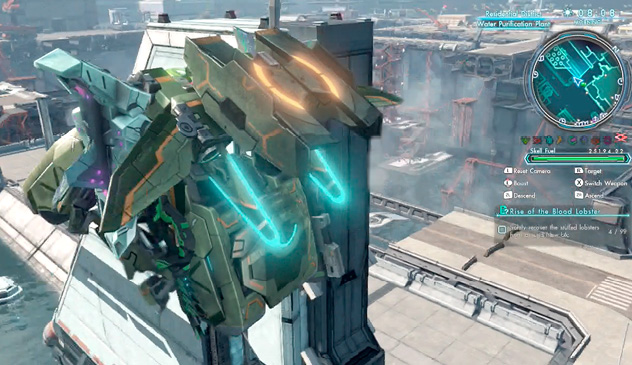
Stuffed Lobster 41: Residential District/Water Purification Plant
Above the pillar bearing the ECP emblem.
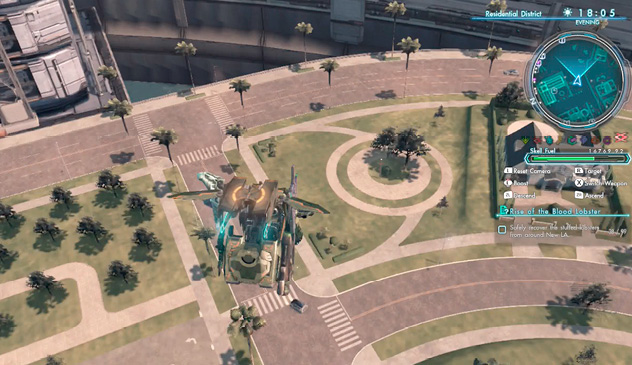
Stuffed Lobster 42: Residential District
Southeast area. Look for the trees growing amidst a circle-patterned sidewalk.
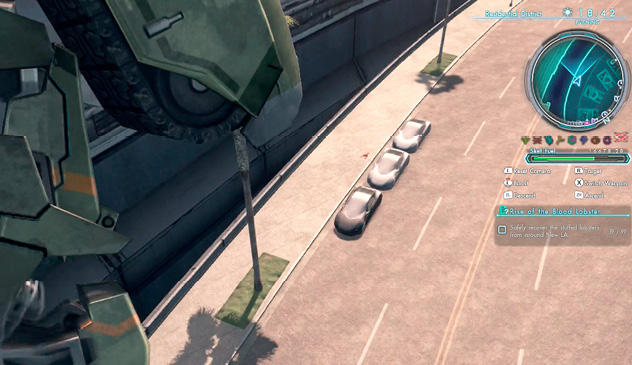
Stuffed Lobster 43: Residential District
Southeast area. Scan the road and look for three cars parked in a row.
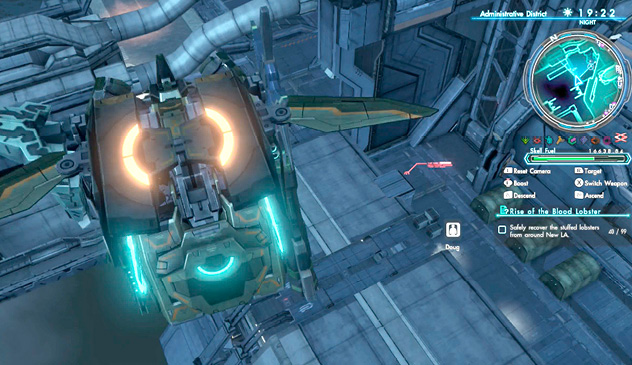
Stuffed Lobster 44: Administrative District/Hangar Area
On the other side of the fence, directly north of Doug’s hangout.
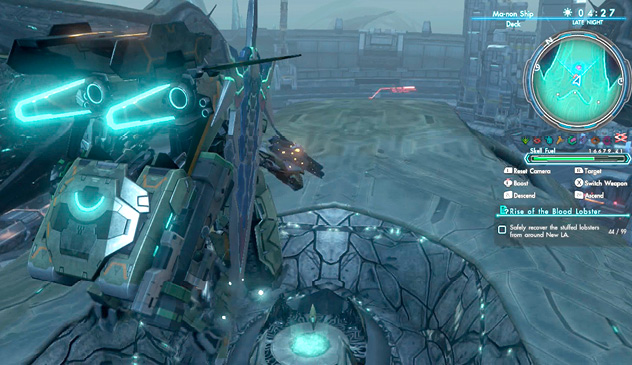
Stuffed Lobster 45: Ma-non Ship
Jump up behind the warp to BLADE Tower and proceed straight.
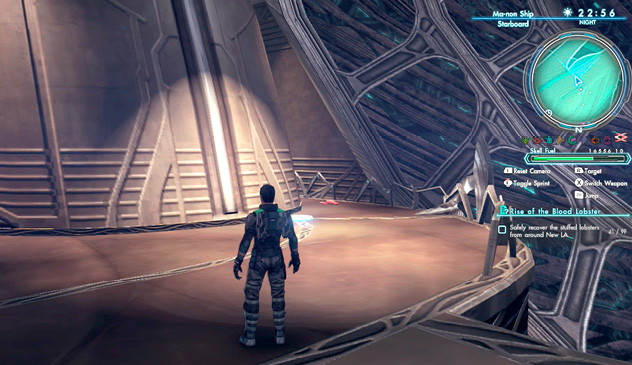
Stuffed Lobster 46: Ma-non Ship
Lowest point of the lower starboard area.
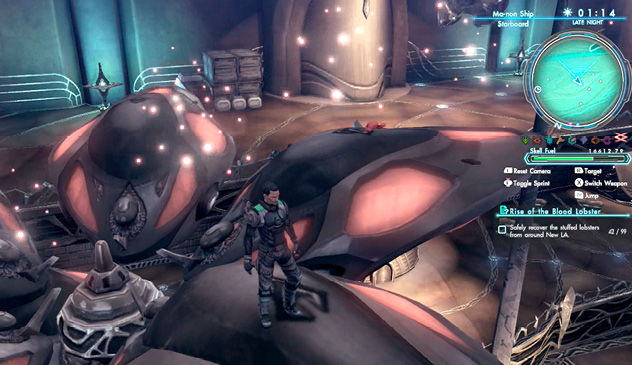
Stuffed Lobster 47: Ma-non Ship
Atop the centerpiece capsule pods in the lower starboard area of the ship.
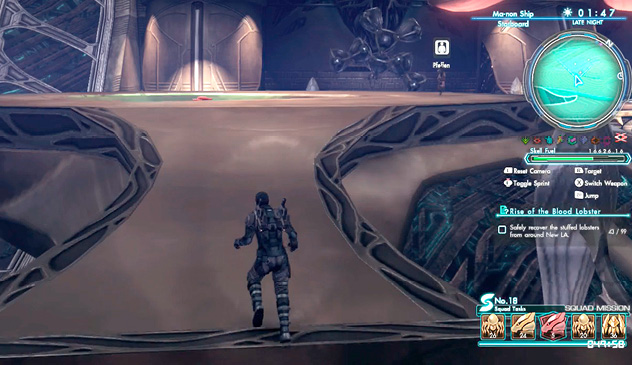
Stuffed Lobster 48: Ma-non Ship
Lower starboard area, near the back of the nuclear reactor, on the scaffold where Pfeffen is standing.
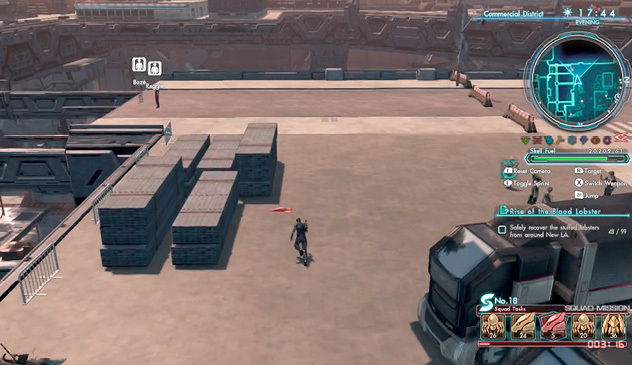
Stuffed Lobster 49: Commercial District
Check the raw materials near Bozé’s hangout.
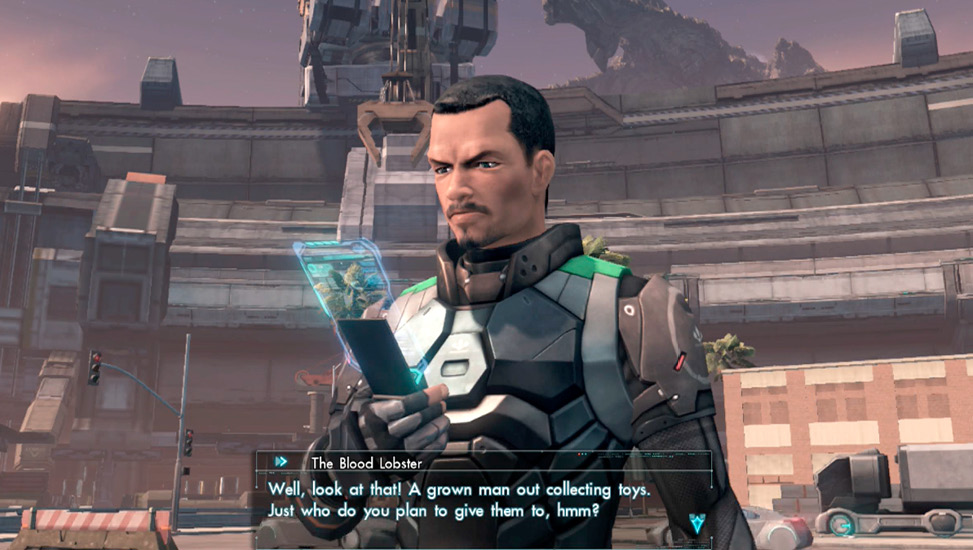
Once you grab lobster 49, the Blood Lobster taunts you and sets off some fireworks. Once the show is over, the lobsters in the next list become collectable!
Lobsters – Second Half
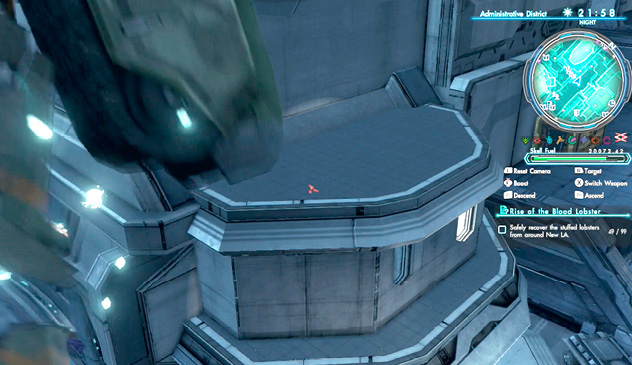
Stuffed Lobster 50: Administrative District
On the roof just around the corner from the arms manufacturers terminal.
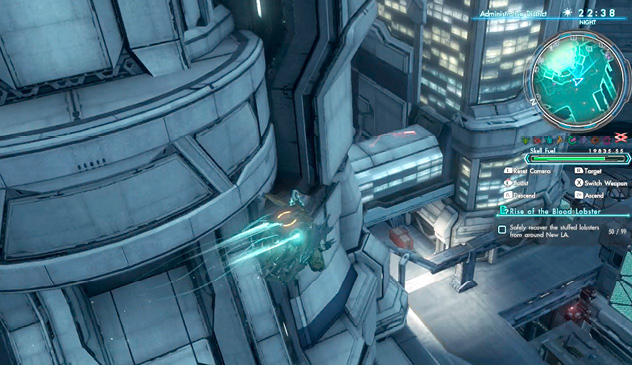
Stuffed Lobster 51: Administrative District/BLADE Tower
Atop the pillar that connects BLADE Tower to another building (look past the right side of BLADE Tower’s power display).
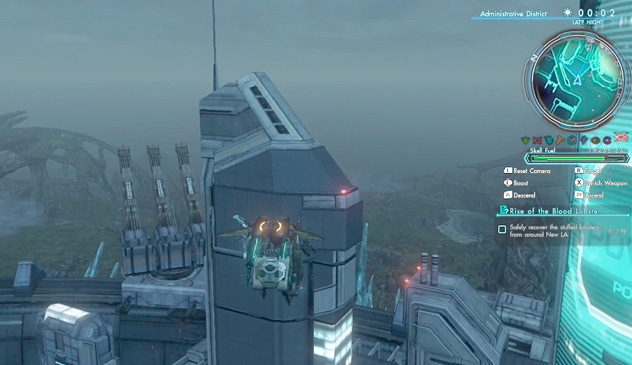
Stuffed Lobster 52: Administrative District/BLADE Tower
Atop the slimmer tower directly next to the top of BLADE Tower (look past the left side of BLADE Tower’s power display).
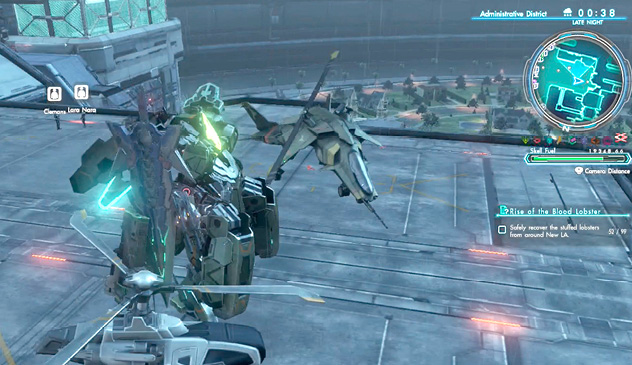
Stuffed Lobster 53: Administrative District/BLADE Tower
Under the fighter jet in front of BLADE Tower.
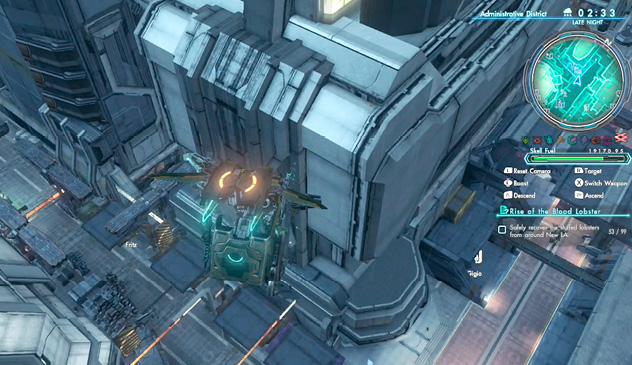
Stuffed Lobster 54: Administrative District/Armory Alley
On a roof high up directly above the arms manufacturers terminal.
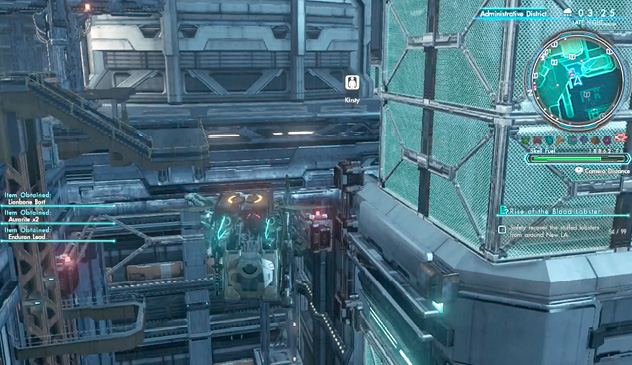
Stuffed Lobster 55: Administrative District
Near the elevator nearby BLADE Tower, on top of the machine connected to the pipe.
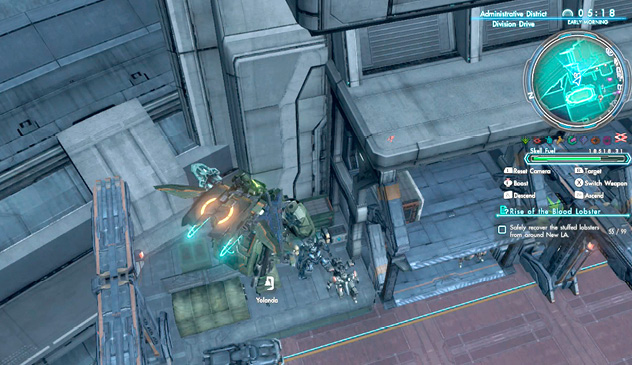
Stuffed Lobster 56: Administrative District/Division Drive
Roof above the Harriers’ area.
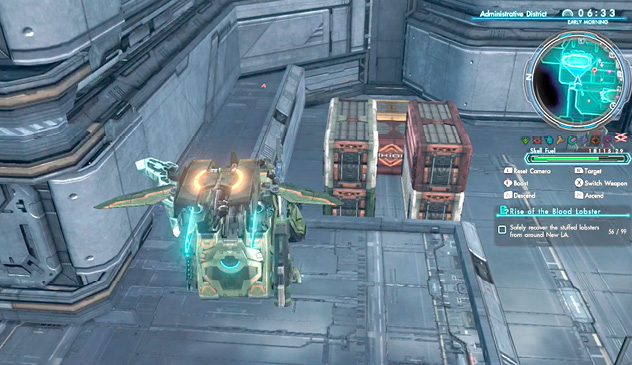
Stuffed Lobster 57: Administrative District/Hangar
Beside the large orange AXIOM crates in the northeast corner.
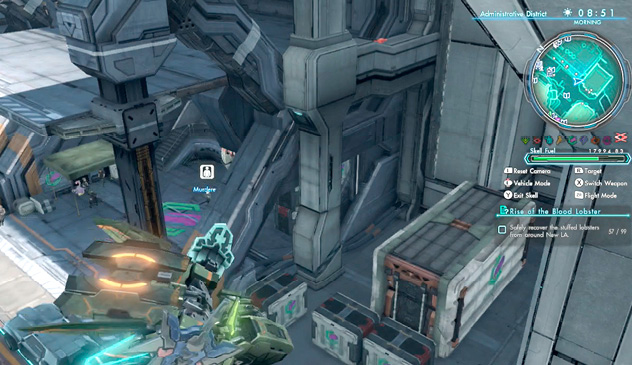
Stuffed Lobster 58: Administrative District
Next to the Mimeosome Maintenance Center, at the edge of the roof above the Curators’ area (Murderess’s hangout).
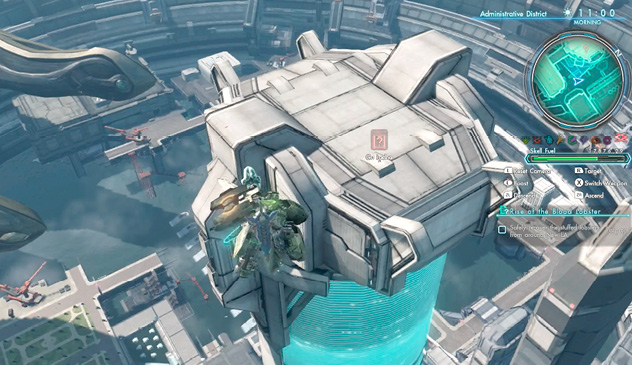
Stuffed Lobster 59: Administrative District/BLADE Tower
The very top of BLADE Tower!
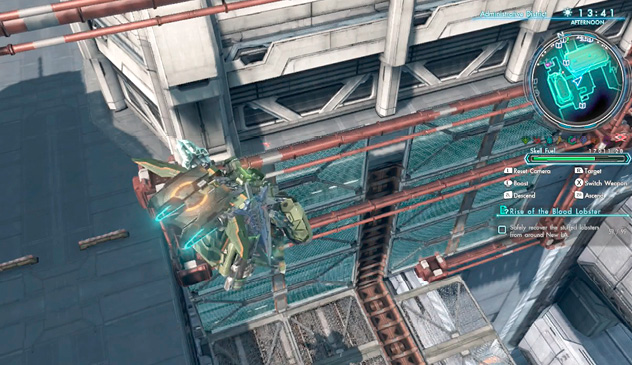
Stuffed Lobster 60: Administrative District
Check this narrow path between the fence and building near the south area of BLADE Tower. (It’s just above where you found lobster 6.)
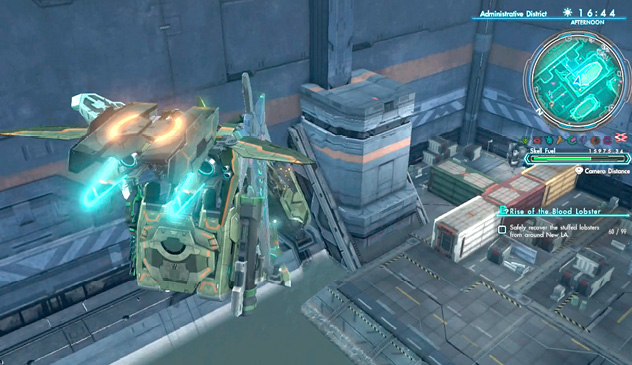
Stuffed Lobster 61: Administrative District
Directly under the Hangar. If you’ve unlocked Yardley’s avatar modification console, it’s the same area.
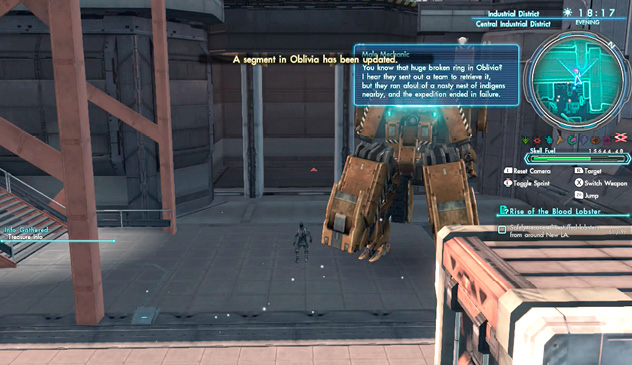
Stuffed Lobster 62: Industrial District
Under the West Gate elevator.
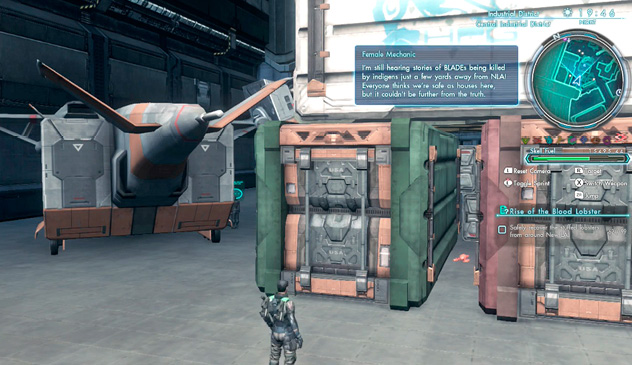
Stuffed Lobster 63: Industrial District
Near the transport northwest of the West Gate, in the space between the red and green containers.
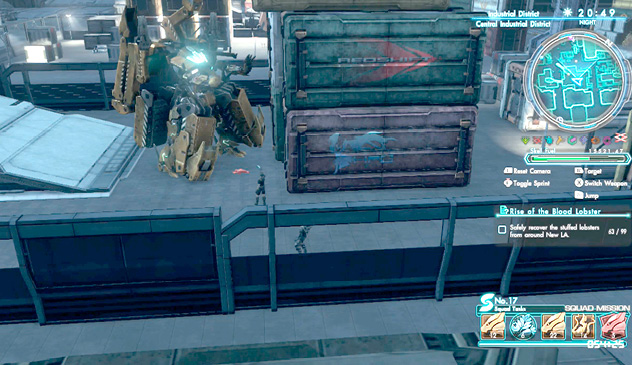
Stuffed Lobster 64: Industrial District
Find the Transport Pilot, then look for the moving Skell behind the fence directly across from him. The lobster is here.
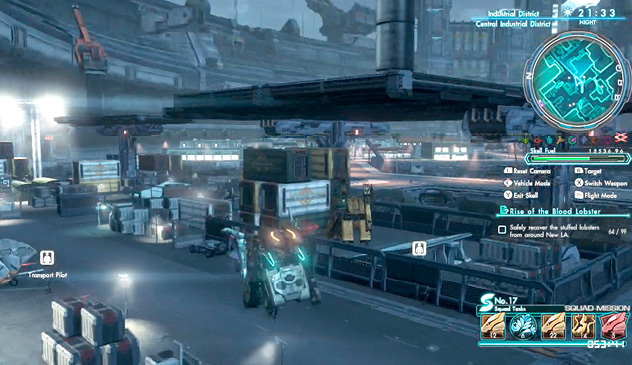
Stuffed Lobster 65: Industrial District
Atop the container right next to where lobster 64 is.
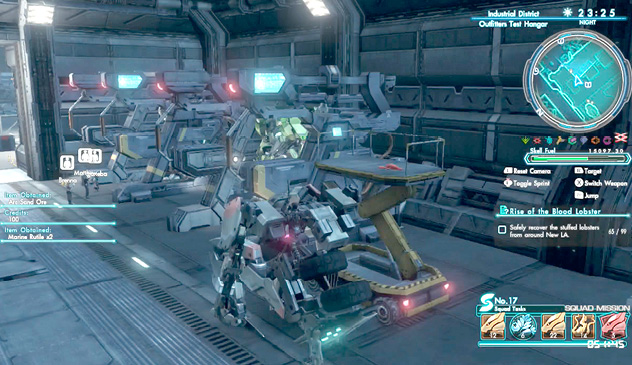
Stuffed Lobster 66: Industrial District
Check the push car just inside the Outfitters Test Hangar.
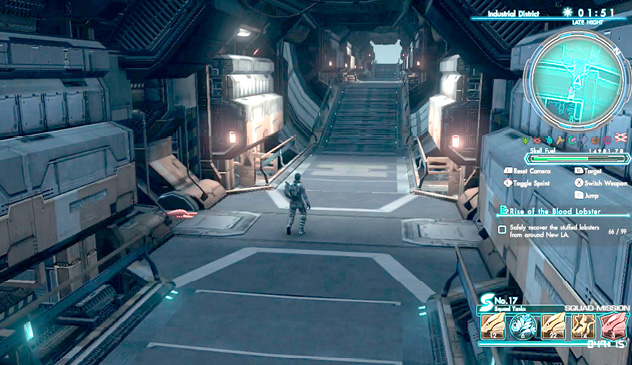
Stuffed Lobster 67: Industrial District
Fly up the full length of the West Gate elevator shaft, then go inside the passage. It’ll be to your left.
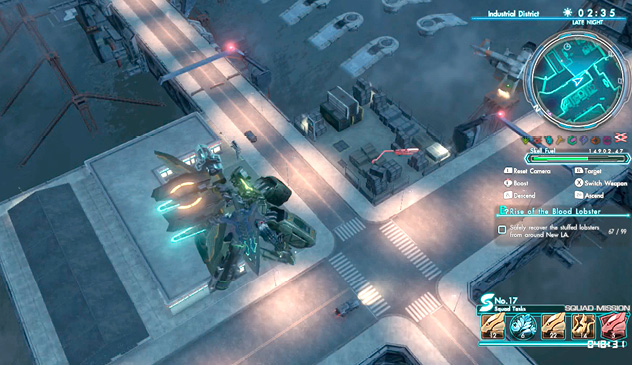
Stuffed Lobster 68: Industrial District
Raw materials yard across the street from Repenta Diner.
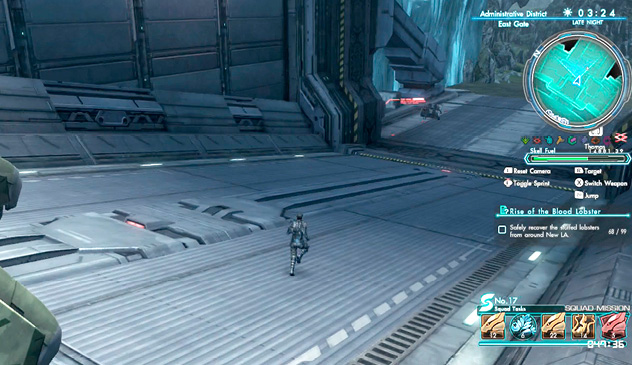
Stuffed Lobster 69: Administrative District/East Gate
Entrance of the East Gate, next to the Skells.
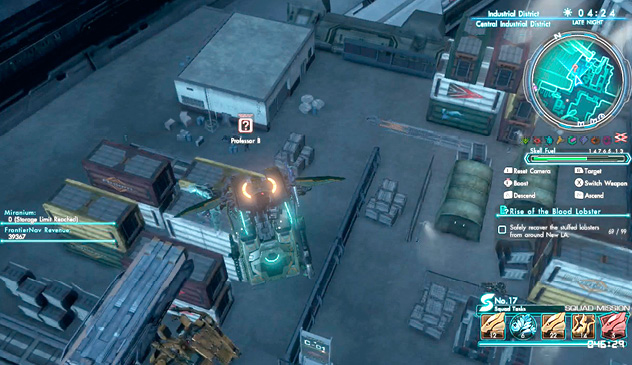
Stuffed Lobster 70: Industrial District/Professor B’s Lab
North area of the Industrial District. If you’ve encountered Professor B, check around the left corner of the building behind where he stands.
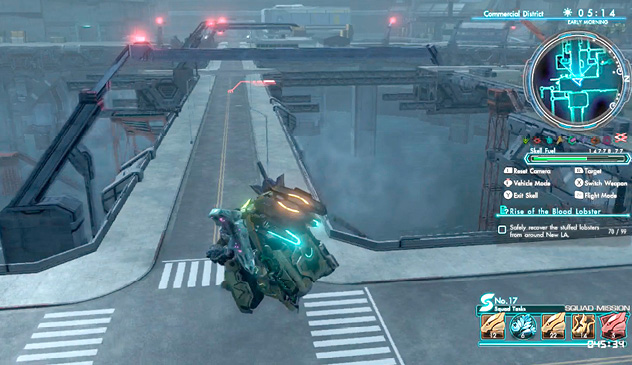
Stuffed Lobster 71: Commercial District
Connection road between the Commercial and Industrial Districts.
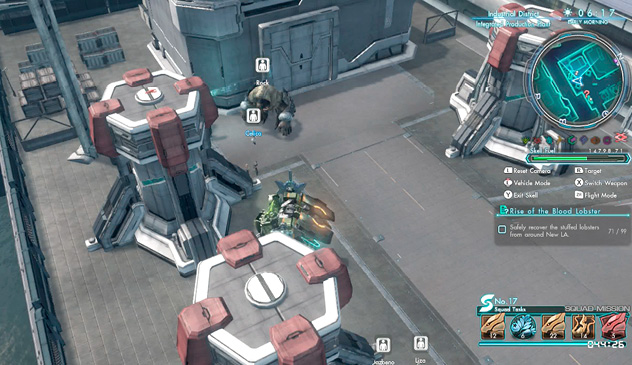
Stuffed Lobster 72: Industrial District/Integrated Production Plant
On top of the nearest waste processing unit to Rock and Celica’s hangout.
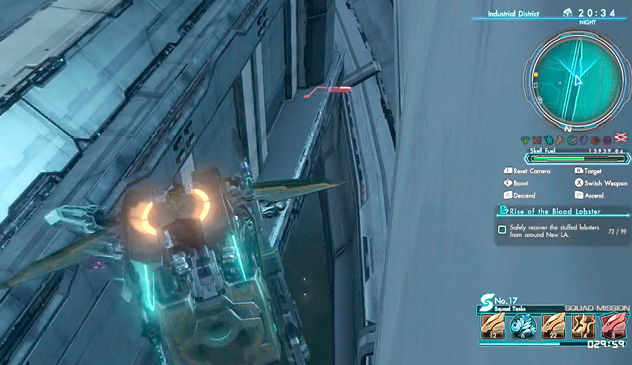
Stuffed Lobster 73: Industrial District/Outfitters Test Hangar
Narrow passage directly behind the Outfitters Test Hangar.
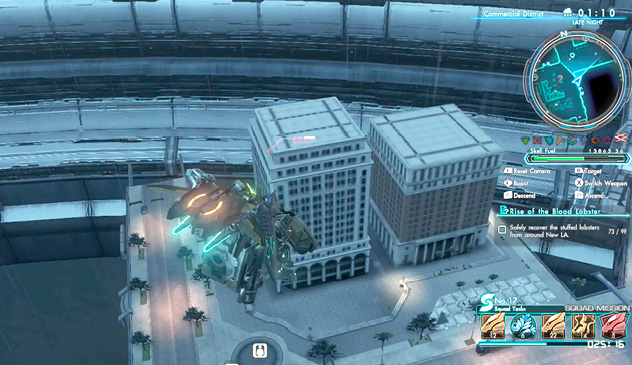
Stuffed Lobster 74: Commercial District
Two buildings in the northeast are directly adjacent to each other (in the same area where you found lobster 34). Check the top of the taller, white building.
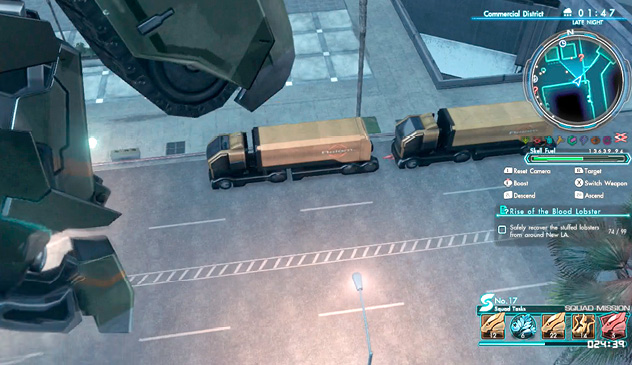
Stuffed Lobster 75: Commercial District
In the same area, look for two orange trucks parked directly next to each other. The lobster is between them.
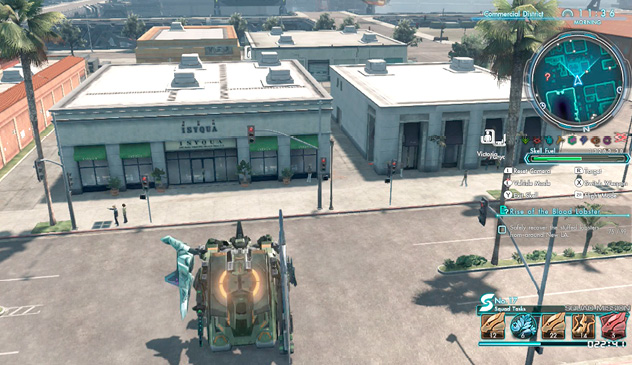
Stuffed Lobster 76: Commercial District
The alleyway between the “ISYQUA” shop and the building where Victoria can be found.
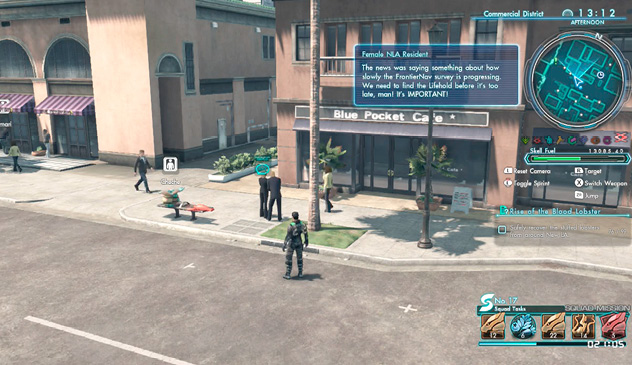
Stuffed Lobster 77: Commercial District
In front of the Blue Pocket Café next to Barista Court.
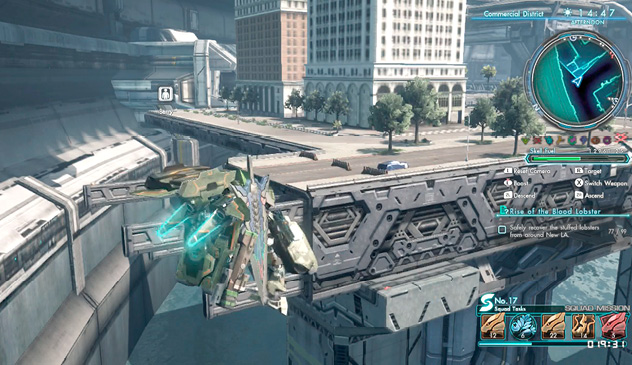
Stuffed Lobster 78: Commercial District
Go back to the two buildings where you found lobsters 74 and 75. Around the corner left from the white building, the road ends. The lobster is on a ledge below that road.
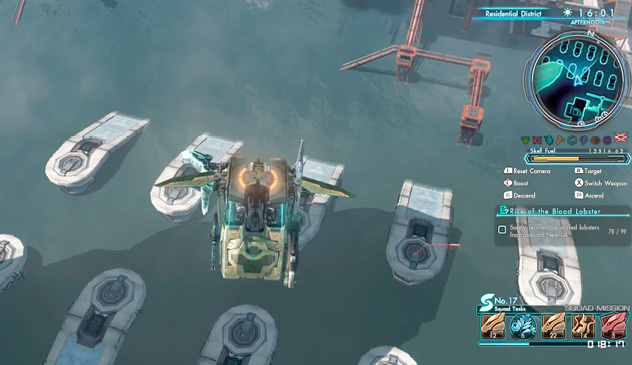
Stuffed Lobster 79: Commercial District
The pillars on the waters between the Commercial and Residential Districts. Basically a redo of lobster 28.
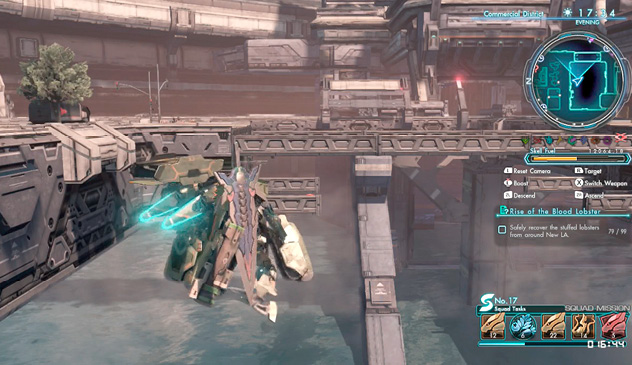
Stuffed Lobster 80: Commercial District
There are thin steel girders connecting the Commercial District and the road leading out of the Administrative District. Check the lower one of these.
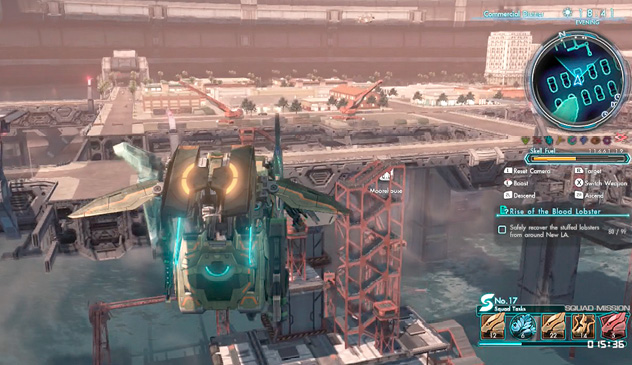
Stuffed Lobster 81: Commercial District
South side of the Commercial District, on the red steel stairs.
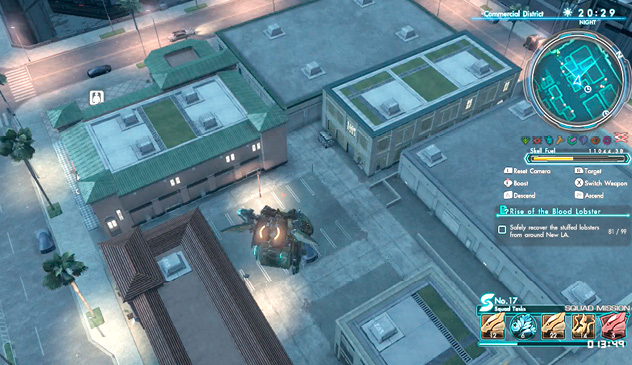
Stuffed Lobster 82: Commercial District
In the parking lot behind Army Pizza.
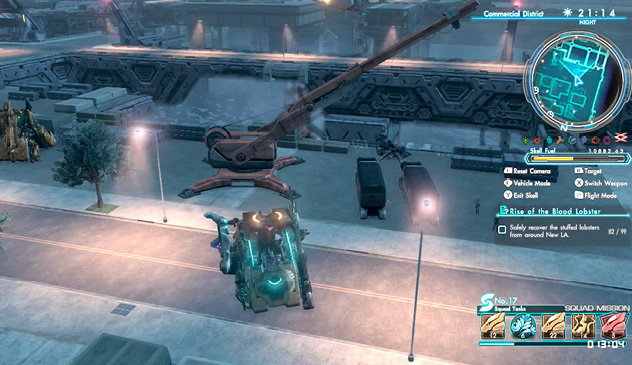
Stuffed Lobster 83: Commercial District
Look between the two black trailers next to where Bozé Lowes’s hangout is.
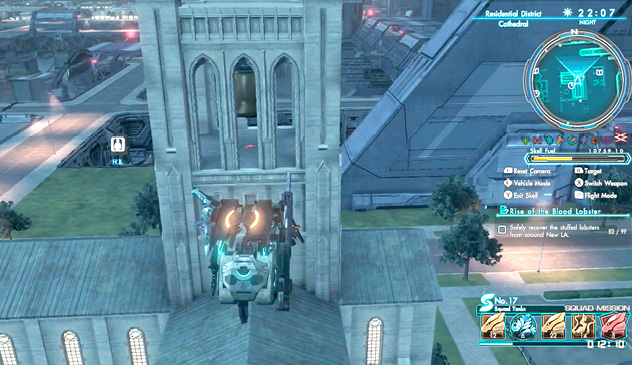
Stuffed Lobster 84: Residential District/Cathedral
Under the cathedral bell.
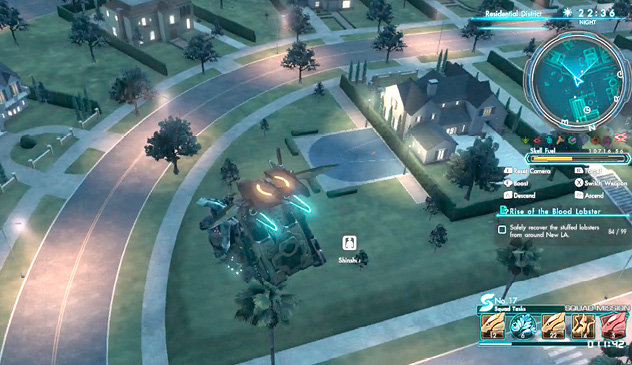
Stuffed Lobster 85: Residential District/Ishmael Hills
Southeast basketball court.
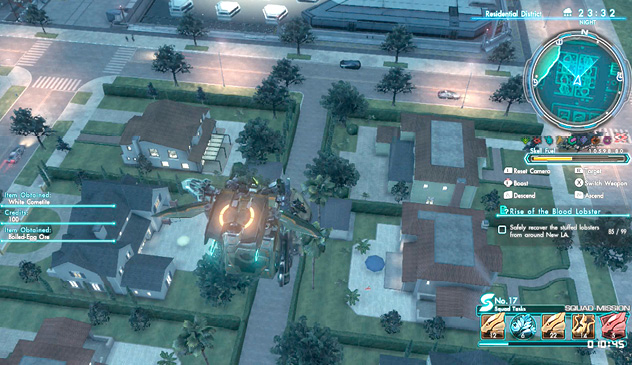
Stuffed Lobster 86: Residential District
Deep within the residential housing across from the water-treatment plant. In the picture, it’s the backyard of the bottom-right house.
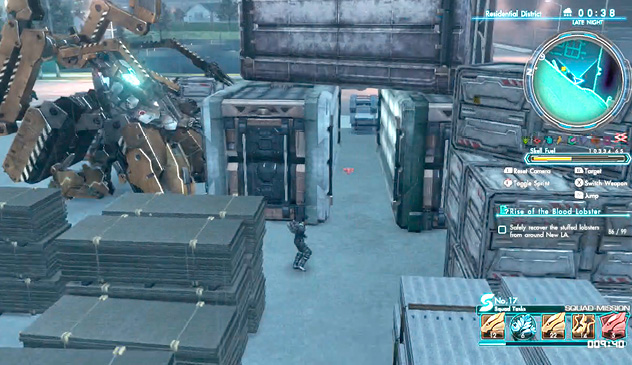
Stuffed Lobster 87: Residential District
Check the yard with the Skells and giant crane across from the Sports Complex. Between the two crates (with a third crate on top) is the lobster.
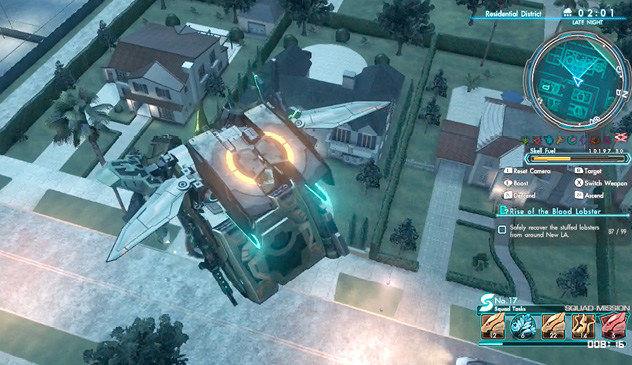
Stuffed Lobster 88: Residential District
Row of four houses adjacent to the Sports Complex. White house, black roof: check its balcony.
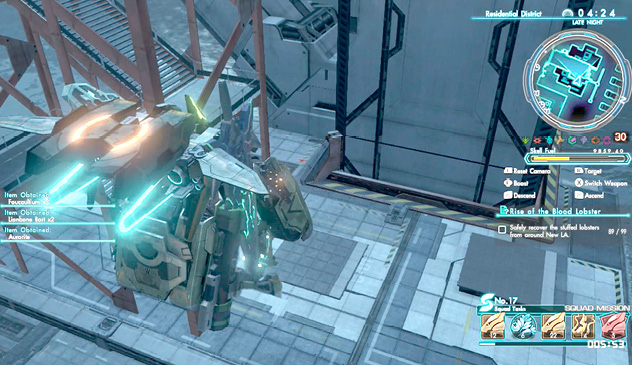
Stuffed Lobster 89: Residential District
Go down the red stairs across from the water-treatment plant. Halfway down is the lobster.
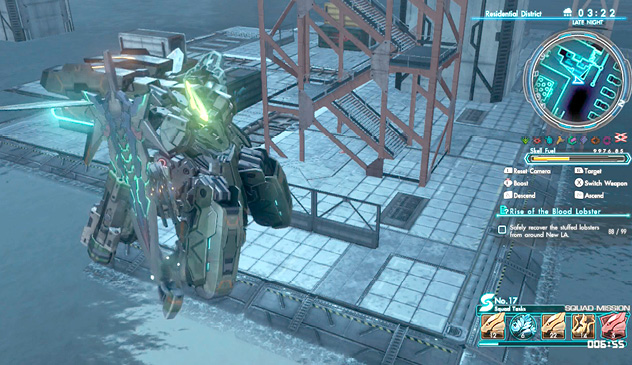
Stuffed Lobster 90: Residential District
Keep going down the steps past lobster 89. The lobster is at the base of the steps.
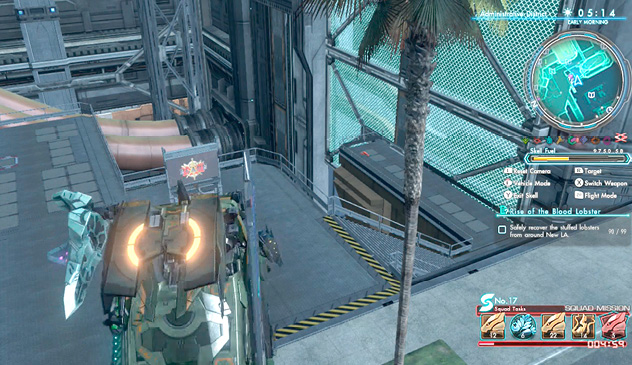
Stuffed Lobster 91: Administrative District
Ride the elevator near BLADE Tower to the bottom, then go down the steps to the little alcove.
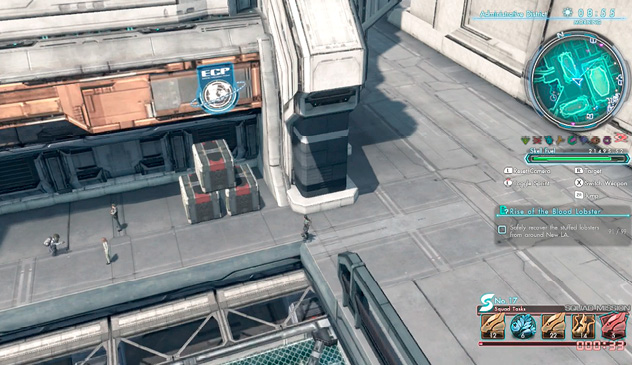
Stuffed Lobster 92: Administrative District
Look for the small narrow passageway in the middle of Armory Alley and go through it. Go straight until you see three triangularly stacked boxes. The lobster is behind these.
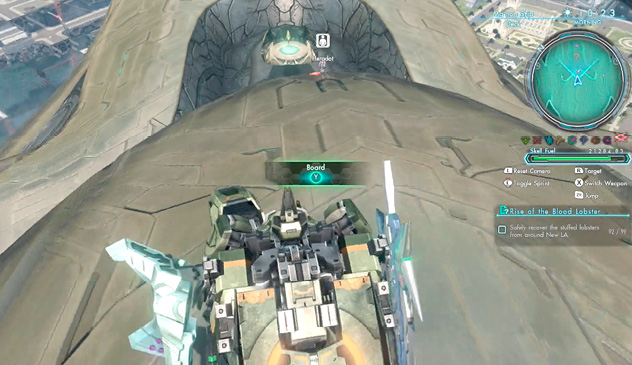
Stuffed Lobster 93: Ma-non Ship/Deck
Between the starboard and port entrances, on top of the wall.
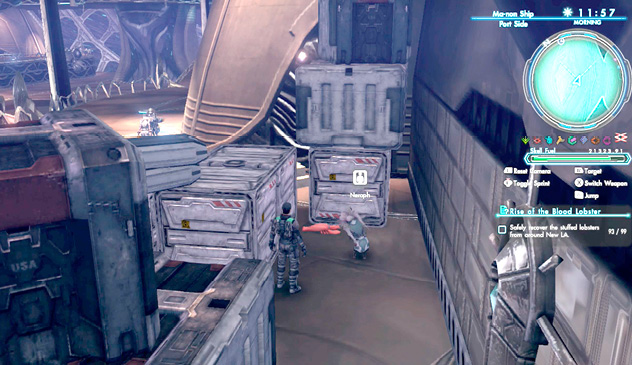
Stuffed Lobster 94: Ma-non Ship/Port Side
Where the containers are piled up in the lower north area (Neraph is here as well).
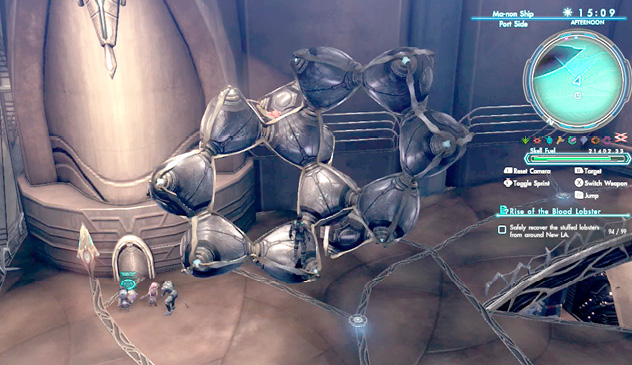
Stuffed Lobster 95: Ma-non Ship Area/Starboard Side
On top of the floating object in the lower south area.
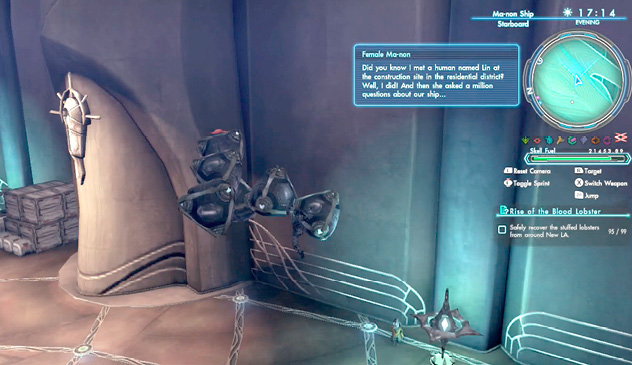
Stuffed Lobster 96: Ma-non Ship Area/Port Side
Lower northern area, on top of another floating object.
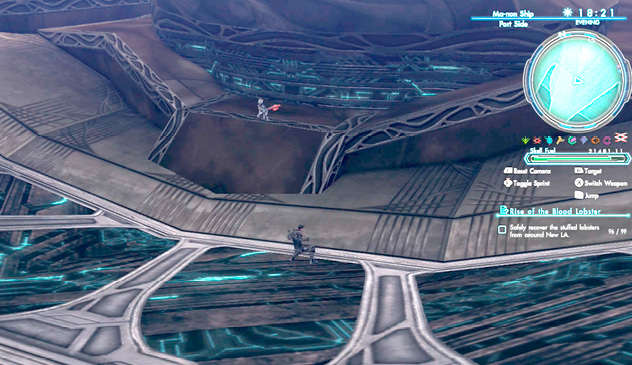
Stuffed Lobster 97: Ma-non Ship Area/Port Side
Check under the platform outcropping at the very end of the ship.
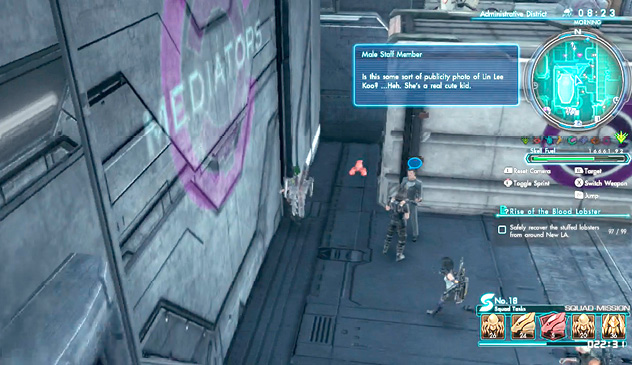
Stuffed Lobster 98: Administrative District/Division Drive
This stuffed lobster will not spawn until you have completed “Definian Downfall” and you have access to the Cauldros’s Ganglion Antropolis. Check behind the boxes at the right side of the left Mediators area.
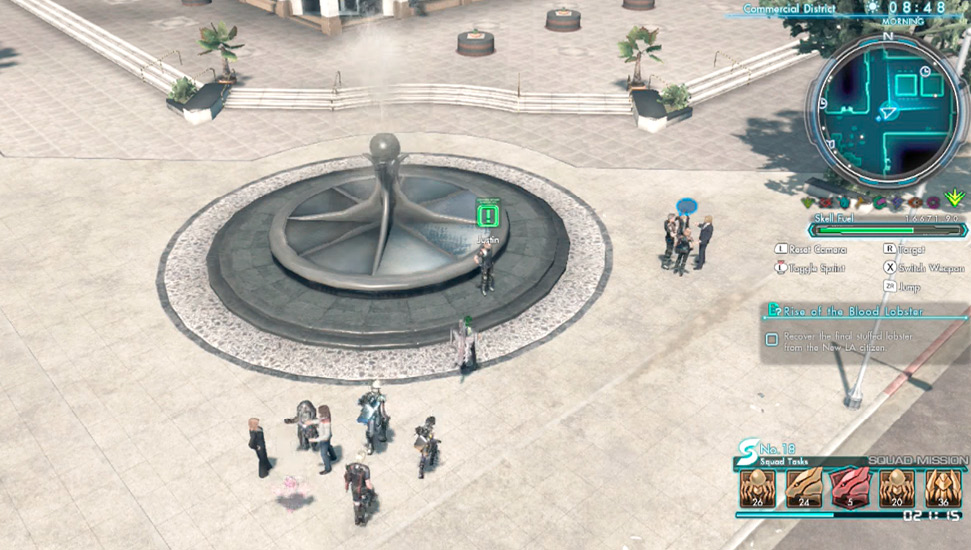
Once you collect lobster 98, you get another call from the Blood Lobster saying that the last lobster is with a justice-obsessed citizen of New LA. As you’ve already finished “A Hero’s Ride,” you know who that is. Talk to Justin in the Commercial District.
The Blood Lobster then challenges you to a final meeting at the Definian base. Head to Cauldros’s Ganglion Antropolis for the final showdown.
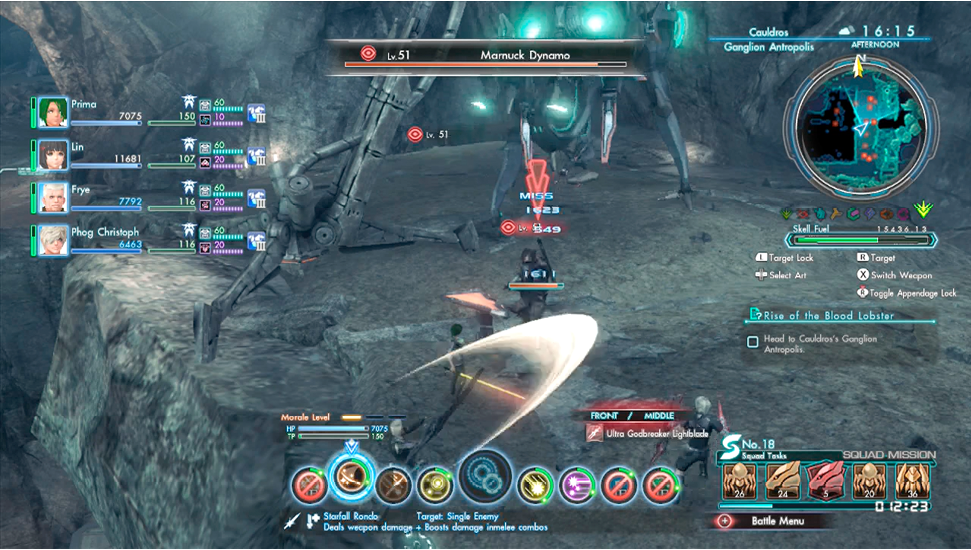
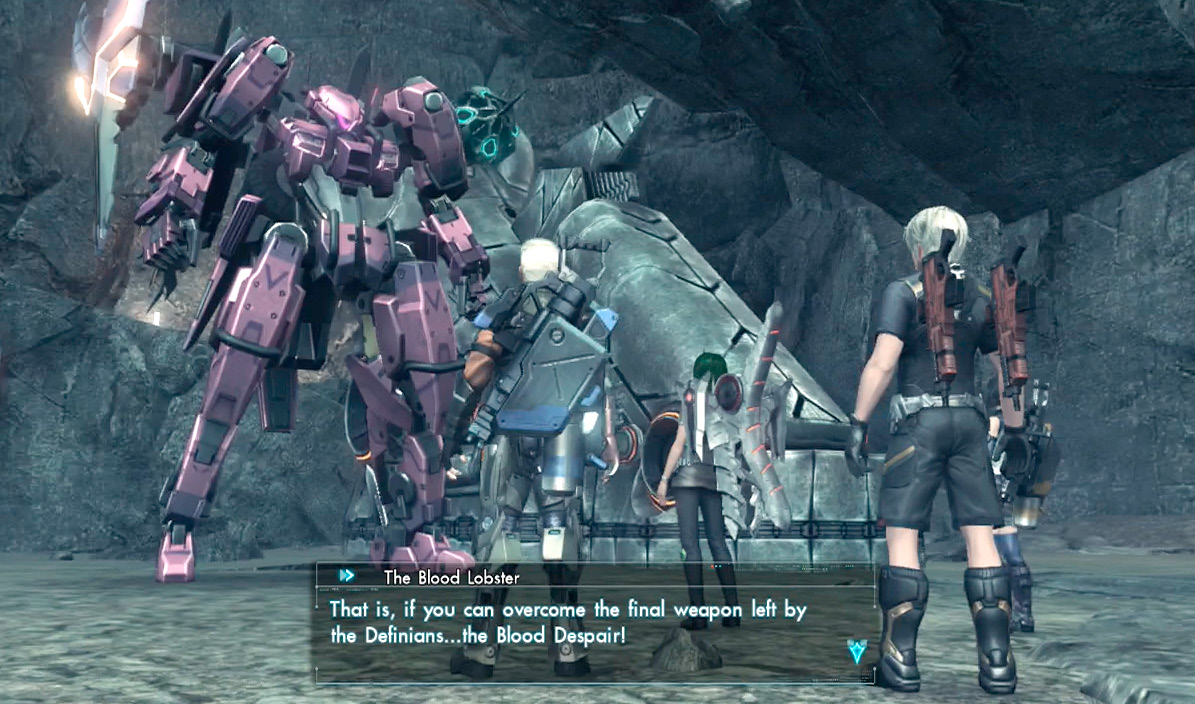
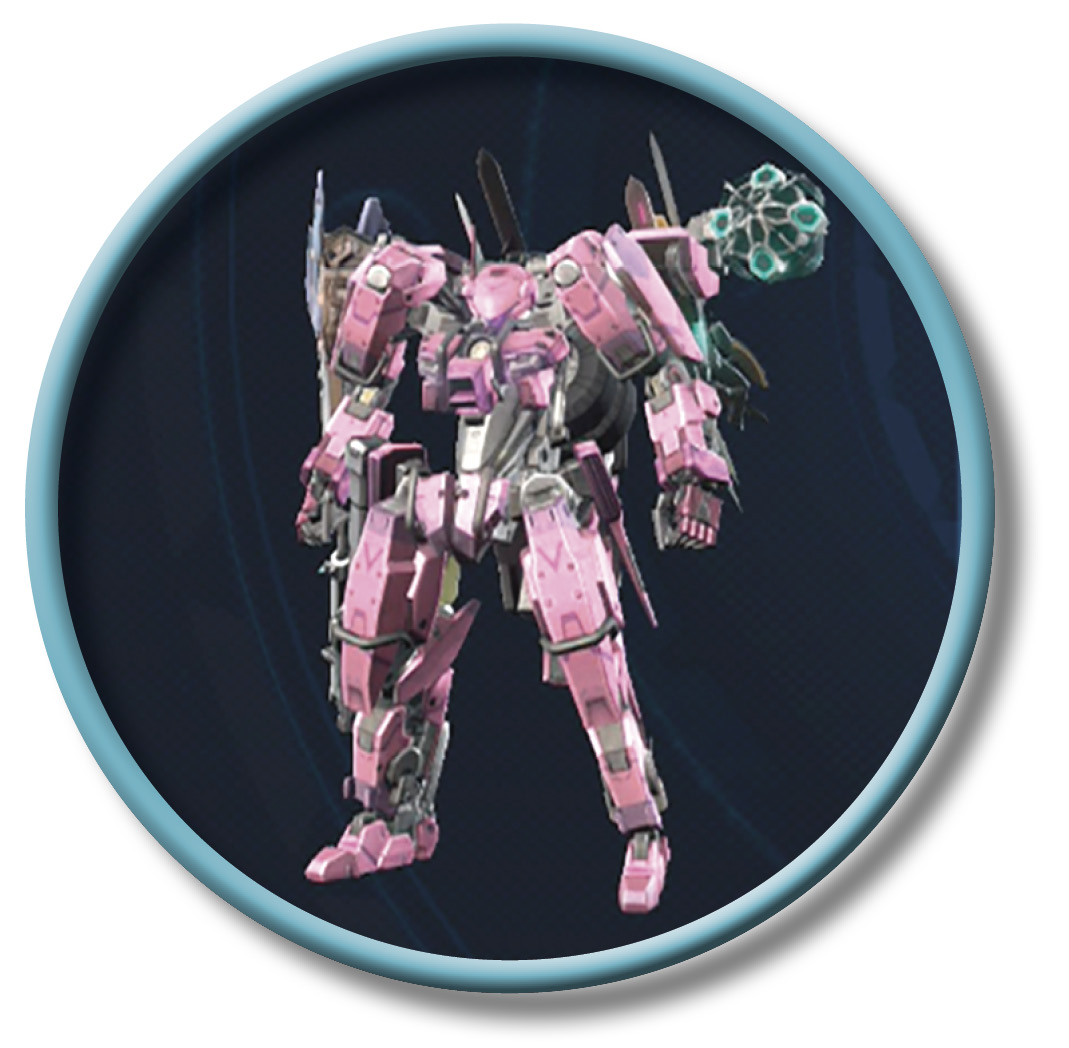
Rush past the enemies if you can, to the wide cave in the back, and go straight until you see the purple Skell. This is the Blood Despair, piloted by the Blood Lobster himself!
Blood Despair
|
Level |
60 |
|
Experience |
874 |
|
HP |
582,907 |
|
Melee Attack |
1,353 |
|
Melee Accuracy |
308 |
|
Ranged Attack |
1,476 |
|
Ranged Accuracy |
330 |
|
Potential |
1,230 |
|
Evasion |
237 |
Attribute Resistances
|
Physical |
45 |
|
Beam |
-10 |
|
Ether |
25 |
|
Thermal |
25 |
|
Electric |
-10 |
|
Gravity |
-25 |
The Blood Despair is one tough lobster! Preparation is the key here. Bring your gravity-based weapons and beam-resistant armor, load up any healing, buff, and debuff Arts you can feasibly hold among all your party members, and equip any skills that allow for extra damage against machinery.
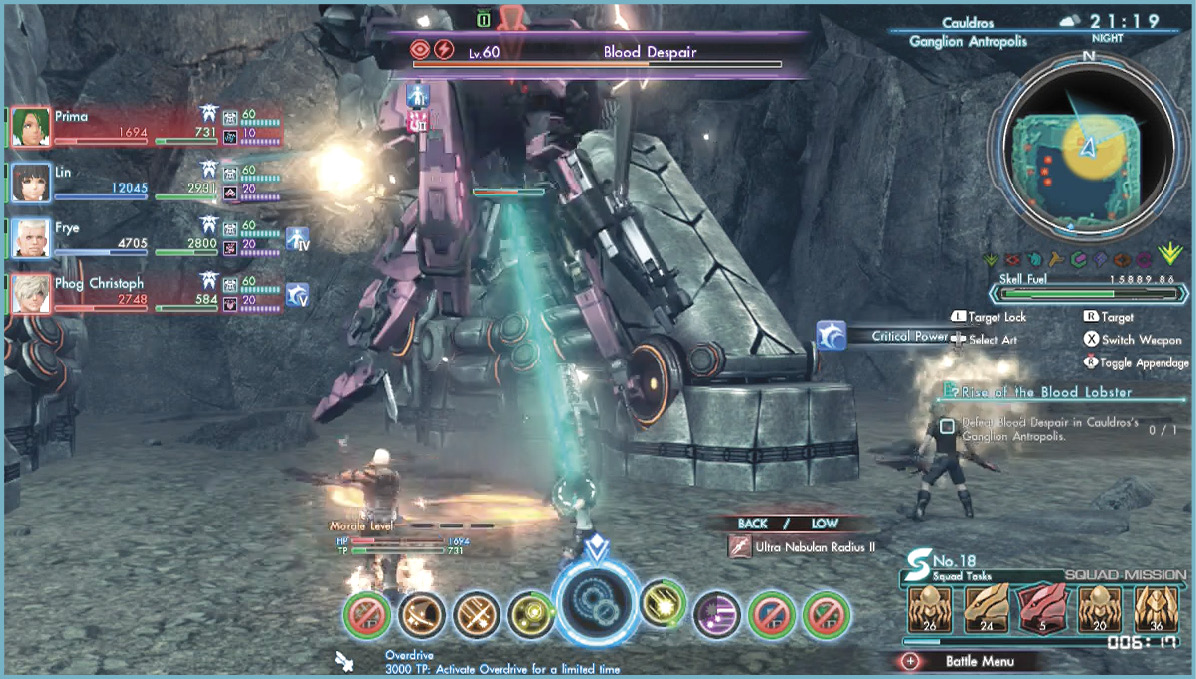
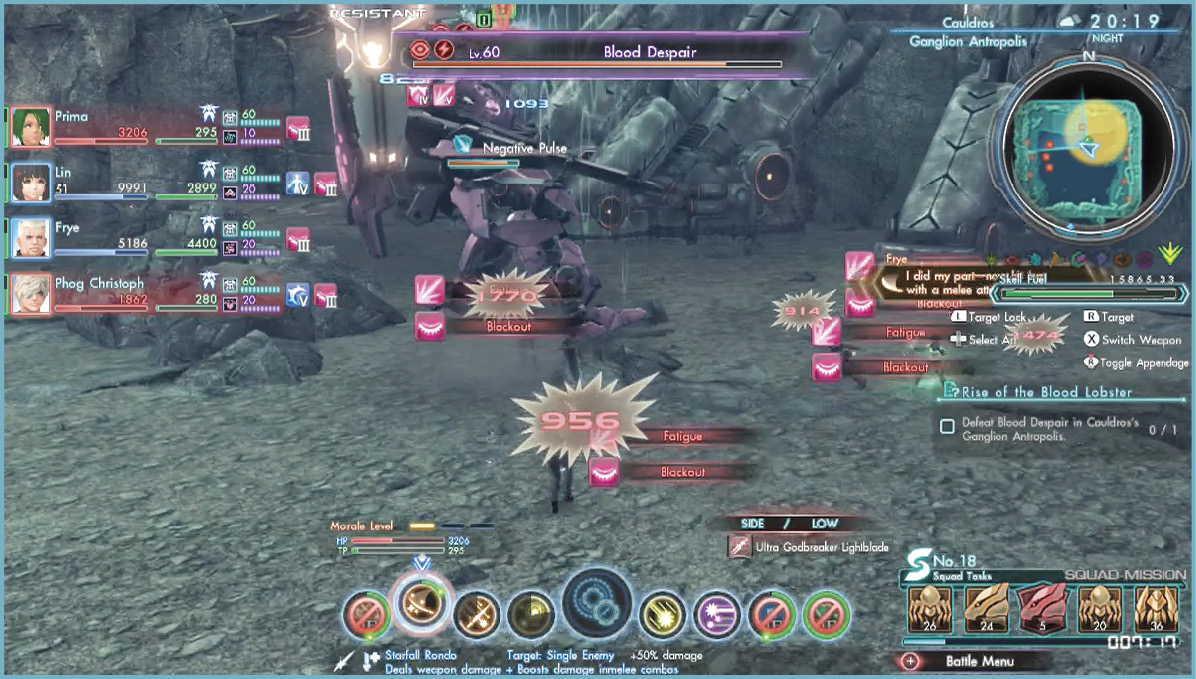
The Blood Despair likes to let loose with hard-hitting beam and physical attacks, but by far his two most dangerous trump cards are an area-of-effect attack called Negative Pulse (which inflicts all hit with Fatigue and Blackout while taking off a decent chunk of HP) and another area-of-effect attack called Meteor Launcher (which just really hurts upon impact). Be sure to do whatever you can to recover if you’re hit with these attacks, or go for his appendages to try to disable his ability to launch them altogether.
Beat the Blood Despair for a surprising revelation about the Blood Lobster that we’ll leave you to find out. Good luck!