Prima Games eGuides
primagames.com Browse Redeem a code Help
Super Mario 3D World eGuide
Sign in My Guides

Sign in or create an account

We'll email you a link. No password needed, and if you don't have an account yet, the link makes one.

By creating an account or signing in, you agree to our Terms of Service and Privacy Policy.

Have a password?

Had an account on the old eGuides site, or a code from a printed guide? Help and troubleshooting

Sign in with a password

By signing in, you agree to our Terms of Service and Privacy Policy.

Check your email

A sign-in link is on its way. It works once and expires in 15 minutes. Open it and you're in, with an account if you didn't already have one.

Contents

  • Welcome to the Sprixie Kingdom!
    • Introduction
    • How to Use This Guide
  • How to Play
    • Character Control
    • The Basics
    • Our Four Heroes
    • Power-Ups and Forms
    • Items and Objects
    • Multiplayer (Eight Legs Are Better Than Two!)
    • Enemies
  • Walkthrough
    • World 1
      • Introduction
      • World 1-1: Super Bell Hill
      • World 1-2: Koopa Troopa Cave
      • World 1-A: Chargin Chuck Blockade
      • World 1-3: Mount Beanpole
      • World 1-4: Plessies Plunging Falls
      • World 1-5: Switch Scramble Circus
      • World 1: Captain Toad Goes Forth
      • World 1-Castle: Bowsers Highway Showdown
    • World 2
      • Introduction
      • World 2-1: Conkdor Canyon
      • World 2-2: Puffprod Peaks
      • World 2-3: Shadow-Play Alley
      • World 2: Mystery House Melee
      • World 2-4: Really Rolling Hills
      • World 2-A: Big Galoomba Blockade
      • World 2-5: Double Cherry Pass
      • World 2-Castle: Bowser's Bullet Bill Brigade
    • World 3
      • Introduction
      • World 3-1: Snowball Park
      • World 3-2: Chain-Link Charge
      • World 3-3: Shifty Boo Mansion
      • World 3: Captain Toad Makes a Splash
      • World 3-4: Pretty Plaza Panic
      • World 3-A: Magikoopa Blockade
      • World 3-5: Pipeline Lagoon
      • World 3-6: Mount Must Dash
      • World 3-7: Switchboard Falls
      • World 3-Castle: The Bullet Bill Express
      • World 3-B: A Banquet With Hisstocrat
    • World 4
      • World 4-1: Ant Trooper Hill
      • World 4-2: Piranha Creeper Creek
      • World 4-A: Brolder Blockade
      • World 4-3: Beep Block Skyway
      • World 4-4: Big Bounce Byway
      • World 4: Mystery House Mad Dash
      • World 4-5: Spikes Lost City
      • World 4-B: Fire Bros. Hideout #1
      • World 4: Sprixie House
      • World 4-Castle: Lava Rock Lair
    • World 5
      • World 5-1: Sunshine Seaside
      • World 5: Captain Toad Plays Peek-a-Boo
      • World 5-2: Tricky Trapeze Theater
      • World 5-3: Backstreet Bustle
      • World 5-A: Chargin Chuck Blockade Is Back
      • World 5-4: Sprawling Savanna
      • World 5-5: Bob-ombs Below
      • World 5: Sprixie House
      • World 5-B: Fire Bros. Hideout #2
      • World 5-6: Cakewalk Flip
      • World 5-7: Searchlight Sneak
      • World 5-8 Castle: King Ka-thunks Castle
      • World 5: Coin Express
    • World 6
      • World 6: Sprixie House
      • World 6-1: Clear Pipe Cruise
      • World 6-2: Spooky Seasick Wreck
      • World 6-3: Hands-On-Hall
      • World 6-4: Deep Jungle Drift
      • World 6-A: Prince Bully Blockade
      • World 6-5: Ty-Foo Flurries
      • World 6-6: Bullet Bill Base
      • World 6-7: Fuzzy Time Mine
      • World 6: Mystery House Throwdown
      • World 6-Castle: Bowsers Bob-omb Brigade
      • World 6-B: Fire Bros. Hideout #3
      • World 6-C: Motle Bossblobs Big Battle
    • World Castle
      • World Castle-1: Fort Fire Bros.
      • World Castle-2: Switchblack Ruins
      • World Castle-3: Red-Hot Run
      • World Castle-4: Boiling Blue Bully Belt
      • World Castle-A: Brolder Blockade Is Back
      • World Castle-B: Prince Bully Blockade Is Back
      • World Castle-C: Fire Bros. Hideout #4
      • World Castle-5: Trick Trap Tower
      • World Castle: Captain Toad Gets Thwomped
      • World Castle-6: Rammerhead Reef
      • World Castle-7: Simmering Lava Lake
      • World CASTLE-Castle: Bowsers Lava Lake Keep
    • World Bowser
      • World Bowser-1: Spiky Spike Bridge
      • World Bowser-2: Plessies Dune Downhill
      • World Bowser-3: Cookie Cogworks
      • World Bowser: The Bowser Express
      • World Bowser-4: Footlight Lane
      • World Bowser-5: Deepwater Dungeon
      • World Bowser-6: A Beam in the Dark
      • World Bowser: Mystery House Claw Climb
      • World Bowser-7: Grumblump Inferno
      • World Bowser-A: Motley Bossblobs Encore
      • World Bowser-B: Hisstocrat Returns
      • World Bowser-Castle: The Great Tower of Bowser Land
    • World Star
      • World Star-1: Rainbow Run
      • World Star-2: Super Galaxy
      • World Star-3: Rolling Ride Run
      • World Star-4: The Great Goal Pole
      • World Star-5: Super Block Land
      • World Star-6: Honeycomb Starway
      • World Star-7: Gargantuan Grotto
      • World Star-8: Peepas Fog Bog
      • World Star-9: Cosmic Cannon Cluster
      • World Star: Captain Toad Takes a Spin
    • World Mushroom
      • Introduction
      • World Mushroom-1: Night Falls on Really Rolling Hills
      • World Mushroom-2: Spiky Mount Beanpole
      • World Mushroom-3: Deep-Black Jungle Drift
      • World Mushroom-4: Trouble in Shadow-Play Alley
      • World Mushroom-5: Back to Hands-On Hall
      • World Mushroom-6: Gigantic Seasick Wreck
      • World Mushroom-7: Broken Blue Bully Belt
      • World Mushroom: Mystery House Brawl
    • World Flower
      • Introduction
      • World Flower-1: Switch Shock Circus
      • World Flower-2: Floating Fuzzy Time Mine
      • World Flower-3: Piranha Creeper Creek after Dark
      • World Flower-4: Faster Fort Fire Bros..
      • World Flower-5: Sprawling Savanna Rabbit Run
      • World Flower-6: Shiftier Boo Mansion
      • World Flower-7: Pipeline Boom Lagoon
      • World Flower-8: Blast Block Skyway
      • World Flower-9: Towering Sunshine Seaside
      • World Flower-10: Honeycomb Skyway
      • World Flower-11: Spiky Spike Bridge Sneak
      • World Flower-12: Boss Blitz
    • World Crown
      • Introduction
      • World Crown-Crown: Champions Road
      • World Crown: Captain Toads Fiery Finale
      • World Crown: Mystery House Marathon
  • Secrets
    • Introduction
    • Star Ratings
    • A Fifth Hero: Rosalina
    • Secret Warp Pipes
    • Maximum Lives
    • Locked Levels
    • Stamping Miiverse
    • Luigi Mania!

Super Mario 3D World Guide › Walkthrough › World Bowser

World Bowser-5: Deepwater Dungeon
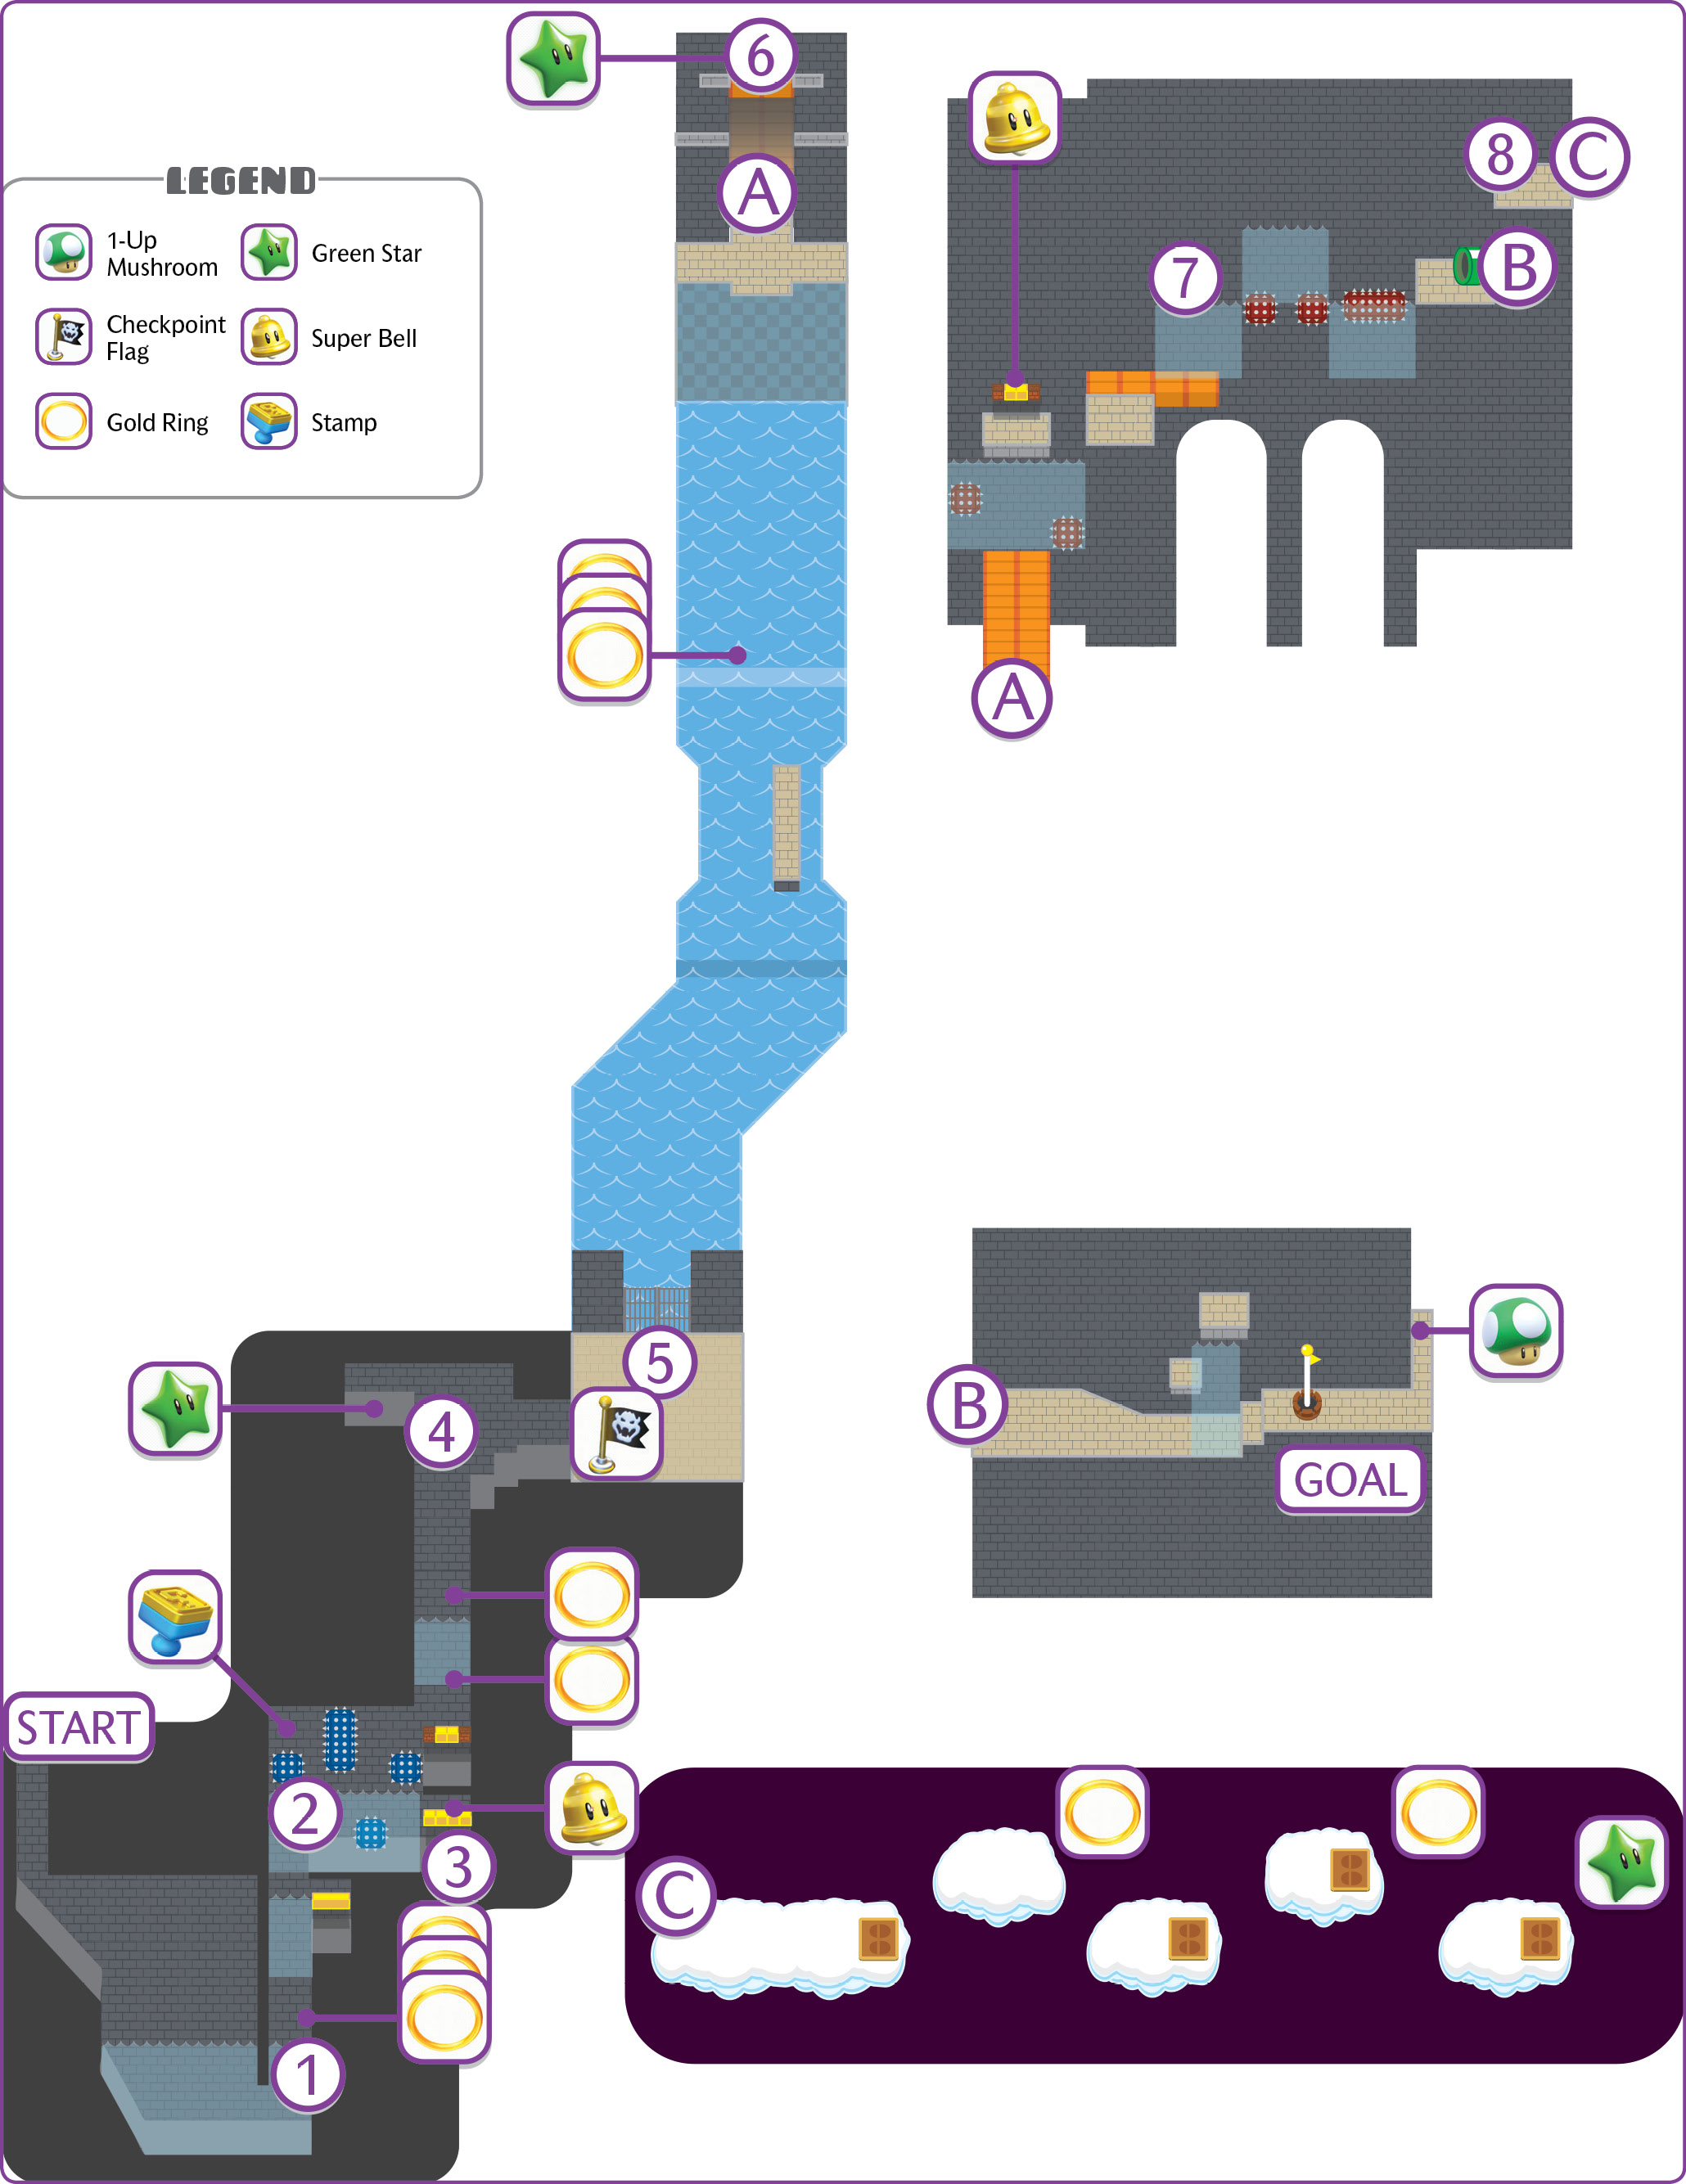
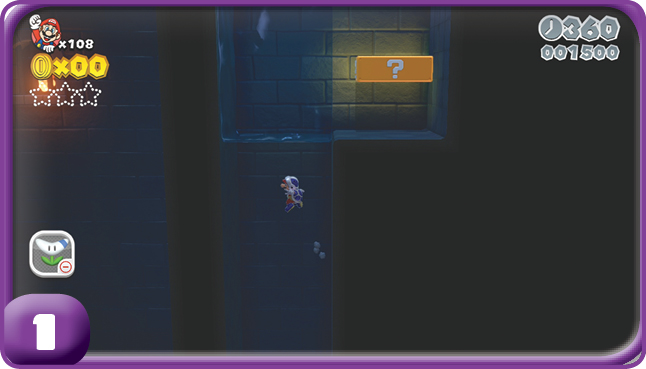
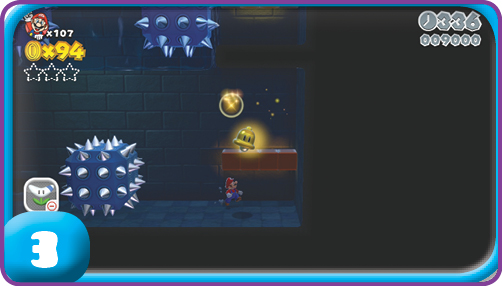
The water level rises and falls throughout this level, sometimes with separate sections of water doing their own thing. You don’t have to necessarily wait for the water to come to you if you use wall jumps.

Stamp
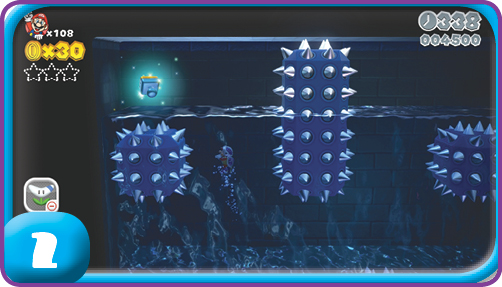
You can get the Stamp pretty early on. Wait for the water to rise up and allow you to avoid the Spike Blocks under the Stamp. While you’re in this area, don’t miss picking up the Cat Power-Up from a nearby ? Block. You’ll need it.

Green Star #1
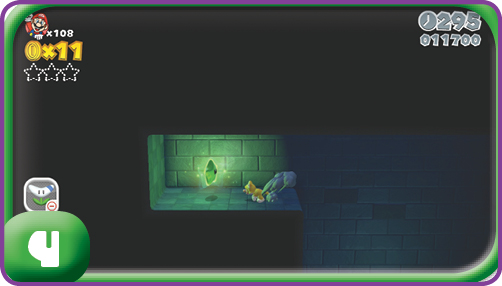
If you scale the wall on the left of the passageway leading up from the Stamp room, you can find a hidden alcove with the first Green Star.
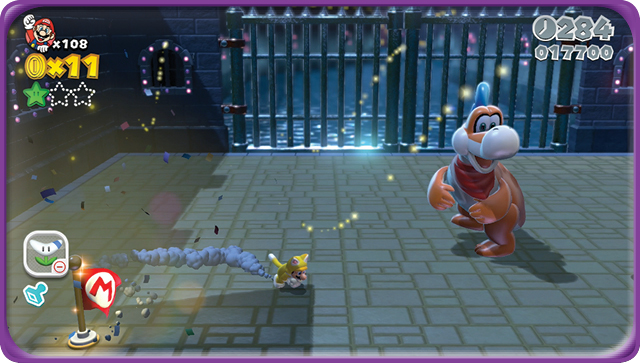
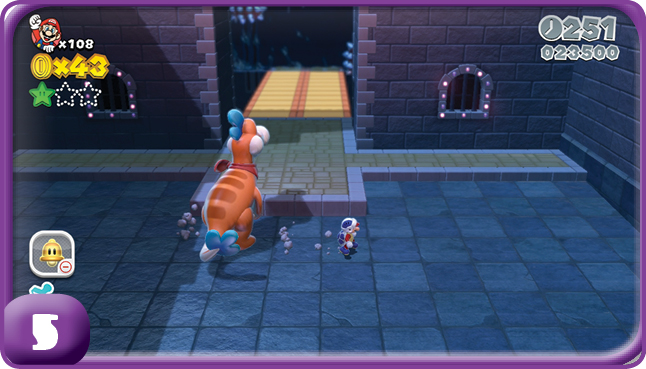
Plessie waits for you near the Checkpoint Flag, but it’s a short ride to the next section of the level.
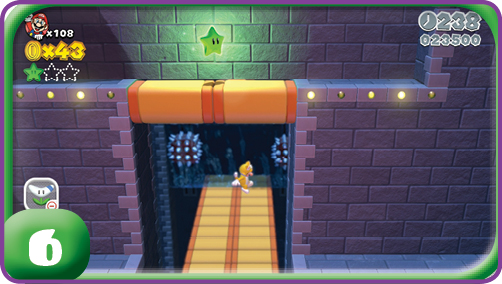
Green Star #2

The second Green Star is atop a pair of Donut Blocks atop the wall Plessie drops you off at. You’ll need the Cat Power-Up to reach it.
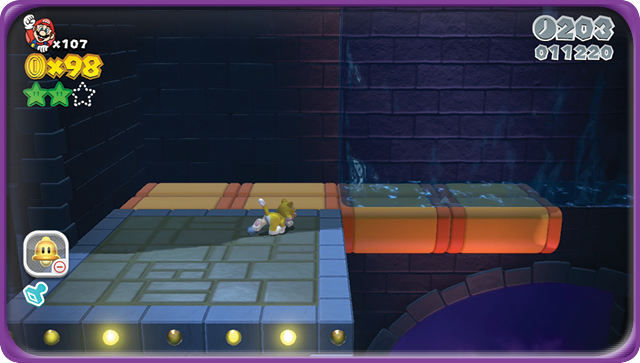
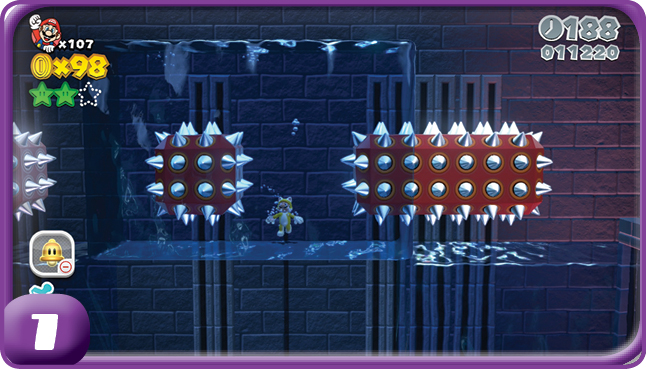
This next section can be pretty rough! Using the moving water cubes, you’ve got to navigate past the moving sets of Spike Blocks. Don’t get caught underneath a Spike Blocks that’s moving downwards because you can get forced out of the water and into the bottomless pit.

Green Star #3
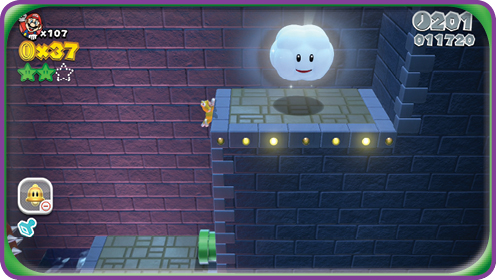
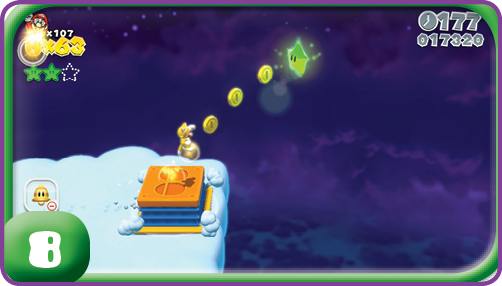
Ignore the pipe you find just past the moving water cubes for the moment. Climb up the wall it’s on to find a Cloud Cannon that takes you to a bonus area where the third Green Star awaits. Watch out for the Para-Biddybuds in this area!

Keep reading with a free account

The first 3 sections of Super Mario 3D World are open to everyone. An account opens the rest of it, and every other guide in the archive. It's free, and there's nothing to buy.

Bought guides on the old Prima Games site? Your account and every guide you own moved here, so there's nothing to buy again. Sign in.

Create a free account Or browse our free guides

PreviousWorld Bowser-4: Footlight Lane NextWorld Bowser-6: A Beam in the Dark