Prima Games eGuides
primagames.com Browse Redeem a code Help
Super Mario 3D World eGuide
Sign in My Guides

Sign in or create an account

We'll email you a link. No password needed, and if you don't have an account yet, the link makes one.

By creating an account or signing in, you agree to our Terms of Service and Privacy Policy.

Have a password?

Had an account on the old eGuides site, or a code from a printed guide? Help and troubleshooting

Sign in with a password

By signing in, you agree to our Terms of Service and Privacy Policy.

Check your email

A sign-in link is on its way. It works once and expires in 15 minutes. Open it and you're in, with an account if you didn't already have one.

Contents

  • Welcome to the Sprixie Kingdom!
    • Introduction
    • How to Use This Guide
  • How to Play
    • Character Control
    • The Basics
    • Our Four Heroes
    • Power-Ups and Forms
    • Items and Objects
    • Multiplayer (Eight Legs Are Better Than Two!)
    • Enemies
  • Walkthrough
    • World 1
      • Introduction
      • World 1-1: Super Bell Hill
      • World 1-2: Koopa Troopa Cave
      • World 1-A: Chargin Chuck Blockade
      • World 1-3: Mount Beanpole
      • World 1-4: Plessies Plunging Falls
      • World 1-5: Switch Scramble Circus
      • World 1: Captain Toad Goes Forth
      • World 1-Castle: Bowsers Highway Showdown
    • World 2
      • Introduction
      • World 2-1: Conkdor Canyon
      • World 2-2: Puffprod Peaks
      • World 2-3: Shadow-Play Alley
      • World 2: Mystery House Melee
      • World 2-4: Really Rolling Hills
      • World 2-A: Big Galoomba Blockade
      • World 2-5: Double Cherry Pass
      • World 2-Castle: Bowser's Bullet Bill Brigade
    • World 3
      • Introduction
      • World 3-1: Snowball Park
      • World 3-2: Chain-Link Charge
      • World 3-3: Shifty Boo Mansion
      • World 3: Captain Toad Makes a Splash
      • World 3-4: Pretty Plaza Panic
      • World 3-A: Magikoopa Blockade
      • World 3-5: Pipeline Lagoon
      • World 3-6: Mount Must Dash
      • World 3-7: Switchboard Falls
      • World 3-Castle: The Bullet Bill Express
      • World 3-B: A Banquet With Hisstocrat
    • World 4
      • World 4-1: Ant Trooper Hill
      • World 4-2: Piranha Creeper Creek
      • World 4-A: Brolder Blockade
      • World 4-3: Beep Block Skyway
      • World 4-4: Big Bounce Byway
      • World 4: Mystery House Mad Dash
      • World 4-5: Spikes Lost City
      • World 4-B: Fire Bros. Hideout #1
      • World 4: Sprixie House
      • World 4-Castle: Lava Rock Lair
    • World 5
      • World 5-1: Sunshine Seaside
      • World 5: Captain Toad Plays Peek-a-Boo
      • World 5-2: Tricky Trapeze Theater
      • World 5-3: Backstreet Bustle
      • World 5-A: Chargin Chuck Blockade Is Back
      • World 5-4: Sprawling Savanna
      • World 5-5: Bob-ombs Below
      • World 5: Sprixie House
      • World 5-B: Fire Bros. Hideout #2
      • World 5-6: Cakewalk Flip
      • World 5-7: Searchlight Sneak
      • World 5-8 Castle: King Ka-thunks Castle
      • World 5: Coin Express
    • World 6
      • World 6: Sprixie House
      • World 6-1: Clear Pipe Cruise
      • World 6-2: Spooky Seasick Wreck
      • World 6-3: Hands-On-Hall
      • World 6-4: Deep Jungle Drift
      • World 6-A: Prince Bully Blockade
      • World 6-5: Ty-Foo Flurries
      • World 6-6: Bullet Bill Base
      • World 6-7: Fuzzy Time Mine
      • World 6: Mystery House Throwdown
      • World 6-Castle: Bowsers Bob-omb Brigade
      • World 6-B: Fire Bros. Hideout #3
      • World 6-C: Motle Bossblobs Big Battle
    • World Castle
      • World Castle-1: Fort Fire Bros.
      • World Castle-2: Switchblack Ruins
      • World Castle-3: Red-Hot Run
      • World Castle-4: Boiling Blue Bully Belt
      • World Castle-A: Brolder Blockade Is Back
      • World Castle-B: Prince Bully Blockade Is Back
      • World Castle-C: Fire Bros. Hideout #4
      • World Castle-5: Trick Trap Tower
      • World Castle: Captain Toad Gets Thwomped
      • World Castle-6: Rammerhead Reef
      • World Castle-7: Simmering Lava Lake
      • World CASTLE-Castle: Bowsers Lava Lake Keep
    • World Bowser
      • World Bowser-1: Spiky Spike Bridge
      • World Bowser-2: Plessies Dune Downhill
      • World Bowser-3: Cookie Cogworks
      • World Bowser: The Bowser Express
      • World Bowser-4: Footlight Lane
      • World Bowser-5: Deepwater Dungeon
      • World Bowser-6: A Beam in the Dark
      • World Bowser: Mystery House Claw Climb
      • World Bowser-7: Grumblump Inferno
      • World Bowser-A: Motley Bossblobs Encore
      • World Bowser-B: Hisstocrat Returns
      • World Bowser-Castle: The Great Tower of Bowser Land
    • World Star
      • World Star-1: Rainbow Run
      • World Star-2: Super Galaxy
      • World Star-3: Rolling Ride Run
      • World Star-4: The Great Goal Pole
      • World Star-5: Super Block Land
      • World Star-6: Honeycomb Starway
      • World Star-7: Gargantuan Grotto
      • World Star-8: Peepas Fog Bog
      • World Star-9: Cosmic Cannon Cluster
      • World Star: Captain Toad Takes a Spin
    • World Mushroom
      • Introduction
      • World Mushroom-1: Night Falls on Really Rolling Hills
      • World Mushroom-2: Spiky Mount Beanpole
      • World Mushroom-3: Deep-Black Jungle Drift
      • World Mushroom-4: Trouble in Shadow-Play Alley
      • World Mushroom-5: Back to Hands-On Hall
      • World Mushroom-6: Gigantic Seasick Wreck
      • World Mushroom-7: Broken Blue Bully Belt
      • World Mushroom: Mystery House Brawl
    • World Flower
      • Introduction
      • World Flower-1: Switch Shock Circus
      • World Flower-2: Floating Fuzzy Time Mine
      • World Flower-3: Piranha Creeper Creek after Dark
      • World Flower-4: Faster Fort Fire Bros..
      • World Flower-5: Sprawling Savanna Rabbit Run
      • World Flower-6: Shiftier Boo Mansion
      • World Flower-7: Pipeline Boom Lagoon
      • World Flower-8: Blast Block Skyway
      • World Flower-9: Towering Sunshine Seaside
      • World Flower-10: Honeycomb Skyway
      • World Flower-11: Spiky Spike Bridge Sneak
      • World Flower-12: Boss Blitz
    • World Crown
      • Introduction
      • World Crown-Crown: Champions Road
      • World Crown: Captain Toads Fiery Finale
      • World Crown: Mystery House Marathon
  • Secrets
    • Introduction
    • Star Ratings
    • A Fifth Hero: Rosalina
    • Secret Warp Pipes
    • Maximum Lives
    • Locked Levels
    • Stamping Miiverse
    • Luigi Mania!

Super Mario 3D World Guide › Walkthrough › World 4

World 4: Mystery House Mad Dash
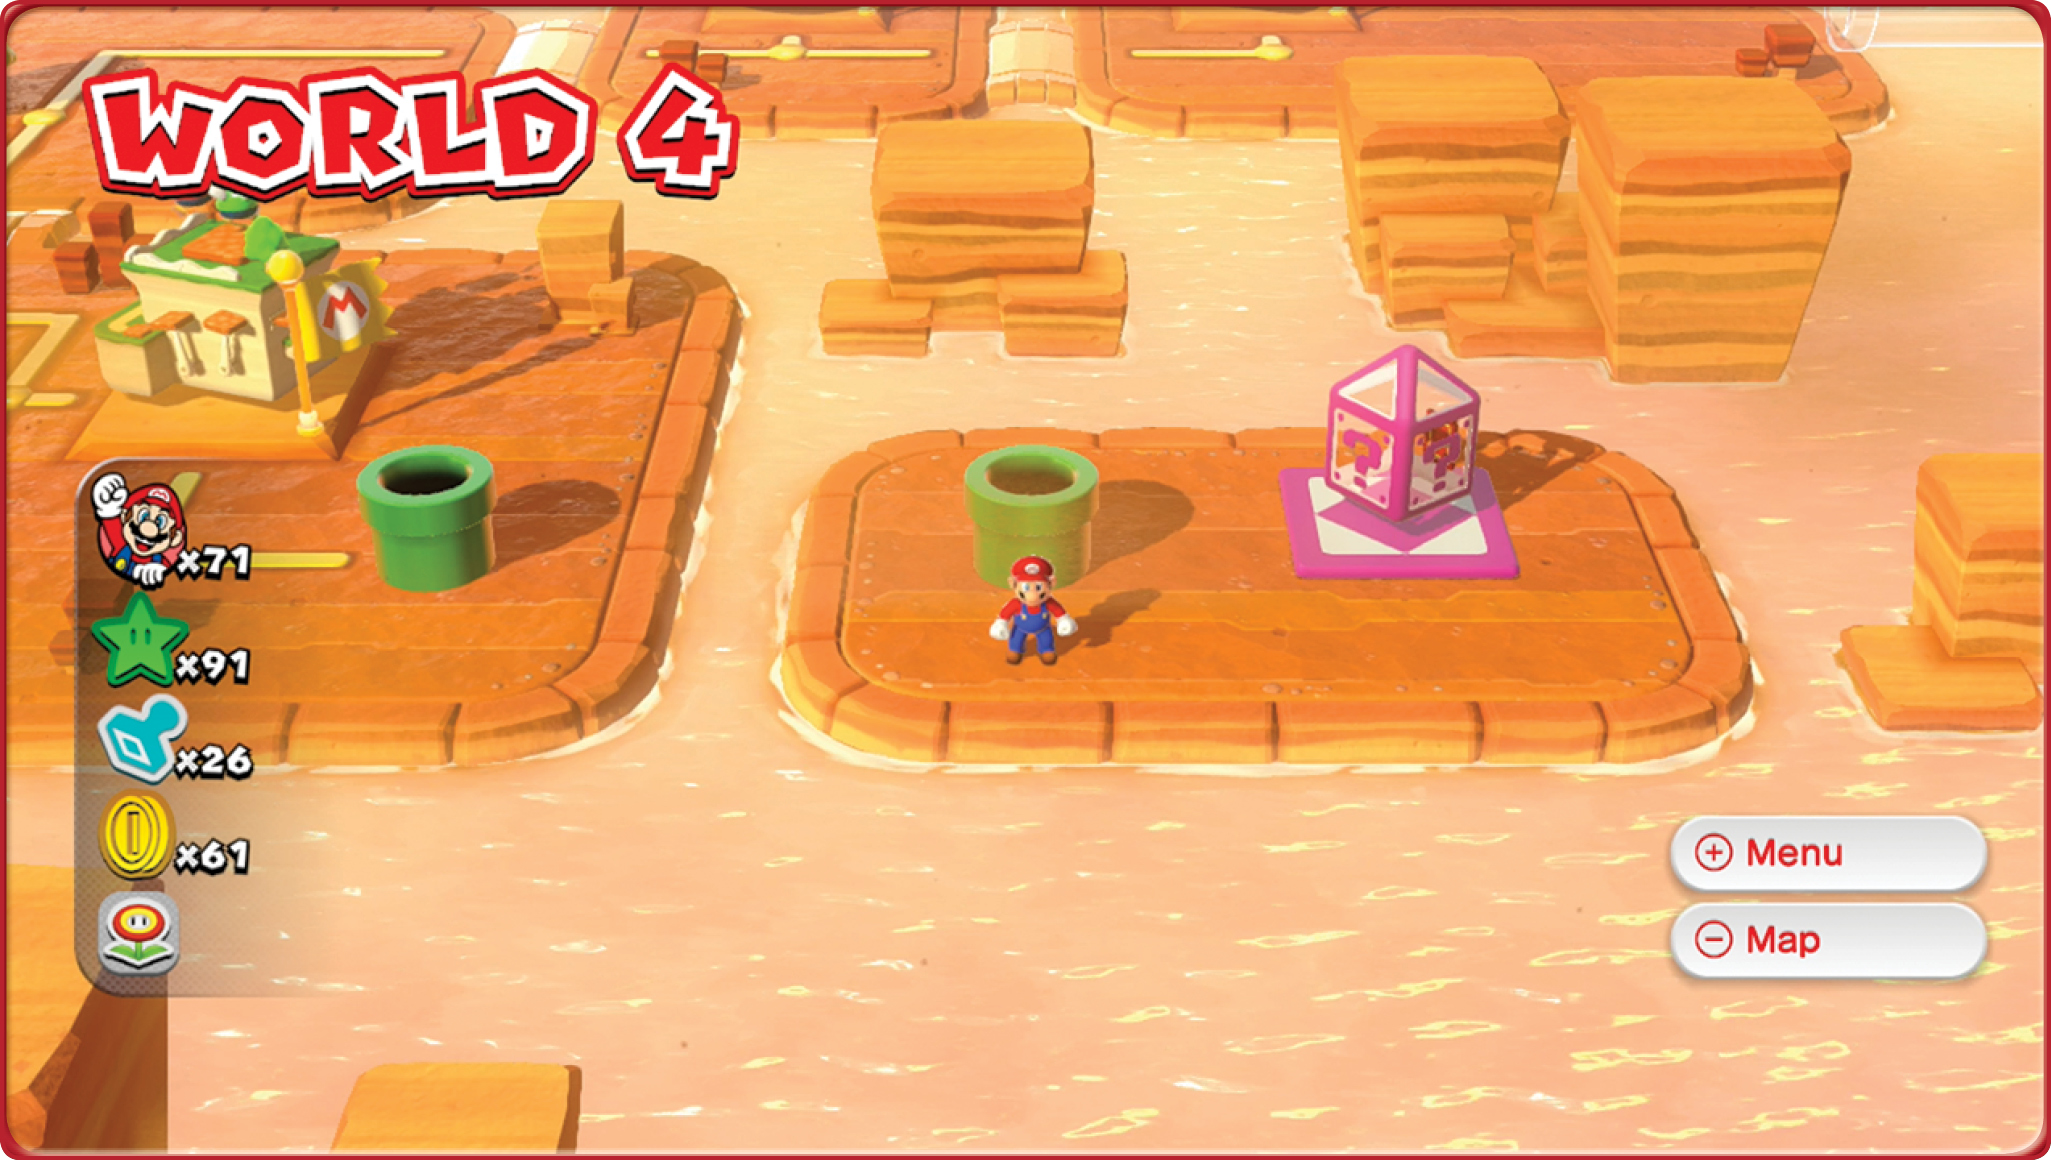
Beating 4-4 opens a side path to a pipe on the World Map, which will take you to the World 4 Mystery House. Unlike the previous house, you have 10 total Green Stars you can earn here. As before, to fully complete the Mystery House, you must get all the Green Stars in one full pass, failing a room (or losing a life) will send you back to the start of the gauntlet.

Green Star #1

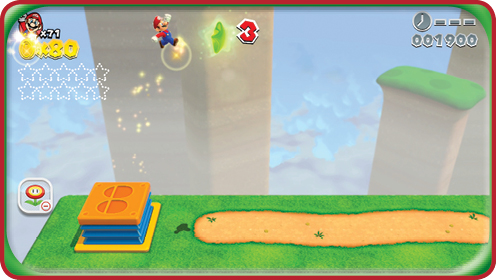
The first challenge is to use Jump Panels to scale a series of progressively taller cliffs until you reach the last cliff and must vault up to the Green Star.
Green Star #2

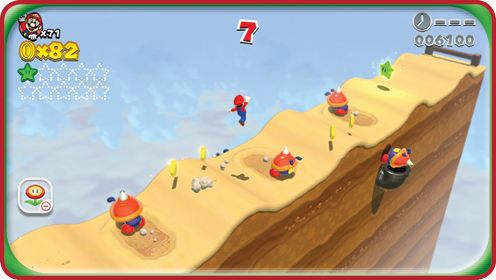
Challenge 2 is a simple dash along a hilly path. Avoid the Horned Ant Troopers and reach the star!
Green Star #3

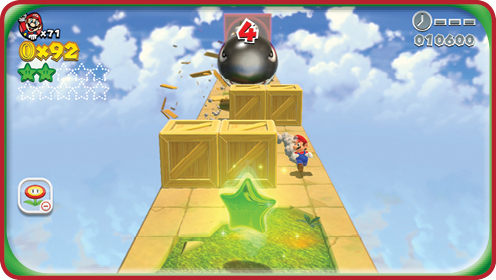
You start the third challenge in front of a Banzai Bill cannon that just fired. Run toward the camera as fast as you can, and around or over the wooden crates. The Green Star is at the center of the path beyond all the obstacles.
Green Star #4

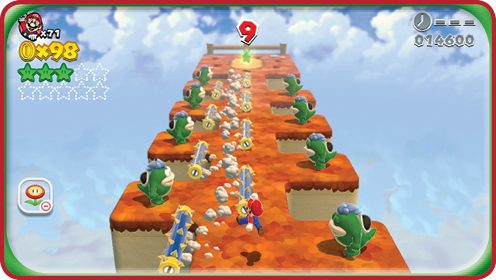
Another straight path to dash through, only now it’s flanked by Spikes, little green lizards who toss large spiked rollers in front of them. You’ll have to use well-timed jumps to get past the rollers they toss and get to the Green Star.

Green Star #5
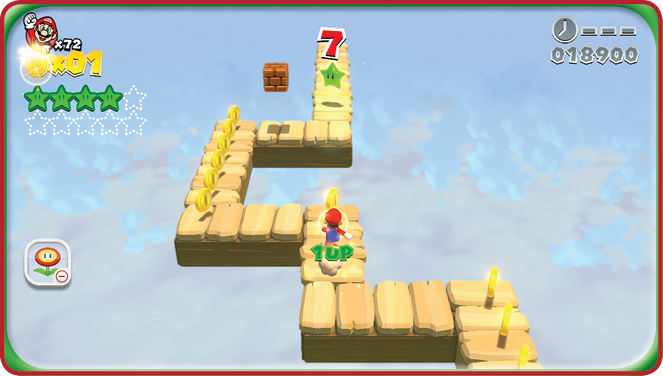
A narrow, winding, wooden path looks really dangerous, and if you intend to follow it turn by turn, you cannot stop dashing at all. However, you can make this a lot easier on yourself by doing long jumps across the gaps and maintaining a straight route directly at the Green Star.
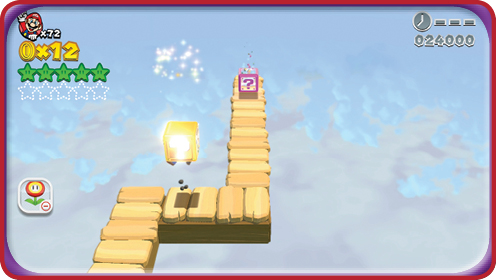
Get a New Hat!

The block that you pass up on this course contains a Coin Box Hat. Before you leave the area, grab this item and enjoy the extra Coins.

Green Star #6

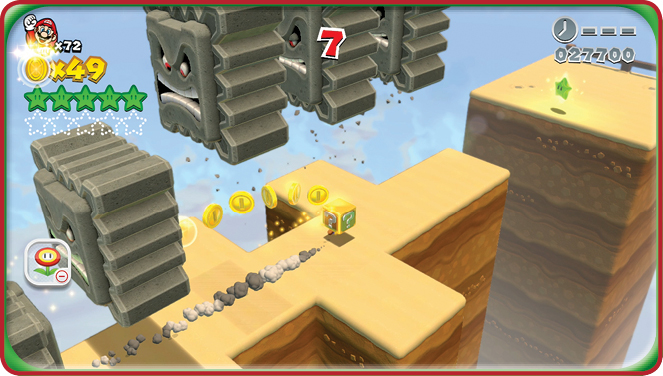
A Dash Panel next to where you start this room will launch you down a straight path, with Thwomps above almost the entire route, ready to crush you if you falter even half a step. Don’t miss the last jump to reach the Green Star!
Green Star #7

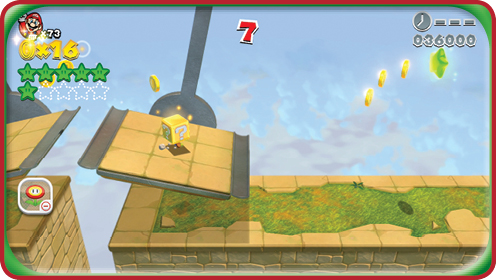
Challenge 7 starts you on a platform that is swinging like a pendulum, partway across a pit toward another swinging platform, which in turn swings toward a third platform. Beyond the third platform, the Green Star hangs in the air. You cannot miss this jump;, you’ll most likely not have a second chance at the star.
Green Star #8

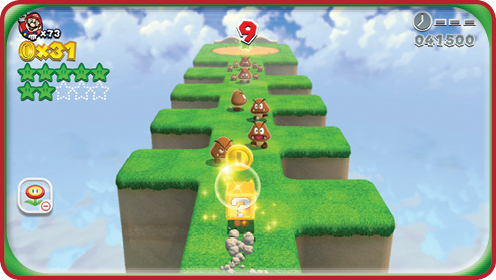
This path is similar to the one for Green Star # 4, but your enemies here are a swarm of Goombas. Get past them as quickly as you can to retrieve the star.
Green Star #9

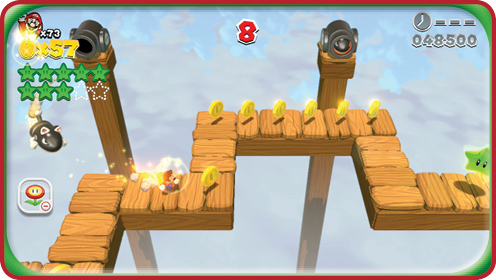
Now it’s back to that winding wooden path suspended in the air, except this time, the camera view is from the side, and cannons are firing Cat Bullet Bills at you. The same trick from before works here: long-jump over those gaps to get to the star as fast as possible.
Green Star #10

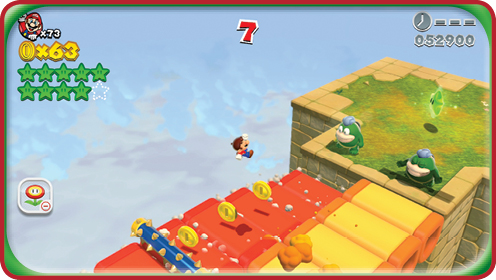
This last challenge is actually pretty easy to mess up: Two bridges of Donut Blocks separate you and a pair of Spikes on the other side. Their rollers will cause the lifts to fall into the chasm below. You have to be fast enough that you can get within a safe distance to jump from your likely falling platform to safety. Don’t even both fighting the Spikes, just get the Green Star and put an end to this Mystery House!

Keep reading with a free account

The first 3 sections of Super Mario 3D World are open to everyone. An account opens the rest of it, and every other guide in the archive. It's free, and there's nothing to buy.

Bought guides on the old Prima Games site? Your account and every guide you own moved here, so there's nothing to buy again. Sign in.

Create a free account Or browse our free guides

PreviousWorld 4-4: Big Bounce Byway NextWorld 4-5: Spikes Lost City