
Mario & Luigi: Dream Team Guide Welcome to Pi'illo Island Getting Started
Battle
Making contact with enemies in the real or dream world triggers a turn-based battle, pitting Mario and Luigi against a variety of foes. When initiating a battle with an enemy, try to perform a preemptive attack either by jumping on an enemy or hitting them with your hammer—the damage is carried across into the battle sequence. As the battle begins, Mario, Luigi, and the enemies take turns attacking. During an enemy’s attack be ready to dodge or counter—sometimes you can counter by jumping on enemies or whacking them with your hammer. Every enemy attack can be dodged or countered, so look for openings to make the most out of each opportunity. When it’s Mario and Luigi’s turn, they can choose from several options shown in the Command Blocks above their heads. In addition to performing attacks, Mario and Luigi can use items or even flee during their turn.
Jump Attack
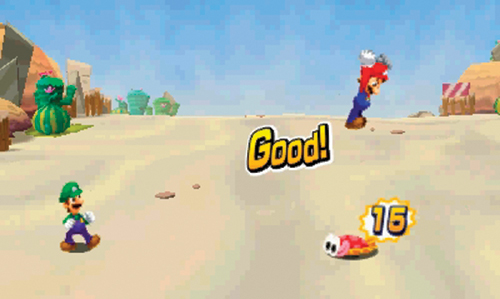
The Jump attack is the most basic of attacks, available from the very beginning. When initiating a Jump attack, timing is critical to score optimal damage. Press
 or
or
 each time Mario or Luigi makes contact with the enemy. If the button press is timed just right, Mario or Luigi will rebound into the air and initiate another attack. You can bounce on an enemy in this fashion a total of two times, inflicting damage with each impact and scoring an Excellent strike. However, Jump attacks aren’t advisable on every enemy—don’t jump on spiked or flaming enemies.
Hammer Attack
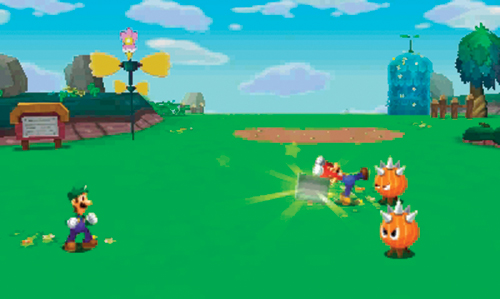
Once hammers are acquired in Mushrise Park, Mario and Luigi add Hammer attacks to their arsenal. Like Jump attacks, Hammer attacks require careful timing to pull off. As Mario or Luigi approaches an enemy and begins to swing, hold off on pressing
or
until the hammer is brought fully back and a small spark appears, accompanied by a ringing sound cue—now’s the time to strike to score an Excellent hit. If you press the button too early or too late, damage output is minimal. Hammer attacks are effective against spiked and flaming enemies, but don’t use them against flying enemies—you’ll swing and miss every time.
Mario’s Bros. Attacks
3D Red Shell
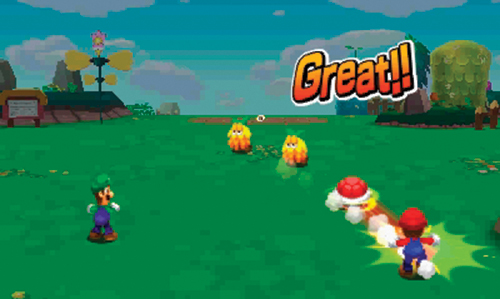
- Cost: 4 BP
- Unlock: Collect all 10 Attack Pieces in Mushrise Park
As Mario produces a red shell, alternate between pressing
and
, causing Mario and Luigi to kick the shell at targets in the distance. Timing and rhythm is important, particularly as the attack commences into its later stages.
Bye-Bye Cannon
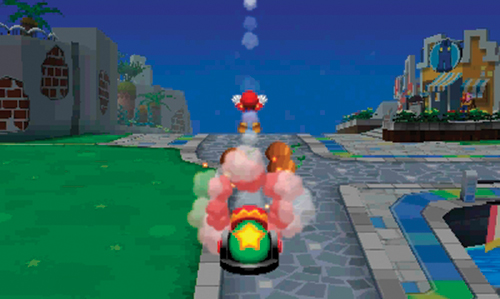
- Cost: 7 BP
- Unlock: Collect all 10 Attack Pieces in Wakeport
During this unique attack, you must memorize the order in which Mario and Luigi are launched from a cannon. As they land on an enemy, press
for Mario and
for Luigi. If you get it perfect, they’ll descend in the opposite order. Definitely practice this attack many times before using it in a battle—it’s a bit tricky and requires a high level of focus.
Bomb Derby
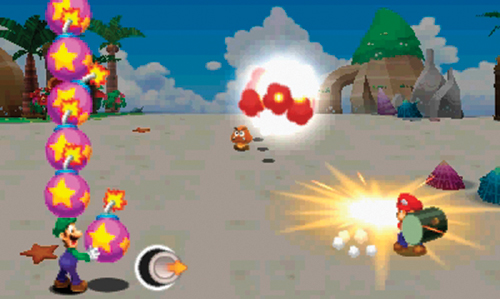
- Cost: 9 BP
- Unlock: Collect all 10 Attack Pieces in Driftwood Shore
During this attack, Luigi lobs a series of bombs toward Mario, prompting him to strike each incoming bomb with his hammer, launching them toward a distant group of enemies. This is a very powerful attack ideal for dealing damage to multiple enemies. However, it can be difficult to master—use the Circle Pad to toss bombs while pressing
to swing Mario’s hammer.
Jet-Board Bash
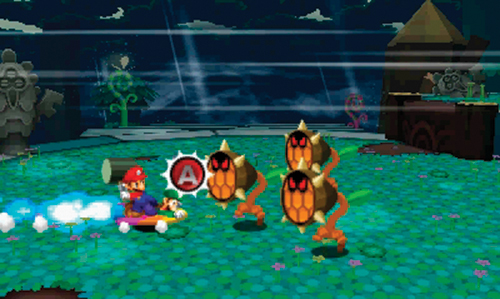
- Cost: 12 BP
- Unlock: Collect all 10 Attack Pieces in Somnom Woods
In this attack, Mario and Luigi ride on a skateboard-like device called a Jet Board—hold down
to pick up speed. When the Jet Board reaches top speed, press
at the right time to trigger Mario’s hammer attack—press
just before reaching the targeted enemy to inflict optimal damage. The Jet-Board Bash is a great way to inflict damage on a single enemy.
Zee Egg
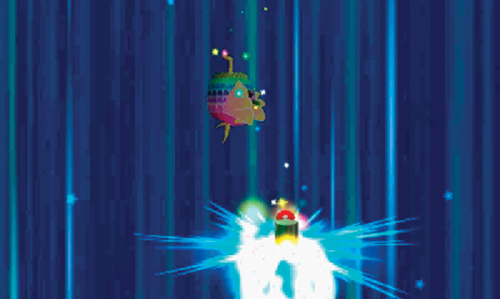
- Cost: 15 BP
- Unlock: Awarded by Eldream for rescuing all 52 Pi’illos
At the start of the attack, the Zeekeeper swoops in and picks up Mario and Luigi. Once high above the battle, the Zeekeeper releases a large egg-shaped Wakeorb. As the Wakeorb falls, align the Zeekeeper with it by moving the Circle Pad left or right. Once aligned, Mario and Luigi automatically jump off the back of the Zeekeeper, plunging toward the Wakeorb below. As Mario approaches the Wakeorb, press
to whack it with his hammer. When Luigi approaches the Wakeorb, press
to strike it with his hammer. Mario and Luigi may jump at the Wakeorb simultaneously, requiring you to press
and
at the same time. With each successful hammer strike, the Wakeorb picks up speed, causing it to inflict more damage upon impact.
Luigi’s Bros. Attacks
3D Green Shell
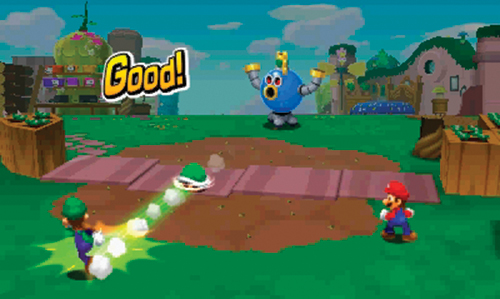
- Cost: 4 BP
- Unlock: Awarded by Boss Brickle in Mushrise Park
The 3D Green Shell Bros. Attack works almost identically to Mario’s 3D Red Shell attack, only this attack is initiated by Luigi. This is useful for damaging large groups of enemies.
Fire Flower
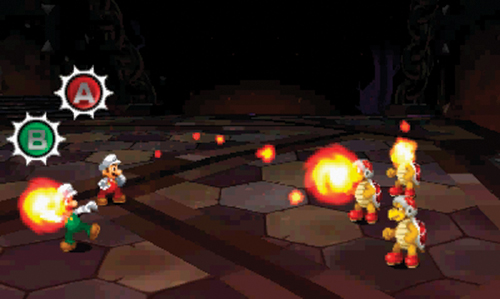
- Cost: 6 BP
- Unlock: Collect all 10 Attack Pieces in Dozing Sands
Alternate between pressing
and
to make Mario and Luigi toss fireballs toward their targets. Watch as the fireballs grow in Mario and Luigi’s hands—press the buttons to throw the fireballs before they explode. But if you press the buttons too early, the brothers will release tiny fireballs that inflict little damage.
Dropchopper
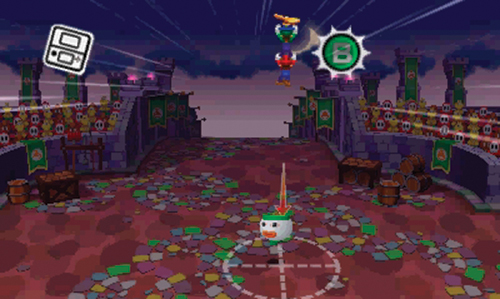
- Cost: 8 BP
- Unlock: Collect all 10 Attack Pieces in Mount Pajamaja
This simple aerial attack requires you to tilt the Nintendo 3DS to collect both brothers before unleashing a powerful overhead attack on your enemies. For best results, line up the crosshairs with your intended target to ensure optimal damage. In addition to dealing damage to the target, a radial effect spreads outward, damaging all nearby enemies.
Slingsniper
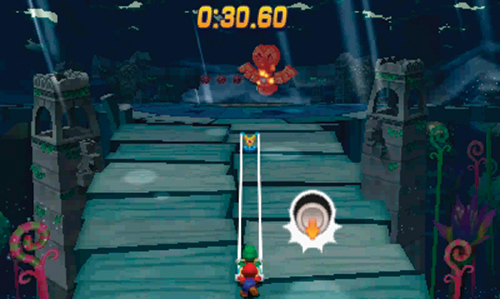
- Cost: 10 BP
- Unlock: Awarded by Big Massif in Mount Pajamaja (2nd Tour)
During this attack, Mario uses a large slingshot-like device to launch Luigi at distant enemies. Use the Circle Pad to draw back Luigi in the sling, then hold down
to bring up an aiming reticle—quickly target an enemy by tilting the Nintendo 3DS. Once a target is centered in the aiming reticle, release
to send Luigi flying. The quicker you target and release Luigi, the more damage inflicted, so don’t take too much time aiming. If you take too much time to aim, both Mario and Luigi will go flying through the air, inflicting no damage on the enemies.
Star Rocket
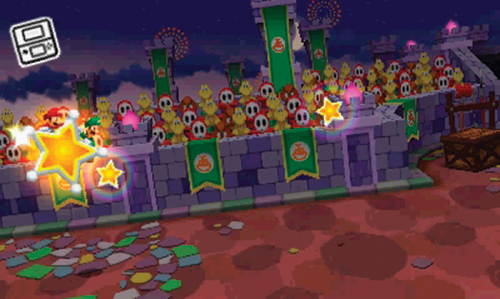
- Cost: 12 BP
- Unlock: Collect all 10 Attack Pieces in Neo Bowser Castle
As Mario and Luigi sit on the Star Rocket, it’s your responsibility to steer it by tilting the Nintendo 3DS up and down. Collect the little stars along the way to gain more power. At the end of the attack, press
as Luigi lands on top of the targeted enemy. Follow up by pressing
when Mario lands to inflict even more damage.
Luiginary Attacks
By collecting Attack Pieces in the dream world you can unlock several powerful Luiginary Attacks, allowing Mario to harness the power of Dreamy Luigi and his Luiginoids. But like Bros. Attacks, each of these attacks consumes BP—so use them sparingly.
Luiginary Ball
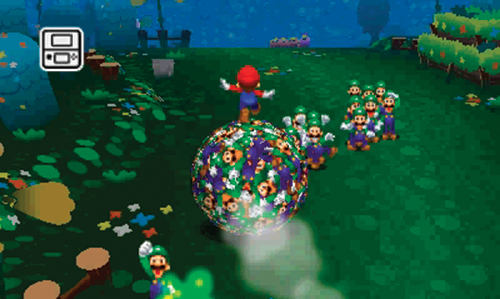
- Cost: 6 BP
- Unlock: Collect all 10 Attack Pieces in Dreamy Mushrise Park (A)
This attack places Mario atop a ball comprised entirely of Luiginoids. Tilt the Nintendo 3DS left and right to steer the ball as it automatically travels forward. Along the way, run over more Luiginoids to increase the size of the ball. The larger the ball gets, the more damage it inflicts upon striking an enemy. Once the ball reaches critical mass, press
to kick it toward a group of enemies.
Luiginary Stack
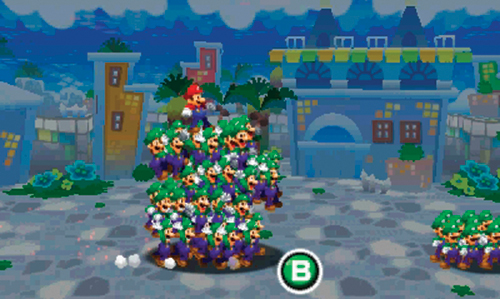
- Cost: 10 BP
- Unlock: Collect all 10 Attack Pieces in Dreamy Dozing Sands (F)
During this attack you must gather a tall Stack of Luiginoids and carefully balance them prior to launching a devastating attack. The trick is balancing each new set of Luiginoids added to the bottom of the Stack. If the Stack gets out of alignment, use the Circle Pad to maintain balance, or else all the Luiginoids will come crashing down, aborting the attack. For best results, get the Stack organized as straight as possible to maintain stability. Then, when it’s time to attack, pay close attention. After the Luiginoids come crashing down on your enemies, be ready to press
to inflict extra damage as Mario.
Luiginary Hammer
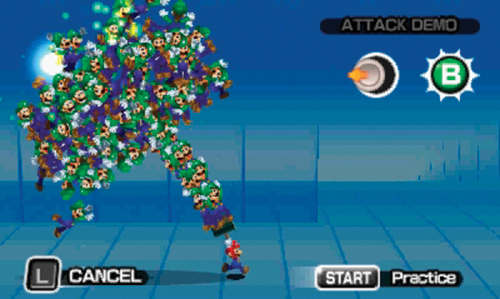
- Cost: 10 BP
- Unlock: Collect all 10 Attack Pieces in Dreamy Mount Pajamaja (E)
The Luiginary Hammer functions similarly to the Luiginary Stack attack, only this time the Luiginoids form a massive Hammer, requiring Mario to carefully balance the increasing weight before unleashing a powerful attack. Rapidly press
to create the Hammer from a large group of Luiginoids. But as more and more Luiginoids pile on, the Hammer becomes more and more difficult to balance—move the Circle Pad to keep the Hammer from toppling over. Once the Hammer is complete, approach the group of enemies, using the crosshairs icon to aim. When you’re satisfied with the alignment, press
to swing the Hammer downward, inflicting massive damage on the target and surrounding enemies.
Luiginary Flame
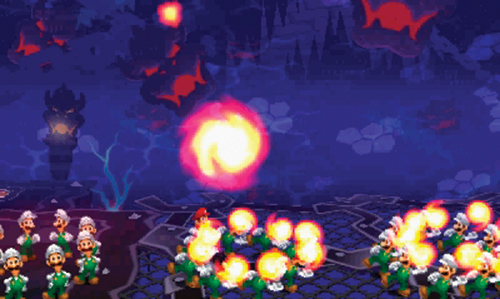
- Cost: 14 BP
- Unlock: Collect all 10 Attack Pieces in Dreamy Driftwood Shore (A)
During this Luiginary Attack, Mario produces a Flame by pressing
. The Flame then bounces at a steady pace across several sets of Luiginoids—press
each time the Flame makes contact with the Luiginoids. The Flame grows larger and larger with each successful juggle But as the Flame crosses from one set of the Luiginoids to the next, Mario must occasionally fill in gaps among the Luiginoids to keep the Flame growing—press
to make Mario juggle the Flame. When the Flame reaches critical mass, Mario must use his hammer to direct it at a group of enemies.
Luiginary Wall
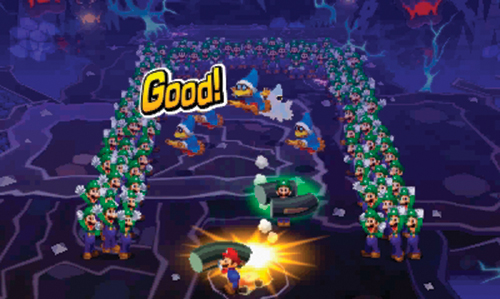
- Cost: 14 BP
- Unlock: Collect all 10 Attack Pieces in Dreamy Wakeport (B)
Here the Luiginoids form a three-sided box as Mario uses his hammer (
) to knock Dreamy Luigi across the floor. When struck by Mario’s hammer, Dreamy Luigi bounces against the Luiginoid Wall, smacking enemies along the way. The idea is to bounce Dreamy Luigi off the three enclosed Walls—use the Circle Pad to move Mario around so you can strike Dreamy Luigi from different angles, causing him to fly in new directions. At the conclusion of the attack, the Luiginoids form a massive vertical Wall in the background. Knock Dreamy Luigi into this distant Wall to cause the Luiginoids to come crashing down on your enemies.
Luiginary Typhoon
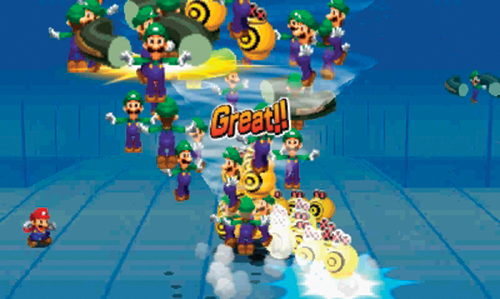
- Cost: 16 BP
- Unlock: Collect all 10 Attack Pieces in Dreamy Somnom Woods (G)
Start by winding up a rope of Luiginoids with
. Then press
to yank them into a powerful Typhoon—timing is critical here otherwise Mario will get launched at the enemies and the attack will end. Once a Typhoon is formed, use the Circle Pad to control it, flying it over a large group of enemies. The Typhoon actually picks up enemies and tosses them around. While the Typhoon is active, rapidly press
to deal more damage to the enemies.
Levels and Ranks
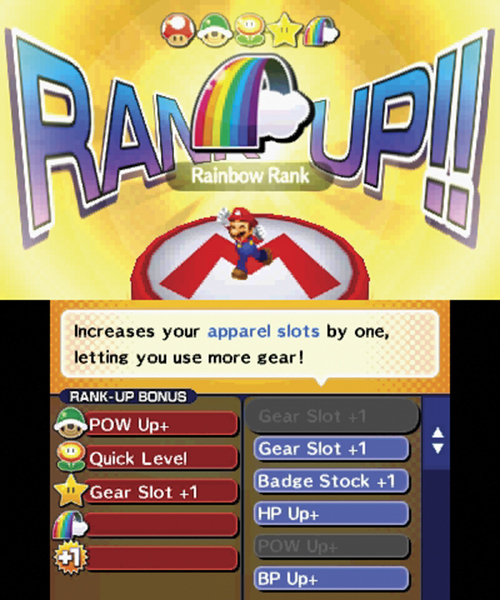
Defeating enemies earns Mario and Luigi coins, items, gear, and EXP. EXP accumulates over time, allowing our heroes to level up. When you level up, your stats increase and you get stronger. This makes it easier to defeat future enemies. In addition to gaining stats with each level, when leveling up, you can increase one stat of your choice. Move the bonus slot up and down the column of stats to choose which stat you want to increase. Press
to begin rotating the bonus slot on the desired stat. This causes a series of numbers to begin spinning, similar to a slot machine—press
again to make the numbers stop. Whichever number the slot stops on is the bonus stat you get.
At levels 8, 16, 26, and 40 Mario and Luigi attain new ranks. Each time your rank goes up you get to apply a bonus, which is very useful during battles—at rank 40 you get to choose two bonuses! Choose the bonus that best fits your style of play. But choose carefully—you can only apply a maximum of five bonuses to your character total.
Rank-Up Bonuses
| Name | Description | Rank Required |
|---|---|---|
| Gear Slot+1 | Adds one Gear slot | Shell (Level 8) |
| Badge Stock+1 | Adds one Badge stock | Shell (Level 8) |
| HP Up+ | Adds 2 HP per level | Shell (Level 8) |
| POW Up+ | Adds 1 POW per level | Shell (Level 8) |
| BP Up+ | Adds 1 BP per level | Shell (Level 8) |
| Quick Level | Gives 20% more EXP | Shell (Level 8) |
| Iron Body | Reduces damage by 25% | Shell (Level 8) |
| Jump Man | Boosts solo-jump damage by 125% | Flower (Level 16) |
| Hammerhead | Boosts solo-hammer damage by 125% | Flower (Level 16) |
| Counterer | Boosts counterattacks by 150% | Flower (Level 16) |
| Shroom EXP | Mushrooms give EXP | Flower (Level 16) |
| Big Lucky | Boosts Lucky Hit damage by 200% | Star (Level 26) |
| Casual Bros. | Bros. Attacks cost 1/2 | Star (Level 26) |
| Quick Healer | Items heal 200% | Star (Level 26) |
Expert Challenges
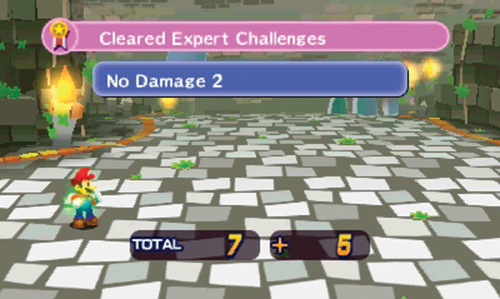
Expert Challenges are optional objectives that can be completed during battle. You accumulate points whenever you clear an Expert Challenge. Hitting point milestone targets nets you rare gear. From the menu screen, select the Collections sub-menu to review the different Expert Challenges available. Select the title of a challenge in this menu and press
to review the criteria for each. There are a total of ten different pieces of gear awarded through Expert Challenges, each at a different point milestone. Complete all the Expert Challenges to gain access to the powerful Duplex Crown—this allows you to attack twice per turn.
Expert Challenge Rewards
| Milestone | Reward |
|---|---|
| 20 | Expert Boots |
| 50 | POW Scarf |
| 90 | Expert Wear |
| 140 | Perfect POW Gloves |
| 200 | BP Knockout Bangle |
| 300 | Expert Hammer |
| 450 | Birthday Boots |
| 600 | Golden Hammer |
| 800 | Master Gloves |
| 1,000 | Duplex Crown |
Giant Luigi Battles
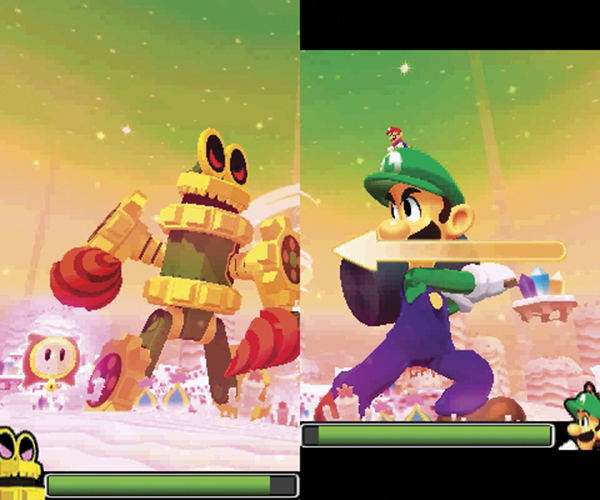
In the dream world, Mario and Dreamy Luigi sometimes encounter enemies that are just too big to fight in a regular battle. In these rare circumstances, Dreamy Luigi steps up to the challenge, drawing in Luiginoids from the dream world to match the size and strength of their colossal foe. When a Giant Luigi battle begins, tilt the Nintendo 3DS as directed by the on-screen instructions. During these battles all attacks and counters are performed by interacting with the Touch Screen—always use a stylus for precision. Unlike the turn-based battles, timing and quick reflexes are a necessity during these encounters, requiring you to draw lines, or tap particular spots on the Touch Screen. Giant Luigi’s health appears in the meter at the bottom of the Touch Screen while the enemy’s health appears at the bottom of the other screen. Keep attacking, dodging, and countering until the enemy’s health is depleted.