
Mario & Luigi: Dream Team Guide Enemies Dream World Bosses and Minions
Dream World Bosses and Minions
Antasma (Bat State)
Locations: Dream’s Deep
Stats
| LVL | HP | POW | DEF | SPD | EXP | Coins | Rate | Normal Loot | Rate | Rare Loot | Rate |
|---|---|---|---|---|---|---|---|---|---|---|---|
| 9 | 6 | 59 | 43 | 1 | 0 | 0 | 0% | Syrup Jar | 3% | None | 0% |
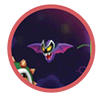
Mario and Dreamy Luigi first encounter Antasma in his bat state in Dream’s Deep—this is soon after Antasma forms an alliance with Bowser. When it’s your turn to attack, don’t hold back. Your most powerful attack at this point is the Luiginary Ball. Use it repeatedly to inflict heavy damage on both Bowser and Antasma. When you run low on BP, consume a Syrup Jar to get more and resume with the Luiginary Ball attacks. Antasma attacks as well, sending a swarm of bats in your direction. Strike them with your hammer to avoid taking damage.
Antasma
Locations: Dreamy Neo Bowser Castle
Stats
| LVL | HP | POW | DEF | SPD | EXP | Coins | Rate | Normal Loot | Rate | Rare Loot | Rate |
|---|---|---|---|---|---|---|---|---|---|---|---|
| 35 | 2,435 | 416 | 284 | 168 | 7,500 | 900 | 100% | None | 0% | Dark Hammer | 100% |

Get ready to counter Antasma’s first attack as he creates several clones of himself—pay attention to the one that holds a ball of purple energy above his head. As the different Antasmas scramble and form a line, be ready to hit back the ball of purple energy flying toward Mario. When it’s Mario’s turn to attack, don’t hold back. Choose a powerful Luiginary Attack like the Luiginary Wall or Luiginary Typhoon to inflict as much damage as possible on Antasma and his Antasmunchies. When Antasma transforms into a swarm of bats, be ready to jump as the swarm approaches Mario. But you don’t have to jump over every bat. Just jump over the ones that fly low to the ground, directly at Mario. Watch the shadows of the bats on the ground and only jump over the bats whose shadows are aligned with Mario. If Mario is hit by the bats or any other Antasma attack, he’ll fall asleep, triggering an endless nightmare sequence—you must find an exit or else you’ll be trapped here forever. When it’s your turn to attack, keep hitting Antasma with one Luiginary Attack after another. Over time this depletes his HP, leading to his defeat.
Antasmunchie
Locations: Dreamy Neo Bowser Castle (Antasma Minion)
Stats
| LVL | HP | POW | DEF | SPD | EXP | Coins | Rate | Normal Loot | Rate | Rare Loot | Rate |
|---|---|---|---|---|---|---|---|---|---|---|---|
| 34 | 90 | 275 | 344 | 70 | 0 | 0 | 0% | Max Candy | 2% | None | 0% |
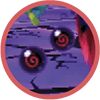
At the start of the battle Antasma conjures several dark orbs called Antasmunchies. Antasma consumes a few Antasmunchies, increasing his POW. Get ready to counter Antasma’s first attack as he creates several clones of himself—pay attention to the one that holds a ball of purple energy above his head. As the different Antasmas scramble and form a line, be ready to hit back the ball of purple energy flying toward Mario. After absorbing a fair amount of damage, Antasma inverts and falls asleep within a purple force field. While sleeping, Antasma steadily replenishes HP and can’t be attacked. You must wake him up by destroying all of his Antasmunchies. A Luiginary Attack is the quickest way to target and destroy all the Antasmunchies, causing Antasma to wake from his slumber. If you destroy all the Antasmunchies in one attack turn, Antasma will recover no HP.
Big Massif
Locations: Dreamy Wakeport
Stats
| LVL | HP | POW | DEF | SPD | EXP | Coins | Rate | Normal Loot | Rate | Rare Loot | Rate |
|---|---|---|---|---|---|---|---|---|---|---|---|
| 16 | 864 | 140 | 103 | 61 | 800 | 250 | 100% | None | 0% | Knockout Boots | 100% |
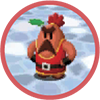
Battling Big Massif is similar to the battles with the other Hooraws, only Big Massif has much more HP and deals more damage with his attacks. Be ready to use your hammer and knock back a large stone pillar he punches in your direction. When it comes to attacking Big Massif, don’t hold back. Use Luiginary Attacks like the Luiginary Ball and Luiginary Stack to deal massive amounts of damage to Big Massif and his small army of Hooraws. These attacks do far more damage than any Jump or Hammer attack, significantly shortening the length of the battle. If you’re running low on BP, consume a Syrup Jar and keep the Luiginary Attacks going. But Big Massif can organize a Stack of his own, riding atop a massive stack of Hooraws. During this sequence Mario runs away from the approaching Stack. Move left and right to avoid getting trampled. Also be ready to jump when the Stack jumps toward you. Upon landing, the Stack emits a powerful radial shockwave.
Beef Cloud (Big Massif Disciple)
Locations: Dreamy Wakeport
Stats
| LVL | HP | POW | DEF | SPD | EXP | Coins | Rate | Normal Loot | Rate | Rare Loot | Rate |
|---|---|---|---|---|---|---|---|---|---|---|---|
| 14 | 357 | 1 | 105 | 1 | 200 | 50 | 100% | Super Candy | 30% | HP Knockout Bangle | 5% |
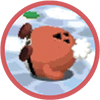
He may be big, but Beef Cloud is always sleepy—and the longer he sleeps, the more HP he recovers. Keep hitting Beef Cloud with simple Jump attacks. Instead of taking a turn to attack, Beef Cloud continues to sleep, recovering HP with each passing moment. So as soon as it’s your turn to attack again, do so as quickly as possible. Continue hammering Beef Cloud with continuous Jump attacks until he’s down for the count.
Heavy Zest (Big Massif Disciple)
Locations: Dreamy Wakeport
Stats
| LVL | HP | POW | DEF | SPD | EXP | Coins | Rate | Normal Loot | Rate | Rare Loot | Rate |
|---|---|---|---|---|---|---|---|---|---|---|---|
| 14 | 282 | 113 | 80 | 60 | 200 | 50 | 100% | Super Candy | 30% | HP Knockout Bangle | 5% |

Heavy Zest surrounds himself with several smaller Hooraws—you must defeat them all in three turns to win this battle. During one of Heavy Zest’s most common attacks, he comes charging at Mario while the Hooraws stand in the background. Take note of the Hermite Crab just behind Mario during this sequence. Move in sync with the Hermite Crab, then watch closely as Heavy Zest approaches—he may either jump or stay on the ground, running directly into Mario. If he jumps, stay on the ground. But if he doesn’t jump, be ready to jump to avoid getting hit. Either way, Heavy Zest crashes into the Hermite Crab as long as Mario is properly aligned. As the Hermite Crab’s coconut flies through the air, it bounces across most of the Hooraws in the background, inflicting heavy damage. When it’s Mario’s turn to attack, don’t fool around—use only Luiginary Attacks. Although they cost BP, these attacks are your best bet at defeating Heavy Zest in three turns. Both the Luiginary Ball and Luiginary Stack are effective as long as you score Excellents with each attack. It’s entirely possible to defeat Heavy Zest before all the Hooraws. But remember, the battle isn’t over until all foes are defeated.
Sorrow Fist (Big Massif Disciple)
Locations: Dreamy Wakeport
Stats
| LVL | HP | POW | DEF | SPD | EXP | Coins | Rate | Normal Loot | Rate | Rare Loot | Rate |
|---|---|---|---|---|---|---|---|---|---|---|---|
| 14 | 395 | 139 | 75 | 115 | 200 | 50 | 100% | Super Candy | 30% | HP Knockout Bangle | 5% |

Sorrow Fist doesn’t exactly exude confidence. But don’t let his somewhat helpless demeanor fool you. Sorrow Fist surrounds himself with other Hooraws. Be ready to defend yourself against his attacks. In one attack he strikes a shell falling from the sky, sending it flying at Mario—knock it back with your hammer. In another attack, Sorrow Fist comes charging at Mario, flailing his arms—jump on his head to counter. When it’s Mario’s turn to attack, focus on attacks you’re confident you can score Excellent hits with—remember, any other hits will heal Sorrow Fist instead of damaging him. Jump attacks are relatively easy to score Excellent hits with and deal a reasonable amount of damage, so simply perform one Jump attack after another until Sorrow Fist is down for good.
Thunder Sass (Big Massif Disciple)
Locations: Dreamy Wakeport
Stats
| LVL | HP | POW | DEF | SPD | EXP | Coins | Rate | Normal Loot | Rate | Rare Loot | Rate |
|---|---|---|---|---|---|---|---|---|---|---|---|
| 14 | 140 | 176 | 53 | 138 | 200 | 50 | 100% | Super Candy | 30% | HP Knockout Bangle | 5% |
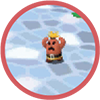
You must use Thunder Sass’s own attacks to damage him. Furthermore, only healing items can be used during this battle, and badge effects are banned. Thunder Sass surrounds himself with Hooraws—but you only need to defeat Thunder Sass to win. In one common attack, Thunder Sass bounces across groups of Hooraws before launching himself toward Mario at high speed, but he only bounces off the groups of Hooraws that have their arms raised. This makes it easier to predict when and from which direction Thunder Sass will come flying. Counter by hitting Thunder Sass with the hammer as he flies toward Mario. During another Thunder Sass attack, he comes charging directly at Mario. Time your jump carefully so you land on top of him to inflict damage. It’s much easier to score a counter during these attacks than it is with the hammer counter, so make the most of these opportunities. It only takes a few successful counters to defeat Thunder Sass, so stay focused to come out on top in this battle.
Hooraw (Big Massif/Disciple Minion)
Locations: Dreamy Wakeport
Stats
| LVL | HP | POW | DEF | SPD | EXP | Coins | Rate | Normal Loot | Rate | Rare Loot | Rate |
|---|---|---|---|---|---|---|---|---|---|---|---|
| 14 | 28 | 1 | 49 | 1 | 0 | 5 | 20% | None | 0% | None | 0% |
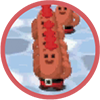
Hooraws are common, minor enemies encountered during the battles with Big Massif and his disciples. With the exception of the Heavy Zest battle, Hooraws don’t have to be defeated to win. In fact, they’re best avoided during the fight with Big Massif. Defeating the Hooraws makes Big Massif’s POW go up, making his attacks more and more powerful. You’re better off dealing damage through counter attacks. Hooraws defeated during counters do not cause Big Massif’s POW to increase.
Bowser
Locations: Dream’s Deep
Stats
| LVL | HP | POW | DEF | SPD | EXP | Coins | Rate | Normal Loot | Rate | Rare Loot | Rate |
|---|---|---|---|---|---|---|---|---|---|---|---|
| 9 | 233 | 70 | 56 | 23 | 300 | 150 | 100% | None | 0% | Iron Ball Hammer | 100% |
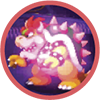
Mario and Dreamy Luigi first face off against Bowser in Dream’s Deep. As usual, Bowser is no slouch when it comes to battles. He’s made even more powerful by his recent alliance with Antasma, so when it’s your turn to attack, don’t hold back. Your most powerful attack at this point is the Luiginary Ball. Use it repeatedly to inflict heavy damage on both Bowser and Antasma. When you run low on BP, consume a Syrup Jar to get more BP and resume with the Luiginary Ball attacks. When you’re not attacking, get ready to evade and counter Bowser’s attacks. Leap over the flame attacks and be ready to strike back with your hammer when Bowser comes charging at you—he leads with his fist when he’s about to strike. When Bowser turns into a spiky ball and begins rolling toward Mario, pay attention to the lines of flames ahead. As Mario runs away from Bowser, move left and right to step around the flames. It’s possible to leap over the orange flames, but the purple flames are too high to leap, so make a habit of jumping over the orange flames while moving around the purple flames. Making contact with any of the flames inflicts damage and slows Mario. If you strike two flames, Mario trips and is run down by Bowser, inflicting even more damage.
Dreamy Mario
Locations: Dreamy Pi’illo Castle
Stats
| LVL | HP | POW | DEF | SPD | EXP | Coins | Rate | Normal Loot | Rate | Rare Loot | Rate |
|---|---|---|---|---|---|---|---|---|---|---|---|
| 5 | 96 | 30 | 30 | 19 | 75 | 45 | 100% | None | 0% | So-so Boots | 100% |
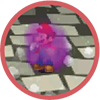
Mario confronts a Dreamy version of himself in Dreamy Pi’illo Castle. As the Dreamy Marios multiply, keep an eye on the original Dreamy Mario and always target him with attacks. Start with a Jump attack, targeting the original Dreamy Mario instead of one of his clones. Striking the original Dreamy Mario makes all the clones disappear…at least temporarily. A purple cloud attacks by firing a mix of coins, Mushrooms, and fireballs—grab the coins and Mushrooms but evade the fireballs either by moving or jumping over them. Also, watch out for incoming Dreamy Marios hurtled toward you. You can’t move around these incoming projectiles, so time your jumps carefully. If you time your jumps just right you can land on the incoming Dreamy Mario to inflict damage. The Dreamy Marios also attack by charging directly at you. Once again, time your jumps carefully to either jump over them or on top of them. During another enemy attack, lines of Dreamy Marios come charging at you. Don’t make contact with any of these enemies as they’ll inflict damage. Instead, jump over the Dreamy Marios as they approach to avoid taking any damage. When you’re not evading attacks, perform more Jump Attacks of your own, targeting the original Dreamy Mario each time.
Elite Trio
Corporal Paraplonk
Locations: Dreamy Driftwood Shore
Stats
| LVL | HP | POW | DEF | SPD | EXP | Coins | Rate | Normal Loot | Rate | Rare Loot | Rate |
|---|---|---|---|---|---|---|---|---|---|---|---|
| 23 | 415 | 176 | 193 | 120 | 700 | 200 | 100% | None | 0% | Counter Wear | 100% |
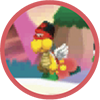
During the Elite Trio battle, be ready to leap over (or on) Corporal Paraplonk as he launches himself at Mario, while bouncing between two blocks. If you land on his shell, it will fly toward the Sub-Goombas, including all the Sub-Goombas in the background. If targeting Corporal Paraplonk directly, do so with air-based attacks. Since he’s flying, ground-based attacks don’t hit him.
Private Goomp
Locations: Dreamy Driftwood Shore
Stats
| LVL | HP | POW | DEF | SPD | EXP | Coins | Rate | Normal Loot | Rate | Rare Loot | Rate |
|---|---|---|---|---|---|---|---|---|---|---|---|
| 23 | 249 | 169 | 152 | 60 | 700 | 300 | 100% | None | 0% | Mushroom | 100% |

Private Goomp is the most likely to fall first, but he’s quickly revived by his comrades—this is why it’s so important to knock out all three enemies at once. Keep hitting the enemies hard with one Luiginary Attack after another. But be ready to counter Private Goomp’s attack when he sends his army of Sub-Goombas charging at Mario. Leap on the incoming formation, sending them back at Private Goomp. Continue this volley until the Sub-Goombas trample Private Goomp.
Sergeant Guy
Locations: Dreamy Driftwood Shore
Stats
| LVL | HP | POW | DEF | SPD | EXP | Coins | Rate | Normal Loot | Rate | Rare Loot | Rate |
|---|---|---|---|---|---|---|---|---|---|---|---|
| 23 | 581 | 189 | 166 | 75 | 700 | 5 | 100% | None | 0% | Action Hammer | 100% |

Use your hammer to whack the various Sergeant Guy imposters rushing toward you from different angles—these are actually Sub-Goombas in disguise. During one of Sergeant Guy’s most elaborate attacks, he comes charging at Mario with a massive bomb, with the Sub-Goomba’s leading the chase. Jump on (or over) the incoming Sub-Goombas as they come charging at Mario. Private Goomp makes a pass too—try to jump on him to inflict more damage. Keep dodging (or countering) the incoming Sub-Goombas until the bomb explodes, inflicting heavy damage on all enemies. Sergeant Guy also fires a massive Bullet Bill (loaded by pink Sgt. Guy Cannon enemies) from the cannon—it takes Sergeant Guy one turn to load the cannon and a second turn to fire it. But be ready to move when that Bullet Bill comes zooming at Mario. Rapidly press
 to boost Mario’s speed, keeping him a few paces ahead of Bullet Bill. Bullet Bill eventually loses altitude, bouncing along the ground and crashing back into Sergeant Guy.
Sgt. Guy Cannon (Elite Trio Minion)
Locations: Dreamy Driftwood Shore
Stats
| LVL | HP | POW | DEF | SPD | EXP | Coins | Rate | Normal Loot | Rate | Rare Loot | Rate |
|---|---|---|---|---|---|---|---|---|---|---|---|
| 23 | 1 | 189 | 1 | 66 | 0 | 0 | 0% | None | 0% | None | 0% |
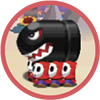
These enemies make a brief cameo, loading a Bullet Bill into Sergeant Guy’s cannon. As a result, they’re not valid targets during the battle.
Sub-Goomba (Elite Trio Minion)
Locations: Dreamy Driftwood Shore
Stats
| LVL | HP | POW | DEF | SPD | EXP | Coins | Rate | Normal Loot | Rate | Rare Loot | Rate |
|---|---|---|---|---|---|---|---|---|---|---|---|
| 22 | 80 | 120 | 105 | 57 | 0 | 5 | 20% | Mushroom | 2% | None | 0% |
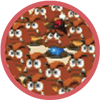
As the battle gets underway, Private Goomp surrounds himself with multiple Sub-Goombas, with an army of more Sub-Goombas in the background. When they’re not charging at Mario, these enemies do little more than insulate Private Goomp. But they won’t stand up to repeated strikes by Luiginary Attacks. Don’t focus on defeating these enemies as there’s an endless supply in the background. Instead, focus on defeating the Elite Trio, knocking them all out simultaneously.
Kamek
Locations: Dreamy Neo Bowser Castle
Stats
| Battle # | Color | LVL | HP | POW | DEF | SPD | EXP | Coins | Rate | Normal Loot | Rate | Rare Loot | Rate |
|---|---|---|---|---|---|---|---|---|---|---|---|---|---|
| 1 | Blue | 31 | 1,428 | 297 | 266 | 128 | 0% | 0% | 0% | None | 0% | None | 0% |
| 2 | Blue | 32 | 1,743 | 311 | 270 | 132 | 0 | 0% | 0% | None | 0% | None | 0% |
| 3 | Blue | 34 | 1,496 | 300 | 286 | 58 | 3,000 | 50000% | 100% | None | 0% | Mushroom Gloves | 100% |
| 3 | Green | 34 | 816 | 225 | 275 | 93 | 0 | 0 | 0% | None | 0% | None | 0% |
| 3 | Red | 34 | 544 | 313 | 275 | 46 | 0 | 0 | 0% | None | 0% | None | 0% |
| 3 | White | 34 | 626 | 188 | 275 | 70 | 0 | 0 | 0% | None | 0% | None | 0% |

Mario and Dreamy Luigi battle Kamek a total of three times in Dreamy Neo Bowser Castle. During the third battle Kamek conjures green, red, and white variants of himself. The first two battles are rather easy to complete if you go in prepared with plenty of HP, BP, and an aggressive set of Luiginary Attacks at the ready, but the final battle is a bit tricky. When Mario is encased in four rings, watch as the rings expand and contract—jump up as the rings contract to avoid taking damage. Kamek (Red) performs a giant broom attack, requiring Mario to move around to avoid getting swept away. Use the Circle Pad to move up, down, left, or right to dodge. In another unique attack, Kamek chases Mario toward a set of falling stone blocks. Kamek, in the blue robe, has much more HP than his red, green, and white clones. As a result, he’s often the last one standing at the end of the battle, but don’t let up. Keep hammering him with Luiginary Attacks until he’s defeated.