
Mario & Luigi: Dream Team Guide Enemies Real World Enemies
Real World Enemies
Bandit
Locations: Dozing Sands, Somnom Woods
Stats
| LOCATION | LVL | HP | POW | DEF | SPD | EXP | Coins | Rate | Normal Loot | Rate | Rare Loot | Rate |
|---|---|---|---|---|---|---|---|---|---|---|---|---|
| Dozing Sands | 25 | 111 | 135 | 122 | 125 | 110 | 20 | 100% | Taunt Ball | 10% | Gloves DX | 2% |
| Somnom Woods | 27 | 123 | 158 | 133 | 138 | 100 | 0 | 100% | None | 0% | None | 0% |

Bandits are tricky enemies, eager to steal Mario and Luigi’s coins. When they toss smoke bombs, be ready to jump over (or on) them as they emerge from the smoke and charge at Mario and Luigi—if they make contact, they’ll inflict damage and steal 100 coins. Keep track of the Bandits that have stolen coins, and defeat them before they can escape. Bros. Attacks work best against these enemies—try Mario’s Bomb Derby. But if you’re low on BP, simple Jump and Hammer attacks will suffice. You only have one attack turn to defeat Bandits holding your coins. If you’re unsuccessful in defeating them in your turn, they’ll toss a smoke bomb and run away, taking 100 coins with them. In another attack, Bandits will push explosive decoys toward Mario and Luigi from the confines of their smoke screen—don’t take the bait. Striking one of these decoys with your hammer will only damage you. Wait until the real Bandit emerges from the smoke, then strike him with your hammer.
Beehoss
Locations: Somnom Woods
Stats
| LVL | HP | POW | DEF | SPD | EXP | Coins | Rate | Normal Loot | Rate | Rare Loot | Rate |
|---|---|---|---|---|---|---|---|---|---|---|---|
| 27 | 123 | 158 | 133 | 138 | 100 | 0 | 100% | None | 0% | None | 0% |
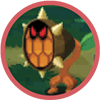
This peculiar flower-like enemy is covered in spikes. Therefore, use Hammer attacks instead of Jump attacks—Bros. Attacks are also effective. During their attack phase, the Beehoss sends swarms of bees at Mario and Luigi. Simply jump over these swarms. Jumping on the swarms only agitates the bees, causing them to sting Mario or Luigi. After inflicting damage, the bees immediately return to the Beehoss. But if you completely avoid contact with the bees, the Beehoss will have no bees to attack with for a few turns, leaving it defenseless until the bees eventually return.
Bloatula
Locations: Pi’illo Castle
Stats
| LVL | HP | POW | DEF | SPD | EXP | Coins | Rate | Normal Loot | Rate | Rare Loot | Rate |
|---|---|---|---|---|---|---|---|---|---|---|---|
| 4 | 12 | 38 | 34 | 18 | 5 | 4 | 100% | Nut | 4% | Secret Box | 2% |
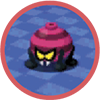
Bloatulas are large spider-like monsters. There’s nothing particularly challenging about defeating the Bloatulas. Simply use Jump attacks to whittle down their HP while evading or countering their simple attacks.
Boomerang Bro
Locations: Somnom Woods
Stats
| LVL | HP | POW | DEF | SPD | EXP | Coins | Rate | Normal Loot | Rate | Rare Loot | Rate |
|---|---|---|---|---|---|---|---|---|---|---|---|
| 27 | 135 | 193 | 141 | 83 | 160 | 30 | 100% | Ultra Nut | 3% | Heart Wear | 2% |
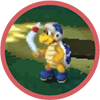
Avoid incoming boomerangs tossed by Boomerang Bros.—initiate a battle by jumping on or hammering this foe. When these enemies attack, watch the Commander Lakitus hovering in the background—they raise M or L flags, indicating whether Mario or Luigi is about to be attacked. Use your hammers to knock back the boomerangs. In other instances the Commander Lakitus will indicate what type of boomerang attack is coming. If the Commander Lakitus move in a circular motion, be ready to jump over the incoming boomerang, so it returns and strikes the Boomerang Bro who threw it. These enemies are best defeated with standard Jump attacks. Or if you want to end the battle quickly, use a Bros. Attack like Bomb Derby.
Caccac
Locations: Dozing Sands
Stats
| LVL | HP | POW | DEF | SPD | EXP | Coins | Rate | Normal Loot | Rate | Rare Loot | Rate |
|---|---|---|---|---|---|---|---|---|---|---|---|
| 11 | 74 | 60 | 77 | 23 | 32 | 16 | 100% | Super Candy | 10% | Bare Boots | 4% |
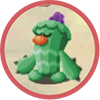
Be ready to knock these guys back during their multi-stage charge attack by using your hammer. Even after knocking them back one time, be ready to keep hitting them as they continue their attack. Caccacs also throw cactus chunks at Mario and Luigi. Be ready to jump if the toss goes low. Otherwise, don’t jump at all—the chunk will fly over Mario and Luigi’s heads and circle back hitting the Caccac.
Capnap
Locations: Mushrise Park
Stats
| LVL | HP | POW | DEF | SPD | EXP | Coins | Rate | Normal Loot | Rate | Rare Loot | Rate |
|---|---|---|---|---|---|---|---|---|---|---|---|
| 5 | 16 | 40 | 38 | 23 | 15 | 5 | 100% | Mushroom | 5% | Candy | 2% |
Use Jump attacks to perform preemptive attacks on these enemies. During battle, Jump attacks are most effective against Capnaps.
Chain Chomp
Locations: Neo Bowser Castle
Stats
| LVL | HP | POW | DEF | SPD | EXP | Coins | Rate | Normal Loot | Rate | Rare Loot | Rate |
|---|---|---|---|---|---|---|---|---|---|---|---|
| 34 | 245 | 300 | 275 | 104 | 50 | 80 | 100% | Max Nut | 8% | POW Scarf DX | 1% |
These enemies always appear with a Walker Guy who tries to maintain control. In these battles target the Chain Chomps first, as they pose the biggest threat. Fire-based attacks aren’t very effective against the Chain Chomps, so consider hitting them with standard Jump attacks or Bros. Attacks, like Bomb Derby, Dropchopper, or Slingsniper. But be ready to counter the Chain Chomps as they come charging at Mario and Luigi, dragging their Walker Guy along the way. Instead of jumping over the charging Chain Chomp, jump on it to inflict moderate damage. You can even jump on the Walker Guy, potentially defeating him. Chain Chomps also fling their Walker Guys at Mario and Luigi—knock the Walker Guy out of the air with your hammer, then be ready to smack the charging Chain Chomp as he approaches.
Commander Lakitu
Locations: Somnom Woods
Stats
| LVL | HP | POW | DEF | SPD | EXP | Coins | Rate | Normal Loot | Rate | Rare Loot | Rate |
|---|---|---|---|---|---|---|---|---|---|---|---|
| 27 | 1 | 1 | 133 | 83 | 100 | 20 | 100% | None | 0% | Heart Wear | 15% |
Commander Lakitus usually appear in the background during Boomerang Bro attacks—they raise M or L flags, indicating whether Mario or Luigi is about to be attacked. If the Commander Lakitus move in a circular motion, be ready to jump over the incoming boomerang, so it returns and strikes the Boomerang Bro who threw it. Simply toss a Taunt Ball at these enemies to defeat them—they have very low HP.
Durapurl
Locations: Driftwood Shore
Stats
| LVL | HP | POW | DEF | SPD | EXP | Coins | Rate | Normal Loot | Rate | Rare Loot | Rate |
|---|---|---|---|---|---|---|---|---|---|---|---|
| 21 | 89 | 112 | 350 | 61 | 130 | 30 | 100% | 1-Up Deluxe | 3% | None | 0% |
Due to their shell exterior, these guys can absorb some heavy hits. To inflict more damage, hit them while they’re out of their shell. During their attacks, they exit their shell and roll at you—counter by jumping on top of them. Damage dealt during these counters far exceeds what can be dished out during your own attacks, so time your jumps carefully to end these battles quickly.
Eyepi’illo
Locations: Somnom Woods
Stats
| LVL | HP | POW | DEF | SPD | EXP | Coins | Rate | Normal Loot | Rate | Rare Loot | Rate |
|---|---|---|---|---|---|---|---|---|---|---|---|
| 28 | 138 | 247 | 277 | 105 | 290 | 50 | 100% | Taunt Ball | 5% | Bare Hammer DX | 2% |
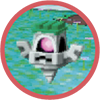
Wait until these floating stone enemies descend to the ground, then whack them with a hammer or jump on them to initiate a battle. During one of their attacks Eyepi’illos spin around in front of Mario and Luigi, emitting pink sparks in one direction—this indicates the direction they’re about to fire. Interrupt this sequence by striking the spinning Eyepi’illo with your hammer while the sparks are facing away from you. If you time it just right, the Eyepi’illo will stop and shoot one of its comrades on the right. Jump attacks and Hammer attacks are both effective against these enemies.
Fire Bro
Locations: Neo Bowser Castle
Stats
| LVL | HP | POW | DEF | SPD | EXP | Coins | Rate | Normal Loot | Rate | Rare Loot | Rate |
|---|---|---|---|---|---|---|---|---|---|---|---|
| 30 | 172 | 252 | 190 | 94 | 300 | 50 | 100% | 1-Up Deluxe | 4% | Crystal Boots | 3% |
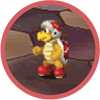
These enemies perform much like the Boomerang Bros. from Somnom Woods, but instead of tossing boomerangs, they hurl fireballs. Keep an eye on their hands when they attack—if a fireball appears get ready to jump. However, sometimes a Fire Bro throws a coin instead of a fireball—there’s no need to jump over incoming coins. Occasionally a Fire Bro launches a massive fireball into the air, causing it to disappear. But the fireball returns after a few turns, coming down from above, so be ready to counter the incoming fireball by striking it with your hammer. When it’s your turn to attack, rely on Jump attacks to defeat these guys. Or, if facing off against a large number of Hammer Bros., consider using a Bros. Attack like Mario’s Bomb Derby or Luigi’s Dropchopper.
Flaming Antasmaton
Locations: Neo Bowser Castle
Stats
| LVL | HP | POW | DEF | SPD | EXP | Coins | Rate | Normal Loot | Rate | Rare Loot | Rate |
|---|---|---|---|---|---|---|---|---|---|---|---|
| 31 | 190 | 220 | 213 | 128 | 400 | 70 | 100% | Ultrasyrup Jar | 4% | Farmer Boots | 1% |
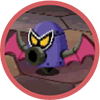
These spinning mechanical bats spew flames, requiring Mario and Luigi to stay on their toes. When a Flaming Antasmaton approaches from the top or bottom of the screen, be ready to jump as the foe spins and moves across the floor—both Mario and Luigi need to jump to avoid this flame attack. Keep jumping until the attack has concluded. Later, the Flaming Antasmaton may try another spinning attack, targeting Mario or Luigi. But pay close attention to the changing rotational speeds of the Flaming Antasmaton. Jump over the first flame attack, then watch and wait as the Flaming Antasmaton slows down—if you jump too soon you’ll land directly on top of the incoming flame. As with the Fire Bro, rely on basic Jump attacks to defeat these enemies. But a Bros. Attack may be necessary if confronting a large group of Flaming Antasmatons.
Flibbee
Locations: Mushrise Park
Stats
| LVL | HP | POW | DEF | SPD | EXP | Coins | Rate | Normal Loot | Rate | Rare Loot | Rate |
|---|---|---|---|---|---|---|---|---|---|---|---|
| 6 | 36 | 41 | 36 | 31 | 17 | 7 | 100% | Syrup Jar | 10% | So-so Hammer | 2% |
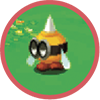
Jump attacks are not advisable against Flibbees due to the large spike on their head. Instead, use your hammers to hit these enemies while they’re on the ground. Flibbees are only vulnerable to Jump attacks when they’re in the air and their spike is pointing down—hammer attacks will miss against an airborne Flibbee.
Flibbee R
Locations: Mount Pajamaja
Stats
| LVL | HP | POW | DEF | SPD | EXP | Coins | Rate | Normal Loot | Rate | Rare Loot | Rate |
|---|---|---|---|---|---|---|---|---|---|---|---|
| 17 | 142 | 101 | 82 | 66 | 75 | 26 | 100% | Supersyrup Jar | 5% | None | 0% |

This blue enemy performs much like the yellow Flibbee you encounter in Mushrise Park. When the Flibbee R is on the ground, use Hammer attacks—don’t jump on him unless the spike on his head is facing downward.
Flounderflage
Locations: Dozing Sands
Stats
| LVL | HP | POW | DEF | SPD | EXP | Coins | Rate | Normal Loot | Rate | Rare Loot | Rate |
|---|---|---|---|---|---|---|---|---|---|---|---|
| 9 | 28 | 39 | 51 | 43 | 24 | 8 | 100% | Super Nut | 6% | Shock Bomb | 5% |

Watch out for the Flounderflage lurking beneath the sand in Dozing Sands—and watch for their eyes peeking out of the surface. Jump on top of these enemies before they emerge from the sand and attack. If they hit you first, there’s a chance they will trip Mario or Luigi. The Flounderflages don’t put up a particularly fierce attack. Simply jump on top of them to counterattack.
Fly Guy
Locations: Driftwood Shore
Stats
| LVL | HP | POW | DEF | SPD | EXP | Coins | Rate | Normal Loot | Rate | Rare Loot | Rate |
|---|---|---|---|---|---|---|---|---|---|---|---|
| 20 | 138 | 125 | 107 | 83 | 100 | 35 | 100% | Super Mushroom | 5% | Mushroom Amulet | 1% |
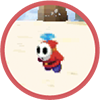
Wait for Fly Guys to land, then jump on them to initiate a battle, or strike them with your hammer as they swoop down. Fly Guys are joined by Goombas in battle, sometimes dropping them on Mario or Luigi—counter by striking the incoming Goomba with your hammer. When it’s Mario and Luigi’s turn to attack, rely primarily on Jump attacks to defeat these enemies.
Fly Guy R
Locations: Pi’illo Blimport, Mushrise Park, Driftwood Shore
Stats
| LVL | HP | POW | DEF | SPD | EXP | Coins | Rate | Normal Loot | Rate | Rare Loot | Rate |
|---|---|---|---|---|---|---|---|---|---|---|---|
| 23 | 149 | 156 | 138 | 98 | 190 | 35 | 100% | Ultra Mushroom | 5% | Bros. Wear | 2% |

The Fly Guy Rs perform just like the standard Fly Guys you encountered earlier, only they’re a bit tougher and joined by their equally more durable Goomba Rs—you should have no problem defeating them.
Golden Egg
Locations: Somnom Woods
Stats
| LVL | HP | POW | DEF | SPD | EXP | Coins | Rate | Normal Loot | Rate | Rare Loot | Rate |
|---|---|---|---|---|---|---|---|---|---|---|---|
| 27 | 68 | 1 | 664 | 1 | 0 | 200 | 100% | None | 0% | None | 0% |
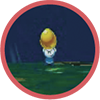
Encountering a Golden Egg in battle is extremely rare and only occurs in Somnom Woods, outside the Pi’illo Temple area. While battling other enemies, there’s a chance a Bandit will appear in the background carrying a Golden Egg. Strike the Bandit with a Taunt Ball to make him drop the Golden Egg. As the Golden Egg bounces toward Mario and Luigi, they must hit it with their hammers to receive a coin bonus. Since these encounters are random and rare, flee from enemies during battle and reengage until you come across a Bandit with a Golden Egg.
Goomba
Locations: Driftwood Shore
Stats
| LVL | HP | POW | DEF | SPD | EXP | Coins | Rate | Normal Loot | Rate | Rare Loot | Rate |
|---|---|---|---|---|---|---|---|---|---|---|---|
| 20 | 54 | 83 | 86 | 51 | 15 | 15 | 100% | Boo Biscuit | 10% | None | 0% |
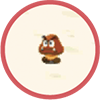
Fly Guys are joined by Goombas in battle, sometimes dropping them on Mario or Luigi—counter by striking the incoming Goomba with your hammer. Goombas are easily countered by simply jumping on them during their charging attacks.
Goomba R
Locations: Mushrise Park, Driftwood Shore
Stats
| LVL | HP | POW | DEF | SPD | EXP | Coins | Rate | Normal Loot | Rate | Rare Loot | Rate |
|---|---|---|---|---|---|---|---|---|---|---|---|
| 23 | 58 | 104 | 110 | 60 | 30 | 10 | 100% | Boo Biscuit | 10% | None | 0% |
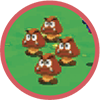
Goomba Rs appear with Fly Guy Rs in battle. Counter by jumping on or hitting the Goomba Rs with your hammer. When it’s your turn to attack, target the Fly Guy Rs first, then attack the Goomba Rs last.
Gromba
Locations: Pi’illo Blimport, Pi’illo Castle
Stats
| LVL | HP | POW | DEF | SPD | EXP | Coins | Rate | Normal Loot | Rate | Rare Loot | Rate |
|---|---|---|---|---|---|---|---|---|---|---|---|
| 2 | 8 | 27 | 12 | 15 | 3 | 1 | 100% | Mushroom | 10% | 1-Up Mushroom | 4% |
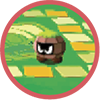
This is the first enemy Mario and Luigi encounter. When Grombas roll toward you, time your jump carefully so you land on top of them, inflicting damage. Also, be ready to jump over the rocks they kick at you. When it’s your turn to attack, rely on Jump attacks to finish off Grombas.
Grumbell
Locations: Mount Pajamaja
Stats
| LVL | HP | POW | DEF | SPD | EXP | Coins | Rate | Normal Loot | Rate | Rare Loot | Rate |
|---|---|---|---|---|---|---|---|---|---|---|---|
| 18 | 88 | 100 | 127 | 75 | 90 | 24 | 100% | Refreshing Herb | 5% | POW Gloves | 2% |

These large dumbbell-like foes aren’t terribly tough, but be ready to counter with your hammers before they can smash Mario or Luigi. During your turn, Jump and Hammer attacks are adequate for defeating these enemies.
Hermite Crab
Locations: Wakeport
Stats
| LVL | HP | POW | DEF | SPD | EXP | Coins | Rate | Normal Loot | Rate | Rare Loot | Rate |
|---|---|---|---|---|---|---|---|---|---|---|---|
| 13 | 40 | 62 | 65 | 52 | 55 | 16 | 100% | Super Nut | 5% | HP Bangle | 3% |
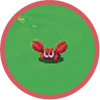
Either jump or use your hammer to initiate a preemptive attack. These guys hide under coconuts—there are always more coconuts than crabs. Watch closely and remember which coconuts conceal these sneaky enemies. Jump attacks work best against these enemies—one jump knocks away their coconut while the second jump deals damage. The Hermite Crab’s attacks are relatively easy to read and counter. Be ready to jump when they toss a coconut at Mario or Luigi—jump right after the coconut passes over their head to avoid getting tripped by the rushing crab.
Hermite Crab R
Locations: Driftwood Shore
Stats
| LVL | HP | POW | DEF | SPD | EXP | Coins | Rate | Normal Loot | Rate | Rare Loot | Rate |
|---|---|---|---|---|---|---|---|---|---|---|---|
| 23 | 81 | 143 | 124 | 90 | 220 | 30 | 100% | Ultra Nut | 5% | None | 0% |
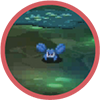
These blue enemies perform just like their red Hermite Crab counterparts, only with greater Stats, making them slightly tougher to defeat. Only attack the coconuts where you know a Hermite Crab R is hiding—the first strike knocks away the coconut and the second hit deals damage. Likewise, be ready to counter their coconut-based attacks with your hammer.
Inky Piranha Plant
Locations: Neo Bowser Castle
Stats
| LVL | HP | POW | DEF | SPD | EXP | Coins | Rate | Normal Loot | Rate | Rare Loot | Rate |
|---|---|---|---|---|---|---|---|---|---|---|---|
| 30 | 3 | 1 | 190 | 125 | 100 | 80 | 100% | None | 0% | None | 0% |

During battles in Neo Bowser Castle, there’s a chance an Inky Piranha Plant will appear in the background. Striking these foes with a Taunt Ball makes them fall asleep. If you want to defeat an Inky Piranha Plant, you must hit it with three Taunt Balls. Otherwise these plants attack by spraying black ink onto the screen, making it difficult to see the battle and perform counters.
Monolift
Locations: Mount Pajamaja
Stats
| LVL | HP | POW | DEF | SPD | EXP | Coins | Rate | Normal Loot | Rate | Rare Loot | Rate |
|---|---|---|---|---|---|---|---|---|---|---|---|
| 16 | 120 | 77 | 86 | 43 | 85 | 20 | 100% | Taunt Ball | 8% | Ultra Nut | 2% |
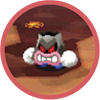
Prior to a battle, these guys try to initiate combat by throwing a large brown stone at you. Avoid contact with these incoming rocks and initiate a battle with a Jump or Hammer attack. Rocks are also important to their attacks during battle. When they approach with a stack of rocks, watch carefully as they punch them toward Mario and Luigi, one at a time. Jump over the gray rocks, and pay extra attention to the brown rocks—they split in two, traveling toward both Mario and Luigi. In another attack, the stack of rocks is balanced above the Monolift’s head, leaning left and then right. When the stack of rocks leans away, to the right, counter with your hammer—this causes the stack of rocks to fall on the Monolift, inflicting damage. When it comes to attacking, use Hammer attacks as Jump attacks do no damage due to the layer of rocks above each Monolift. Bros. Attacks like the 3D Green Shell and 3D Red Shell also work well against these foes.
Monolift R
Locations: Mount Pajamaja
Stats
| LVL | HP | POW | DEF | SPD | EXP | Coins | Rate | Normal Loot | Rate | Rare Loot | Rate |
|---|---|---|---|---|---|---|---|---|---|---|---|
| 23 | 184 | 130 | 138 | 64 | 210 | 35 | 100% | Refreshing Herb | 10% | None | 0% |
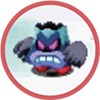
This enemy performs much like the standard Monolifts—they’re just tougher. Use Hammer attacks to inflict damage on them, then look for opportunities to counter when they attack, using their own rocks against them. Remember, when they approach with a stack of rocks tilting above them, strike them with your hammer when the rocks tilt away from you. And when they start punching rocks at you, make sure Mario and Luigi both jump simultaneously to avoid getting hit by the debris from brown rocks.
Pi’illodactyl
Locations: Mount Pajamaja
Stats
| LVL | HP | POW | DEF | SPD | EXP | Coins | Rate | Normal Loot | Rate | Rare Loot | Rate |
|---|---|---|---|---|---|---|---|---|---|---|---|
| 22 | 318 | 192 | 197 | 57 | 200 | 180 | 100% | Ultra Candy | 80% | Soft Hammer | 20% |
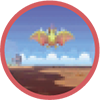
While battling the enemies in Mount Pajamaja, you have a chance of encountering a Pi’illodactyl. These winged enemies only attack from the background—until you hit them with a Taunt Ball. When attacking from the background, the Pi’illodactyl will shoot flames at Mario and Luigi. Pay attention to the creature’s legs—if the right leg is raised Mario will be attacked. If the left leg is raised, Luigi will be attacked. You can jump over the incoming fire, but continue jumping as the red, scorched ground beneath Mario and Luigi cools. If you prefer fighting the Pi’illodactyl directly, hit him with a Taunt Ball. This will make the Pi’illodactyl (and other background enemies) come to the foreground where they can be engaged with attacks. However, the Pi’illodactyl is much stronger than other enemies, so hit them hard, preferably with Bros. Attacks. If you choose not to engage the Pi’illodactyl with a Taunt Ball, he will fly away on his own once the foreground enemies are defeated.
Pi’illodactyl R
Locations: Somnom Woods
Stats
| LVL | HP | POW | DEF | SPD | EXP | Coins | Rate | Normal Loot | Rate | Rare Loot | Rate |
|---|---|---|---|---|---|---|---|---|---|---|---|
| 31 | 476 | 352 | 320 | 86 | 600 | 450 | 100% | Max Candy | 20% | POW Gloves DX | 5% |
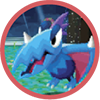
During your battles in Somnom Woods you have the chance of encountering a Pi’illodactyl R appearing in the background. Upon this creature’s first appearance, toss a Taunt Ball at it to bring it to the foreground so you can attack it. With the exception of greater durability and damage potential, this enemy performs just like the standard Pi’illodactyl found in Mount Pajamaja. Don’t fool around—use your Bros. Attacks to defeat the Pi’illodactyl R before he can toast Mario and Luigi with his fiery attacks. Luigi’s Slingsniper is ideal for inflicting heavy damage against this dangerous foe.
R/B/Y Virus
Locations: Mushrise Park, Dozing Sands, Wakeport, Mount Pajamaja, Driftwood Shore
Stats
| LVL | HP | POW | DEF | SPD | EXP | Coins | Rate | Normal Loot | Rate | Rare Loot | Rate |
|---|---|---|---|---|---|---|---|---|---|---|---|
| 24 | 106 | 168 | 230 | 71 | 30 | 6 | 100% | Secret Box | 5% | POW Mush Jam | 1% |

Each time one of these enemies is hit, they shift colors. For example, when a Yellow Virus is hit, it shifts from yellow, to red, to blue, then back to yellow. The goal is to get at least three like-colored enemies next to each other—this causes the adjacent identical-colored Viruses to disappear. As Viruses in the front disappear, the Viruses in the back move forward, altering the formation and potentially leading to new eliminations based on color adjacency. In this sense, the battle is a like a puzzle, so pick your targets carefully, altering the color of each Virus to maximize damage across the entire formation. If you need to hit a Virus twice to change it to a desired color, use a Jump attack. If you only need to hit it once, use a Hammer attack.
During their attack phase, continue to use the Virus’s colors against them. When they come marching toward Mario and Luigi, whack them with your hammers to create a stack of Viruses—they don’t change colors when struck during their attack phase. When creating the stack, try to stack three Viruses of the same color to eliminate them—intentionally miss Viruses that don’t fit your three-in-a-row color pattern. But before the attack is over, be sure to hit each Virus with your hammer to send it to the stack—this is the only way to avoid taking damage. In another attack, the Viruses from two lines and march toward Mario and Luigi—simply jump to counter or avoid contact. Once the Viruses are scattered during your attack phase, and no longer adjacent, you must eliminate them one by one. Consider using a Bros. Attack to take them out quickly and finish the battle.
Sandoon
Locations: Dozing Sands
Stats
| LVL | HP | POW | DEF | SPD | EXP | Coins | Rate | Normal Loot | Rate | Rare Loot | Rate |
|---|---|---|---|---|---|---|---|---|---|---|---|
| 10 | 52 | 50 | 53 | 32 | 30 | 12 | 100% | Super Mushroom | 4% | None | 0% |
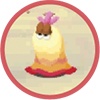
Like the Flounderflages, Sandoons also lurk beneath the surface in Dozing Sands. Wait for them to emerge, then either jump or use your hammer to initiate a battle. During their attack phase, don’t let Sandoons sneak up on you—counter by striking them with a hammer before they can swallow Mario or Luigi. If either character is swallowed by a Sandoon, damage dealt to the Sandoon is also felt by the swallowed character, so it’s best to keep your distance from these enemies. Fortunately, they’re relatively easy to defeat—use Jump attacks to whittle away their HP.
Shy Guy Airtub
Locations: Mushrise Park, Dozing Sands, Mount Pajamaja, Driftwood Shore
Stats
| LVL | HP | POW | DEF | SPD | EXP | Coins | Rate | Normal Loot | Rate | Rare Loot | Rate |
|---|---|---|---|---|---|---|---|---|---|---|---|
| 27 | 123 | 245 | 83 | 110 | 250 | 240 | 100% | Ultra Candy | 80% | Iron Ball Hammer DX | 20% |

There’s a chance you may encounter a Shy Guy Airtub in one of your battles—use a Taunt Ball to lure the Shy Guy Airtub from the background to the foreground. Use your hammers to knock back the Airtub’s spiked cannonballs—knock back at least two cannonballs to cause the Shy Guy Airtub to crash and explode, annihilating any remaining enemies on the ground. But the battle isn’t over until you eliminate the three Shy Guys who escape the wreckage. Once you get the hang of it, defeating Shy Guy Airtubs is quite easy. But you must stock up on Taunt Balls to bring this enemy to the foreground, otherwise be ready to counter their cannonball attacks as they hover in the background.
Shy Guy
Locations: Mushrise Park, Dozing Sands, Mount Pajamaja, Driftwood Shore
Stats
| LVL | HP | POW | DEF | SPD | EXP | Coins | Rate | Normal Loot | Rate | Rare Loot | Rate |
|---|---|---|---|---|---|---|---|---|---|---|---|
| 24 | 35 | 84 | 130 | 63 | 15 | 20 | 100% | Ultra Mushroom | 5% | None | 0% |
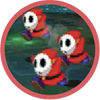
With their Airtub destroyed, the three Shy Guys must fight on their own. Time your jumps carefully to counter their charging attacks–try to land on them to inflict damage. When it’s your turn to attack, finish them off with standard Jump or Hammer attacks.
Shy Guy Airtub R
Locations: Neo Bowser Castle
Stats
| LVL | HP | POW | DEF | SPD | EXP | Coins | Rate | Normal Loot | Rate | Rare Loot | Rate |
|---|---|---|---|---|---|---|---|---|---|---|---|
| 35 | 178 | 364 | 119 | 144 | 500 | 160 | 100% | Max Candy | 20% | Soft Hammer DX | 5% |

This is a tougher variant of the standard Shy Guy Airtub, appearing in the background of some battles in Neo Bowser Castle. Use a Taunt Ball to bring it to the foreground, then attack and counter as normally.
Shy Guy R
Locations: Neo Bowser Castle
Stats
| LVL | HP | POW | DEF | SPD | EXP | Coins | Rate | Normal Loot | Rate | Rare Loot | Rate |
|---|---|---|---|---|---|---|---|---|---|---|---|
| 31 | 48 | 132 | 192 | 86 | 25 | 20 | 100% | Max Mushroom | 4% | None | 0% |
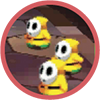
Shy Guy Rs hop out of the Shy Guy Airtub R after is crashes. Jump on them as they charge toward Mario and Luigi, then finish them off with simple Jump attacks.
Thorb
Locations: Mushrise Park
Stats
| LVL | HP | POW | DEF | SPD | EXP | Coins | Rate | Normal Loot | Rate | Rare Loot | Rate |
|---|---|---|---|---|---|---|---|---|---|---|---|
| 5 | 12 | 36 | 46 | 28 | 16 | 6 | 100% | Nut | 5% | None | 0% |
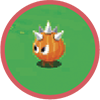
You definitely don’t want to jump on these spiked enemies. Instead use your hammer to attack and counter Thorbs. Keep hitting Thorbs with your hammers until you’re victorious.
Walker Guy
Locations: Neo Bowser Castle
Stats
| LVL | HP | POW | DEF | SPD | EXP | Coins | Rate | Normal Loot | Rate | Rare Loot | Rate |
|---|---|---|---|---|---|---|---|---|---|---|---|
| 34 | 136 | 250 | 206 | 104 | 330 | 20 | 100% | Max Mushroom | 4% | None | 0% |
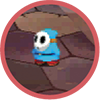
Walker Guys only appear with Chain Chomps. Unlike their counterparts, they pose no direct threat, so target the Chain Chomps first, then focus on the Walker Guys. Once the Chain Chomp companion is defeated, the Walker Guy runs to the background and looks around. At this point the Walker Guy has a small chance of brining a new Chain Chomp into the battle. But as long as they’re without a Chain Chomp, Walker Guys do not attack on their own.