
Mario & Luigi: Dream Team Guide Enemies Real World Bosses and Minions
Real World Bosses and Minions
Dreamy Bowser
Locations: Neo Bowser Castle
Stats
| Target | LVL | HP | POW | DEF | SPD | EXP | Coins | Rate | Normal Loot | Rate | Rare Loot | Rate |
|---|---|---|---|---|---|---|---|---|---|---|---|---|
| Body | 37 | 2,417 | 523 | 343 | 87 | 0 | 0% | 0% | None | 0% | None | 0% |
| Right Arm | 37 | 464 | 523 | 343 | 87 | 0 | 0 | 0% | None | 0% | None | 0% |
| Left Arm | 37 | 350 | 523 | 343 | 87 | 0 | 0 | 0% | None | 0% | None | 0% |

Both of Dreamy Bowser’s arms can be targeted separately from his body. Focus on targeting his right arm first, as this is the arm he uses to deflect attacks to his body. But don’t bother targeting the right arm with simple Jump or Hammer attacks. Use Bros. Attacks like Mario’s Jet-Board Bash or Luigi’s Star Rocket—one Excellent hit from either of these Bros. Attacks should be enough to render his right arm useless. When it’s your turn to attack again, target Dreamy Bowser’s body with more Bros. Attacks. This is one moment where Mario’s Zee Egg is very effective, dishing out tons of damage. If you don’t have access to the Zee Egg, rely on Mario’s Jet-Board Bash and Luigi’s Slingsniper to dish out some heavy damage.
Dreamy Bob-omb (Dreamy Bowser Minion)
Locations: Neo Bowser Castle
Stats
| LVL | HP | POW | DEF | SPD | EXP | Coins | Rate | Normal Loot | Rate | Rare Loot | Rate |
|---|---|---|---|---|---|---|---|---|---|---|---|
| 34 | 82 | 250 | 183 | 116 | 0 | 0 | 0% | None | 0% | None | 0% |
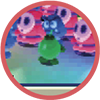
When targeting the Koopa Corps individually, focus on the Dreamy Bob-ombs first. When defeated, they explode, potentially damaging nearby enemies. Also during their charging attacks, don’t jump on the Dreamy Bob-ombs—they’ll explode if touched. Instead, jump over them.
Dreamy Goomba (Dreamy Bowser Minion)
Locations: Neo Bowser Castle
Stats
| LVL | HP | POW | DEF | SPD | EXP | Coins | Rate | Normal Loot | Rate | Rare Loot | Rate |
|---|---|---|---|---|---|---|---|---|---|---|---|
| 34 | 95 | 125 | 137 | 116 | 0 | 0 | 0% | None | 0% | None | 0% |
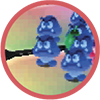
Dreamy Goombas aren’t a huge threat during the Dreamy Bowser battle, but you need to eliminate them quickly. Use a Taunt Ball to lure Dreamy Bowser from the background, then lead him through the Dreamy Goombas as he chases Mario and Luigi in the foreground.
Dreamy Paratroopa (Dreamy Bowser Minion)
Locations: Neo Bowser Castle
Stats
| LVL | HP | POW | DEF | SPD | EXP | Coins | Rate | Normal Loot | Rate | Rare Loot | Rate |
|---|---|---|---|---|---|---|---|---|---|---|---|
| 34 | 54 | 150 | 206 | 116 | 0 | 0 | 0% | None | 0% | None | 0% |
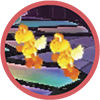
Like the Dreamy Goombas, the Dreamy Paratroopas are best defeated by luring Dreamy Bowser with a Taunt Ball. Otherwise, target these enemies with Bros. Attacks like Mario’s Bomb Derby. Since they fly, Dreamy Paratroopas can’t be hit with Hammer or ground-based attacks, so don’t bother with 3D Red Shell or 3D Green Shell Bros. Attacks.
Shy Guy Airtub DX (Dreamy Bowser Minion)
Locations: Neo Bowser Castle
Stats
| LVL | HP | POW | DEF | SPD | EXP | Coins | Rate | Normal Loot | Rate | Rare Loot | Rate |
|---|---|---|---|---|---|---|---|---|---|---|---|
| 36 | 240 | 449 | 288 | 145 | 0 | 0 | 0% | None | 0% | None | 0% |
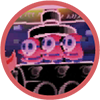
During the Dreamy Bowser battle, a Shy Guy Airtub DX eventually shows up, chasing after Mario and Luigi. This sequence requires teamwork. While Luigi runs away from the Airtub, press
 to make him jump over the incoming blasts of purple energy. Meanwhile, Mario sneaks aboard the Airtub—press
 to make Mario eliminate Shy Guys with his hammer. Once all four Shy Guys are eliminated, hammer away on the Bowser head on the bow of the Airtub to inflict more damage. If you inflict enough damage, the Airtub will crash, otherwise the Airtub moves to the background and is replenished with new Shy Guys. The Shy Guy Airtub DX can continue to attack from the background, launching cannonballs at Mario and Luigi—knock them back using your hammers. If countering the Airtub’s attacks isn’t enough to destroy it, lure it to the foreground with a Taunt Ball. This causes it to chase after Luigi, giving Mario another opportunity to deal heavy damage to the Shy Guys on board as well as the Airtub itself.
Grobot
Locations: Mushrise Park
Stats
| LVL | HP | POW | DEF | SPD | EXP | Coins | Rate | Normal Loot | Rate | Rare Loot | Rate |
|---|---|---|---|---|---|---|---|---|---|---|---|
| 7 | 288 | 58 | 54 | 26 | 250 | 75 | 100% | None | 0% | So-so Hammer | 100% |
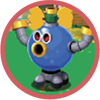
Grobot is one tough customer, so pull out all the stops when it comes to attacking. Use your 3D Red Shell and 3D Green Shell Bros. Attacks to dish out some serious damage. If necessary, consume Syrup Jars to restore BP, allowing you to perform more Bros. Attacks—these attacks are the quickest way to whittle down Grobot’s HP. Grobot has a few attacks up his robotic sleeves, so pay close attention. When he charges at you, use your hammers to knock him back. When he blows small blue bubbles, hop over them—avoid jumping when large blue bubbles come your way. In another sequence Grobot comes charging after Mario and Luigi, requiring them to jump over the blue orbs fired from his arms. Keep jumping over the incoming projectiles until Grobot eventually trips over a rock, bringing an end to this particular attack.
Mammoshka
Locations: Mount Pajamaja
Stats
| LVL | HP | POW | DEF | SPD | EXP | Coins | Rate | Normal Loot | Rate | Rare Loot | Rate |
|---|---|---|---|---|---|---|---|---|---|---|---|
| 20 | 918 | 187 | 171 | 48 | 1,100 | 350 | 100% | None | 0% | 1-Up Gloves | 50% |
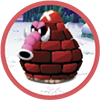
Make note of the white X on Mammoshka’s head—this is his weak spot. You can score critical hits by striking this part of his head with Jump attacks—the Bye-Bye Cannon and Dropchopper Bros. Attacks are also very effective against this foe’s weak spot. If Mammoshka is equipped with a spiky helmet, stop attacking from the air—you’ll only damage yourself. Instead, rely on Hammer and other ground-based attacks to inflict damage. When attacked with the massive boulder, strike it back at Mammoshka to destroy the spiked helmet. After inflicting enough damage, Mammoshka hops out of his outer red shell and begins running away from Mario and Luigi. The tables have turned during this chase. When prompted, press
and
to jump on Mammoshka’s exposed weak spot. With each successful hit, Mammoshka sheds a new shell, becoming smaller and smaller. When the pink Mammoshka underneath is finally exposed, land one more successful jump to finish the battle.
Block Monolift (Mammoshka Minion)
Locations: Mount Pajamaja
Stats
| LVL | HP | POW | DEF | SPD | EXP | Coins | Rate | Normal Loot | Rate | Rare Loot | Rate |
|---|---|---|---|---|---|---|---|---|---|---|---|
| 16 | 1 | 1 | 86 | 1 | 0 | 0 | 0% | None | 0% | None | 0% |

Mammoshka is joined by Block Monolifts. These enemies perform much like their Monolift counterparts, but carry around large ice chunks, containing helmets for Mammoshka. It’s important to eliminate these enemies as quickly as possible, otherwise they’ll supply Mammoshka with a helmet, covering the white X on his head. Use the 3D Green Shell or 3D Red Shell Bros. Attacks to quickly wipe out all the Block Monolifts, leaving Mammoshka’s weak spot exposed. The Block Monolifts only have 1 HP, so it only takes one hit to eliminate them.
Pi’illodium
Locations: Somnom Woods
Stats
| Target | LVL | HP | POW | DEF | SPD | EXP | Coins | Rate | Normal Loot | Rate | Rare Loot | Rate |
|---|---|---|---|---|---|---|---|---|---|---|---|---|
| Body | 30 | 1,673 | 328 | 333 | 94 | 3,600 | 60000% | 100% | None | 0% | Anti-air Boots DX | 100% |
| Wings | 30 | 172 | 1 | 333 | 94 | 0 | 0 | 0% | None | 0% | None | 0% |
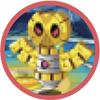
Waste no time dishing out as much damage as possible using Bros. Attacks. However, since Pi’illodium floats in the air, ground-based attacks (and Hammer attacks) aren’t effective. Mario’s Bomb Derby and Luigi’s Slingsniper are your best bets. When it’s Pi’illodium’s turn to attack, be ready to knock back the Mini Pi’illoids he knocks toward Mario and Luigi from the background—hit back the Mini Pi’illoids with your hammer. Hammer counters are also important when Pi’illodium turns into a giant hammer. Pay attention to the numerical countdown, accompanied by beeping sounds. As Pi’illodium exits the screen, continue counting down and prepare to counter with your hammer before you’re smashed—if struck by Pi’illodium’s hammer attack, there’s a good chance Mario or Luigi will become dizzy, losing one of their turns. When Pi’illodium’s HP reaches a critical state, he enters self-destruct mode, giving you 40 seconds to finish him off.
Mini Pi’illoid (Pi’illodium Minion)
Locations: Somnom Woods
Stats
| LVL | HP | POW | DEF | SPD | EXP | Coins | Rate | Normal Loot | Rate | Rare Loot | Rate |
|---|---|---|---|---|---|---|---|---|---|---|---|
| 28 | 1 | 1 | 87 | 114 | 0 | 0 | 0% | None | 0% | None | 0% |

Mini Pi’illoids hover in the background throughout the battle with Pi’illodium. They occasionally move to the foreground to restore Pi’illodium’s HP. They are also deployed during a certain attack. When Pi’illodium takes flight and chases after Mario and Luigi, get ready to jump out of the way as he launches a salvo of explosive Mini Pi’illoids in their direction. If you evade the salvo, be ready to jump again as Pi’illodium comes flying at Mario or Luigi—jump on top of Pi’illodium as he approaches to inflict moderate damage.
Popple
Locations: Wakeport
Stats
| LVL | HP | POW | DEF | SPD | EXP | Coins | Rate | Normal Loot | Rate | Rare Loot | Rate |
|---|---|---|---|---|---|---|---|---|---|---|---|
| 25 | 999 | 195 | 167 | 4 | 500 | 100 | 100% | None | 0% | Coin Bros. Gloves DX | 100% |
As Popple approaches, whack him with your hammer. If you don’t, he’ll spin Mario or Luigi around, rendering them defenseless, before striking them with a hammer attack of his own. Nothing is more satisfying than punishing this thief with a powerful Bros. Attack. When it’s Luigi’s turn to attack, use the Slingsniper Bros. Attack to dish out some serious damage—remember, the quicker you acquire the target and release, the more damage dealt. When Popple scatters a few objects (including soccer balls) onto the field, be ready to knock the soccer ball back at him with your hammer. Soccer balls are also contained within the blocks—Popple must kick the blocks first to reveal the soccer ball before kicking it at Mario and Luigi. Watch the direction Popple leans before kicking a soccer ball. If he faces forward, the ball will come flying at Luigi. But if he shifts his shoulders to the right, the ball will be kicked at Mario. Sometimes Popple scatters Mushrooms onto the field—don’t knock these back, otherwise the Mushroom will hit Popple and heal him. Instead, let the Mushroom heal Mario or Luigi.
Smoldergeist
Locations: Pi’illo Castle
Stats
| LVL | HP | POW | DEF | SPD | EXP | Coins | Rate | Normal Loot | Rate | Rare Loot | Rate |
|---|---|---|---|---|---|---|---|---|---|---|---|
| 3 | 12 | 34 | 30 | 999 | 5 | 10 | 100% | None | 0% | Cozy Wear | 20% |
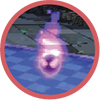
Before leaving you to do battle, Starlow notices that the enemies are surrounded by purple flames. Starlow conjures a wind that temporarily extinguishes the flames, leaving the Smoldergeist enemies vulnerable to Jump attacks. Target one Smoldergeist at a time, attacking with both Mario and Luigi. But you’ll need to evade their attacks as well. Upon reigniting, Smoldergeist can perform a couple of attacks. During one attack the Smoldergeist emits a radial burst of purple flame, requiring both Mario and Luigi to jump to avoid taking damage. But you only need to jump when the Smoldergeist performs this attack from the ground—simply stay put when the Smoldergeist attempts this attack in the air. In another attack, Smoldergeist hovers in front of one of the brothers and spits a purple fireball, requiring the targeted brother to jump. If a Smoldergeist fails in its attack, their flame is extinguished, leaving them vulnerable to Jump attacks. If a Smoldergeist is successful in its attack it reignites. There’s no easy way to extinguish its purple flame once reignited. A Jump attack is effective at temporarily putting out its flame, but the attacking brother will take damage during the process. This is why it’s so important to evade their attacks. But even a flameless Smoldergeist can still attack, slowly rolling toward one of the brothers—jump on top of it to counter.
Torkscrew
Locations: Dozing Sands
Stats
| LVL | HP | POW | DEF | SPD | EXP | Coins | Rate | Normal Loot | Rate | Rare Loot | Rate |
|---|---|---|---|---|---|---|---|---|---|---|---|
| 13 | 656 | 101 | 97 | 34 | 500 | 250 | 100% | None | 0% | Coin Boots | 100% |
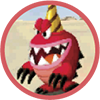
Like any enemy with a spike on its head, don’t use Jump attacks against Torkscrew. Instead, use Hammer attacks or Bros. Attacks. The 3D Red and 3D Green Shell attacks are very effective as is Luigi’s Fire Flower attack. Torkscrew’s attacks are rather brutal, but can be avoided or countered if you pay close attention. When Torkscrew drops beneath the surface of the sand, prevent him from surfacing directly beneath Mario or Luigi—jump to avoid getting impaled by his horn and carried away. Likewise, when Torkscrew takes to the air, use your hammer to knock him back. If you manage to knock Torkscrew on his back, by counterattacking with a hammer, you can commence with Jump attacks. But even in this vulnerable state, Bros. Attacks offer the most damage output, assuming you still have enough BP to pull them off. If not, consider consuming Syrup Jars to replenish your BP.
Wiggler
Locations: Wakeport
Stats
| LVL | HP | POW | DEF | SPD | EXP | Coins | Rate | Normal Loot | Rate | Rare Loot | Rate |
|---|---|---|---|---|---|---|---|---|---|---|---|
| 26 | 1,485 | 256 | 188 | 0 | 1,000 | 400 | 100% | 1-Up Deluxe | 50% | Max Candy | 30% |
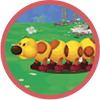
Wiggler has an enormous amount of HP. Simple Jump and Hammer attacks don’t inflict enough damage to bring this battle to close. So when it’s your turn to attack, initiate a Bros. Attack, such as Bomb Derby or Slingsniper. These attacks inflict the heaviest damage against Wiggler. But even then, you’ll need to perform multiple Bros. Attacks to come out on top. If necessary, take a turn to consume Syrup Jars to restore your BP. As Wiggler stomps the ground, a yellow line of energy radiates along the ground—jump over it to avoid taking damage. Wiggler also performs a charging attack. Jump on him as he comes charging at Mario or Luigi. On his way back, Wiggler comes charging at the other brother, this time approaching from the left side. Once again, jump on top of Wiggler to inflict minor damage—it’s better than getting trampled.