
Mario & Luigi: Dream Team Guide Enemies Dream World Enemies
Dream World Enemies
Antasman
Locations: Dreamy Neo Bowser Castle
Stats
| LVL | HP | POW | DEF | SPD | EXP | Coins | Rate | Normal Loot | Rate | Rare Loot | Rate |
|---|---|---|---|---|---|---|---|---|---|---|---|
| 34 | 204 | 313 | 206 | 139 | 84 | 12 | 100% | Secret Box | 2% | Legendary Wear | 1% |

These cloaked figures perform a variety of powerful attacks. As a result, you don’t want to let them linger—take them out as fast as possible, preferably with a Luiginary Attack, like the Luiginary Wall or Luiginary Typhoon. In one of their most common attacks, they flank Mario on both sides. Move out of the way as one of the Antasmans steps forward and raises his wand—jump over the purple bolt of energy that shoots from the wand, causing it to strike other Antasmans on the other side. Antasmans also have a charging attack, approaching Mario with impenetrable energy barriers—don’t let these hit you. Instead, maneuver to avoid the energy barrier, hopping on one of the Antasmans on its flanks.
Big Tail Goomba
Locations: Dreamy Neo Bowser Castle
Stats
| LVL | HP | POW | DEF | SPD | EXP | Coins | Rate | Normal Loot | Rate | Rare Loot | Rate |
|---|---|---|---|---|---|---|---|---|---|---|---|
| 33 | 260 | 300 | 269 | 80 | 200 | 85 | 100% | Boo Biscuit | 5% | Crystal Hammer | 3% |
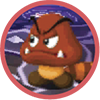
These large enemies perform a spinning attack, whipping their long, striped tail along the floor. As the Big Tail Goomba begins his attack, lure him toward you by moving up and down—do this to guide him through a large group of enemies. After the Big Tail Goomba crashes through his comrades, jump on his head to counter. Big Tail Goombas are pretty durable, but they don’t pose a huge threat. So when it’s your turn to attack, use Jump attacks to finish them off. But wait until all the other enemies are gone before actively targeting any Big Tail Goombas—their reckless attacks actually benefit you, so it’s best to keep them around as long as possible.
Bloopurn
Locations: Dreamy Driftwood Shore
Stats
| LVL | HP | POW | DEF | SPD | EXP | Coins | Rate | Normal Loot | Rate | Rare Loot | Rate |
|---|---|---|---|---|---|---|---|---|---|---|---|
| 22 | 127 | 156 | 197 | 50 | 75 | 35 | 100% | Ultrasyrup Jar | 5% | None | 0% |

Watch out for the vase-like objects—these are Bloopurns. Don’t get hit by the squid-like Bloopers ejected from these enemies—during battle, strike the Bloopers with your hammer, knocking them back at the Bloopurns. In addition to producing Bloopers as their projectile attack, the Bloopurns can also unload Dreamcap Captain Rs and Dreamcap Rs. Remember, target the Dreamcap Captain Rs first, then deal with the Dreamcap Rs last, after the Bloopurns have been defeated. Standard Jump attacks work best against the Bloopurns. Or if you want to end the battle quickly, consider using a Luiginary Attack.
Chizzle
Locations: Dreamy Mount Pajamaja
Stats
| LVL | HP | POW | DEF | SPD | EXP | Coins | Rate | Normal Loot | Rate | Rare Loot | Rate |
|---|---|---|---|---|---|---|---|---|---|---|---|
| 17 | 44 | 101 | 127 | 50 | 12 | 3 | 100% | Ultra Mushroom | 1% | Fighter Wear | 1% |
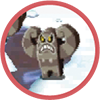
These durable stone enemies perform charging attacks requiring Mario to move and jump to counter. They also toss a giant stone dumbbell toward Mario—knock it back with the hammer. Hammer counters are also necessary when the Chizzles come charging toward Mario out of lava pools—they emerge from the pools in the same order in which they entered, so pay close attention. Jump attacks are effective against these enemies. But if you want to end the battle fast, use a Luiginary Attack like the Luiginary Ball or Stack.
Cocoknight
Locations: Dreamy Wakeport
Stats
| LVL | HP | POW | DEF | SPD | EXP | Coins | Rate | Normal Loot | Rate | Rare Loot | Rate |
|---|---|---|---|---|---|---|---|---|---|---|---|
| 13 | 42 | 45 | 58 | 52 | 10 | 3 | 100% | Super Mushroom | 1% | EXP Bro Gloves | 1% |

Attacking in large groups, Cocoknights are a bit challenging. Use your hammer to knock back their spear attacks. When they encircle Mario and begin spinning, move with the crowd to avoid getting trampled—just be ready to jump out of the circle at the end of the spinning sequence. Don’t hesitate to use a Luiginary Attack, like the Luiginary Ball or Luiginary Stack, to take out large groups of Cocoknights.
Cocoknight R
Locations: Dreamy Wakeport
Stats
| LVL | HP | POW | DEF | SPD | EXP | Coins | Rate | Normal Loot | Rate | Rare Loot | Rate |
|---|---|---|---|---|---|---|---|---|---|---|---|
| 26 | 101 | 128 | 126 | 104 | 20 | 5 | 100% | Ultrasyrup Jar | 1% | None | 0% |

These enemies are tougher variants of the Cocoknights you encountered earlier. Expect the same kinds of attacks and counters. Don’t get hit by their incoming spears. Instead, hit them with a Jump or Hammer attack to initiate a battle, then finish them off with a Luiginary Attack.
Dark Block
Locations: Dream’s Deep
Stats
| LVL | HP | POW | DEF | SPD | EXP | Coins | Rate | Normal Loot | Rate | Rare Loot | Rate |
|---|---|---|---|---|---|---|---|---|---|---|---|
| 23 | 133 | 169 | 414 | 38 | 150 | 40 | 100% | Ultra Candy | 10% | Knockout Hammer | 3% |

During their attack phase, Dark Blocks pass over Mario’s head, along with several other objects—jump up to strike the Dark Blocks to avoid taking damage. When it’s your turn to attack, rely on Luiginary Attacks or simple Jump attacks to inflict damage. Once a Dark Block has been defeated, it turns into a standard ? Block—press
 to collect what’s inside.
Dreamcap
Locations: Dreamy Mushrise Park
Stats
| LVL | HP | POW | DEF | SPD | EXP | Coins | Rate | Normal Loot | Rate | Rare Loot | Rate |
|---|---|---|---|---|---|---|---|---|---|---|---|
| 7 | 18 | 40 | 32 | 34 | 1 | 1 | 20% | None | 0% | None | 0% |
When entering a battle with these enemies, always target the purple Dreamcap Captains first—the orange Dreamcaps won’t attack once the Dreamcap Captain has been eliminated. But as long as the Dreamcap Captain is around, prepare to dodge (and counter) the herd of Dreamcaps as they come rushing toward you during their attack phase. Time your jumps carefully to land on top of them.
Dreamcap Captain
Locations: Dreamy Mushrise Park
Stats
| LVL | HP | POW | DEF | SPD | EXP | Coins | Rate | Normal Loot | Rate | Rare Loot | Rate |
|---|---|---|---|---|---|---|---|---|---|---|---|
| 7 | 26 | 40 | 40 | 35 | 6 | 7 | 100% | Syrup Jar | 10% | Super Mushroom | 2% |
Dreamcap Captains always accompany Dreamcaps, serving as their leader in battle. Without a Dreamcap Captain to lead them, Dreamcaps are defenseless. So at the start of a battle with these enemies, wipe out all the Dreamcap Captains first. Afterward you can mop up the remaining Dreamcaps without facing a single attack.
Dreamcap R
Locations: Dreamy Driftwood Shore
Stats
| LVL | HP | POW | DEF | SPD | EXP | Coins | Rate | Normal Loot | Rate | Rare Loot | Rate |
|---|---|---|---|---|---|---|---|---|---|---|---|
| 21 | 74 | 123 | 88 | 79 | 10 | 5 | 20% | None | 0% | None | 0% |
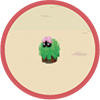
These are simply tougher variants of the standard Dreamcaps. Be ready to counter their charging attacks by whacking these enemies with your hammer or by jumping on them. The trick to defeating these enemies is eliminating the Dreamcap Captain Rs first. When there are no more Dreamcap Captain Rs left, the remaining Dreamcap Rs don’t know what to do, forfeiting their turn to attack. Simple Jump attacks are sufficient for eliminating all of these enemies.
Dreamcap Captain R
Locations: Dreamy Driftwood Shore
| LVL | HP | POW | DEF | SPD | EXP | Coins | Rate | Normal Loot | Rate | Rare Loot | Rate |
|---|---|---|---|---|---|---|---|---|---|---|---|
| 22 | 116 | 132 | 115 | 85 | 30 | 30 | 100% | Shock Bomb | 5% | None | 0% |

Dreamcap Captain Rs are the tougher variants that join Dreamcap Rs in battle. As usual, target the Dreamcap Captain Rs first, leaving the Dreamcap Rs without a leader. Simple Jump attacks are sufficient for eliminating these enemies, but be ready to counter their charging attacks by jumping on them.
Dromba
Locations: Dreamy Pi’illo Castle
Stats
| LVL | HP | POW | DEF | SPD | EXP | Coins | Rate | Normal Loot | Rate | Rare Loot | Rate |
|---|---|---|---|---|---|---|---|---|---|---|---|
| 3 | 6 | 31 | 18 | 19 | 1 | 1 | 50% | Mushroom | 2% | Discount Boots | 1% |
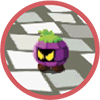
This is the first enemy you encounter in the dream world. They’re easily defeated with Jump attacks. But during the Dromba’s attack, line Mario up with the longest line of incoming Drombas and then jump. If you time the jump just right, Mario will bounce across the long line of Drombas, inflicting damage on all of them.
Gold Beanie
Locations: Dreamy Pi’illo Castle, Dreamy Mushrise Park, Dreamy Dozing Sands, Dreamy Wakeport, Dreamy Mount Pajamaja, Dreamy Driftwood Shore, Dreamy Somnom Woods, Dreamy Neo Bowser Castle
Stats
| LVL | HP | POW | DEF | SPD | EXP | Coins | Rate | Normal Loot | Rate | Rare Loot | Rate |
|---|---|---|---|---|---|---|---|---|---|---|---|
| 30 | 517 | 315 | 950 | 125 | 4,000 | 800 | 100% | Random DX Bean or MINI Gear | 100% | None | 0% |
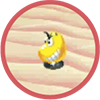
The highly elusive Gold Beanie isn’t easy to defeat, thanks in large part to its high HP and DEF Stats. Even your strongest attacks do very little damage to these durable guys. During one of his attacks, the Gold Beanie marches in a circular formation—jump on top of him as he approaches to counter. Upon jumping on the Gold Beanie, he reverses direction, marching back toward Mario—keep jumping on him to inflict damage. Jump on him at least three times to knock him on his back—this prevents him from escaping. When he chases after Mario with a group of Green Beanies, pay attention to where the Gold Beanie is in the group. When he hides behind one of the Green Beanies and charges forward, jump on him to counter. When it’s your turn to attack, don’t bother with Jump or Hammer attacks—bring out the big guns, using your strongest Luiginary Attacks, like the Luiginary Wall or Luiginary Typhoon. But as you deal more and more damage, don’t be surprised if the Gold Beanie runs away, ending the battle prematurely. This is why it’s so important to successfully counter this enemy during its attack phase, knocking him on his back. But if you do defeat the Gold Beanie, you earn 800 coins and 4,000 EXP! The Gold Beanie also drops a random DX Bean or a piece of MINI gear such as the MINI Boots, MINI Hammer, or MINI Gloves.
Krubbish
Locations: Dreamy Wakeport
Stats
| LVL | HP | POW | DEF | SPD | EXP | Coins | Rate | Normal Loot | Rate | Rare Loot | Rate |
|---|---|---|---|---|---|---|---|---|---|---|---|
| 25 | 83 | 180 | 152 | 58 | 160 | 45 | 100% | Refreshing Herb | 10% | Rookie Gloves | 5% |

A Krubbish is a pink trash-can-like foe—they often appear with Cocoknight Rs. During his attack, the Krubbish inhales several Cocoknight Rs and coughs out a cloud of dust, shaped like an arm and fist. Before he attacks, pay attention to which directions the Krubbish coughs in, as this indicates the direction the dust cloud attacks will come from. Move Mario in the opposite direction of the incoming attack, then leap over the dust cloud as it approaches. During these battles, target the Krubbish enemies first, preferably with Jump attacks. If you have BP to spare, a powerful Luiginary Attack is also very effective against these large groups of enemies.
Lakitu
Locations: Dreamy Driftwood Shore
Stats
| LVL | HP | POW | DEF | SPD | EXP | Coins | Rate | Normal Loot | Rate | Rare Loot | Rate |
|---|---|---|---|---|---|---|---|---|---|---|---|
| 20 | 60 | 120 | 102 | 83 | 45 | 25 | 100% | Secret Box | 10% | Blunt Hammer | 3% |

During battles, Lakitus let their Spiny friends do most of the fighting. But Lakitus will join the battle too, approaching from the background to throw more Spinies at Mario—knock them back with your hammer. Carefully watch the object in the Lakitu’s hand, however—they sometimes throw Mushrooms. Let the Mushrooms hit Mario to restore his HP. If you hit a Mushroom back, it restores the Lakitu’s HP. Defeating Lakitus and their Spinies earns you a lot of EXP, so always seek out these encounters.
Lakitu R
Locations: Dreamy Neo Bowser Castle
Stats
| LVL | HP | POW | DEF | SPD | EXP | Coins | Rate | Normal Loot | Rate | Rare Loot | Rate |
|---|---|---|---|---|---|---|---|---|---|---|---|
| 32 | 97 | 265 | 205 | 143 | 120 | 60 | 100% | Max Syrup Jar | 4% | None | 0% |
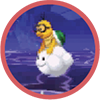
Lakitu Rs are found exclusively at Neo Bowser Castle. These enemies are a bit tougher than their standard counterparts, but perform similarly. Remember, hit back the Spinies the Lakitu Rs throw at you, but don’t strike the incoming Mushrooms.
Lob-omb
Locations: Dreamy Dozing Sands
Stats
| LVL | HP | POW | DEF | SPD | EXP | Coins | Rate | Normal Loot | Rate | Rare Loot | Rate |
|---|---|---|---|---|---|---|---|---|---|---|---|
| 11 | 42 | 64 | 70 | 42 | 10 | 14 | 100% | Supersyrup Jar | 5% | Thick Gloves | 3% |
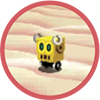
These robotic enemies juggle and toss bombs toward Mario—memorize the position of the bomb with the star on it and watch as Lob-omb juggles. The unmarked bombs are dummies and do no damage. But the bomb with a star on it explodes—knock it back at Lob-omb using your hammer before it explodes. Contact with an exploding bomb can make Mario dizzy, causing him to lose a turn or get struck by other attacks. In another attack, Lob-omb tosses only one bomb toward Mario. Pay attention to the way the bomb is held for a sign of where it will land. If Lob-omb holds the bomb with its right hand, the bomb will land behind Mario. If the bomb is held in Lob-omb’s left hand, it will land in front of Mario. Or if the bomb is held in both of Lob-omb’s hands it will land at Mario’s feet. Use these cues to determine where the bomb will land, then act quickly to knock it away with your hammer before it explodes. Needless to say, Lob-ombs are dangerous—target and eliminate them first before focusing on other enemies.
Lob-omb R
Locations: Dreamy Mount Pajamaja
Stats
| LVL | HP | POW | DEF | SPD | EXP | Coins | Rate | Normal Loot | Rate | Rare Loot | Rate |
|---|---|---|---|---|---|---|---|---|---|---|---|
| 19 | 105 | 134 | 112 | 67 | 30 | 25 | 100% | Ultrasyrup Jar | 5% | None | 0% |
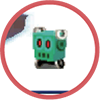
These green robotic enemies function much like the Lob-ombs you face in Dreamy Dozing Sands. When they juggle three bombs, keep an eye on the one marked with a star icon and be ready to knock it back with your hammer—the other two bombs are decoys. Target the Lob-omb R enemies first. When destroyed, they emit a powerful explosion, potentially eliminating nearby enemies.
Magmad/Icead
Locations: Dreamy Mount Pajamaja
Stats
| LVL | HP | POW | DEF | SPD | EXP | Coins | Rate | Normal Loot | Rate | Rare Loot | Rate |
|---|---|---|---|---|---|---|---|---|---|---|---|
| 18 | 125 | 137 | 98 | 70 | 50 | 20 | 100% | Super Candy | 5% | Secret Box | 1% |

Icy terrain in which these enemies are found can be a little dangerous, causing Mario and Dreamy Luigi to slide along the slippery surface. This can make initiating preemptive attacks against the Magmads/Iceads difficult. For best results, wait for these enemies to approach, then strike them with your hammer to begin a battle. The orange Magmads and blue Iceads always appear together in battles. These enemies have two basic attacks. When they surround Mario as orange and blue pools, be ready to strike back with your hammer as their heads emerge. When Mario is flanked by these enemies, be ready to jump over their fiery and icy blasts—as the blast misses Mario, it strikes the enemy on the other side, inflicting damage. When you’re not countering, score some damage of your own. Hammer attacks are most effective against these enemies—don’t use Jump attacks against the Magmads.
Mechakoopa
Locations: Dreamy Neo Bowser Castle
Stats
| LVL | HP | POW | DEF | SPD | EXP | Coins | Rate | Normal Loot | Rate | Rare Loot | Rate |
|---|---|---|---|---|---|---|---|---|---|---|---|
| 21 | 1 | 106 | 1 | 54 | 0 | 10 | 100% | None | 0% | None | 0% |
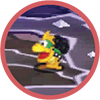
The robotic Mechakoopas have two different states—damaged and undamaged. A damaged Mechakoopa emits blue sparks, altering the way it functions. When Mario is surrounded by Mechakoopas, pay close attention to the pattern in which they attack—undamaged Mechakoopas always attack straight ahead, charging directly at Mario. However, damaged Mechakoopas always attack from the opposite direction in which they approach. For instance, if they approach from the right, be ready to whack them with the hammer when they circle back on the left side. You must correctly anticipate these attacks, as the Mechakoopas move too fast to adequately react to their movements. Mechakoopas also perform charging attacks, moving directly at Mario. If a damaged Mechakoopa hops during its approach, don’t jump—it will hop right over Mario. But if it doesn’t hop during its approach, jump to get out of its way—undamaged Mechakoopas perform the exact opposite attack pattern. Mechakoopas also attack with fireballs, marching at Mario in lines while launching their fiery munitions. Use the Circle Pad to avoid the fireballs, then jump on the Mechakoopas when they approach. Every fireball that misses Mario circles back and damages the Mechakoopa who fired it. When it’s your turn to attack, consider using a Luiginary Attack to wipe out these foes quickly—the Luiginary Wall and Luiginary Typhoon are both very effective.
Nipper Plant
Locations: Dreamy Driftwood Shore
Stats
| LVL | HP | POW | DEF | SPD | EXP | Coins | Rate | Normal Loot | Rate | Rare Loot | Rate |
|---|---|---|---|---|---|---|---|---|---|---|---|
| 21 | 1 | 106 | 1 | 54 | 0 | 10 | 100% | None | 0% | None | 0% |

Nipper Plants appear in the background of some battles. Use your hammer to knock back the fireballs these distant enemies hurl at Mario, sending them flying at the enemies in the foreground. Once all enemies in the foreground have been defeated, you don’t need to worry about the Nipper Plants in the background.
Pelicrump
Locations: Dreamy Somnom Woods
Stats
| LVL | HP | POW | DEF | SPD | EXP | Coins | Rate | Normal Loot | Rate | Rare Loot | Rate |
|---|---|---|---|---|---|---|---|---|---|---|---|
| 28 | 109 | 152 | 156 | 86 | 50 | 10 | 100% | Ultra Candy | 1% | None | 0% |
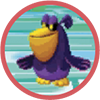
These purple birds are best dispatched with Jump attacks, but be ready to counter their attacks too. When the flock takes off, pay attention to which Pelicrump is carrying a white egg in the background. Then as the Pelicrumps swoop down at Mario, using your hammer only strike the one carrying the egg. In another common Pelicrump attack, they approach Mario carrying bombs. But usually only one Pelicrump moves within attack range of Mario—strike the nearby Pelicrump using your hammer and ignore the rest. Pelicrumps also have a habit of coughing up bombs before they’re defeated. These bombs eventually detonate, damaging other Pelicrumps nearby.
Piranha Plant
Locations: Dreamy Driftwood Shore
Stats
| LVL | HP | POW | DEF | SPD | EXP | Coins | Rate | Normal Loot | Rate | Rare Loot | Rate |
|---|---|---|---|---|---|---|---|---|---|---|---|
| 21 | 222 | 146 | 138 | 54 | 170 | 30 | 100% | Ultra Mushroom | 5% | None | 0% |

Watch out for the Piranha Plants in the dream world—don’t get hit by their incoming fireballs. Instead, approach and whack them with your hammer to initiate a battle. Be ready to jump over their fireball attacks during the battle too. When you’re not dodging or countering their attacks, perform Jump attacks to eliminate the Piranha Plants.
Propellion
Locations: Dreamy Mushrise Park
Stats
| LVL | HP | POW | DEF | SPD | EXP | Coins | Rate | Normal Loot | Rate | Rare Loot | Rate |
|---|---|---|---|---|---|---|---|---|---|---|---|
| 8 | 42 | 56 | 46 | 22 | 8 | 8 | 100% | Candy | 10% | None | 0% |

These airborne enemies are best dispatched with Jump attacks. Also, be ready to evade their attacks by jumping—if you time your jump just right you can perform a counterattack, landing on top of them to inflict damage.
Skipdrill
Locations: Dreamy Dozing Sands
Stats
| LVL | HP | POW | DEF | SPD | EXP | Coins | Rate | Normal Loot | Rate | Rare Loot | Rate |
|---|---|---|---|---|---|---|---|---|---|---|---|
| 12 | 22 | 55 | 55 | 53 | 7 | 3 | 100% | Super Candy | 1% | Secret Box | 1% |

Any attack works well against these enemies, but be ready to dish out some damage during counterattacks too. During one of their attacks, use your hammer to knock falling Skipdrills into their colleagues surrounding you. In a different Skipdrill attack, you must either leap over (or on) the Skipdrills flying toward Mario. Once you get the hang of it, you should be able to counter all of the Skipdrill attacks, significantly decreasing the length of each battle. Finish any remaining Skipdrills off with Jump attacks.
Skipdrill R
Locations: Dreamy Somnom Woods
Stats
| LVL | HP | POW | DEF | SPD | EXP | Coins | Rate | Normal Loot | Rate | Rare Loot | Rate |
|---|---|---|---|---|---|---|---|---|---|---|---|
| 29 | 66 | 220 | 146 | 130 | 35 | 6 | 100% | Boo Biscuit | 1% | None | 0% |

The Skipdrill R performs just like a standard Skipdrill—these purple variants are just a bit tougher to defeat. Use the same hammer- and jump-based counters during their attacks phase, then finish them off with Jump attacks or Luiginary Attacks.
Spiny
Locations: Dreamy Driftwood Shore
Stats
| LVL | HP | POW | DEF | SPD | EXP | Coins | Rate | Normal Loot | Rate | Rare Loot | Rate |
|---|---|---|---|---|---|---|---|---|---|---|---|
| 20 | 31 | 125 | 139 | 70 | 21 | 4 | 100% | Super Candy | 1% | None | 0% |

These spike-covered enemies are vulnerable when knocked on their backs—this is why a Hammer attack is the best preemptive method. Every time these enemies are struck with a Hammer attack, they flip belly-up, exposing their soft underbelly. Only perform Jump attacks when these guys are on their backs. When it’s their turn to attack, the Spinies often come marching at Mario in a staggered line. Hit the first Spiny with your hammer to knock it on its back. Then wait for the remaining Spinies to form a straight line—hit the flipped Spiny again with your hammer to send it flying at the rest of the Spinies. If you miss the full line of Spinies, be ready to defend yourself with your hammer as the remaining Spinies perform spin attacks, approaching from the top and bottom. In another attack, the Spinies attack in column formations—pay attention when they make their formations. If a Spiny jumps during the formation phase, it means it will jump when it approaches Mario. Line yourself up with the Spinies who don’t jump, then simply jump over them when they approach. If you encounter a jumping Spiny in midair, you’ll take damage.
Spiny R
Locations: Dreamy Neo Bowser Castle
Stats
| LVL | HP | POW | DEF | SPD | EXP | Coins | Rate | Normal Loot | Rate | Rare Loot | Rate |
|---|---|---|---|---|---|---|---|---|---|---|---|
| 32 | 50 | 276 | 281 | 121 | 56 | 6 | 100% | Max Mushroom | 2% | None | 0% |
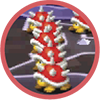
These enemies perform just like the Spinies you encounter earlier, but they’re a little tougher, capable of taking more damage. Remember, knock these guys on their backs using a Hammer attack, then follow up by performing a Jump attack while their bellies are exposed. Don’t be surprised if these Spiny Rs are joined by a Lakitu R.
Spritzbloom
Locations: Dreamy Somnom Woods
Stats
| LVL | HP | POW | DEF | SPD | EXP | Coins | Rate | Normal Loot | Rate | Rare Loot | Rate |
|---|---|---|---|---|---|---|---|---|---|---|---|
| 28 | 200 | 228 | 208 | 57 | 160 | 60 | 100% | Refreshing Herb | 5% | Flame Hammer DX | 3% |

These flower-like enemies launch balls filled with noxious purple spores into the air—knock the balls back by jumping before they explode. Watch the shadows of these balls as they fly toward Mario to get underneath them. Then jump up while beneath the ball to knock it back in the direction of the Spritzbloom. When a Spritzbloom approaches Mario, jumping toward him and away from him, striking the Spritzbloom with your hammer causes it to spew toxic spores back at its friends on the right. But if you miss, Mario will get a face full of toxic spores, inflicting moderate damage.
Storch
Locations: Dreamy Pi’illo Castle
Stats
| LVL | HP | POW | DEF | SPD | EXP | Coins | Rate | Normal Loot | Rate | Rare Loot | Rate |
|---|---|---|---|---|---|---|---|---|---|---|---|
| 3 | 14 | 50 | 30 | 23 | 4 | 3 | 100% | Super Mushroom | 5% | None | 0% |
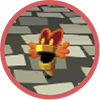
Storches are torch-like monsters capable of attacking with flames. Storches are often joined by Drombas. During such battles, eliminate the Storches first and then go after the Drombas. Engaging and defeating large groups of enemies like this is a great way to boost your EXP and level up early in the game, so don’t miss the chance to engage in battle.
Ticksquawk
Locations: Dreamy Wakeport
Stats
| LVL | HP | POW | DEF | SPD | EXP | Coins | Rate | Normal Loot | Rate | Rare Loot | Rate |
|---|---|---|---|---|---|---|---|---|---|---|---|
| 14 | 90 | 76 | 75 | 37 | 20 | 18 | 100% | Supersyrup Jar | 5% | None | 0% |

These clock-like enemies aren’t particularly difficult to defeat, especially if you damage them with a preemptive attack at the start of a battle. These enemies are often joined by Cocoknights. During such battles, focus on the Cocoknights first, as they pose the biggest threat. If you have BP to spare, target all enemies with a Luiginary Attack. Otherwise, rely on Jump attacks to defeat these groups.