
Dissidia Final Fantasy NT Guide One-Player Modes Story Mode
Paths Converge
Total memoria cost: 5
Fighting Chance
Cost: 1 memoria Type: cutscene

Having returned to this plane of existence, most of the warriors assemble at the gods’ towers.
If fighting attracts the planesgorger, then a battle between all the warriors should lure it out of hiding. The time for petty squabbles is past.
World in the Balance
Cost: 1 memoria Type: cutscene
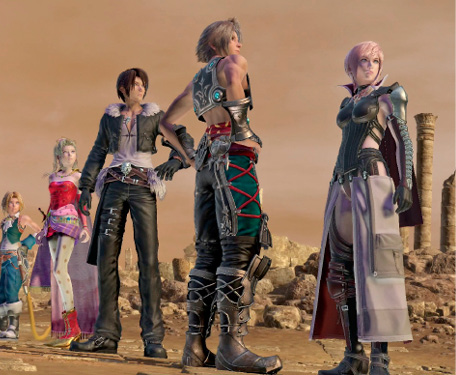
The explorers and intelligence gatherers bump into each other on the barren plane where they were first summoned.
Everyone may always be summoned here without notice, but there is no other place where so many peerless heroes gather. For this world to vanish would be a shame.
It Draws Near
Cost: 3 memoria Type: battle (Boss)
Available champions: ALLOpponents: ???Location: The Final BattlefieldReward: 2 Treasures
To unlock this panel you must first complete Fighting Chance and A World in the Balance. You’ll need to clear at least two paths. Choosing from either the first, second, and fourth and either the third or fifth.
Everyone, including the deities, musters in a nondescript field in preparation for battle.
The Warrior of Light is heartened by the fact that, while they may be foes in their respective lands, here they fight as one, and such is not possible anywhere else.
It’s all come to this. With the battle party of your choice, you can tackle story mode’s final adversary, the source of all this realm’s woe. Right from the beginning, this terrifying entity unleashes a surging tsunami at the party in the form of Tidal Wave, forcing rapid sideways dashing instantly. This thing means business.
The dimension-devouring creature before you acts a lot like a mix of Leviathan and Bahamut in its first form, tending to hover well above the battlefield, casting wide-ranging spells on the allied party and encouraging high-altitude engagement. It has mastery of all elemental magics, putting its own twist on various summon attacks.
Planesgorger’s Arsenal: First Form
| Type | Name | Description |
|---|---|---|
|
Bravery |
Atomic Ray |
The fiend spits a blazing fast laser straight at its target. |
|
Bravery |
Putrefaction |
A trio of poisonous homing globes are spat at the target. Inflicts Venom Breath debuff. |
|
Bravery |
Glacial Breath |
A fan of icy breath is sprayed across the target, freezing them on contact. |
|
Bravery |
Disgorge |
The fiend swoops over the ground, exhaling a huge cloud of ash underneath. |
|
Bravery |
Maelstrom |
The fiend beckons forth a vortex of rock from underneath the target, which stretches high into the sky. |
|
HP |
Tidal Wave |
Low, wide waves of tsunamis scour the land in a line away from the monster. |
|
HP |
Levinbolt |
The fiend targets an area with a huge thunderbolt. |
|
HP |
Fulgent Rain |
The monster gathers magical energy to drop a shower of lethal lasers over the arena. |
|
EX |
Chaotic Deluge |
The monster executes a buff or debuff. It can double its own Bravery, lock its own Bravery in place, or negate enemy Bravery. |
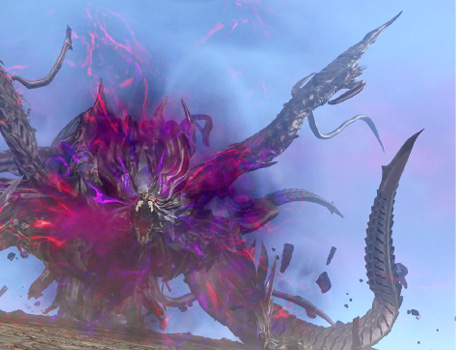
In its final form, the monstrosity has devious attacks that can strike anywhere in the arena in an instant, forcing respect no matter where allies are. Here, the monster acts like a mix between Alexander and Bahamut, dominating one side of the arena with its bulk and position, but able to laser in on anyone, anywhere.
If you choose to use a marksman to fight the boss, it’d be best to have one other marksman and one vanguard as your computer teammates. As a marksman, be ready to dodge most attacks, waiting for good openings to spam your projectile moves.
A very simple strategy for the second form involves positioning your character directly below its head. This puts you out of reach from most of its attacks, allowing you to stack Bravery unchallenged.
One of the best characters for this strategy is Garland. Not only is he a vanguard, which will cause the fiend to stagger sooner, but Deranged Soul provides him with an extra damage boost from landing consecutive attacks. Although this strategy isn’t foolproof, it does take much of the difficulty out of what can be an otherwise frustrating fight. Just be sure to dodge Trinity and Arrant Calamity as needed, and to reposition yourself quickly after Screech of Oblivion.
Remember, if you are having trouble with this final fight, you can always raise your Story Bonus Level to increase your stats.
Planesgorger’s Arsenal: Second Form
| Type | Name | Description |
|---|---|---|
|
Bravery |
Ray of Discord |
The monster attacks with a huge dark laser aimed straight at the target. |
|
Bravery |
Tentacled Terror |
Four limbs pierce the ground, to erupt under encroaching foes and attack from below. |
|
Bravery |
Disembowel |
An enormous claw swipe the fiend uses against pests too close for comfort. |
|
Bravery |
Writhing Shadows |
Dark pillars emerge under moving foes one after another. The craters become Stop traps. |
|
Bravery |
Ebon Orb |
The fiend casts a slow, huge dark matter projectile with excellent homing. |
|
HP |
Cimmerian Rain |
The monster creates a grid of magical turrets in the air before it, which then all fire homing lasers at once. Any single laser is part of the HP attack. |
|
HP |
Trinity |
This twisted spell is a combination of Ramuh’s Judgment Bolt, Shiva’s Diamond Dust, and Ifrit’s Hellfire. |
|
HP |
Arrant Calamity |
The ultimate attack, in any dimension. The only safe zone is on the farthest perimeter away from the boss. |
|
EX |
Intimidate |
The fiend’s attack and guard crushing power rise greatly, but defense decreases. |
|
EX |
Aegis |
The monster greatly increases defense and regenerates Bravery rapidly, but attack is decreased. |
|
EX |
Screech of Oblivion |
The fiend’s supernatural shriek blows everyone to the edges of the arena while removing their buffs. |