
Assassin's Creed Unity Guide Walkthrough
Sequence 10
 Memory 01/“A Dinner Engagement”
Mission OverviewChallenges■Drive two Brutes berserk: see ■ Perform two double assassinations: see Notes & Further Reading■Sequence 10 begins with another batch of ability unlocks. See page 239 to read our suggested upgrades. ■As this Memory offers two distinct ways to eliminate Le Peletier, we cover both in this walkthrough. We refer to these as the “Poison Wine Assassination” and the “Bribery Assassination”. The latter requires a minimum financial investment of 4,000 ■The two Challenges encourage exploration of the area, but we have incorporated advice on how to beat them in both walkthroughs. |
 .
. .
. , so will not be possible if you are low on funds.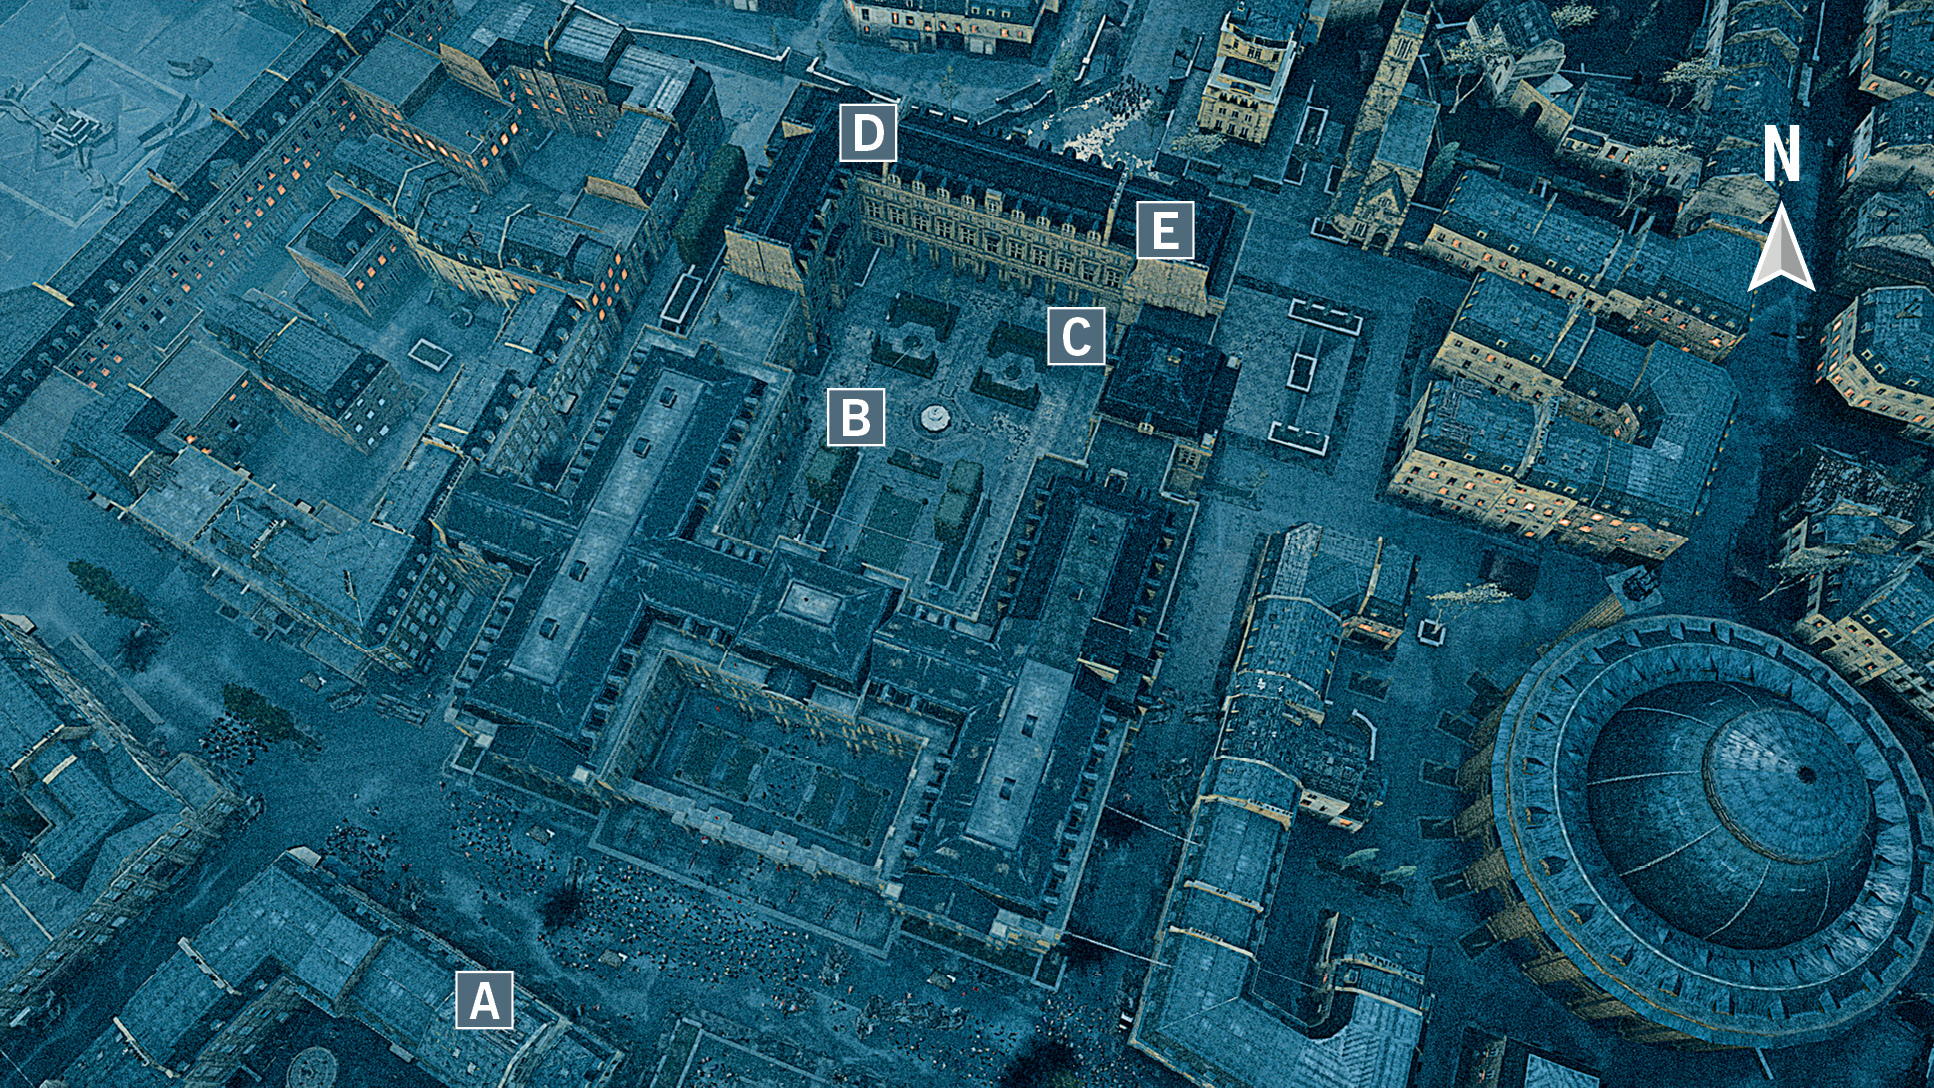
 Arno’s starting position.
 A shipment of deadly lead-laced wine. You can steal a bottle of this to set up a very specific (and time-sensitive) assassination while Le Peletier remains in his starting position at
  .
.
 A member of Le Peletier’s household staff can be found in this location. For a bribe of 4,000
  , she will request that a window in her master’s study be opened. This sets up a quiet and very easy assassination with an uncomplicated departure from the scene.
 Le Peletier’s starting position, in the upstairs suites, and the location where the poison wine can be placed on a bar to trigger one of the two special assassination scenarios. If you wait too long after identifying Le Peletier, he will automatically leave this room and walk to his secondary location at
  .
.
 This is Le Peletier’s study. If you choose the bribery assassination, two windows will be opened to provide a simple entrance and exit.
 Memory 01/“A Dinner Engagement”
Poison Wine Assassination
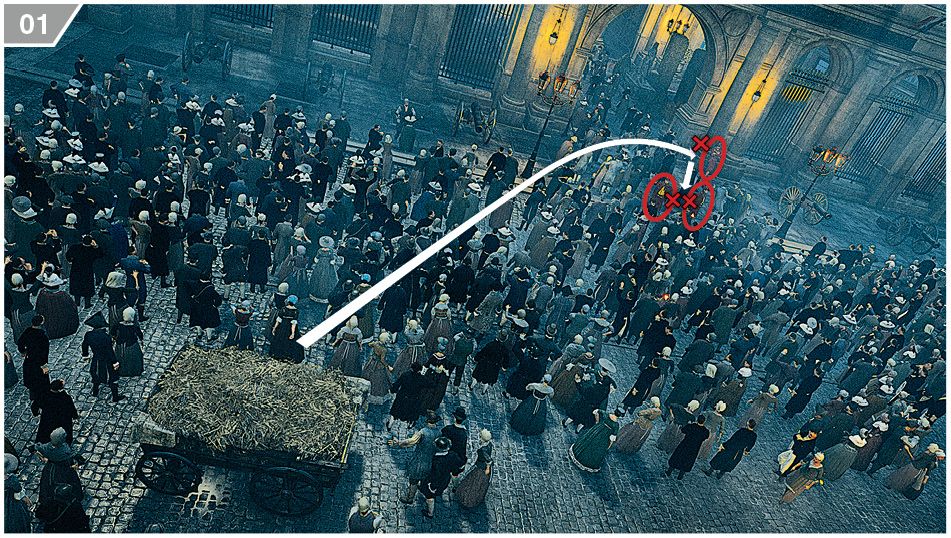
From Arno’s start position, perform a Leap of Faith into the hay cart below. Before you steal the poison wine, it’s wise to complete both Challenges in advance (but if you would prefer to leave them for another time, skip to entry  ). Blending with the large crowd, approach the guard leaning against the wall in the back and eliminate him. You can now backtrack to the two Extremists. When you are right behind them, carefully move forward until both are surrounded by a highlight, indicating a double assassination opportunity, then press
  /
/ to strike.
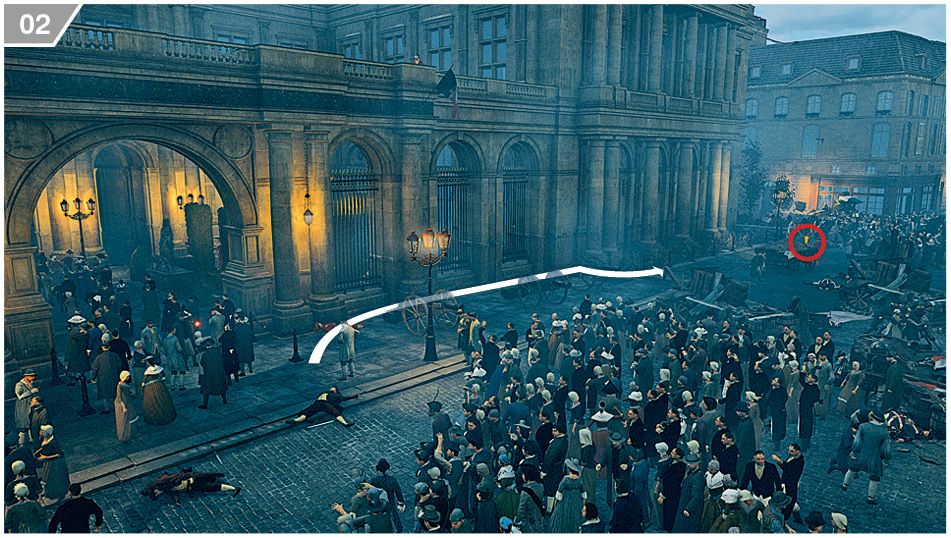
You will find a Brute to the east of your position at the front entrance. Sneak up behind the hay cart and hit him with a Berserk Blade. Stay very close to the wall to avoid the gaze of a rooftop sentry.
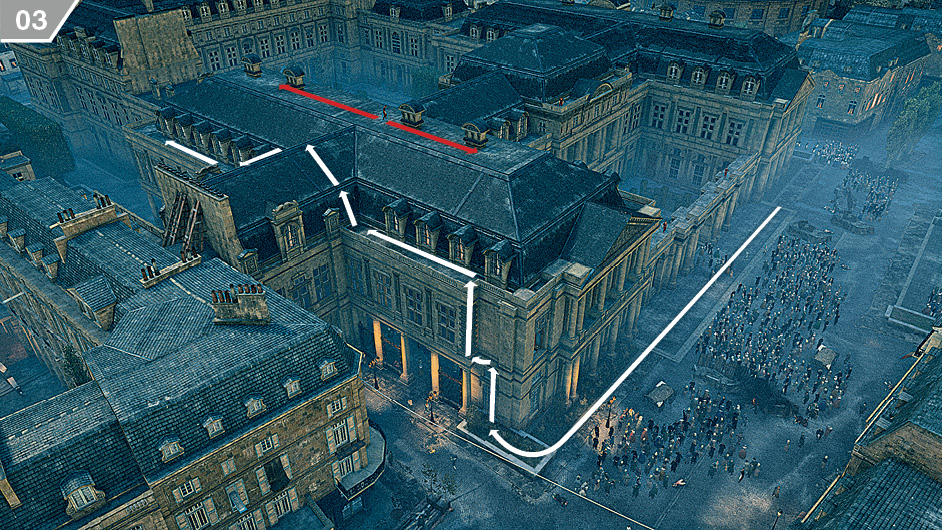
Return to the front entrance and follow the route shown here to reach a position where you can find another Brute and a second double assassination opportunity. There is a sniper patrolling on the top roof; whether you strike him down or avoid him when you pass is entirely at your discretion.
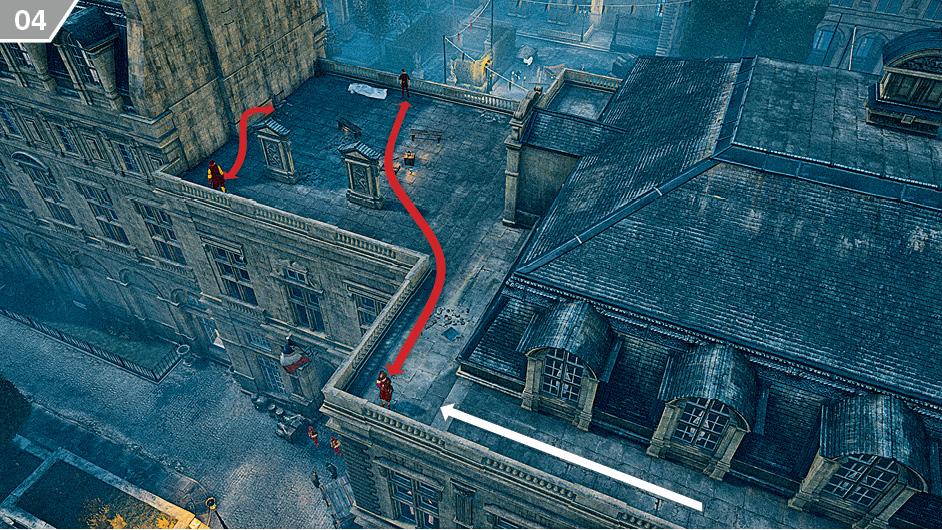
You will encounter a Brute and two other Extremists on this rooftop. Wait until the enemy with the long patrol moves to the opposite side of the roof, then move into position behind the balustrade and hit the Brute with a Berserk Blade. You can then either bring the fight to a close with the Phantom Blades, or climb out of sight as the battle unfolds.
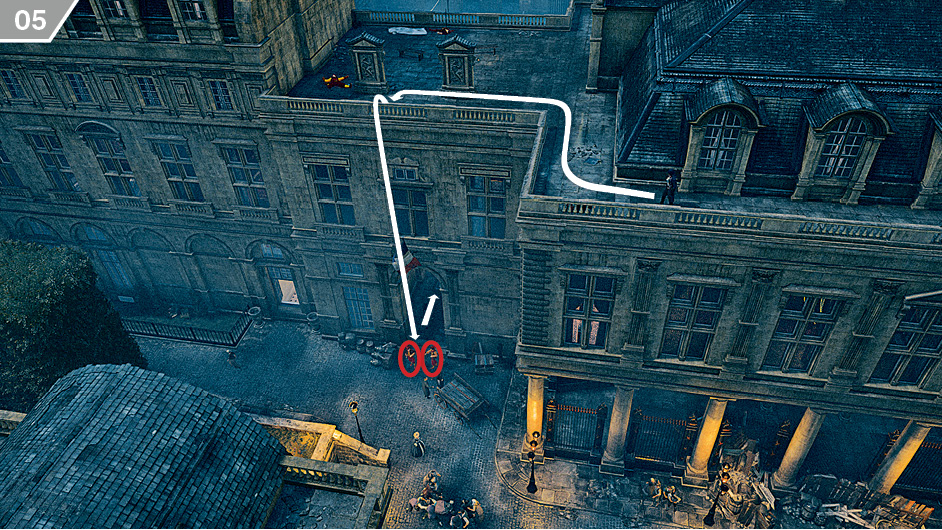
The final double assassination is almost directly below: climb down to the flag and, after ensuring that both Extremists are highlighted, eliminate both simultaneously. If you skipped to this stage from entry  , you will need to scale the outer wall further away and traverse to this position: both guards need to be eliminated before you can go through the passage behind them.
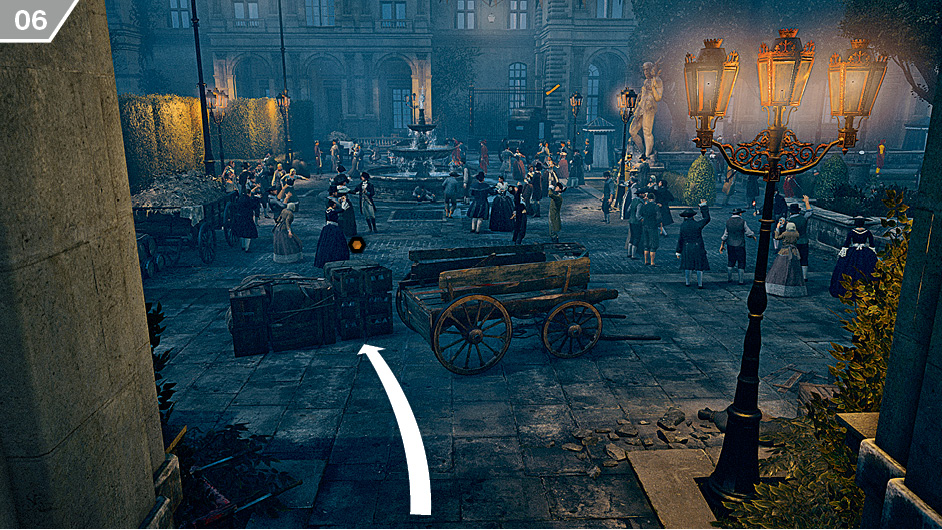
At the other end of the passage, sneak over to the deliveries in Stealth Mode and press  /
/ when the prompt appears to steal a bottle of poison wine. You should then backtrack to the street outside.
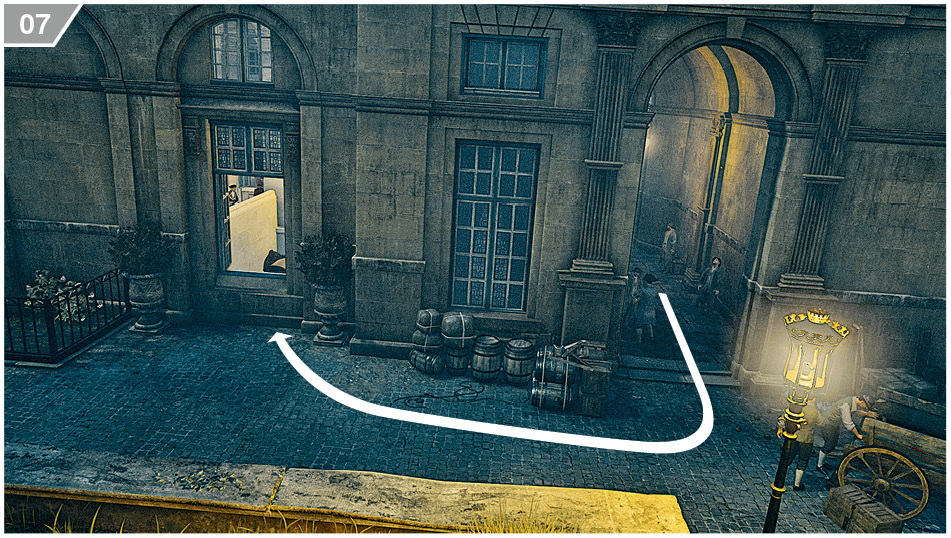
Approach the window shown here and, after checking that no one is looking in your direction inside with Eagle Vision, take cover beneath it.
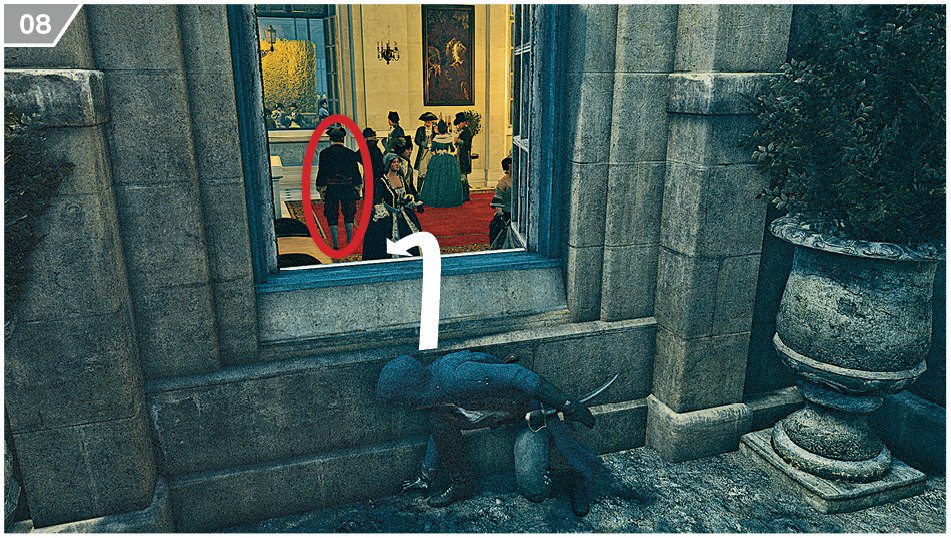
Watch through the window until you see a guard move into a position just in front of you. When he leaves, it’s time for a purposeful burst of activity. Start by vaulting through the window.
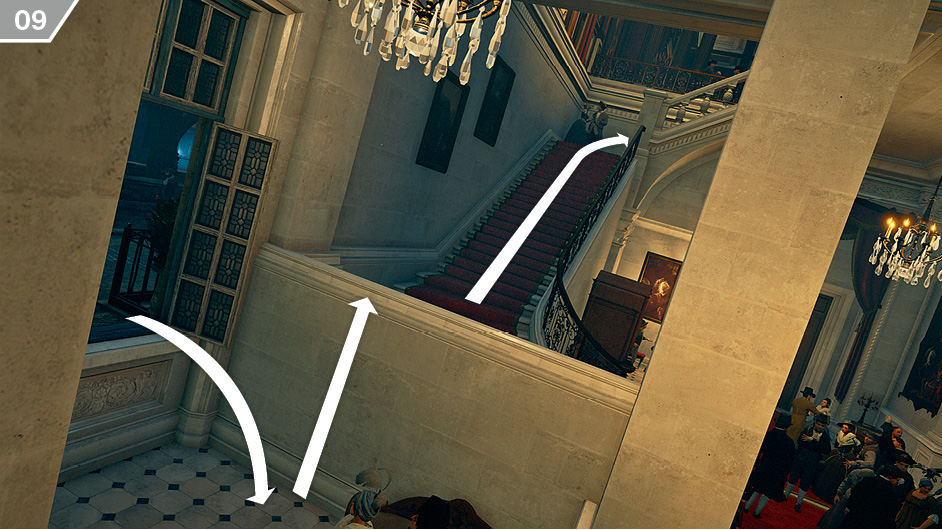
Turn left and climb the wall, then run up the stairs. Slow to a walk once you reach the top of the first flight.
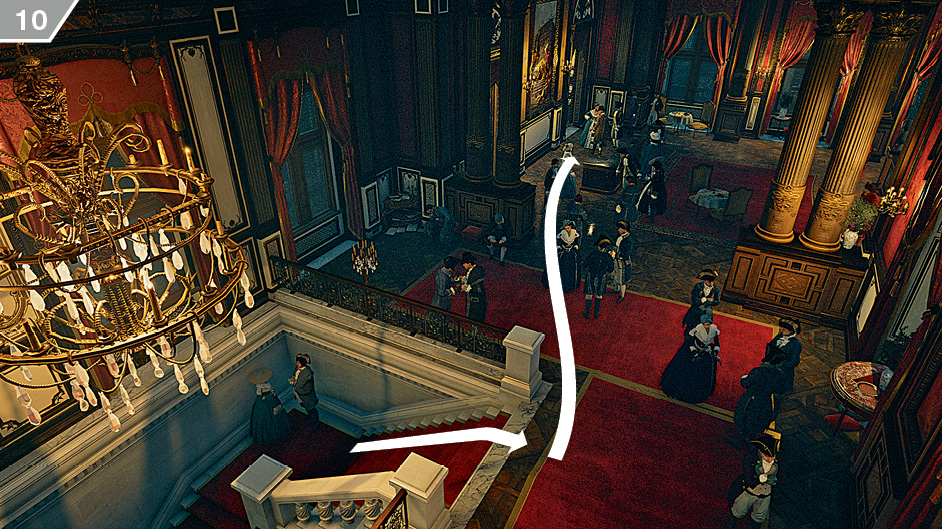
Once in the room above, Blend with the partygoers to reach the bar area, then quickly activate Stealth Mode and hide behind the bar before Arno is detected by the nearby guards. This is the most delicate part of the infiltration, so don’t rush.
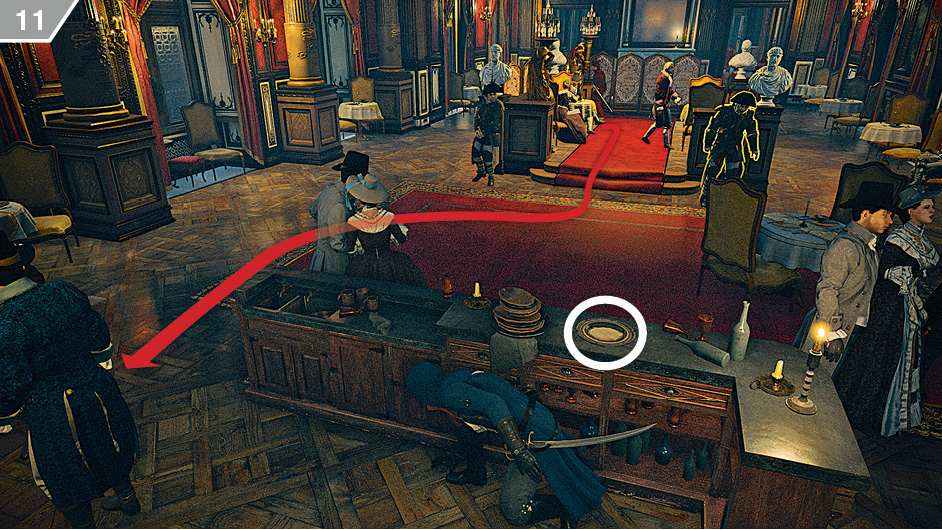
Behind the bar, press  /
/ in front of the highlighted tray to place the poison wine. Once it has been delivered to Le Peletier, he will follow the route shown here to reach a small room just behind the bar.
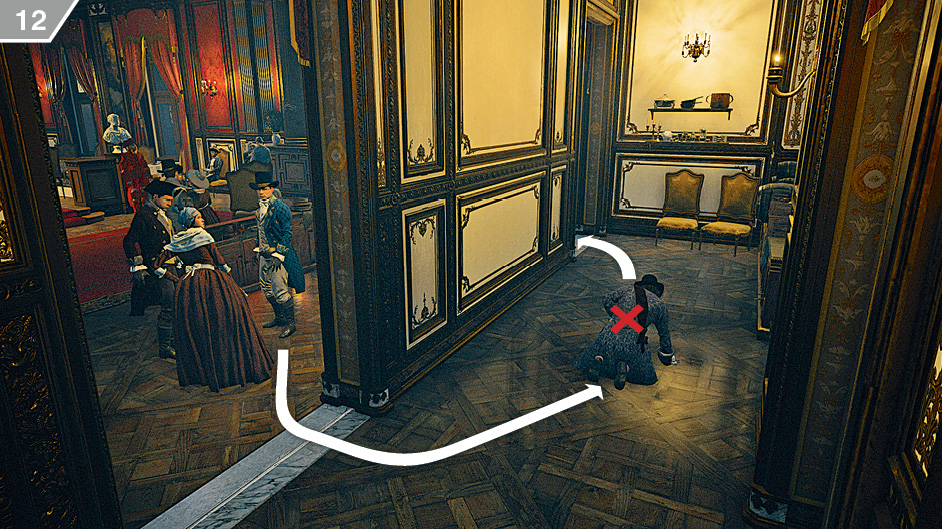
Le Peletier will collapse once out of sight. Sneak into the room and perform a Hidden Blade assassination to trigger the customary cinematic. When this ends, you can carefully retrace your steps to the window downstairs to leave the building. Once you exit the highlighted area (and leave any chasing Extremists in your wake if your departure was less subtle than you might have hoped), the Memory ends.
 Memory 01/“A Dinner Engagement”
Bribery Assassination
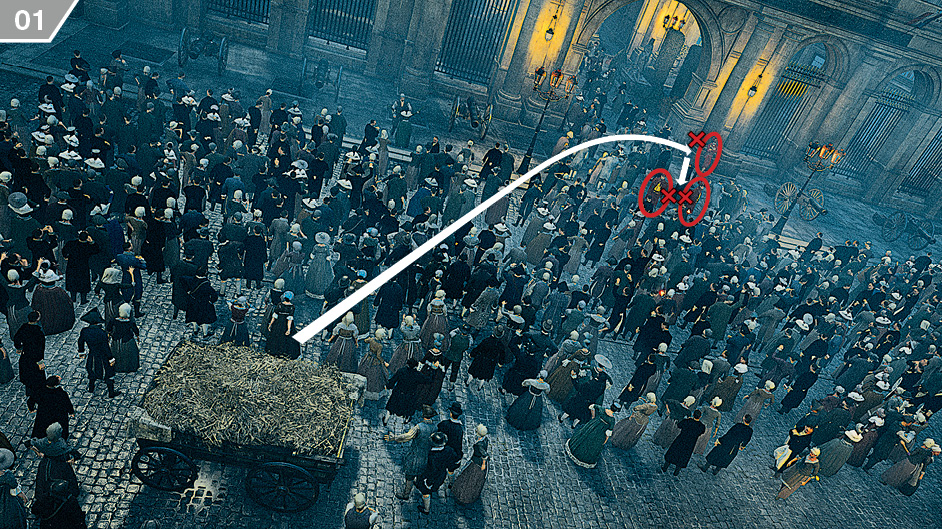
From Arno’s start position, perform a Leap of Faith into the hay cart below. This assassination opportunity is much faster than the method involving poison wine, but you will still need to take some time at the start to complete the mission’s Challenges; if you would prefer to skip them, jump to entry  . Blending with the large crowd, approach the guard leaning against the wall in the back and eliminate him. You can now backtrack to the two Extremists. When you are right behind them, carefully move forward until both are surrounded by a highlight, indicating a double assassination opportunity, then press
  /
/ to strike.
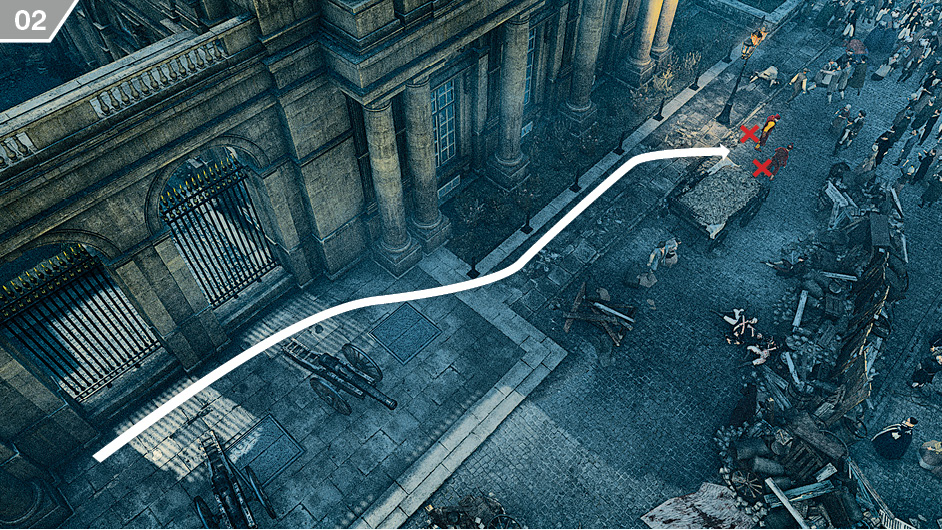
Perform your second double assassination (completing the first Challenge) by carefully sneaking up on the two Extremists by the hay cart to the east of your previous location. This may require some careful positioning to ensure that both targets are highlighted in red simultaneously.
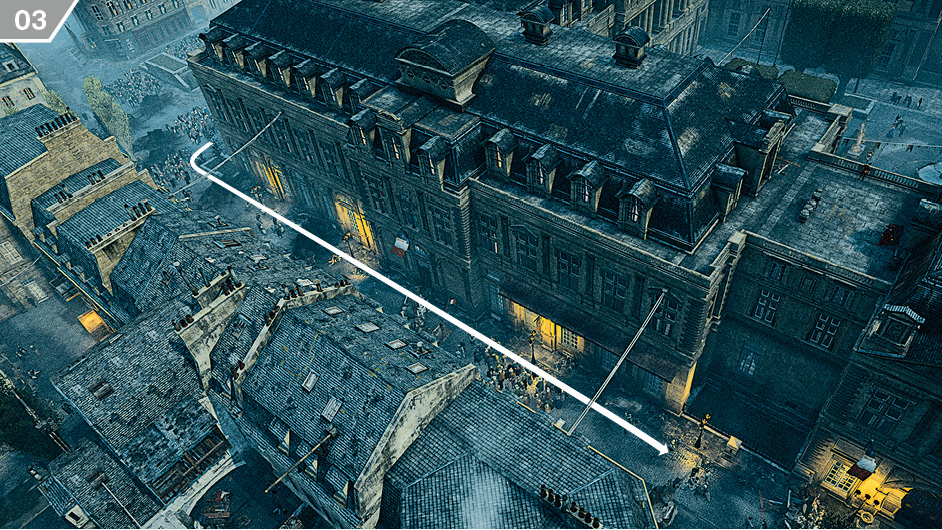
Run along the crowded street around the corner (heading approximately north) until you reach the position illustrated above.
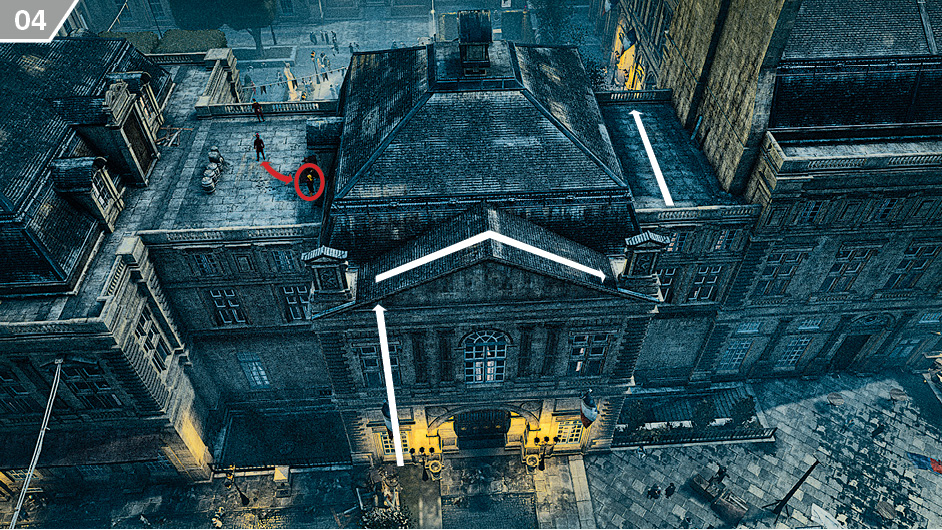
Climb up and, from a secluded position, hit the Brute with a Berserk Blade while his patrolling companion is facing away. You can then follow the arrows shown here to reach a position above the servant who Arno will bribe. If you have skipped the Challenges, you can just climb to the rooftop and bypass the Extremists entirely.
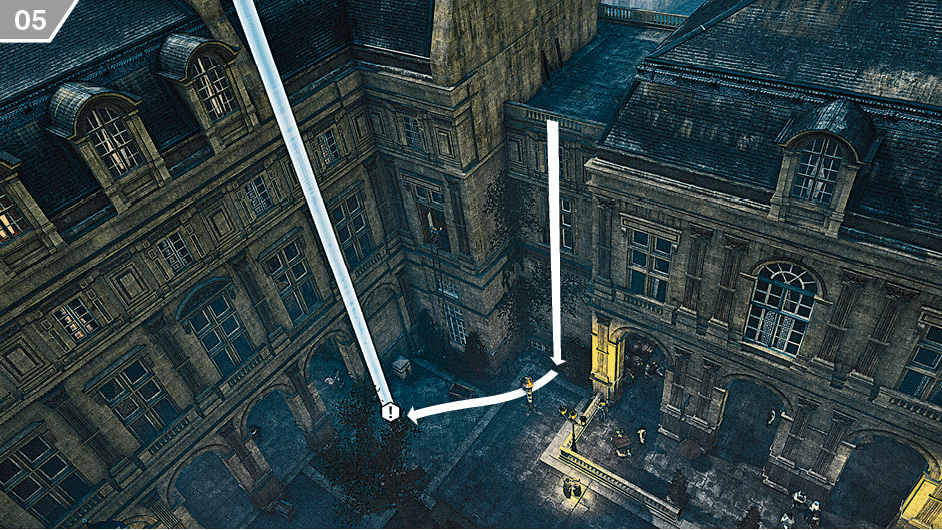
Climb down and interact with the highlighted woman; when the prompt appears, press  /
/ to pay the required 4,000
  bribe. This will trigger a brief cutscene.
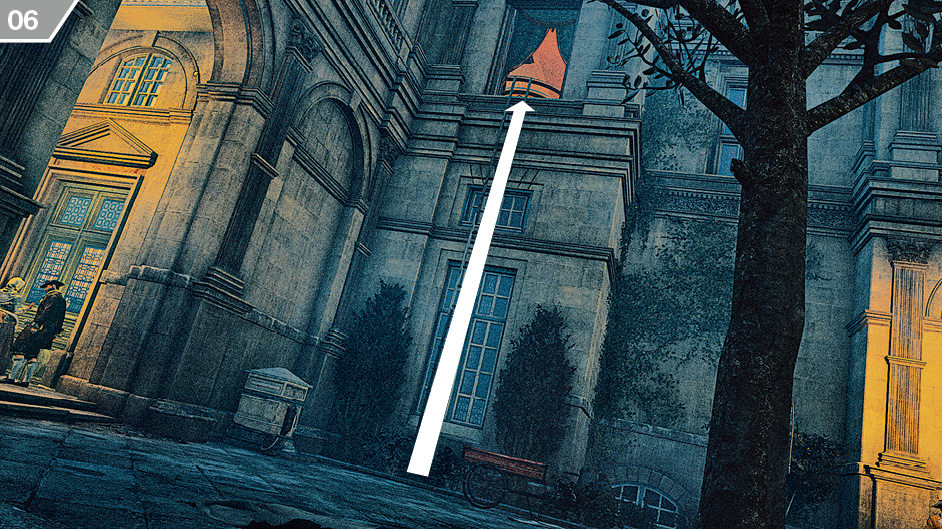
When play resumes, climb the ladder close to your position and clamber through the window to reach Le Peletier’s private quarters.
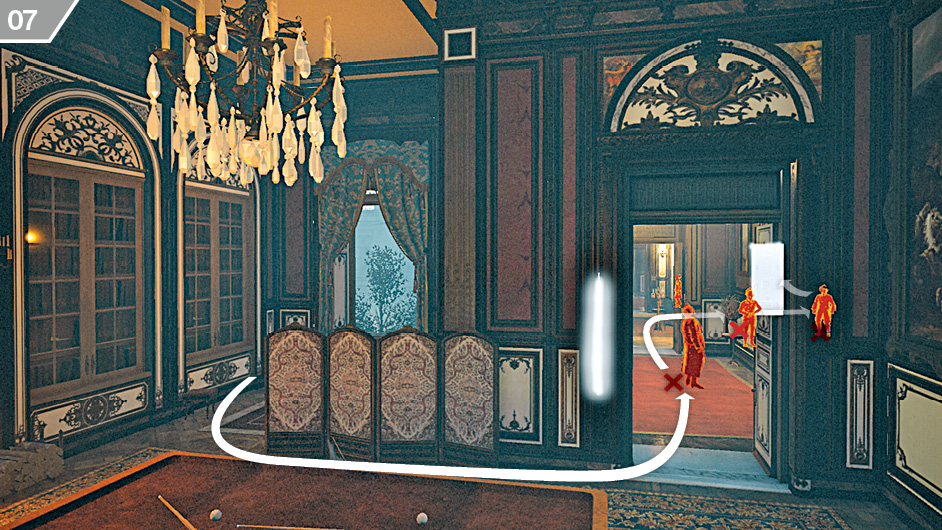
Inside the first room, go through the door shown above and assassinate the Defender. Wait until the soldier in the next room turns away, then activate Stealth Mode and quickly stab both the Seeker and the soldier in turn. You can now lockpick the nearby door.
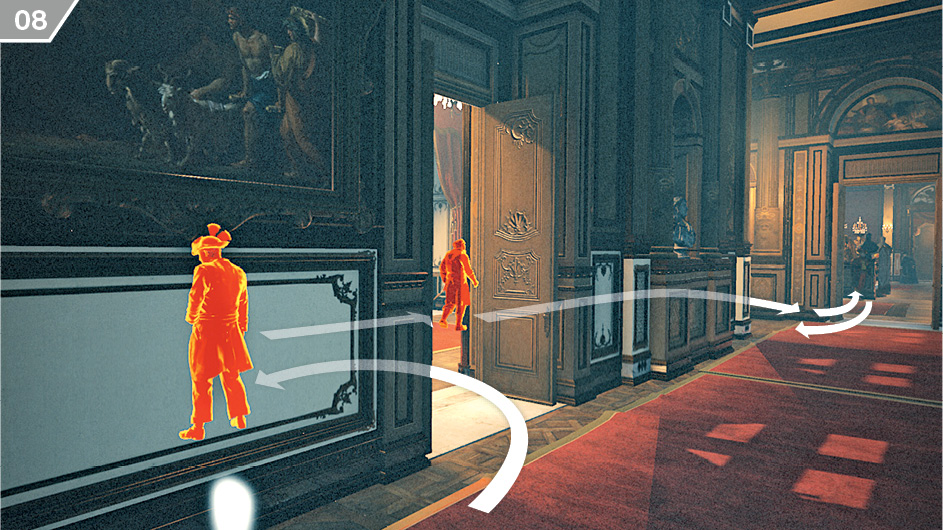
Use Eagle Vision to identify the Brute who patrols in the corridor. When he moves away from you, walk to the soldier and stab him, then repeat this with the Brute. You can now approach the room where Le Peletier is sitting, as shown above. Ensure that the patrolling Seeker is not looking your way, then briefly step in the room to trigger a discussion between Le Peletier and a waiter. The moment this happens, immediately step back to cover.
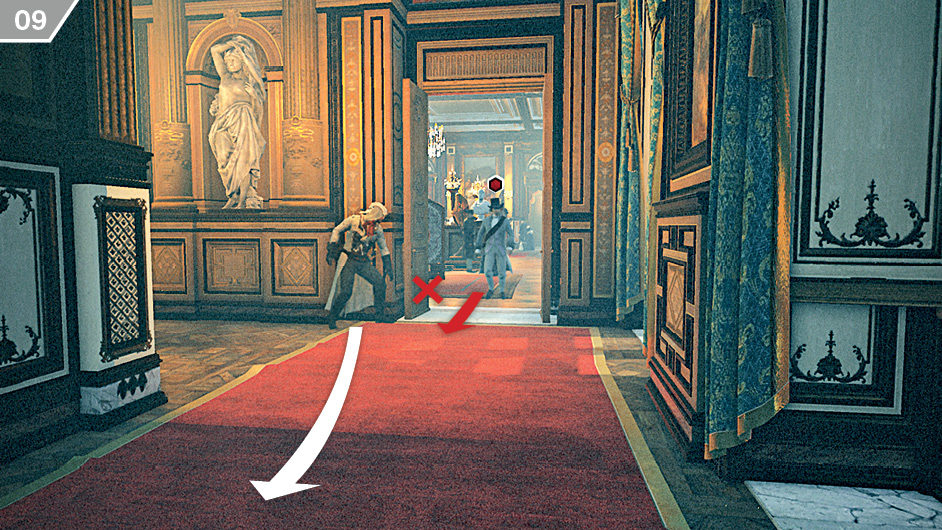
You can now wait for Le Peletier to come to you, which takes a few minutes. When he finally does, take him down with a cover kill. After the cinematic interlude ends, retrace your steps back to the study and jump through one of the nearby windows to land on a canopy outside. Turn to the left and look at the Extremists below. To complete the second Challenge, identify the Brute and hit him with a Berserk Blade. You can then leave the highlighted area to end the Memory.
 Memory 02/“The Execution”
Mission OverviewChallenges■Kill two snipers: see ■ Stun five enemies: see Notes & Further Reading■Important: The first half of this Memory is a locate-and-infiltrate exercise that is much more enjoyable if you attempt it yourself without assistance on a first playthrough. This way, you can relish the spectacle of the huge crowds, soak in the atmosphere and solve the mystery of how to approach the Templar Grand Master. Once you know where Germain is, it can take less than a minute to reach him via the most direct route, and little more than a few minutes if you also complete the opening Challenge. ■ Pack as many Stun Bombs as Arno can carry before you begin, and ideally select equipment that increases his capacity: you will need them to complete the second Challenge. |
 .
. .
.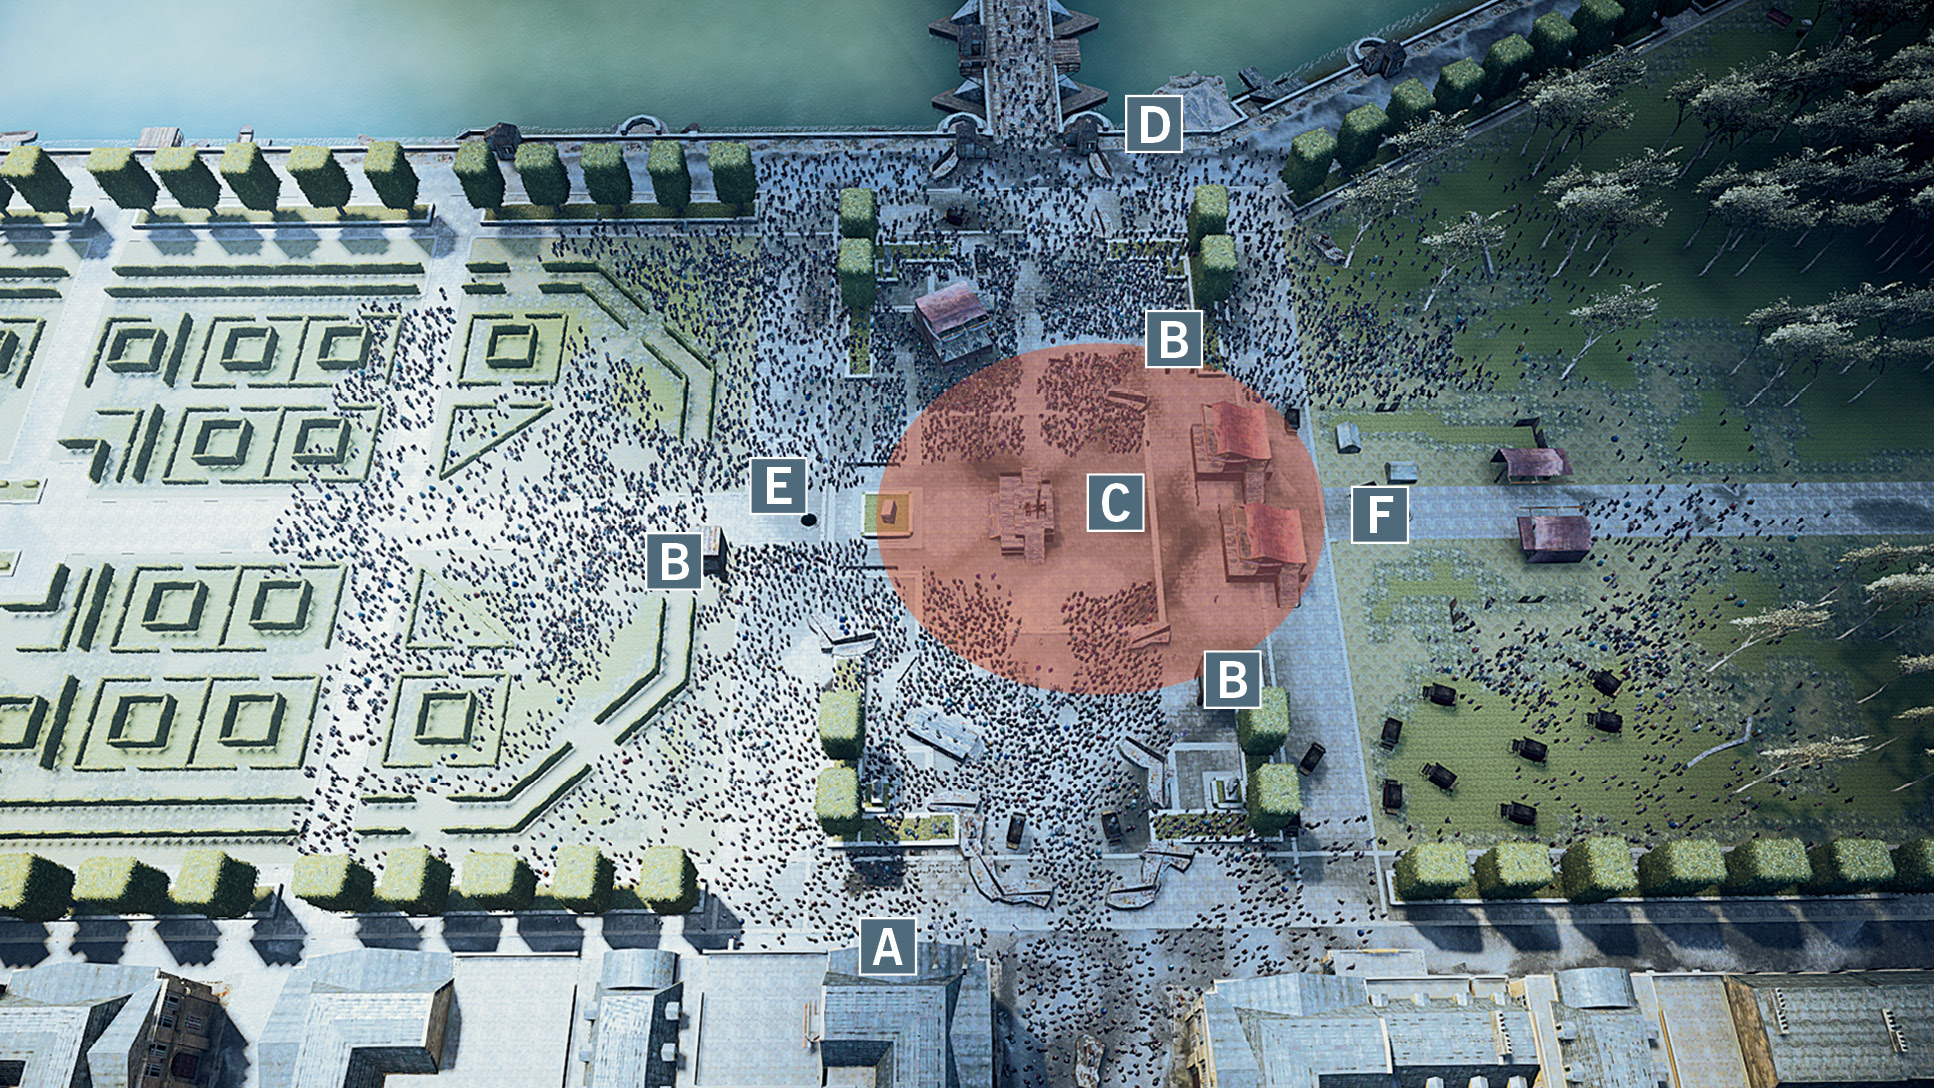
 Arno’s starting position.
 The three wooden watchtowers each have a sniper stationed on them. You must kill two of these marksmen to complete the Memory’s first Challenge.
 The Restricted Area where Germain can be found is populated by numerous guards (highlighted in blue in Eagle Vision). They will attack Arno if he trespasses.
 There is a sewer entrance by the river bank that provides access to the ladders leading to positions
  and
and  .
.
 This sewer entrance leads to
  by the riverside and
  close to the stands.
 This sewer entrance lies at the end of the linear underground tunnel. It places Arno very close to Germain, but with many guards around him.
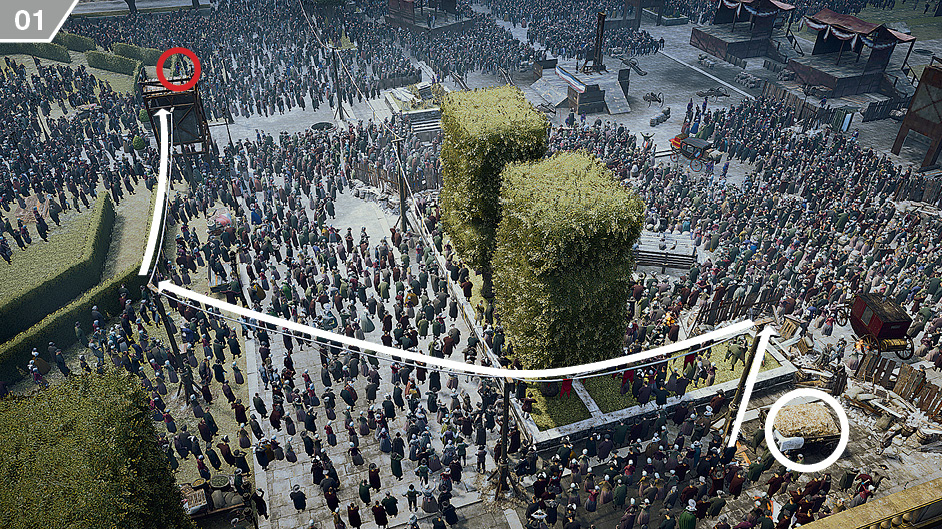
From your start position, perform a Leap of Faith into the hay cart below. You should then climb the nearby pole. Running along the ropes, approach the first watchtower and kill the sniper stationed on it.
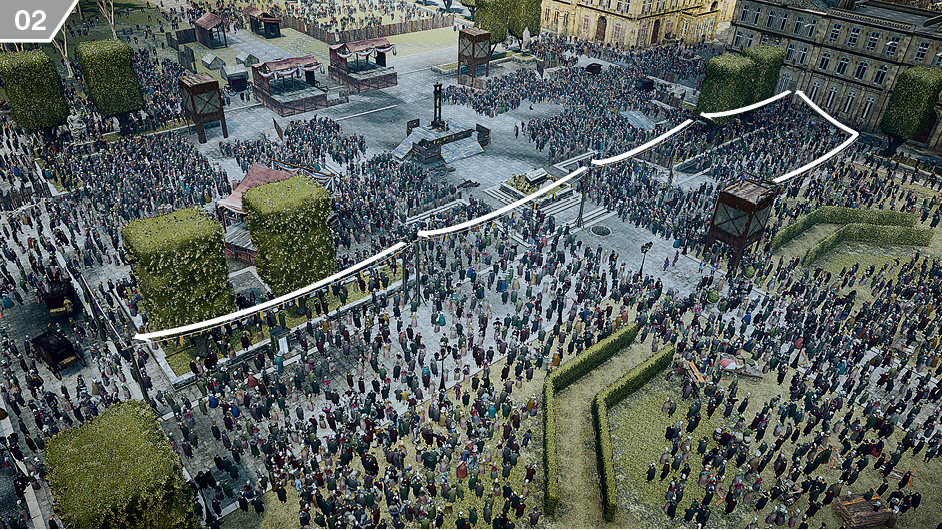
With the route now safe to cross, run along the ropes to reach the far side of the crowd.
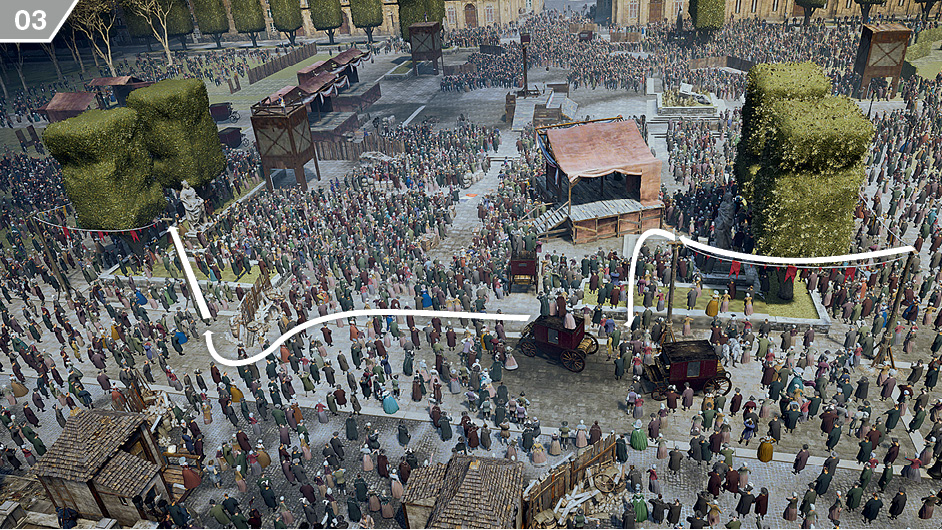
At the final pole, drop to the ground. Push through the crowds to reach another pole and climb up.
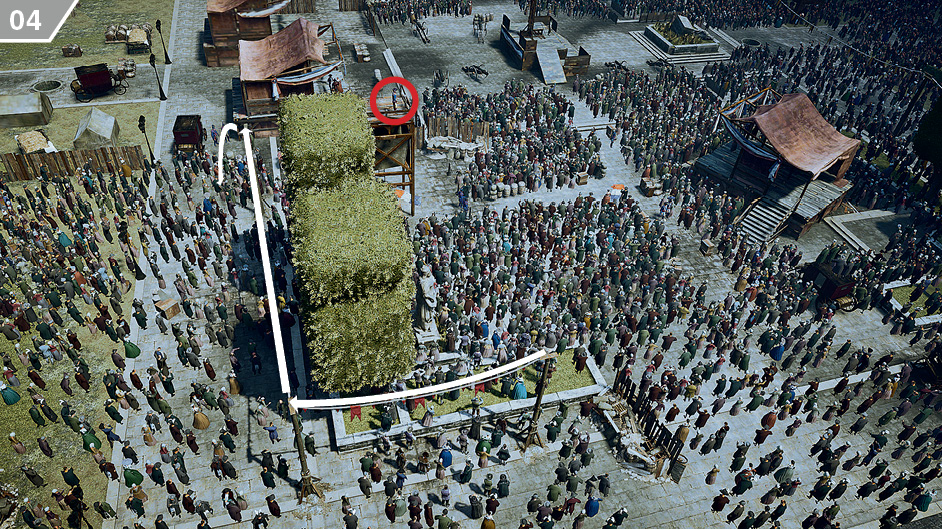
Follow the rope until you have a clear view of the sniper on the nearby watchtower, and kill him with a Phantom Blade headshot. You can then climb down and Blend with the crowd.
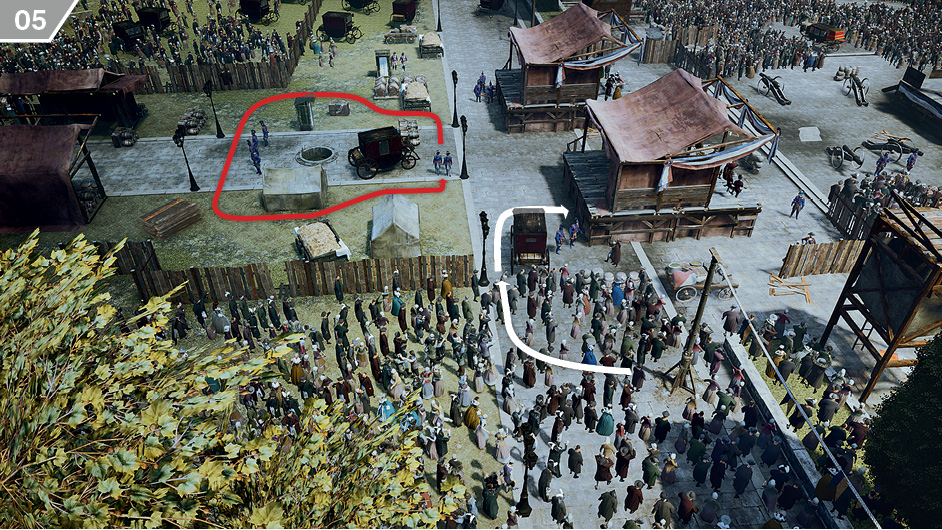
From the edge of the crowd, activate Eagle Vision to scan for patrols just inside the Restricted Area… and to identify Germain in the stand to your right. Before you continue, equip Stun Bombs in preparation. When the coast is clear, approach the back of his position to trigger a cinematic.
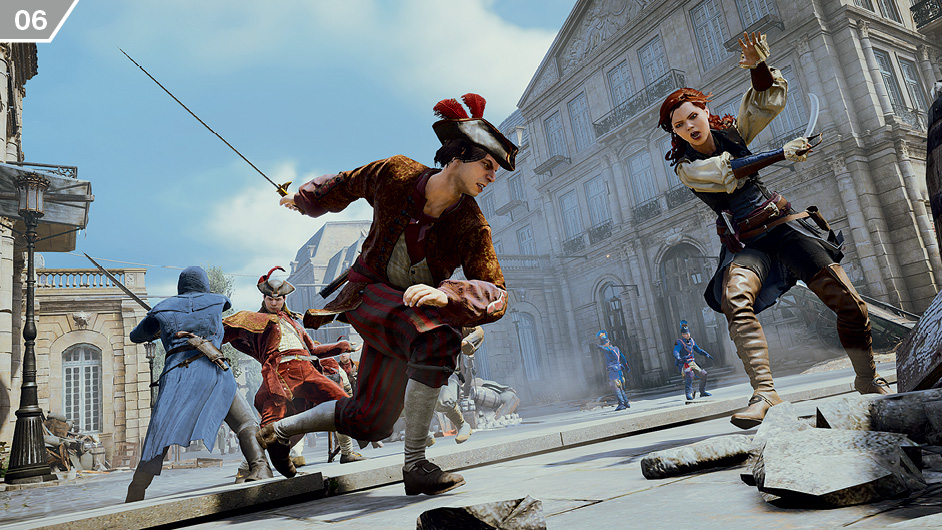
Be ready to fight as soon as the cinematic ends. Your priority during this final, combat-oriented section of the Memory is to assist Élise and follow her lead: whenever she moves, you should follow immediately. There are broadly three preset confrontations: the opening fight, another when you reach the main street, and a third not long afterwards. Unless Élise stops to fight, you should ignore all other Extremists that you pass. Stunning five opponents to complete the second Challenge won’t be difficult: employ Stun Bombs to disorient targets (or offer aid to Élise if she is surrounded) during the main fights, then switch to Smoke Bombs when you run out. After the third fight, follow Élise until the closing cinematic begins.