
Assassin's Creed Unity Guide Walkthrough
Sequence 04
 Memory 01/“The Kingdom of Beggars”
Mission OverviewChallenges■Four Phantom Blade kills: see ■ Two Cherry Bomb lures: see Notes & Further Reading■This is a good time to obtain new equipment and weapons for Arno. ■Having completed the opening Server Bridge, you will find that the first Rift is available to play. |
 .
. .
.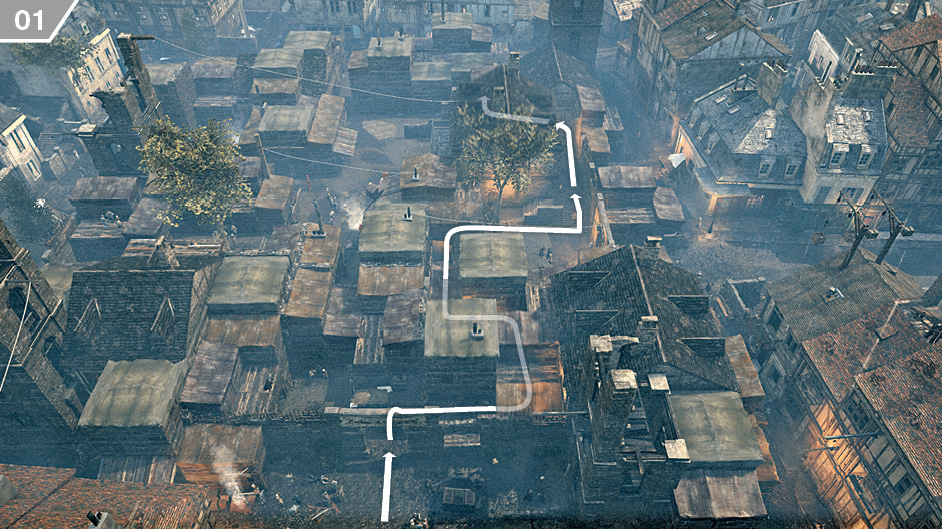
Visit the Brotherhood Sanctuary and head to the waypoint to trigger a cutscene. When it ends, Arno takes possession of the Phantom Blades and Berserk Blades. Leave the Sanctuary and head to the Memory Start marker to formally begin “The Kingdom of Beggars”. Your first objective is to investigate the area. While you are free to take in its sights, smells and sins at your leisure, you must visit the specific building within the search zone to advance the story. The most direct path from the Memory Start marker is to stay at ground level and follow the route shown here. Though you may notice guards inside the hovel behind the large building, you can safely enter to trigger a cutscene.
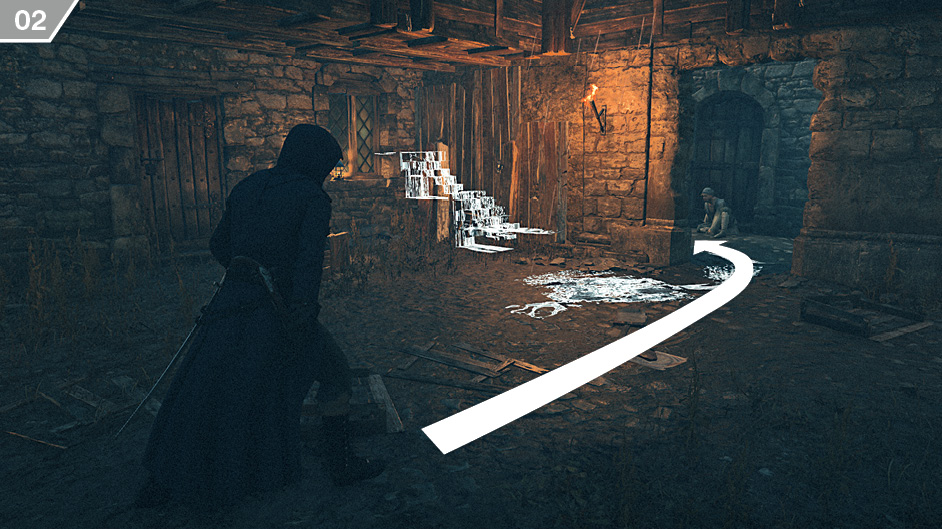
After the cinematic ends, activate Eagle Vision to detect a trail. Leave the room via the door shown here and turn left, then continue along the alleyway as it turns to the right.
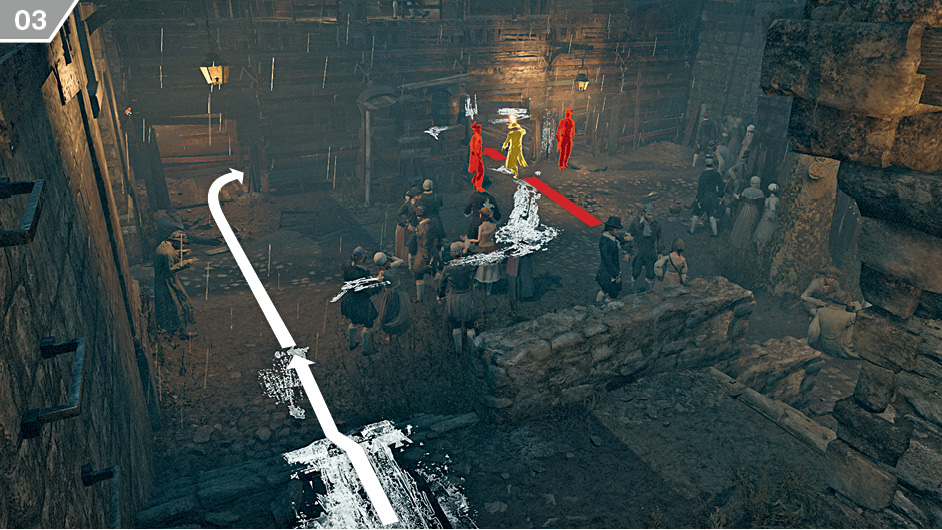
As you enter the next area, walk forward and Blend with the crowd. Activate Eagle Vision to identify La Touche, who appears in yellow. When he moves forward, go through the smaller opening to the left of the entrance he passes through.
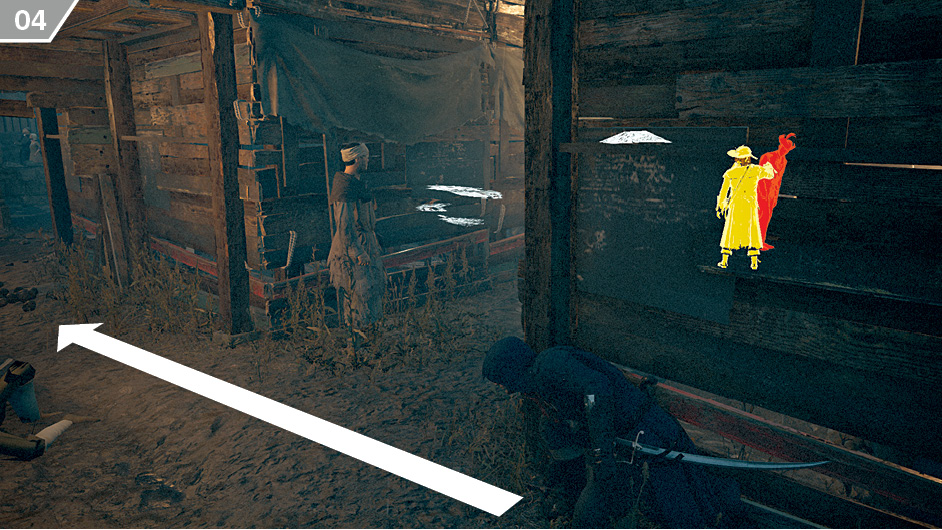
Inside the corridor, pause and activate Eagle Vision. Wait until La Touche turns his back to you, then creep stealthily out onto the street.
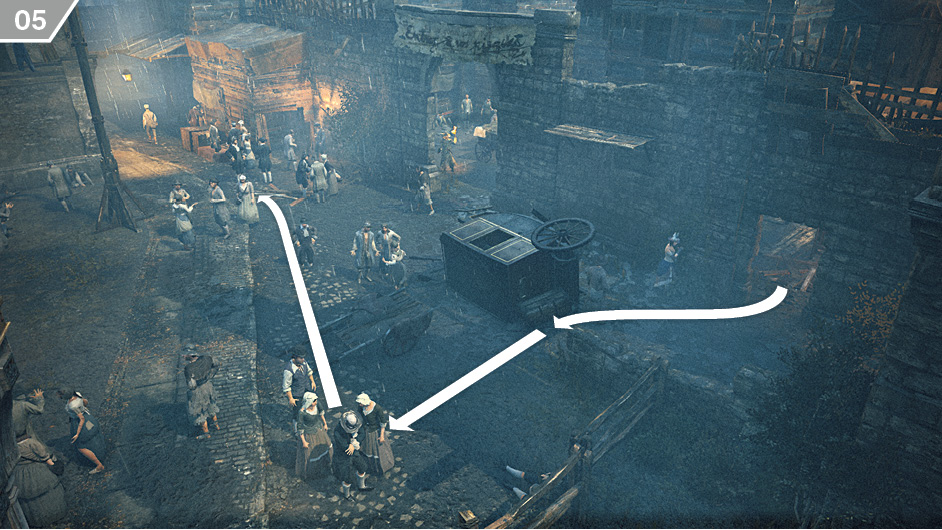
One or more guards may catch a brief glimpse of Arno as he reaches the street, so quickly move into a crowd of people to Blend. When you are sure that no one is watching, move southeast along the street to approach the dilapidated tower. Use Eagle Vision to maintain regular visual “contact” with La Touche.
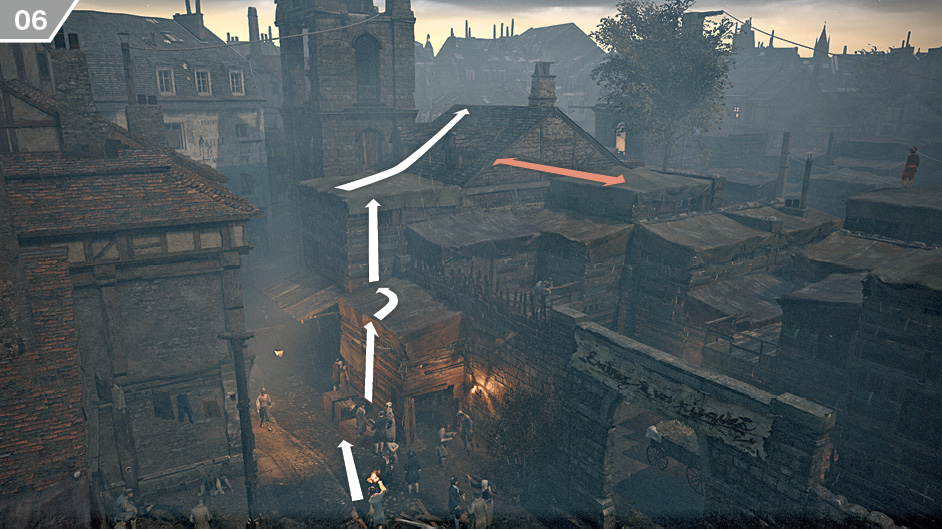
Climb to the roof of the house next to the tower, but stay on the near side of the sloped rooftop for now and observe La Touche making his rounds via Eagle Vision. There is a sentry on the opposite side of this roof who is a suitable first target for the Challenge to complete four kills with the Phantom Blades, but it’s prudent to wait until La Touche moves safely to the south before you strike; a body landing in his path will delay his movements.
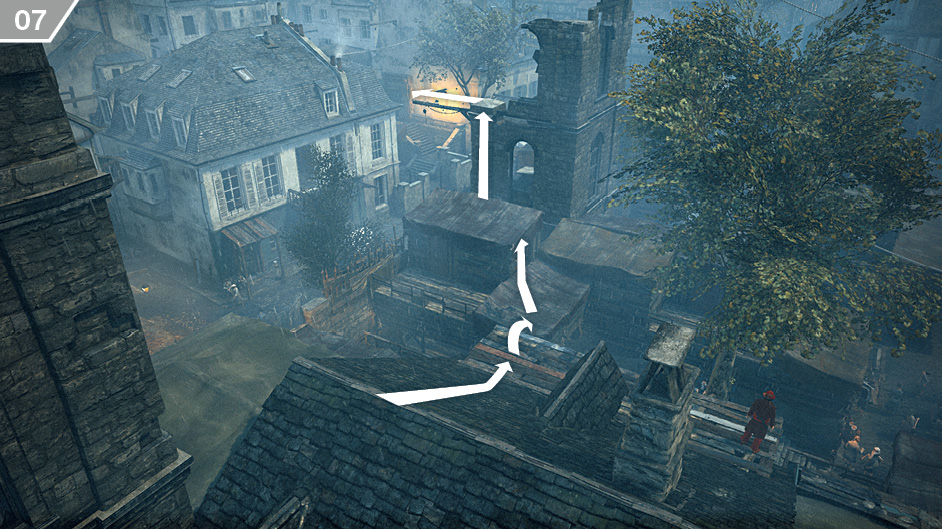
Free run to the smaller ruined tower and climb onto the wooden beam. From there, look down to the gate (to your right, below) and activate Eagle Vision to identify La Touche and trigger a cutscene. When this ends, you obtain a Challenge to distract two guards with Cherry Bombs.
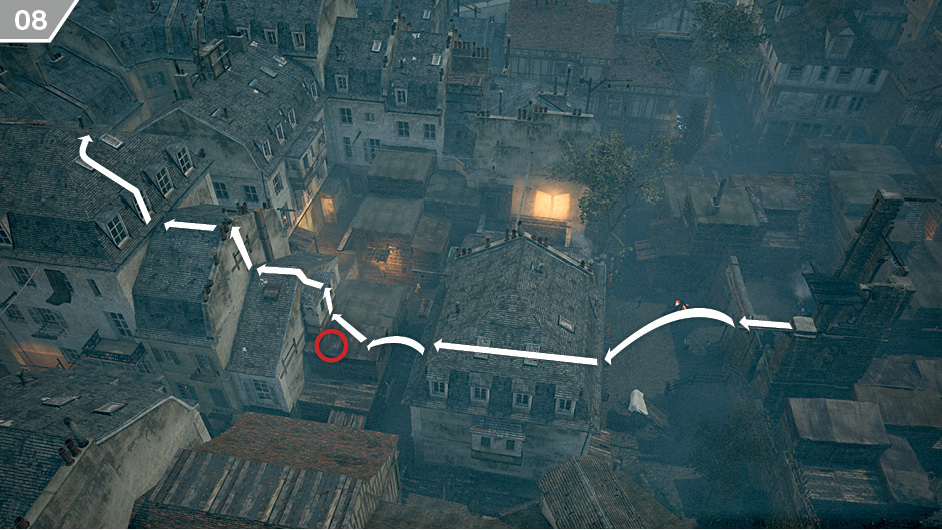
The Restricted Area that La Touche enters is heavily guarded, but you can immediately climb back to the same wooden beam that you were on before the cutscene for an easy rooftop infiltration. Follow the route shown here to reach a position to the south. Eliminate the patrolling guard with the Phantom Blades.
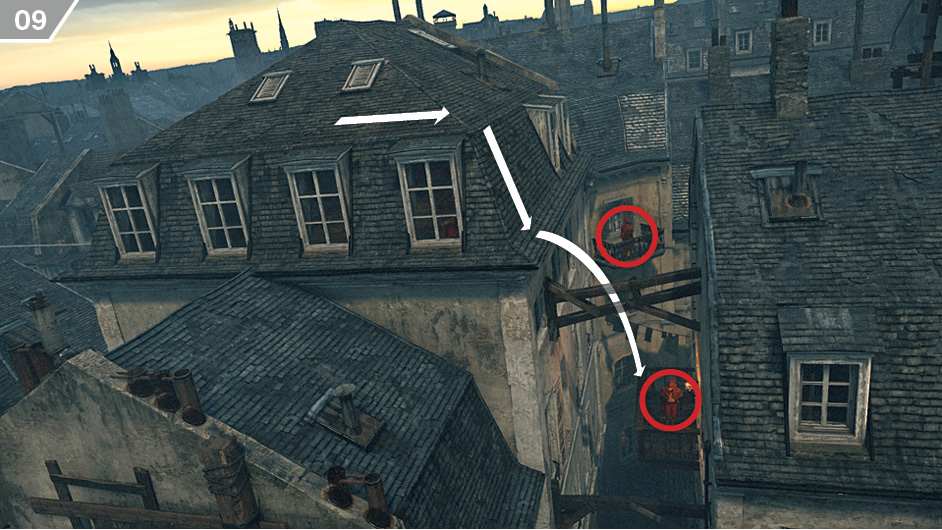
From the rooftop, there are two sentries to neutralize before you jump to the balcony below your position. Use the Phantom Blades with both to complete the Challenge.
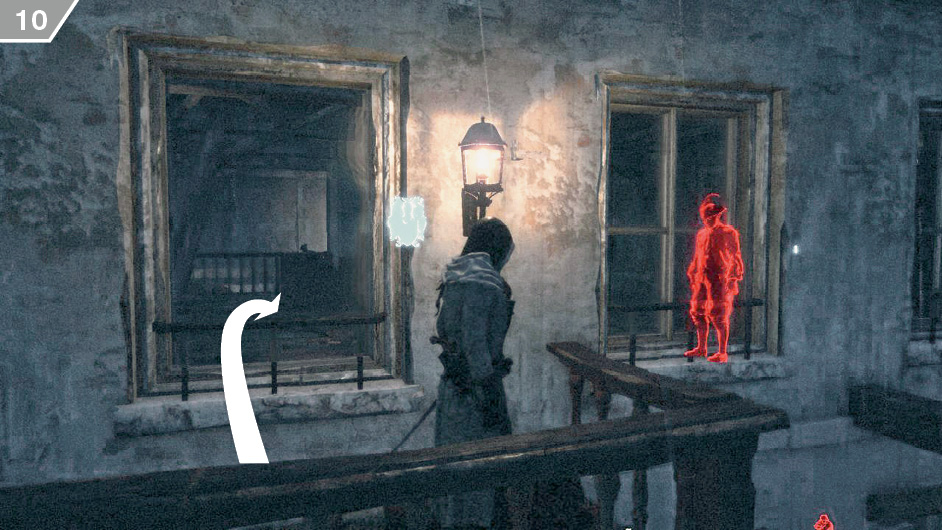
Drop down to the balcony and hide behind the wall to the right of the open window. Activate Eagle Vision to identify a guard in the room. You can easily jump through the window and stab him from behind for a quick kill if you wish.
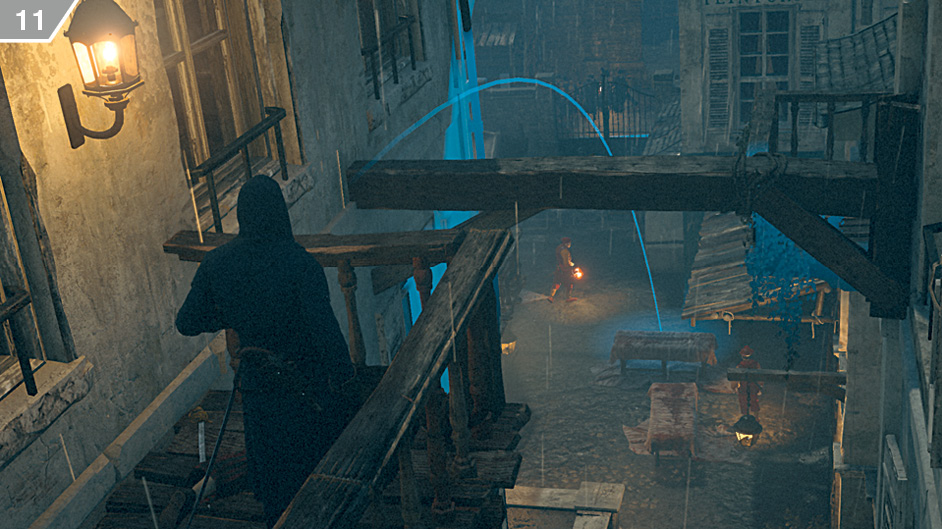
After collecting the Artifact clearly visible on the wall, head down the stairs. On the next floor down, activate Eagle Vision to detect La Touche in the adjacent room, then interact with the door to trigger a cinematic. When this ends, you can backtrack to the balcony to escape from the highlighted area via the rooftops. Before you depart, though, throw a Cherry Bomb in the direction of the main gates to complete the second Challenge if you have yet to do so – the concentration of guards in that area should mean that you can fulfil the required quota with a fairly casual throw.
 Memory 02/“Le Roi Est Mort”
Mission OverviewChallenges■Three air assassinations: see ■ Two kills with the Phantom Blades during the final approach to le Roi des Thunes: see Notes & Further Reading■There are many ways to complete this open-ended mission, and the following annotated map highlights some of the main options at your disposal. Feel free to replay the mission and experiment! ■Our walkthrough on the page to your right assumes that you complete two key tasks above ground (blocking the chimneys and protecting the beggars) before you enter the sewers. If you don’t, enemy configurations in the initial part of the infiltration will be different, and the final escape will be more difficult. |
 .
. .
.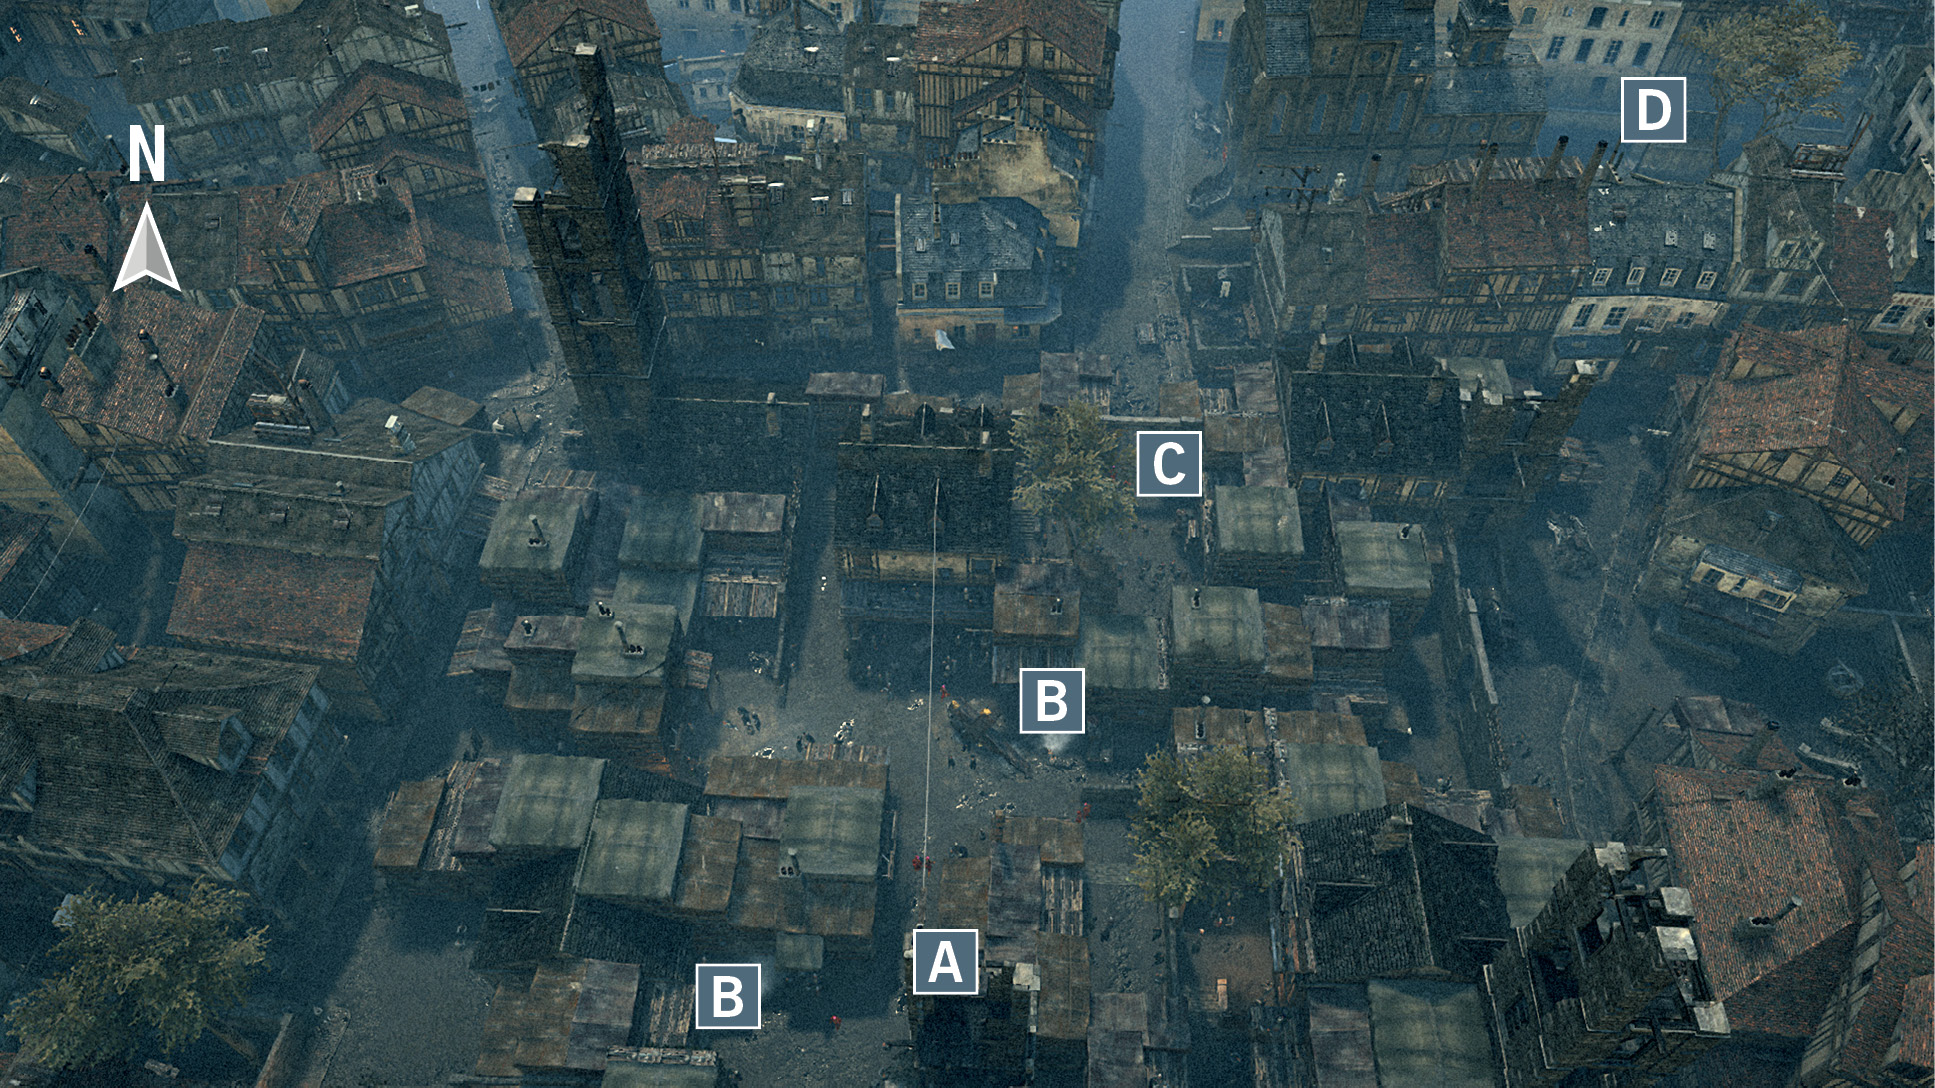
 This is Arno’s starting position as the Memory begins.
 There are two chimneys that enable the (clearly visible) smoke from fires and torches in the sewers to escape. You can approach both of these and block them, which – though it will not be immediately apparent – will make your eventual escape from the underground area much easier.
 You will find beggars in this position who, dissatisfied with their rapidly diminishing lot in life (not to mention the prospect of enforced dismemberment) will attack Templar thugs as you approach their position. If you jump into the fray and protect them, you can instigate an uprising. This will reduce the number of guards stationed in the sewer tunnels, making your approach to le Roi des Thunes much easier. It will also cause an immediate commotion on the street leading to the sewer entrance.
 Enter this crypt to reach the underground sewer network.
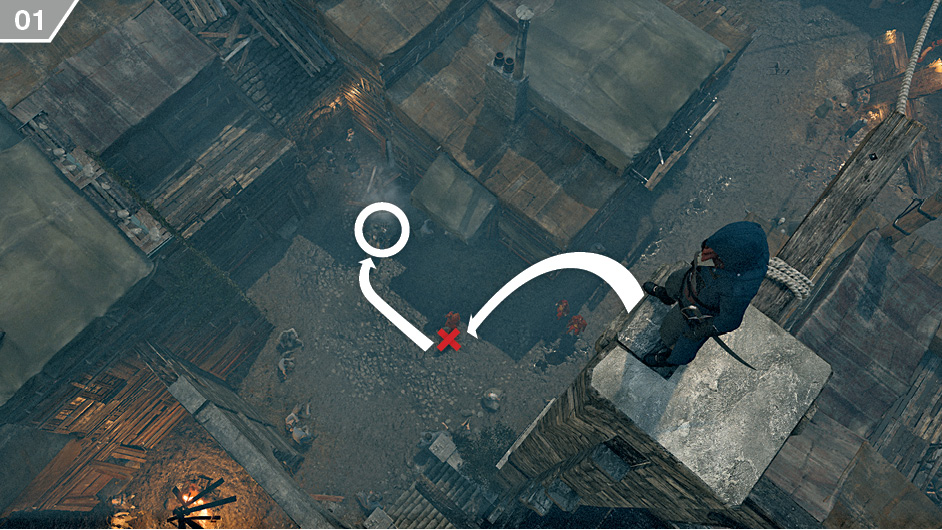
From your starting position, turn left and study the area below with Eagle Vision. You can obtain an easy air assassination for the first Challenge on the guard situated below. With that accomplished, approach the nearby chimney and press  /
/ to block it. If you quickly climb back up to a nearby rooftop and wait out of sight, you can air assassinate at least one other Extremist when a two-man patrol pauses to examine the corpse of your earlier victim.
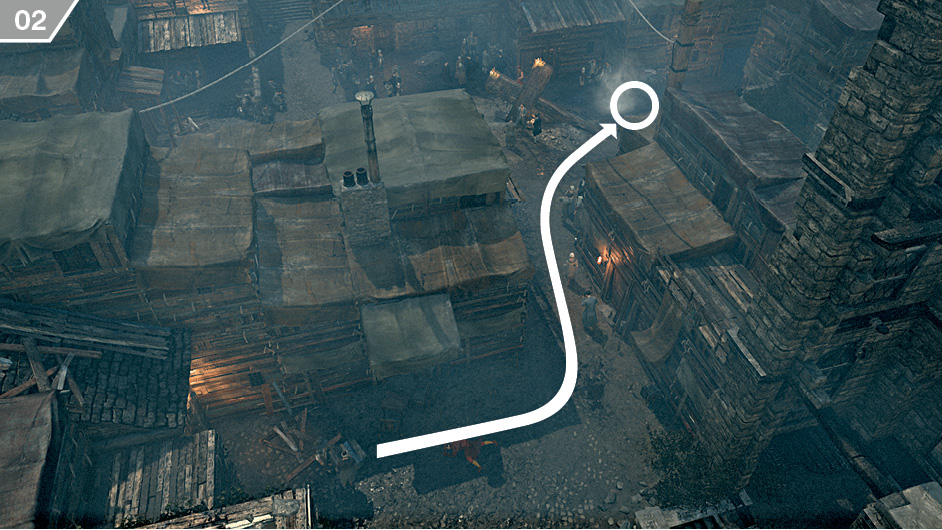
By either Blending with the crowds to avoid detection or by crossing the rooftops, make your way to the second chimney and, as before, interact to block it.
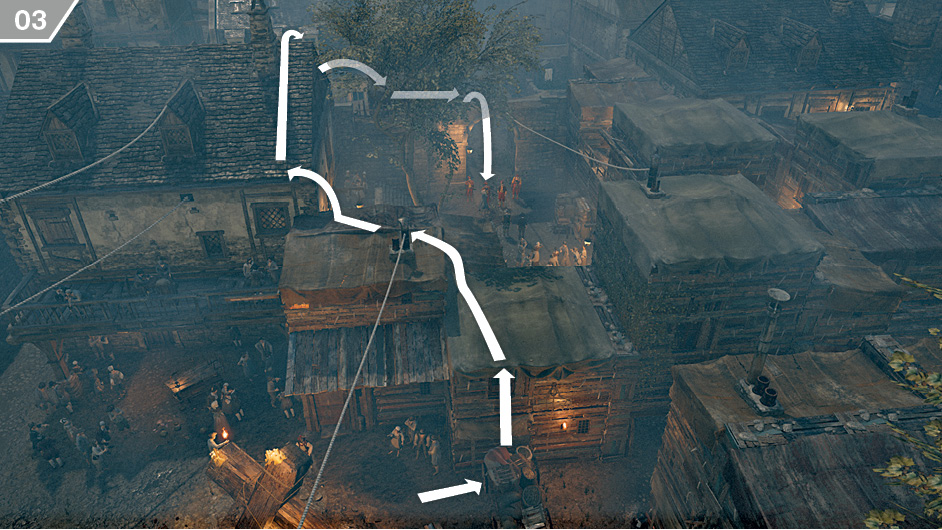
From the second chimney, climb as directed in the screenshot above to see a confrontation between Extremists and a group of beggars (with the latter highlighted in green with Eagle Vision). Join the fight with an air assassination to complete the Challenge, then protect the beggars until the battle ends.
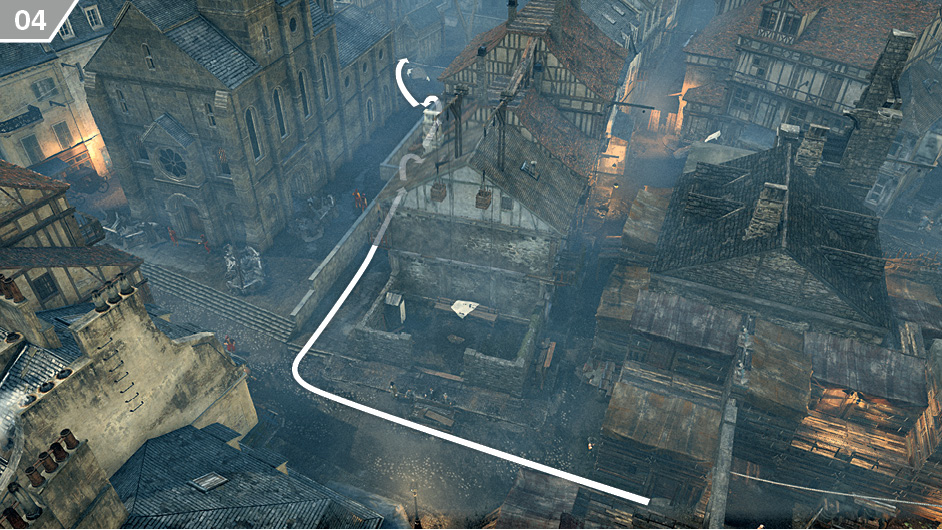
After assisting the beggars, follow the route shown here to reach an open crypt behind the church. Two Extremists will emerge from the entrance as you approach: by staying behind the wall, you can avoid combat here. If you have yet to do so, note that you must complete the air assassination Challenge before you enter the sewer system.
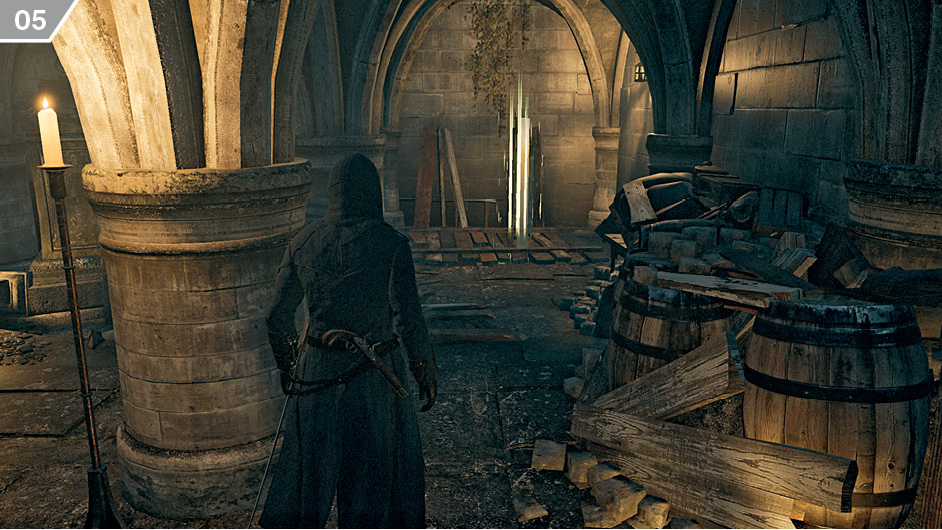
Head south through the crypt, eliminating the unwary guards inside with quiet assassinations, until you reach the position shown here. Press  /
/ while standing close to the wooden board to enter the sewers below.
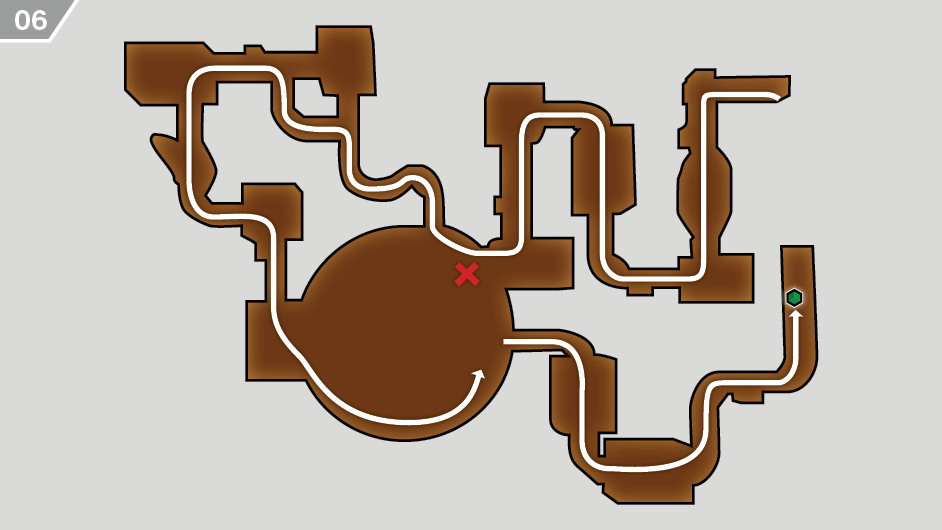
With Arno having fomented a minor riot by assisting the beggars, a brief cutscene will show Extremists leaving the tunnels to attend to the unfolding drama on the streets above. Your map and mini-map show an outline of the tunnels, which should prevent you from becoming lost. As the route is broadly linear, we will offer advice on major junctions and areas where you may run into conflict.
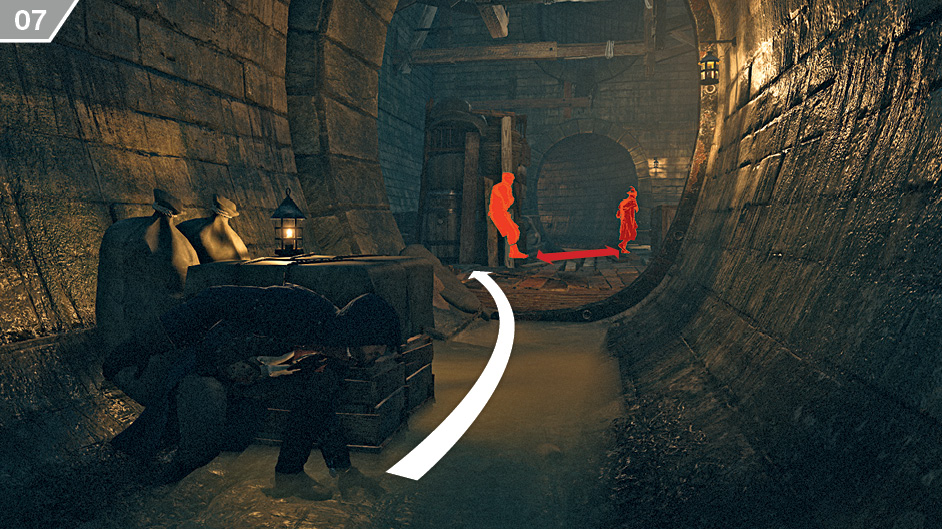
Follow the sole route through the sewers until you reach the position shown in the above screenshot, then eliminate the two Extremists with Hidden Blade kills when one guard separates from his companion.
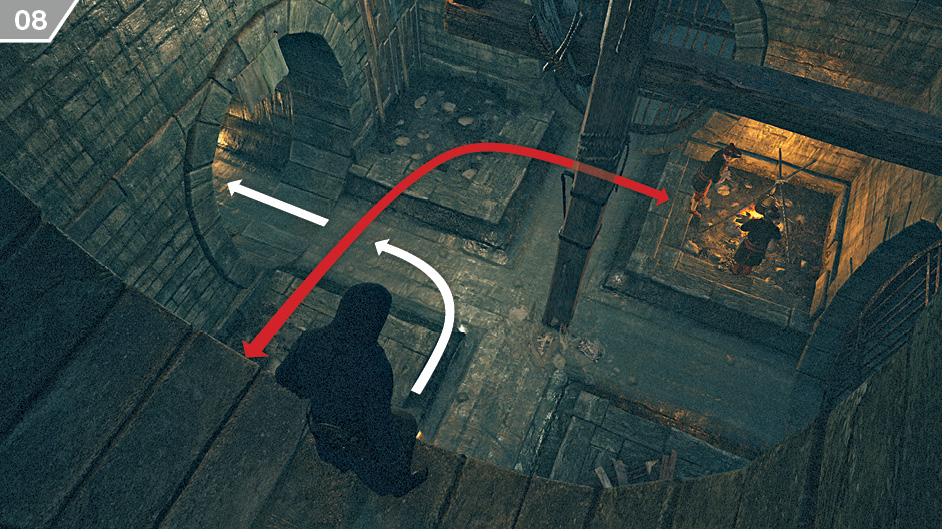
At the next junction, you need to go through the tunnel entrance below your position, as marked on the screenshot. You can either wait until the Extremist joins his companion at the fire to slip through or eliminate him with an air assassination before you continue.
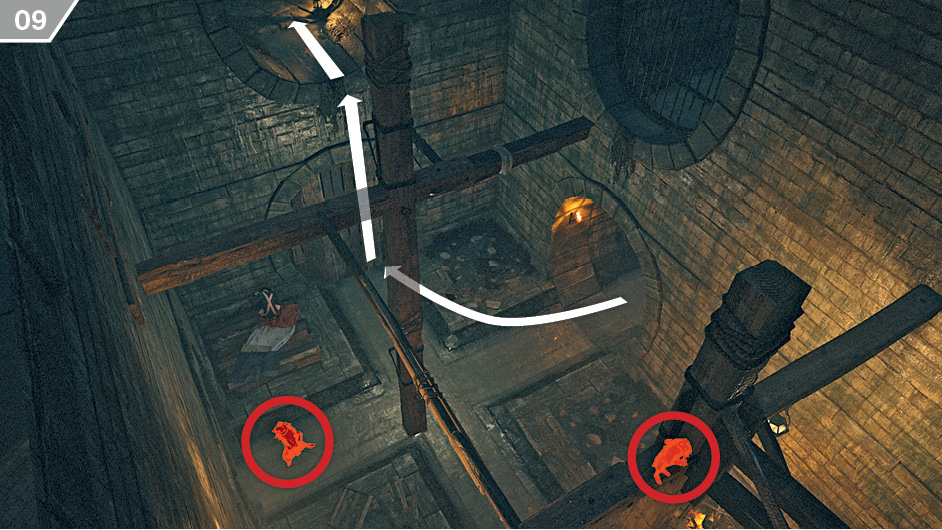
When you approach the end of the next tunnel, use Eagle Vision to identify some guards in the junction area. There is no need to engage these: simply turn right and climb to the tunnel opening above. Continue forward to trigger a cinematic interlude.
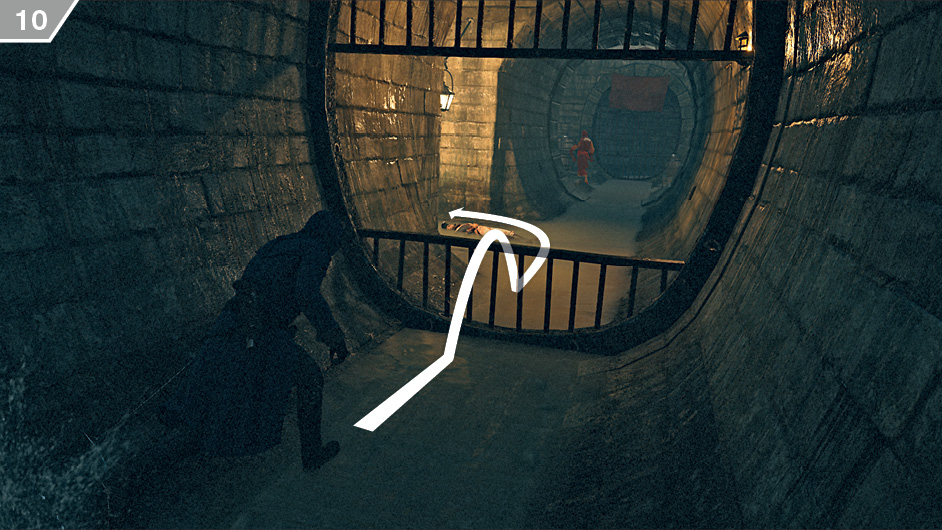
Go through the only open tunnel and stop when you reach the junction shown here. The left-hand path enables you to bypass three guards; take another left when you reach a junction.
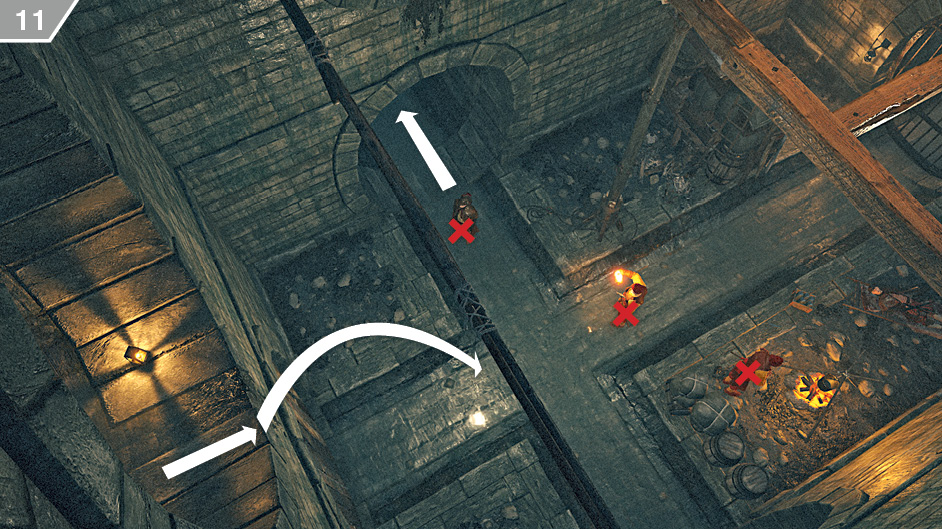
At the end of the tunnel, jump to the wooden beam and watch the three Extremists below. The most economical way to deal with them is two Phantom Blades and an air assassination for the third. However, ensure that this leaves you with at least two Phantom Blades to complete an imminent Challenge.
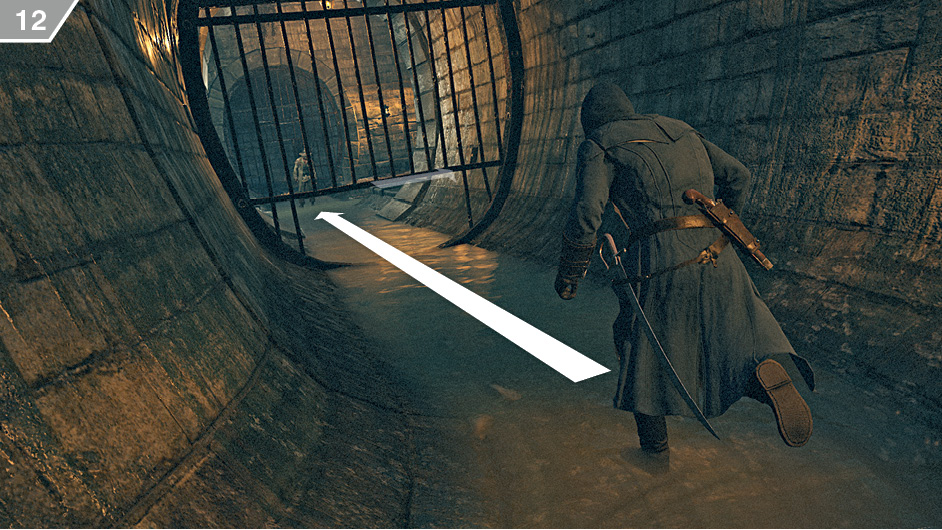
Continue through the tunnels until you reach this position. Don’t worry about La Touche in the tunnel ahead: he will move on without incident when you slide through the gap (hold / as you run towards it). Take a right on the other side; when you reach the next open area, climb the ladder to your left.
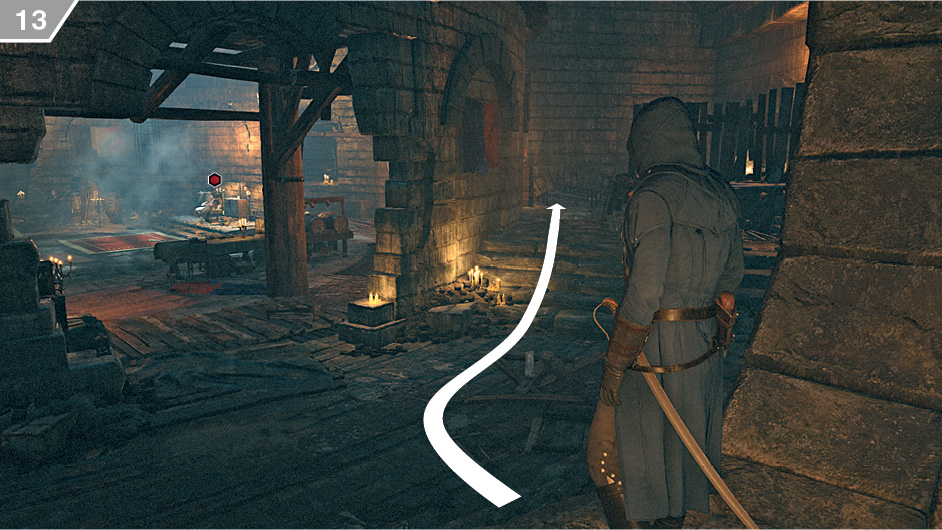
Though the second Challenge (completing two Phantom Blade kills) is activated at this stage, it’s wise to avoid open conflict in the lower area of the hideout. The figure on the central throne, as a quick look around the area with Eagle Vision should obliquely reveal, is a decoy: Le Roi des Thunes has organized his men to spring an ambush. To avoid a pitched battle, sneak to the position shown here and slide through the low gap to reach the other side of the wall.
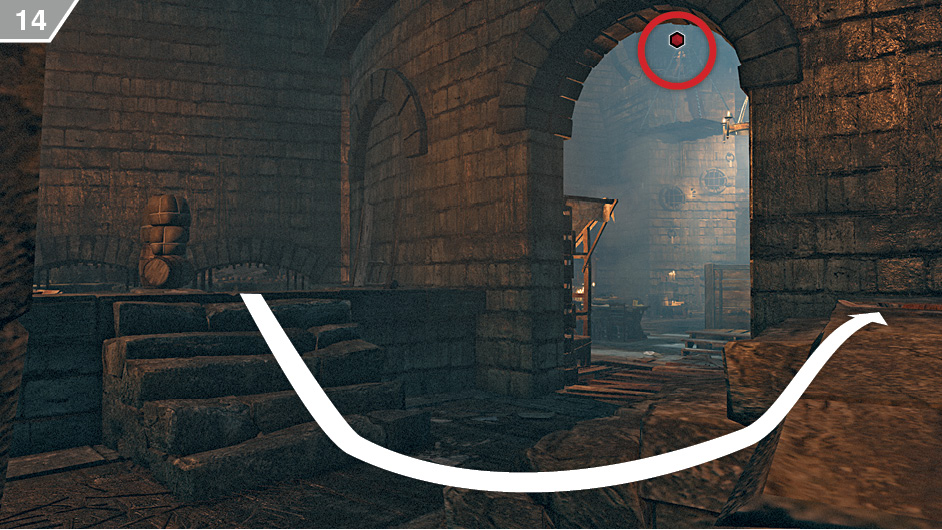
From this position, behind the throne, you can employ Eagle Vision to identify le Roi des Thunes on a platform overlooking his hideout.
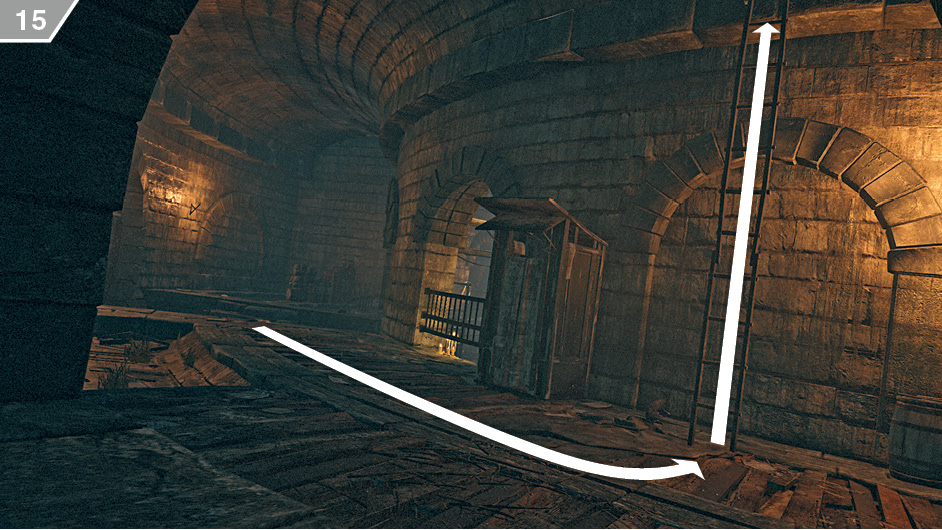
Climb the nearby ladder to reach the platforms lining the inner area of the hideout.
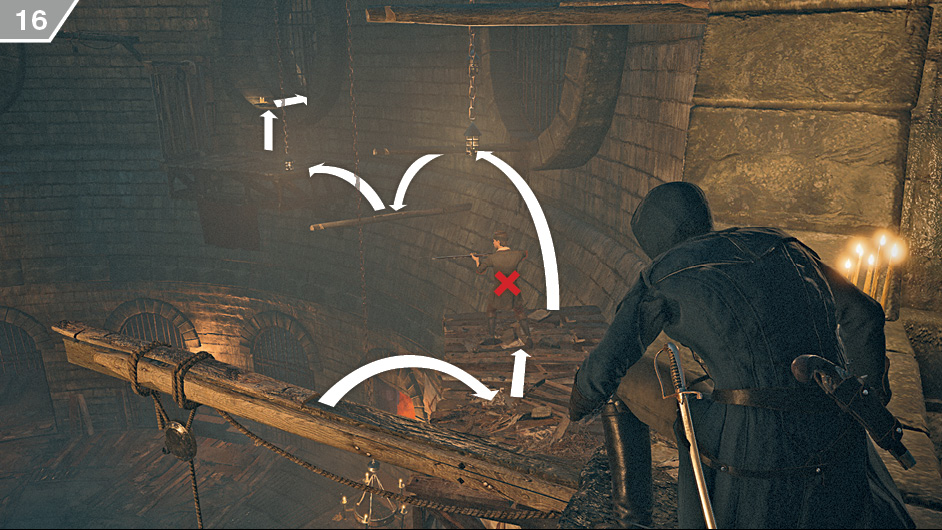
The king of beggars is located on a platform opposite your position. While it is technically possible to employ distraction techniques to ensure his gaze is averted, there’s no actual need to do so. Instead, kill the hostile on the nearby platform and make a break for the locked door in the above screenshot. When you reach it, pick the lock.
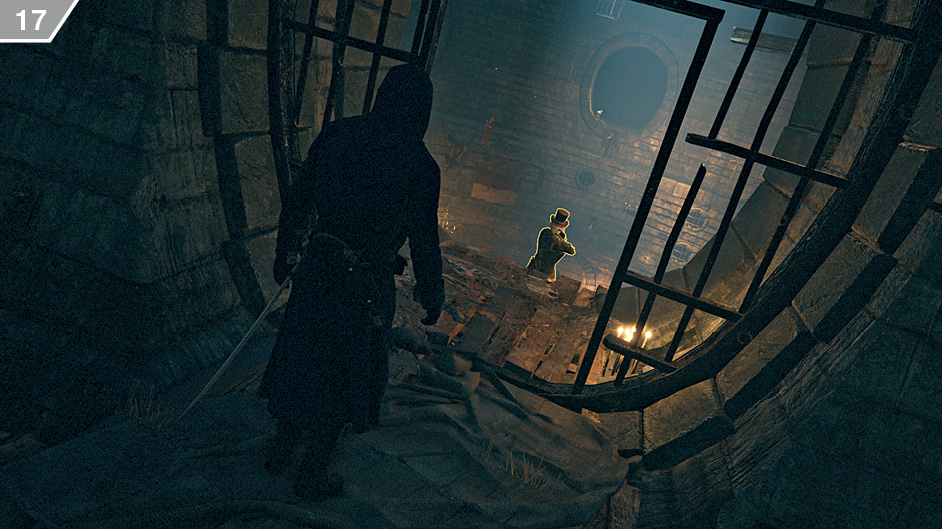
Follow the tunnel to arrive at a position behind your target, then step forward and assassinate him: as with all missions of this ilk, the mortal blow must be delivered with Arno’s Hidden Blade, but you can land an easy Phantom Blade headshot to advance the related Challenge.
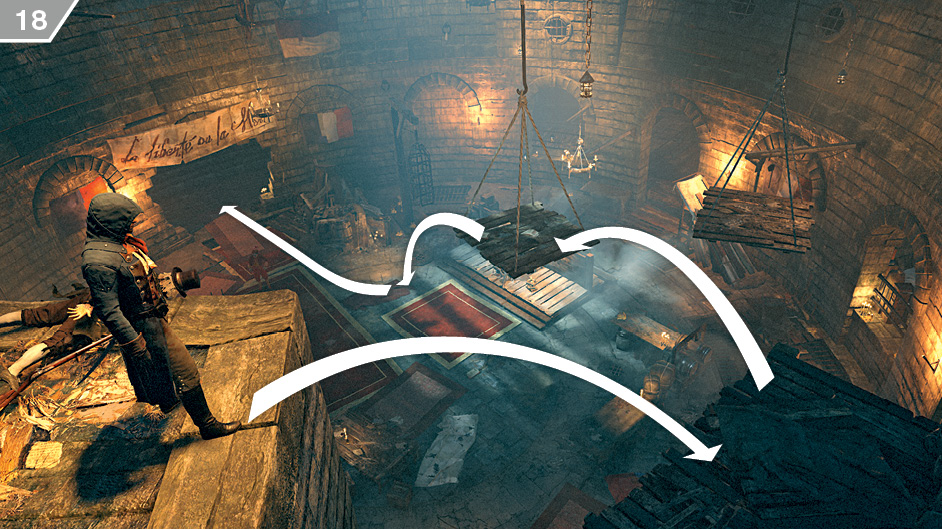
If you have not yet completed the Challenge for Phantom Blade kills, you can do so with assailants on the lower level before you descend. Once you are ready, make your descent as shown here and follow the waypoint markers to escape from the sewers. The first stretch of tunnels leading to the exit is filled with guards but, thanks to your efforts above ground, the smoke greatly reduces their ability to detect Arno. Pay them a wide berth as you proceed on the linear path to the exit, using the map and mini-map to guide you along.