
Assassin's Creed Unity Guide Walkthrough
Sequence 03
 Memory 01/“Graduation”
Mission OverviewChallenges■Three cover kills: see ■ Keep up with Bellec: see Notes & Further Reading■Sequence 03 begins with an introduction to the skills that are unlocked via progression in the main storyline. ■You are also free to join and host Co-op Missions. |
 .
. .
.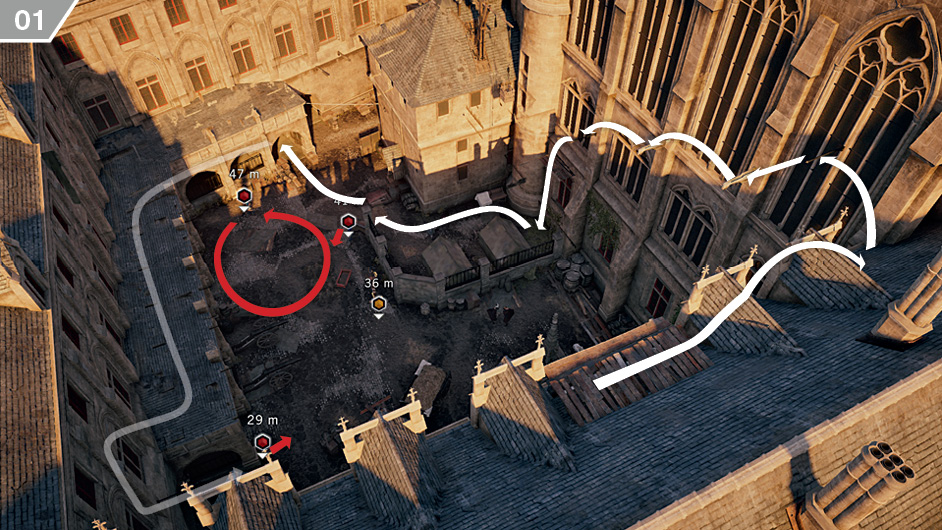
From your position on the rooftop, study the area below. Your objective here is to eliminate the trio of guards. Since you are given an optional Challenge to kill three enemies from cover positions, this makes this trio perfect targets (though you can choose to fulfill the Challenge at any point before the end of the mission instead). To perform a cover assassination, lock onto a surface with  /
/ , then press
  /
/ for a deadly strike on any target within range. You can engineer these scenarios with astute use of the Last Known Position system, luring suspicious guards to their deaths. The Challenge is not failed if Arno is detected: if you run from your assailants and turn a corner, moving out of sight, you can quickly lock to the surface (
 /
/ ) and eliminate a pursuer as they run within range. Once all three guards are dead, approach the alarm bell and press
  /
/ to sabotage it.
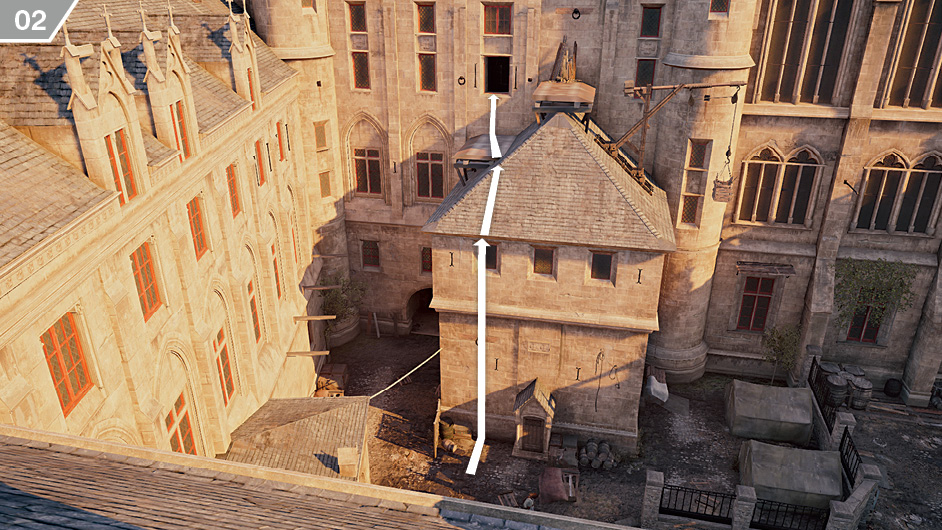
Assassinate the target as directed, then collect the evidence from the body with  /
/ . When soldiers pour into the area, quickly drop a Smoke Bomb and follow Bellec’s lead in the ensuing escape: scale the wall and pass through the building, then return to street level when he does. The second Challenge of this mission (to keep up with the Assassin as you leave the highlighted area and then travel to the Brotherhood Sanctuary) becomes active at this stage, but staying within range is easy enough at first.
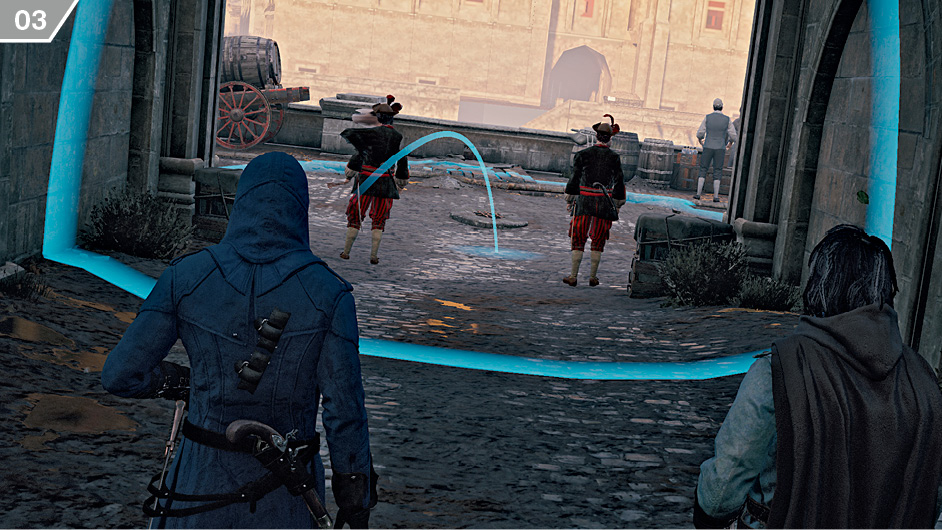
Complete the brief tutorial on throwing Smoke Bombs (hold  /
/ , aim with
  , release
  /
/ to throw), then step forward and assassinate the man on the left; Bellec will deal with his companion. If you are missing a cover assassination for the first Challenge, you can secure a kill here by locking to cover before you dispatch the man standing watch. The next part of the journey takes place on foot. Pay potential aggressors a wide berth as you follow Bellec.
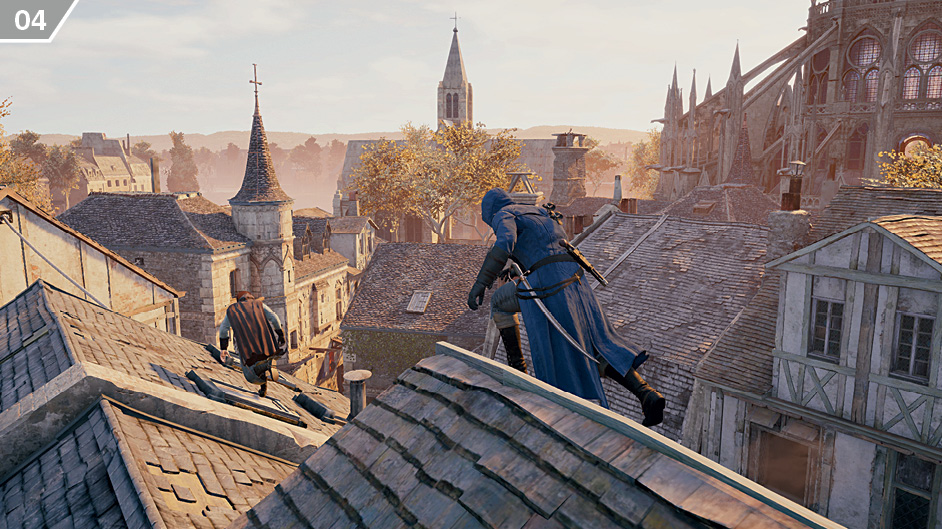
When Bellec climbs to the rooftops, the journey becomes a little more complicated. You can greatly simplify the process of keeping up with him (and therefore completing the Challenge) by remaining on top of the buildings: when he passes through windows or otherwise takes a complicated route, always look for an easier way to keep up with him.
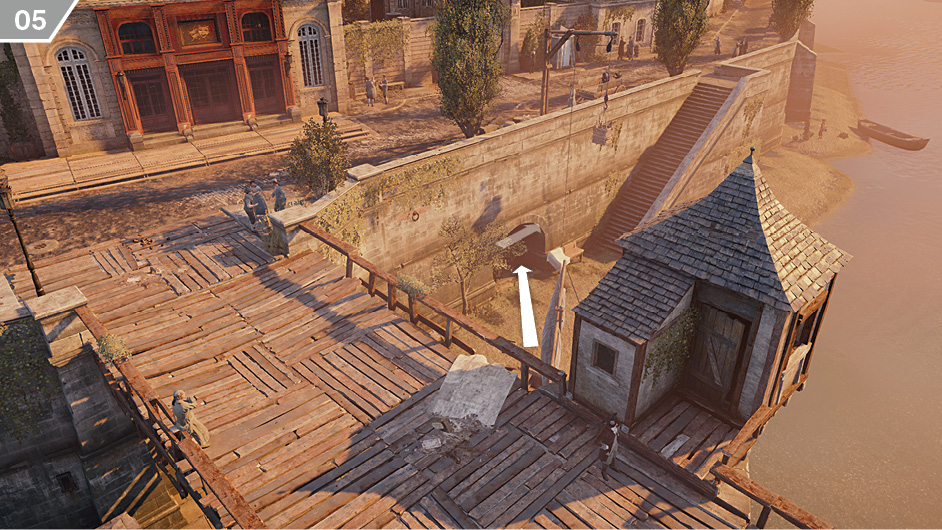
Should you lose track of Bellec, a waypoint for the Sanctuary will appear instead. When you arrive at the riverside (either with the Assassin or trailing far behind), go through the opening shown here and turn right to find a door. Press  /
/ to enter, then head for the waypoint inside to complete the Memory.
 Memory 02/“Confession”
Mission OverviewChallenges■Two kills from hiding spots: see ■ Don’t trigger any alarms: see Notes & Further Reading■The walkthrough overleaf and the overview map below offer a step-by-step guide to an optimal assassination where you also complete the mission’s two Challenges. There are many other ways to kill Sivert, and you can replay the mission at any time. Feel free to experiment, and make sure you study the map. ■The first “Server Bridge” begins immediately on conclusion of this Memory. |
 (overleaf).
 (overleaf).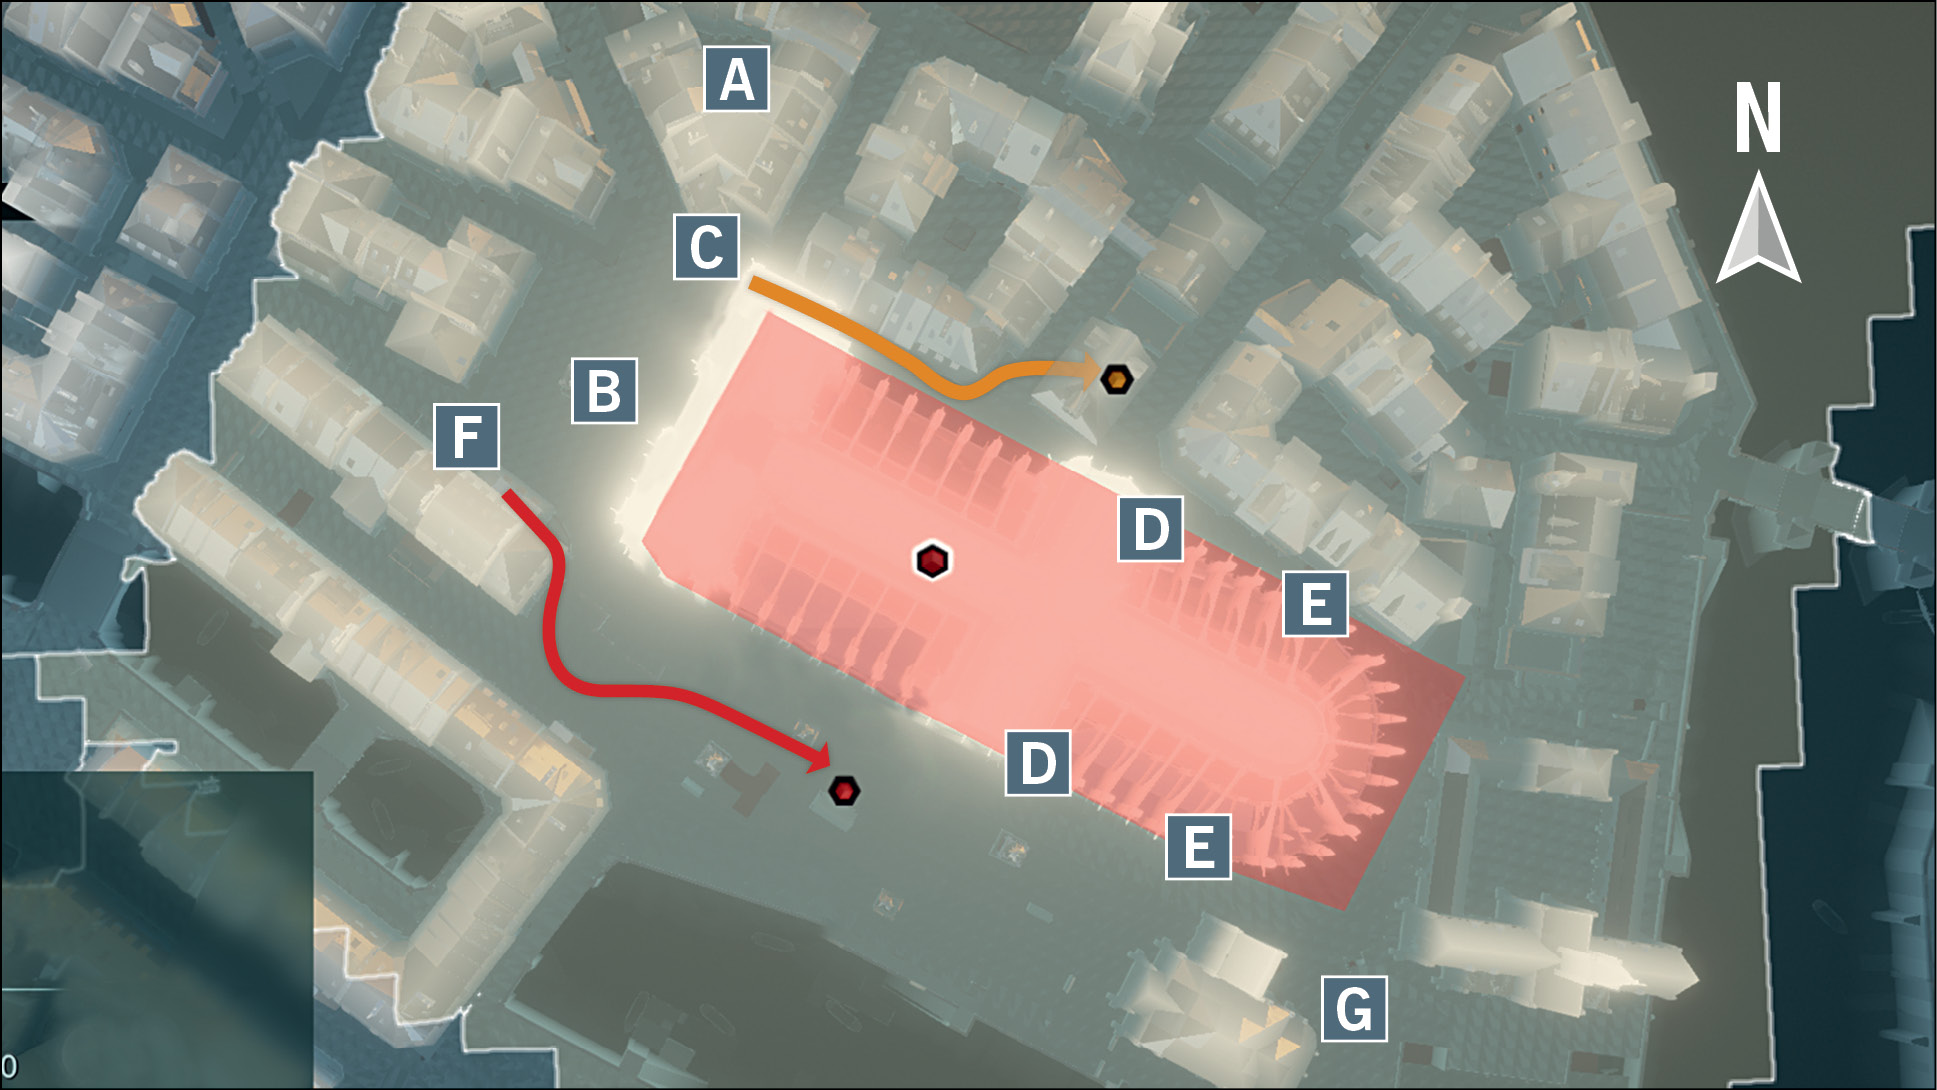
 Arno’s start position. There are many ways to complete this open-ended mission, and this annotated map highlights some of the main approaches you can choose.
 A frontal assault on the heavily guarded entrance is a foolhardy (and, most likely, suicidal) course of action. Though Sivert is not too far inside, Arno will surrender the element of surprise and likely be cut down before he can weaken the Templar for the (mandatory) Hidden Blade kill.
 Two thugs carrying keys stolen from a Notre Dame priest (as alluded to by the opening cinematic) begin in this position, then walk along Notre Dame and enter a building. You can fight them to gain the keys… or wait until a simple pickpocket opportunity arises once they come to a stop, as marked on our map.
 If you have the keys from the thugs, you can unlock either of the two windows marked in this position to gain entrance to Notre Dame – or, of greater utility, an easy escape after the deed has been done. This is the quickest way to reach Sivert without raising the alarm before you strike.
 There are two open (and unguarded) windows in these positions.
 Sivert’s associate Duchesneau begins in this position, but will walk away and enter the nearby (guarded) graveyard for a meeting with a priest when Arno approaches him, as highlighted on our map. Killing Duchesneau is a compulsory step if you wish to perform this mission’s “signature” assassination. If you lose Duchesneau after his meeting with the priest, he walks a long patrol route that goes all the way around the cathedral, and then repeats this loop.
 A sewer access at this position leads to a secret underground entrance (take the first left in the tunnel) to the southeast end of Notre Dame. This offers a fantastic opportunity for a “perfect” assassination, where you also complete the Memory’s two Challenges.
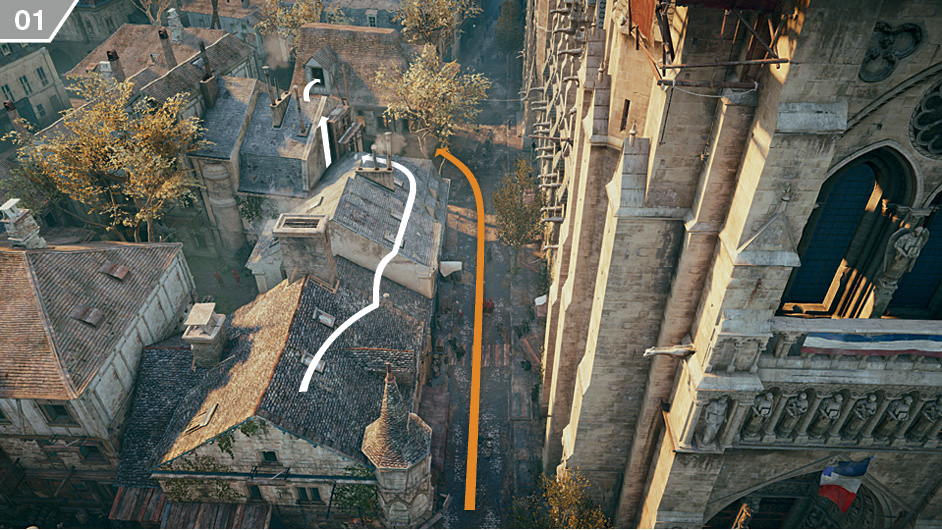
The first step is to appropriate the stolen Notre Dame keys from the group of thugs. Though not strictly essential, this will later provide you with the cleanest and quickest way to leave once Sivert is dead. From your starting position, use Eagle Vision to identify them on the street below, then follow them via the rooftops. You can fight them for the keys if you wish, starting your assault with an air assassination, but a more refined solution is to wait until they enter the building shown on the above screenshot. When they do so, head in through an open window.
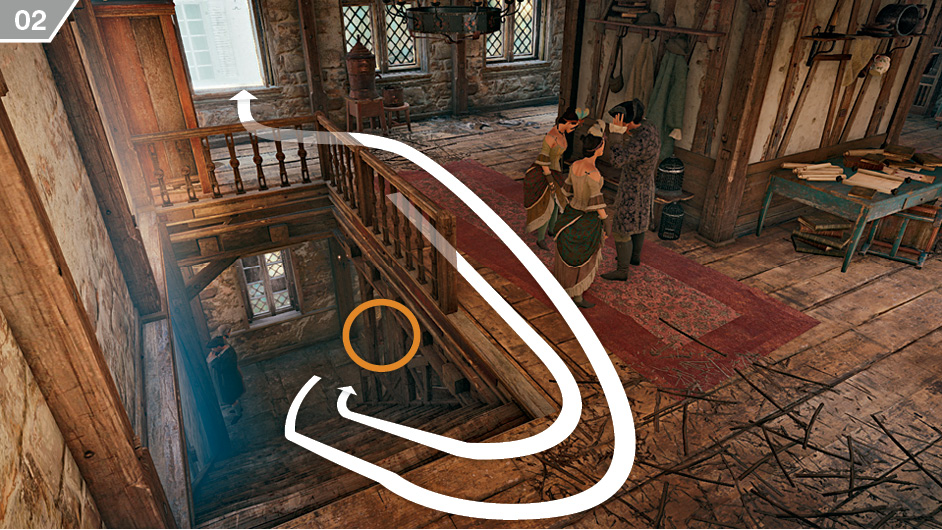
Reach the stairs shown here and use Stealth Mode to sneak down. With careful positioning, you can hold  /
/ to pickpocket the keys from the closest thug without being spotted. Leave the same way you came and return to the front of Notre Dame.
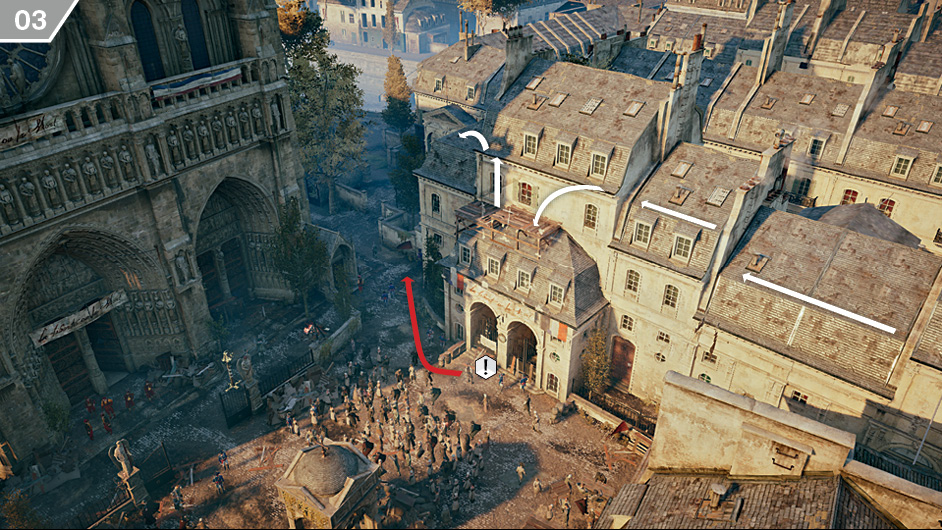
The second step is to eliminate Duchesneau, which triggers the availability of this mission’s unique kill opportunity. To avoid detection, it makes sense to climb to the rooftops and approach him from above. When you move close to his position, he will then walk to the graveyard to the northeast.
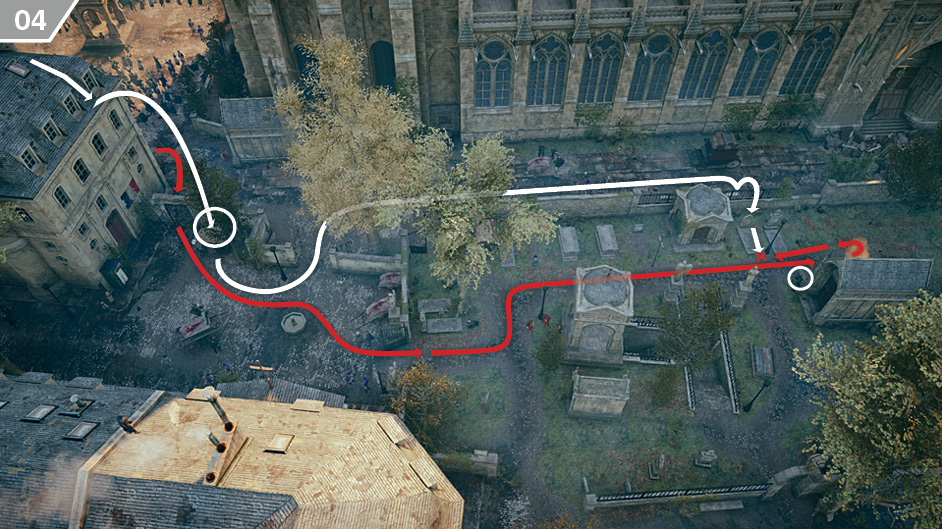
If you are quick and purposeful, you can perform a Leap of Faith into the hay cart highlighted on this screenshot and assassinate Duchesneau as he walks past. If you miss this window of opportunity, there is a second chance inside the graveyard after his meeting with a priest. Climb down and approach via the street to avoid Extremists, take up position behind the barrels when your target moves behind the crypt, then perform a cover assassination as he backtracks towards you.
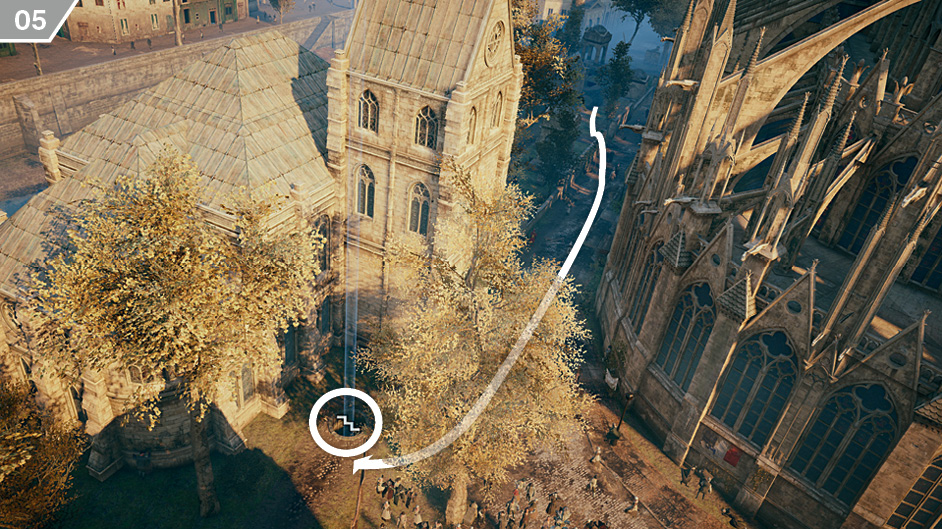
Follow the street that runs alongside the graveyard to the southeast (sprint to avoid the Extremists near the end) and locate the sewer entrance highlighted on the above screenshot. Climb down the ladder, then follow the tunnel until you reach an opening to your left. Go through, then climb the first set of steps. Approach the button on the wall and press  /
/ to open the secret Notre Dame entrance above the next set of steps. Use Stealth Mode when you reach the top.
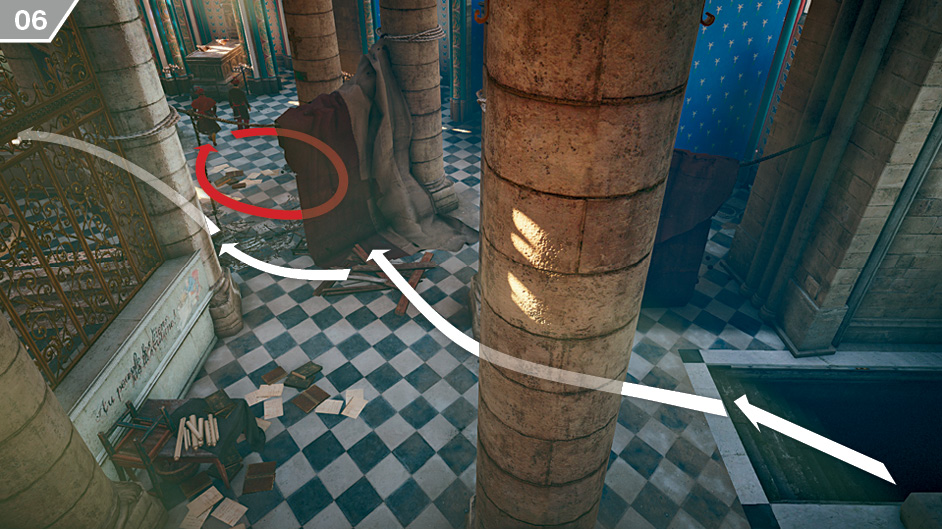
Both Challenges become active once you enter Notre Dame. You need to slip by two guards at the rear of the cathedral to reach the area where the mission-critical confessional (marked by the icon) can be found. One guard is stationary, while the other makes short identical patrols at regular intervals. Wait until both are facing away, then sneak past them. There is an easy hiding-spot assassination opportunity here, but you will have another two very shortly.
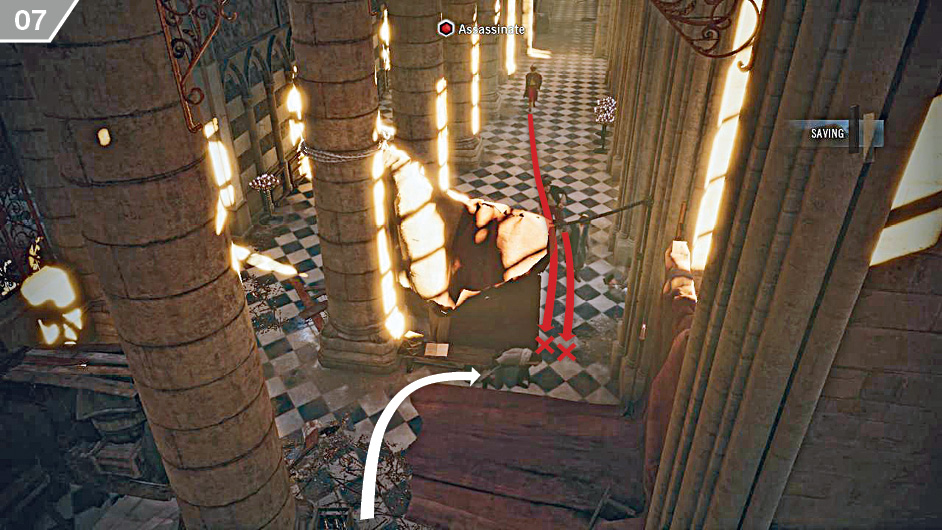
There are two guards in the confessional area that you must eliminate prior to Sivert’s arrival. Use the Last Known Position feature to lure each of them separately to the positions shown here, then perform cover assassinations when they move within range.
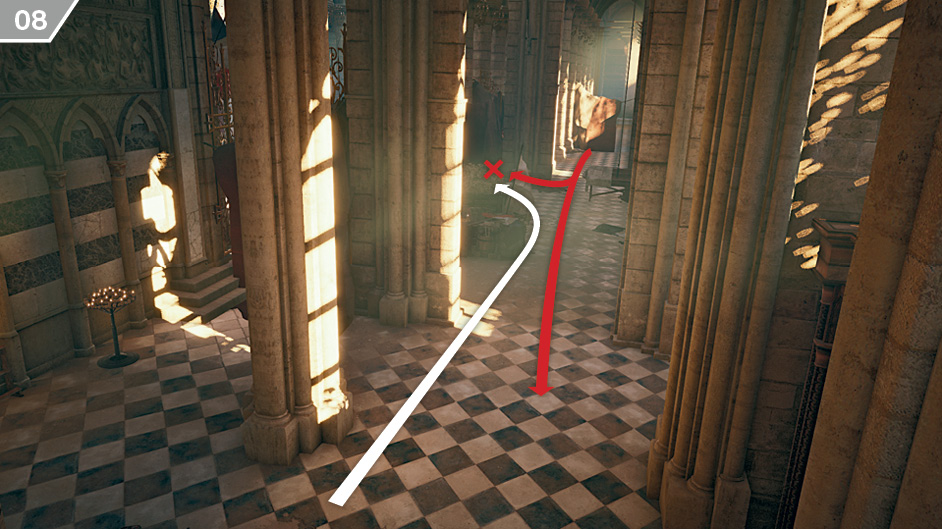
Don’t enter the confessional just yet: there’s one last loose end to tie up beforehand. Walk to the nearby hay cart and identify Sivert with Eagle Vision to initiate his patrol. As soon as he starts moving, hide in the hay cart. One of his bodyguards will break off and walk past the cart. When he moves within range, press  /
/ to complete the first hiding place assassination for the related Challenge.
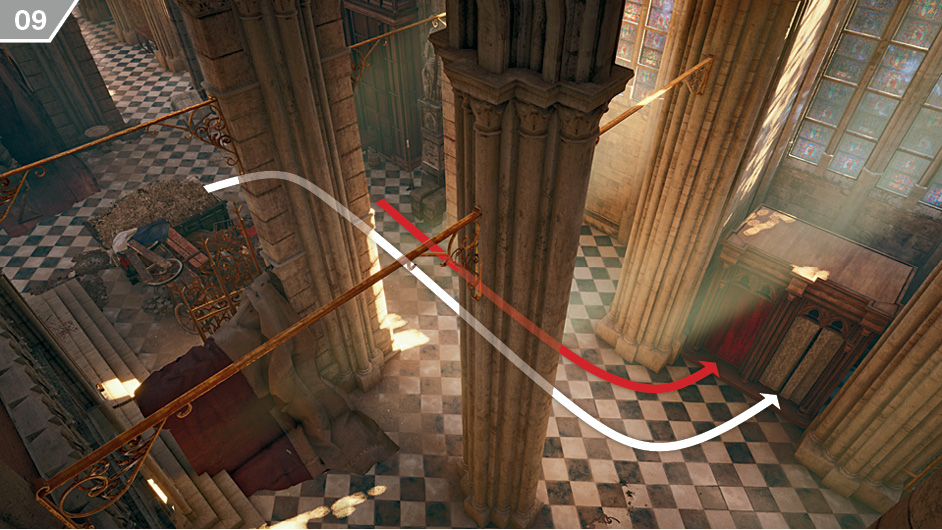
Wait until Sivert is inside the confessional, then – using Stealth Mode to avoid disturbing his guard – enter the booth on the right to trigger a cinematic. You can perform the unique kill as soon as the  /
/ prompt appears at the center of the screen, though you can wait to hear the conversation play out before you strike. Don’t delay too long, though – if you do, Sivert will leave the confessional and the unique kill opportunity will be lost. Killing Sivert in this fashion completes the Kills from Hiding Spots Challenge.
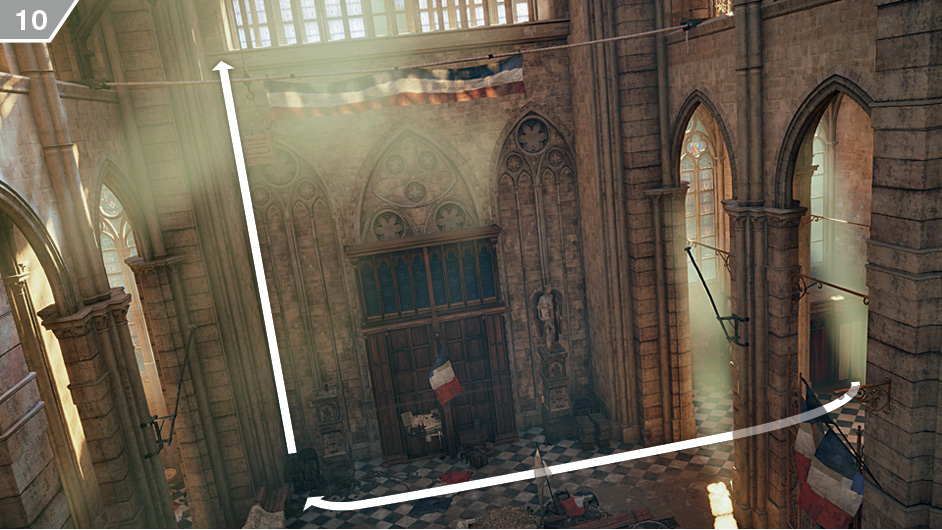
Use the lift close to the hay cart to reach the upper balcony.
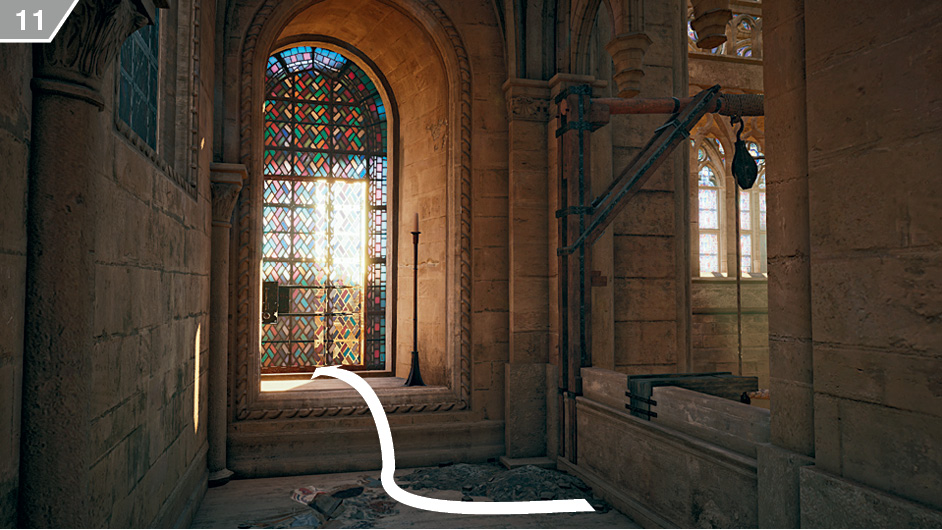
At the top, turn right and unlock the exit with the keys you secured at the start of the mission. (If you do not have these keys, note that you will need a “Locksmith” skill to pick the lock.) Outside, use the nearby ropes to reach an adjacent building and leave the highlighted area.
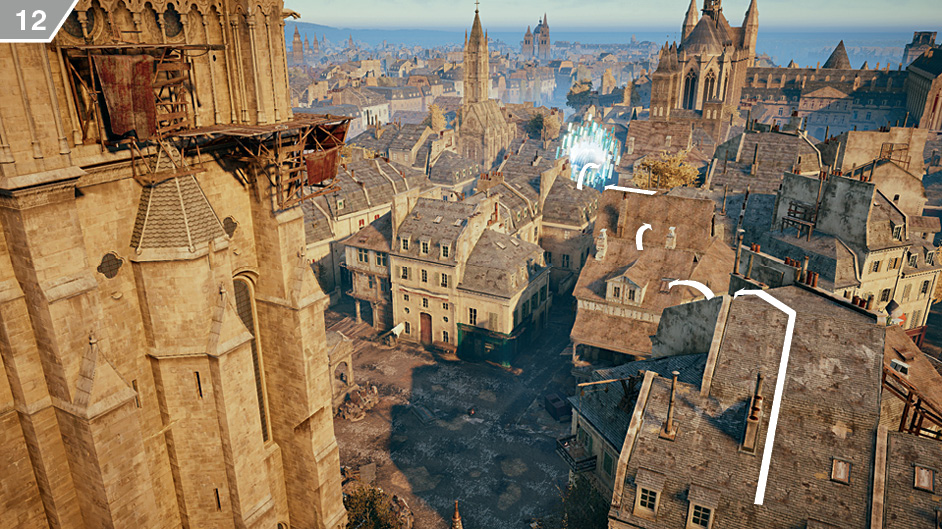
After the post-Memory stats screen, the first Server Bridge event occurs. When you regain full control of Arno, head for the portal at the  waypoint marker and leap through it before the “sweep” reaches your position.