
Assassin's Creed Unity Guide Walkthrough
Sequence 08
 Memory 01/“The King’s Correspondence”
Mission OverviewChallenges■Sabotage three alarm bells: see ■ Perform three cover kills: see Notes & Further Reading■After the Sequence begins, you will need to visit the Sanctuary for Arno to receive the orders that set this Memory in motion. When the opening cinematic ends, you start on a rooftop overlooking the Palais des Tuileries. While your natural instinct may be to accept the invitation of the hay cart below and attempt to sneak your way through the garden, this will plunge you into a web of interlocking fields of vision, awkward patrols and a very high probability of detection. Our pure stealth approach bypasses this enjoyable puzzle almost entirely, but it’s definitely worth returning to beat it on a later playthrough. ■We suggest that you use a double air assassination for a fairly critical step in this walkthrough so, if you have yet to do so, we suggest that you purchase this skill beforehand. |
 .
. .
.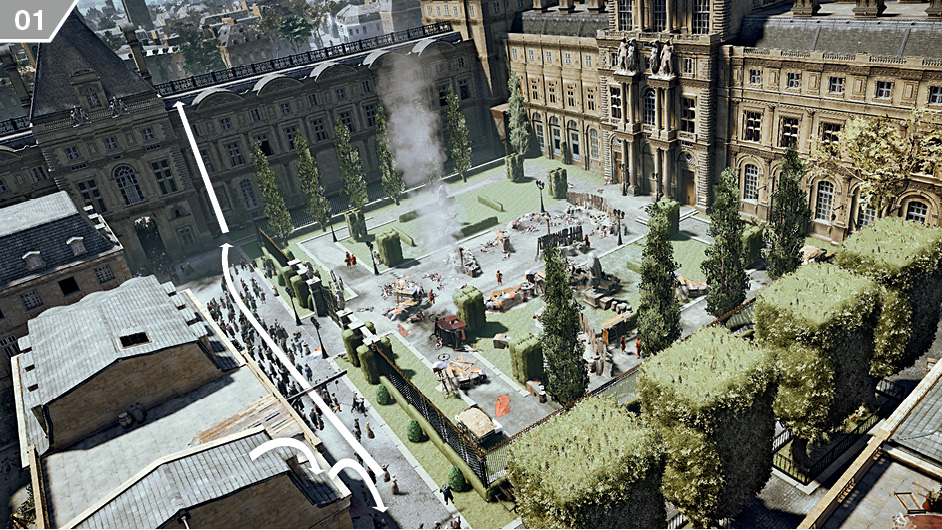
There are numerous points of entry to the Palais des Tuileries, but most carry a high (and, in some instances, absolute) risk of detection. Your first priority, then, is to secure the safest way into the building. From your start position, climb down to the street and follow the directions on the accompanying screenshot to reach a rooftop to the southwest.
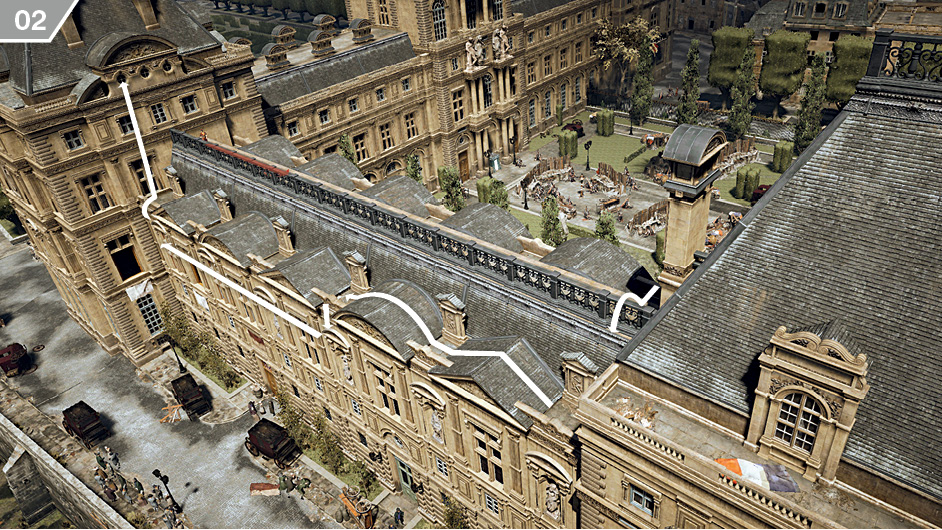
There is a sniper at the far end of the rooftop to the northwest, so jump over to the other side of the balustrade to avoid detection. While the use of Stealth Mode should enable you to pass him without being spotted when you draw close, you can also drop down and traverse to the left on the outer face of the building to be extra careful. Once you are behind him, climb to the upper rooftop.
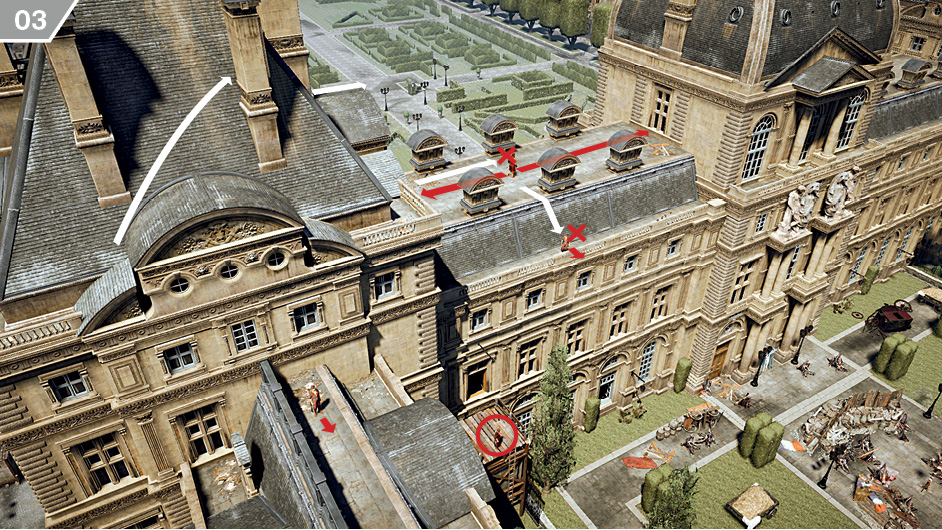
There are two guards to eliminate here: the Brute patrolling on the rooftop, and the sniper overlooking the front entrance. You can actually ignore the marksman that you passed a few moments ago, as he poses no threat. Wait until the Brute faces away from you, then drop down and run in behind him for a quiet kill, then dispatch the sniper in the same manner. If you do not wish to complete the Challenge to sabotage three alarm bells, you can air assassinate the guard on the wooden tower (circled above) and skip to step  of this walkthrough. Those who will settle for no less than 100% completion have a few tasks to perform beforehand…
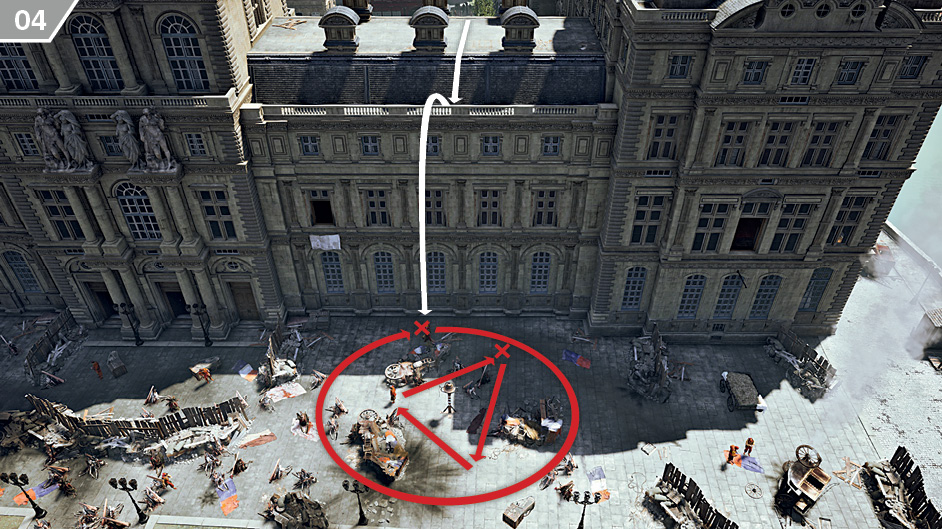
Move to the back of the rooftop and study the area by the alarm bell below. There are three Extremists to deal with before you can sabotage it, but the need to avoid alerting additional enemies to either side of this general area (particularly the main door) means that you will need to be quick and purposeful. When the pair walking the outer patrol pass below your position, perform a double air assassination to eliminate them simultaneously. Hide behind the debris and wait until the solitary guard’s patrol takes him to the closest point to the building, then sneak behind him for a Hidden Blade kill.
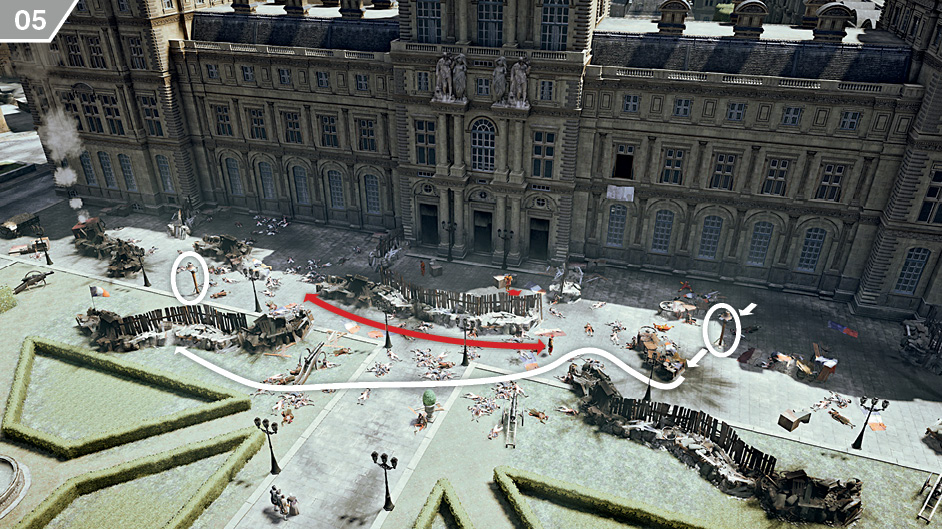
Watch the guard patrolling in front of the barricade by the entrance with Eagle Vision. When he turns away, sabotage the alarm bell, then follow the exact route shown above to reach a position close to the second alarm bell.
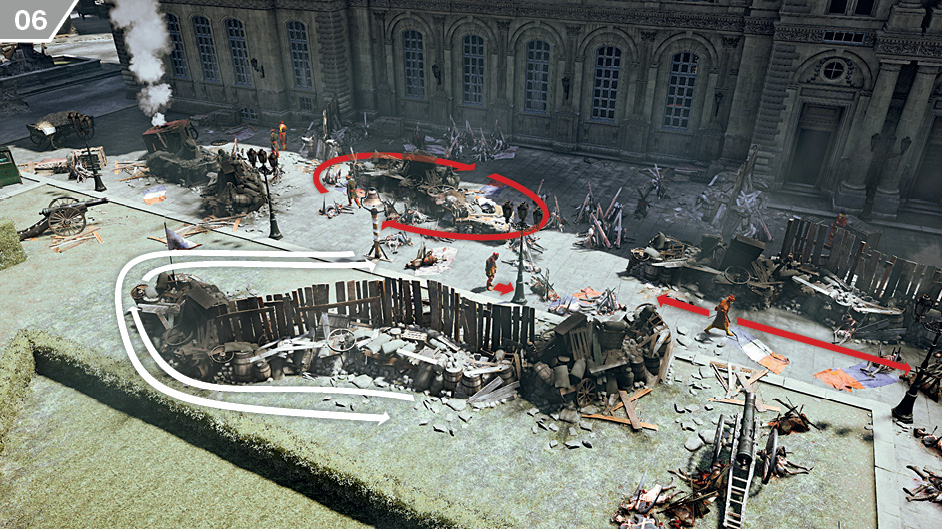
There is guard who patrols around a large pile of debris, a path that takes him past the second alarm bell at regular intervals. If you wait until he strolls past the bell, you can easily sneak to it with Stealth Mode active, sabotage it and move back behind the barricade before Arno is spotted.
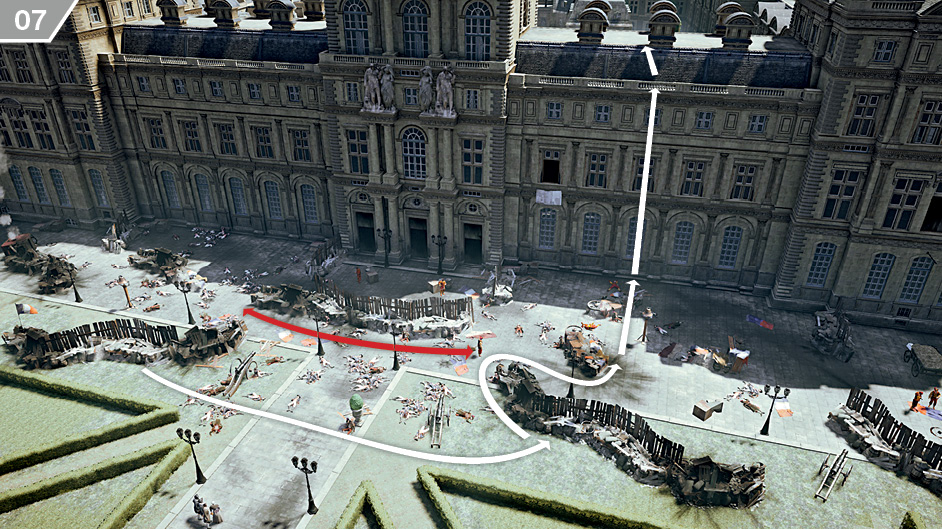
You now need to return to the rooftop. Don’t try to cut corners during the journey, and time your movements to coincide with the patrolling Extremist. When he sets off, move to the barricade on the right as directed above. You can then loop around the debris (to avoid detection by a guard standing close to the entrance) and scale the building.
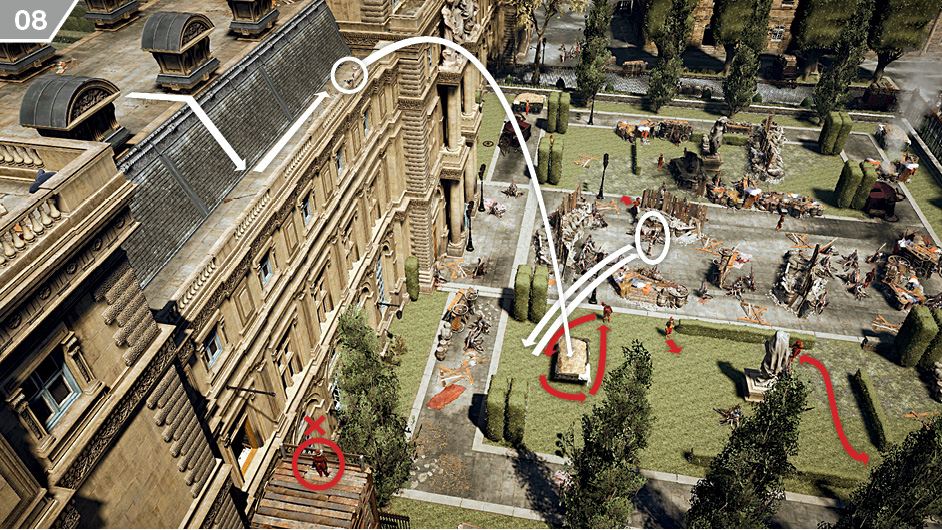
There is one last alarm bell to attend to before you enter the palace. Return to the front entrance and neutralize the sniper on the wooden platform with the Phantom Blades. Move to the Leap of Faith position marked by guano, then dive into the hay cart below. Wait until the guard patrolling around it passes behind your hiding spot, then perform a stealth kill when he moves within range. Now watch the Brute who has a short patrol that leads him to briefly face in your general direction. When he turns away, hop out of the cart and move stealthily to the alarm bell. After sabotaging it, return to a position behind the hay cart.
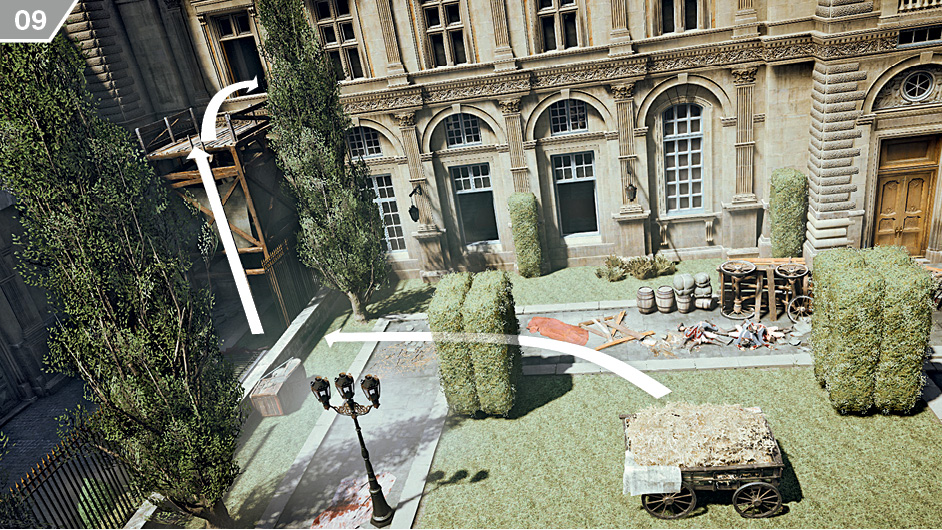
Use the ladder in the corner to climb to the wooden platform (where you earlier killed the sniper) and, after activating Eagle Vision to ensure that there is no one watching, climb through.
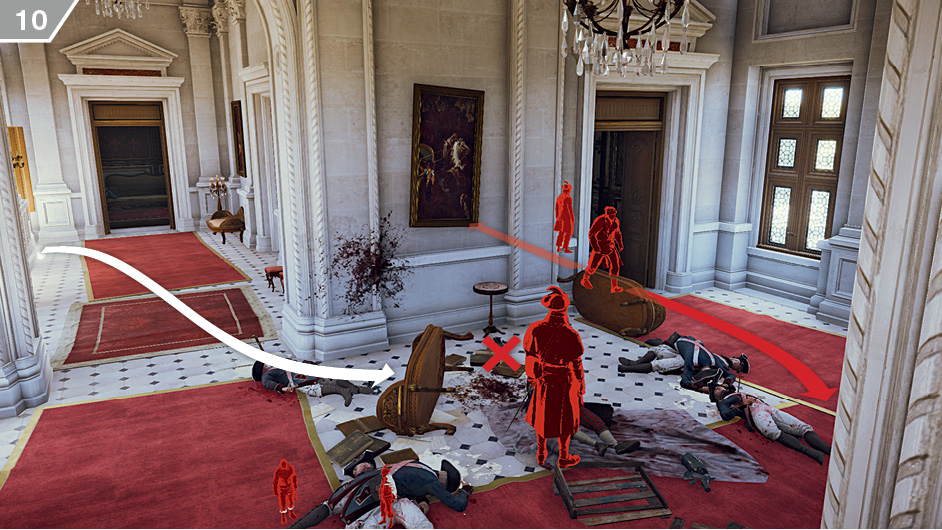
Inside the building, activate Eagle Vision to detect three guards: one in the small room to the left who poses no danger (he is thoroughly engaged with the door), a Brute who patrols between that room and the grand entrance hall, and a stationary Extremist who watches the door of the small room. Wait until the Brute enters the small room, then sneak up to the overturned couch and lock into cover. From here, you can quickly perform the first of three required kills from cover positions.
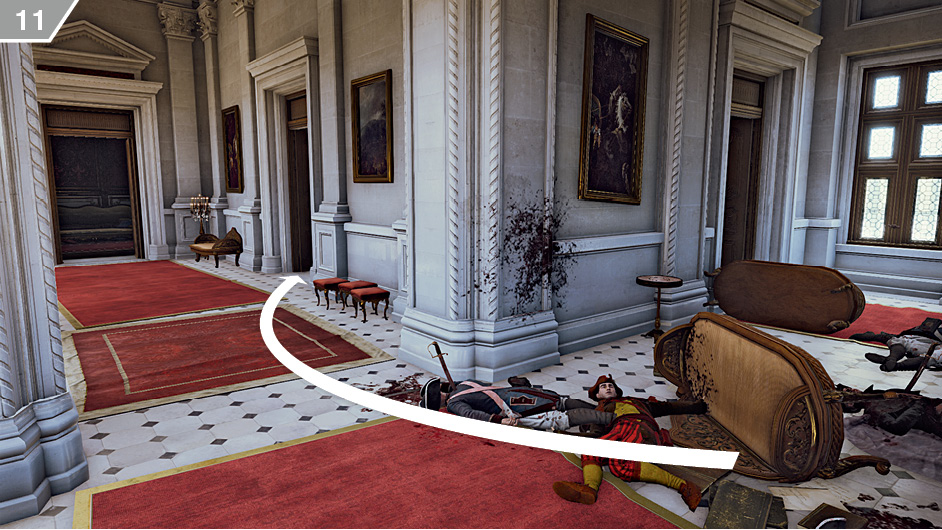
From the overturned couch, retrace your steps and enter the small room once the Brute has moved to the hall.
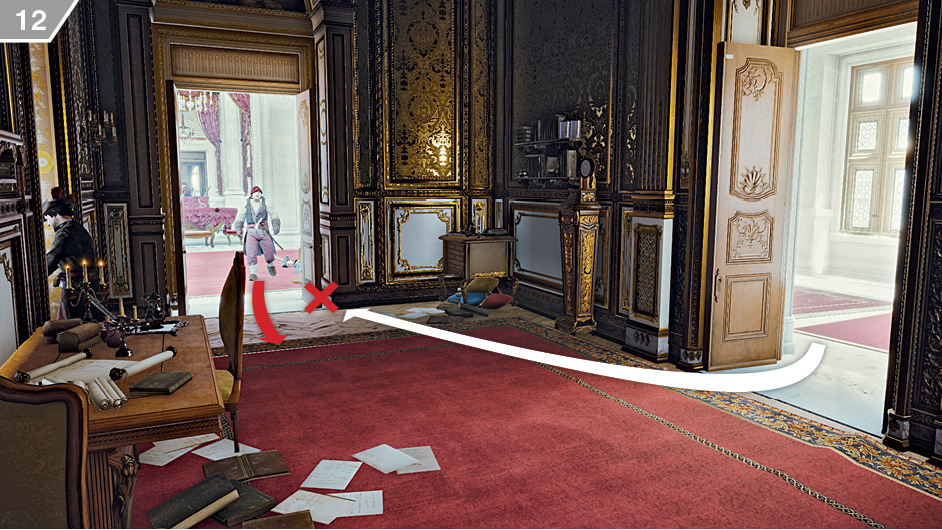
Get into position in cover on the right-hand side of this door, then perform a second kill from cover when the Brute returns.
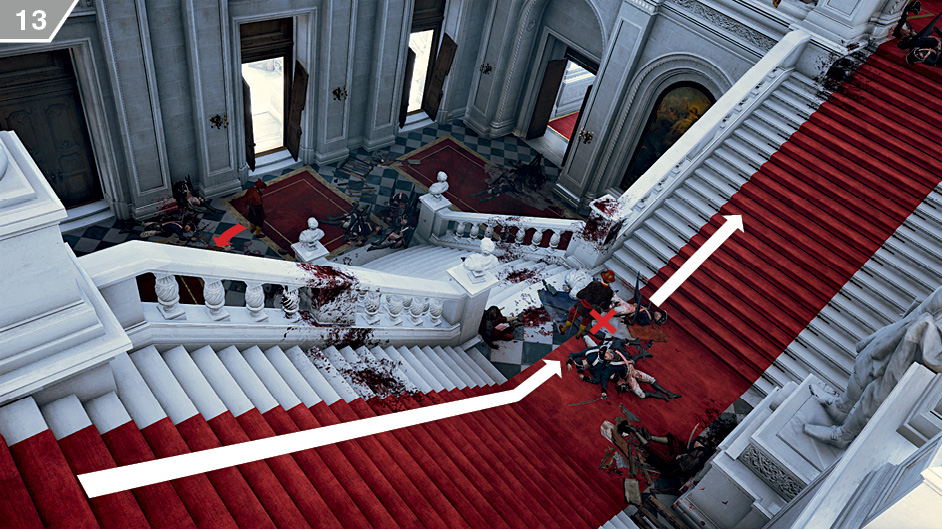
Approach the stairs in the grand entrance hall and activate Eagle Vision. In the area below, there is a guard with a short patrol that takes him to a position close to the door leading outside. When he walks away from that location, creep down the stairs and kill the guard directly ahead with the Hidden Blade. Move up the next set of stairs, but stop halfway and activate Eagle Vision.
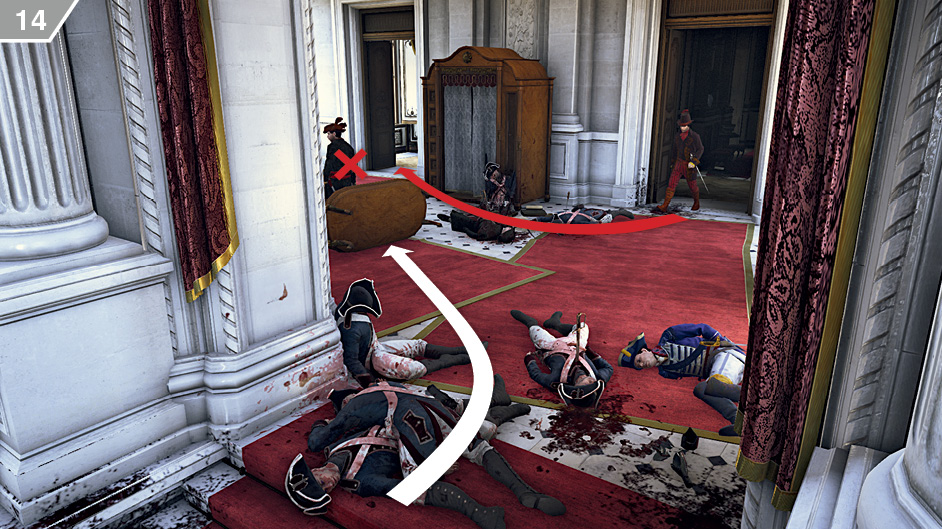
There is a stationary Extremist here and another who has a moderately complicated set of actions. Wait until the patrolling hostile moves to the left, past the hiding place, then move up and lock to cover behind the table. Perform your third cover kill here to complete the Challenge, then creep into the hiding spot. Eliminate the Extremist when he walks by.
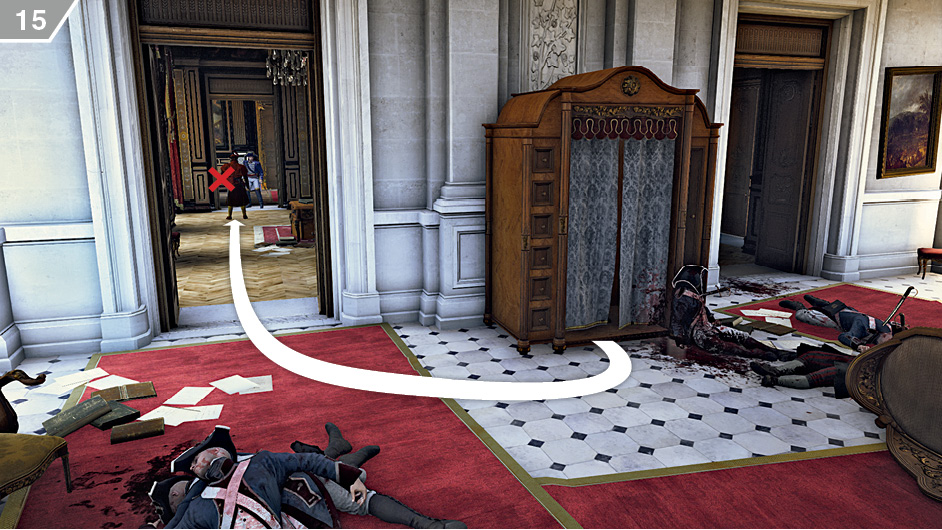
Through the door on the left, you will witness a terrified soldier confronted by two Extremists (the second, a Brute, is just out of sight in that room). Though you can’t get there in time to change the outcome, you can run over and kill the enemy with his back to you.
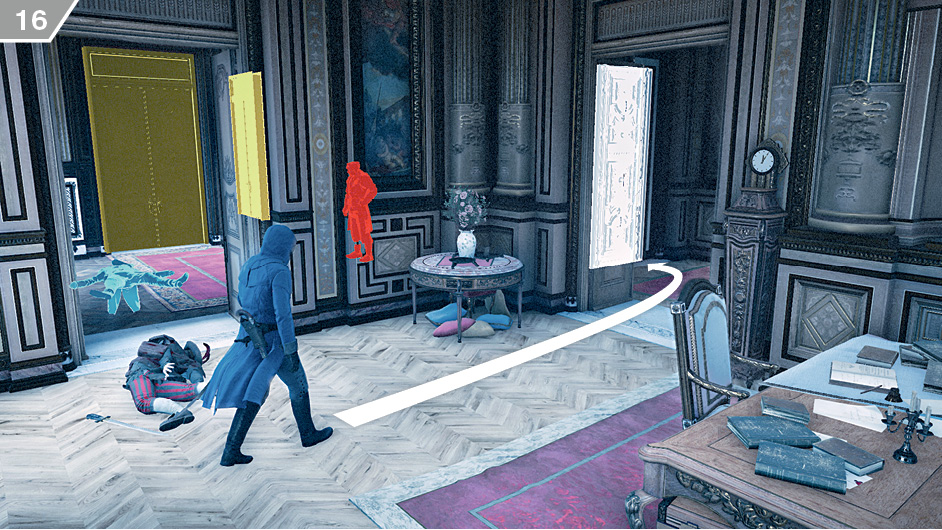
The locked door in the adjacent room will enable you to avoid a confrontation with the Brute who watches the open entrance. You can then interact with either of the two doors highlighted in Eagle Vision to advance the story.
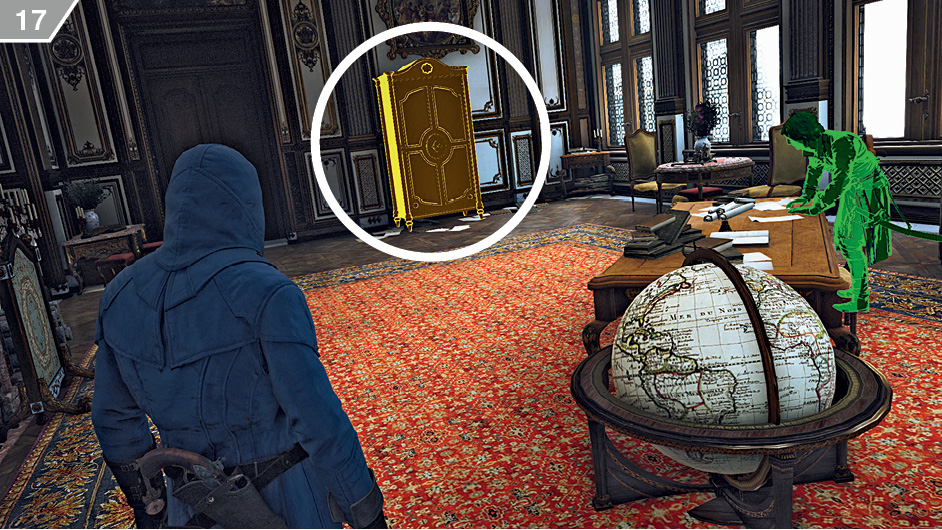
After the cinematic, identify the Armoire de Fer with Eagle Vision. Before you interact with it, ready a ranged weapon and either Smoke Bombs or Stun Bombs. Extremists will arrive in waves, so focus on incapacitating each group and eliminating the weakest targets first. When the battle ends, follow Napoleon though the sewers. The closing moments of the Memory are entirely straightforward.
 Memory 02/“September Massacres”
Mission OverviewChallenges■Three cover kills: see ■ Three ledge assassinations: see Notes & Further Reading■As with all prior main assassination missions, we include directions for optional objectives and presume that you complete them as directed. ■Though our walkthrough focuses on stealth, an aggressive approach could be equally successful until you reach the rooftop area. At that point, the sheer number of guards (and, unless you complete the second optional objective, snipers) encourages a switch to a measured approach. |
 .
. .
.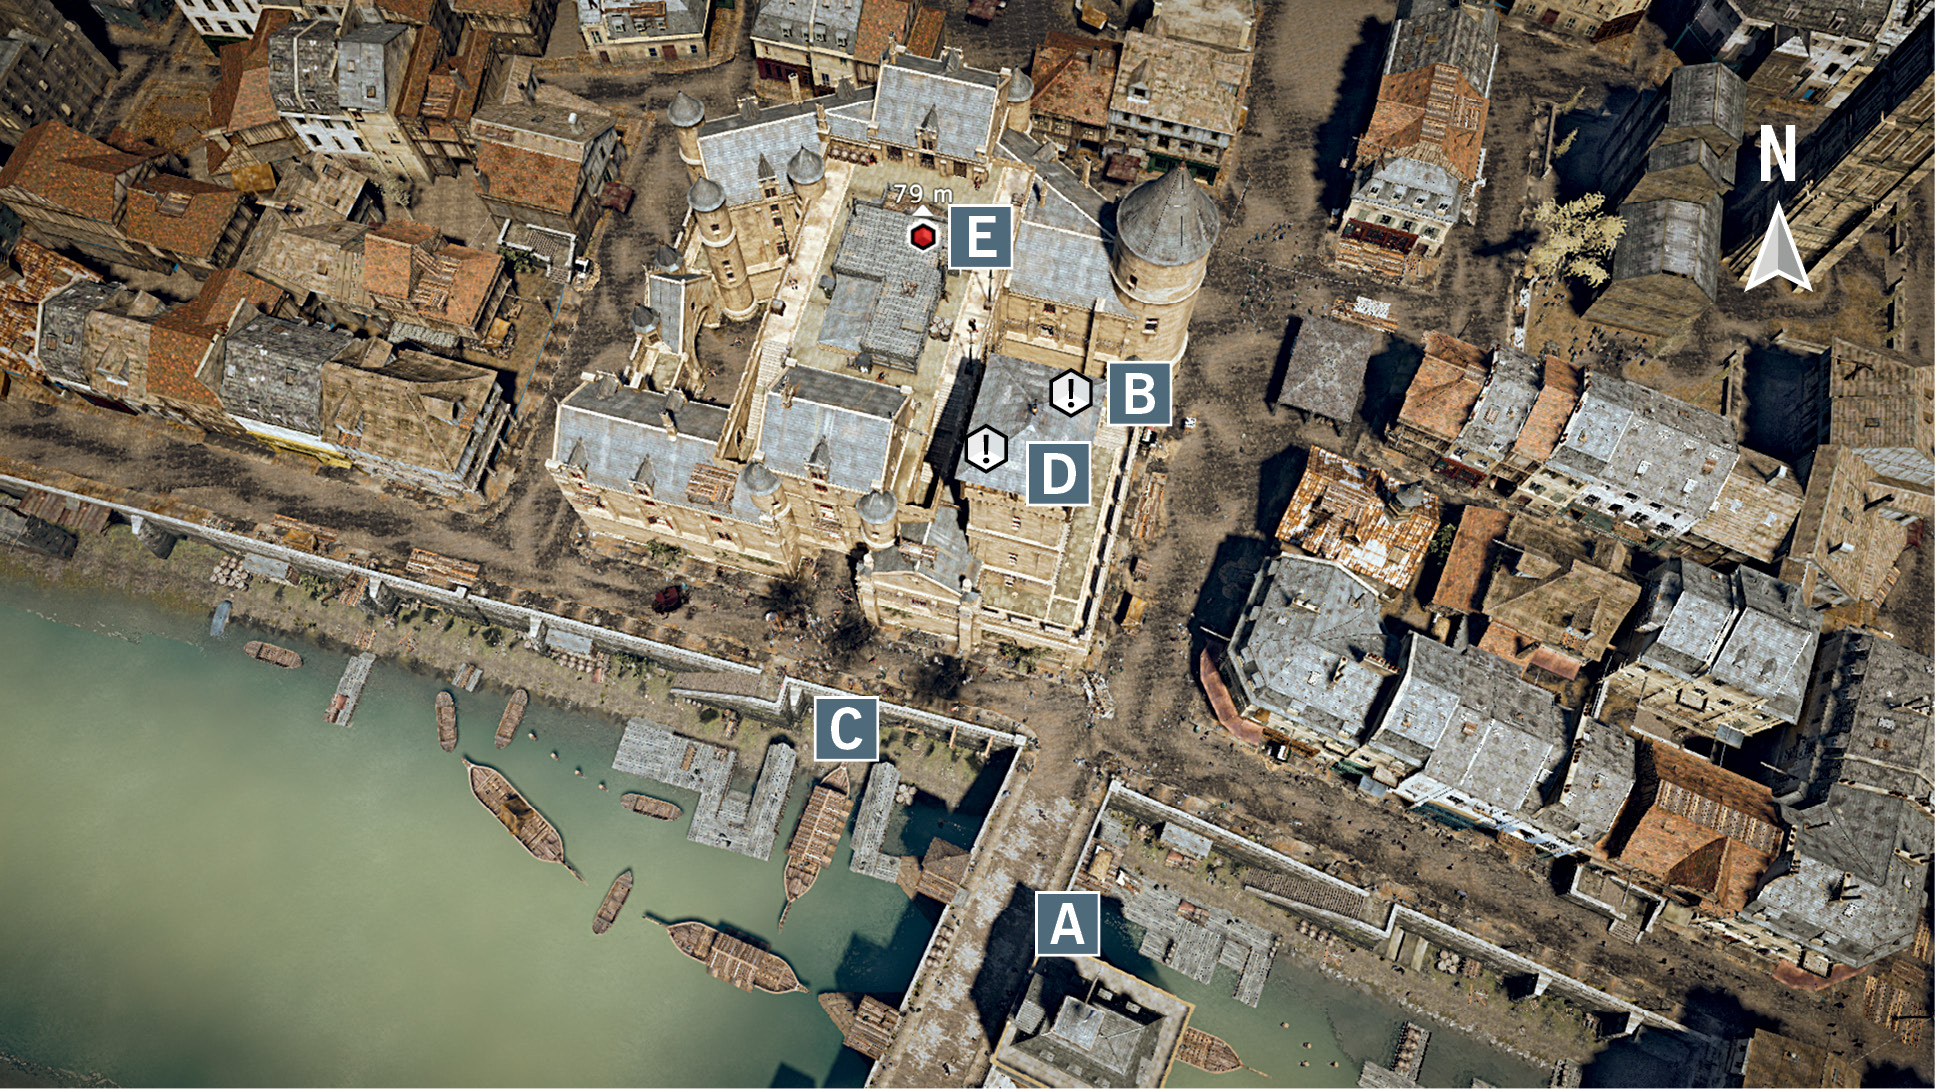
 Arno’s start position.
 An Assistance Opportunity optional objective in the yard, which can be accessed from two directions: via the secret entrance (see
  ) and the wall just to the east. Eliminating the marked targets here triggers friendly soldiers to attack Extremists in an interior area during the infiltration.
 The “secret entrance” referenced in the pre-mission briefing page that follows the opening cinematics. The sewer entrance leads to a linear path through tunnels that, after climbing a ladder and running up a few flights of stairs, delivers Arno to the yard where the Assistance Opportunity can be found.
 Once you reach the upper roof area, a waypoint appears on the west face of this tower. If you reach it and interact with the marked flag, Arno will set a fire that causes snipers above to lose consciousness. This simplifies the final assassination.
 The target, Rouille, is stationed on a wooden platform on the central roof area.
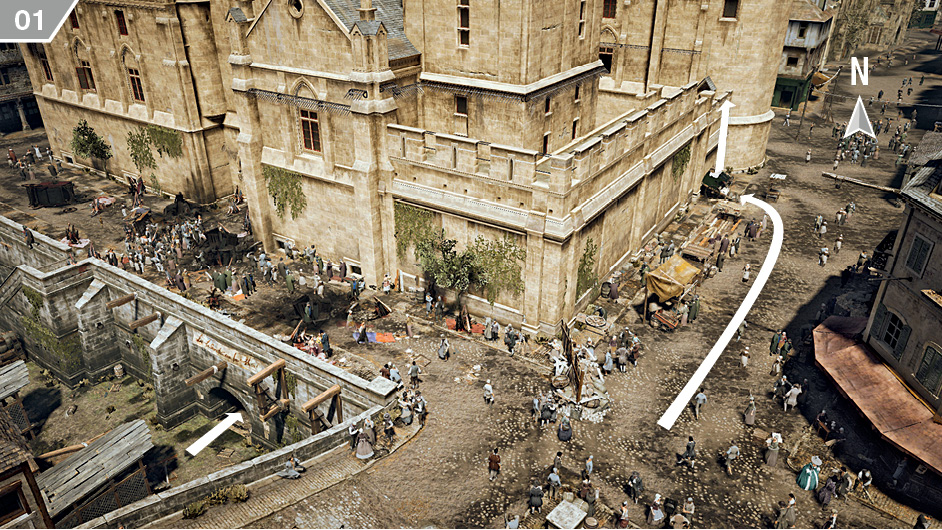
From your start position, you can choose where you begin your infiltration of the Grand Châtelet. The sewer (bottom left of the above screenshot) is the “secret entrance” referenced in the pre-mission briefing screen. The second point annotated on the screenshot provides a more direct (but less atmospheric) route to the Assistance Opportunity in the yard. If you take the latter, skip to entry  .
.
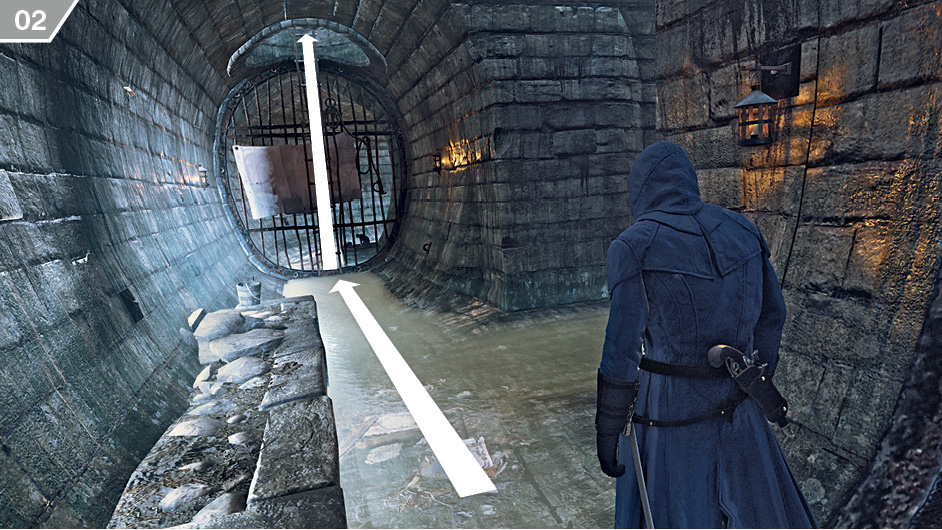
The secret entrance tunnel is easy to navigate. When you reach the ladder shown above, climb to the upper level.
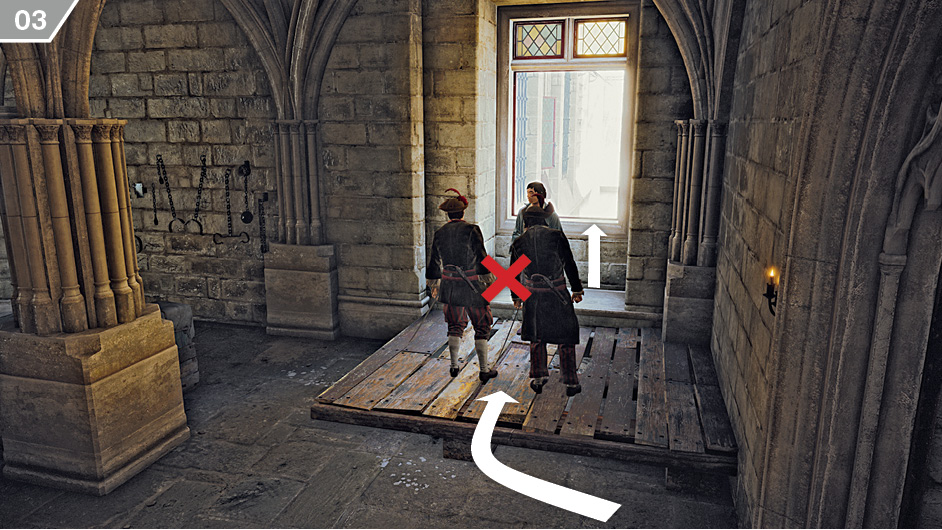
At the top of the ladder, climb the stairs until you reach an open doorway. Just beyond it are two Extremists with their backs to Arno, guarding an open window that you need to use. Perform a double assassination to remove this obstruction, then vault through the window to reach a wooden beam just outside.
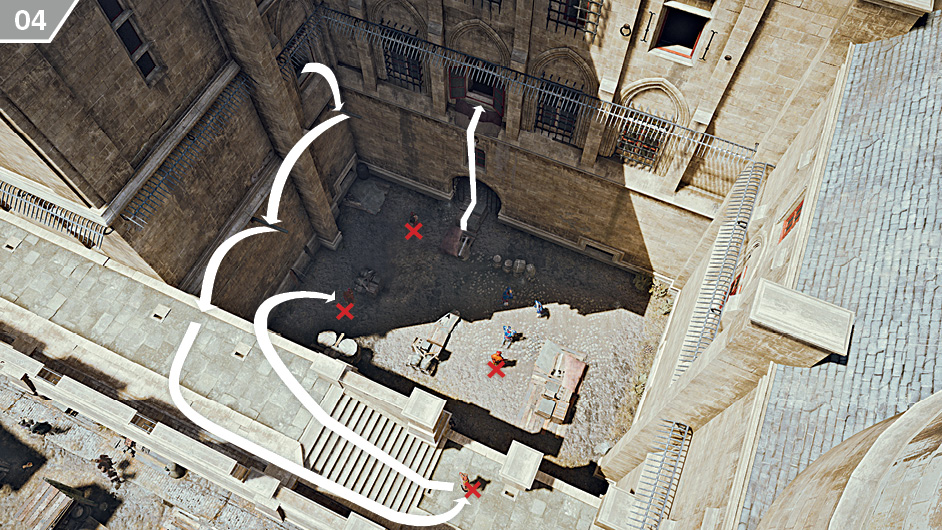
Once outside, don’t be too quick to rush to the aid of the captives. Instead, leap to the adjacent beam and, from there, to the outer wall. Approach the sniper and quietly assassinate him. If you chose to scale the outer wall instead of using the secret entrance, you will actually arrive just behind the sniper. Wait until the patrolling Extremist reaches the four barrels, then kill him with an air assassination. You can then eliminate the two remaining enemies with Phantom Blade headshots. With this task accomplished, climb to the open window.
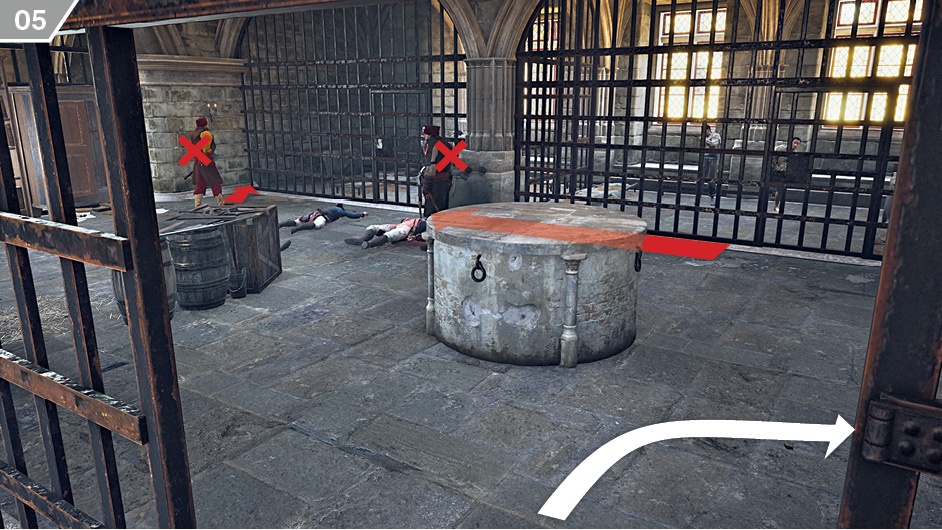
Once Arno passes through the window, the first Challenge (to kill three enemies with cover kills) becomes active, though it only lasts while Arno remains inside the building. The two Extremists in the first cell area aren’t ideal candidates, as their movements are rather hard to judge – and, what’s more, detection could cause two guards in the adjoining room to enter the fray. Instead, wait until they both turn away – ideally when their patrols take them to the far corner of the room – and silence them both with safe Phantom Blade headshots.
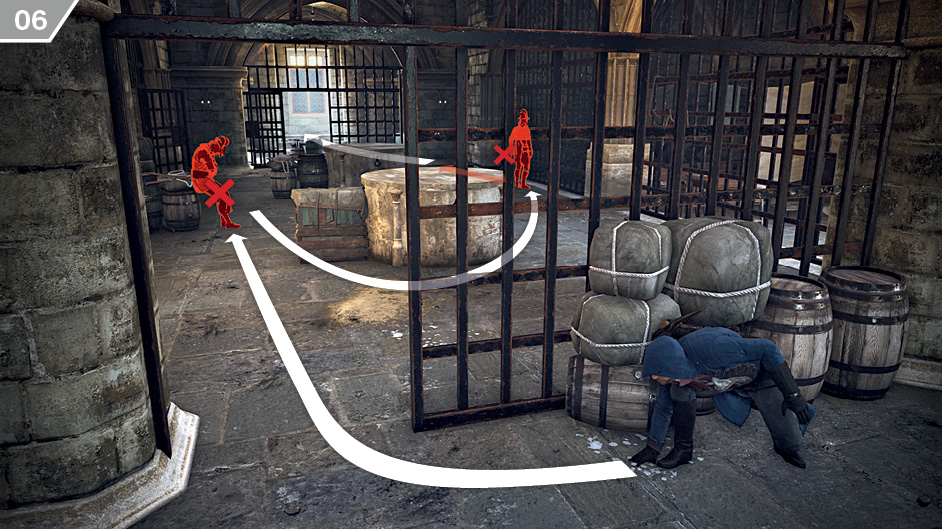
On the other side of the window, turn right and observe the two Extremists beyond with Eagle Vision. While the enemy on the left dozes fitfully, his companion on the right taunts the prisoners. Wait until the unlucky soul on the left starts to drift to sleep, then quickly snap to cover beside him and perform a cover kill. You can then sneak up behind the second target and neutralize him. Sneak through the door directly ahead and turn left.
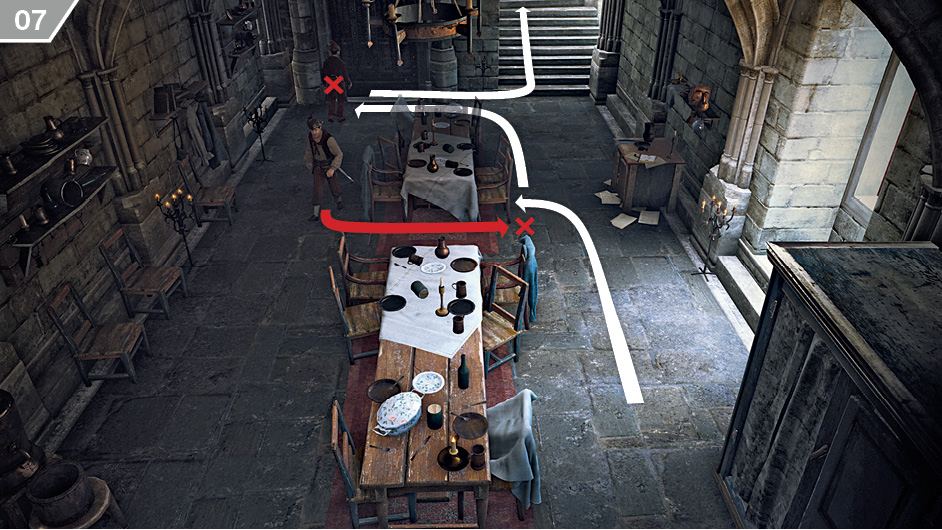
Approach the door and, once again, employ Eagle Vision to observe the guards in the next room. When the patrolling guard moves towards his companion near the closed door, lock to cover behind the chairs on the right-hand side of the second table in line. Perform a cover kill when the Extremist walks past, then sneak up and silence his cohort. You can then run up the stairs.
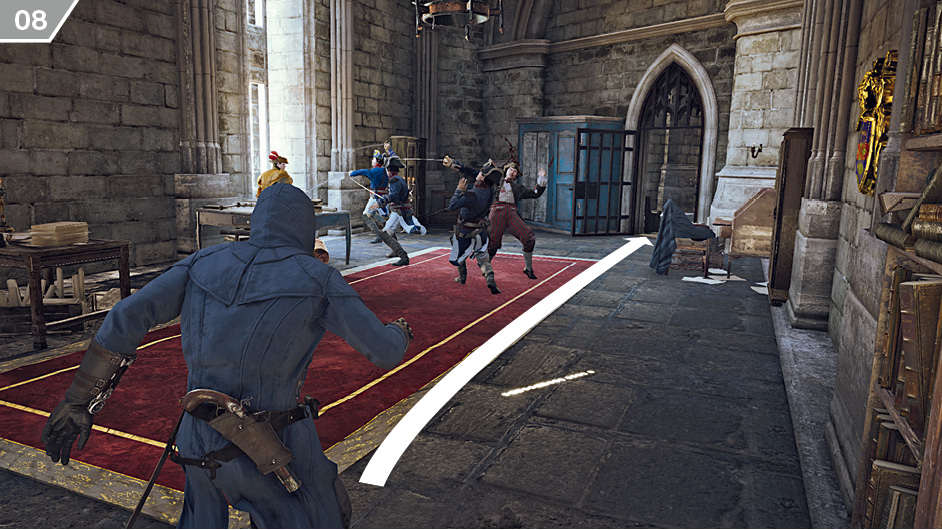
On the next floor, you will encounter soldiers (in blue) fighting Extremists as a result of your earlier intervention to save prisoners. Dash in and provide aid once again with Hidden Blade kills, then go through the door and turn right.
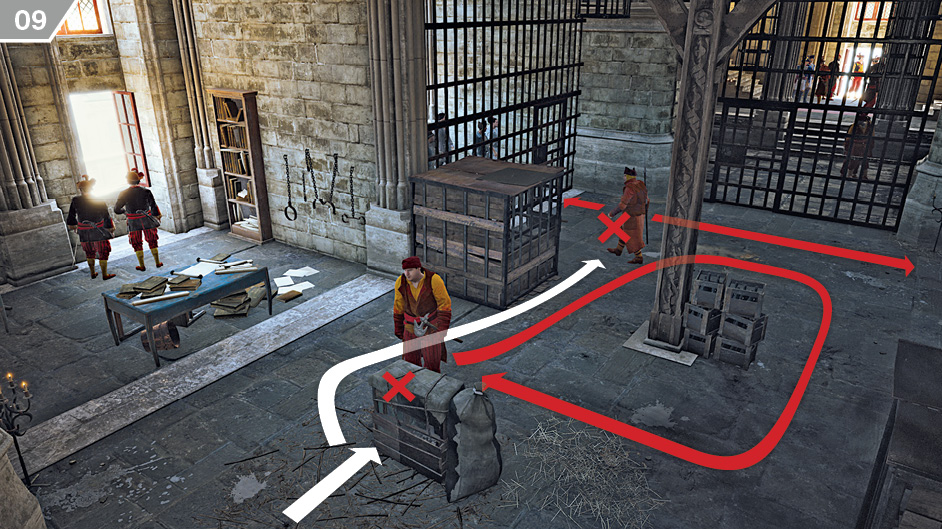
In the prison area, you will encounter a Brute and a Defender, with two additional Extremists engrossed by the view from the window to the left. As long as you are not detected, the second two enemies will not trouble you at all. Wait for the Brute to leave the area close to where you enter, then move up to the cover position as illustrated above. When the Brute walks past your position, perform the third and final cover kill required for the first Challenge. You can then creep up on the Defender to disable him.
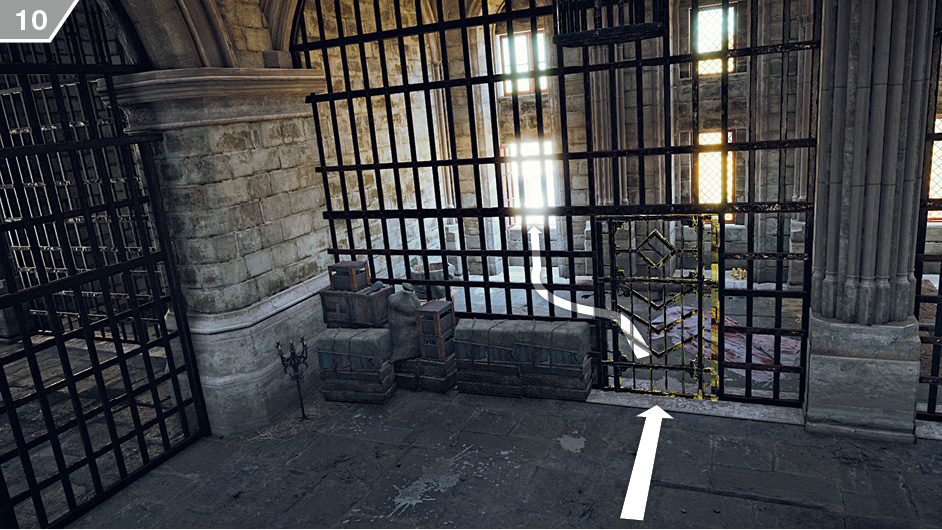
Though you can continue your journey by double assassinating the two guards by the window, the locked cell door leads to a window that offers a much more suitable route. Pick the lock, then move to the wall outside. Note that the Challenge to complete three cover kills ends as soon as Arno passes through the window.
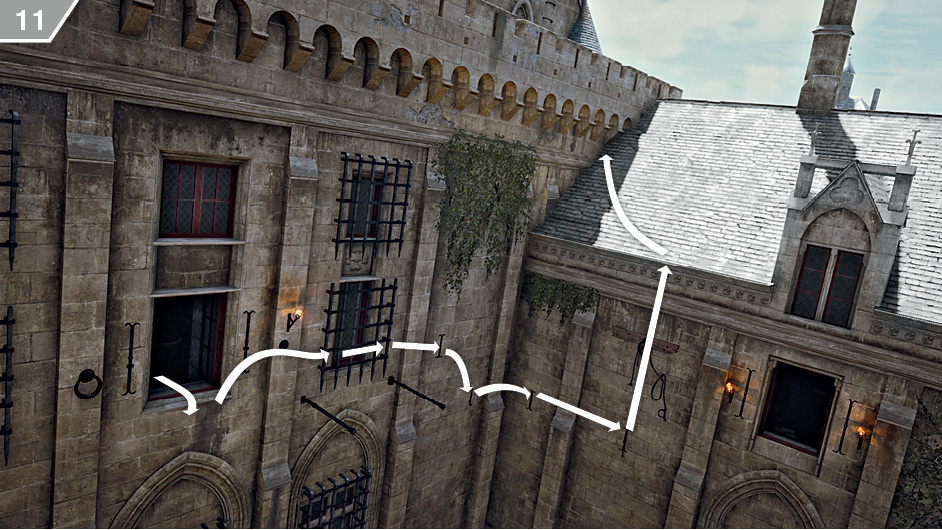
Follow the route illustrated here to reach the rooftop, but be careful to stay out of sight of enemies above when you reach the end of the climb. You now have a Challenge to complete three ledge assassinations, and an opportunity to set a fire to disable snipers in a watchtower that overlooks Rouille’s position.
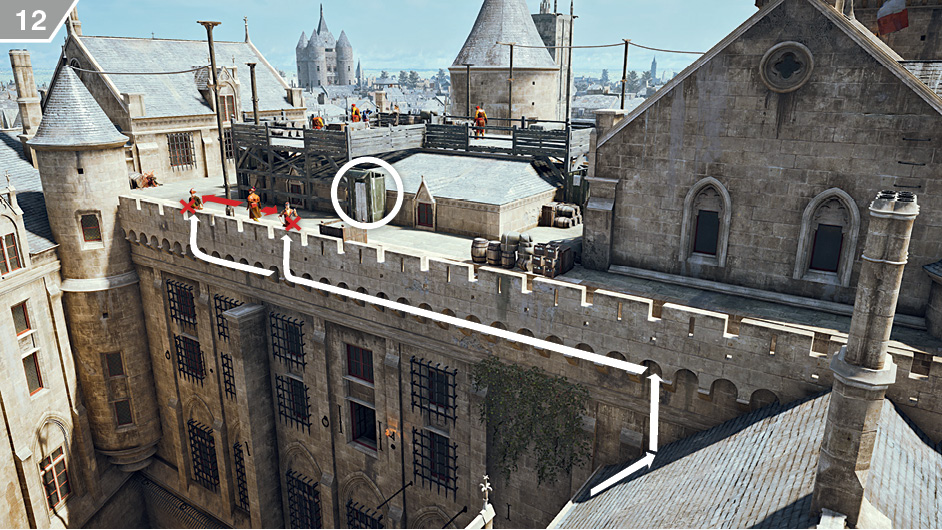
From the roof, climb to the wall above and traverse to the left. With a keen eye trained on the patrolling Extremist, eliminate the two stationary sentries with ledge assassinations. Be careful to not move onto the upper ledge (until, of course, you are poised to strike) to avoid detection. When you have completed the first two kills of the Challenge, jump up and sneak into the hiding place (highlighted on the screenshot). From there, kill the remaining enemy on the lower level when he passes.
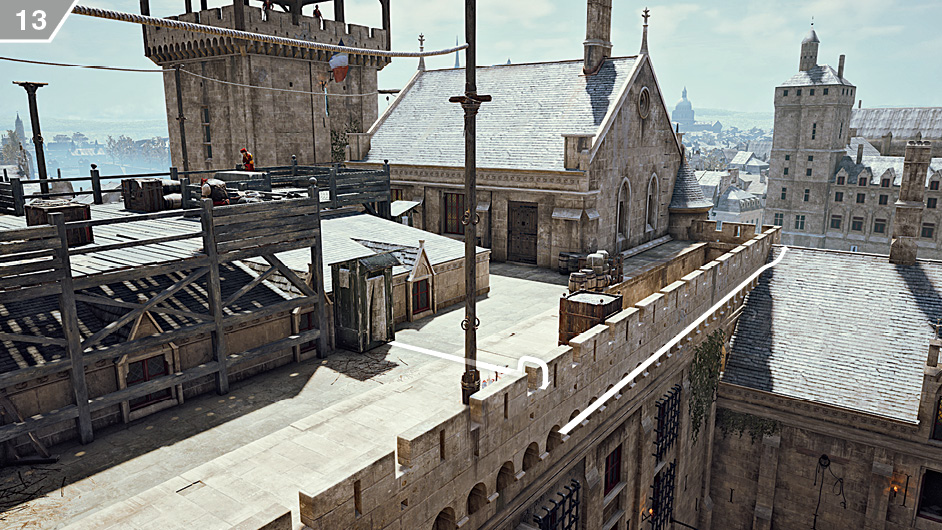
After leaving the hiding spot, return to your original position on the sloped roof.
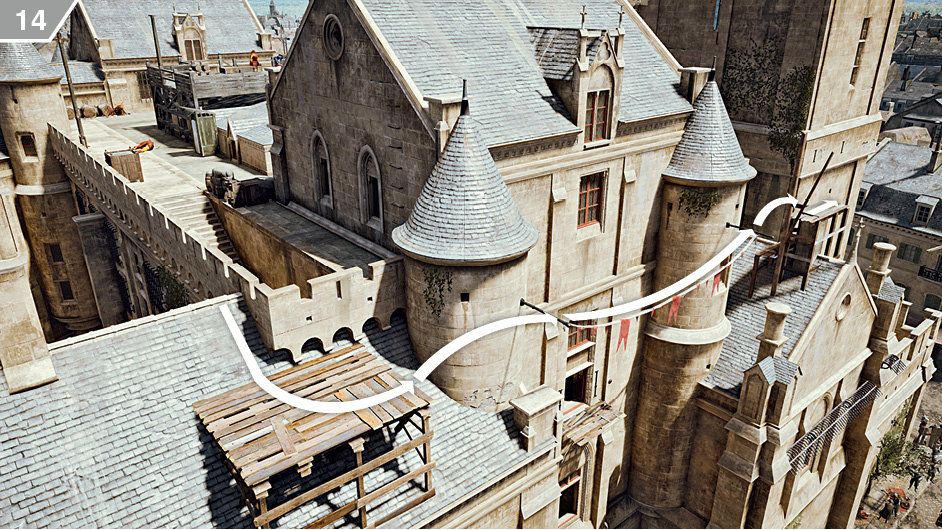
On the outer edge of the roof, follow the free run course shown here to approach the sniper tower.
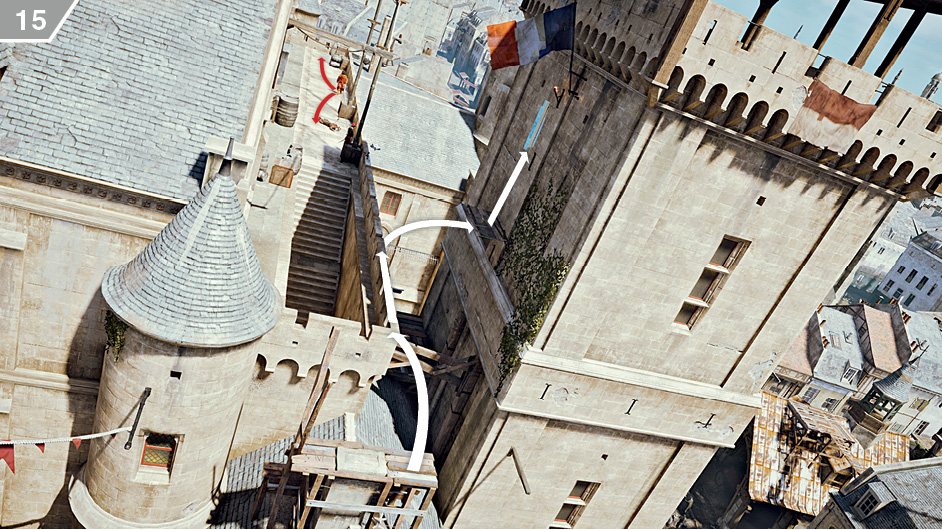
There is one patrolling guard in the distance who may possibly spot Arno during the climb to the flag, so you may wish to wait until he is walking away before you begin the climb illustrated above. When you reach the flag, Arno will automatically set the fire. After the brief cutscene ends, climb back down.
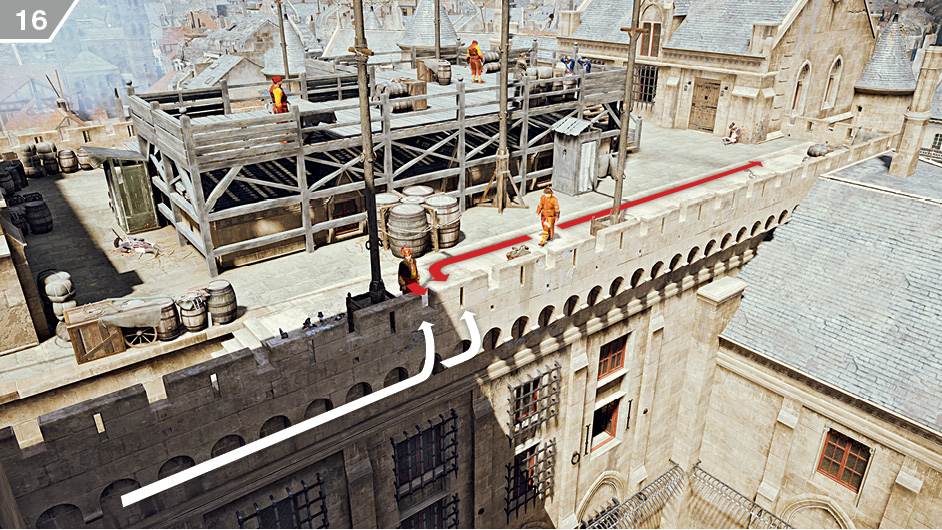
As with the wall on the opposite side, traverse along the lower ledges of the wall until you reach the stationary guard. When his companion is facing away during his periodic patrols, perform a ledge assassination (which will complete the second Challenge). You can then eliminate the patrolling enemy when he returns using the same method.
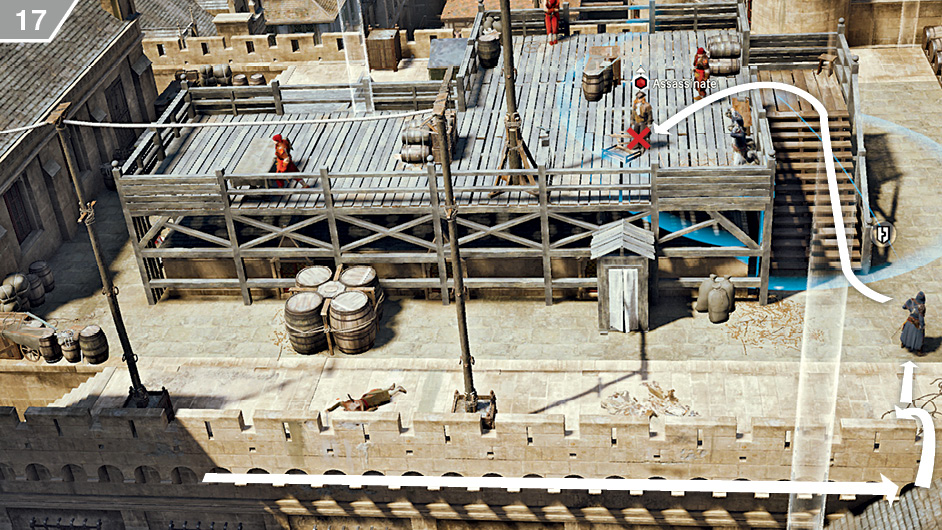
Remain on the same wall and traverse until you reach the sloped roof. From here, move into position at the bottom of the steps that lead to the wooden platform. As you are now safe from prying eyes, take the time to manually aim a Smoke Bomb towards the top of the steps. Adjust the throwing arc to ensure that Rouille and the nearby Extremist are both standing inside the explosion radius, as shown above. When you are ready, release  /
/ to toss the bomb, and immediately sprint up the steps to stab Rouille while concealed by the smoke.
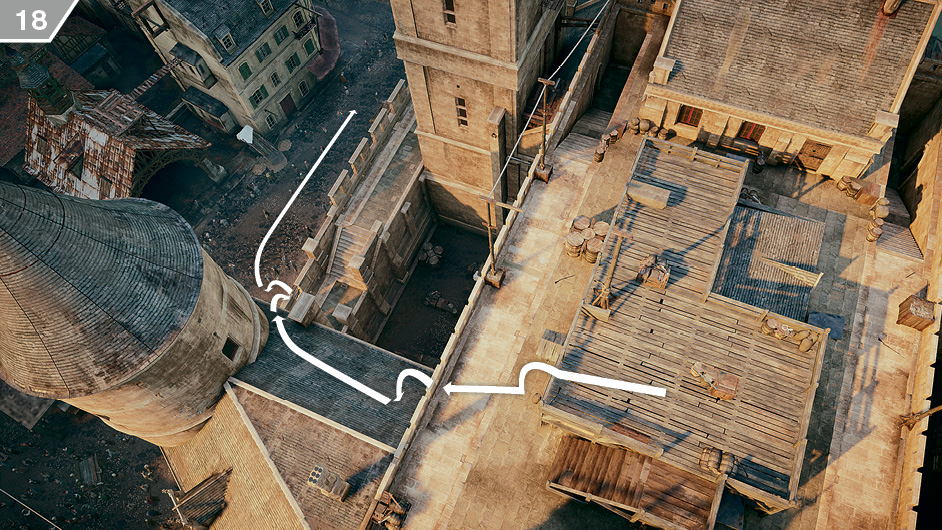
When the assassination is complete, follow the route illustrated above and free run down until you are back at street level. Sprint back to the river and leave the zone highlighted on the mini-map to conclude the Memory.