
Assassin's Creed Unity Guide Side Quests
Murder Mysteries
This chain of side quests (marked by the  icon) is activated by interacting with Vidocq in the Palais de Justice district. Each individual mission is an investigation where you study crime scenes using Eagle Vision, analyze clues, talk to witnesses and gather evidence to identify the murderer. Your ultimate goal is to accuse the correct suspect, which will lead to a bonus reward if you do so on your first attempt. Conversely, any erroneous accusation will lead to a quest reward of lower value. All of the clues that you collect during your investigation can be viewed in the Case Files entry of the Database menu. From a practical standpoint, conducting an investigation entails:
1. Studying the crime scene and gathering clues using Eagle Vision, with all points of interest (including witnesses) in the Investigation Zone appearing in yellow.
2. Travelling to any additional Investigation Zone revealed during the analysis of the crime scene and repeating the process.
3. Reviewing all of the evidence gathered in the Case Files menu to identify the culprit.
4. Accusing the correct culprit.
As the whole process is very straightforward and relies mostly on using Eagle Vision to scan the Investigation Zones, we will simply list all of the locations to investigate and the evidence to gather, then offer the solution to the murder mystery if you can’t find it by yourself. Once you’ve solved the case, don’t forget to speak to the nearby Chief of Police to collect your reward: a unique weapon. You will also receive money for accusing the correct culprit, though the amount you are awarded is reduced for each erroneous accusation that you make.
Murder Foretold
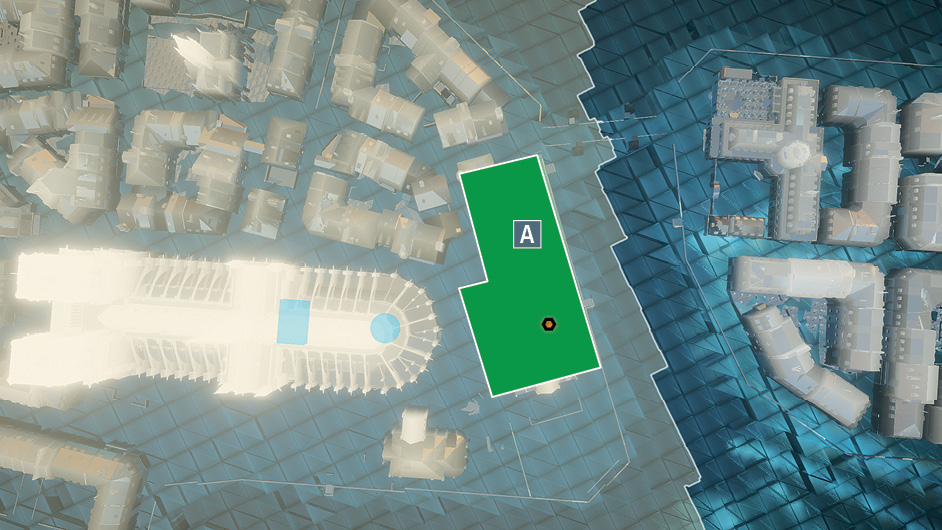
Investigation Zones & Clues:
 Monastery: “Body”, “Crumpled paper”, “Body of Friar Stanislaus”, “Body of Friar Bernard”, “Body of Friar Benoit”, “A page of paper”, “Partially burnt diary”, “Large book”, “Statement of Friar Honoré”, “Statement of the Abbot”, “Statement of Friar Benedict”, “Statement of Friar Joseph”, “Statement of the Vineyard Worker”
Solution: Friar Honoré became obsessed with the predictions of Nostradamus and brought his friend Friar Jean into his obsession. Together, they plotted to make one of Nostradamus’ predictions come true: Honoré poisoned a cask of wine and Jean served it to the elder monks (the eldest of the “branches”). In a fit of remorse, Friar Jean decided to confess and was in the act of writing of this decision in his diary when he was surprised by Friar Honoré, who then strangled Jean with his own rosary beads. Honoré then attempted to burn a page from Jean’s diary, but was seen by the vineyard worker and ran off in a fright.
The Body in the Brothel
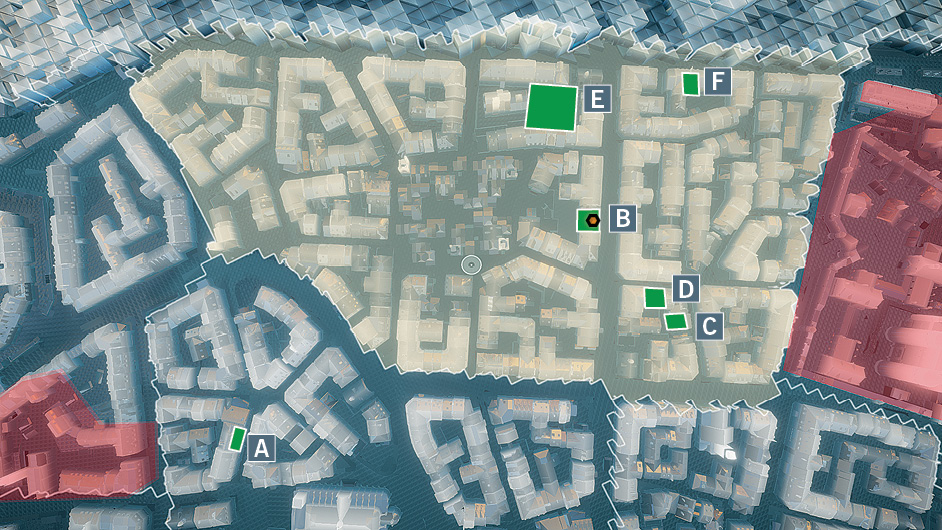
Investigation Zones & Clues:
 Brothel: “Woman’s body”, “Diary”, “Ropes and gag”, “Spikes and hooks”, “Whip”, “Statement of Micheline”, “Statement of Anna”
 De Sade Villa: “Statement of the Marquis de Sade”, “Statement of the Valet”, “Letter to valet”
 Leather Shop: “Statement of the Leather Worker”, “Delivery book”
 Student’s Hovel: “Book: 120 Days of Sodom by Donatien A.-F., Marquis de Sade”, “Statement of the Student”
 Meeting Place: “Statement of the Vagabond”
 House: “Scrapbook”, “Mysterious letter”
Solution:De Sade’s valet, after years of witnessing scenes of debauchery and being subject to humiliations himself, was lured by an agent of St-Just to frame de Sade for a murder. The valet collected some of de Sade’s personal effects, met with St-Just’s agent and went to the brothel where he murdered Suzanna in a show of “sadism.” After the murder, he met the agent in a church courtyard for his payment, where the vagabond saw both the valet and St. Just’s agent.
The Body Politic
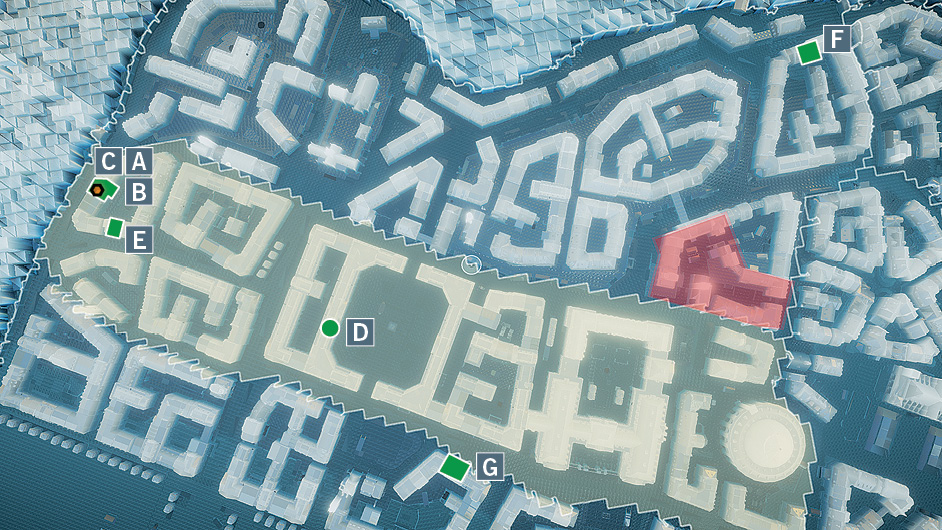
Investigation Zones & Clues:
 Dining Room: “Man’s body”, “Necklace”, “Victim’s wine glass”, “Statement of Antoine Gerard”, “Statement of Madeleine Gerard”, “Statement of Olivier Gedet”, “Statement of Mme Hennebert”
 Kitchen: “Window pane”, “Note to Alicia”, “Statement of Alicia”, “Statement of Armand”
 Office: “Note from Gedet”, “Feuillant letter”
 Black Office: “Note to agent”, “Note from chemist”, “Report”, “Agent list”
 André’s House: “Bottle”, “Note for André”, “Statement of the Old Woman”
 Glassmaker’s: “List of accounts”, “Glass bead”, “Statement of the Glassmaker”
 Apothecary: “Statement of André”
Solution: Deputy Hennebert was targeted by the extreme left for being far too conservative an assemblyman. An attempt on his life lead him to hire Armand to protect him. A Black Office agent shot a hole in Beaudoin’s window as a way to prompt him to seek a reconciliation. The Black Office then used the hapless Gedet as a go-between to arrange an innocent-looking dinner party with Assemblyman Gerard, also known as Black Office agent “Patriot”. The Black Office further used its knowledge of Prince Rupert drops to embed a poison into Mme Gerard’s necklace. By this means, the Gerards were able to evade Armand’s scrutiny. Mme Gerard pretended to break her necklace and M. Gerard pretended to try to fix it, while in actuality breaking the tail of the Prince Rupert drop, releasing the poison into Hennebert’s empty wine glass.
The Red Ghost of the Tuileries
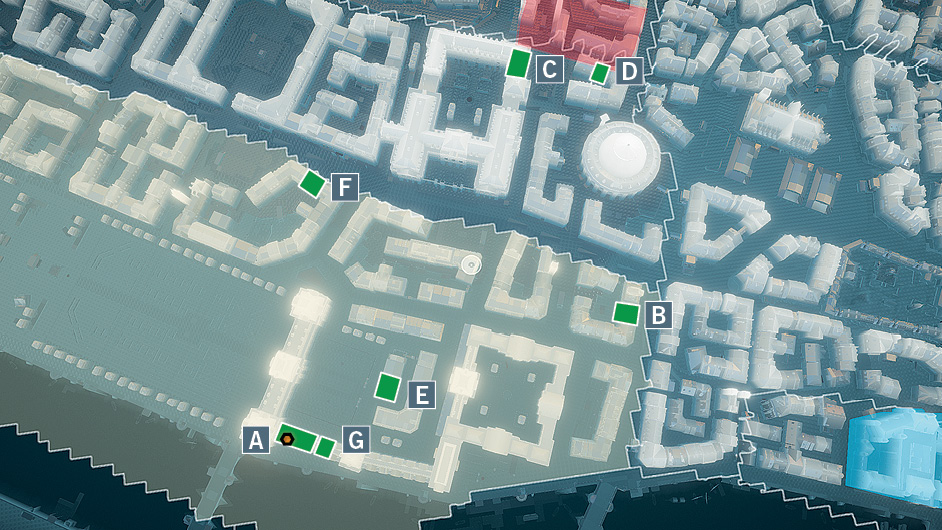
Investigation Zones & Clues:
 Office: “Body of Director Beaudoin”, “Love Letter”, “Invitation”, “Bank registry”, “Newspaper”, “Vent trap”, “Oil painting”, “Marks on wall”, “Vials”, “Personal letter”, “Statement of Counselor LeGall”, “Statement of First Valet”, “Statement of Second Valet”, “Statement of Third Valet”
 Von Glück Mansion: “Empty bottles”, “Report”, “Statement of Herr Friedrich von Glück”, “Statement of Brigitta von Glück”
 Gambling Den: “Ledger”, “Set of dueling pistols”, “Statement of card-player”, “Statement of Creditor”
 Victim’s House: “Historical books and papers”, “Letter from Counselor LeGall”, “Suicide note”, “Religious objects”, “Glass vials”, “Letter from creditor”
 Counselor’s House: “Letter from Beaudoin”, “Official-looking letter”, “A genealogical tree”
 Apothecary Shop: “Statement of the Apothecary”
 Secret Room: “Pot and brush”, “Mouthpiece”, “Levers”, “Red garment”, “Instruments”
Solution: Citizen Beaudoin was goaded into suicide by Counselor LeGall. LeGall wanted to take Beaudoin’s position and, as he happened to be a descendant of the man who started the Red Ghost legend, used the tricks and gimmicks of his ancestors to serve his own purposes. Von Glück had motive to kill Beaudoin, but he was too drunk to take action. Beaudoin’s creditor was in fact working with Beaudoin in a scheme to cheat others.
Barber of Seville
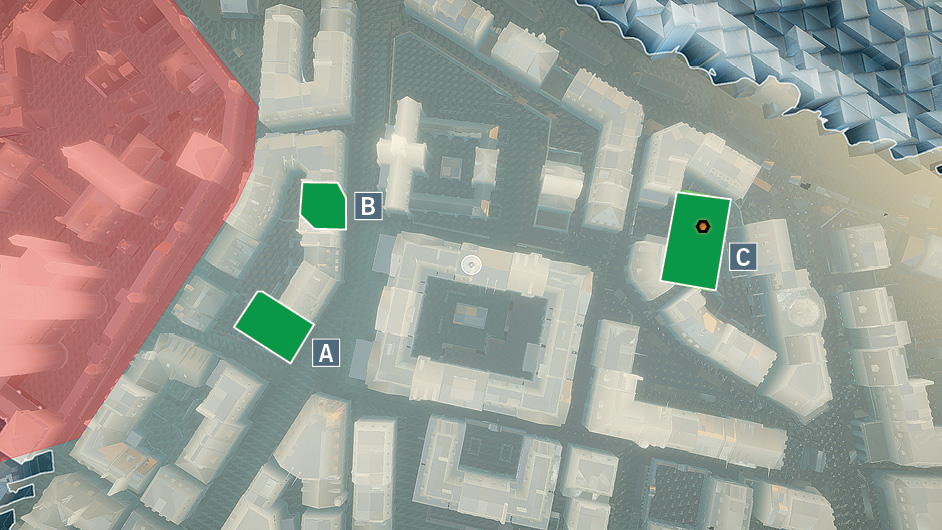
Investigation Zones & Clues:
 Courtyard: “Body”, “Handbill”
 Café / Love Nest: “Razor”, “Body”, “Crumpled note”, “Theatre poster”, “Statement of Café Owner”
 Outdoor Theatre: “Prop table”, “Fire site”, “Rendez-vous note”, “Anonymous note”, “Costume rack”, “Statement of Rose”, “Statement of Pascal”, “Statement of Ficarron”
Solution: Barto (the body in the courtyard) coerced Rose into a relationship. Her abusive husband Laurent (the body in the love-nest) confirmed this, grabbed the prop razor and went to murder Barto. Rose sent a note to her brother, Ficarron, telling him of the situation. Protective of his sister, Ficarron sent her a note telling her not to worry. He disguised himself using the stage costume for the Poor Student and went to the love-nest Barto kept in the café for his assignations. Laurent had already slashed Barto’s throat when Ficarron arrived. Ficarron used the same blade to kill Laurent. Pascal did not like Barto, but there is no evidence to link him to the crime.
Hot Chocolate to Die For
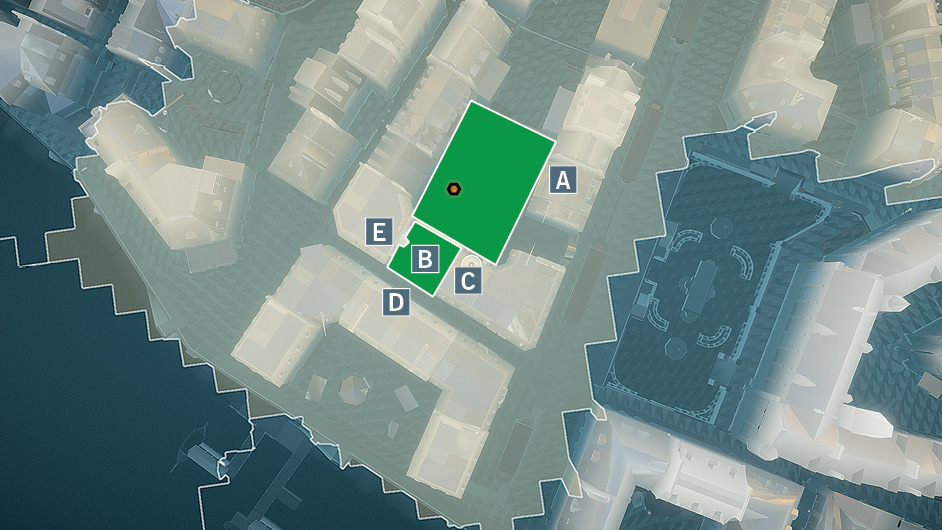
Investigation Zones & Clues:
 Garden: “Statement of Amèlie Monvoisin”, “Women’s body”, “Overturned cup”, “Flower garden”, “Ring”
 Dining Room: “Statement of Pierre Duclos”, “Statement of Georges Villiers-Segonac”, “Silver pot”, “Snuffbox”, “Letter to Pierre”
 Kitchen: “Statement of the Maid”, “Kitchen supplies”, “Mortar and pestle”
 Study: “Crumpled letter”, “Documents”, “Book: Paris Society”, “Commonplace book”
 Terrace: “Statement of Lucille Tuchet”
Solution: Valérie Duclos, neé Monvoisin, was poisoned by her younger sister Amélie who wanted to inherit their ancestor’s fortune and gain independence. The crime revolved around an old legacy created by Marguerite Monvoisin, whose fortune (likely earned through the use and sale of exotic poisons) is passed down to the eldest surviving female of that line. Valérie, as the eldest, had inherited the fortune, but her husband (whose death also raises questions) wrote a conflicting will. It was this will that put the money out of Valérie’s hands, declaring family friend Georges Villiers-Segonac as executor and her son, Pierre Duclos, as sole trustee. Valérie received a lawyer’s assurances that the entire fortune did, in fact, belong to her, but with the qualification that as long as Georges Villiers-Segonac was “active,” she would not enjoy control of it. It is for this reason that Valérie was especially angry on this night, and also for this reason that the notion of denouncing Georges to the Committee of Public Safety, thereby removing him from the equation, came into her head. However, her younger sister, Amélie, without an income of her own and dependant upon her relations, realized that if Valérie died the money would come to her as the next female in line. Using a recipe inherited by Valérie, Amélie concocted a powerful poison which she stored in a poison ring (also inherited). On this particular evening, the victim threatened to denounce Georges. Amélie saw the incredible opportunity of removing her sister while leaving the hapless Georges as the obvious culprit. She secretly poisoned Valérie’s cocoa, then gave the cup to Georges and discarded her ring in the garden.
Bones of Contention
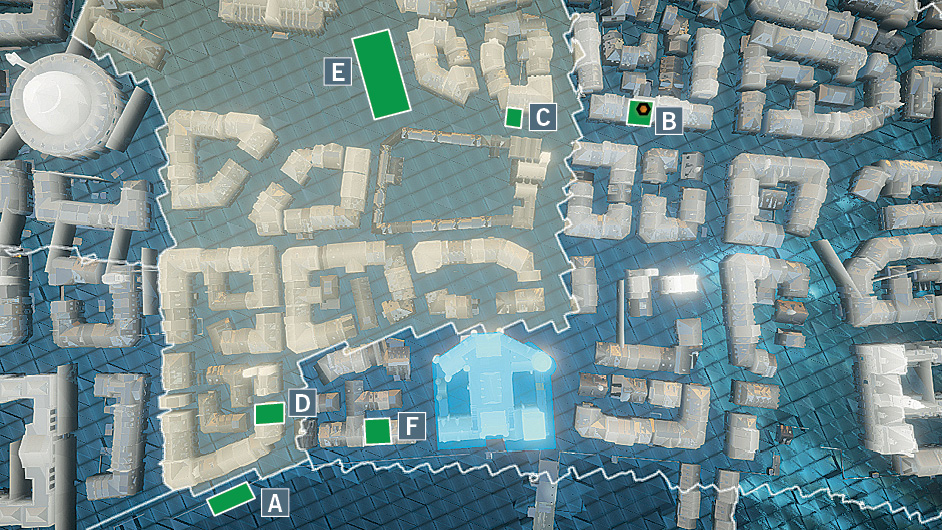
Investigation Zones & Clues:
 Shore: “Dirty sackcloth bag”, “Statement of the boatman”, “Statement of National Guardsman”
 Bella’s House: “Letter from Jamie”, “Statement of Bella”, “Statement of Jamie MacArthur”, “Statement of old woman”
 Shop: “Statement of the shopkeeper”, “List of Errands”
 Jamie’s House: “Letters from Bella”, “Crumpled letter”
 Butcher Shop: “Bloody bucket”, “Large sackcloth bag”, “Small bag”, “Butcher’s block”, “Statement of the butcher”
 Taverne du chien qui boite: “Statement of barkeep”
Solution: Frustrated by Bella’s father’s refusal to allow him to marry Bella, Jamie MacArthur concocted a plan to make him disappear. He intercepted one of the grandmother’s frequent errand lists and wrote the address of an out-of-the-way butcher’s shop on it. He then knocked out the butcher, waited until Bella’s father arrived, killed him and ground him up into haggis using the implements found there at the butcher shop. He disposed of the bones by tossing them into an old butcher’s sack and throwing it into the river.
Ancestral Vengeance
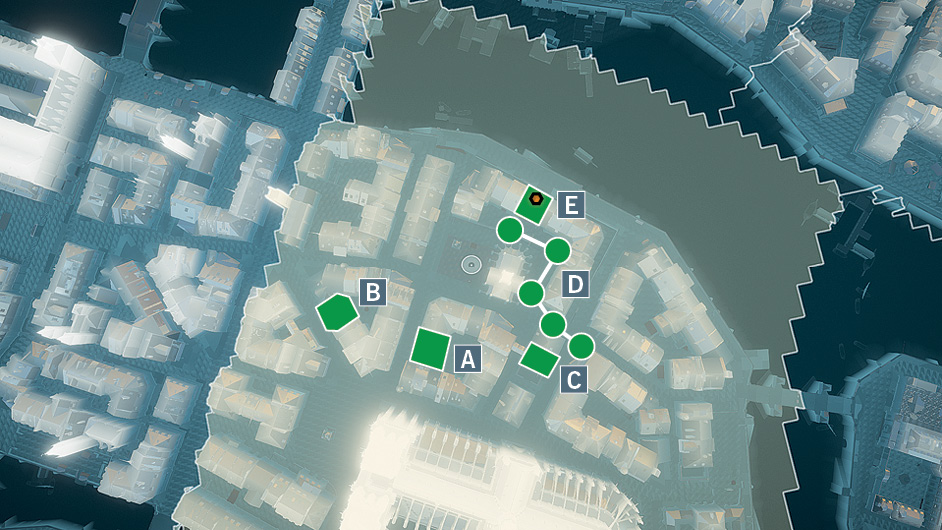
Investigation Zones & Clues:
 Teragon’s House: “Pool of blood”, “Dead body”, “Partially burned letter”, “A book: History of France, volume 4”, “A book: Almanac: Île de la Cité – XII”, “Newspaper”, “Bloody symbol”, “Torture devices”, “Statement of Madame Teragon”
 Grimany’s House: “Dead body”, “Bloody symbol”, “Letter from Teragon”, “Torture devices”
 De Prasi’s House: “Murderer’s blood trail”, “Blood trail out of house”, “Statement of Victor de Prasi”, “Torture devices”
 Street: “Trail of blood”
 Locked House: “Statement of Anne de Molay”
Solution: Descendants of some well-known medieval inquisitors had been living peacefully under aliases – anagrams of their forefathers names – until recently when one of them, Bertrand Grimany (descendant of de Marigny), foolishly gave an interview to a city newspaper. The article exposed his address and he was subsequently murdered, a large bloody roman numeral I inscribed on his wall. However, Grimany managed to wrest a pendant with a key away from his murderer in the struggle. Grimany’s friend, Paul Teragon (the first body discovered, and descendant of de Nogaret) was then murdered, and a bloody roman numeral II left behind. The third descendant, M. de Prasi (from de Paris), would have doubtless suffered the same fate but managed to fight off the attacker. A blood trail leads to the murderer, Anne de Molay, a descendant of the famous Templar victim of the medieval inquisitors. She had taken vengeance on the descendants of her forbearer’s torturers.
A Dash of Poison
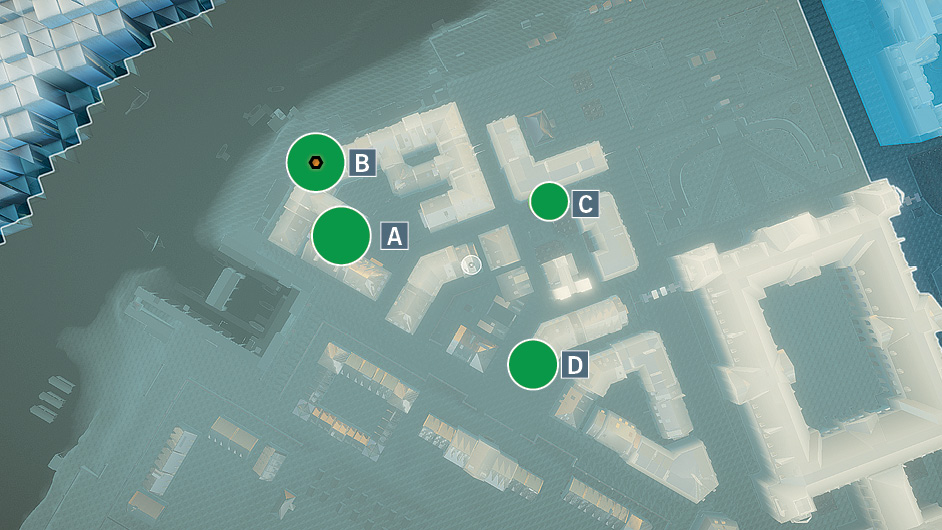
Investigation Zones & Clues:
 Alley: “Man’s body”, “Woman’s body”, “Empty coin purse”, “Bloody vomit”, “Drops of black liquid”, “Small glass vial”
 Apothecary Stand: “Pestle and mortar”, “Medicinal tonics”, “Chemistry books and journals”, “Supplies”, “Statement of the apothecary”
 Merchant Stall: “Tonics and medicine”, “Tonic bottle”, “Purses”, “Statement of the merchant”
 Workshop: “Notebook”, “Supplies”, “Pestle and mortar”, “Medicine bottles”, “Statement of the chemist”, “Letter from Samuel Maran”
Solution: In an unusual arrangement, Mme Beaudry was both the biggest customer and the fiercest rival of Samuel Maran. She was an avid consumer of his tonic but was also selling it for cheap at her stall by adding cheaper elements into the mixture. When Maran, who already had a difficult rapport with Mme Beaudry, discovered this he realized why he was losing most of his business. He therefore sent Beaudry a new tonic for her to try. Beaudry received the delivery and after unwittingly giving the tonic a taste she dropped dead in an alley. An unlucky vagrant that came upon her body decided to rummage through her purse and try the poisonous mixture himself. An unwise decision.
The Death of Philibert Aspairt
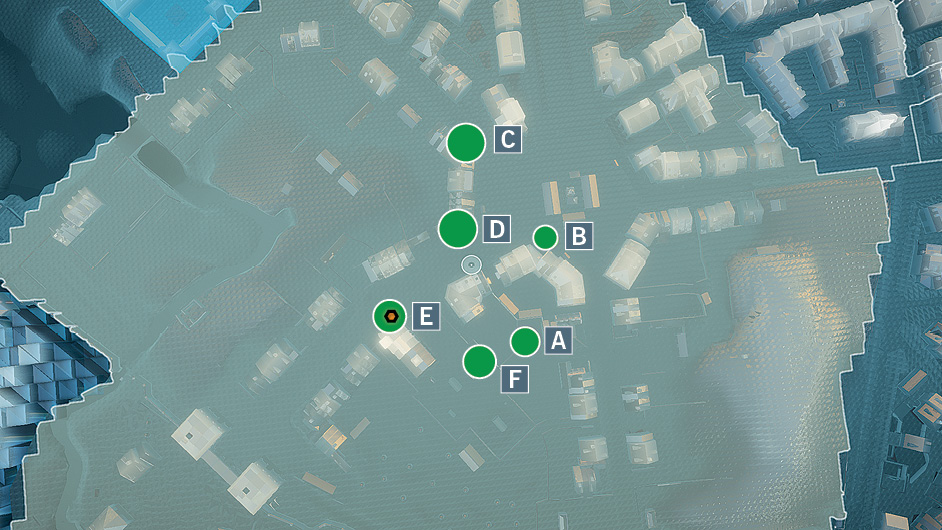
Investigation Zones & Clues:
 Catacombs: “Worn shovel”, “Set of keys”, “Old satchel”, “Bible”, “Crate of Chartreuse”, “Loose beads”
 Apothecary Stand: “Statement of the apothecary”
 Merchant Stall: “Statement of the merchant”, “New shovels”, “Supplies”
 Tavern: “Statement of the barkeep”, “Statement of Antoine Danis”, “Statement of Navarre Cavery”, “Statement of Catherine Doyère”, “Bottles of Chartreuse”, “Bottles of wine and liquor”
 Convent: “Statement of the nun”, “The blood of Christ”, “Bottles of Chartreuse”, “Stack of Bibles”
 Graveyard: “Statement of the gravedigger”, “Shovel”, “Half buried coffin”, “Worn Bible”, “Small wooden cross”
Solution: Philibert Aspairt was in over his head with debt. He had spent all his earnings gambling and building up a tab at the local tavern. One night, in a drunken haze, he wandered straight into the Paris catacombs. He was lucky enough to stumble upon a large stash of precious Chartreuse. The Chartreuse was made by Carthusian monks and said to be hidden by the nuns of the Convent des Filles de l’Enfant Jésus. Seeing an easy way to clear his debts, Philibert attempted to steal as much Chartreuse as he could carry. He had not accounted for the fact that Sister Sorel, who was charged with hiding the cherished elixir, wouldn’t take too kindly to thievery. She kept a watchful eye of the catacombs. She also politely gave Philibert a warning that he ignored. When Philibert once again returned for more Chartreuse, he was met with a shovel to the head. Sister Sorel ensured Philibert would remain in the catacombs for the rest of his days.
The Decapitated Warden
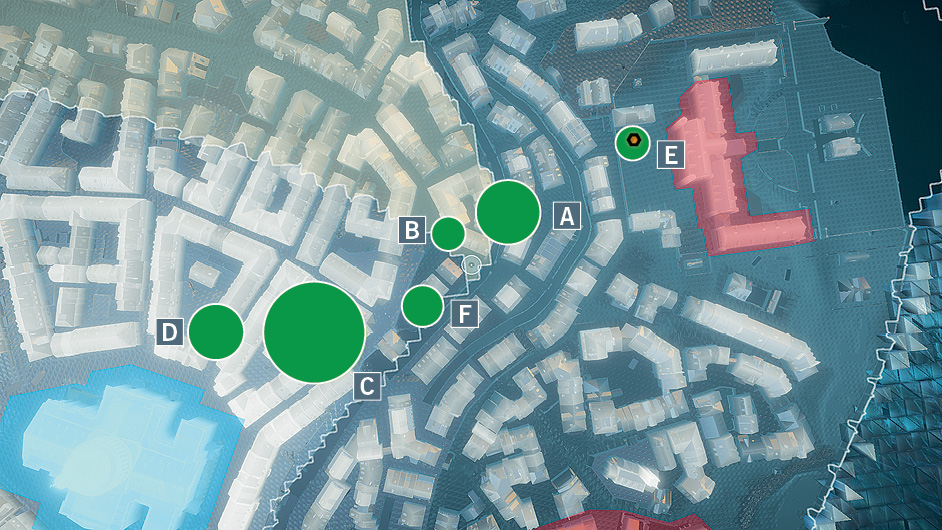
Investigation Zones & Clues:
 Tannery: “Dissolving corpse”, “Short sword”, “Statement of Mathieu Rochon”, “Statement of tannery owner”
 Jewelry Shop: “Statement of the jewelry shop owner”
 Warden’s House: “Letter”, “Statement of the Mme. Camille”, “Statement of Julien Lamond”,”Statement of Genevieve Cerne”, “Statement of MInette Rosier”, “Letter from Warden Leroux”
 Tavern: “Statement of the barkeep”, “Statement of Danton Marotte”
 Prison: “Head on a pike”, “Statement of the Deputy Warden”
 Blacksmith Shop: “Statement of the blacksmith”
Solution: Warden Leroux had been helping run La Salpêtrière prison for many years. His Deputy, Hugo Soulière, had grown tired of waiting his turn in line. After learning the Warden had some very serious gambling debts with a local gang, Les Marcheurs Morts, Deputy Hugo saw his opportunity. Having learned much about the gang’s methods in prison he ordered their custom blade at the local blacksmith, one that leaves the mark of an “x” on its victims. He then stabbed the Warden on his way home from work and tossed the corpse into a tub filled with chemicals at the local tannery. He made the bloody marking of the “x” clearly visible for all to see. To ensure the crime could never be traced to him, Deputy Hugo decapitated Warden Leroux and placed his head on a pike outside the prison. This was meant to appear to be a “message” sent by Les Marcheurs Morts to the next warden in line, Deputy Hugo himself. As an added bonus it turned out the Warden’s wife, Mme Camille, had been having an affair behind her husband’s back. Deputy Hugo thought he was in the clear. Unfortunately, despite all the work he’d done covering his tracks, Hugo’s own words were his downfall. The Deputy’s statement claimed Leroux left his post the previous evening, while Leroux’ wife and neighbors revealed he’d been missing for at least two days.
Cut the Middle Man
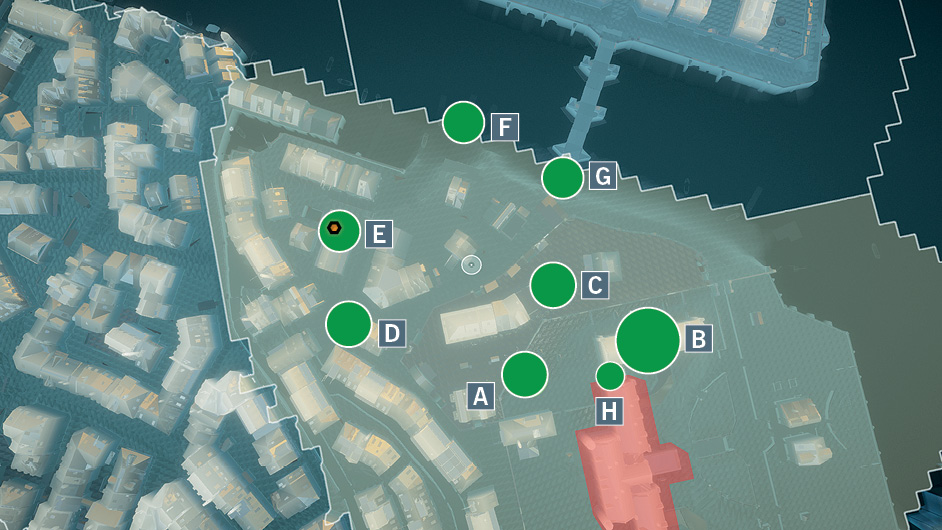
Investigation Zones & Clues:
 Cemetery: “Dead body”, “Footprints”, “Seaweed”, “Satchel”
 Asylum: “Torn medical journal”, “Fishing hook”, “Mattress”, “A book: Guide to Fish Species”, “Statement of asylum inmate”
 Office: “Statement of the surgeon”, “Statement of surgeon’s assistant”
 House: “Trail of blood”, “Signs of struggle”, “Raw meat”, “Statement of Leon Doiron”
 Butcher Shop: “Butcher’s knives”, “Statement of the butcher”, “Statement of the butcher’s assistant”
 Dock: “Human limb”, “Statement of the fisherman”
 Shack: “Pile of corpses”, “Cleaver”, “Torn journal”, “Leather straps”
 Gate: “Statement of asylum director”
Solution: A deranged patient at La Salpêtrière asylum, Simon Larue, managed to steal a medical journal outlining surgical procedures from a visiting surgeon. He became obsessed with dissecting flesh, experiencing illusions of being a surgeon himself. After practicing on rats he’d find in his cell, Larue felt ready to test what he learned on the world. He made a daring escape and several civilians were murdered, their mutilated bodies dumped in a shack by the Seine. He eventually found work at a local butcher’s shop, where he continued to hone his skills with the blade. Still, the escaped asylum patient was sloppy. His sand-covered boots and a butcher’s knife left in the shack pinned him directly to the crime.
The Hand of Science
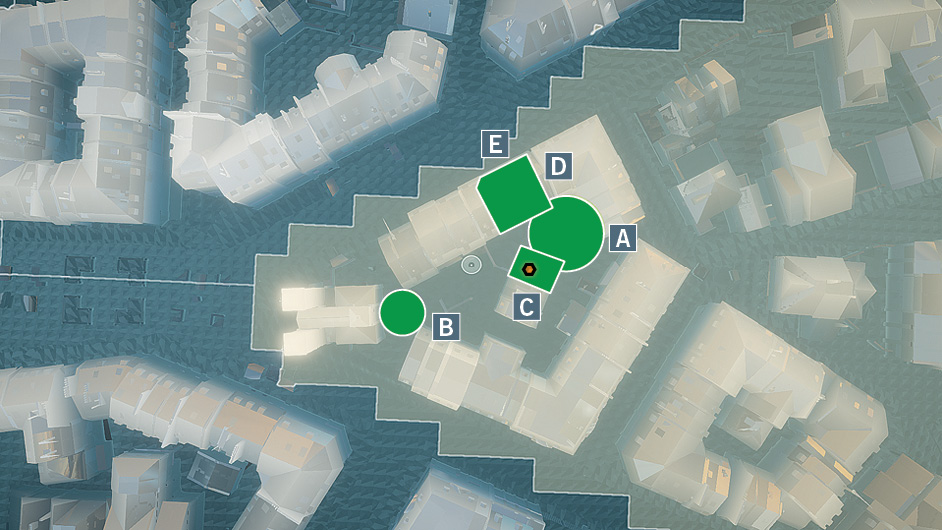
Investigation Zones & Clues:
 Courtyard: “Corpse”, “Bloody Bible”, “Exam of Pierre Simeoni”, “Exam of Lionel Viala”, “Trail of blood”, “Statement of Pierre Simeoni”, “Statement of Lionel Viala”, “Statement of Professor Frison”
 Church: “Statement of the priest”, “Statement of the church deacon”
 Office: “List of chemicals”, “Manifesto”, “Scrap of paper”
 School: “Lesson plan”, “Chemical vials”, “Smashed bottles”, “Statement of the school caretaker”
 Bedroom: “L’avantcourer Journal”, “Key”
Solution: For one too many years, Professor Frison had been working in the shadow of his friend and colleague Professor Marcel at the chemistry department of Chemical Science School Eustache du Gary. When Marcel published an essay in the L’avantcoureur Journal that supported Antoine-Laurent de Lavoisier’s discrediting of the Phlogiston Theory of Combustion and publicly refuted Frison’s own theories, Frison’s hidden jealousy hit breaking point. Frison had only a few weeks prior published a paper supporting Phlogiston Theory. Knowing that Professor Marcel was highly meticulous, Frison stole his lesson plan for the next day and learned he was using sulfuric acid in an experiment to make Diethyl Ether. Though this compound is flammable, Frison knew Marcel would be very careful with the mixture. So while Marcel was tutoring at night, Frison swapped out the lab’s bottle of sulfuric acid and replaced it with nitric acid, a highly explosive chemical. He then re-labeled the bottle, having painstakingly studied Professor Marcel’s handwriting. As a result, the next day Marcel inadvertently caused a minor explosion in his own classroom. Fatally injured, he dragged himself into the courtyard, all the while clutching a bible belonging to the Church of Saint Côme. Judging by his published feelings towards the church`s priest he seemed to be implying the church played a role in his death. The truth was much closer to home.
The Assassination of Jean-Paul Marat
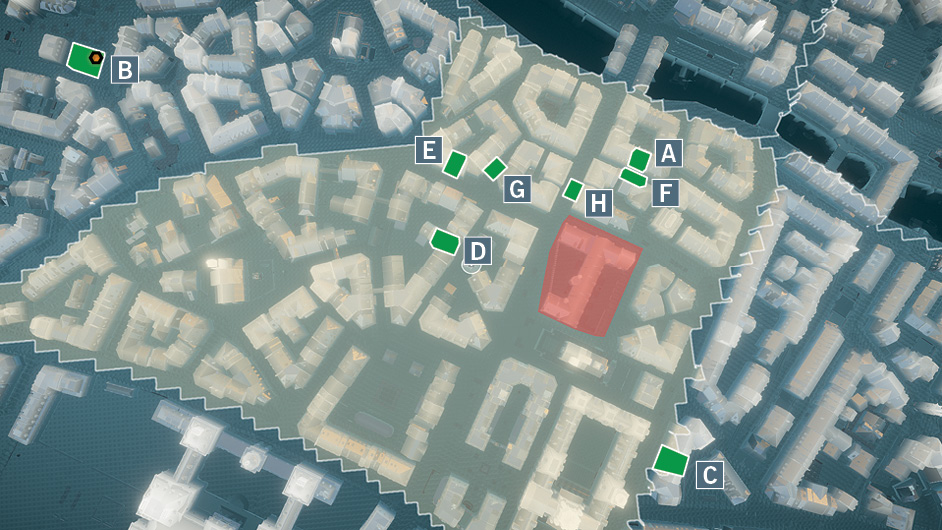
Investigation Zones & Clues:
 Marat’s House: “Jean-Paul Marat’s body”, “Empty Bottle of tonic”, “Bloody knife”, “The Friend of the People”, “Statement of Jacques-Louis David”, “List of Girondin traitors”, “Letter from Charlotte Corday”
 Prison: “Statement of Albertine Marat”, “Statement of Jasper Lasalle”, “Statement of Simmone Evrard”, “Statement of Charlotte Corday”, “Statement of Theron Brignac”
 Hotel: “Letter from Charlotte Corday”, “Plutarch’s Parallel Lives”
 Sewer: “Letter from Simmone Evrard”, “Corpse”
 Shop: “Statement of Dominique Bûches”
 Street: “Statement of Jacqueline Perel”, “Statement of Madeline Leclair”, “Statement of Chantelle Naves”
 Merchant Stall: “Statement of the merchant”, “Providence Hotel Handbill”
 Apothecary Stall: “Statement of the apothecary”
Solution: Jean-Paul Marat’s revolutionary newspaper, “The Friend of the People,” outraged many in France. Being an outspoken Jacobin supporter, he had no shortage of enemies. This included Charlotte Corday, a minor aristocrat from Caen. She had aligned with the Girondists and had grown to believe Marat was radicalizing the revolution with his inflammatory newspaper. Believing France could descend into civil war, she decided to assassinate Marat in an attempt to prevent more bloodshed. She visited his house claiming to have a list of Girondist leaders for Marat to examine. Marat invited her upstairs, where he was soaking in a tub to soothe a persistent skin condition. Corday listed off fake Girondist names and Marat began to scrawl them down quickly. Corday seized the opportunity and pierced his heart with a blade, killing him almost instantly. Corday wanted to inflict confusion and fear among the Jacobin ranks and it worked. Despite the inevitable noise of clues and suspects that surrounds any high-profile murder, the truth was deceptively simple for those who cared to look close enough. The list of Girondist names provided by Corday contained a basic code that pointed to the Hotel Providence. Inside one of the rooms was a hand-written confession by Corday that claimed, “I kill one man to save 100,000”.