
Syndicate Guide Walkthrough The Co-Op Game
Playing a Mission
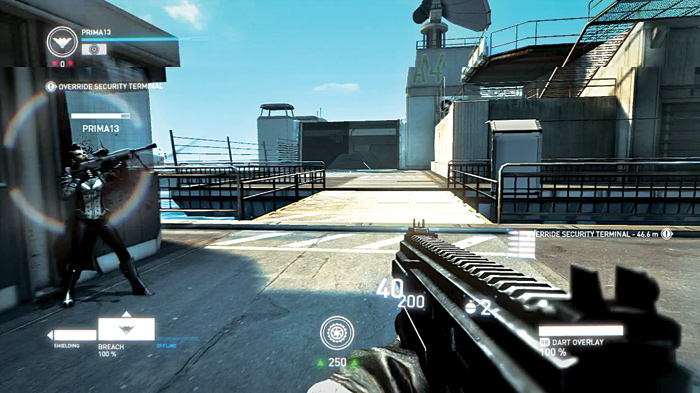
The co-op missions are different from the campaign game. While you play solo in the campaign game, in co-op you can play with up to three other players.
In fact, all of the co-op missions are designed for four players working together.
Though you could play with only two or three players, the difficulty of the mission increases drastically. Don’t even try these missions on your own. You need backup.
Roles
In each mission, it is important for the members of a team to take on specific roles and come armed with the appropriate weapons for those roles.
Depending on the mission, you may want to have different compositions for your team. There are three main roles—offensive, defensive, and support.
Offensive
The job of the offensive player is to advance and get in close to the enemy. These players need to move quickly and take advantage of cover.
When fighting against enemies with armor, their job is to move close enough to breach the armor and distract the enemy while team members with heavier firepower engage from long range.
An offensive loadout kit should include a submachine gun or shotgun as well as Reboot, EMP, E-Drain, or C2C Pulse apps.
If you plan on playing this role, upgrade your chip to increase your health because the offensive player is the one who usually takes a lot of fire.
For most missions, you will want to take along two offensive players who can work together in partnership—keeping each other healed and providing close support when the other offensive player gets into trouble.
Defensive
The defensive player’s task is to provide direct support to the offensive team members as well as defend the dropship, during the missions where this is an objective.
This role stays back a bit, following the offensive players and engaging the enemies that are attacking those team members. Defensive players also attack armored soldiers after offensive players have breached their armor.
For this role, you want an assault rifle, which combines firepower with longer range.
A TAR-39 works well for a defensive player who likes to play up a bit closer to the enemy, while the ACR-10 is better for staying back—especially once it has been upgraded with the scope.
Select apps such as Shielding, Virus, or Focus Target, which can help other members of the team as well as the defensive player.
Each mission should have at least one defensive player, or two defensive players, with one playing forward and the other playing back.
Support
Every team needs a support player. The job of this role is to stay back and engage enemies at long range.
This player role looks for enemies up on catwalks or enemy snipers and kills them before they can inflict damage on your team members. The sniper rifle is the weapon of choice for support.
Pick up an assault rifle during a mission for a second weapon you can use at closer range rather than a sidearm.
Support players should select apps that can support the entire team at all ranges. Heal Squad is a great choice along with Battery or Damage Link.
The support player can also defend the dropship when this is an objective and be ready to move forward to reboot team members who have gone down.
Teamwork
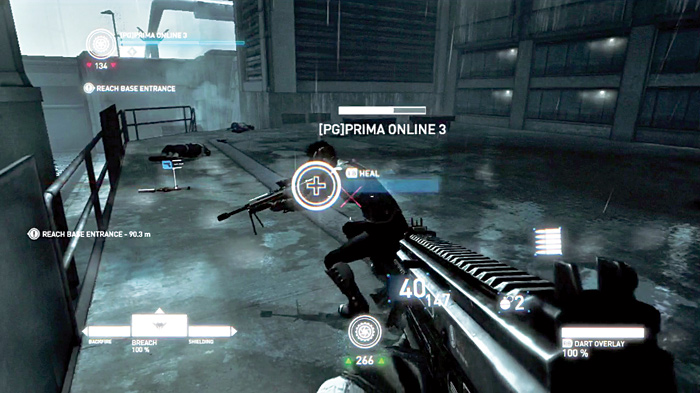
The key to completing co-op missions is working together as a team. These missions are designed to force players to work together. Playing as individuals only results in a failed mission.
As mentioned previously, each member of a team should be assigned a role and be armed accordingly. It is usually a good idea to designate one player as the team leader.
The leader, who can play in any of the three roles, is the one who ensures that the team members focus on the current objective. For most missions, it is a good idea to stick together.
When a team must split up, always make sure to use the buddy system. A player alone is a dead player.
Therefore, if you have to defend the dropship while stealing items, leave two at the dropship while the other two go after the goods.
The main reason to always have a buddy is for healing.
You can heal another team member at any time by targeting them and then pressing the breach button. Not only does this help keep your team members alive, you also get experience points for healing.
If a team member loses all of their health, they do not die, but drop to the ground and can crawl, but not fight. Another team member must use the breach ability to reboot them and get them up and running again.
If all team members are on the ground, the mission is a failure. Therefore, it is important to always keep one player back but in range to reboot the other players.
Plus, by constantly healing each other, you can avoid needing to reboot.
Officers
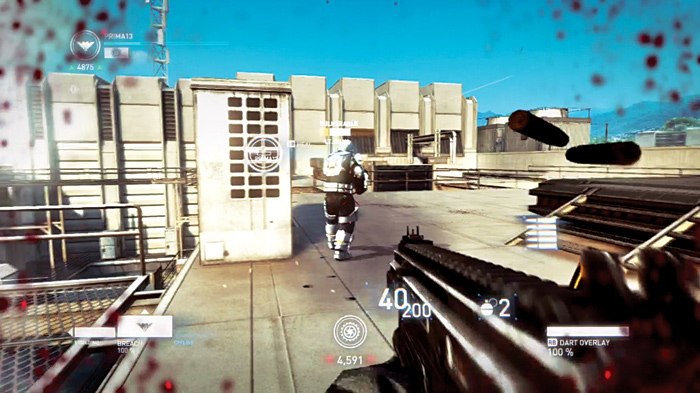
Every mission has officers that you must defeat. They are always in some type of armor, which you must first breach. Don’t try to go one-on-one with an officer. Instead, you need to work together as a team.
As your offensive team members move in and breach the armor—while hiding behind cover if possible—the rest of the team fires from longer range. If you have to take on one of these enemies with just a couple of players, use a tag team tactic.
As one player has the officer’s attention, a second player shoots at the officer from the side or rear while the first player seeks cover.
As soon as the officer turns to engage the second player, the first player then goes on the attack while the targeted player rushes for cover.
This lets you maintain constant firepower on the officer while allowing each player time to recover health. Don’t forget to heal each other during the fight as well or have a support player use Squad Heal.
With a little practice, officers will be a lot easier to take down.
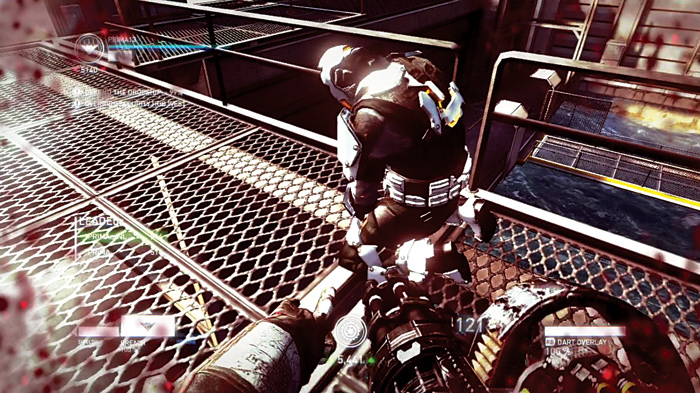
After defeating an officer, move in and rip out his chip. You have only a few seconds after the officer drops to his knees to get the chip.
Once the time is up, the chip is unrecoverable. Not only do you get experience points for the chip rip, you also can earn tokens for upgrading after the mission is complete.
Agents
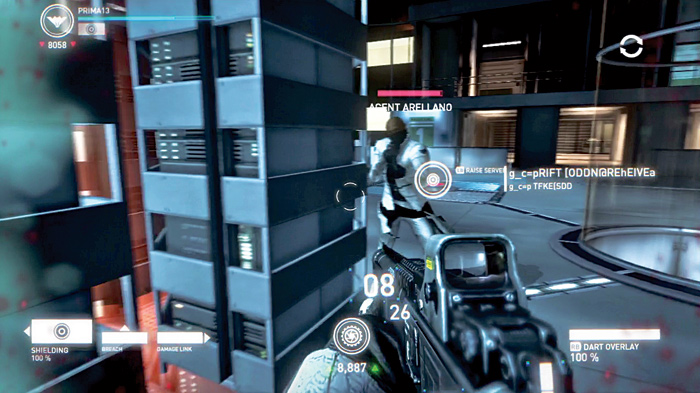
During some missions, you must defeat enemy Agents. These are your toughest foes. Some Agents have the ability to heal each other.
Therefore, the best strategy is to use heavy firepower and have all members of your team concentrate their fire on a single Agent at a time. Usually once one goes down, the others are easier to kill.
Use apps that help the entire team such as Shielding, Battery, or Squad Heal to keep everyone at their fighting best.
Other apps are also useful—especially if you have upgraded them so they affect the entire team. Once you kill an Agent, you can rip out his chip just like an officer.
You can also breach his chip while he is down and cause him to self-destruct. This keeps the Agent from rebooting, but prevents you from ripping the chip.
DART Overlay
During co-op missions, using the DART overlay does not slow down time. However, it still allows you to see enemies behind cover.
Plus, if a team member can see an enemy, the same enemy appears in your DART as well. Therefore, it is a good idea to have your support with the sniper rifle look for enemies so that everyone else can also see them.
Some chip upgrades or apps also improve your abilities while in DART overlay mode.
While you can pick up ammo and weapons from downed enemies, also look for ammo caches.
They appear with a blue outline while in DART overlay mode and can provide ammo for all weapons except heavy weapons such as the minigun or thermite gun.
When you find an ammo cache, be sure to call out to your team and let them know as well.
Hints and Tips from the Testers
Here are some battle-tested co-op tips from the Syndicate testers.
- Keep moving while breaching! The range check on breaching only applies to initiating a chip connection—once the connection has been established you can move freely (that is, into cover) and perform other actions (such as shooting, reloading, etc.). This is particularly important when healing and rebooting team mates! Drive-by reboots and heals are a key to success!
- Heal, heal, and heal ! Keeping your fellow Agents up and running is the key to success. Keep an eye on the health status of your fellow Agents.
- Running out blindly to try and reboot another Agent of the team might end up getting you killed. Personal safety should come first.
- Sticking together and working is essential.
- You can never have too much ammo. Stock on ammo crates frequently. They are available in all gates as well as additional locations in some missions.
- The more Agents connect to a breach, the faster it will be completed.
- Observe Agents and their abilities. Taking on the wrong Agent first can result in mission failure.
- Breach enemy grenades for points and to stock up your own supply.
- Hanging on to your sidearm is of advantage when on a mission that calls for stealing new technology or commodities.
- The Riot Lance can be deadly when combined with close-quarters melee takedowns! Stun your enemy and then take them down!
- If you are not the world’s most accurate shot, you can still be of immense use to your team. Try hanging back and supporting your team with a heal or reboot and other beneficial applications.
- A good tactic against Riot shield Police is to have one teammate flank them. This will expose their backs to at least part of the team.
- The DART overlay gives you a huge tactical advantage over your enemies. It can be used to outsmart and flank enemies, locate mission objectives, and find team members.
- If you are getting overwhelmed, think, backtrack, regroup, heal, and use DART overlay to plan a new approach.
- If you find your vision is distorted and you are unable to breach or use applications it means an ECM unit is close. Use DART overlay to find them and eliminate them before enemies exploit your temporary weakness.
- When facing opposing Agents, it pays off to pay attention to their loadout, both their applications and weapons, and to formulate an appropriate takedown strategy.
- When an enemy Agent is down, either rip his chip or ensure that you and your team members breach his chip to cause a self-destruct—if this is not done the opposing Agent can be rebooted by his team members.
- Remember the damage boost received from using DART overlay. This comes in particularly handy when using weapons with a high rate of fire, such as the UMK.
- Stun weapons like the Riot Lance and the Electron Mace will cause Riot shield Police to drop their shields.
- When facing opponents that use stun weapons, sticking with your team is imperative.
- Remember that you can save (and rename) up to three different loadouts. Make use of these to create presets for different roles. Team member’s loadouts are visible in the lobby, so you can quickly change to make sure you pick one that compliments the rest of the team.
- Both the Kusanagi assault rifle and the sniper rifle can fire through riot shields when they have the wall-penetration upgrade.
- After taking down an Agent, it might be safer to breach his chip to activate the self-destruct. Chip-ripping him might be tempting, but it can also put you into the line of fire of remaining enemies.