
Air
Transport Helicopters
Each transport helicopter is capable of holding five players, making them ideal for transporting squads to any spot on the battlefield. During Conquest matches, these large choppers are the best way to capture neutral control points at the start of a battle. But the transport helicopter’s impressive troop capacity is also its weakness, and may result in a big score for a fighter pilot or any other unit armed with heat-seeking missiles. To avoid such threats, fly low and fast, using trees, hills, and buildings to mask your movements. As long as you avoid line-of-sight with your enemies, they can’t attain a lock and fire a missile. There are no vehicle unlocks or loadout options for transport helicopters.
UH-1Y Venom
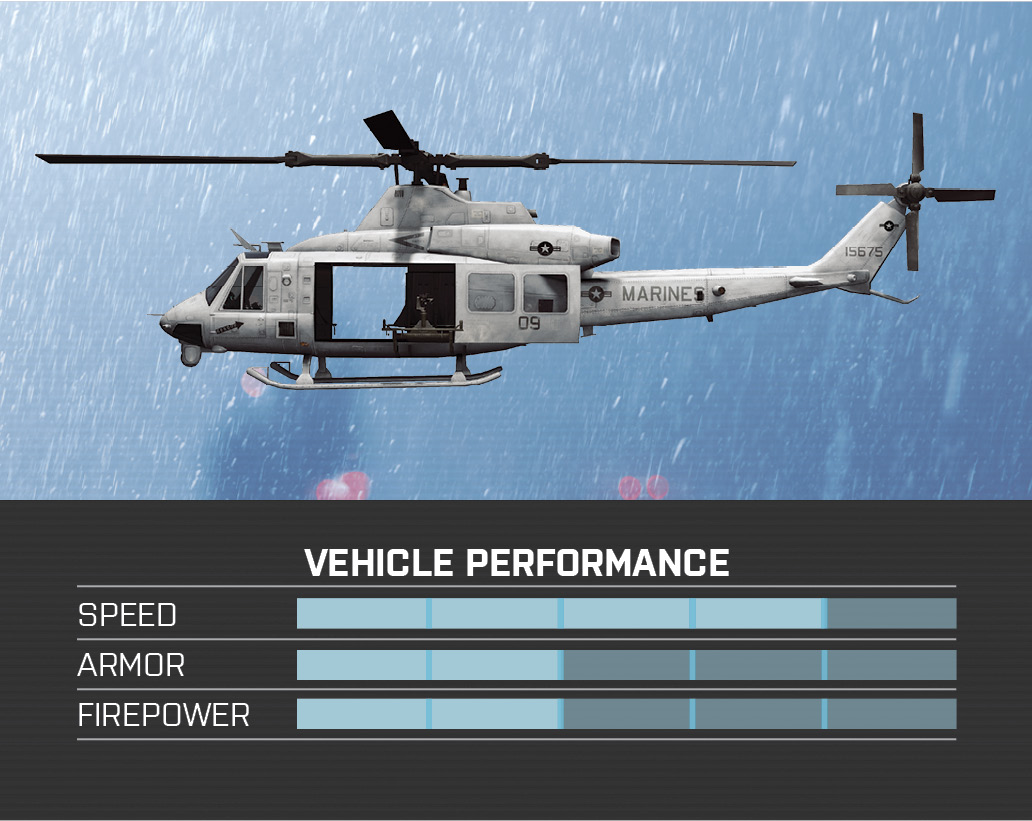
- Nationality: US
- Description: Newest modern version of the “Twin Huey” helicopters used by the USMC since the 1970s. This new variant was introduced in 2008.
Vehicle Occupancy
| Seat | Position | Weapon | Ammo |
|---|---|---|---|
|
1 |
Pilot | None | — |
|
2 |
Gunner | Minigun | Infinite |
|
3 |
Gunner | Minigun | Infinite |
|
4 |
Passenger | Troop Kit | — |
|
5 |
Passenger | Troop Kit | — |
Field Notes
The Venom is the US team’s fastest high-capacity troop transport. It is also armed with port and starboard mounted miniguns. The miniguns have a blazing rate of the fire, ideal for engaging troops and light vehicles. With sustained fire, they can even damage armored vehicles such as tanks and IFVs.
KA-60 Kasatka
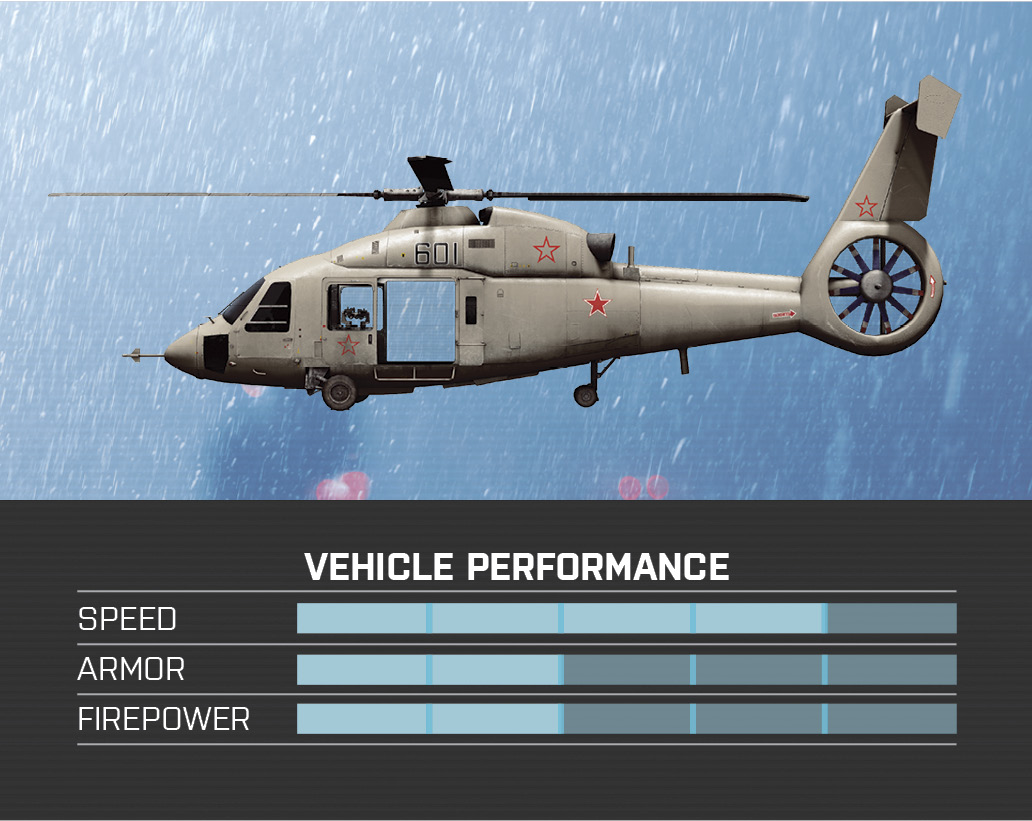
- Nationality: RU
- Description: New utility helicopter from Kamov entering service with the Russian Air Force to replace the aging Mi-8.
Vehicle Occupancy
| Seat | Position | Weapon | Ammo |
|---|---|---|---|
|
1 |
Pilot | None | — |
|
2 |
Gunner | Minigun | Infinite |
|
3 |
Gunner | Minigun | Infinite |
|
4 |
Passenger | Troop Kit | — |
|
5 |
Passenger | Troop Kit | — |
Field Notes
The KA-60 performs much like the US team’s Venom, but the pilot sits on the starboard side. This can be a bit disorienting at first, compared to piloting the other choppers where the pilot either sits in the middle or on the port side. So when maneuvering the chopper at low altitude, be mindful of the port side to avoid clipping trees, towers, and other objects.
Z-9 Haitun
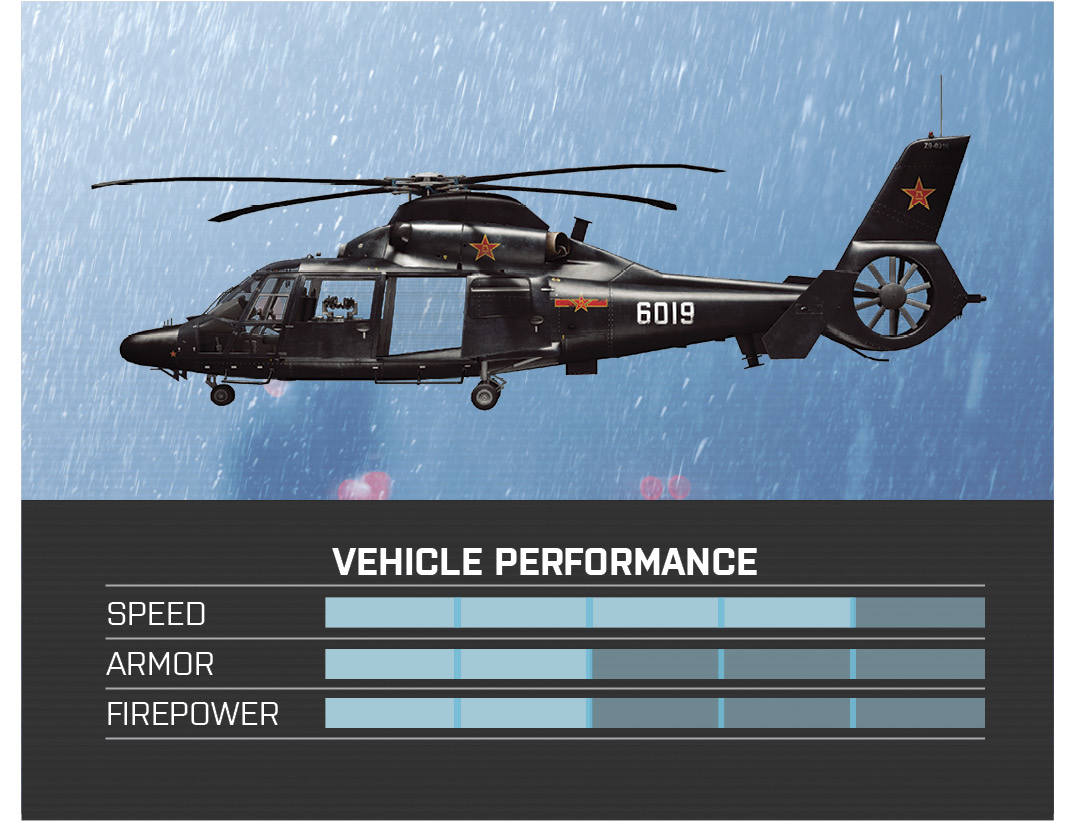
- Nationality: CN
- Description: Based on a French design, the Chinese Z-9 Haitun was first deployed by the PLA in 1994, serving primarily as a troop transport.
Vehicle Occupancy
| Seat | Position | Weapon | Ammo |
|---|---|---|---|
|
1 |
Pilot | None | — |
|
2 |
Gunner | Minigun | Infinite |
|
3 |
Gunner | Minigun | Infinite |
|
4 |
Passenger | Troop Kit | — |
|
5 |
Passenger | Troop Kit | — |
Field Notes
The pilot in the Z-9 sits on the port side. This makes piloting the Z-9 just like flying the US team’s Venom. This helicopter is almost always deployed at bases, serving as the perfect transport for quickly moving a squad to distant objectives. Fly low and get troops on the ground as quickly as possible.
Transport Helicopter Tactics
- Unless you have experience flying helicopters, don’t try to fly a transport helicopter filled with teammates. This is the wrong time to take a flying lesson—go practice on the Test Range until you’re ready. This will allow you to experiment with taking off, flying, and landing. Don’t pilot one of these helicopters in a match until you can easily land on a rooftop.
- It takes a few seconds for a transport helicopter’s rotor to spin up before take-off. So after securing an enemy base in Rush matches, watch for enemies lurking about during these vulnerable seconds as you can die fast if you get hit with a rocket or tank round. Also, take steps to ensure the enemy doesn’t steal your choppers.
- The transport helicopters can be used to quickly capture control points during Conquest matches—hover over the flag to convert it. The more players on board, the faster it will be captured. However, watch out for defenders below. A hovering chopper makes a juicy target. It’s much safer to drop troops via parachute onto a control point.
- Use the miniguns to blow apart light cover offered by walls and rooftops. This is a great way to expose objectives located inside small structures during Rush and Obliteration matches.
- The miniguns are capable of high rates of fire, but they have a tendency to overheat, rendering them inoperable for a few seconds. So lay off the trigger occasionally to allow the barrels a chance to cool down. For a better view of distant targets, use the minigun’s zoom function.
- When piloting a transport helicopter, orbit around a contentious point so the gunners on the port and starboard sides can provide supporting fire with the miniguns. While orbiting around one location, usually only one gunner has the best view. Consider switching directions so both gunners get a chance to lay down some fire. A transport helicopter spitting out thousands of rounds is likely to draw attention, so be prepared to escape to a safe distance if you detect a missile lock. Drop altitude fast in an attempt to break line-of-sight with a missile before it is launched.
- Soldiers riding in the fourth and fifth positions can access their weapons and gadgets. This gives engineers the ability to repair the helicopter while it’s in flight—they can also fire guided weapons like the Stinger, SRAW, or Javelin. Support and recon players can toss C4 charges down onto the battlefield, blowing up unsuspecting enemies.
Scout Helicopters
The scout helicopters bridge the gap between the attack helicopters and the transport helicopters. Initially the scout helicopters only have light armament in the form of gun pod-mounted miniguns, ideal for strafing infantry and light vehicles. But new and more powerful weapons can be equipped as well, turning these small, agile helicopters into formidable weapons platforms. Heatseekers and Laser Guided missiles give these helicopters a more active role in shooting down enemy aircraft and destroying enemy armor. But with three passenger seats, the scout helicopter is best utilized as a quick way to move troops around the battlefield.
Scout Helicopter Upgrades
| Image | Name | Slot | Unlock Points | Description |
|---|---|---|---|---|
| Default Upgrades | ||||
|
|
7.62mm Miniguns | Primary Weapon |
— |
Very high rate of fire machine guns for use against infantry, light armor, and other aircraft. |
|
|
IR Flares | Countermeasure |
— |
Infrared flare launchers that, when deployed, spoof incoming missiles and break lock-ons. |
|
|
Gyro Stabilizer | Upgrade |
— |
A system that tries to maximize maneuverability until automatic repairs can be started. Is automatically activated when the aircraft receives a critical hit. |
| Unlockable Upgrades | ||||
|
|
Stealth Coating | Upgrade |
7,000 |
Special plating that increases the time it takes for enemy targeting systems to lock on to you. |
|
|
Heatseekers | Secondary Weapon |
13,000 |
Once locked on, these heat-seeking missiles will guide themselves towards their target. |
|
|
Proximity Scan | Upgrade |
20,000 |
Scans the area around the vehicle and reveals enemy movement on the minimap. |
|
|
Fire Extinguisher | Countermeasure |
27,000 |
Can only be deployed when the vehicle is in a critically damaged state. It will put out any fires, bring the vehicle back to a functional state, and let the vehicle start recovering from sustained damage. |
|
|
25mm Cannons | Primary Weapon |
33,000 |
Fires 25mm explosive shells effective against light and medium armor as well as infantry. |
|
|
Belt Feeder | Upgrade |
40,000 |
An enhanced mechanism that makes reloading faster. |
|
|
ECM Jammer | Countermeasure |
47,000 |
When activated, this system will prevent targeting systems from locking on to you and will spoof any incoming missiles for a short while before it needs to be reloaded. |
|
|
Air Radar | Upgrade |
53,000 |
Replaces the minimap with a radar display, showing airborne targets in a large radius around the aircraft. |
|
|
Laser Guided | Secondary Weapon |
60,000 |
A powerful missile that locks on to ground vehicles. Once lock-on is achieved, the user has to maintain it until the missile has reached its target. If lock-on is lost it can be re-acquired and the target can still be taken out. Can also lock on to laser-designated targets. |



AH-6J Little Bird
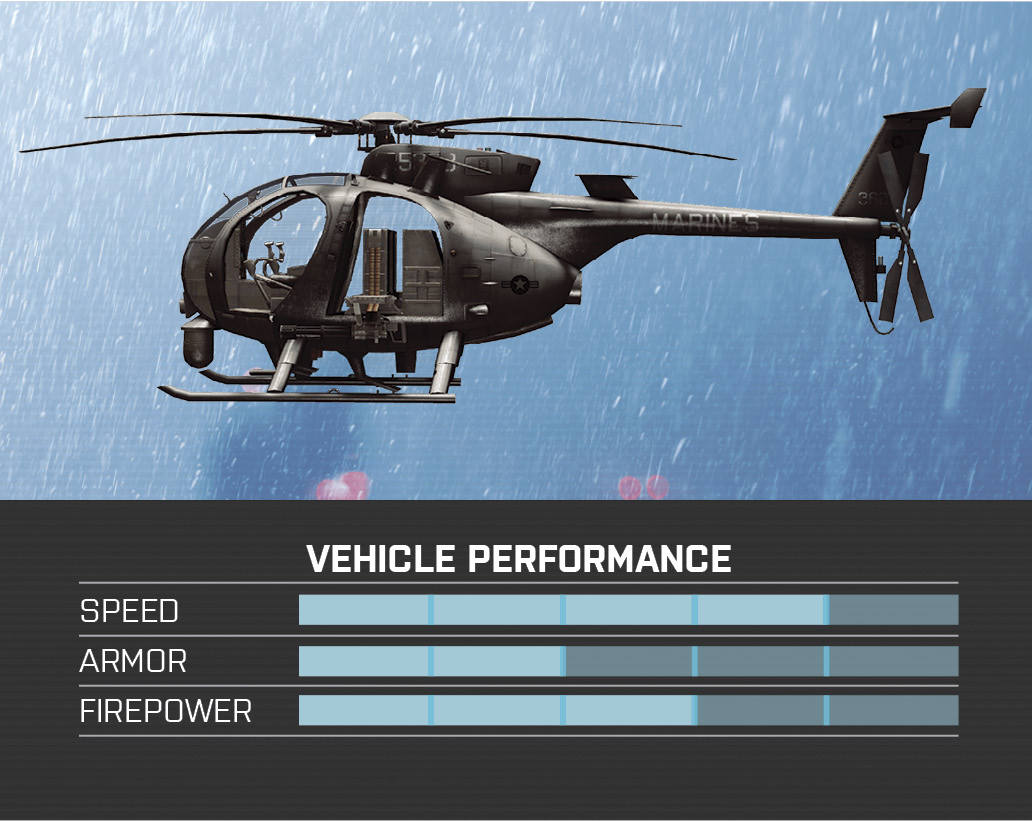
- Nationality: US
- Description: Improved attack version of the MH-6.
Vehicle Occupancy
| Seat | Position | Weapon | Ammo |
|---|---|---|---|
|
1 |
Pilot | 7.62mm Miniguns | Infinite |
|
2 |
Passenger | Troop Kit | — |
|
3 |
Passenger | Troop Kit | — |
|
4 |
Passenger | None | — |
Field Notes
When piloting the Little Bird, be mindful of your passengers in the second and third positions riding on the helicopter’s landing skids. These passengers are completely exposed to incoming fire. So fly low and fast to prevent these troops from being hit. Consider dropping these passenger off before performing any strafing runs.
Z-11W
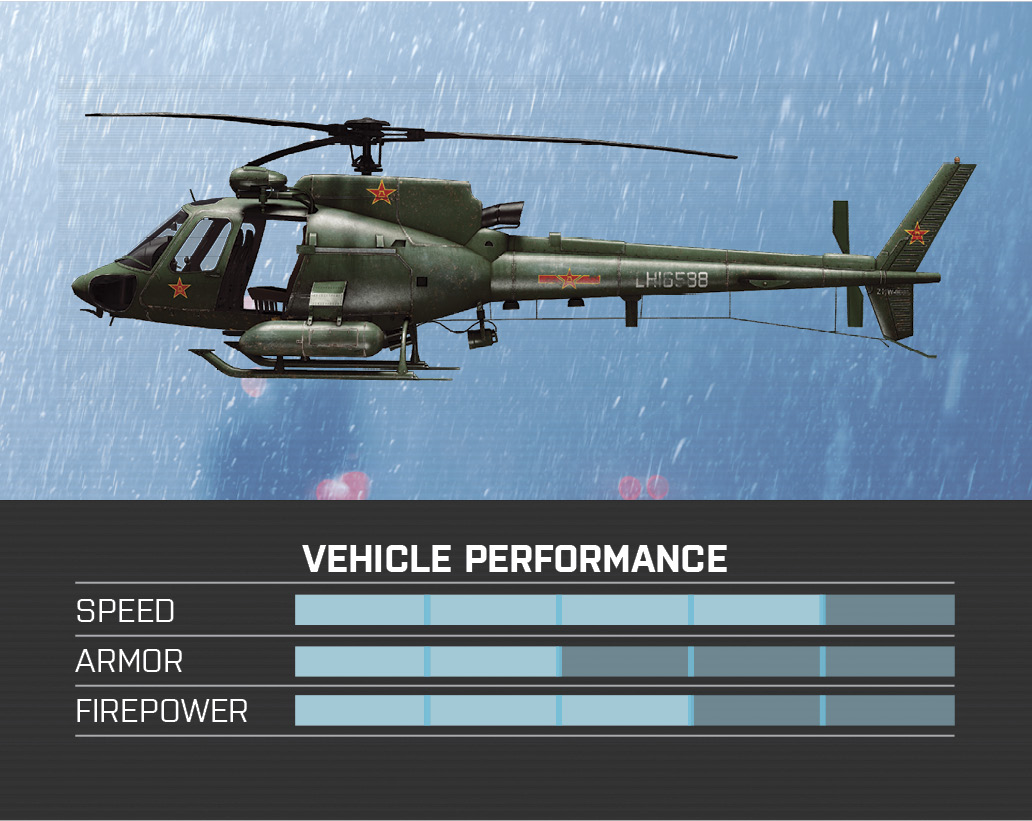
- Nationality: RU/CN
- Description: Armed military version of the Z-11 Chinese light utility helicopter.
Vehicle Occupancy
| Seat | Position | Weapon | Ammo |
|---|---|---|---|
|
1 |
Pilot | 7.62mm Miniguns | Infinite |
|
2 |
Passenger | Troop Kit | — |
|
3 |
Passenger | Troop Kit | — |
|
4 |
Passenger | None | — |
Field Notes
Deployed by both Russian and Chinese forces, the Z-11W is slightly larger than the Little Bird, but it still possesses the same speed and maneuverability. In this chopper the passengers in the second and third positions ride within the cargo compartment in the back. This gives them a bit more protection from incoming fire than riding on the landing skid.
Scout Helicopter Tactics
- Don’t learn to fly with the scout helicopters. They may be a bit too fast and maneuverable for new pilots. Instead, it’s recommended to wait until you have a few hours of practice in the transport helicopters before taking to the skies in these speedy choppers.
- Like all aircraft, the scout helicopters are now equipped with IR Flares by default, giving even new pilots the opportunity to evade incoming missiles. Applying the Stealth Coating upgrade is also recommended, making the chopper more difficult to lock on to.
- On some maps, the scout helicopters are the fastest way to transport troops, so don’t take off until every seat is full. Instead of landing, fly over your destination so you passengers can bail out and parachute down to the ground. This is the best way to quickly secure control points during Conquest matches. For more precise troop insertions, these helicopters are small and agile enough to land on rooftops or other elevated positions usually inaccessible to infantry. Consider dropping recon troops on high perches so they can monitor the battlefield from above.
- The crosshair-like reticle in the center of the pilot’s HUD is the aiming point for the chopper’s miniguns. The miniguns are fixed and always fire straight ahead. This requires you to dip the nose of the chopper while engaging targets on the ground. When pitching the nose down, the chopper will lose altitude. Applying full rotor speed can reduce the speed of descent, but you will still need to pitch the nose of the chopper up to avoid crashing. So when performing strafing runs, don’t get greedy. Fire a quick burst and then pull away before you crash.
- The miniguns are best deployed against infantry and light vehicles. But with sustained accurate fire, they can damage armored vehicles too, including IFVs and tanks. As usual, try to hit these vehicles from the side or rear to inflict the most damage. For even more damage against armored vehicles, equip the punishing 25mm cannons.
- Once the Laser Guided missile is unlocked, a scout helicopter becomes a self-sufficient tank killer. It’s up to the pilot to both designate the target and fire the missile. Start by orienting the chopper within line-of-sight of an enemy vehicle to automatically attain a lock. At this point a Guided missile can be fired, automatically homing in on the laser.
- Given their speed and maneuverability, the scout helicopters serve as great air-to-air weapons platforms when armed with the Heatseekers unlock. When an enemy aircraft is within view, instead of chasing it, simply rotate the chopper so you’re always facing the target. This gives the missile enough time to lock on. While carrying these missiles, the pilot can still switch back to the gun pods for strafing runs. Available from the start, there’s no reason not to have the Heatseekers assigned to the secondary weapon slot. But when the Laser Guided missile is unlocked, you’ll have to make a choice between the two.
- Soldiers sitting in the second and third positions can access their weapons and gadgets. This allows engineers equipped with a Repair Tool to fix the chopper while it’s in flight—this is an awesome way to score some easy Repair points. Weapons can also be deployed from these two positions. But firing from a fast-moving chopper is difficult unless you’re launching guided weapons like the Stinger, IGLA, or Javelin. Still, dropping C4 out of the chopper is always fun too.
Attack Helicopters
The attack helicopters are the most devastating vehicles in the game, but only when manned by a capable pilot and gunner. A two-man crew is essential for each attack helicopter to live up to its deadly potential. The pilot can fire the chopper’s unguided rockets, ideal for taking out tanks and other ground vehicles. But it’s the gunner who benefits from the awesome firepower provided by the chin-mounted turret. Like the auto cannons found on the IFVs, the cannons on attack helicopters fire small explosive rounds. The gunner can use this weapon to rack up dozens of infantry kills. Despite their impressive offensive capability, attack helicopters are vulnerable to heavy machine gun fire, rockets, and guided missiles fired by engineers or other aircraft. But with some fancy flying, and the aid of countermeasures and upgrades, it’s possible to minimize the danger posed by these threats. Unlike other vehicles, attack helicopters have six loadout slots—three for the pilot and three for the gunner. This allows an experienced crew to become more powerful with each attained unlock.
Attack Helicopter Upgrades
AH-1Z Viper
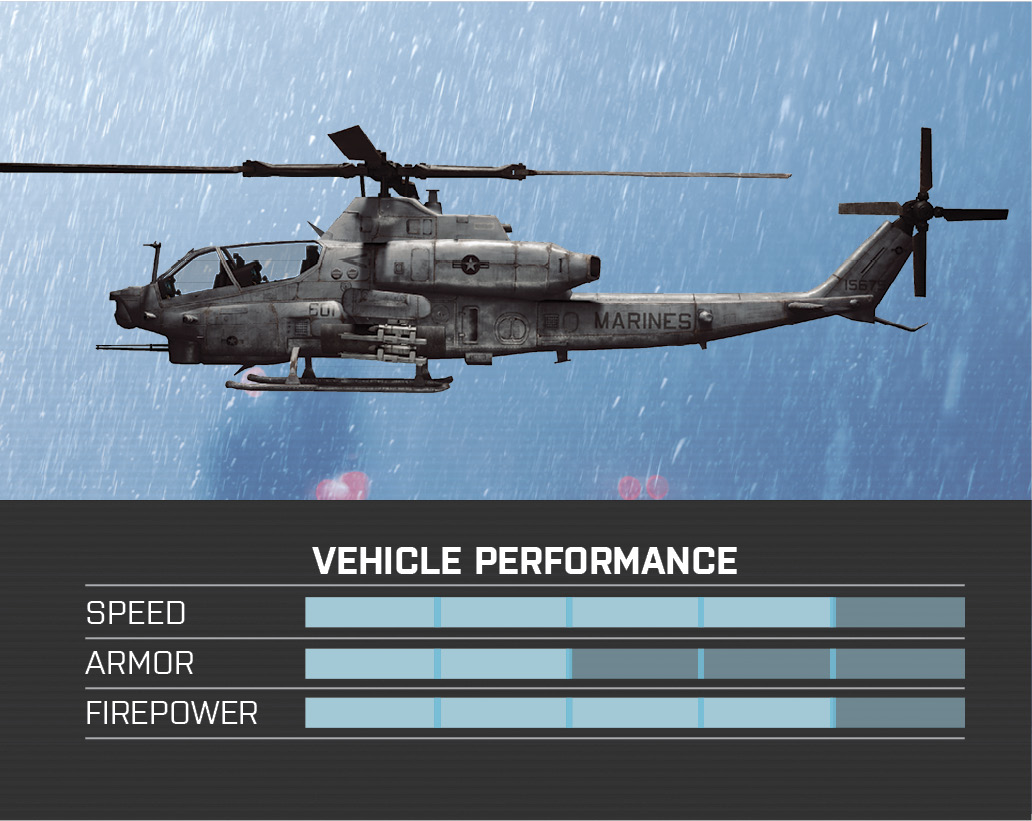
- Nationality: US
- Description: The AH-1Z Viper (also called “SuperCobra” or “Zulu Cobra”) is a twin-engine helicopter based on the AH-1W.
Vehicle Occupancy
| Image | Name | Slot | Unlock Points | Description |
|---|---|---|---|---|
| Default Upgrades | ||||
|
|
Hydra Rockets | Primary Weapon |
— |
A versatile rocket pod system capable of eliminating infantry as well as light, medium, and heavy armor. |
|
|
Heatseekers | Secondary Weapon |
— |
Once locked on, these heat-seeking missiles will guide themselves towards their target. |
|
|
IR Flares | Countermeasure |
— |
Infrared flare launchers that, when deployed, disrupt incoming missiles and breaks lock-ons. |
|
|
Gyro Stabilizer | Upgrade |
— |
A system that tries to maximize maneuverability until automatic repairs can be started. Is automatically activated when the aircraft receives a critical hit. |
|
|
Gunner Zoom | Gunner Optics |
— |
Zooms the view to more easily spot and take out targets at greater distance. |
|
|
Gunner Belt Feeder | Gunner Upgrade |
— |
An enhanced mechanism that makes reloading faster. |
| Unlockable Upgrades | ||||
|
|
Stealth Coating | Upgrade |
5,000 |
Special plating that increases the time it takes for enemy targeting systems to lock on to you. |
|
|
Gunner Proximity Scan | Gunner Upgrade |
10,000 |
Scans the area around the vehicle and reveals enemy movement on the minimap. |
|
|
Fire Extinguisher | Countermeasure |
15,000 |
Can only be deployed when the vehicle is in a critically damaged state. It will put out any fires, bring the vehicle back to a functional state, and let the vehicle start recovering from sustained damage. |
|
|
Gunner IRNV | Gunner Optics |
20,000 |
Enhanced infrared night vision that will make heat signatures easily distinguishable at close to medium ranges. |
|
|
Zuni Rockets | Primary Weapon |
25,000 |
Slow but powerful anti-infantry rockets. |
|
|
ECM Jammer | Countermeasure |
30,000 |
When activated, this countermeasure will prevent targeting systems from locking on to you and will disrupt any incoming missiles for a short time before it needs to be reloaded. |
|
|
Laser Guided | Gunner Secondary Weapon |
35,000 |
A powerful missile that locks on to ground vehicles. Once lock-on is achieved, the user has to maintain it until the missile has reached its target. If lock-on is lost, it can be re-acquired and the target can still be taken out. Can also lock on to laser-designated targets. |
|
|
Air Radar | Upgrade |
40,000 |
Replaces the minimap with a radar display showing airborne targets in a large radius around the aircraft. |
|
|
Gunner Thermal Optics | Gunner Optics |
45,000 |
A black and white night vision system that shows heat signatures across all ranges. |
|
|
TOW Missile | Secondary Weapon |
50,000 |
A user-guided anti-tank missile that deals huge damage to heavily armored targets and infantry inside the blast radius. |
|
|
TV-Guided Missile | Gunner Secondary Weapon |
55,000 |
A missile controlled by the user via remote camera. Effective against armored targets. |
|
|
Smart Rockets | Primary Weapon |
60,000 |
A rocket system with built-in guidance that will track towards the nearest armored target after being fired. |

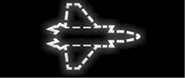



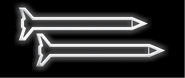
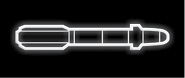

| Seat | Position | Weapon | Ammo |
|---|---|---|---|
|
1 |
Driver | Hydra Rockets | 28 |
|
2 |
Gunner | 20mm Cannon | Infinite |
Field Notes
When piloting the Viper, use the I-shaped reticle in the middle of the HUD to aim your rockets. You can fire up to 14 rockets in one salvo, but then the rockets must reload. Likewise, the gunner can only fire 30 cannon rounds in quick succession before the weapon must be reloaded. The time it takes to reload these weapons can be reduced by applying Autoloader to both the pilot and gunner upgrade slots.
Mi-28 Havoc
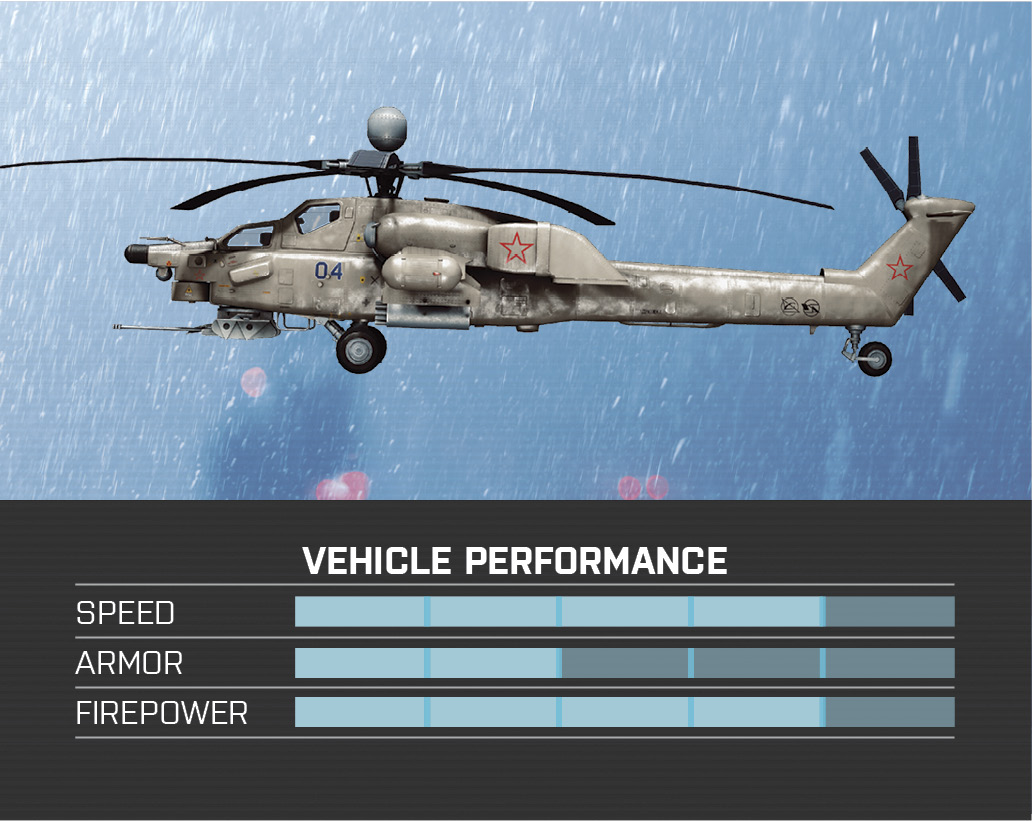
- Nationality: RU
- Description: The Mil Mi-28 (NATO reporting name “Havoc”) is a Russian all-weather day-night two-seat anti-armor attack helicopter.
Vehicle Occupancy
| Seat | Position | Weapon | Ammo |
|---|---|---|---|
|
1 |
Driver | Hydra Rockets | 28 |
|
2 |
Gunner | 30mm Chain Gun | Infinite |
Field Notes
The Havoc performs identically to the US team’s Viper, even utilizing the same HUD layout. In the default configuration, the pilot can fire rockets while the gunner controls the chin-mounted Chain Gun. Both weapons are effective against infantry as well as light and armored vehicles. When not firing, the gunner position is great for spotting targets, particularly when the Zoom Optics or Thermal Optics gadgets are selected.
Z-10W
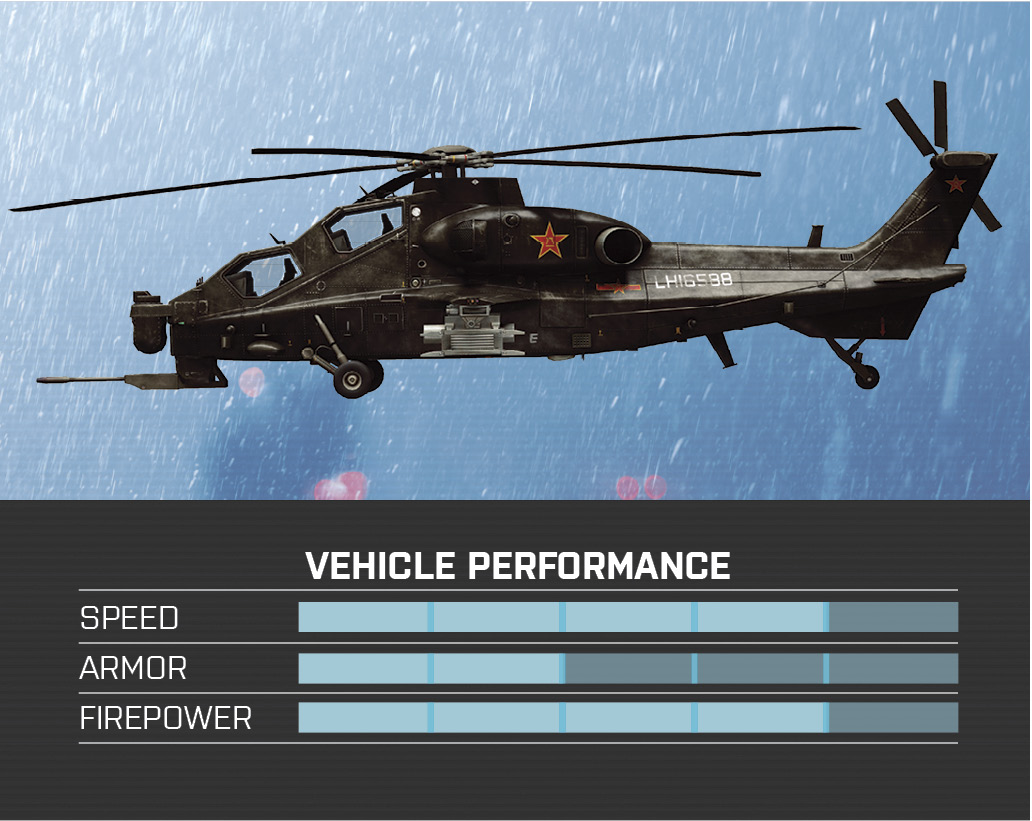
- Nationality: CN
- Description: The Chinese Z-10W entered service in 2010 and is deployed primarily in an anti-tank role by the PLA.
Vehicle Occupancy
| Seat | Position | Weapon | Ammo |
|---|---|---|---|
|
1 |
Driver | Hydra Rockets | 28 |
|
2 |
Gunner | 30mm Chain Gun | Infinite |
Field Notes
The Z-10W’s angular features give it a stealthy, modern appearance. But despite the chopper’s futuristic design, it performs identically to its American and Russian counterparts. The pilot’s view in the Z-10W is partially obscured by the compact canopy design. This reduces visibility significantly. So when you’re not actively targeting enemies, fly from the third-person perspective to avoid collisions.
Attack Helicopter Tactics
- If you’re planning to fly an attack helicopter, discuss loadouts with your gunner before deploying into the game. Mix up your primary and secondary weapon loadouts to maximize the effectiveness of this powerful vehicle.
- With the new vehicle damage system, critical hits can prove fatal to helicopters unless you have the Gyro Stabilizer upgrade equipped. If you stay away from enemy fire for a few seconds, your chopper will automatically return to full health. However, if your helicopter catches fire, there are only two ways to repair it. You can land and have an engineer use their Repair Tool or you can use the Fire Extinguisher countermeasure to put out the flames.
- Heatseekers are the default secondary weapon for the attack helicopter’s pilot. This gives the attack helicopter the ability to shoot down enemy aircraft. Heatseekers can only lock on to enemy aircraft in flight. Once a lock is achieved, fire the missile and watch it streak toward the target.
- IR Flares are also standard equipment in attack helicopters. Apply Stealth Coating to greatly increase your chances of survival. Both upgrades make it difficult for heat-seeking missiles to achieve a lock. If you don’t have these upgrades equipped, stay low to the ground, utilizing nap-of-the-earth (NOE) flight to put objects such as hills and trees between your chopper and hostile missile launchers. By breaking line-of-sight with a guided missile, you can prevent a lock prior to launch.
- The chin turrets on the attack helicopters are absolutely devastating against infantry. So when piloting these choppers, try to give your gunner a stable firing platform to increase the weapon’s accuracy. Instead of dipping the chopper’s nose forward, fly laterally, keeping the nose pointed toward the enemy. Strafing left and right keeps the chopper moving while allowing your gunner to accurately engage enemy ground targets.
- The Laser Guided missile is very effective and can acquire a lock on its own. Once a target is painted, the missile can be fired. However, the pilot must keep the chopper in a position where it can maintain a line-of-sight with the target. Alternatively, the missile can lock on to targets designated by SOFLAMs and PLDs.
- The gunner’s TV-Guided missile is manually guided. When fired, the missile’s perspective fills the screen, allowing the gunner to fly the missile into any target. Countermeasures don’t work against these missiles, allowing the gunner to score some devastating hits on even the most prepared tank drivers. For best results, try to hit the top or rear armor of tanks and IFVs to score critical hits.
- As soon as it’s available, choose the Fire Extinguisher as your countermeasure. If your chopper ever becomes disabled, it’s incredibly difficult to control, potentially leading to a crash. But if you immediately deploy the Fire Extinguisher, the controls are immediately restored. Still, you may want to seek cover while the helicopter regenerates health.
Stealth Jets
Jets have been divided into two different categories in Battlefield 4: stealth jets and attack jets. The new stealth jets are the fastest vehicles in the game and designated as air superiority fighters. Along with other aircraft, these jets can travel a significant distance outside the map’s combat zone. This is useful when engaged in a dogfight with an enemy pilot. But eventually a jet must turn around to avoid flying off the map. If your jet is heavily damaged, make sure you’re within the map’s combat zone before bailing out. Initially each stealth jet is equipped with a cannon, Heatseekers, IR Flares, and Stealth Coating, providing a respectable loadout for pilots seeking to test their air combat skills. But as you score more points with the stealth jets, more upgrades become available including more powerful cannons and missiles.
Stealth Jet Upgrades
| Image | Name | Slot | Unlock Points | Description |
|---|---|---|---|---|
| Default Upgrades | ||||
|
|
20mm Cannon | Primary Weapon |
— |
A high rate of fire Chain Gun capable of incapacitating light armor and other aircraft. |
|
|
Heatseekers | Secondary Weapon |
— |
Once locked on, these heat-seeking missiles will guide themselves toward their target. |
|
|
IR Flares | Countermeasure |
— |
Infrared flare launchers that, when deployed, spoof incoming missiles and break lock-ons. |
|
|
Stealth Coating | Upgrade |
— |
Special plating that increases the time it takes for enemy targeting systems to lock on to you. |
| Unlockable Upgrades | ||||
|
|
Belt Feeder | Upgrade |
5,000 |
An enhanced mechanism that makes reloading faster. |
|
|
Passive Radar | Secondary Weapon |
10,000 |
Air-to-air missiles that require the user to maintain lock-on to the target. If the lock-on is lost, it can be re-acquired and the missiles can still reach their target. |
|
|
Proximity Scan | Upgrade |
14,000 |
Scans the area around the vehicle and reveals enemy movement on the minimap. |
|
|
25mm Cannon | Primary Weapon |
19,000 |
A powerful 25mm Chain Gun with medium rate of fire, damaging against other aircraft and light armor. |
|
|
ECM Jammer | Countermeasure |
24,000 |
When activated, this system will prevent targeting systems from locking on to you and will spoof any incoming missiles for a short while before it needs to be reloaded. |
|
|
Laser Guided | Secondary Weapon |
29,000 |
A powerful missile that locks on to ground vehicles. Once lock-on is achieved, the user has to maintain it until the missile has reached its target. If lock-on is lost it can be re-acquired and the target can still be taken out. Can also lock on to laser-designated targets. |
|
|
Fire Extinguisher | Countermeasure |
34,000 |
Can only be deployed when the vehicle is in a critically damaged state. It will put out any fires, bring the vehicle back to a functional state, and let the vehicle start recovering from sustained damage. |
|
|
30mm Cannon | Primary Weapon |
38,000 |
A 30mm cannon with lower rate of fire but increased damage against aircraft and light armor. |
|
|
Gyro Stabilizer | Upgrade |
43,000 |
An automatic system that helps to stabilize the vehicle after receiving a critical hit. |
|
|
Active Radar | Secondary Weapon |
50,000 |
Once fired, these missiles will locate and track toward the nearest airborne target and explode within close proximity. |


F-35
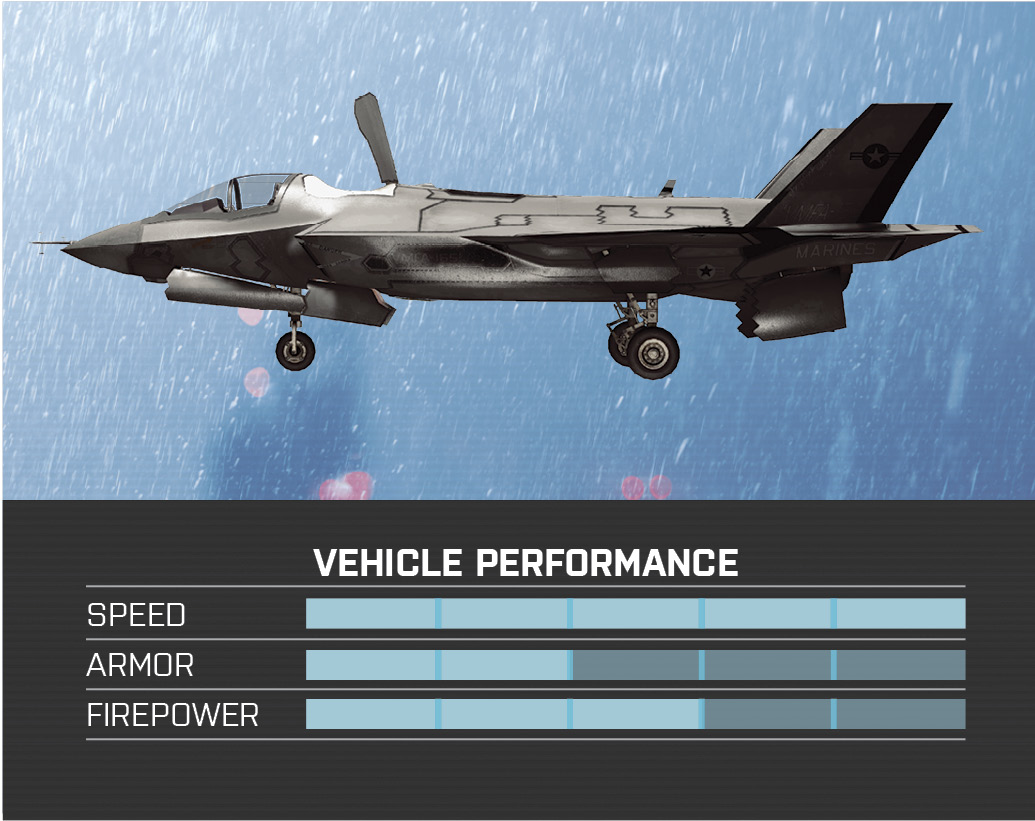
- Nationality: US
- Description: The F-35 is a multi-role aircraft designed for the USMC as a replacement for the AV-8B Harrier.
Vehicle Occupancy
| Seat | Position | Weapon | Ammo |
|---|---|---|---|
|
1 |
Pilot | 20mm Cannon | Infinite |
Field Notes
The Vertical Take-Off and Landing (VTOL) functionality of the F-35 makes it the most unique jet in the game. By throttling down, the jet enters VTOL mode, allowing it to both land and take off vertically. But the VTOL function can also come in handy during combat. While dogfighting, VTOL mode can be activated sporadically to rapidly decrease air speed, allowing for tighter turns.
SU-50
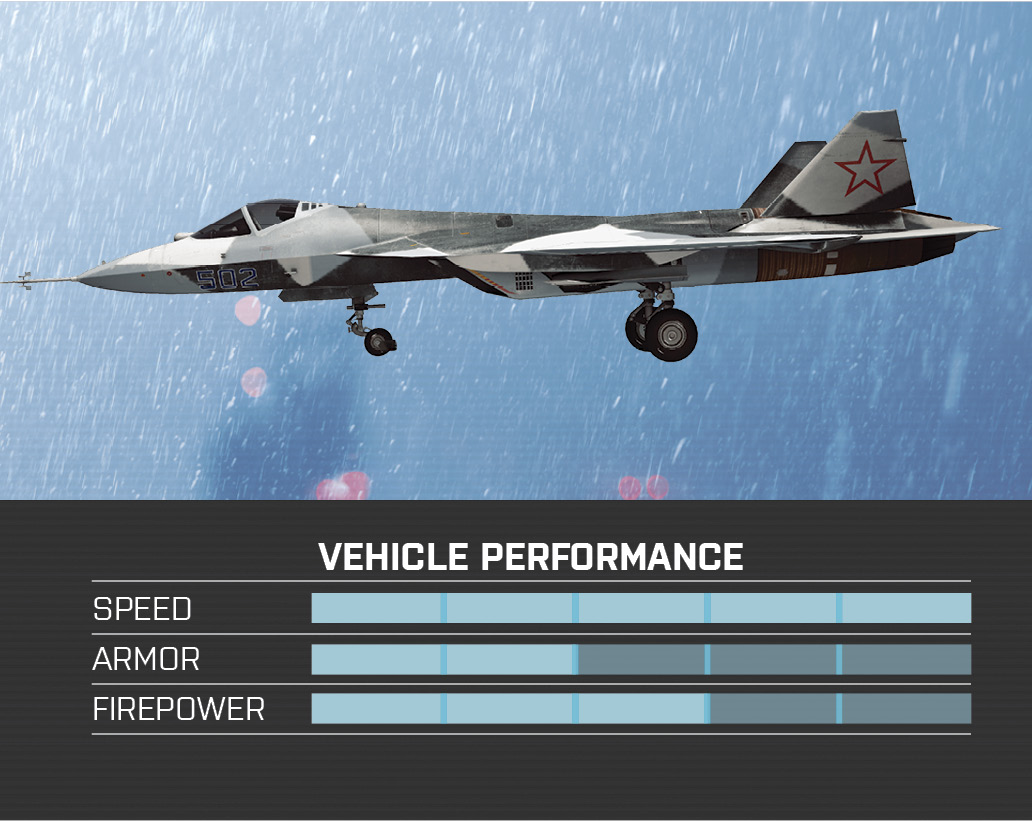
- Nationality: RU
- Description: Designed as a successor to the MiG-29 and Su-27, the SU-50 is Russia’s latest frontline fighter jet.
Vehicle Occupancy
| Seat | Position | Weapon | Ammo |
|---|---|---|---|
|
1 |
Pilot | 20mm Cannon | Infinite |
Field Notes
Although lacking the VTOL features of the F-35, the SU-50 is a very nimble, responsive jet. The aircraft is equipped with a powerful afterburner, allowing for quick acceleration. But the SU-50 also benefits from stability at low speeds, ideal for pulling tight turns during dogfights or lining up accurate strafing runs.
J-20
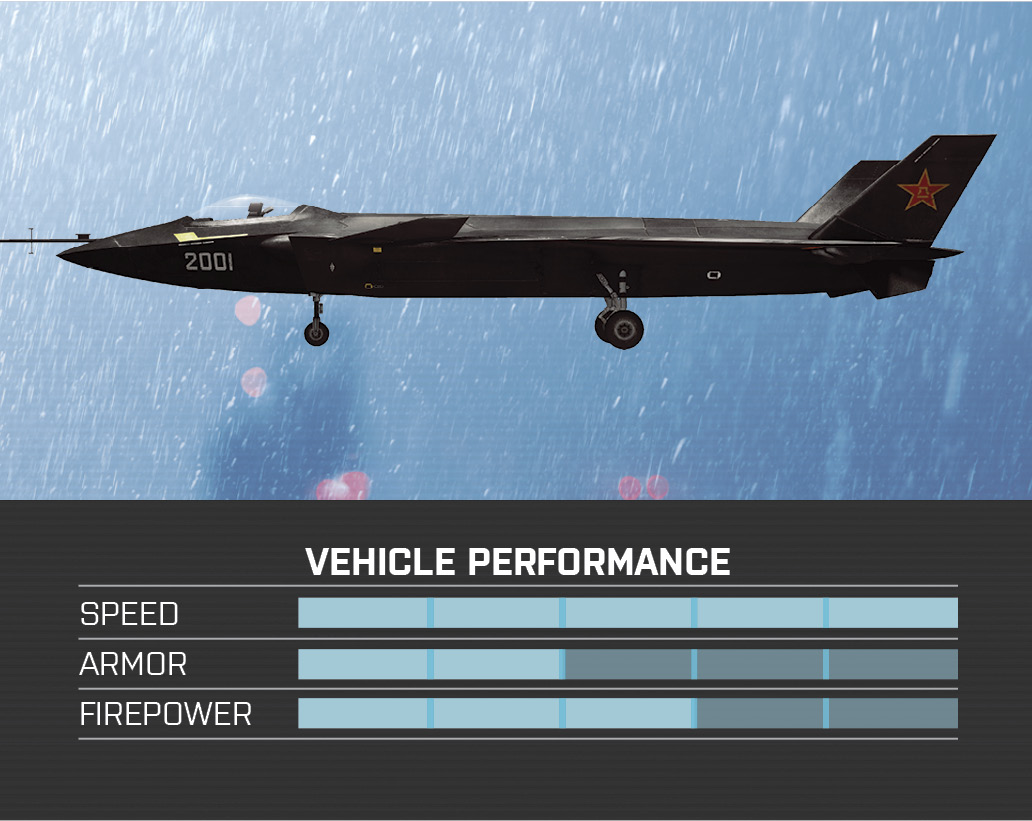
- Nationality: CN
- Description: The J-20 is China’s first stealth jet, incorporating an angular design and a pair of canards positioned behind the cockpit.
Vehicle Occupancy
| Seat | Position | Weapon | Ammo |
|---|---|---|---|
|
1 |
Pilot | 20mm Cannon | Infinite |
Field Notes
Beyond its unusual design, the next most striking thing about the J-20 is its frameless canopy. The bubble-like canopy provides the pilot excellent visibility, with no obstructions. This makes it much easier to spot and track air targets, crucial during chaotic dogfights.
Stealth Jet Tactics
- There’s no need to camp runways waiting for jets to spawn at your base. You can spawn directly into a waiting jet (or helicopter) from the deploy screen. Simply choose the name of a jet from the list of available spawn points to hop in the pilot’s seat.
- Pay close attention to the floating circle icon in the center of the jet’s HUD. This is the angle of attack indicator, representing the true direction your aircraft is travelling. If the icon is firmly in the center of the HUD, you are travelling straight ahead. However, if the icon drifts to the bottom of the HUD, you’re experiencing a stall. Immediately apply throttle and gently lift the nose of the aircraft to increase lift before you crash.
- All stealth jets are equipped with afterburners. Press and hold the sprint key/button to activate the afterburners, producing a sudden increase in speed. Apply afterburners when taking off or when trying to prevent a stall. Do not use the afterburner when attempting to make tight turns. This increases the turn radius of the aircraft, putting you at a disadvantage during dogfights. Instead, decrease throttle during tight turns to reduce the aircraft’s turn radius.
- All stealth jets are equipped with Air Radar by default—you don’t even have to equip it. This feature replaces the minimap with a radar screen, showing all objectives on the ground as well as all enemy aircraft, appearing as red icons. Keep an eye on this radar to monitor the enemy aircraft, particularly jets sneaking up behind you.
- Due to the stealth jets’ high speed, it’s difficult to lock on to a slow chopper with Heatseekers. Your jet will often zoom past the helicopter before it can acquire a lock. Therefore, consider using the cannon when engaging enemy choppers. This requires more skill, but if your aim is true, the enemy helicopter is toast. The cannon is also a good option when dogfighting enemy jets, because IR Flares can’t fool this weapon. Equip the powerful 25mm and 30mm cannons as soon as they’re unlocked to dish out even more damage.
- All stealth jets come equipped with IR Flares by default. These countermeasures some in handy for breaking locks and evading incoming missiles. The ECM Jammer is equally effective. But all countermeasures take several seconds to recharge, leaving your jet vulnerable to attack. Either fly out of the danger zone or decrease your altitude, using hills and treetops to mask your movements until your countermeasure of choice is ready.
Attack Jets
Compared to the sleek and futuristic stealth jets, these aircraft aren’t much to look at. But each of these Cold War-era attack jets has a proven track record. Although they’re capable of serving an air-to-air role, these jets were designed to provide close air support, tearing apart tanks and other armored vehicles with their powerful cannons and hard-hitting air-to-ground rockets, missiles, and bombs. By default, each attack jet comes equipped with a 30mm cannon, Laser Guided missiles, and IR Flares, giving them the ability to make their presence felt on the ground. So instead of chasing down enemy jets and helicopters, get busy helping your squad and teammates knock out tanks and other high-value targets.
Attack Jet Upgrades
| Image | Name | Slot | Unlock Points | Description |
|---|---|---|---|---|
| Default Upgrades | ||||
|
|
30mm Cannon | Primary Weapon |
N/A |
A heavy 30mm Gattling cannon, effective against heavily armored targets. |
|
|
Laser Guided | Secondary Weapon |
N/A |
A powerful missile that locks on to ground vehicles. Once lock-on is achieved, the user has to maintain it until the missile has reached its target. If lock-on is lost it can be re-acquired and the target can still be taken out. |
|
|
IR Flares | Countermeasure |
N/A |
Infrared flare launchers that, when deployed, spoof incoming missiles and break lock-ons. |
|
|
Belt Feeder | Upgrade |
N/A |
An enhanced mechanism that makes reloading faster. |
| Unlockable Upgrades | ||||
|
|
Stealth Coating | Upgrade |
5,000 |
Special plating that increases the time it takes for enemy targeting systems to lock on to you. |
|
|
Heatseekers | Secondary Weapon |
11,000 |
Air-to-air missiles that require the user to maintain lock on the target. If the lock-on is lost, it can be reacquired and the missiles might still reach their target. |
|
|
Proximity Scan | Upgrade |
16,000 |
Scans the area around the vehicle and reveals enemy movement on the minimap. |
|
|
Hydra Rockets | Secondary Weapon |
21,000 |
A rocket pod system for taking out targets without the need to lock-on or laser designate. |
|
|
ECM Jammer | Countermeasure |
27,000 |
When activated, this system will prevent targeting systems from locking on to you and will spoof any incoming missiles for a short while before it needs to be reloaded. |
|
|
Fire Extinguisher | Countermeasure |
32,000 |
Can only be deployed when the vehicle is in a critically damaged state. It will put out any fires, bring the vehicle back to a functional state, and let the vehicle start recovering from sustained damage. |
|
|
TV-Guided Missile | Secondary Weapon |
37,000 |
A missile controlled by the user via remote camera. Effective against armored targets. |
|
|
Gyro Stabilizer | Upgrade |
43,000 |
A system that tries to maximize maneuverability until automatic repairs can be started. Is automatically activated when the aircraft receives a critical hit. |
|
|
JDAM Bomb | Secondary Weapon |
50,000 |
A powerful bomb that can also be dropped onto a laser-designated target. |



A-10 Warthog
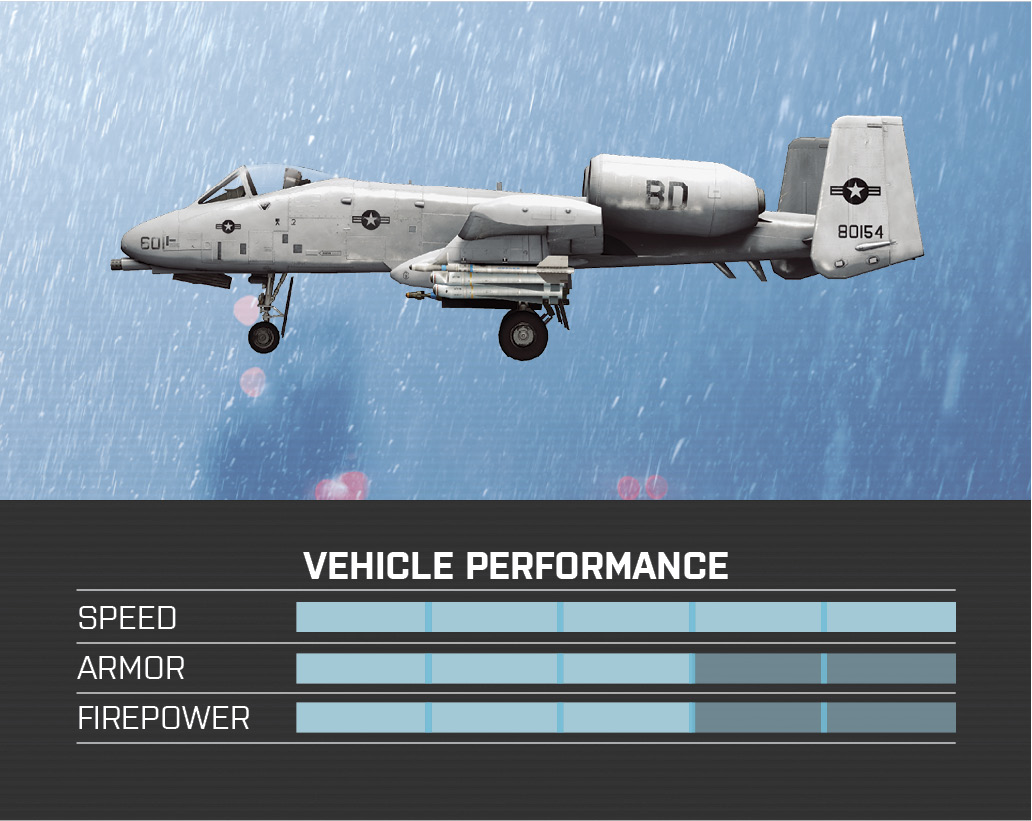
- Nationality: US
- Description: Designed for a USAF requirement to provide Close Air Support (CAS) of ground forces by attacking ground targets with limited AA capability.
Field Notes
Designed as a tank killer, the A-10 excels in a ground attack role. Its massive 30mm cannon can pierce the thick armor of tanks and IFVs, disabling them with a single strafing pass. The aircraft benefits from a relatively low stall speed, allowing you to reduce speed during strafing runs, giving you more time to fire the cannon or rockets.
Vehicle Occupancy
| Seat | Position | Weapon | Ammo |
|---|---|---|---|
|
1 |
Pilot | 30mm Cannon | Infinite |
SU-25TM Frogfoot
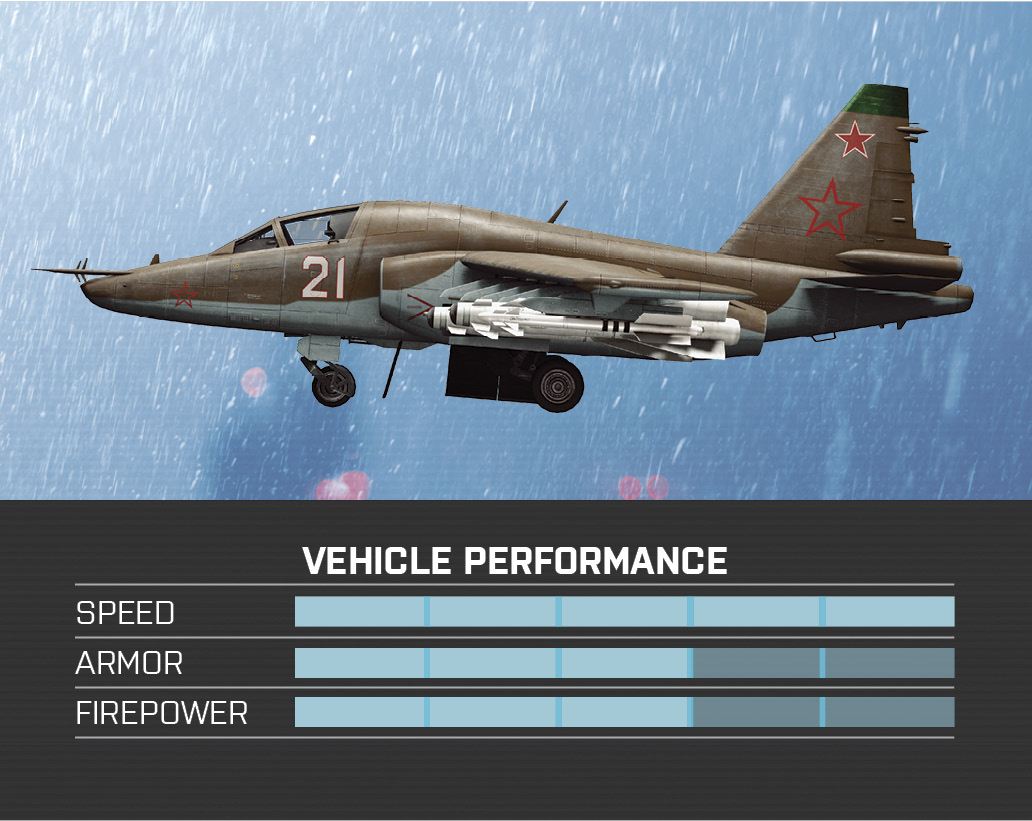
- Nationality: RU
- Description: Soviet-designed Close Air Support (CAS) plane designated “Frogfoot” by NATO.
Vehicle Occupancy
| Seat | Position | Weapon | Ammo |
|---|---|---|---|
|
1 |
Pilot | 30mm Cannon | Infinite |
Field Notes
Like the A-10, the Russian SU-25TM is best deployed as a ground attack aircraft. However, with the addition of the Heatseekers, the aircraft can also serve as a fighter. While banking, apply the air brake to perform tight turns. But don’t forget to apply throttle after the turn to prevent stalling.
Q-5 Fantan
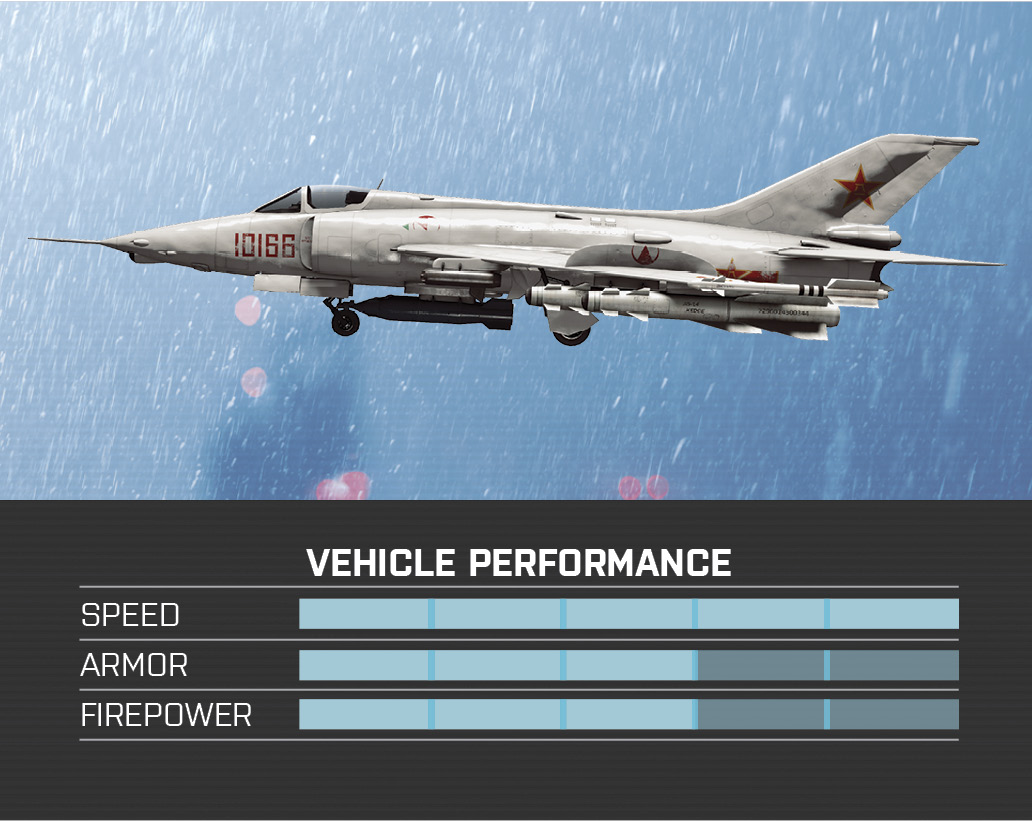
- Nationality: CN
- Description: Based on the MiG-19, the Q-5 was developed in the 1960s to fill a close air support role for the PLA.
| Seat | Position | Weapon | Ammo |
|---|---|---|---|
|
1 |
Pilot | 30mm Cannon | Infinite |
Field Notes
The Q-5 is an old attack jet, and it flies like one. Visibility from the cockpit is extremely limited, so consider flying from the third person perspective—this makes it much easier to spot ground targets. But despite this drawback, the Q-5 performs well as a ground-attack aircraft, benefiting from a low stall speed.
Vehicle Occupancy
Attack Jet Tactics
- Despite their relative slow speed, attack jets travel so quickly that it’s difficult for them to identify ground targets without assistance. Teammates on the ground or in slower-moving helicopters can greatly aid jets by spotting ground targets such as tanks and IFVs. This temporarily marks targets on the HUD, making it much easier for jets to set up strafing runs. Recon troops equipped with SOFLAMs or PLDs are equally important when firing the Laser Guided missile.
- Getting struck by missiles can result in a critical hit, causing the aircraft to lose control. To prevent this, apply the Gyro Stabilizer upgrade and the Fire Extinguisher countermeasure. Together, these loadout options will increase your survivability when nursing a crippled attack jet back to full health.
- Be careful when aiming the Laser Guided missile. When equipped, the screen switches to the view of a belly-mounted camera—at this point you have no control of the jet. So make sure you fly high and level above the battlefield before accessing this weapon. While in the weapon’s view, you can pan and tilt the camera slightly. Place the reticle over an enemy target and wait for a lock to be acquired. Once locked, the missile can be fired. But you must maintain the lock until the missile reaches the target. This is a lot to manage while attempting to fly a jet. It’s much easier to have teammates on the ground paint targets for you using a SOFLAM or PLD. Stay in contact with squadmates on the ground to set up some memorable coordinated attacks.
- When aligning your aircraft prior to a strafing run, use the strafe controls to apply left and right rudder. Performing these slight lateral adjustments makes it much easier to align your jet with the target. After making a strafing pass, continue flying straight for a couple of seconds, then perform a half-loop. If you made no lateral adjustments, you’ll still be lined up with your target, assuming it hasn’t moved.
- The Hydra Rockets function just like the rockets fired by the attack helicopters. When selected, an I-shaped reticle appears at the center of the HUD. Use this reticle to aim the rockets during strafing runs. You can fire up to 14 rockets per salvo at which point the weapon must reload. So when making a pass, simply hold down the trigger to fire all 14 rockets. By the time you circle around for another pass, a new salvo of rockets should be ready to fire. The Belt Feeder upgrade significantly reduces the reload time.
- The powerful JDAM Bomb is most effective when dropped on a laser-designated target. But this requires the assistance of teammates equipped with SOFLAMs or PLDs. It’s also possible to drop the JDAM Bomb manually, but this takes some practice.
Gunship
Originally introduced in Battlefield 3: Armored Kill, the Gunship is back, rewarding one team with a powerful airborne weapons platform. In some Conquest matches there is one control point associated with the Gunship. Once captured, the control point grants the controlling team’s commander the ability to deploy the Gunship—your team must have a commander to gain access to this aircraft. But once deployed, the commander does not control the Gunship—that’s up to the team. Spawn directly into the Gunship from the deployment screen to take a seat onboard. Unlike other aircraft, there is no pilot position in the Gunship. Instead, the aircraft orbits around the map on its own with three crew positions accessible from the spawn screen. Each gunner position is equipped with a port-mounted cannon. The 105mm cannon is essentially a tank gun mounted on the side of the aircraft, perfect for scoring critical top hits on tanks and IFVs. The 40mm cannon performs much like the auto cannons on the IFVs, firing up to 12 rounds in rapid succession before undergoing a brief reload phase. The 25mm cannon functions like a minigun, spitting out tons of rounds—it has infinite ammo but can overheat, so fire in short, controlled bursts. In addition to serving as an awesome ground-attack aircraft, the Gunship is also a mobile spawn point, capable of dropping troops over the battlefield along its circular flight path.
Gunship
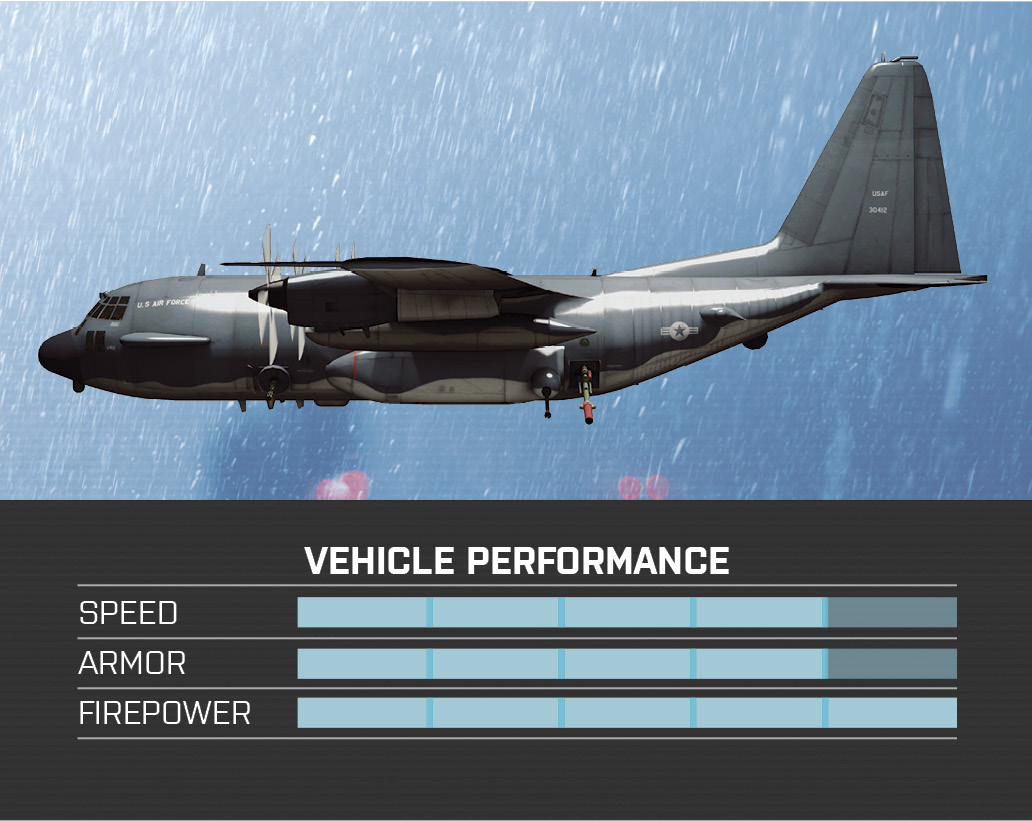
- Nationality: All
- Description: Heavily armored ground-attack vehicle with three mounted cannons.
Vehicle Occupancy
| Seat | Position | Weapon | Ammo |
|---|---|---|---|
|
1 |
Gunner | 105mm Cannon | 5 |
|
2 |
Gunner | 40mm Cannon | 24 |
|
3 |
Gunner | 25mm Cannon | Infinite |
|
4 |
Passenger | Troop Kit | — |
Field Notes
This converted cargo aircraft is equipped with three powerful cannons capable of tearing apart any ground vehicle. But this slow-moving aircraft is an easy target for enemy aircraft and anti-aircraft units on the ground. Fortunately, the Gunship can take heavy damage before falling out of the sky. The automatic IR Flares help defend the Gunship against enemy aircraft and incoming missiles.
Gunship Tactics
- Before using the Gunship Paradrop option to deploy, monitor the Gunship’s position on the spawn screen’s map. Don’t jump out of the plane until the Gunship is flying next to your intended destination. This will allow you to drop close to your target and perform a low-altitude deployment of your parachute. Free fall as long as possible to avoid becoming an easy target for enemy troops on the ground. The longer you drift in your parachute, the more likely you are to be spotted and hunted down.
- What the Gunship’s minigun-like 25mm cannon lacks in stopping power, it makes up for in volume and rate of fire. A steady barrage of 25mm rounds can disable and eventually destroy a tank. But this weapon is much more effective against infantry and light vehicles. It can even tear apart lower-flying helicopters and jets. For a closer view of the target, activate the zoom function for 3X magnification.
- The 40mm cannon offers a good balance between rate of fire and damage output. While this weapon can eventually take out armored vehicles, like tanks and IFVs, it’s much more effective against light vehicles. All it takes is a few rounds from this weapon to disable and eventually destroy a light vehicle. It’s also very deadly against infantry. Use the 3X zoom magnification to get a closer view of your targets.
- Due to the Gunship’s constant movement, accurately firing the 105mm cannon can be a little tricky. For starters, don’t fight the controls. Instead, aim ahead of your target and let the Gunship’s movement do the rest. As the reticle passes over the target, fire. Watch your point of impact on the ground, and adjust your aim before firing a follow-up shot. Like the 25mm cannon, this weapon is also equipped with a 3X zoom magnification option, offering a slightly more detailed view of the target. The camera’s default infrared display also makes it easy to spot the heat signatures of enemy vehicles and troops—look for the bright, white dots.
- The Gunship’s IR Flares are deployed automatically whenever an enemy missile locks on to the aircraft. The flare deployment lasts several seconds, preventing any new locks from being acquired. But the Gunship is left vulnerable after flare deployment—it takes several seconds for the flares to reload. During this reload phase, the Gunship can be hit with any guided missile. When targeting the Gunship, wait for it to jettison its flares, then attack.
- The Gunship can sustain heavy damage, but it cannot be repaired. Unlike other vehicles, the aircraft’s health does not regenerate on its own either. Since all damage is permanent, take extra steps to keep the Gunship airborne. Use jets and helicopters to ward off enemy aircraft attacking the Gunship. Keep a close eye on the Gunship’s health and be ready to bail out before it reaches 1%. When the Gunship’s health reaches zero, the aircraft simply explodes, giving you no time to bail out.