
Madden NFL 16 Guide Connected Franchise Mode
Start Your Franchise
League Settings
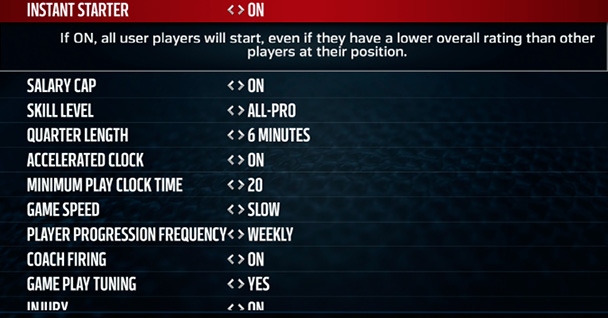
Players who want the most control of their franchise should set their options before heading into franchise mode. In an online league, the commissioner will control the league settings, so check them when joining. This is the last step to customizing your experience before the game starts, and you can really tailor your experience.
Things to Do
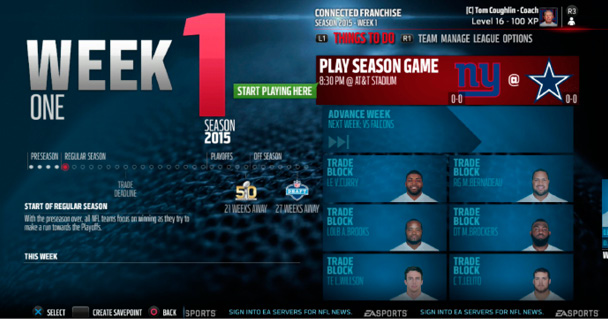
Your main screen this year will be the Things to Do tab, which will help you keep track of your weekly objectives. Early in the season, you want to check the trade block and free agents to make sure your roster is set up for the incoming season. Make sure to do the following if you want to be an active owner:
- Trade Block
- Depth Chart
- Add Free Agents
- View Goals
- View News
- View Transaction Log
Preseason
The preseason will be simulated on default settings during year 1 to get you into games even faster. If you wish to play it, make sure to adjust the setting before starting. You won’t suffer any injuries if you choose to simulate and will still get XP and confidence.
Owner Mode
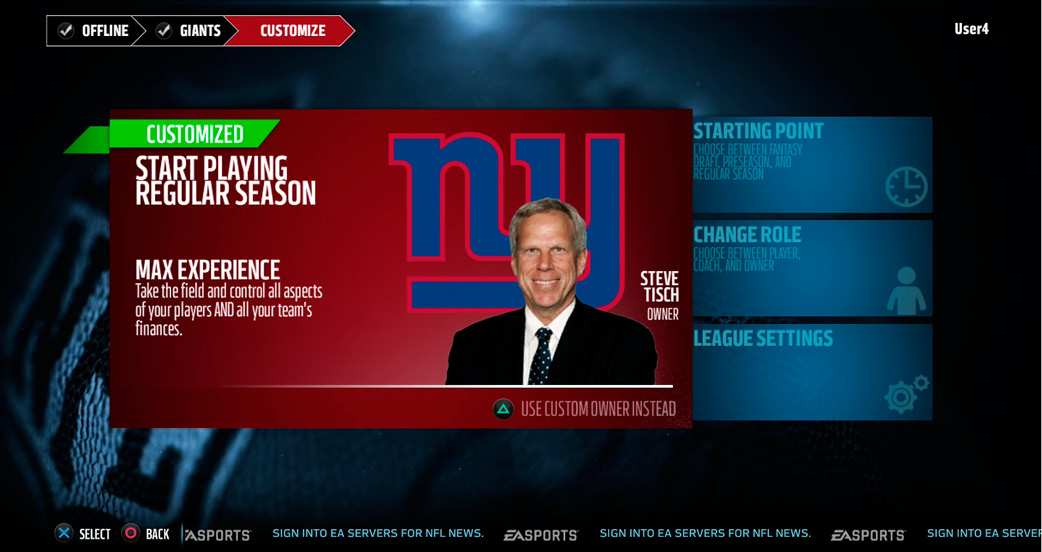
When taking on the role of owner, you have a few additional responsibilities beyond what you would as a coach. Most of these deal with the finances of your team and keeping fans and players happy. This is once again a balancing act but is dependent on what type of owner you want to be. While most of your responsibilities are the same, there have been lots of improvements to the financial aspects of the game, which should allow you to run a successful franchise if you handle it with care. Here are the areas you will need to keep an eye on under the My Owner panel:
- Team Success: Winning can cure almost everything, and this is where you can see how much success plays a role in your value.
- Media Questions: This is your chance to let everyone know what type of owner you are and also will effect happiness in different areas, so be wise!
- Owner Goals: Owners have goals for adding to their legacy, just like coaches do.
- Team Value: This is a great place to get a snapshot of your value in all areas; use it to find your weaknesses and then investigate them individually.
- Finances (Tickets, Merchandise, Concessions, Team Revenue): Finances allow you to set the price of everything from tickets to merchandise and concessions. Keep an eye on your costs, including player salaries and any potential stadium maintenance, as they will eat away at your bottom line. Respect the feedback from your fans, because they will let you know what they are comfortable paying.
- Marketing: Player popularity and personality are very effective at increasing revenue by bringing in jersey sales! You can also see your team popularity and how your media relations affect fan happiness.
- Stadium Overview:Stadiums are crucial to how much money you can generate and can be upgraded depending on a few different factors. For teams that don’t have state-of-the-art facilities, you can always rebuild or relocate depending on your stadium rating. Keep in mind that it is costly to move a team over the first few seasons, but the move becomes more successful over time if you choose wisely. Keep an eye on your levels on amenities like parking and concessions. The higher they are, the more you can offer your fans.
- Fan Happiness:This is a key area to monitor. If you can keep your fans happy, earning revenue should be a breeze. Check in on your rankings every few weeks, if your fans aren’t happy, they will let you know here.
- Staff:Staff is a crucial element to running a great franchise. While the best trainers and scouts cost more, their value is often essential to keeping fans happy and getting the best players on the field! This is also the spot to buy upgrade packages for your head coach.
Now you know the full list of responsibilities that an owner must partake in to run a successful franchise. Test out different prices and strategies, because an active owner is usually the best one. No matter what, focus on winning on the field — it will cure almost all of your issues!
TOP 5 Game Prep Tips
The Game Prep section in CFM is crucial to improving your players — not just in the short term, but for developing them over the course of their careers. Game prep is limited to a certain number of hours each week based on how many days you have between games, so make sure to maximize your time. A Free Practice option is also available under Game Prep but doesn’t cost hours, and while it doesn’t build XP or confidence, it is still very valuable. Here are five areas to focus on each week. You can always allow the CPU to handle your game prep hours so they won’t go to waste.
 Earn Player XP
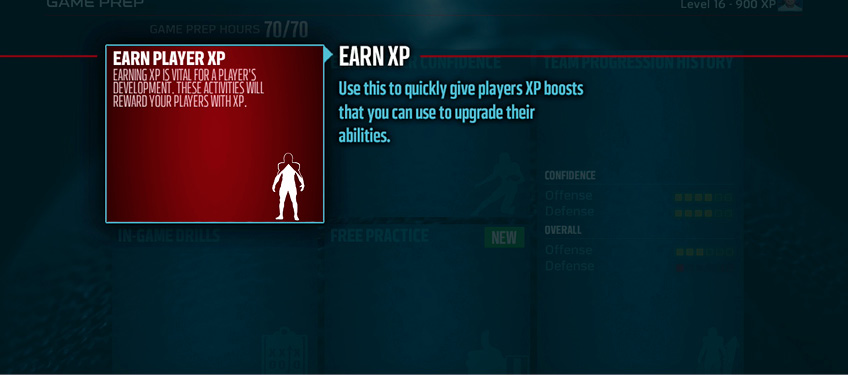
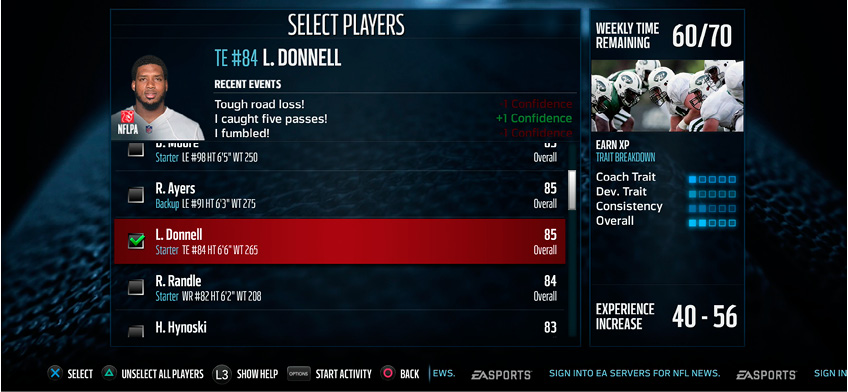
Earning XP is pretty simple and requires you to select the positions you want available to upgrade. You can usually cover most of the players at an entire position or dish it out to a few players at each. Make sure to balance the long-term gains of XP with the short-term confidence. Aim to earn XP for 3-4 players each week, generally for those on the younger side. One of the toughest things to balance is the aging of older players and how to handle their declining physical attributes. Consider changing their role or even your scheme if it becomes too costly to maintain their ratings over time.
 Earn Player Confidence
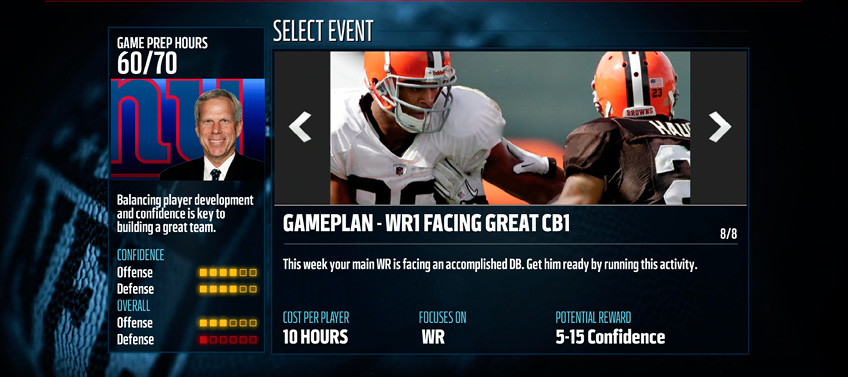
Inside of Game Prep, you have a chance to earn player confidence each week. You can choose to work on the whole team or focus in on a specific position. These events have to do with your upcoming opponent, and different options will appear throughout the season. The more focused the drill is on a specific position, the bigger the confidence reward. Use this to keep team morale up, which can often suffer after a tough loss. Be proactive! Always remember that you can see the effects of confidence on a player’s ratings by looking at his player card on the lineup screen.
 Practice In-Game Drills
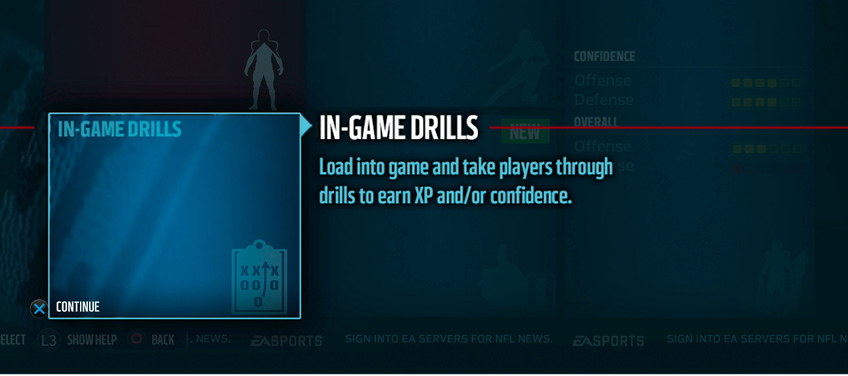
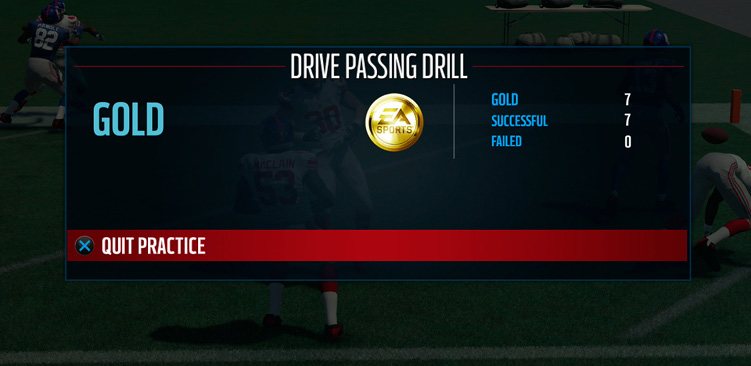
For players who want to take a more active approach to their game prep, there are in-game drills. These allow you to take players at a specific position through a series of drills to gain XP or confidence. These are especially valuable for QBs, because not only do they help gain development, but also they help you learn concepts and fundamentals to utilize in the game. On defense, make sure to use “defensive assist” with the left bumper for drills that require tackling. This will cut down the risk of missing a tackle and should help you get gold. While it takes a bit longer to go through drills with all your players, the rewards often justify the time.
 Know Your History
Each week, you should check the Progression Recap screen to see what players and positions did well and who needs improvement. The history screen will show you your game prep recap, confidence changes and progression recaps. You should monitor this to fight any downhill spiral that can happen with player confidence. Consider looking into a game prep package at a position where you have trouble developing talent. If you have a created coach, you can really start to become a force over time by investing early. The more you continue to level, the more increases you will see.
 Progress Your Players
Once you have stacked some XP, head into the Upgrade Team menu and choose between automatically or manually progressing your players. If you choose to automatically do it, the game will keep in mind your team scheme and player type. We always recommend taking the time to manually progress your players, however. Abilities cost different amounts of XP and are dependent on things like current rating and position. At the start of the season, write down a target of XP to earn. You probably won’t need to spend it each week, but stopping every four weeks or at the half-season mark is a good idea to see how you are doing. You can also buy traits from this screen. These are generally more expensive than abilities, but they are more of an investment, especially development traits.
Offense XP Upgrades by Position
|
Primary |
Pocket QB |
Mobile QB |
Speed HB |
Power HB |
Outside WR |
Slot WR |
TE |
OL |
|---|---|---|---|---|---|---|---|---|
| 1 | Throw Power | Throw Power | Elusiveness | Trucking | Catch in Traffic | Speed | Catch in Traffic | Development Trait |
| 2 | Deep Accuracy | Acceleration | Speed | Ball Carrier Vision | Release | Route Running | Route Running | Run Block |
| 3 | Medium Accuracy | Speed | Agility | Agility | Spectacular Catch | Catch in Traffic | Run Block | Pass Block |
| Secondary | Pocket QB | Mobile QB | Speed HB | Power HB | Outside WR | Slot WR | TE | OL |
| 1 | Short Accuracy | Throw On Run | Catching | Speed | Speed | Release | Spectacular Catch | Strength |
| 2 | Play Action | Deep Accuracy | Juke Move | Strength | Route Running | Agility | Release | impact Block |
| 3 | Consistency | Short Accuracy | Acceleration | Carrying | Acceleration | Acceleration | Jumping | Acceleration |
Defense XP Upgrades by Position
|
Primary |
3-4 DE |
4-3 DE |
DT |
3-4 OLB |
4-3 OLB |
MLB |
Man CB |
Zone CB |
Coverage Safety |
Hard-Hitting Safety |
|---|---|---|---|---|---|---|---|---|---|---|
| 1 | Strength | Power Moves | Block Shed | Finesse Moves | Zone Coverage | Play Recognition | Man Coverage | Zone Coverage | Zone Coverage | Play Recognition |
| 2 | Block Shed | Acceleration | Strength | Speed | Man Coverage | Zone Coverage | Speed | Play Recognition | Speed | Zone Coverage |
| 3 | Power Moves | Strength | Power Moves | Acceleration | Play Recognition | Block Shed | Play Recognition | Press | Play Recognition | Hit Power |
| Secondary | 3-4 DE | 4-3 DE | DT | 3-4 OLB | 4-3 OLB | MLB | Man CB | Zone CB | Coverage Safety | Hard-Hitting Safety |
| 1 | Tackle | Block Shed | Acceleration | Zone Coverage | Speed | Speed | Press | Acceleration | Acceleration | Speed |
| 2 | Pursuit | Pursuit | Play Recognition | Play Recognition | Acceleration | Strength | Agility | Man Coverage | Man Coverage | Acceleration |
| 3 | Play Recognition | Zone Coverage | Hit Power | Hit Power | Hit Power | Big Hitter Trait | Acceleration | Tackle | Awareness | Catching |
Goals
On the My Team panel, you can head down to Team Goals to get a look at what you need to accomplish to gain even more XP from week to week. Goals are a big part of CFM and allow you to earn well beyond just your game prep upgrades. There are three main types of goals to be aware of for each player. New goals will pop up depending on how a player is performing. These vary by position, by how a player is performing, and by where they are in their career. You could see team goals that affect both the individual and the team as a whole.
Goal Types:
- Weekly Goals
- Season Goals
- Milestone Goals
While short-term goals give XP, milestone goals take longer to achieve and provide legacy rewards for you player. Season goals are important to track to see if you are on pace. Aim for the “hard” goal to keep your player on a positive path. “Normal” goals will tend to keep them the same early in their career, while “very hard” can really change their trajectory, especially if you have a superstar trait.
NEW! Dynamic Drive Goals
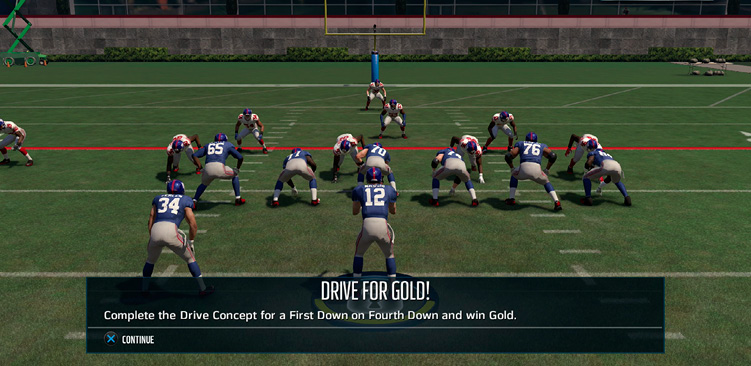
Dynamic drive goals are all new this year and can really tweak how you attack each drive. Now, a specific goal will appear at the start of every drive and you will be tasked to complete it to gain bonus XP or confidence! This can be a great way develop your player while in the middle of a game, and completing these will really speed up the upgrading process. But don’t let a drive goal cost you a game; otherwise, you will gain confidence for one player but possibly risk it for your whole team.
Keeping Up On Your Team
Make sure to use the My Team panel to keep track of these of your franchise:
- Roster
- Depth Chart
- Injury Report
- Re-signing Players
- Salaries
- Team Needs
- Player Progression
- Team Goals
TOP 5 Tips for Team Relocation
Moving Your Team Checklist
- Select Location
- Select Nickname
- Select Uniforms
- Select Stadium
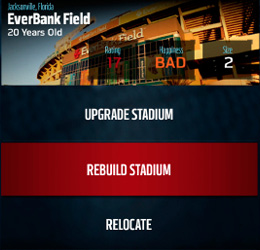
The owners of teams with a stadium rating under 20 have the option to relocate their franchise early in the season. This can be a strong move for an owner who wants a new stadium that can generate more revenue. Relocation settings can be set to Disabled, Normal, Users Only (stadium rating under 20; CPU cannot relocate), Everyone (regardless of stadium rating), and All Users Only (any stadium rating; CPU cannot relocate).
 Renovation
Leaving town should be your last option as an owner. If you can simply upgrade your stadium or rebuild it, that may be the best option. Moving the team will upset your current fan base and will cost you money during the short term. Explore all other options before relocating.
 Location, Location, Location
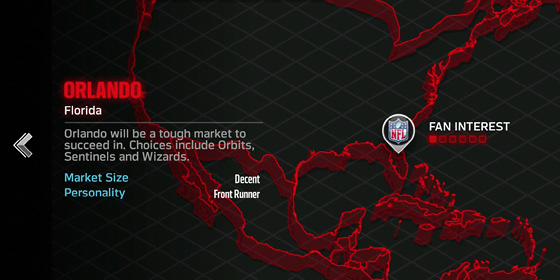
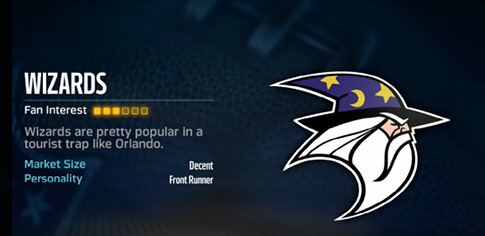
After you’ve decided to relocate, you will have to determine who is interested. Within a few weeks, you should have some options to start exploring. Consider factors like market size, fan personality, and interest before making a move. Once you select a location, the week after you will have the option to select a nickname. You can keep your current name or go with one of three other options.
CFM Relocation Cities
|
Cities |
Nickname 1 |
Nickname 2 |
Nickname 3 |
Market Size |
Personality |
Fan Interest |
|---|---|---|---|---|---|---|
| Austin, Texas | Bats | Armadillos | Desperados | Decent | Front-Runner | 4 |
| Brooklyn, New York | Beats | Bulls | Barons | Huge | Hard-Core | 5 |
| Chicago, Illinois | Tigers | Blues | Cougars | Huge | Hard-Core | 4 |
| Columbus, Ohio | Aviators | Caps | Explorers | Decent | Front-Runner | 2 |
| Dublin, Ireland | Celtic Tigers | Antlers | Shamrocks | Decent | Laid-Back | 2 |
| Houston, Texas | Oilers | Gunners | Voyagers | Huge | Loyal | 4 |
| London, England | Bulldogs | Black Knights | Monarchs | Huge | Fair Weather | 6 |
| Los Angeles, California | Crusaders | Red Dragons | Aftershocks | Huge | Fair Weather | 5 |
| Memphis, Tennessee | Hounds | Egyptians | Steamers | Small | Laid-Back | 1 |
| Mexico City, Mexico | Diablos | Conquistadors | Golden Eagles | Huge | Hard-Core | 5 |
| Oklahoma City, Oklahoma | Lancers | Nighthawks | Bisons | Small | Laid-Back | 2 |
| Orlando, Florida | Orbits | Sentinels | Wizards | Decent | Front-Runner | 1 |
| Portland, Oregon | River Hogs | Snowhawks | Lumberjacks | Decent | Fair Weather | 4 |
| Sacramento, California | Redwoods | Miners | Condors | Average | Laid-Back | 2 |
| San Antonio, Texas | Dreadnoughts | Marshalls | Express | Average | Loyal | 4 |
| Salt Lake City, Utah | Elks | Flyers | Pioneers | Small | Loyal | 2 |
| Toronto, Canada | Huskies | Mounties | Thunderbirds | Large | Laid-Back | 3 |
 Look Good, Play Good
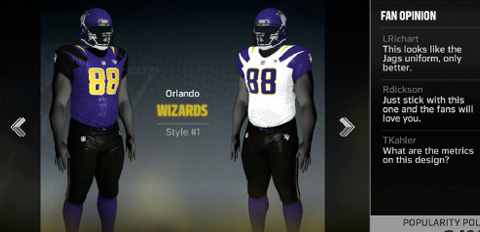
Once you’ve decided on a city and nickname, you will choose which uniforms you will wear for the upcoming season. These are all attached to fan opinions with a popularity poll in the bottom right-hand corner. This should be a fairly easy decision to make between three styles.
 Franchise Centerpiece
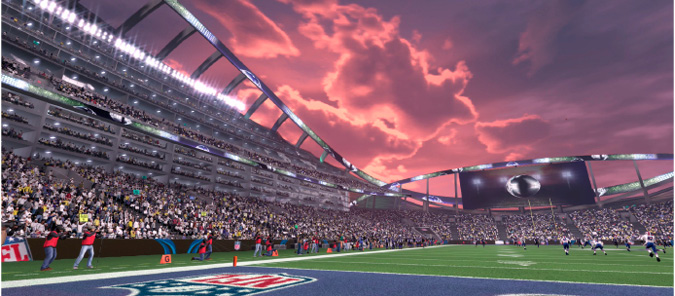
Choosing a type of stadium to build is the most crucial choice in the process after location. There are many factors to take into account, including weekly cost, stadium funding, and seat capacity. Make sure to take into account the fan opinions and the number of suites, which can really help generate revenue. Here you must consider paying the big bill up front for the deluxe stadium or going with the basic style and saving some money early! Look at the advanced details before making a decision!
The stadium types are:
- Basic Canopy: $0.75 billion build cost, $1.08 million weekly cost
- Deluxe Canopy: $1 billion build cost, $1.58 million weekly cost
- Basic Futuristic: $0.85 billion build cost, $1.27 million weekly cost
- Deluxe Futuristic: $1.35 billion build cost, $2.28 million weekly cost
- Basic Sphere: $0.70 billion build cost, $0.98 million weekly cost
- Deluxe Sphere: $1.15 billion build cost, $1.88 million weekly cost
- Basic Hybrid: $0.80 billion build cost, $1.17 million weekly cost
- Deluxe Hybrid: $1 billion build cost, $1.58 million weekly cost
- Basic Traditional: $0.71 billion build cost, $1.00 million weekly cost
- Deluxe Traditional: $1.18 billion build cost, $1.92 million weekly cost
 Long-Term Gains
The overall goal of relocating your franchise is to generate profit. Since winning is so crucial to the whole process, make sure not to sink yourself into a insurmountable pile of debt. This could lead to a losing spiral that could be tough to climb back from. Overall, moving your team adds a great layer to CFM and really allows you to put your custom stamp on your franchise in owner mode.
Offseason
Once you have played through the bulk of your season, you will get into the playoffs and the offseason. Make sure to complete these tasks:
- Re-sign Staff
- Hire Staff
- Continue Scouting
- Re-sign Players
- Sign Free Agents (Four Stages)
Signing free agents is a process that takes a few weeks and is really enjoyable when you are bidding against other users. Keep in mind how much potential interest may be in each free agent and what his value to your team could be. There are seasons when you may not have as many holes or the crop of free agents may have less quality. It is okay to save your money for the future if you already have a solid team. It is often less expensive to keep your own players than to sign new ones.
If you do have to sign some free agents, keep an eye on your available cap room. Players will be interested in your bid based on these factors:
- Coach Ability
- Scheme Fit
- Team Need
- Contract Length
- Salary Amount
- Signing Bonus
- Location
At the next stage, certain players will sign while other negotiations will be ongoing. Check your negotiations to see if your targets are still deciding or have signed with another team. You can also view the other signings from around the league and get an idea of similar contracts by position or rating. Before the draft, there will be a free agency recap, which will help you see who is still available and who signed where. This is crucial information that can help tip you off to some of your opponent’s potential draft needs and selections.
NEW! TOP 5 Scouting Tips
The scouting system in Madden NFL 16 is all new and starts at Week 3 of the regular season. Scouting rewards players who take time each week to spend their points and helps them build a clear vision of the incoming draft class, along with finding some potential gems and busts. Here are our five best tips after multiple seasons of scouting. These got us in the best position to find playmakers during the draft.
Offensive Scouting Guide by Position
|
Good Unlock |
Pocket QB |
Mobile QB |
Speed Back |
Power HB |
Balnced WR |
Speed/Route Runner WR |
Red Zone WR |
TE |
OL |
K/P |
|---|---|---|---|---|---|---|---|---|---|---|
| A- | Throw Power | Throw Accuracy Short | Elusiveness | Trucking | Route Running | Route Running | Catch in Traffic | Catch in Traffic | Pass Block | Kick Power |
| B+ | Throw Accuracy Deep | Throw On Run | Catching | Ball Carrier Vision | Catch in Traffic | Catch in Traffic | Spectacular Catch | Spectacular Catch | Run Block | Kick Accuracy |
| B- | Throw Accuracy Short | Throw Power | Ball Carrier Vision | Carrying | Spectacular Catch | Release | Release | Run Block | – | – |
| Unlock More | Consistency | Consistency | Juke Move | Spin Move | Release | Spectacular Catch | Route Running | Catching | Toughness | Awareness |
| – | Throw On Run | Throw Deep | Spin Move | Stiff Arm | Catching | Catching | Catching | Route Running | Impact Block | – |
| – | – | – | Stiff Arm | Juke Move | Kick Return | Kick Return | Kick Return | – | – | – |
Defensive Scouting Guide by Position
|
Good Unlock |
3-4 Run Stopper |
Speed Rusher |
DT |
3-4 OLB |
4-3 OLB |
MLB |
Man CB |
Zone CB |
Coverage Safety |
Hard-Hitting Safety |
|---|---|---|---|---|---|---|---|---|---|---|
| A- | Block Shedding | Power Moves | Block Shedding | Power Moves | Hit Power | Tackle | Man Coverage | Zone Coverage | Zone Coverage | Hit Power |
| B+ | Power Moves | Finesse Moves | Power Moves | Hit Power | Zone Coverage | Hit Power | Press | Man Coverage | Hit Power | Zone Coverage |
| B- | – | Hit Power | – | Zone Coverage | Man Coverage | Zone Coverage | Zone Coverage | Press | Play Recognition | Play Recognition |
| Unlock More | Hit Power | Pursuit | Tackle | Pursuit | Pursuit | Pursuit | Catching | Catching | Pursuit | Pursuit |
| – | Tackle | Tackle | Pursuit | Tackle | Tackle | Catching | Kick Return | Kick Return | Catching | Catching |
| – | Pursuit | – | – | – | – | – | – | – | – | – |
 Start with One Skill
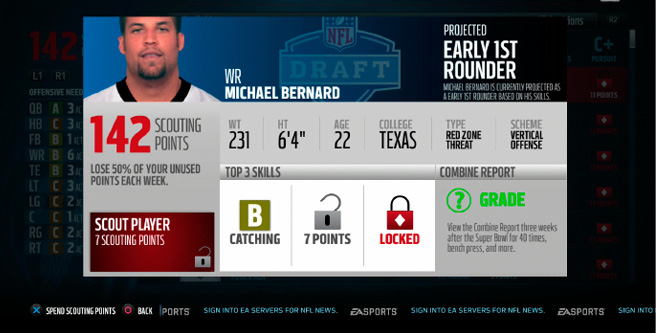
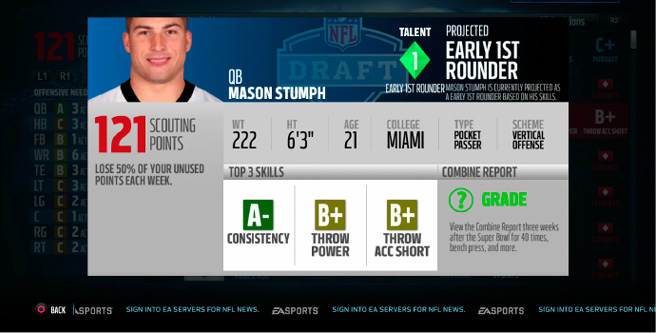
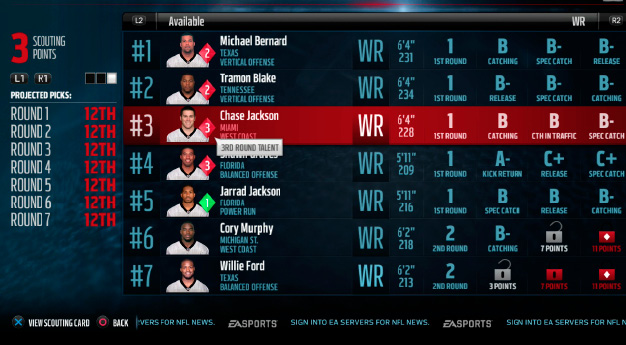
At the start of the draft, the entire class will be ranked by their projected draft position. From here, you will slowly uncover each player’s top three skills over the course of the season. Start with just one skill for players early in the process, as the skills get more expensive for each category. The first skill will be a player’s highest grade, so if you know you won’t see anything better, you can often abandon a player after seeing just one skill. For example, if you choose a QB and the first grade unlocked is a D+ Throw Power, you know his Accuracy rating can’t be any higher, so it isn’t worth spending any more scouting points. After unlocking all three skills, you will see a player’s true talent grade. Depending on if it exceeds or comes up short of your expectations, you can position him accordingly on your board. The computer won’t have this inside information, so expect it to pick based on the initial ranking. If you are playing with users, they may or may not have scouted your hidden gems, so play it differently!
 Be Consistent
There are plenty of points to go around in scouting, as long as you do it each week. There is no worse feeling than getting to the draft and not being prepared. While you may scout plenty of players in the early rounds, most of those guys will be gone and can make your late-round picks tough. Don’t forget to keep late-round picks in mind, or you will be forced to randomly select players based on their combine numbers. If you get to a point where you don’t know, check their size, combine numbers, and scheme type. From there, just go with your most wanted position and cross your fingers. Which scouting package your coach has will reduce the overall cost of a position, so consider making a purchase to save in the long run.
 Combine Warriors
A few weeks after the Super Bowl, you will be able to review the results of the scouting combine. This will help you determine the physical skills for all the players in the draft class and help you rank them or find a specific talent. Make sure to check on the players you have already scouted to review if they performed well and are consistent with your picture of them. Scout anyone you may have missed who performed well to see if he could be a sleeper!
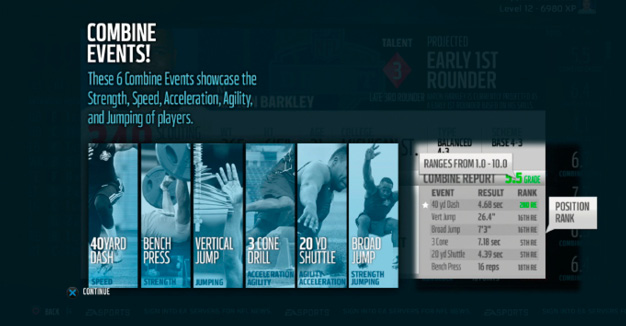
- 40-Yard Dash: Speed
- Bench Press: Strength
- Vertical Jump: Jumping
- 3-Cone Drill: Acceleration, Agility
- 20-Yard Shuttle: Agility, Acceleration
- Broad Jump: Strength, Jumping
|
40-Yard Dash |
Speed |
Bench Press |
Strength |
Vertical |
Jump |
3 Cone |
Acceleration/Agility* |
Shuttle |
Agility/Acceleration* |
|---|---|---|---|---|---|---|---|---|---|
| 4.27 | 98 | 44 Reps | 98 | 41.1 | 95 | 6.75 | 93-95 | 4.01 | 94 |
| 4.33 | 96 | 41 Reps | 95 | 38.7 | 91 | 6.85 | 92 | 4.05 | 90 |
| 4.41 | 93 | 39 Reps | 93 | 35.9 | 86 | 6.95 | 88 | 4.12 | 89 |
| 4.57 | 87 | 38 Reps | 92 | – | – | 7.14 | 82 | 4.18 | 88 |
| 4.68 | 83 | 36 Reps | 90 | – | – | 7.2 | 80 | 4.3 | 87 |
| 4.74 | 81 | 34 Reps | 88 | – | – | – | – | 4.57 | 72 |
| 5.34 | 59 | 31 Reps | 85 | – | – | – | – | 4.67 | 68 |
| – | – | 27 Reps | 80 | – | – | – | – | – | – |
| – | – | 22 Reps | 74 | – | – | – | – | – | – |
| – | – | 11 Reps | 57 | – | – | – | – | – | – |
| – | – | 6 Reps | 46 | – | – | – | – | – | – |
*Acceleration and Agility varied; number is for first attribute listed.
 Scheme vs Position
Finding a good scheme fit is important to maximize a future player’s fit on your roster. Always go for talent first, but if things are equal, try to match the scheme. Every player’s type can be seen without spending any points and will generally match their skills. It is rare to see a strong-arm QB without a good Throw Power rating. It is rare to see a red zone threat WR without a big frame and a solid Catch in Traffic rating. Use these to your advantage during the process. Style can help tip off what skills you may be unlocking.
 Tag ’Em
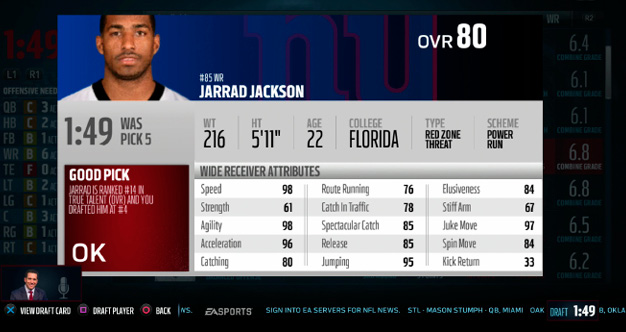
When your team is on the clock, there can be a feeling of panic! You have to keep an eye on other teams’ selections, and you also have the option to trade down. Keep everything organized by tagging your draft targets. This will allow you to sort the list of players you have identified as good matches for your team before the draft. Don’t let time run out on you; plan ahead and be in a position to find that gem in the sixth round. The good news is that you will get instant feedback on your selection and be able to see his true talent in the class. Once the draft completes, your rookies will be signed automatically and you will be notified and able to view the deals.
Fight On!
You know have officially completed your first season as an NFL player, coach, or owner — that wasn’t so hard! There is always room for improvement, even for teams that bring home a Super Bowl championship. Keep developing your team, and remember that the real work is done off the field. If it didn’t go according to plan, you can always try a new experience and utilize all the little tips you picked up along the way. When entering season two, continue to think about the long term and developing those young guys into future playmakers!
Next year, you will start at the preseason, so be ready to think about cutting players and chasing down the dream of a Super Bowl again.