
Prima Games eGuides
primagames.com Browse Redeem a code Help
Lego Star Wars III: The Clone Wars eGuide
Sign in My Guides

Sign in or create an account

We'll email you a link. No password needed, and if you don't have an account yet, the link makes one.

By creating an account or signing in, you agree to our Terms of Service and Privacy Policy.

Have a password?

Had an account on the old eGuides site, or a code from a printed guide? Help and troubleshooting

Sign in with a password

By signing in, you agree to our Terms of Service and Privacy Policy.

Check your email

A sign-in link is on its way. It works once and expires in 15 minutes. Open it and you're in, with an account if you didn't already have one.

Contents

  • Essentials
    • Padawan Training
      • Introduction
      • Adventurous Actions
      • Space Combat
      • Ground Assaults
      • Tantalizing Treasures
    • Secrets and Extras
      • Secrets and Extras-Introduction
      • Space Combat
      • Secrets and Extras
      • Secrets and Extras
      • Cheat Codes
    • DS Game Basics
      • The Hub (DS)
      • Game Modes (DS)
      • Game Progress (DS)
      • Character Abilities (DS)
      • Characters (DS)
      • Ships (DS)
    • Cast
      • Unlocking Characters
      • Cast
    • DS Checklists
      • DS Checklists
  • Walkthrough
    • Hub Areas
      • Battleship Resolute
      • The Invisible Hand
    • Prologue
      • Geonosian Arena
      • Freeplay
    • Count Dooku
      • Chapter I: Battle of Geonosis
      • Chapter II: Gungan General
      • Chapter III: Jedi Crash
      • Chapter IV: Defenders of Peace
      • Chapter V: Weapons Factory
      • Chapter VI: Legacy of Horror
    • General Grievous
      • Chapter I: Duel of the Droids
      • Chapter II: Shadow of Malevolence
      • Chapter III: Destroy Malevolence
      • Chapter IV: Lair of Grievous
      • Chapter V: Rookies
      • Chapter VI: Grievous Intrigue
    • Asajj Ventress
      • Chapter I: The Hidden Enemy
      • Chapter II: Ambush
      • Chapter III: Blue Shadow Virus
      • Chapter IV: Storm Over Ryloth
      • Chapter V: Innocents of Ryloth
      • Liberty on Ryloth
    • Epilogue
      • Epilogue
    • Separatist Missions
      • Chapter I: Hostage Crisis
      • Chapter II: Castle of Doom
    • Ambush (DS)
      • Ambush-Introduction (DS)
      • Ambush-Act 1 (DS)
      • Ambush-Act 2 (DS)
      • Ambush-Act 3 (DS)
    • Destroy Malevolence (DS)
      • Destroy Malevolance-Introduction (DS)
      • Destroy Malevolance-Act 1 (DS)
      • Destroy Malevolance-Act 2 (DS)
      • Destroy Malevolance-Act 3 (DS)
    • Rookies (DS)
      • Rookies-Introduction (DS)
      • Rookies-Act 1 (DS)
      • Rookies-Act 2 (DS)
      • Rookies-Act 3 (DS)
    • Lair of Grievous (DS)
      • Lair of Grievous-Introduction (DS)
      • Lair of Grievous-Act 1 (DS)
      • Lair of Grievous- Act 2 (DS)
      • Lair of Grievous-Act 3 (DS)
    • Gungan General (DS)
      • Gungan General-Introduction (DS)
      • Gungan General-Act 1 (DS)
      • Gungan General-Act 2 (DS)
      • Gungan General-Act 3 (DS)
    • Jedi Crash (DS)
      • Jedi Crash-Introduction (DS)
      • Jedi Crash-Act 1 (DS)
      • Jedi Crash-Act 2 (DS)
      • Jedi Crash-Act 3 (DS)
    • Hidden Enemy (DS)
      • HIdden Enemy-Introduction (DS)
      • Hidden Enemy-Act 1
      • Hidden Enemy-Act 2 (DS)
      • Hidden Enemy-Act 3 (DS)
    • Blue Shadow Virus (DS)
      • Blue Shadow Virus-Introduction (DS)
      • Blue Shadow Virus-Act 1 (DS)
      • Blue Shadow Virus-Act 2 (DS)
      • Blue Shadow Virus-Act 3 (DS)
    • Storm Over Ryloth (DS)
      • Storm Over Ryloth-Introduction (DS)
      • Storm Over Ryloth-Act 1 (DS)
      • Storm Over Ryloth-Act 2 (DS)
      • Storm Over Ryloth-Act 3 (DS)
    • Liberty on Ryloth (DS)
      • Liberty on Ryloth-Introduction (DS)
      • Liberty on Ryloth-Act 1 (DS)
      • Liberty on Ryloth-Act 2 (DS)
      • Liberty on Ryloth-Act 3 (DS)
    • Weapons Factory (DS)
      • Weapons Factory-Introduction (DS)
      • Weapons Factory-Act 1 (DS)
      • Weapons Factory-Act 2 (DS)
      • Weapons Factory-Act 3 (DS)
    • Legacy of Teror (DS)
      • Legacy of Terror-Introduction (DS)
      • Legacy of Terror-Act 1 (DS)
      • Legacy of Terror-Act 2 (DS)
      • Legacy of Terror-Act 3 (DS)

Lego Star Wars III: The Clone Wars Guide › Walkthrough › Storm Over Ryloth (DS)

Storm Over Ryloth-Act 2 (DS)
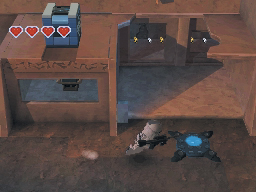
Clone troopers Waxer and Boil are inside the Twi’lek city. Move to the right to find the build-it pad near a damaged building. There is a blue crate in the small room to the left. A crate sits on the rooftop.
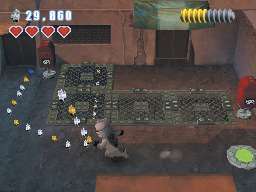
Carry the blue crate to the build-it pad. Assemble the grapple pad, then swing up to the crate. Push the crate over the edge, then drop down and build a switch. Trigger the switch to reveal a trail of studs.
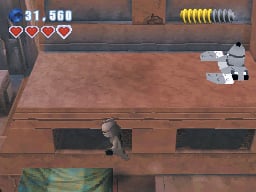
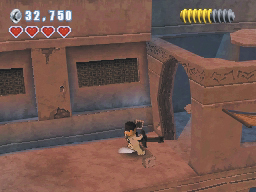
Return to the grapple pad and swing back up to the rooftops. Move to the left and jump onto the awning. Use the awning to bounce up to the large bomb.
Tip

During Free Play, use the Force on the red boxes scattered throughout the city—doing so gains you some extra studs.

When you’re ready to leave, detonate the large bomb and continue to the next area.
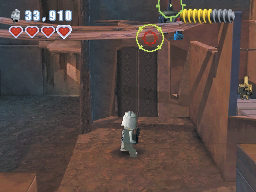
Look for the recon Droid hovering in the next area. The Droid is too high to hit with normal blaster fire; use your light clone’s sharpshooting ability to knock it out of the air. After the recon Droid shatters, use the pieces to build a large bomb. Detonate the bomb to blast through the door and then continue through the buildings.
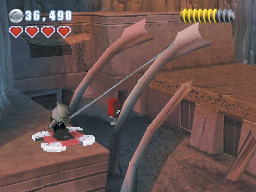
Tip

During Free Play, use the Force to hang all of the laundry on the clothesline. When the line is full, a trail of studs appears to the left.

Clear out the next wave of Droids, then use the grapple pad past the giant bones in the ground. When you land on the roof, use the next grapple pad to whip one of the bones into the building across the alley.
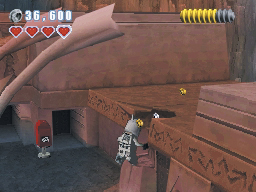
When you’re ready to move on, follow the studs over the building to the right.
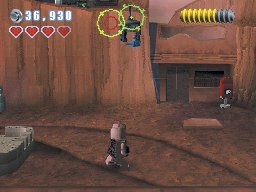
Clear out the battle Droids around the fountain, then continue to the right. Shoot the recon Droid out of the air; after the crash, Numa joins your party.
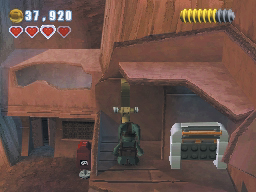
Move to the right, and use Numa to pass through the small door. After you reach the building’s next floor, pull the lever to open the exit. Drop down and search for extra studs, then continue onto the next area.
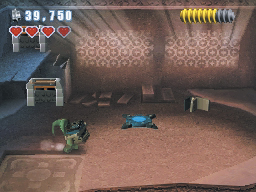
Smash all of the objects in the next room. Use the small door to reach the blue crate on the ledge. Take the crate to the build-it pad, then use the pieces to assemble a lever. Pull the lever to open the floor panel. When you’re ready to leave, drop down into the sewer.
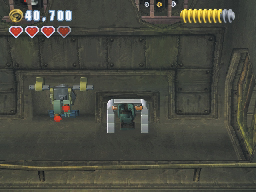
When you land, follow the path to the right. Use the small door to slip past the locked gate.
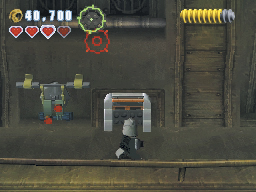
When you pop out from the small door, switch to clone trooper Waxer. Shoot the pipe along the wall to release the steam. Pull the lever near the gate, then follow the studs to the left.
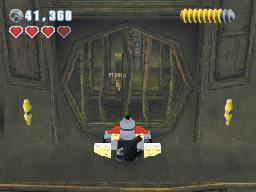
Move back to the right and detonate the large bomb. After the explosion, pull the lever to release more steam from the pipes. When you’re ready to move on, continue to the right and exit the sewer.

Minikit 2 (Freeplay)
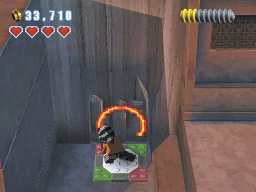
Before you detonate the large bomb, smash the boxes to the left. Assemble the Jedi pad, then use it to cut through the wall.
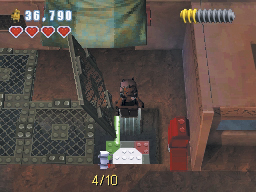
Drop down through the hole, then follow the passage under the grates to collect a minikit. Use the Jedi pad at the end of the passage to return to the surface.

Minikit 3 (Freeplay)
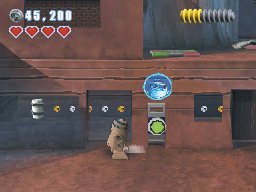
When you reach the city’s next open area, use the Droid control panel on the wall. When the door opens, head inside and collect the minikit.

Minikit 4 (Freeplay)
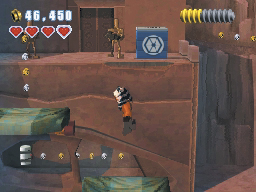
After you grapple onto the building, use the Jedi pad to the left. Jump to the awnings and bounce up to the crate near the battle Droids. Take out the Droids, then push the crate off the ledge. Drop down and assemble a Jedi pad, then cut through the wall to collect the minikit.

Minikit 5 (Freeplay)
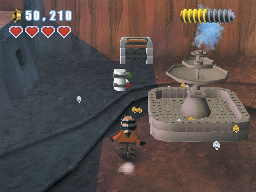
Use the Force to repair the fountain. When the water starts flowing, a minikit drops to the ground.

Minikit 6 (Freeplay)
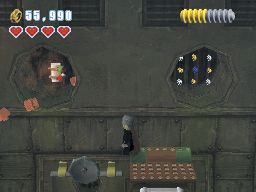
Before you use the small door, select a bounty hunter to set off the thermal detonators to the left. After the hatch flips up, assemble the platform above the door. Use the Dark Force to remove the bars in the wall. Hop onto the hatch and double-jump up to the minikit in the wall.

Keep reading with a free account

The first 3 sections of Lego Star Wars III: The Clone Wars are open to everyone. An account opens the rest of it, and every other guide in the archive. It's free, and there's nothing to buy.

Bought guides on the old Prima Games site? Your account and every guide you own moved here, so there's nothing to buy again. Sign in.

Create a free account Or browse our free guides

PreviousStorm Over Ryloth-Act 1 (DS) NextStorm Over Ryloth-Act 3 (DS)