
Lego Star Wars III: The Clone Wars Guide Walkthrough Count Dooku
Chapter IV: Defenders of Peace
“When surrounded by war, one must eventually choose a side.”
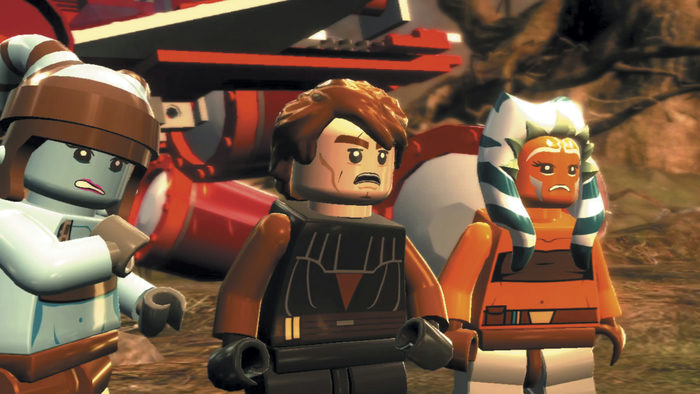
Thanks to the daring intervention of Anakin and Ahsoka, Aayla Secura has been safely reunited with her Republic allies. But even as they find some little time to rest and prepare for the next stage of the galaxy-wide conflict, the Jedi know that Separatist forces, masterminded by the devious Count Dooku, can confront them at any time....
Minikits
|
No. |
Icon(s) |
Mode |
Notes |
|
x |
1-10 |
Story |
Destroy the 10 palm trees scattered across the level. |
|
x |
2 |
Story |
At the crash site, head to the right and follow the cliff edge to find a hidden minikit. |
|
x |
3 |
Free Play |
Activate the bounty hunter panel to the left of the battlefield, then kill 50 Droids before time expires. |
|
x |
— |
Story |
Destroy three enemy tanks, then use a tank to collect the minikit that appears above the final tank you destroy. |
|
x |
5 |
Story |
Destroy the enemy barracks at the northwest base. Build three base structures around the pad where the barracks formerly stood. |
|
x |
— |
Story |
Build a minikit dispenser by building one base structure of every preceding group in the build menu. |
|
x |
7 |
Free Play |
Build and activate the astromech Droid control panel to the right of the start position, then collect the studs that appear. |
|
x |
8 |
Free Play |
Activate the protocol Droid control panel to the south, then use a speeder to quickly drive over each of the race pads that appear. |
|
x |
9 |
Free Play |
Activate the power panel on the east wall, then grapple the revealed hook point. |
|
x |
10 |
Free Play |
Use a Sith character to shatter the northeast Dark Force rock. |
True Jedi Stud Requirement: 100,000
Story Characters
Anakin Skywalker
Ahsoka Tano
Aayla Secura
Wag Too
Commander Bly
Objective 1: Establish a Base

Anakin has crash-landed in Separatist territory, and it won’t be long before trouble starts brewing. Use the Force to lift some rubble off Commander Bly to free him.

Anakin shapes the rubble into a speeder, but don’t race off just yet. Instead, use Commander Bly and Wag Too to grapple and tug on both hook points on the side of the downed ship.

Pulling the hook points causes a jumble of bits to spill out. Use the Force to build these into a second speeder, then use the Force again to turn the three exposed valves on the ship.

Turning the valves reveals the ship’s power core. Use the Force again to lift and move the power core over to open ground, creating a base. Very cool!
Objective 2: Escape the Crash Site

Now you need some cash—base-building is expensive! Zip around on a speeder or on foot, scouring the crash site for studs. You can collect over 20,000 from this small area.
Minikit 1

While hunting for studs, smash four small palm trees around the crash site (check the map for their locations). After you escape the crash site, you can hunt down the remaining six trees. Destroy all 10 for a minikit!
Minikit 2

This minikit is tucked away near the cliff on the right side of the crash site. Grab it at your convenience.

A wall of silver rubble prevents you from advancing, but not for long. Notice the large gray pads that appear on the ground as you circle the power core of your base. Stand on a pad that’s close to the rubble and press the Action button to call up the build menu.

At this point, you can only construct a basic cannon. Purchase the cannon to make it appear.

With the cannon in place, jump into the gunner’s seat and hold the Attack button to aim. Target the silver rubble ahead and release the Attack button to fire. Repeat this until the rubble is removed.
Objective 3: Establish a Foothold

With the rubble out of your way, hop into a speeder and zip up the path. Attack the nearby enemy base, which features only a Droid barracks. Destroy this lone structure with your speeder’s blasters or a Jedi’s Lightsaber to capture the base.

With the base under your command, build a cannon, then sprint to the right. Head for the middle-north enemy base, which is covered by a shield. Run through the shield on foot and attack all of the base’s structures with a Jedi to destroy them, or drop the shield by pulling the lever and assault the structures with vehicles.

With the second enemy base captured, open your build menu to see that you can now erect structures that call for “small air support.” Select the AT-RT (the only option) to build a little radio tower that orders an AT-RT vehicle to deploy nearby.
Minikit 3 (Freeplay)

During Free Play, don’t destroy the first barracks until you’ve activated the nearby bounty hunter panel to the left. Activate the bounty hunter control panel, then camp out near the barracks and destroy the Droids that regularly emerge. You may need to seek out and destroy the barrack’s active battalion of Droids before more will emerge from the structure.
Objective 4: Destroy the Defoliator

Head for the enemy’s far west base, which features two barracks and a cannon. Destroy all of these, then build two blaster clone barracks and a silver cannon in their place.

Assault the nearest southern base next, destroying another two barracks and a vehicle generator. The next base to the north features a silver cannon and ray shield, so build a gold cannon and use it to obliterate them. Remember to hold the Attack button to aim and release to fire.
Minikit 4

Destroy three enemy tanks to make a minikit appear above the final tank you destroy. You can only collect this minikit in Story mode by driving a stolen enemy tank (or similarly large vehicle) into it. (During Free Play, you can use Jar Jar to double-jump and grab this minikit.)
Minikit 5

This minikit hides beneath the first barracks you destroyed, in the enemy’s northwest base. To claim it, you must build structures around the construction pad where the enemy barracks formerly stood. Build a structure to the right of the pad, and another to the left. Build a third structure anywhere else to reveal the minikit.
Minikit 6

To acquire this minikit, you must capture enough bases and build enough structures to unlock to the final build menu option, “minikit dispenser.” Simply ensure that you’ve built at least one structure at each captured base, and that you build one structure from each category (cannon, barracks, etc.) You’ll eventually unlock the minikit dispenser, which you may purchase for a tidy sum.

With the silver ray shield destroyed, the enemy’s northeast defoliator weapon is made vulnerable. Spend some time wiping out any remaining enemy structures for fun and studs before destroying the defoliator to end the mission.
Minikit 7 (Freeplay)

Build the pile of loose pieces you find on the cliff to the left of the starting point. Activate the astromech Droid control panel you create from the bits to summon a vehicle, then collect the line of studs that appears to the right to score a minikit.
Minikit 8 (Freeplay)

Swing your speeder to the southeast area of the battlefield and find a protocol Droid control panel. Activate this with C-3PO to cause a familiar-looking orange pad to appear nearby.

Return to your speeder and pass over the pad to change its color to green. Follow the line of green beacons to locate the next pad, and keep following along until you’ve passed over every pad. The pads reset to orange after a time, so try to keep a good pace. Turn all those pads green to win a minikit!
Minikit 9 (Freeplay)

Use MagnaGuard or a similar character to activate the power panel on the battlefield’s far-right wall. This extends a hook point above you; toggle to a grapple character and yank on the hook point to bring down a minikit.
Minikit 10 (Freeplay)

Use a Sith character to shatter the Dark Force rock in the area’s northeast corner (near the defoliator). A hidden minikit pops out!