
Lego Star Wars III: The Clone Wars Guide Walkthrough General Grievous
Chapter II: Shadow of Malevolence
“Easy is the path to wisdom for those not blinded by ego.”
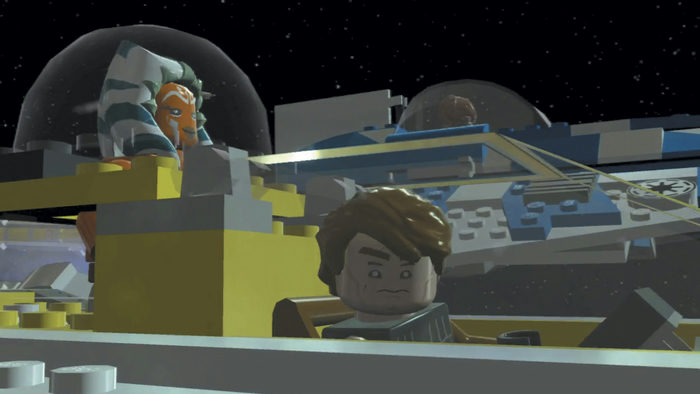
Suspecting that General Grievous will attack the Kallida Shoals Medical Center in his seemingly invincible ship, the Malevolence, Anakin Skywalker plans a daring ambush. Accompanied by Master Plo Koon in his Jedi starfighter, Anakin leads Shadow Squadron and their Y-wings in a bold mission to disable the Separatist warship before it can bring its deadly ion cannon to bear on the Medical Center....
Minikits
|
No. |
Icon(s) |
Mode |
Notes |
| 1 |
— |
Free Play |
Destroy the five highlighted ships. |
| 2 |
— |
Free Play |
At the far left of the Malevolence , lower deck, use an enemy ship to destroy the glowing red object. |
| 3 | 3 |
Free Play |
Grapple down the box on the first landing pad, then use Jar Jar to jump up to the minikit. |
| 4 | 4 |
Free Play |
Launch the shuttle on the first landing pad, then destroy it in space. |
| 5 |
— |
Free Play |
Destroy the gold object on the Malevolence near the first landing pad with a rapid-fire ship. |
| 6 | 6 |
Free Play |
On the second landing pad, activate the protocol Droid control panel, then grapple the pool hook point and use Jar Jar to reach the minikit. |
| 7 | 7 |
Free Play |
On the second landing pad, grapple the hook point to find two plunk Droids, then use them to turn the nearby pads green. |
| 8 | 8 |
Story |
On the third landing pad, use the Force to send three red dumpsters to the trash compactor. |
| 9 | 9 |
Free Play |
Launch another shuttle from the third landing pad, then destroy it in space. |
| 10 |
— |
Free Play |
Fly close to the ion cannon at high altitude to open a secret panel, then destroy the silver object within with missiles. |
True Jedi Stud Requirement: 190,000
Story Characters
Anakin Skywalker
Plo Koon
Objective 1: Acquire Torpedoes

Strap yourself in—you’re piloting a starfighter in this fast-paced mission! Get a feel for your ship’s controls as you fly about the imposing Malevolence. Hold the Jump button to boost, and double-tap the control stick in any direction to perform a swift roll maneuver.

Fly around and look for one of several circular objects floating in space—these are called boost rings. Fly close to one and press the Change Character button to dock at the ring, then press the Jump button to boost down to a lower altitude.

Scan the lower section of the Malevolence and spy a large blue arrow that points to a landing pad. Fly close and press the Change Character button to set your ship down.
Minikit 1 (Freeplay)

During Free Play, five enemy ships will be highlighted by green reticles. Destroy all five ships to strike a blow for the Republic and earn a minikit! You may need to use boost rings to change your elevation and find them all.
Minikit 2 (Freeplay)

Toggle to any enemy ship, such as a Vulture Droid, and fire on the glowing red object at the rear (far left) of the Malevolence. Only enemy ships can destroy this object, which spits out a minikit when obliterated.
Landing Pad A

Explore the landing pad to locate a lever to the right. Pull the lever to activate a giant torpedo generator. This should come in handy!
Minikit 3 (Freeplay)

Grapple the hook point in the upper-left corner of the landing pad to pull down a crate. Toggle to Jar Jar afterward and leap onto the ledge where the crate formerly sat, then double-jump up to snag a high, hovering minikit.
Minikit 4 (Freeplay)

Use the Dark Force to uncover a power panel near the shuttle on the landing pad’s right side. Activate the panel afterward to launch the shuttle into space near the Malevolence. When you leave the landing pad, find the shuttle in space and destroy it to score a minikit.
Objective 2: Torpedo the Targets

Return to your ship and lift off. Collect some torpedoes and use them to blast the two pink targets on the ship near the landing pad.

Reload your torpedoes, then use a boost ring to return to the higher elevation. Strike three more pink targets on the side of the Malevolence with torpedoes to blow open a large portion of the battleship and reveal another landing pad.

Before you land, fire your ship’s blasters at the three satellite dishes that are emitting a dome-shaped shield over another torpedo launcher. Touch down at the landing pad afterward.
Minikit 5 (Freeplay)

Toggle to any rapid-fire ship and destroy the gold objects on the Malevolence near the landing pad. A minikit will be your prize—something far better than gold!
Landing Pad B

Run to the left to locate the lever that controls the second landing pad’s torpedo generator. Throw the switch to activate the generator, then board your ship and collect some of those torpedoes.
Minikit 6 (Freeplay)

Use C-3PO to activate the protocol Droid control panel on the landing pad’s right side. A swimming pool emerges from the nearby ground—how nice! Switch to a grapple gun character and yank on the pool’s central hook point to uncork a floating minikit that only Jar Jar can reach.
Minikit 7 (Freeplay)

Grapple the hook point on the second landing pad’s upper-left bin to discover a pair of plunk Droids. Wonder how these got here ...

Hop into one of the plunk Droids and steer it onto the nearest of the nearby orange pads to turn the pad green. Park the plunk Droid here and drive the other plunk Droid over the remaining pads, starting with the farthest pad and rolling toward the plunk Droid you parked. All this plunk Droid-based zaniness earns you a minikit.

Torpedo the two pink targets near the upper landing pad, then reload your torpedoes and fly to the left. Blast three more targets to destroy another portion of the Malevolence; you’ll reveal a third landing pad.
Objective 3: Destroy the Ion Cannon

There’s no pressing need to touch down at the third landing pad, but doing so can net you a minikit (see the sidebar). Instead, simply fly back to the right and collect more torpedoes from the previous generator, then return and blast the two pink targets near the third landing pad to reveal a final target on the side of the ion cannon itself.
Minikit 8

Set your ship down on the third landing pad, then run to the left and use the Force to place three red dumpsters into the nearby garbage disposal unit. You’ll receive some studs for your troubles, along with a minikit that’s made of 100 percent recycled materials.
Minikit 9 (Freeplay)

Blast the silver pipe near the third landing pad’s shuttle to uncover a hook point, then grapple the hook point to bring a power panel online. Activate the power panel to launch the shuttle, then find the shuttle floating in space and destroy it for another minikit.

Now it’s time to take out that cannon. Grab some torpedoes, then use a boost ring to return to the lower plane. Fire one final torpedo at the pink target that now appears on the side of the ion cannon to obliterate the fearsome weapon, at last ending the threat to the Republic’s precious medical center. Superb work!
Minikit 10 (Freeplay)

Before annihilating the ion cannon, remain at high altitude and toggle to a ship that fires missiles (this will be mentioned in the ship’s name). Wait for the ion cannon to cease fire, then quickly fly close to the top of the cannon. A panel slides away as you approach, revealing a silver mechanism. Blast this with missiles to collect a secret minikit!