Prima Games eGuides
primagames.com Browse Redeem a code Help
Lego Star Wars III: The Clone Wars eGuide
Sign in My Guides

Sign in or create an account

We'll email you a link. No password needed, and if you don't have an account yet, the link makes one.

By creating an account or signing in, you agree to our Terms of Service and Privacy Policy.

Have a password?

Had an account on the old eGuides site, or a code from a printed guide? Help and troubleshooting

Sign in with a password

By signing in, you agree to our Terms of Service and Privacy Policy.

Check your email

A sign-in link is on its way. It works once and expires in 15 minutes. Open it and you're in, with an account if you didn't already have one.

Contents

  • Essentials
    • Padawan Training
      • Introduction
      • Adventurous Actions
      • Space Combat
      • Ground Assaults
      • Tantalizing Treasures
    • Secrets and Extras
      • Secrets and Extras-Introduction
      • Space Combat
      • Secrets and Extras
      • Secrets and Extras
      • Cheat Codes
    • DS Game Basics
      • The Hub (DS)
      • Game Modes (DS)
      • Game Progress (DS)
      • Character Abilities (DS)
      • Characters (DS)
      • Ships (DS)
    • Cast
      • Unlocking Characters
      • Cast
    • DS Checklists
      • DS Checklists
  • Walkthrough
    • Hub Areas
      • Battleship Resolute
      • The Invisible Hand
    • Prologue
      • Geonosian Arena
      • Freeplay
    • Count Dooku
      • Chapter I: Battle of Geonosis
      • Chapter II: Gungan General
      • Chapter III: Jedi Crash
      • Chapter IV: Defenders of Peace
      • Chapter V: Weapons Factory
      • Chapter VI: Legacy of Horror
    • General Grievous
      • Chapter I: Duel of the Droids
      • Chapter II: Shadow of Malevolence
      • Chapter III: Destroy Malevolence
      • Chapter IV: Lair of Grievous
      • Chapter V: Rookies
      • Chapter VI: Grievous Intrigue
    • Asajj Ventress
      • Chapter I: The Hidden Enemy
      • Chapter II: Ambush
      • Chapter III: Blue Shadow Virus
      • Chapter IV: Storm Over Ryloth
      • Chapter V: Innocents of Ryloth
      • Liberty on Ryloth
    • Epilogue
      • Epilogue
    • Separatist Missions
      • Chapter I: Hostage Crisis
      • Chapter II: Castle of Doom
    • Ambush (DS)
      • Ambush-Introduction (DS)
      • Ambush-Act 1 (DS)
      • Ambush-Act 2 (DS)
      • Ambush-Act 3 (DS)
    • Destroy Malevolence (DS)
      • Destroy Malevolance-Introduction (DS)
      • Destroy Malevolance-Act 1 (DS)
      • Destroy Malevolance-Act 2 (DS)
      • Destroy Malevolance-Act 3 (DS)
    • Rookies (DS)
      • Rookies-Introduction (DS)
      • Rookies-Act 1 (DS)
      • Rookies-Act 2 (DS)
      • Rookies-Act 3 (DS)
    • Lair of Grievous (DS)
      • Lair of Grievous-Introduction (DS)
      • Lair of Grievous-Act 1 (DS)
      • Lair of Grievous- Act 2 (DS)
      • Lair of Grievous-Act 3 (DS)
    • Gungan General (DS)
      • Gungan General-Introduction (DS)
      • Gungan General-Act 1 (DS)
      • Gungan General-Act 2 (DS)
      • Gungan General-Act 3 (DS)
    • Jedi Crash (DS)
      • Jedi Crash-Introduction (DS)
      • Jedi Crash-Act 1 (DS)
      • Jedi Crash-Act 2 (DS)
      • Jedi Crash-Act 3 (DS)
    • Hidden Enemy (DS)
      • HIdden Enemy-Introduction (DS)
      • Hidden Enemy-Act 1
      • Hidden Enemy-Act 2 (DS)
      • Hidden Enemy-Act 3 (DS)
    • Blue Shadow Virus (DS)
      • Blue Shadow Virus-Introduction (DS)
      • Blue Shadow Virus-Act 1 (DS)
      • Blue Shadow Virus-Act 2 (DS)
      • Blue Shadow Virus-Act 3 (DS)
    • Storm Over Ryloth (DS)
      • Storm Over Ryloth-Introduction (DS)
      • Storm Over Ryloth-Act 1 (DS)
      • Storm Over Ryloth-Act 2 (DS)
      • Storm Over Ryloth-Act 3 (DS)
    • Liberty on Ryloth (DS)
      • Liberty on Ryloth-Introduction (DS)
      • Liberty on Ryloth-Act 1 (DS)
      • Liberty on Ryloth-Act 2 (DS)
      • Liberty on Ryloth-Act 3 (DS)
    • Weapons Factory (DS)
      • Weapons Factory-Introduction (DS)
      • Weapons Factory-Act 1 (DS)
      • Weapons Factory-Act 2 (DS)
      • Weapons Factory-Act 3 (DS)
    • Legacy of Teror (DS)
      • Legacy of Terror-Introduction (DS)
      • Legacy of Terror-Act 1 (DS)
      • Legacy of Terror-Act 2 (DS)
      • Legacy of Terror-Act 3 (DS)

Lego Star Wars III: The Clone Wars Guide › Walkthrough › Lair of Grievous (DS)

Lair of Grievous- Act 2 (DS)
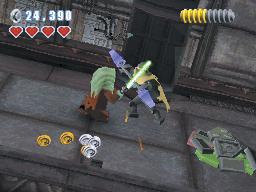
Act 2 opens with Fisto, Vebb, and the clone troopers deep in General Grievous’ lair. Move to the right until the MagnaGuard bursts out of its tank. Defeat the Droid, then assemble the nearby Jedi pad. Activate the Jedi pad to jump up to the ledge; when you land, use the Force to flip the switch to the right.
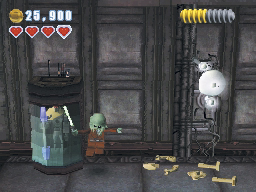
When you’re ready to move on, run across the ledge and drop down to find another tank. Deal with the MagnaGuard and continue to the right. For extra studs, repair the broken Droid and use the Force on the wall fixture. When you’re ready, drop down into the large room to the right.

Caution

The large room’s floor separates when you touch the red button—stay clear of it until you’re ready to leave the area.

Note

Repeat the process on the room’s left side to collect some extra studs.

Step on the red button and back away until the floor splits apart. Drop down to one of the rocks floating in the lava pool. Whenever you touch a rock, it sinks into the lava. Jump toward the bricks near the wall. Switch to your heavy clone and shoot the bricks, but keep moving across the rocks to stay out of the lava.

When you destroy the last of the bricks, a platform emerges from the lava. Hop across and assemble the built-it. Step on the switch to ride up to the locked door. Activate the Jedi pad and climb up to the ledge high above you. Use the Force to move the three wall panels into place. When the door opens, drop down and fight the MagnaGuard below you.

Tip

When you drop from the ledge, steer your drop into the wall to collect the studs above the door.

In the next room, run up the stairs to clear out the MagnaGuards and battle Droids. When the large door opens, General Grievous’ pet roggwart emerges. Move to the left and assemble the Jedi pad. Jump up to the ledge and use the Force to pull the red panel from the wall.

Drop down to the ground. Stay clear of the roggwart and assemble the grapple pad on the right. Grapple up to the ledge and remove a second red panel with the Force. Move to the center of the room and use your light clone’s sharpshooting ability to shoot the exposed chains and bring the door crashing down on the roggwart.

Note

After you collect this red brick, the “Auto Pickup” extra can be purchased in the rec room.

When you’re ready to continue, use the Force to lift the door off the roggwart. Jump onto the fallen beast and leave the room.

Minikit 5 (Freeplay)

After you flip the switch, turn back to the left. Use a jetpack character to hover through the studs and grab the floating minikit.

Minikit 6 (Freeplay)
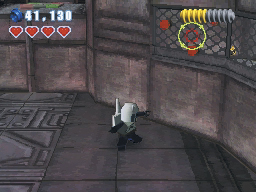
In the large room, avoid the red button in the center of the floor. Move to the right and locate the grate covered in thermal detonators. Use a bounty hunter to destroy the grate, then switch to a Jedi to double-jump through the gap. Move along the wall to collect the minikit behind the grates.

Minikit 7 (Freeplay)
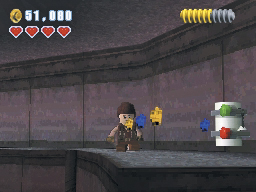
Before you leave the roggwart room, assemble the small door to the left. Use the door to reach the ledge above you. Move to the right and collect the minikit at the end of the ledge. There are plenty of additional studs to collect, so make a full sweep of the ledge.

Red brick (Freeplay)
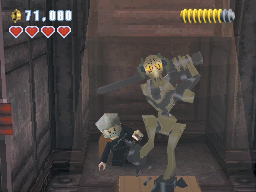
Before you leave the roggwart room, access the Droid control panel and open the door to the right. When you enter the next room, move to the Jedi pad and jump up to the ledge. Collect the studs and assemble the switch. Trigger the switch to open a panel in the wall below you. Drop down and build the first statue of General Grievous.
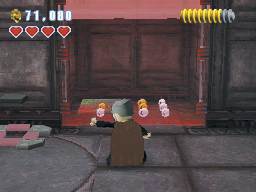
Now move to the right. Use the Force to move the build-it from behind a red barrier at the end of the room. Use the grapple pad to reach the ledge above you. When you land, build the second Grievous statue. A third statue appears near the center of the room. Drop down behind the red barrier. Grab the studs, then use the Jedi pad to get back over the barrier.
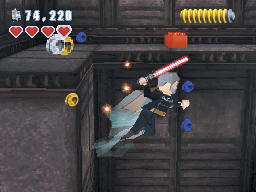
Destroy the third Grievous statue to expose a Jedi pad. Use the pad and climb up to the red brick above you. Collect any remaining studs in the area, then head back out to the roggwart room.

Keep reading with a free account

The first 3 sections of Lego Star Wars III: The Clone Wars are open to everyone. An account opens the rest of it, and every other guide in the archive. It's free, and there's nothing to buy.

Bought guides on the old Prima Games site? Your account and every guide you own moved here, so there's nothing to buy again. Sign in.

Create a free account Or browse our free guides

PreviousLair of Grievous-Act 1 (DS) NextLair of Grievous-Act 3 (DS)