
Lego Star Wars III: The Clone Wars Guide Essentials Padawan Training
Ground Assaults
Ground Assaults

Also new to LEGO Star Wars III are large-scale ground assault battles. These special missions play out like real time strategy (RTS) combat: the battlefield features several bases, which both sides (Republic and Separatist) fight to control. A variety of special structures can be built at each controlled base to help each army gain the advantage—but who will reign supreme?
The Minimap
Assault battles occur across huge battlefields, so a minimap is provided to help you keep your bearings. Blue circles represent Republic-controlled bases, while red circles denote Separatist-owned bases. White blips are base structures, and your current position is marked by the crosshairs. Use the minimap to help you plot your next move!
Attacking Bases

At the start of a ground assault battle, each base will either be under the control of the Republic or Separatist forces. Annihilate all structures at an enemy base to seize control of the base and begin building your own structures there!

Most base structures are covered in standard protective plating— any form of attack, even basic blasters and close-range Lightsabers, will eventually bring these down. A structure’s health is shown by a red meter that appears over the structure as it’s being attacked.

Silver base structures are fortified against normal attacks. Such structures cost more to build than normal base structures, but you get more bang for your stud. That’s because silver structures can only be destroyed by explosive attacks, such as cannon and tank fire—they deflect blasters and Lightsaber attacks, suffering no damage.

Gold base structures are the most costly and stalwart of all. Only steady, rapid-fire attacks will destroy these hardened structures. Each side owns just one air support vehicle armed with rapid-fire weaponry— the Republic has the RX-200 Tank, while the Separatists have the OG-9 Homing Spider Droid. In a pinch, a squad or two of blaster clones, lead by a captain or commander (read on for details), can also be directed to destroy gold base structures.
Base Building

Bases are relatively small, circular sites that sport a central power core. Each base’s power core can sustain several structures—stand on one of the gray pads that appear as you circle the power core, then press the Action button to call up the radial build menu and make your selection.

Building base structures requires studs— each structure’s cost is shown next to its build menu icon. The more bases you control, the more structures you can potentially build.
Cannons
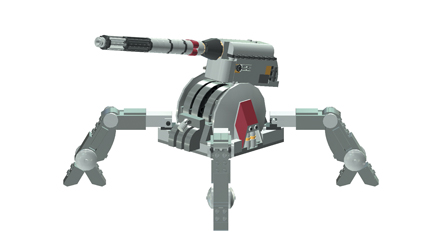
Cannons are large, stationary vehicles that boast long-range explosive attacks. While manning a cannon, hold the Attack button to aim and greatly improve accuracy. A cannon’s explosive attacks can destroy silver structures and objects! Cannons are also protected by a underbelly blaster that helps ward off nearby pests.
Small Air Support

Use the small air support menu to call down smaller vehicles such as speeders. Small vehicles are faster and lighter than tanks and walkers, but they generally suffer from weak firepower and little armor. Use smaller vehicles primarily as transports to help you quickly navigate the battlefield—speeders are especially useful for getting around!
Barracks
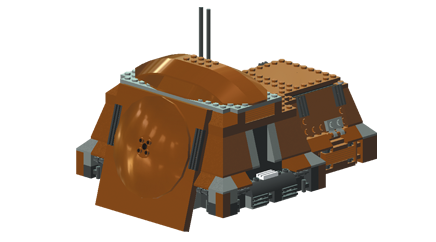
Barracks are squat structures that generate squads of infantry. There are two primary types of barracks: blaster clones/Droids, and rocket clones/Droids. Construct lots of barracks to flood the battlefield with troops and hamper the enemy’s advance!
- Blaster clones/Droids can destroy gold structures.
- Rocket clones/Droids can destroy silver structures.

Special characters, such as high-ranking clones and enemy Droids, can issue orders to infantry troops. While using such a character, simply stand next to a group of friendly infantry and press the Action button to get their attention. Now they’ll follow you around!
Hold the Attack button to designate targets for troops you’ve got following you. The soldiers will continue firing at the target until it has been destroyed. Leading troops around with a commander character can be a good way to do some damage, and it helps negate enemy shields (keep reading)—but don’t expect infantry to last long against direct fire!
Each time you wish to designate a new target for your infantry, you must first press the Action button to get their attention.
Air Support
Air support structures work just like their smaller peers, however these towers call for far larger and more powerful vehicles. Race to conquer your first four bases so you can begin calling down tanks and heavy walkers with air support!
Shield Generators
Shield generators bestow dome-like energy barriers around bases. These “bubble” shields repel all outside attacks, including long-range cannon fire. Shields also prevent vehicles from passing through, but they have no effect against infantry troops—run right through shields on foot and attack the generator structure directly to destroy it. This brings the barrier down for good.
Ray Shields
Ray shields are uniquely used to protect other structures. Once built, a ray shield emits a wave of energy at a nearby base structure or power core—this coats the target in an impenetrable shield that protects it from all harm! There’s no getting through a ray shield’s projected barrier—you must destroy the ray shield to cut off the energy wave.
Torpedo Generators

Torpedo generators are special structures that turn humble speeders into hit-and-run assault units. Build a torpedo generator, then cruise by on a speeder and collect some pink bombs. Base power cores will now become highlighted by pink reticles—press the Action button to fire a torpedo and completely destroy one of the base’s structures. Successive torpedoes destroy more structures until the base is clear.
Extras

The final build menu option, the Extras menu, only comes into play during certain missions. In some Story mode levels, you can purchase a minikit dispenser through the Extras menu—this is the only way to acquire one of the level’s minikits. In certain Republic Assault and Separatist Assault battles, this menu is used to construct a special Escape Pod structure, which you need to build to win some of these missions. If there’s nothing special to build during the mission, then the Extras menu option won’t be accessible.