
The Witcher 2: Assassins of Kings Guide (Steam) Walkthrough Vergen (Iorveth)
Subterranean Life
Subterranean Life
Hey, Work’s on in the mines!


Something that makes Chapter 2 of this game very different from Chapter 1 is how the side quests work. Most of Chapter 1’s side quests are freestanding affairs you can do without affecting the main plot at all. In Chapter 2, especially on this route, most of the side quests are best done while you’re also completing a main quest, since the side quests tend to affect the same areas. This particular quest you want to do first thing after you get settled in Vergen, since you can’t really complete the mini-game quests here until it’s resolved.
First, go to the notice board just to the right of the Cauldron’s entrance. Take the “Proclamation of the Closure of the Mines.” Next, make sure you have some grapeshot bombs on hand, ideally at least three. If you don’t, go make some. Next, enter the Cauldron and talk to the innkeeper. Drop off everything you’re carrying with a substantial weight that you don’t expect to use in the mines. That especially includes heavy crafting materials, ranged weapons you don’t expect to use, even heavy alchemy reagents you don’t expect to use. You’re about to enter a dungeon-like area loaded with heavy loot, so lightening your load cuts down on trips you have to make to the surface to drop things off in storage. Finally, head into the Cauldron and approach Zoltan’s table. Yarpen, Sheldon, and Cecil are all gathered with him. Speak with Zoltan to trigger a cutscene.
During the cutscene, you have chances to ask questions related to other quests, which you should be sure to do. Eventually, Geralt brings up the immortelle, and Sheldon talks about where you might find it. Eventually, all the dwarves agree that it’s probably growing in the old abandoned mine, and wouldn’t it be cool to go in there axes swinging and kill all the monsters? So after the cutscenes, the whole group of dwarves leads Geralt to the abandoned mine. Cecil authorizes them to open up the mine, and Zoltan, Yarpen, and Sheldon head in along with you. The three of them are very useful during this dungeon crawl, since they do a good job of keeping the larger groups of enemies from dogpiling you.

The enemies you’re about to face are necrophages: rotfiends, greater rotfiends, and a bullvore. If you’re carrying optimized equipment from Chapter 1, you should have no difficulties whatsoever defeating these enemies. Alchemist builds can get great mileage out of necrophage oil in this dungeon, while mages and swordsmen may want to save an application of it for the bullvore at the end. Rotfiends are flammable and emit flammable gases when they explode at death, so Igni and dancing stars can be highly effective in battle against them. The bullvore attacks with powerful poison, so be sure you’re carrying the right reagents to brew a Mongoose before you fight it. Geralts built around swordsmanship can just focus on hacking through the monsters with brute force. Investing a talent or two in Whirl’s group damage abilities can give Geralt a major edge.
The mine’s interior is very dark, so put some thought into how you explore it. There are two main options. One is to simply stick with the dwarves and scan repeatedly with your medallion as you inch forward. Alternatively, you can drink a Cat potion, which makes it a lot easier to keep track of enemy locations and clues like bloodstains on the ground. If you opt for the Cat method, you probably want to apply some sort of oil to your sword to compensate for the -10% damage penalty. For an alchemist build with Catalysis, the penalty is going to be neglible.
Loot the first body you find for a stash of poisoned harpy claws, which you want to hold onto for later in the chapter. When you pass through the door into the first big central section of the mine, about four rotfiends attack you. Make quick work of them with light attacks and any other tricks you want, and then a cutscene triggers. After the cutscene, begin exploring the chamber, which should be full of random loot. Use Igni on the fire pots to light them by standing nearby and pressing the interaction button. Once you light a fire pot it keeps burning and should help you keep track of where you’ve explored.
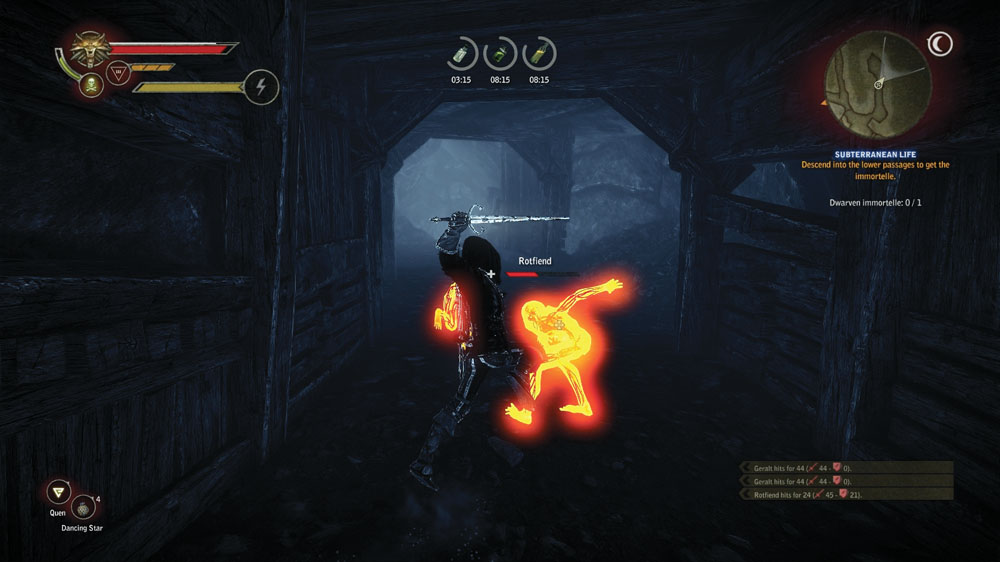
After you’ve cleaned out the central chamber, start exploring the passage just to the right of the entrance. You should find a couple of rotfiends there, along with some superb heavy leather trousers in a chest at the end of the dead-end passage. Loot the body you find there to pick up the upper shaft key, Balin’s journal (I), and Balin’s first map. Just beyond the body, a small tunnel leads away from the passage’s end. This is one of the locations you need to visit to complete Hey, Work’s On in the Mines! Although the quest text calls for beehive bombs, this is really just an oblique reference to grapeshot. If you’re carrying grapeshot, press the interaction button to collapse the tunnel. To clear Hey, Work’s On in the Mines! , you need to collapse two more tunnels like this. Be sure to roll away before the blast goes off.
Now that you have the upper shaft key, head into the tunnel to the left of the entrance tunnel. Once inside, fight your way through the rotfiends. There’s plenty of random loot to be had. Head toward the door at the end of this tunnel to get some more random loot and explore a passage that the miners collapsed. Head back toward the entrance chamber. Just before the door that leads back into it, you should find another door to your right. Scan with your medallion to highlight it if you’re having a hard time spotting it. This opens up a new mine passage, full of more random loot and rotfiends.
Don’t be surprised if you have to make trips back into Vergen to drop loot off into storage, even if you really lightened your load before entering. You can cut back on this by just dropping the iron ore you find in the mines, as it’s going to be far more than you’d ever use in completing the game and its resale value is quite poor. Make sure you keep all of the silver ore and any colored meteorite ores you find in the mines, as these substances are rare, useful, and valuable.
In time, you come to a locked door that requires a key you don't have yet. Explore the passage that leads off to the left of the door instead. At the very end of this passage is the second of the three tunnels you must collapse. There's also a body nearby. Loot it to receive the middle passage key, Balin's second map, and Balin's journal (II). head back to the last locked door you stumbled across. Now you can pass through.

The middle shaft emerges into another major cave, this one actually open to the air and light a little. You still need to clear a pack of rotfiends out of it when you first enter, of course. Light the fire pots nearby and pass through the unlocked door directly ahead of you. This leads to a more recessed cavern stuffed with treasure. Loot the room, then loot the body at the center of it to get the lower shaft key, Balin’s third map, and Balin’s journal (III).
Head back to the open-air chamber and this time go down the broad wooden ramp that leads off to your left. When this tunnel forks, take the right-hand path. You reach a narrow tunnel lined with fire pots and snares. It can be useful to use your medallion to highlight the snares’ locations, as they’re rather hard to spot in the mine’s darkness. Disarm the snares one by one and gather them up. At the end of the tunnel is a small room, the entrance strewn with snares. Pick up the snares, then loot the body at the center of the room. This gives you the storehouse key and Balin’s journal (IV). The storehouse key lets you get into an optional area with really good loot, but it’s best to visit it on the way out rather than backtrack right now.
Doing stuff with the storehouse key is optional, but there’s no harm in doing it now. Head back up to the chamber just ahead of the main entrance and explore the middle set of tunnels. At the end of the left fork you should find the diagram of the red meteorite silver sword. At the end of the right fork you find a room thick with random loot and the door the storehouse key opens. Inside there’s a bunch of bags of random loot and a chest containing the robust sword of Dol Blathanna, some grapeshot, and some orens. Go ahead and equip the robust sword of Dol Blathanna, as it’s probably better than whatever you’re carrying now. You can use this steel sword comfortably until you obtain the chapter’s best steel sword in a later quest.

Now, go back to the open-air chamber and take the tunnel off to your right again. This time when the tunnel forks, go down the left tunnel. Use the lower shaft key to pass through the door. This finally lets you into the tunnel that leads to the bullvore. When you draw near and your dwarven allies begin commenting on the stench, stop and prepare any potions you’re going to drink. Your medallion also warns you of danger around the same time. Mongoose is very useful here, since it makes you immune to the bullvore’s strong poison attack. Treat your sword with necrophage oil, then wade into battle. Because of the bullvore’s large size, the dwarven NPCs tend to pin it in place, so it’s fairly easy for you to just hack at it with strong blows until it dies. Just be careful of its escort of rotfiends, which can be a little dangerous in such an enclosed space.

Loot the bullvore’s body and equip the bullvore trophy if you happen to obtain it as a drop. The bullvore brain you get here is useful in a later quest, so make sure you don’t sell it or use it up in alchemy. Then loot all the immortelles and bodies nearby. Once you’ve picked an immortelle, Subterranean Life resolves and you get 1,000 XP. Collapse the tunnel at the very rear of the bullvore’s area to finish Hey, Work’s On in the Mines! Completing this quest counts toward the Pest Control achievement.
Since you’re headed out anyway, now is a good time to visit the area you can access with the storehouse key. When you get to the chamber that’s just ahead of the main entrance, go explore the middle set of tunnels you haven’t visited yet. At the end of the left fork you should find the diagram of the red meteorite silver sword. At the end of the right fork you find a room thick with random loot and the door the storehouse key opens. Inside there’s a bunch of bags of random loot and a chest containing the robust sword of Dol Blathanna, some grapeshot, and some orens. Go ahead and equip the robust sword of Dol Blathanna, as it’s probably better than whatever you’re carrying now. You can use this steel sword comfortably until you obtain the chapter’s best steel sword in a later quest.
After you leave the mines, you trigger a cutscene. After that’s over, go find Cecil Burdon so you can get your reward money for finishing Hey, Work’s On in the Mines! Say “The necrophage nest” to get your payment. Your reward is 50 orens and the diagram of the hardened leather boots.
poker face: vergen

Begin by going to Haggard’s house. There you can find Bruno Biggs and Cornelius Meyer, the first two dice poker opponents you need to beat in this quest line. Speak to one of them to initiate the quest. After you’ve beaten the two of them, head over to the Cauldron and challenge the innkeeper. After he’s beaten, head back to Cecil Burdon’s and challenge him. Once you beat him, go challenge Haggard. You can take the orens you would’ve won from beating Haggard, or you can ask him for something more valuable by saying “I don’t want gold.” Haggard offers you a choice of the diagrams for blue, red, and yellow meteorite ore.
It is generally best to take the diagram that corresponds to the color of meteorite sword you’ve settled on as best for your Geralt build. Otherwise, you don’t make heavy use of meteorite ore later on in the game. Dark mode players should always take the blue meteorite ore diagram. Be sure to ask about the meteorite ore when you have the chance in dialogue, as it leads to some interesting conversation concerning the mysterious vrans you begin learning about in Chapter 3.
one on one: vergen

Now it’s time to go punch people in the face. Head into the Cauldron and speak to one of the men gathered around the fistfighting ring. Say “Yeah, I’ll fight” to start competing. You can wager up to 20 orens on the first bout with Young Zis, up to 50 orens in your second bout with Stel Placeholdern, and up to 60 orens in your third bout with Percy Boruk. Beating all three of these opponents at a maximum bet is worth 260 orens. You can opt to refight these opponents later, which makes this the best way to grind orens in this chapter.
After you defeat Boruk, Silgrat shows up and insists on challenging Geralt for the championship. You can turn Silgrat down if you like, but challenging him opens up a new side quest.
a score to settle

If you defeat Silgrat, he begs you to kill him because you’ve ruined his reputation. Geralt reasonably refuses, and Silgrat swears revenge. You win 100 orens, and... well, that’s all that happens for now, but you’ll see Silgrat later on in Chapter 3.
bring it on: vergen

Arm-wrestling is tough in this chapter, but you can get some extraordinarily good rewards. That said, though, you can’t arm-wrestle for orens in this chapter, so if you want to grind orens, you need to stick to fistfighting. Anyway, begin by speaking with either Yarpen or Sheldon at Zoltan’s table. Challenge him to arm-wrestle you. You get 25 XP for beating Yarpen, who is a little more difficult than Sheldon. Now, go find Skalen Burdon, who is probably also in the Cauldron. Challenge him to an arm-wrestling match. Note that he is a more challenging opponent than anyone you’ve faced so far, so you may have to match him a few times to get a win. Beating Skalen is worth 50 XP.
Once you do get a win, go back and speak with Yarpen and Sheldon. Pick the dialogue option that means beating Skalen. Yarpen gives you a fire rune and Sheldon gives you an earth rune. These rewards are completely worth the effort of beating Skalen once.
Death Symbolized
With Flickering Heart
Doing these two quests simultaneously might seem strange, but it makes sense based on the locations you need to visit to resolve the quests. First, go speak to Ele’yas outside the Cauldron any time after The War Council is resolved, but don’t begin pursuing With Flickering Heart until you’re also ready to resolve Death Symbolized .

If you’ve been following this guide exactly, Geralt is probably located in the inn as you read this. So, begin by speaking to Yarpen Zigren. Ask Yarpen “Do you remember Brenna?” and you’ll get a lot of information about the Battle of Brenna, which is tied into the curse afflicting the battlefield.
Next, go outside and speak to Ele’yas, who stands right next to the Cauldron’s entrance. He says that some sort of monster is luring young men out to be murdered. He offers Geralt a bounty if he can slay the monster and stop the disappearances. Simple enough. Ask him some additional questions about what’s happening to gather extra information.
Go pay a visit to Felicia Cori. You want to purchase the surgical tools. It can also be helpful to purchase the book The Rudiments of Pathomorphology, if it happens to be in her inventory at the time, though only the surgial tools are strictly necessary for advancing With Flickering Heart . It can also be helpful to buy and read the book The Dun Banner , which she also sells.
Now you’re ready to leave town. Head out the Mahakam Gate. Follow the path and you eventually come to the remnants of a village that burned to the ground. Look around for bloodstains. Once you find them, Geralt speaks a line of dialogue that advances With Flickering Heart . Scan around the area to find a couple of circles and a corpse wearing Temerian jackboots and heavy leather trousers you can loot. If you’re traveling through this area at night, be ready to fight wraiths.

Head back to town, and this time exit through the Old Gate. Once you’re out of the tunnel and into the wilderness, you run afoul of some Scoia’tael turned bounty hunters at the creek north of town. Defeating them shouldn’t be difficult. Loot their bodies for some odds and ends, as well as another copy of the arrest warrant. If you’re in this area at night, or near the other bodies of water you cross along the way, you may encounter drowners.
After you cross the creek, you’re very likely to run into a pack of four or so harpies prowling the area. This encounter respawns, so you can end up fighting them about once a day. Another encounter you can run into in several different places on the north side of the creek is a troop of three Kaedweni soldiers who attack you on sight. If you can get the Kaedwenis to attack while other monsters are in the area, they try to fight the monsters instead and it becomes quite easy for you to pick everyone off. The Kaedwenis are notable because one of them drops the Kaedweni black sword, a unique steel sword that’s worth using if you didn’t get the robust sword of Dol Blathanna earlier (or happen to like the black sword’s critical effects better).
A bit farther on the way toward the catacombs, you usually run afoul of a group of nekkers that spawn near a small pond. Large numbers spawn at once, so they can be a threat if you’re not prepared for them. It’s fun to lead the Kaedwenis into a nekker ambush if they attack you around this area, though. Search the area around the pond very carefully to find a corpse carrying randomloot. Once you find this, you aren’t far from the entrance to the Dwarven Catacombs.


Once you’re inside the catacombs, move forward. An obvious false wall is in front of you, so blast it over with Aard. This opens up a crypt. Be ready to be attacked by a group of wraiths when you step inside. Just as during In the Claws of Madness , the close quarters make the wraiths more dangerous than they would be normally. Alchemist builds shouldn’t hesitate to use traps and bombs to get the group under control, while mages can make good use of Axii. Quen is essential for swordsman builds here—it’s very difficult to get through these battles without getting surrounded.
You can examine the corpses in the crypt by approaching them and pressing the interaction button to uncover them. Doing this sometimes summons a wraith. Many corpses yield nothing interesting when examined, but a few reveal some random loot, orens, or rather significant items. One of the bodies in this crypt, for instance, yields the unique silver sword Fate when examined. Equip it if you’re not already using something better.
Continue exploring the catacombs. The next two false walls you can blast away reveal nothing useful, but the third one should open up another large crypt chamber. Be sure to pick up the Wild Hunt investigator’s notes just before you come to the chamber where the fresh corpse awaits. When you come to the fresh corpse, pick the various options that appear in the dialogue tree to gain information about it. Be sure to examine the arms so you can use the surgical tools to extract the metal fragment. The metal fragment is not a quest item and does not appear in your inventory. If you examine the arms with the surgical tools in your possession, Geralt remarks upon the metal fragment. Once you’ve heard that bit of dialogue, then you’ve successfully retrieved it. Also make sure to examine the torso, then turn the body over so you can find Dandelion’s poetry sketchbook. Examining the body lets you obtain the Anatomy Lesson character attribute, which becomes very useful at the end of the chapter.

You’re done with With Flickering Heart in the catacombs, but stay around a bit longer to resolve Death Symbolized . Continue exploring and open up the final crypt in the catacombs by blasting down the false wall. This reveals the ghost of Ekhart Hennessy, color bearer of the Dun Banner. In death, he’s become the guardian of the Dun Banner itself, so Geralt can’t obtain it unless he deals with the ghost somehow. There are two different ways you can do this.
The most direct and easy way is to slay Ekhart Hennessy’s wraith. He is an incredibly weak opponent that swordsman builds can dispatch with little more than a chain of strong attacks. Alchemist and mage builds may opt to play around a little with potion buffs or signs, but they shouldn’t have any harder of a time defeating him. After Hennessy is slain, you can simply loot the Dun Banner itself, called the standard, from Hennessy’s sarcophagus.
There’s also a sneaky but slightly more challenging way to resolve the quest. You can attempt to convince Hennessy that you’re a surviving member of the Dun Banner who needs the corps’ standard for a worthy cause. If you can do this successfully, Hennessy gives you the standard and an extra item, the sword of the Dun Banner, willingly. To deceive Hennessy, you must answer all of his questions about the Battle of Brenna correctly. If you remember the details of your conversation with Yarpen and have read The Dun Banner, this is not difficult.

In case your memory fails you, the answers Hennessy wants at each branch of the conversation with him on this route are listed here. Note that you can do a version of this quest on Roche’s route, and on that route one of the answers is slightly different. If you are playing Roche’s route and somehow ended up reading about this version of the quest, stop now and turn to to get the answer list you need for Roche’s version of the quest.
answer list
- I served in the Banner.
- You got it wrong.
- Menno Coehoorn.
- Coehoorn is dead.
- Vandergrift and Seltkirk.
- Biggerhorn took me prisoner.

Note that if you answer one of Hennessy’s questions incorrectly, he sees through your deception and attacks you—unless you’re carrying a certain item (see “The Beaver Cap” sidebar). He also attacks you if you give him a violent response like “Die!” It’s still possible to complete the quest by killing him if he attacks you, it just won’t be possible to get the sword of the Dun Banner. The sword of the Dun Banner is decent but not the best steel sword for this chapter, so it’s no huge loss if you can’t get it. Regardless of how you resolve Death Symbolized , there are no XP rewards involved.