
The Witcher 2: Assassins of Kings Guide (Steam) Walkthrough The Kaedweni Camp (Roche)
Poker Face: Kaedweni Camp
Poker Face: Kaedweni Camp
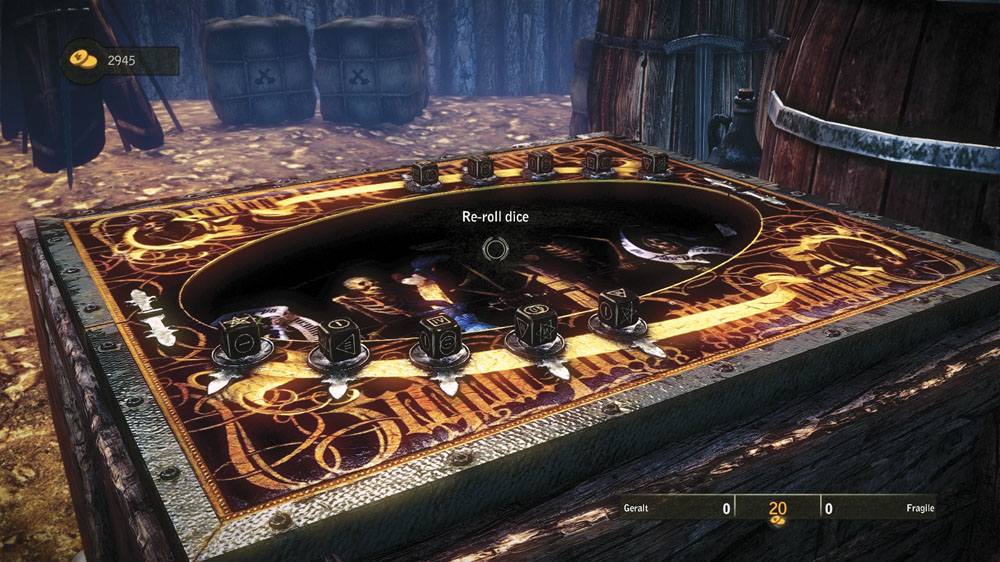
Begin by speaking to the two dice players in front of the canteen, Gondor and Fragile. Speak to one of them to initiate the quest. After you’ve beaten the two of them, go find Zyvik wherever he is (possibly outside) and challenge him. After he’s beaten, head to the Camp Followers’ Encampment and challenge Madame Carole. Once she’s beaten, you can go challenge the local champion, Lasota.
You can take 200 orens for beating Lasota, or you can pick from one of three diagrams: leather, hardened leather (called tempered leather in dialogue), or studded leather. The dialogue makes it sound like you’re getting armor, but no, it’s just a diagram for the crafting material. Take the diagram for hardened leather or studded leather, as they both cost a lot more than 200 orens from merchants if you don’t have Haggling.
Against the Blue Stripes

Go pay a visit to Roche at his camp. You should see some fistfighting going on at the rear of the encampment as Roche’s men practice. Offer to challenge them. No money is wagered in this fistfighting contest, since it’s all friendly sparring. After you defeat two of Roche’s men, Roche himself appears to fight you in the third round. If you defeat him, you get a steel plate enhancement as a reward.
After you defeat Roche, some men from the Kaedweni Camp show up. One of them really wants to challenge Geralt. You can turn him down if you like, but accepting opens up a new side quest.
A Score to Settle

If you defeat Burton, the irate Kaedweni soldier, he leaves but swears this isn’t over yet with you. He’s also mentioned those square coins you’ve been investigating… For now, the quest is finished. Since you fought Burton, though, you have a chance to meet him again in Chapter 3 for a rematch.
Bring It On: Kaedweni Camp

Initiate this quest by speaking with Adam Pangratt in the upper Kaedweni Camp. After telling you an interesting story about why he cares so much about arm-wrestling, Pangratt says he’ll accept your challenge if you can defeat his men, Martin and Randal, and also the camp’s blacksmith, Magnus. You can get up to 40 orens and 25 XP each for defeating Martin and Randal, and up to 60 orens and 25 XP for defeating Magnus. They shouldn’t be especially difficult opponents.
Now go challenge Pangratt. This is very similar to arm-wrestling Bartholomew Bargee in Chapter 1, but just a bit more challenging. As with Bargee, you can wager up to 100 orens on this match, for a payoff of up to 200 orens. So as in Chapter 1, you can arm-wrestle Pangratt repeatedly to quickly grind orens, though chances are you’re not as strapped for cash now as you were back then. The first time you beat Pangratt, you clear the quest and get 50 XP.
The Butcher of Cidaris

You may have initiated the very beginning of this quest while trying to lug Odrin into the canteen. To start the quest, approach the pair of men arguing just outside the canteen’s entrance. It becomes clear that it’s an older man trying to talk his son out of doing something, his effort futile. After the argument, the kid goes to “practice” with his sword outside the canteen. Go inside and speak to the kid’s father, Manfred.
You find out the kid’s name is Sven and he’s going to have to fight Letande Avet, the “Butcher of Cidaris,” to the death. Sven is barely 18 and is pretty much going to die if he fights Avet.
Geralt offers to help save Sven’s life, in return for “help” from his father. Now, go talk to Sven outside. He mouths off to you no matter what, but accepts your proposal that he duel alongside you against Avet and someone else. Now, go find Avet in his tent. You can challenge him or just insult him, but either way he accepts your offer of a duel in pairs. Go speak to Sven again to initiate the fight in the arena.

The actual fight against Avet and his second, Edward “The Petal” Leistham, shouldn’t be too difficult for you. Avet does much heavier damage than Leistham, but he’s vulnerable to all sorts of witcher’s tricks except Axii. You can render the fight hilarious by using Axii on Leistham and ganging up on Avet.
You don’t get any major reward in the form of orens or items, but after you leave the arena Sven’s father gives you information on the square coin conspiracy. It’s exactly what happens if you finish In Cervisia Veritas successfully; you get a square coin and are told how to get Whistling Wendy to open up the gate to where the conspirators gather. You also get some more information about Vinson Traut, whom you should expect to fight once you’re in the hideout.
Again, you could go and do this right away, but instead you should do a few other quests first. They can put your battle with Traut into a more interesting context.
Ave Henselt!

Immediately after you finish The Butcher of Cidaris , you are approached by Proximo, who organizes knightly tournaments for Henselt. Now that you’ve proven yourself in the arena, Henselt wants you to see you in combat against more skilled opponents. These battles aren’t to the death, but instead you battle until your opponent yields (or you yield). It’s worth noting that no matter who you fight during Henselt’s tournament, at no point do you ever want to yield to the enemy. There is one fight where it may seem like you should yield, but this is not the case.
First, speak to Proximo to enter yourself in the tournament. You can only begin a round of the tournament between noon and dusk. You have a chance to save immediately after the first two rounds of the tournament, but not the third. The tournament battles are one-on-one fights against progressively more dangerous opponents. Generally, the first two opponents should pose no real threat to you, the third should be quasi-dangerous, and the fourth must be treated as a legitimately dangerous foe. In any of the fights you can get killed pretty quickly by doing something stupid or making a serious mistake, though. Use tactics that play to your build’s strengths and you should be fine. After each of the first three fights, you earn 50 XP.
Your first opponent is Gwydion, who’s nothing special. Any swordsman build with Riposte should dismantle him easily, and Quen can shut down his ability to do damage. Rendag is similar, but damaging him is a more meticulous process since he carries a shield. Bombs and throwing daggers can come in handy here. The third opponent, Borin, uses the fighting style Letho and Dmitri favor. Getting caught in one of his multi-hit moves can be devastating. You can block his moves easily, but should counter with light attacks instead of slower strong attacks. Fighting him from a distance or focusing on stunning him can be very wise.

After you defeat Borin, Ves appears to be your fourth and final challenger. Ves is easier to damage than Rendag or Borin but does absolutely obscene damage when her blows connect. Getting stuck in one of her multi-hit combos can one-shot you very easily. Keep Quen up, fight from a distance if that’s what your build is good at, and stick to using Riposte and light attacks for countermoves. Whittle down Ves’s vitality very carefully, waiting until you can strike without being punished.
If you choose to yield to Ves, you get no XP (since you lost) and you piss her off, since she says you just threw the fight. After she storms out, try to go talk to her at the Blue Stripes encampment. She gives you a tongue-lashing and tells you to go away. Enduring Ves’s ire is worth another 50 XP and resolves the quest, if in a way that makes you look foolish.
If you defeat Ves, she’s pleased that you took her seriously as an opponent and invites you to speak with her later. You get 250 orens for winning the tournament and 50 XP for beating her. You should also unlock the Gladiator achievement. When you go speak to Ves, you get 50 XP no matter what you say, and then automatically get another 50 XP for resolving the quest successfully.

If you play your cards right with Ves in conversation, you can trigger a love scene with her. Use the following responses as you move through the dialogue tree with her. Saying anything else amounts to offending her or refusing her. While this won’t keep you from getting all of the quest’s rewards, it will keep you from getting to sleep with Ves. Sleeping with her successfully unlocks the Heartbreaker achievement.
Correct Dialogue To Sleep With Ves
- That was a great duel.
- I also feel like using this opportunity.
- She’s both brave and beautiful.
- I like that idea.
The Blood Curse
Lost Lambs
At some point when you stepped outside the Kaedweni Camp, probably after triggering The Blood Curse main quest, you likely triggered a cutscene with Zyvik. He complains of two men who’ve turned up missing and asks you to go look for them. If you haven’t triggered this cutscene yet, go do so now. Agree to go look for them to accept the quest. After you’ve spoken to Zyvik, head to the upper stretch of beach. You need to move through the gullies to get there. When you reach the upper stretch of beach, you find two Kaedweni soldiers and the apparent site of Sabrina Glevissig’s execution. First, talk to the soldiers. Tell them you’ll help them, since otherwise the quest stalls at no real benefit to you. Have them wait until you examine the site of the execution, which is a necessary step for advancing The Blood Curse .

To do the examination, move toward the stone at the center of the circle until you get an interaction prompt. Select all of the examination options, one by one, so you can glean as much information as possible about what happened. Do not stop the examination until you've gone through every option. Be sure to take the square coin and the letter.
After you tell the soldiers "Let's go," lead them back to the area marked as the crossing on your guide map. Drowners immediately spawn on the beach, regardless of what time of day it is. The soldiers can defend themselves well enough, so just focus on taking out the drowners quickly. Use whatever standard tactics work best for your build. After you defeat the drowners and loot the bodies, lead the Kaedweni soldiers back to the crossing. Once they reach the crossing, the Lost Lambs quest automatically resolves and you get 100 XP.
Go talk to Zyvik at the Kaedweni Camp. To get him to give you a reward for completing Lost Lambs , say “I found those missing soldiers.” Zyvik hands over 110 orens as your reward. After that, you may notice that there are a bunch of orange-highlighted dialogue options with Zyvik. These all optional, but advance various quests and give you lots of additional information about the game’s storyline. If you ask Zyvik about his service in the Dun Banner, he gives you the Beaver Cap item, which is useful while resolving the quest Death Symbolized .
Little Sisters
From A Bygone Era

You may have met Mavrick in the Kaedweni Camp, who’s hated by the other troops. Go talk to him. He’s usually not far from the camp’s west exit. He claims to be haunted and, after a little prodding, tells you of a horrifying experience he had with specters on the beach. If at any point you insult Mavrick, it interrupts the dialogue. The quest doesn’t end, but you have to talk to Mavrick again and make different choices to proceed. Eventually, ask Mavrick “Why did you go to the riverside?” and “Around what time did all this happen?” After that, you open up the option to say “I could get rid of that specter. For a price.” This lets Geralt accept the quest, provided you say “I guess I’ll have to.” If you say “I can’t,” it works like insulting Mavrick. You can go back to get the quest later, but otherwise it doesn’t advance.
Before you go far, step into the Camp Followers’ Encampment and talk to Liva, whom Mavrick mentioned earlier. You can ask her some questions about what happened in the hut on the cliff three years ago. Ask every question, since there’s no reason why you can’t. When you’re done speaking with Liva, head to the crossing point marked on the guide map and proceed to the lower stretch of beach. First, investigate the hut itself. If you scan it with your medallion, you won’t find anything. Go investigate the gravesite behind the house that Liva mentioned. Carefully examine all four grave markers. In particular, examine the one marked as Malget’s. It is inscribed with a down arrow, a diamond, and an up arrow series of sigils. Keep these in mind.

Head back to the hut. By now you have probably noticed that there are some conspicuous barrels sitting by the house’s left-hand side (while facing the entrance). Approach them and you get an interaction prompt to use Aard to blow them up. This reveals a trap door that leads into the house’s hidden cellar. Climb down.
Inside the cellar there’s a bunch of random loot you can acquire and three curious podium-like altars, each with a candle atop it. Each altar is marked at the front with some sticks that, bound together, form a shape. There’s a down arrow altar, an up arrow altar, and a diamond altar. If you approach the altars, you get an interaction prompt to light the candles with Igni. If you light the altars in the order specified on Malget’s grave marker (down arrow, diamond, up arrow), you reveal a hidden room. If you light the candles in any other order, you just summon a wraith that tries to kill you.

Inside the hidden room you find a desk and a bookshelf. If you scan for loot, there won’t be any, but you can pick up Malget’s notes on the desk. This triggers the quest From a Bygone Era . There are two things you can do with the notes. You can sell them to Dethmold for 150 orens or keep them and have someone decipher them in Chapter 3. It is recommended that you keep them for Chapter 3, since progressing the quest there lets you obtain loot that’s worth a lot more than 150 orens. For now, you’ve done all you can with From a Bygone Era . Climb out of the cellar and head down to the beach the cabin overlooks.

Head to the area marked “Little Sisters” on the guide map and meditate until midnight. When you come out of meditation, a wraith-like female spirit NPC should be waiting for you on the beach. Move toward her to initiate a dialogue sequence. The Little Sisters quest can have three outcomes depending on what you say and do during this dialogue and another one that can follow it.
The simplest outcome is to say “I kill wraiths” at the first dialogue branch. You can also get a similar outcome by saying “I’m a witcher,” followed by “You lie. Die.” In this scenario, Geralt doesn’t listen to a word the female specter says and takes Mavrick’s word that she’s evil. The dialogue immediately ends and combat begins. You must defeat the female specter and her two “little sisters” quickly. While they have more vitality than the average wraith, they use the same attack patterns and aren’t especially damaging. Use specter oil if you need it and basically fight them the way you would a pack of wraiths with your current build. You should defeat them without too much trouble. If you resolve things this way, return to the Kaedweni Camp and speak with Mavrick. He hands over 50 orens and you get 50 XP for resolving the quest.

A more complex outcome is to say “I’m a witcher” and then “I’ll need to check that” at the second dialogue branch. In this case, Geralt is willing to believe that the spirit might not be lying. Go back to the Kaedweni Camp and speak with Mavrick. When the dialogue begins, say “The specters claim you’re a murderer.” Mavrick panics at this, insults you, and then runs away. Head back to the lower beach. Once there you find Mavrick’s half-eaten, grisly remains and the female specter, who mocks you and then summons what she calls a demon to eat your soul.
The enemy, though called a demon, is in all respects basically just a bullvore, and you can fight it using the same tactics. It should be a bit easier to beat than the one in the camp cave, since you’ve got a wide-open area to fight it in and plenty of room for dodging. When you defeat the demon, it drops some necrophage body parts, a bullvore trophy, and the diagram of the Mahakaman sihil. The quest fails in your journal and you get no additional XP or orens. The catch, though, is that the sword you can make using the diagram you just obtained is by far the best steel sword you can obtain in Chapter 2. Failing the Little Sisters quest and fighting this particular enemy is the only way to obtain this diagram, which is the only way to obtain the sword.
The third way to resolve the quest gives Mavrick a much happier outcome. For this resolution, you say “I’m a witcher” and then “I’ll need to check that first,” when you first speak with the female specter. When you visit Mavrick in town, you say, “I need your help to drive the specters off.” You can mention having investigated the hut first, but Mavrick won’t really tell you anything useful in response.

Mavrick agrees to help you and goes to wait for you in the clearing near Malget’s house. Simply return to the lower beach and you can pick up Mavrick along the way. Take Mavrick to the beach, so you’re with him when the female specter and her two little sisters materialize. They repeat their accusations. You can try to get more information about what really happened from Mavrick, by saying “I need to ask you something,” followed by “Tell the truth.” After those two options, you have to decide whether to support Mavrick (“I believe you”) or say you think he’s lying (“You need to answer for your deeds”). You can also side with Mavrick at the first dialogue branch by saying “Don’t listen to them,” or turn against Mavrick by saying “He’s yours.” If you turn against Mavrick here, there’s a brief combat where you have to fight him with the three specters as allies. Once Mavrick is killed in battle, then the sequence with the bullvore happens.
If you want the happier ending, you must side with Mavrick. The female specter (whom you can recognize is a bruxa if you’ve read the book about them) is outraged that you’ve seen through her plot to devour Mavrick and turns on you with her two little sisters. Mavrick fights alongside you as an ally against them. As when you fight them alone, the female specters amount to being wraiths with high vitality and shouldn’t be hard to beat using standard tactics. After you defeat them, you get 300 XP. Although Mavrick seems to hand you a money pouch in a cutscene, you get no orens for resolving this quest. Loot the bodies to get some wraith drops and, if you’re lucky, maybe a good mutagen or two.
Mechanically, the most beneficial outcome to Little Sisters is whatever lets you make the Mahakaman sihil. Once it’s made you can socket it with runes and then have a significant advantage in the chapter’s remaining fights against humans. Of course, Mavrick really didn’t kill his sisters, so to get this sword you basically have to let a demon eat an innocent man. If that doesn’t sit well with you, there are some lesser steel swords you can make do with and you can resolve the quest with its happy 300 XP resolution instead.
The Rotfiend Contract
The Path To Vision
Now you can wrap up the chapter’s last major side quest and get started on part of the main quest line. These quests are simple and straightforward. First, go take the quest notice for The Rotfiend Contract off of the canteen’s notice board if you haven’t already. Just beyond the canteen, you may see or overhear a group of men speaking about a relic one of them purchased, a nail that supposedly protects against Scoia’tael arrows. If you have the rusty nail relic from Sabrina Glevissig’s execution site, you can approach them and prove that the relic they’re discussing is fake (because it looks too new). This counts toward helping the camp’s soldiers, which in turn counts toward getting to question the Scoia'tael prisoner.
Next, step inside the canteen and speak with the Relic Seller (again, if you haven’t already). You should’ve already had the conversation with Zyvik that relates to this quest, too. Tell the Relic Seller you found footprints at the site of Sabrina Glevissig’s execution, and make it very clear that you know the footprints are his. The Relic Seller agrees to answer whatever questions you ask and you should ask all of them.
With that taken care of, you need to acquire knowledge of rotfiends before setting out for the Kaedweni Camp. You can buy the book about rotfiends that Sambor sells or go check your character menu to see if you acquired knowledge of rotfiends while cleaning out the camp cave earlier. It is also possible you have already obtained the rotfiend book as random loot at some earlier point in the game.

Once you have acquired rotfiend knowledge somehow, leave the camp and go looking for unburied corpses to burn. There are nine in the area around the Kaedweni Camp, which you encounter in three groups of three corpses each. Once you’ve burned them all, the quest is done. The corpse locations are all marked on the map. To burn a corpse, simply approach and interact with it. Once you’ve burned the corpses, the respawn rate of rotfiends in the area slows down a bit. Generally, the easiest way to do things is to start with the corpses farthest south, behind the Camp Followers’ Encampment, which you can find alongside some Kaedweni soldiers. Once the southern corpses are dealt with, work your way north. You may end up fighting some nekkers while you burn the corpses along the creek bed. The rotfiends themselves should pose no real threat to you by this point in the game.

When you head to the northernmost set of corpses, you trigger a cutscene that advances The Path to Vision . You come upon some rotfiends attacking a group of Kaedweni soldiers. Get out your silver sword and help the Kaedwenis out. When you defeat the rotfiends, the Kaedwenis mention that they were going to see the Visionary but are fed up with fighting monsters. They give you 46 orens to pass on to him, along with the soldiers’ note to the Visionary. Burn the corpses nearby. You could return to the Kaedweni Camp now to turn in The Rotfiend Contract , but you can cut back on backtracking by waiting. Instead, head on to the Visionary’s cabin.
When you get there, a flock of harpies fly in. The Visionary tells you to run over to the candles. While you can usually beat harpies very easily, listen to him this time. The harpies in this area can spawn infinitely if you trigger them correctly (see the “Infinite Harpies” sidebar), so you can come back to fight them whenever you like. For now, speak with the Visionary.