
The Witcher 2: Assassins of Kings Guide (Steam) Walkthrough Loc Muinne (Roche)
From A Bygone Era
From a Bygone Era
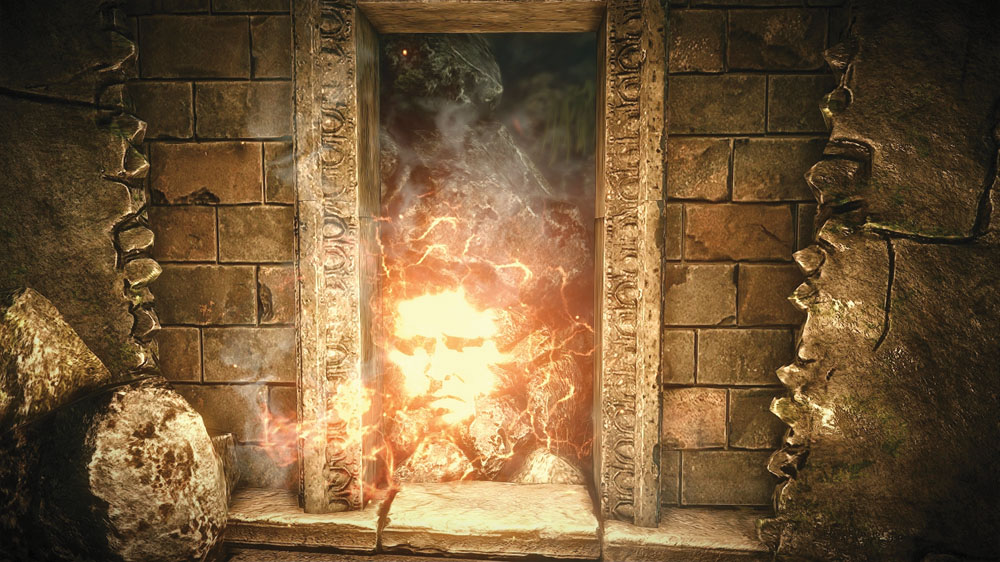
You can only initiate this quest if you obtained Malget’s notes in Chapter 2 and kept them instead of selling them to Dethmold. You need to take Malget’s notes and go speak to Bras of Ban Ard. Say “I want to know everything about this manuscript.” Bras quickly figures out that Malget’s notes contain a password that lets you access a secret vault—but he won’t tell you how to use the password for free. At this point, you come to a dialogue branch where you can opt to bribe him or use Axii on him. If Axii works, he just goes ahead and tells you how to use the password. If you bribe him, you probably need to give him at least 300 orens to get him to talk. Note that if Axii fails against Bras, you can try it again by refusing to pay the bribe and just restarting the conversation.
Once you get Bras to talk, he explains that you don’t need to know what the book actually means to use the password correctly, just which part of it must be repeated to the sentry if you want to pass. You can work this out on your own, but to state it plainly, you need to say:
- 1. Zi
- 2. Uddu-ya
- 3. Ia Ia
- 4. Gat
- 5. Exa
- 6. Nibbit
- 7. Kanpa
- 8. Gat
- 9. Uddi-Zi
Go to the sentry down in the sewer tunnels and say this exact sequence of words to it. The sentry disappears and turns into a teleportation portal. If you’re having a hard time finding the sentry for some reason, consult the sewers map. On the other side is a simple puzzle you must solve to proceed through the room’s door.


In this room is a series of braziers. To pass through the door, you must light them all simultaneously. The problem is that lighting any one brazier causes the state of two others to “reverse.” That is, if they are alight, they are extinguished, and vice versa. So to get all seven of the braziers lit up simultaneously, you need to take advantage of this property. This involves understanding the relationships among the braziers, which we’ll refer to with letters to make what’s going on a bit clearer.
- A reverses B and D
- B reverses E and G
- C reverses A and B
- D reverses C and F
- E reverses A and G
- F reverses C and E
- G reverses C and F
So solving the puzzle is simply a matter of taking advantage of the reversals so that you can get all seven braziers going at once. There are a lot of different ways to do it, but the sequence that uses the fewest number of moves (that we’ve found) is A, F, B, A. Once the door unlocks, you should save your game. Once the room is open, you’re free to enter and speak to a forbidding NPC called the Operator.
Basically, you can use the Operator to respec your Geralt build if you aren’t happy with it, or you can attempt to fight the Operator to obtain a powerful weapon and some rare drops. You can also use this to test how good your build is. The Operator is by far the toughest encounter in the game, and only very strong builds are going to be able to drop him. If you try fighting the Operator and can’t get his vitality below 50 percent no matter what you try, then your build is weak and you should probably respec.

You can only speak to the Operator once. If you attempt to leave during that conversation, he disappears and you can never re-enter this area. So before you speak to the Operator, take a look at where you are in the game. If you’re positive you want to reset your skills, you can go ahead and speak with him regardless of level. If you’re interested in fighting him, make sure you’re fully prepared for the battle.
Visit craftsmen to make any traps you might want to use (notably, the Talgar winter). Make sure you have ingredients on hand for any potions you want to drink or bombs you want to make. The best steel sword to take into battle against the Operator is the forgotten vran sword, which you can only obtain by completing the main quest Of His Blood and Bone. You may want to skip ahead to and complete this quest before proceeding here.
You also want to wield Deithwen, wear a complete Elder Blood set or its equivalent, and wear vran armor or (if you’re a mage) armor of Ysgith. All of your equipment should be fully slotted. You should be at level 35, so Geralt has every skill and stat bonus possible. If you feel Geralt’s level is too low, go complete any side quests you haven’t bothered with or advance the main plot. You can attempt to defeat the Operator at any time before you initiate the main quest A Summit of Mages.

If you want to get the Operator to respec you, say “What does this artifact do anyway?” and then “Yeah. Get started.” You immediately enter a meditating stance and get all of your talents back. You must still spend six on the training tree to unlock the others, but after that you can spend your talents however you wish. If you invested in some ability you really don’t like or picked a skill tree you’re not totally happy playing, then you can use the respec to put your points toward something different and hopefully better.
If you want to fight the Operator, say either “I’m no chosen one” or “What does this artifact do anyway?” followed by “I think I can use this thing myself.” You get a slightly different response for each, but either way the Operator becomes enraged and vows to kill you. Do not undertake this decision lightly. If you decide to fight the Operator, then only do it after applying your strongest potions, enhancing your sword with whetstones, and having huge stacks of the appropriate traps or bombs in hand.

The Operator begins by shooting powerful fireballs at you constantly. He can defend himself with Quen and moves too quickly for daggers to interrupt his spells. The best way to damage him is to roll up to him while he’s preparing a fireball and hit him before the animation completes. You can usually get in a three-hit combo before he throws Quen up. If you corner him, he teleports away or hits you with his staff, which can stun you or knock you down. The Operator’s vitality regenerates at a frightening rate, so turtling isn’t an option when you fight him. His only real weakness is being fairly vulnerable to incineration, so dancing stars and leveled-up Igni can be useful here.
The Operator by himself might be manageable, but there’s a huge complication to the fight. When the Operator is reduced to 75 percent, 50 percent, and 25 percent HP, he summons a pair of incredibly strong gargoyles. Although the Operator is clearly a supernatural being, the game considers him human and you need to be wielding a steel sword to do optimal damage to him. The gargoyles he summons are ridiculously powerful, though, and can batter your Quen down in no time. You can’t afford to attack them with anything but an optimal silver sword like Deithwen, since they do so much damage they can easily kill you in one or two hits on all but the lowest difficulties.
Defeating the gargoyles quickly and efficiently is the key to winning this battle. There are a few ways to go about it, but they all amount to the same basic idea: Get rid of the gargoyles fast, then go back to hitting the Operator before his vitality has time to significantly regenerate.
One way is to rely heavily on your adrenaline effects. For this method, you immediately blow your adrenaline effect the moment the gargoyles appear so you can kill them quickly (possibly instantly), then get back to battling the Operator. The danger of this method is that even if you’re using equipment to boost your adrenaline regeneration, it’s really hard for mage and swordsman builds to generate adrenaline quickly enough for handling all three waves of gargoyles. Alchemists can come close to doing it, but still probably need a backup plan for dealing with wave two or three. Swordsmen and mages need a backup plan for getting through the rest of the battle.

Since adrenaline is unreliable, you can try to focus on instant kills to eliminate the gargoyles. If you go this route, optimize your equipment so that every piece of your kit possible is upping your instant kill chance. Also make sure you’ve taken every instant kill skill available to your skill tree. Mages don’t get any such skills, so pursuing this method is probably not going to be successful. This can be a fruitful approach for alchemists or swordsmen, though, especially ones with access to Aard III.
The third and final way is to abuse the freeze critical effect. Very few things in the game let you inflict freezing on enemies, but you can do it consistently with use of the Talgar winter trap. The forgotten vran sword can also do it regularly in the hands of a swordsman, or any build that has taken skills that bolster critical effects chances. Gargoyles are fully vulnerable to freezing, so at the very least the critical effect slows them. If one is frozen solid, then you only need to hit it once to shatter it. This acts as an instant kill, but depending on your build, it may be easier to trigger.
A few tactics may seem useful but actually aren’t worth it. The big one is mind-controlling the gargoyles. This does get the gargoyles off of you, giving you time to recover. The problem is that you can’t really damage the Operator at all while the gargoyles are beating on each other. He just stands there and keeps his Quen up until the gargoyles are back on his side. If the gargoyles turn on the Operator, they can’t really damage him, either. Overall this tactic just makes the fight more frustrating.

Another tactic to avoid is hiding behind pillars. You may notice that if you stand directly behind one of the pillars, the Operator’s fireballs can’t hit you and gargoyles may hesitate to attack you. Once behind the pillar, it seems like you can just throw bombs at your enemies all day and win that way. The problem is that you can’t easily damage the Operator quickly enough this way to outpace his regeneration. Even if you make headway, eventually he’s going to summon another wave of gargoyles. Hanging around in the areas behind the pillars tends to result in the gargoyles pinning you against a wall and beating you rapidly to death. It’s much safer to just keep moving around, relying on Quen to help you soak up blows.
A positioning trick that is far more useful is to try to keep the gargoyles positioned between you and the Operator after they appear. It is difficult to do this consistently, but if you pull it off right, then the Operator basically smacks his gargoyles in the back with fireballs while he’s trying to target you (similar to the friendly fire you sometimes have to deal with when Triss is your ally). The Operator’s fireballs don’t do a lot of damage to the gargoyles, but if the fireballs are hitting the gargoyles then they’re not hitting you.
If you defeat the Operator, he drops the Operator’s staff, dragon scales, a vran armor enhancement, and a magic wrap. Only the Operator’s staff is worth it, as this weapon has a perfectly ridiculous +80 percent chance of incineration and a +10 percent chance of freeze. Using it in battle with humans results in hilariously one-sided victories. You don’t need anything like this to finish the game, though, and only a handful of battles with human opponents are left in the game. In short, while the Operator’s staff is an amusing curio, it’s not worth fighting the Operator to get. It’s more of a trophy.
You can successfully resolve this quest by either getting a respec for Geralt or defeating the Operator. You must choose one or the other. If you kill the Operator, you cannot respec. If you respec, you cannot fight the Operator. Either way, you don’t get any XP for resolving the quest but should be better off for having done it.
The Gargoyle Contract

You can grab this quest off of the notice board outside the inn. As with most contract quests, the first step is researching gargoyles. You probably haven’t fought them enough to pick up full knowledge, so instead pick up a copy of Gargoyles, Gutters, Sputters—Maintenance and Repair from Felicia Cori if you haven’t already. If you already have a copy of that book, read it. You may also want to pick up all four volumes of Runes of Power from either Bras of Ban Ard or Felicia Cori. You aren’t required to buy these to complete the quest, but they contain information about a certain puzzle you must solve. This guide contains the same information you need, so if you want to save your orens, you can skip them.
The locations of the three “gargoyle courtyards” in Loc Muinne are labeled on your map. The easiest way is to start with the room to the northwest, near the amphitheater, and then circle around clockwise to find the others. This method also lets you obtain a very powerful piece of equipment early in the quest, so you can use it later on. When you enter a gargoyle courtyard, you are immediately attacked by three or four gargoyles. Fight them using whatever tactics work well for your build.
After you defeat the gargoyles that guard the courtyard, look around the area for a stairwell leading down. At the bottom of the stairwell is an iron gate, then beyond it an underground room. The room should contain a magically locked chest, four magic runes glowing on the walls, and a podium. When you come to the podium, press the interaction button to read what it says. What you get is a snippet of poetry that acts as a code, indicating the order in which you should extinguish the runes.

You must move toward each rune and press the interaction button to extinguish it. If you extinguish them in the correct order, they remain extinguished and the chest magically unlocks. If you extinguish them in the incorrect order, then Geralt takes some damage and a random critical effect (usually bleeding, poisoning, or incineration). After that passes, you can try again. Each room’s clue is randomly selected from a list of six possibilities. If you read the Runes of Power books they detail 12 possible runes, but in practice the Loc Muinne rune rooms use varying combinations of only four runes: art, time, sky, and animal. Here’s what each rune looks like.
Art - Time - Sky - Animal


Here are the six possible clues you can find waiting for you on the podium of any given rune room. You won’t get the same clue twice. Basically, in any given game’s version of this quest, you should encounter half of these clues.
First Clue
A doe's long shadow
The moon quietly moans
It is autumn already
Sequence: Animal, Sky, Art, Time
Second Clue
Three field mice
Dance in a circle at dusk
Stars are like grain
Sequence: Animal, Art, Time, Sky
Third Clue
Glittering fish
Dying on a fresco
Struck by lightning
Sequence: Animal, Time, Art, Sky
Fourth Clue
Behold the comet
It is like a wolf in times of scarceness
An evil lullaby
Sequence: Sky, Animal, Time, Art
Fifth Clue
Divertimento!
Clouds are like bees
When bells ring
Sequence: Art, Sky, Animal, Time
Sixth Clue
On the dark sky
The beauty of a falcon’s flight
Faster and faster
Sequence: Sky, Art, Animal, Time
You absolutely must correctly extinguish the rune sequences in the three underground chambers, or it does not count toward the completion of this quest. As long as the runes burn, the gargoyles simply respawn in each courtyard as time passes. Once you’ve extinguished the runes, the gargoyles cease to appear. While the exact puzzles you solve in each room will be semi-randomly generated, you do find certain treasure consistently in each room.
In the northwest room, where we advise that you begin, the locked chest contains the silver sword Addan Deith and the diagram for the Elder Blood trousers. You also obtain some interesting information about the Wild Hunt here. In a game on standard difficulty, this is the strongest silver sword you can consistently obtain in the game in terms of pure damage. That said, Deithwen’s large damage bonuses make it deal more damage in one of the game’s climatic battles. You can use either sword comfortably to finish the game, but if you’ve already slotted Deithwen with runes, you might as well keep using it.

Circle around to the northeast room that’s near the dice players next. After you’ve defeated the gargoyles and entered the northeast underground room, you find it’s guarded by a golem. This fight is extremely dangerous, due to the small size of the underground room. It’s very hard to retreat from the golem for long and very easy for the golem to kill you even on normal difficulty by just hitting you once or twice. Prepare for this battle by drinking an array of potions that supports your build and oiling your silver sword with Falka’s blood or whirl to increase your damage output. If you have any adrenaline abilities, you should definitely use them here. When you head over to the northeast room, which isn’t far from the dice players’ building, the locked chest consistently contains the diagram for the Elder Blood gauntlets.
The final southeastern gargoyle courtyard must be approached carefully. To get to it, use a series of doors to pass around the Temerian camp. Once you’ve unlocked the room’s chest, you can obtain the diagram for the Elder Blood boots and the encrypted manuscript quest item.
Once you’ve solved all three puzzles, go talk to Bras of Ban Ard to resolve the quest and get your reward. He gives you 200 orens in payment and you receive 150 XP. Take some time to craft the Elder Blood items and equip them. Unless you’re already using something that has really good synergy with your build (like the mage’s trousers on a mage or the herbalist’s gloves on an alchemist), the Elder Blood items are essentially the best boots, trousers, and gauntlets you can obtain in a game on standard difficulty.
Upon completing this quest, if you’ve finished every other side quest in the game that involved destroying monster nests, you should unlock the Pest Control achievement. Remember that you need to turn the quest in to Bras of Ban Ard for it to count as completed. You also get the character attribute Arcane Knowledge for completing this quest.
An Encrypted Manuscript

Talk to Bras of Ban Ard after you obtain the encrypted manuscript during The Gargoyle Contract. He says that the book is sealed by a powerful magical spell that he can only break if you bring him a bunch of very specific alchemy items. What makes this quest a bit tricky is that you cannot go out and obtain most of these materials during this chapter. Most of them are rare monster drops you obtain in previous chapters. So if you skipped their relevant quests, used up these items in your own alchemy, or sold them, it is impossible to finish this quest or obtain its rewards.
To cast the spell that decrypts the manuscript, Bras of Ban Ard needs one warrior nekker blood, one queen endrega’s pheromones, one bullvore brain, and one harpy’s egg or rotfiend tongue. You can obtain warrior nekker blood by fighting nekkers in the wilderness cave north of town and queen endrega pheromones by summoning an endrega queen in the endrega nursery located in the wilderness. You pick up a bullvore brain every time you kill a bullvore, so unless you sold or used up all of yours, you should have one. You can grind harpies in this chapter to get the harpy’s egg if necessary and may have a rotfiend tongue on hand from your many battles with them in Chapter 2.
If you have all four of the required items, bring them to Bras of Ban Ard and he can automatically decrypt the manuscript. This resolves the quest and grants you 50 XP. From the manuscript Bras extracts the diagram for Caerme, which allows you to make a powerful steel sword. You can obtain a more powerful steel sword in this chapter only by completing the quest Of His Blood and Bone. If you decide to rescue Triss instead by doing Where Is Triss Merigold? , then Caerme is the most potent steel sword you can obtain in Chapter 3. Either way, crafting Caerme is worthwhile.
For Temeria!

Now that you’ve cleared every side quest you’re interested in, you need to decide whether you wish to help Roche rescue Anais or if you wish to rescue Triss. If you wish to rescue Anais, read on.
Note that this quest doesn’t actually resolve until you’ve made a concrete decision either way. You get exactly the same XP rewards regardless of your choice, so you shouldn’t let that influence your decision.
Of His Blood and Bone

Make sure you’re carrying three runes suitable for slotting into a very powerful steel sword, as you’ll be obtaining one later in the quest. Meet Roche at the bottom of the sewer tunnel that’s just to the left of The Incredible Lockhart, in the town square. This tunnel leads to the entrance to the Kaedweni camp, which includes a tower where Dethmold is holed up. To rescue Anais, you must bust into the tower, which means…well, beating the living hell out of the entire camp. You should go into this battle prepared for a grueling fight against a large number of human foes. Although you will soon find a better steel sword, it can be helpful to craft Caerme just to make the Kaedwenis more manageable. Use whatever potions are best for your build and oil your sword with hanged man’s venom. All the usual sorts of bombs and traps are useful for crowd control, too. Just make sure you bring lots of them.
To get through the tunnel, approach the locked gate guarded by Kaedwenis. During the dialogue with the soldiers, you come to a point where you can use Axii to distract them. After the cutscene ends, the gate is unlocked and the way is opened to you. At this point For Temeria! successfully resolves and you receive 500 XP.
When you emerge from the sewer tunnel, a cutscene ensues. Geralt helps Roche up onto the walls surrounding the courtyard where the Kaedwenis have made their camp. This is extremely important to how the rest of the fight plays out. Crossbowmen lining the walls will take potshots at Geralt until Roche dispatches them. You need to manage the location of the Kaedweni soldiers as they attack you, leading them out of dangerous areas within range of the remaining crossbowmen back into safe areas Roche has already cleared out. Before you head for the Kaedwenis, duck into a walled-in alcove just to the right of where you emerge from the tunnel. A treasure chest here contains a stack of stings and some other loot.

The battle begins with waves of Kaedweni soldiers. They have unusually high vitality and hit very hard but otherwise have all the usual vulnerabilities of human opponents. You tend to fight them in groups of two or three at a time, though you can end up fighting five or six opponents at once if you move such that two waves come after you at once. Generally, every time you move a little deeper toward Dethmold’s tower, a new wave of Kaedwenis appears to try and stop you. Roche clears the eastern side of the camp of crossbowmen first, so try to lure Kaedwenis back in that direction as they jump you. Your adrenaline abilities are extremely useful here for managing the crowd.
Keep slaughtering Kaedwenis until Roche has eliminated the crossbowmen on the walls. This happens shortly after he announces that he has a crossbow and begins taking potshots at Dethmold’s apprentice, who has been commanding the troops. At this point, you should have reduced the forces on the field to a trio of mercenaries with heavy shields. Lure them away from the firefight between Roche and the apprentice, then dispatch them the way you would the other Kaedwenis. The mercenaries are a little tougher, but not by much. After this, you can finally get into the western half of the camp. Look around for a circle of strength and a nearby circle of life at the bottom of a stairwell. A final two mercenaries come after you, backed up by Dethmold’s apprentice. Roche heads down from the battlements to assist you.
Dispatching the mercenaries is simple, but Dethmold’s apprentice is another thing entirely. He casts spells quickly, so interrupting him with daggers can be quite difficult. He’s also very quick to teleport away once a blow or two is landed on him. If you use light attacks, you can knock off nearly half of his vitality with a solid combo, but setting one up is difficult. Keep an eye on where the apprentice is teleporting and dodge-roll to try to get a clear shot at him while he’s launching his fireball spell. A lot of opportunities will be blown by Roche beating you to the punch and hitting the apprentice for a sliver of damage, but with patience you should eventually be able to defeat the apprentice. After the apprentice is killed, the camp goes quiet. You can look around for loot, but don’t expect to find much. The soldiers drop very little of interest—mostly Kaedweni swords.

Head into the tower’s underground entrance. The tower holds little of interest. Don’t approach Anais’s magical prison, or you get damaged by the energy barrier. Head for the door set into the far side of the tower. This leads to Dethmold’s bedroom, and a cutscene plays. By the end of this cutscene, Dethmold is no longer with us.
When the cutscene ends, loot Dethmold’s body to get Dethmold’s safe key. The safe is off to your left, behind Dethmold’s desk. Open the safe to receive the forgotten vran sword, the most powerful steel sword in the game. Equip it and slot it with runes. You won’t have many opportunities to use it before the game ends, but it’s extremely useful when you do.
Head back out to approach Anais. Geralt and Roche have a conversation. Here, you choose between one of two different outcomes for this quest. If you simply say “Let’s go” at the first branch of the conversation, then Roche sides with Radovid. This affects the content of the cutscenes in A Summit of Mages but nothing else about the quest. It also affects the game’s Epilogue. If you take this option, then simply lead Anais out of the tower after the conversation. Outside, you meet a detachment of knights from the Order of the Flaming Rose. Lead the entire troop out of the Kaedweni camp and back to the locked gate in the sewer tunnel to end the quest. This is worth a whopping 2,500 XP and should unlock the achievement Kingmaker.

If you don’t want Roche to side with Radovid, then have Geralt say “Kings don’t always keep their word…” at the beginning of the conversation. This begins a sequence that lets you convince Roche to take Anais back to John Natalis instead of to Radovid. To convince Roche successfully, make sure you do not give any replies that seem to support Radovid. For instance, you can say “Stop and think—what else could you do?” at the conversation’s second branch and then “Freedom comes at a price” at the third. Once Roche is swayed, head out of the tower with Roche and Anais.
Outside, you meet a detachment of knights from the Order of the Flaming Rose who clearly intend to take Anais back to Radovid. Make sure you’ve got the forgotten vran sword equipped and then battle the knights. They have a lot of vitality, but the forgotten vran sword’s high chance of freezing should make this battle trivially easy for you. Once you’ve defeated the Order, take Anais back to the locked gate in the sewer tunnel you used to enter the camp. This completes the quest and grants you a 2,500 XP reward.
Where is Triss Merigold?

If you decide to go after Triss, head to the Nilfgaardian camp. You find Shilard Fitz-Oesterlen haranguing the guards there. In a cutscene, Geralt seizes the ambassador and uses him as a hostage. After the cutscene, For Temeria! resolves and you receive 500 XP.
Now you can make your way directly into the Nilfgaardian camp. The fireworks start when you enter the camp and are confronted by Renuald aep Matsen and a troop of Nilfgaardian soldiers. Geralt attempts to bargain with Fitz-Oesterlen’s life, but Matsen replies by killing Fitz-Oesterlen himself. After that, the Nilfgaardian troops jump you. How difficult this battle is depends entirely on how well your build handles bunches of human enemies at once. If you have some reliable form of crowd control and mass damage, or at least a reliable defense like maxed-out Quen, you should weather this first battle easily.
Once you’ve killed the first Nilfgaardian group, take a little time to loot the camp. Shilard drops Shilard Fitz-Oesterlen’s second letter to the emperor. Everything else in your current area is random, but the orens at least are worth grabbing. If you check the door that leads to the next courtyard over, where Triss is held, you find it’s locked. Time to go looking for the key. To begin, head into the walled area where the Nilfgaardian harpy sword waits. Grab it and any random loot in the area you want, then climb up the ladder. Atop the walls you run into a pair of Nilfgaardian crossbowmen who should be easy to defeat. Follow the area atop the wall until you reach a point where you can jump down. Keep going until you find another area where you can leap down.

Pause before you make the jump down into the pond area. The next battle is a test of resources, so drink some potions, oil your blade with hanged man’s venom, and prepare some bombs or traps of your choice. Once you descend, you are in a challenge where you must fight waves of Nilfgaardian troops. You need to weather three waves of around four Nilfgaardian troops at a time. They all wear full armor and use their swords skillfully to parry your blows. You can afford to whittle them down with Riposte later on, but early in the battle you need to focus on dodge-rolling, getting cheap shots, and using your bombs and traps for crowd control. Adrenaline-based abilities can be hugely useful here, especially Heliotrope.
After you’ve mowed down Matsen’s waves of men, climb up into the courtyard where the entrance to Triss’s prison is located. You have a brief dialogue with Matsen where you may say what you wish. After the dialogue ends, you must battle another wave of around four Nilfgaardians. One of them is a combat mage. He uses the same combat tactics, teleporting randomly, throwing fireballs, and tossing up Quen. Pick off the mage first, then pick off the Nilfgaardian troops who are wielding only swords next. Once the mage is down, Renuald aep Matsen and his shieldmen wade into the fray.
Try to pick off the other combatants first, so you can slow down the pace of battle to deal with Matsen and his men. Use your crowd-control techniques, signs, and adrenaline abilities to try to pick off the shieldmen. Once Matsen is isolated, it’s just a matter of time until you defeat him.

After you defeat Matsen, you can loot his body to obtain Triss’s prison key, the Nilfgaardian camp key, Renuald aep Matsen’s letter, and the armor of Vicovaro. You can examine the loot the other Nilfgaardians you’ve defeated have left behind, too. Be sure to investigate the open tent to the left of the entrance to Triss’s prison cell. It holds the diagram for Nilfgaardian falconer’s gauntlets and Shilard Fitz-Oesterlen’s third letter to the emperor.
Now go unlock Triss’s cell and release her. After you do, you can have a long conversation with her about the Lodge and what’s really going on with the kingslayers. When the conversation is over, you must lead her out of the camp. This is pretty simple, as you can use the Nilfgaardian camp key to pass through the door that was locked earlier.
Exit through the door that leads out of the camp and into the area where the quest began, just north of the town square. At this point you resolve the quest and receive a 2,500 XP reward. Triss decides to go crash the summit with you. She’s going to go wait at a certain point in town and you can simply talk to her when you’re ready to move on to the ending of the game.
A Summit of Mages
Enter The Dragon
To initiate A Summit of Mages, go speak with your companion, who will be standing outside the entrance to the amphitheater. Depending on which of the two main quests you chose, it may be Roche or Triss. The rest of this quest consists of simply watching the events of the cutscene play out, but exactly what you see will be influenced by the decisions you’ve made in your game and who your companion happens to be. The quest resolves automatically when the cutscenes end.

You must now chase down Síle de Tansarville, who has been spirited off to her tower by a dragon. If you want to use potions in this battle, pause to drink them before climbing up into the tower itself. An alchemist may be able to keep potion timers going throughout the entire sequence by skipping dialogue, but for other builds, potions are probably going to wear out shortly after you catch Síle.
The chase up the tower is a setpiece where you can minimize damage by giving yourself immunity to incineration and dodge-rolling up the stairs as much as possible. You may take a little damage, but if you’re using Quen it should be extremely minor.
When you get to the top of the stairs, you face a choice. After a brief cutscene, Síle prepares to teleport away using her megascope. When she begins the teleport, it becomes clear that someone’s tampered with the megascope. You can choose to save Síle by removing the flawed diamond using an interaction prompt, or to simply let her be torn apart by doing nothing at all. Whether you save Síle or let her die has little impact on the rest of your game. If she dies, you unlock the Witchhunt achievement. If you save her, she thanks you with a very important bit of information before she teleports away and you unlock the Sensitive Guy achievement.
After Síle departs, you begin your battle with the dragon Saesenthessis. For the first phase of the combat, you fight only the dragon’s massive head and neck, smashed into the tower room where you stand. During this part of the battle, you simply need to evade its attacks, then roll up to the dragon’s head to get in a quick counterattack. Keep Quen up to mitigate damage and use any tricks you think might be appropriate. Note that Quen prevents incineration, so as long as you have Quen up the dragon’s breath cannot hurt you. When you get her down to about half of her vitality, she leaps off the side of the tower and flies up to its flat roof.

Follow her by climbing up to the tower roof. In this phase of the battle, you still damage her in basically the same ways. Dodge-roll to evade attacks, then try to roll in to her right or left to get in a quick blow of your sword. Don’t try to score multiple hits, or you’re likely to get smacked around by one of her claws or a snapping bite.
Occasionally, Saesenthessis takes to the air to attack you. She may rear up or hover in place while breathing flame at you. If you can give yourself immunity to incineration, this does no damage. Throwing up Quen is the simplest way, but alchemist builds will have more options. She may also attempt to attack you with lunging dives. To avoid these, keep an eye on her when she takes to the air and then dodge-roll to either side. Sometimes she decides to attack by lashing her tail at the tower’s roof. This is also something you can dodge-roll away from easily enough.
Note that you can also damage Saesenthessis with thrown daggers. If you have two points invested in the Dagger Throwing skill and a sufficiently large stack of silver throwing daggers, it is possible to kill her through thrown dagger damage. Alchemists can achieve a similar effect if they have two points of the Alchemist skill and a sufficiently large stack of a heavily damaging bomb like grapeshot. Even if you don’t want to try killing her purely with thrown weapons (it can demand a very large stack on higher difficulties), keep in mind that you can damage her with bombs or daggers while she is flying around and also when she rears up to breathe fire at you.
While she doesn’t deal heavy damage per blow, she has a ton of vitality and you have to hack at her for some time until you can reduce it all. If you’ve got some sort of strong defensive ability and optimal equipment, you should survive long enough to whittle her down. Once you reduce her vitality to a tiny sliver of red, a cutscene begins. There are a couple of QTEs here, and you need to hit them to finish the battle. Hit the interaction button when prompted, then the strong attack button.

Now, you face a decision. You can slay Saesenthessis, who is clearly being magically controlled by Síle, or you can walk away and simply leave her to whatever her fate might be. If you choose to kill Saesenthessis, you unlock the achievement Being Witcher George. If you simply walk away and leave her alive, you unlock the achievement Dragonheart. Which decision you make won’t affect the rest of the game dramatically, but your companion comments on what you did. After that, you proceed to the game’s Epilogue.
Epilogue (Roche)
The Assassins of Kings
Returning Memories
Roche helps you up as you climb back into Loc Muinne, then fills you in on what’s happened in the city. Egged on by the revelations from the Nilfgaardians at the summit, the soldiers left in the city have begun a bloody pogrom against the mages who gathered in Loc Muinne. During the chaos, Roche received a message from Letho, who is waiting for Geralt along with Triss at the Temerian camp.
On the way to the camp, you encounter a sorceress who has gone mad from what she’s witnessed in the dice players’ building. In the area just beyond that, where you fought the bounty hunters, you find a small detachment of disgruntled Temerian soldiers. They consider Roche a traitor and attack the both of you. This can be a surprisingly tough fight, so use any leftover bombs or hanged man’s venom you have on hand. If you have the Operator’s staff handy, equip it to make the battle trivial.

When you make it to the former Temerian camp, you do find Triss with Letho. She immediately gets up and walks toward you. After a quick dialogue scene, she goes to wait with Roche outside the walled-in camp area. This encounter automatically resolves Where Is Triss Merigold? for this chapter.
Roche helps you up as you climb back into Loc Muinne, then fills you in on what’s happened in the city. Egged on by the revelations from the Nilfgaardians at the summit, the soldiers left in the city have begun a bloody pogrom against the mages who gathered in Loc Muinne. During the chaos, Roche received a message from Letho, who is waiting for Geralt along with Triss at the Temerian camp.

On the way to the camp, you encounter a sorceress that has gone mad from what she’s witnessed in the dice players’ building. In the area just beyond that, where you fought the bounty hunters, you now find a small detachment of knights from the Order of the Flaming Rose, supported by Redanian arbalists. They’re under orders to slay Roche for his patriotic treachery in dealing with Radovid. This fight should be quite simple for you thanks to the forgotten vran sword. The knights with shields can be a bit of a pain, so try stunning them with Aard or Zerrikanian suns. If you have it, the Operator’s staff can make quick work of the shieldmen.
When you make it to the former Temerian camp, you do find Triss with Letho. She immediately gets up and walks toward you. After a quick dialogue scene, she goes to wait with Roche outside the walled-in camp area. This encounter automatically resolves Where Is Triss Merigold? for this chapter.

Triss helps you up as you climb back into Loc Muinne, then fills you in on what’s happened in the city. Consumed by fury at the knowledge of Síle’s role in the regicides, the soldiers left in the city have turned on the mages. Only the Council’s re-establishment has kept it from turning into an all-out bloody pogrom against magic-users. She also mentions receiving a letter from a messenger sent by Letho, who wants to meet with Geralt one last time at the site of the former Temerian camp. Begin heading in that direction.
Along the way, you stumble across a group of Kaedweni soldiers who are menacing Roche and a little girl. The girl is Anais, whom Roche went off and rescued himself while you were rescuing Triss. You should have an easy time defeating them all, between your high level and having two NPC companions. Just remember to keep Quen up so Triss doesn’t set you on fire by accident. Say your farewells to Roche and the princess-in-exile, then make your way into the now-deserted Temerian camp to confront Letho. Read on.
Letho's Fate
When you enter the camp, Letho begins a dialogue scene with you. During this dialogue, you have the option to ask him many different questions about his motivations and activities. Say “I chased you for many reasons” to get into the optional dialogue branches where you can ask Letho for explanations of his behavior. (The first decision, whether or not to accept his vodka, is purely for flavor.)

When you’re ready to make the Epilogue’s major decision, say “Let’s finish this.” At this point, you can choose to spare Letho or to kill him. The decision has no mechanical effect, as you might expect at this late date in the game. It’s purely a matter of whether you want to fight him (or, perhaps, whether you’re comfortable with the idea of killing him).
If you wish to spare Letho, say “Go. Somewhere far away.” Letho is true to his word and simply leaves. Geralt returns to his companion (or companions) and proceeds to make his way out of Loc Muinne. The game is over, enjoy your ending. Finishing the game by sparing Letho unlocks the achievement Old Friends. By completing Chapter 3, you unlock the Once Ain’t Enough achievement. By finishing the game, you unlock the achievement To Be Continued.
If you wish to fight and kill Letho, say “Give it your best shot” to initiate the fight. This battle is tough enough that you should make whatever preparations for it you deem necessary. If you want to use potions, be sure to drink them just before entering the Temerian camp and skip all of the optional question-and-answer stuff. Oil your steel sword with hanged man’s venom. Letho’s vulnerabilities are the same, so traps and Yrden can be very powerful here if you succeed at getting him to chase you. Letho still punishes you for getting too far away by throwing bombs, but in the wide open Temerian camp it’s easier to evade and outrun his bombs. In particular, you can make good use of the pool in the middle of the square for both evading Letho and luring him into walking over any traps or Yrdens you might want to lay.

Letho’s vitality is absurdly high and it’s going to take a while to chip it down. Letho is if anything a little bit faster than he was in your first fight, so you may not be able to interrupt his signs with thrown daggers. Strong attacks are usually too slow in this battle, but it’s easy enough to get in a couple of light attacks before you roll away from him. Having both levels of Feet Work makes this battle much easier, perhaps even more so than having a maxed out Quen to use for defense. When you get Letho’s vitality down to about 25 percent, he enters a “battle fury” where he stops using any signs or bombs and instead just does his spinning attack nonstop. Keep Quen up, roll around him, and try to use light attacks to hit him a couple times.
Never go for more than a couple of blows. Even when his vitality is low Letho is going to block you. Getting staggered usually means you get punished with counterattacks. Letho still hits like a freight train, even with your upgraded equipment and maxed-out stats. You need to be patient and careful if you want to defeat him once and for all. When you do beat Letho, you trigger a cutscene, then transition into the game’s normal ending cutscenes. Killing Letho unlocks the Avenger achievement. By completing Chapter 3, you unlock the Once Ain’t Enough achievement. By finishing the game, you unlock the achievement To Be Continued.