
The Witcher 2: Assassins of Kings Guide (Steam) Walkthrough Loc Muinne (Iorveth)
Loc Muinne (Iorveth)
Chapter 3: Loc Muinne (Iorveth)


For a higher Cause
All roads lead to Loc Muinne now. Your first task is to find a way to get into the city, so you can track down Philippa Eilhart and find Triss. Begin by following Iorveth and helping him kill harpies. These fights should be fairly trivial for you, since you finish Iorveth’s version of Chapter 2 at a fairly high level. As you work your way down the winding mountain path, you eventually come within sight of an encampment of knights from the Order of the Flaming Rose.
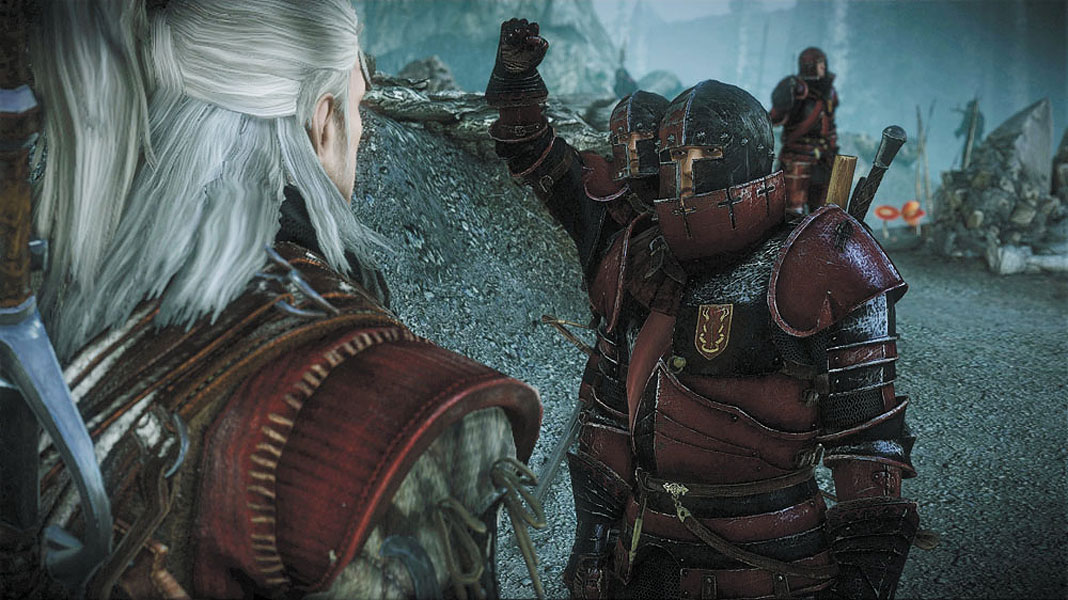
At this point, Iorveth mentions that the Order of the Flaming Rose is dangerous. This is a problem for you, because they're camped out right in front of the city's main gate. Iorveth proposes entering Loc Muinne through a secret path instead, since that lets you avoid dealing with the Order entirely. Now, it may appear here that you face a choice between following Iorveth and dealing with the Order, but in most games that is not the case.
If you attempt to approach the order, you initiate a brief dialogue sequence. When the dialogue is over, the Order of the Flaming Rose becomes hostile toward you and begins attacking. Regardless of how powerful your Geralt build is or how skillful a gamer you are, it is not possible to defeat the Order of the Flaming Rose. The Order has an infinite number of soldiers, you may even notice individuals respawning after you've killed them. The only way you can enter Loc Muinne and advance the game at this point, unless you are playing the PC version of the game and meet certain requirements, is to retreat from the Order and follow Iorveth toward the secret cave.
| Polycarp of Rinde | |
|---|---|
| Item | Price |
| Sun Rune | 376 |
| Ysgith Rune | 501 |
| Earth Rune | 251 |
| Moon Rune | 376 |
| Fire Rune | 501 |
| Diamond Dust | 29 |
| Amethyst Dust | 22 |
| Cloth | 20 |
| Leather | 20 |
| Hardened Leather | 26 |
| Studded Leather | 39 |
| Diagram: Leather | 176 |
| Diagram: Amethyst Dust | 264 |
| Diagram: Diamond Dust | 314 |
| Harvall | 1,470 |
| Magic Wrap | 235 |
| Steel Plate Enhancement | 65 |
| Diagram: Blue Meteorite Ore | 301 |
| Diagram: Red Meteorite Ore | 239 |
| Diagram: Yellow Meteorite Ore | 239 |
| Mail Enhancement | 158 |
| Armor Enhancement | 32 |
| Leather Enhancement | 33 |
| Diagram: Amethyst Armor Enhancement | 201 |
| Diagram: Diamond Armor Reinforcements | 276 |
| Studded Leather Reinforcement | 64 |
| Fibre Enhancer | 33 |
| Reinforced Leather Enhancement | 34 |
| Iron Ore | 20 |
| Silver Ore | 45 |
The Secret Cave


Iorveth immediately enters the secret cave if you move toward him, but don’t follow him inside just yet. Explore the area to the north of the secret cave’s entrance first. You come to a narrow gully patrolled by two arachi. One spawns on either side of you, so it can be helpful to dodge-roll to try and get on either side of the pair. The arachi themselves shouldn’t be difficult for you to defeat at this point if you stick to your build’s strengths.
After you loot the arachasae’s bodies, head into the gully’s dead-end area. You should see a wrecked wagon, a pile of bones, and some lost cargo. Scan the area so you can pick up random loot and orens from the cargo. Examine the pile of bones to find the silver sword Deithwen. Deithwen’s +25 percent damage to large monsters and +25 percent damage to gargoyles makes it ideal for completing the tasks that await you in Chapter 3. Equip it immediately and slot it with runes as soon as you have the opportunity.
Head back to the cave entrance and follow Iorveth. The secret cave is a relatively tame area at first, though you do immediately spot an arachasae once you step inside. You reach the arachasae once you round the first bend. It shouldn’t be a very hard fight with your current equipment and at your current level. The main trick is that, depending on exactly when you enter combat with the arachasae, you may also be fighting some endrega warriors and guards at the same time. The path through the cave is otherwise very linear, with the occasional dead body to loot for orens or rare equipment. There’s also a little bit of random loot.

When you emerge from the cave, follow Iorveth down another winding path. After battling more harpies, you come to some rocks you can use to climb over the city’s walls. Follow Iorveth up, and you can eventually drop down over the walls of Loc Muinne into a small courtyard.
Loc Muinne
So it turns out the courtyard is patrolled by gargoyles, a type of enemy you’re encountering for the first time. Gargoyles hit hard and tend to spawn in groups of three to five. If you manage to defeat one, it explodes upon death into a rain of fiery debris. This explosion hits much harder than a rotfiend’s death throes and can inflict incineration. This fight can be lethal if you aren’t ready to take it seriously. Gargoyles hit hard, and in such a small area, they can easily get behind you and deal pretty serious damage. Even a build with maxed Quen may find gargoyles overwhelming. If you are careful not to get surrounded, you should be able to get through the battle using your build’s usual strengths.
After you defeat the gargoyles, follow Iorveth on a circuitous route around the various royal encampments to an area just outside the Temerian camp. At this point you need to make another choice. You have to find a way to get into the dungeons where Philippa Eilhart is being held. You have two options: You can try to find a way in through the sewer system beneath the city, or you can attack the nearby Temerian camp and get yourself arrested. Regardless of what you say here, you aren’t committed to that course of action. Actually, you can ignore all of the main storyline for this chapter now and go do some side quests. This is highly recommended.

Now that you can take a breather to explore, you discover that Loc Muinne is unlike any of the prior environments you’ve explored in the game. It’s a massive area, easily the size of both Flotsam and its surrounding forest. Parts of the city are crowded and teeming with life, while others are infested with monsters. While exploring Loc Muinne, you can rapidly go from being perfectly safe to being assaulted by irate guards, harpies, or a throng of gargoyles. Most of the city’s points of interest are divided between the town square and amphitheater areas, with everything else often serving as hostile (or at least dangerous) territory.
Amphitheater
This is actually the area just outside the massive amphitheater where the summit is being held. You arrive before deliberations begin, so the air is full of anticipation and a carnival-like atmosphere. The main attractions are NPCs and merchants, but at the far north of the area you can find one of the three gargoyle courtyards you need to fulfill the side quest The Gargoyle Contract .
| Falas | Craftsman/Dice Poker |
|---|---|
| Craftsman | |
| Dice Poker | |
| Item | Price |
| Sun Rune | 376 |
| Ysgith Rune | 501 |
| Earth Rune | 251 |
| Moon Rune | 376 |
| Fire Rune | 501 |
| Diamond Dust | 29 |
| Amethyst Dust | 22 |
| Cloth | 20 |
| Leather | 20 |
| Hardened Leather | 26 |
| Studded Leather | 39 |
| Diagram: Leather | 176 |
| Diagram: Amethyst Dust | 264 |
| Diagram: Diamond Dust | 314 |
| Diagram: Ceremonial Sword of Deithwen | 626 |
| Diagram: Dearg Ruadhri | 1,751 |
| Gynvael Aedd | 1,402 |
| Magic Wrap | 235 |
| Steel Plate Enhancement | 65 |
| Diagram: Blue Meteorite Ore | 301 |
| Diagram: Red Meteorite Ore | 239 |
| Diagram: Yellow Meteorite Ore | 239 |
| Mail Enhancement | 158 |
| Armor Enhancement | 32 |
| Leather Enhancement | 33 |
| Diagram: Amethyst Armor Enhancement | 201 |
| Diagram: Diamond Armor Reinforcements | 276 |
| Studded Leather Reinforcement | 64 |
| Fibre Enhancer | 33 |
| Reinforced Leather Enhancement | 34 |
| Iron Ore | 20 |
| Diagram: Superb Yellow Meteorite Silver Sword | 339 |
| Diagram: Superb Blue Meteorite Silver Sword | 551 |
| Diagram: Superb Red Meteorite Silver Sword | 314 |
| Koviri Sword | 910 |
| Novigradan Sword | 1,576 |
| Superb Temerian Jackboots | 698 |
| Superb Kaedweni Jackboots | 808 |
| Temerian Falconer's Gauntlets | 302 |
| Kaedweni Falconer's Gauntlets | 577 |
| Superb Temerian Leather Breeches | 426 |
| Kaedweni Galligaskins | 306 |
Falas is a craftsman and has a really good shop list, despite not being listed as a merchant in your in-game mini-map. The most notable things he sells are diagrams for the various colors of meteorite ore, a few unique weapons, some really good armor enhancers like the steel plate enhancement, and magic wraps. He also sells the diagram for the diamond armor reinforcements, which offer +2 and are relatively easy to make at this point in the game.