Prima Games eGuides
primagames.com Browse Redeem a code Help
Rage eGuide
Sign in My Guides

Sign in or create an account

We'll email you a link. No password needed, and if you don't have an account yet, the link makes one.

By creating an account or signing in, you agree to our Terms of Service and Privacy Policy.

Have a password?

Had an account on the old eGuides site, or a code from a printed guide? Help and troubleshooting

Sign in with a password

By signing in, you agree to our Terms of Service and Privacy Policy.

Check your email

A sign-in link is on its way. It works once and expires in 15 minutes. Open it and you're in, with an account if you didn't already have one.

Contents

  • Maps
    • Wasteland
      • Hagar Settlement
      • Ghost Hideout
      • Wasted Garage
      • Wellspring
      • The Dead City
      • Mutant Bash
      • Shrouded Bunker
      • The Well
      • The Authority Prison
      • The Dead City 2
    • Eastern Wasteland
      • Subway Town
      • Blue Line Station
      • Gearhead Vault
      • Power Plant
      • The Abandoned Distillery
      • Jackal Canyon
      • Capital Prime
    • Road Rage Maps
      • Maps
  • Essentials
    • Life after Eden
      • Life after Eden
      • Controls
      • Dossier
      • Health and Defibrillation
      • Weapons
      • Quick Use Items
      • Vendors
    • Extended Play
      • Job Boards
      • Mutant Bash TV
      • MiniGames
      • Rage Frenzy
      • Races
    • Armory
      • Primary Weapons
      • Quick Use Weapons
      • Consumables and Miscellaneous Items
    • Garage
      • Driver Training
      • Vehicles
    • The Settlers
      • The Bandit Clans
      • The Authority
      • The Mutants
      • Wasteland Economy
      • Vehicle Upgrades
    • Rage Frenzy Cards
      • Rage: Frenzy Card Gallery
      • Rage Frenzy Stats
      • Rage Frenzy Dealer Decks
    • Extras
      • Achievements and Trophies
    • Mission Flowcharts
      • Flowcharts
  • Walkthrough
    • Wasteland
      • Prologue
      • Quell Bandits
      • Med Supplies
      • Missing Parts
      • Find the Buggy Parts
      • Destroy the Barricade
      • Dan's Message
      • Changing Clothes
      • Renting a Garage
      • Arming your Buggy
      • Resupply Dan Hagar
      • Feltrite Crater
      • Feltrite Sample
      • Cuprino Needed
      • Resupply the Watchtower
      • Destroy the Bomb Caches
      • Highjacked Well
      • Deadly Delivery
      • Secret Delivery
      • Liberate Captain Marshall
      • Recover ID Drive
      • Lost Research Data
    • Eastern Wasteland
      • Subway Town
      • Gaining Influence
      • Ark Equipment
      • Assault the Authority Bridge
      • Assault Capital Prime
      • Epilogue
  • DLC
    • Sewers
      • Wasteland Sewers
      • Eastern Wasteland Sewers
  • Multiplayer
    • Road Rage
      • Game Modes
      • Special Events
      • XP and XP Bonuses
      • Ranks and Unlocks
      • Vehicle Customization
      • Vehicle Body Types
      • Road Rage Developer Tips
    • Wasteland Legends
      • Scoring System
      • Revive Vs Defib
      • Life In Prison
      • Season 1: Pilot
      • Water Service
      • Trophy Hunting
      • Rusty's Rusupply
      • Unwanted Guests
      • Extermination
      • Grab and Go
      • A New Toy
    • Careers and Leaderboards
      • Careers and Leaderboards
    • Multiplayer Emblems
      • Emblems
  • Extras
    • Interface

Rage Guide › Walkthrough › Wasteland

Changing Clothes

Mayor Clayton

Objective: Get some new armor

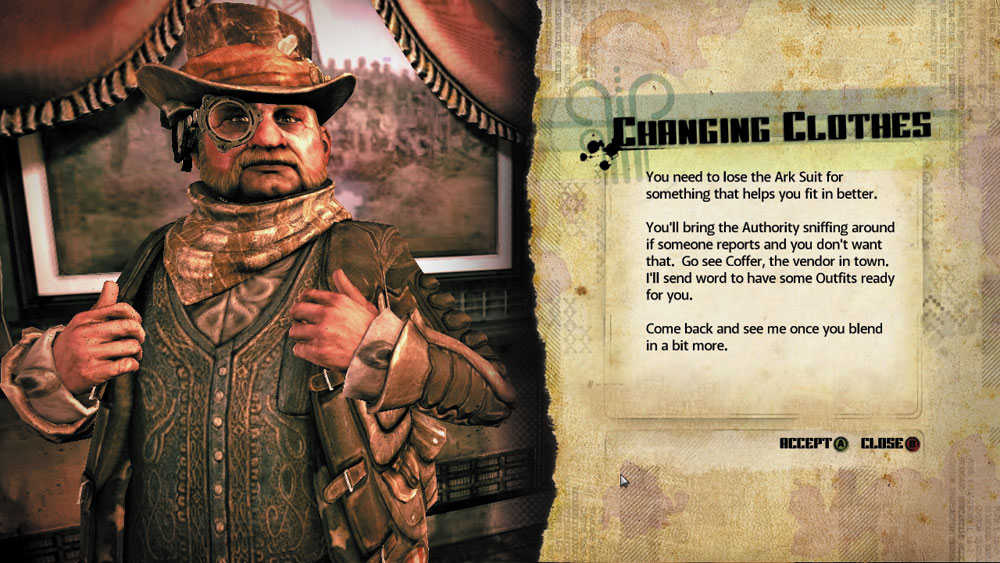
You need to lose the Ark Suit for something that will help you fit in better.
You’ll bring the Authority sniffing around if someone reports you and you don’t want that. Go see Coffer, the vendor in town. I’ll send word to have some outfits ready for you.

Come back and see me once you blend in a bit more.

Provided Equipment: None

Reward: None

New Objective: Find the Outfitter’s
Before you get too comfortable in Wellspring, Mayor Clayton suggests finding a change of clothes. Your Ark Suit makes you stick out, potentially drawing attention from the Authority—nobody wants that. Once you’re finished speaking with the Mayor, exit his office and return to the street. At the Second Chance Bar, hang a left and pass through a short tunnel. As you exit the tunnel, turn to the left to spot Coffer’s Outfitter shop. Ginny, a young woman, is seated next to a soda vending machine outside. She’s surprised to see someone in an Ark Suit. She warns you to be careful—Ark dwellers fetch big rewards from the Authority. But fortunately for you, she hates the Authority more than she needs money. Now head inside and find yourself a new outfit.

New Objective: Select your new armor

Coffer, the proprietor of the shop, is seated behind a counter. He’s a peculiar man wearing an odd hat. Like Halek, Coffer offers a variety of supplies, ingredients, and ammo in his shop. But before you buy anything from him, you must choose your armor. This is a very important decision that can greatly impact the rest of the campaign. You have three armor options to choose from, each with its own perk. The Wastelander option gives you a slight discount when purchasing non-vehicle items in shops. Roughneck armor increases the amount of damage you can take before dying. The Fabricator armor enhances some objects that you build. Your decision here largely depends on your style of play. If you don’t plan on scouring the Wasteland for tons of junk to sell, the Wastelander option might be a good choice. If you’re playing the game on an advanced difficulty level, the Roughneck armor is always a good choice. Maybe you just want to enhance items that you build. In that case, choose the Fabricator option. Don’t take your armor decision lightly. The armor you choose now is the armor you wear for the remainder of the campaign, so consider saving the game prior to making this decision. You may want to come back and try out different armors.
Armor Options
ICON NAME DESCRIPTION
< Wastelander Look like a local! Receive a discount on all cash purchases. Vehicle parts not included.
< Roughneck Roughnecks are rugged! Increase your protection from all the stuff that hurts. Vehicles not included.
Fabricator Build stuff like a pro! Enhance most of the cool things you engineer. Pocket protector not included.

Note

If you purchased the Limited Edition or the Anarchy DLC pack, there is a fourth armor option available. The Crimson Elite Armor combines all the benefits of the other armor types into one powerful (and stylish) suit. This gives you the discount on cash purchases and increased protection, as well as enhanced engineering items.

Note

Directly across from Coffer’s shop is a Job Board. Here you can select some side jobs, each with different objectives and payouts. These jobs are a good way to earn a little extra cash, but are not part of the campaign’s critical path. For more information on the jobs provided here, flip ahead to the next chapter.

New Objective: Return to Mayor Clayton

Once you’ve chosen your armor, head back to Mayor Clayton’s office to show off your new threads. Regardless of which armor you’ve picked, Mayor Clayton is relieved to see you in anything other than that Ark Suit. But he’s not quite ready to let you run free in his town. . .

Keep reading with a free account

The first 3 sections of Rage are open to everyone. An account opens the rest of it, and every other guide in the archive. It's free, and there's nothing to buy.

Bought guides on the old Prima Games site? Your account and every guide you own moved here, so there's nothing to buy again. Sign in.

Create a free account Or browse our free guides

PreviousDan's Message NextRenting a Garage