
Quick Use Weapons
- QUICK USE WEAPONS
- Wingstick
- HE Grenade
- RC Bomb Car
- Sentry Turret
- Sentry Bot
- EMP Grenade
- Advanced RC Bomb Car
- Advanced Wingstick
- Advanced Sentry Turret
- Advanced Sentry Bot
|
|
|
Need a little more firepower? Then look no further than these quick use items that can be quickly deployed to give you a little more offense. Some of these weapons can be purchased directly from vendors, but others must be constructed from parts using schematics. Most schematics can be purchased from vendors. Each time you buy or receive a schematic, you also acquire the parts necessary to build one item. Once built or purchased, these items can be assigned to one of the four quick use slots for easy deployment.
Don’t assign weapons like Sentry Turrets, Sentry Bots, and RC Bomb Cars as your quick use items. These weapons are easily deployed from the inventory screen. Simply access the inventory screen when you want to deploy one of these weapons. This pauses the game, giving you the chance to select the item from the inventory screen. Select the weapon, then choose the use option. When you return to the game, the item you selected now appears. Reserve your four quick use slots for weapons that require more precise targeting, like Wingsticks and grenades. It’s also wise to reserve a quick use slot for Bandages.
Wingstick
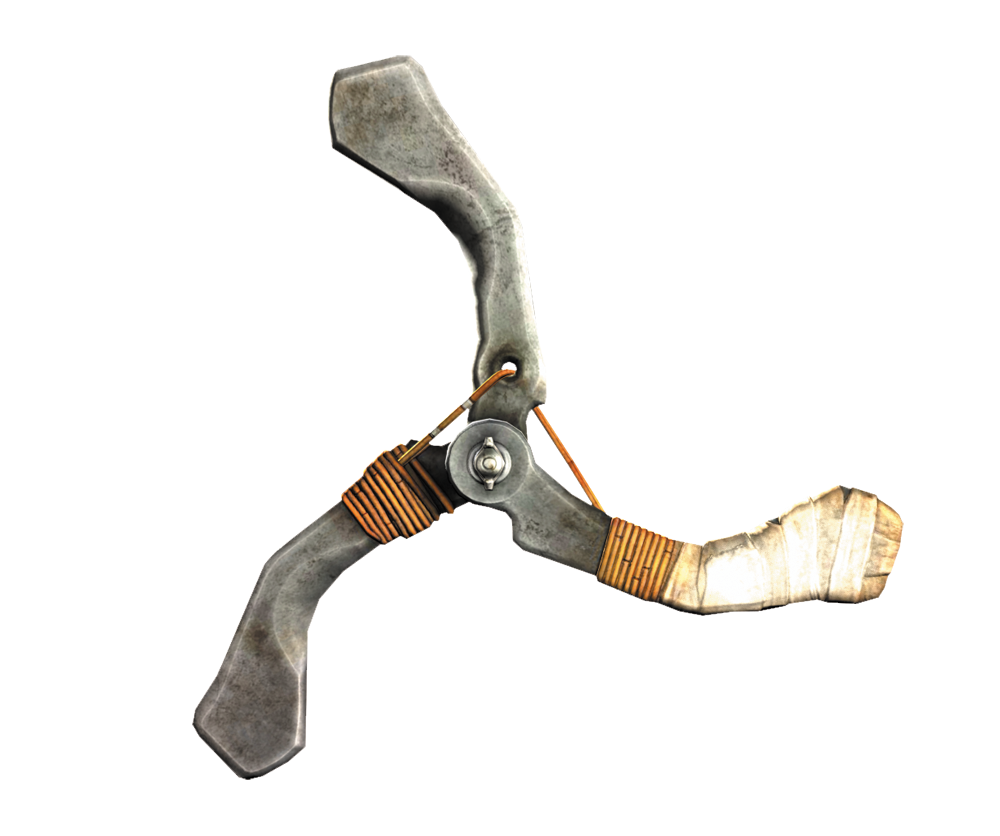
Description:
Smart flying death blades. Not for use with dogs. . .
Cost:
$25 for 5
Sell Price:
$3 each
Schematic Cost:
$50
| Wingstick Ingredients (Builds 15) | ||||
| Image | Name | Cost | Quantity | Description |

|
Steel Blades | $15 | 1 | The sharp parts of a Wingstick. |

|
Hardware Packet | $20 | 1 | Random collection of nuts and bolts. |

|
Electrical Wire Kit | $16 | 1 | Assorted wires, connectors, and other electrical parts. |
Field Notes
The Wingstick is perhaps RAGE’s most iconic weapon, consisting of three blades and a Nano-core for smart targeting. Complete the Wingstick Mastery side quest offered by Loosum Hagar at the start of the campaign to get your first batch of Wingsticks. Halek won’t sell you any Wingsticks until after you’ve completed Loosum’s side quest. This thrown weapon functions similar to a boomerang, returning to the thrower after flying several meters. But unlike a boomerang, the Wingstick’s sharp blades are ideal for lopping off the heads of your enemies. These work best against unarmored targets like mutants. However, if you throw the weapon at close range, it may become embedded in a target’s skull or body. In the case of a mutant, be sure to loot its body before it disintegrates, destroying your Wingstick in the process. Also, avoid throwing Wingsticks in narrow corridors or confined interiors. Wingsticks tend to ricochet when making contact with walls and other solid objects, sending them flying in an unpredictable direction with a small chance of returning to your hand.

Decapathon
Use Wingsticks to decapitate a total of ten enemies to unlock the Decapathon achievement/trophy. This is easiest against mutants or bandits who aren’t wearing helmets, like those from the Ghost Clan.
HE Grenade
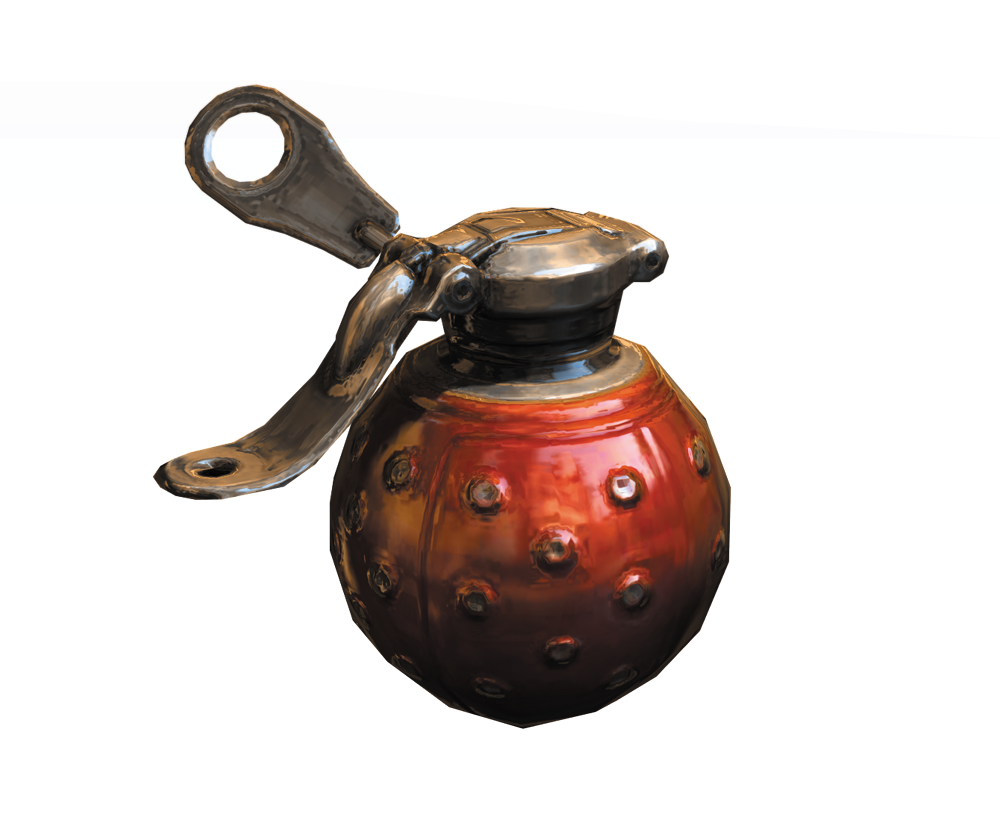
Description:
For when you don’t care about making a mess.
Cost:
$20 for 5
Sell Price:
$4 each
Schematic Cost:
N/A
Field Notes
This is a standard high-explosive hand grenade, perfect for taking out multiple enemies during frantic firefights. As with any explosive weapon, you must take care to avoid injuring (or killing) yourself. When you press and hold down the quick use button, a small white meter appears at the center of the screen, filling from left to right. The meter indicates how much time is left before the grenade explodes. If you hold down the button too long, the grenade will explode in your hand, potentially killing you, depending on your chosen difficulty level. Always throw the grenade before the meter is full. For best results, wait until the meter is about half full, then throw it at your target—this is called cooking a grenade. Your enemies will notice any incoming grenades and attempt to run away. By cooking a grenade, you give your enemies less time to respond to the threat, helping ensure they’re caught in the blast. Also, notice how HE Grenades bounce when thrown. The detonator is purely fuse-based and does not explode upon impact with any surface. This allows you to bounce grenades off walls and other surfaces, useful when you don’t want to expose yourself to incoming fire. HE Grenades are extremely powerful, vaporizing all targets within their modest blast radius—don’t expect to find any bodies to loot.
RC Bomb Car
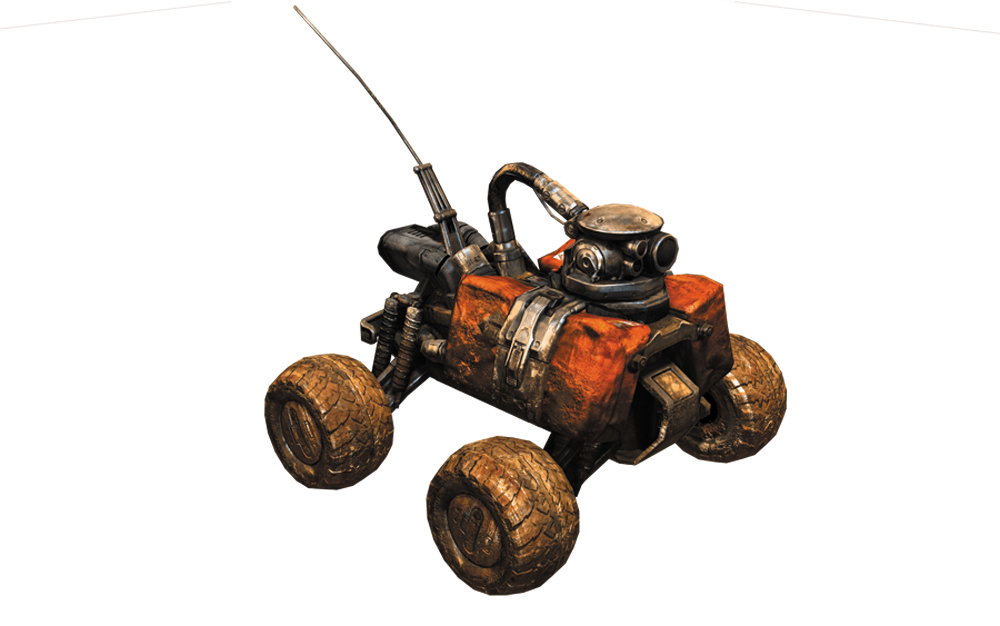
Description:
Best idea a 12-year-old ever had.
Cost:
N/A (Can only be built)
Sell Price:
$65 each
Schematic Cost:
N/A (Provided by Sheriff Black)
| RC Bomb Car Ingredients (Builds 1) | ||||
| Image | Name | Cost | Quantity | Description |

|
Explosive Pack | $20 | 1 | Makes things go boom! |

|
Nanotrite Conduit | $22 | 1 | The conduit between your Nanotrites and your humanity. |

|
Small Battery Pack | $16 | 1 | Perfect for powering mechanized instruments of death. |

|
RC Car Kit | $30 | 1 | All the pieces you need to make a remote controlled car. Assembly required. |
Field Notes
Initially, the Shrouded Clan developed these explosive remote controlled cars, using them to terrorize their enemies and anyone else they felt like messing with. But Sheriff Black uncovered the schematics for these cars, allowing you to build them—the schematic is provided at the start of the Destroy the Bomb Caches job. Once you’ve built and deployed an RC Bomb Car, the camera switches to a third-person view behind the miniature vehicle. The controls work just like driving a vehicle, complete with a boost option. However, pay attention to the car’s signal strength meter at the bottom of the screen. If you drive too far away, the signal strength drops. If the signal is completely lost, you lose control of the RC Bomb Car and it detonates on its own. As long as the signal strength remains strong, you can keep driving around and detonate it at any point. If you don’t want to detonate it, simply choose the exit option. This stops the vehicle, and returns the camera to the default first-person perspective—you can now pick up the RC Bomb Car and return it to your inventory. This gives you the opportunity to use RC Bomb Cars as reconnaissance vehicles, scouting out areas before advancing. RC Bomb Cars are small, and can drive into tight spaces such as ducts and drains. If you can’t fit into an opening, your RC Bomb Car probably can. Experiment with RC Bomb Cars to explore areas you can’t reach. In combat, RC Bomb Cars will often get the attention of your enemies, prompting them to open fire and run away. Use the boost function to get in close to your targets before they can either get away or destroy the car.

Three Birds, One Bomb Car
Drive an RC Bomb Car into a large group of enemies and detonate it. If you manage to kill at least three enemies with the explosion, you unlock the Three Birds, One Bomb Car achievement/trophy.
Sentry Turret
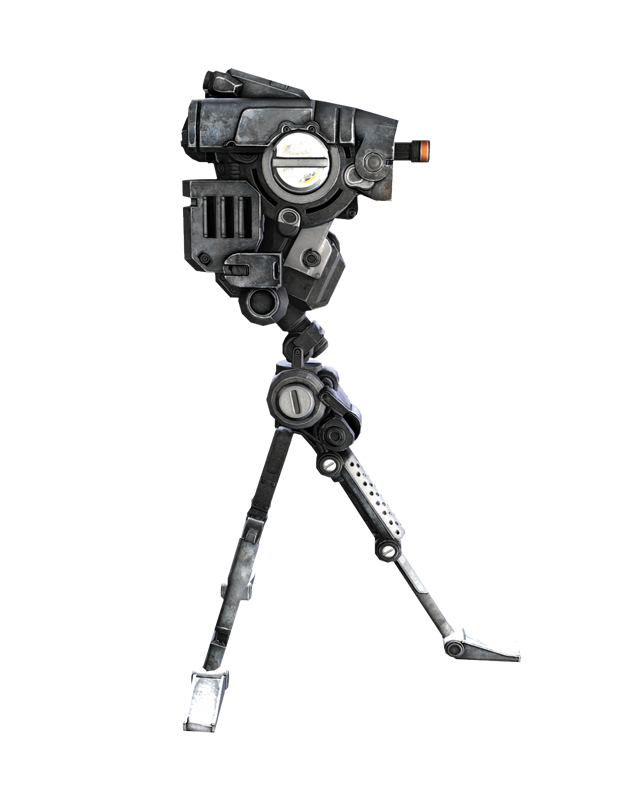
Description:
Set it and forget it!
Cost:
N/A (Can only be built)
Sell Price:
$80 each
Schematic Cost:
$125
| Sentry Turret Ingredients (Builds 1) | ||||
| Image | Name | Cost | Quantity | Description |

|
Ordnance Pack | $12 | 1 | A collection of bullets and slugs used to cause a whole lot of carnage. |

|
Turret Barrel | $18 | 1 | The business end of a lead-spewing turret. |
|
|
Nanotrite Conduit | $22 | 1 | The conduit between your Nanotrites and your humanity. |
|
|
Small Battery Pack | $16 | 1 | Perfect for powering mechanized instruments of death. |
|
|
Electrical Wire Kit | $16 | 1 | Assorted wires, connectors, and other electrical parts. |
Field Notes
The Sentry Turret Schematic can be purchased from Coffer in Wellspring for $125. Once you have the schematic, you can start cranking these out. Instead of buying the parts to build Sentry Turrets, gather them during your adventures to cut down on the production cost, otherwise they cost $84 if you have to buy the parts from a vendor. These tripod-mounted turrets can dish out some serious damage, automatically acquiring and attacking targets on their own. They’re best deployed against large waves of mutants. Simply stand back and let your Sentry Turret do all the dirty work. But Sentry Turrets have a limited lifespan, as indicated by the power meter on the left side of the screen. The more rounds they fire, the more energy they consume until they eventually cease functioning. Even after a Sentry Turret ceases functioning, you can still salvage it for parts, usually recovering the Turret Barrel. More parts can be salvaged if you interact with the Sentry Turret while it still has energy—the more energy it has, the more parts are salvaged. Sentry Turrets are also vulnerable to melee attacks. If a mutant or bandit is fortunate enough to get close enough, the enemy can knock over a Sentry Turret, effectively disabling it. Stand guard and make sure no enemies get close enough to touch your little friend.
Keep ‘Em Coming
To unlock the Keep ‘Em Coming achievement/trophy, you must kill five enemies with a single Sentry Turret. For best results, drop a Sentry Turret in an area with multiple mutants. Stand guard and blast any mutants that attempt to knock over the Sentry Turret, giving it a chance to score the requisite five kills.
Sentry Bot
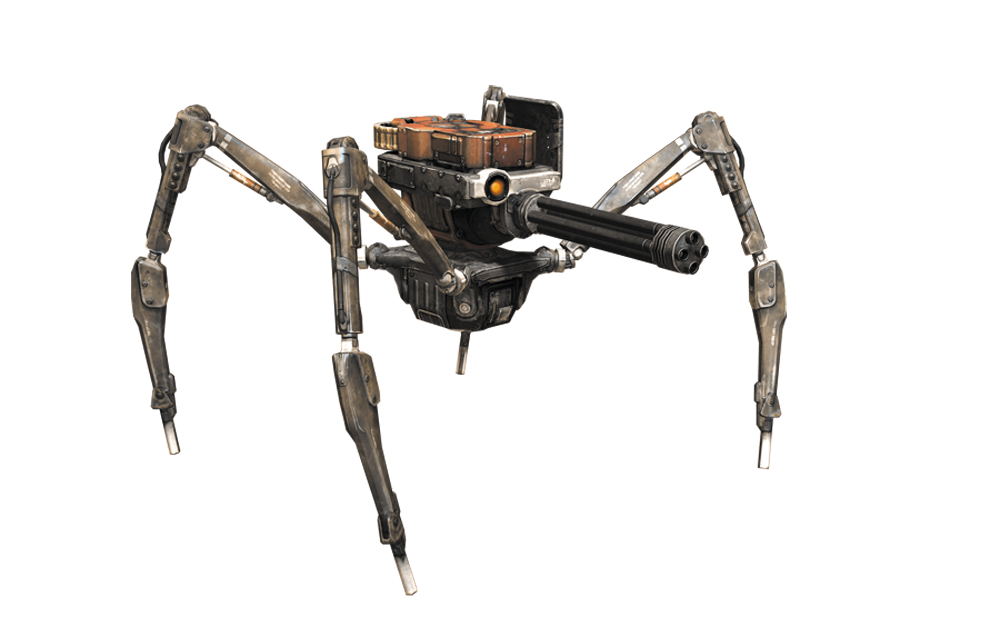
Description:
The best walking and shooting robot this side of the apocalypse.
Cost:
N/A (Can only be built)
Sell Price:
$85 each
Schematic Cost:
$175
| Sentry Bot Ingredients (Builds 1) | ||||
| Image | Name | Cost | Quantity | Description |
|
|
Ordnance Pack | $12 | 1 | A collection of bullets and slugs used to cause a whole lot of carnage. |
|
|
Nanotrite Conduit | $22 | 1 | The conduit between your Nanotrites and your humanity. |
|
|
Small Battery Pack | $16 | 1 | Perfect for powering mechanized instruments of death. |
|
|
Electrical Wire Kit | $16 | 1 | Assorted wires, connectors, and other electrical parts. |
|
|
Hardware Packet | $20 | 1 | Random collection of nuts and bolts. |
Field Notes
The Sentry Bot is a completely autonomous spider-like robot that follows you around and attacks your enemies. Coffer sells the Sentry Bot Schematic for $175 in Wellspring. It’s a steep price to pay early on, but if you can gather the necessary parts during your adventures, the buy in isn’t so bad. Sentry Bots are much more durable than their stationary Sentry Turret counterparts—you can view the unit’s health in the red meter on the left side of the screen. In addition to shooting enemies with a minigun-like automatic weapon, they can also use their sharp front legs to perform melee attacks. Think of Sentry Bots as a viscous but loyal guard dog that will always watch your back. They do have a mind of their own, however, and will charge into battle even if you don’t want them to. You can deactivate a Sentry Bot by simply interacting with it. At this point you salvage any reusable parts and add them to your inventory. As with the Sentry Turret, the more health a Sentry Bot has, the more parts are salvaged when interacting with it.

Passive Aggressive
This achievement/trophy is awarded for scoring three kills with a single Sentry Bot. This is easiest to earn when a Sentry Bot is deployed amongst a large group of mutants. Mutants are the easiest enemies for a Sentry Bot to kill.
EMP Grenade
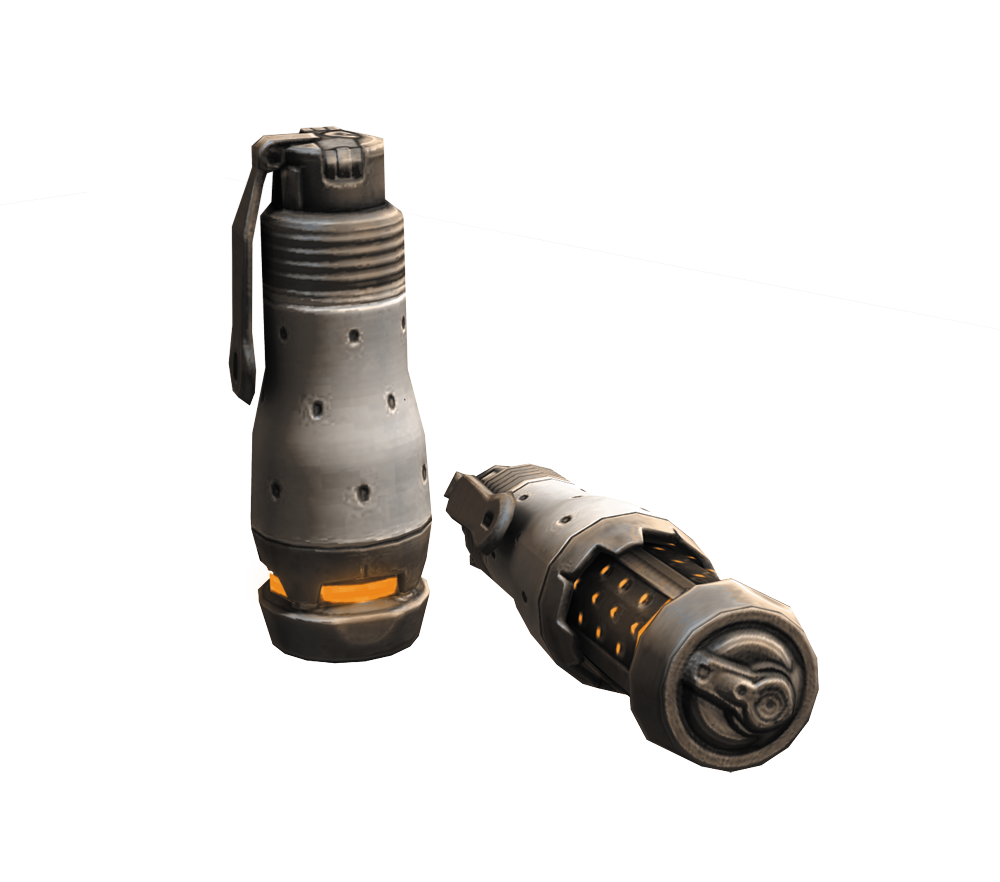
Description:
Powerful electro-magnetic pulse that can disrupt unshielded electronics.
Cost:
$45 for 3
Sell Price:
$10 each
Schematic Cost:
N/A (found in Authority Prison)
| EMP Grenade Ingredients (Builds 3) | ||||
| Image | Name | Cost | Quantity | Description |
|
|
Electrical Wire Kit | $16 | 1 | Assorted wires, connectors, and other electrical parts. |

|
Feltrite Power Pack | $12 | 1 | Feltrite-powered fuel cell. |
|
|
HE Grenade | $12 | 3 | For when you don’t care about making a mess. |
Field Notes
EMP Grenades are the best way to disable any electronic-based piece of equipment. You can find the EMP Grenade Schematic inside the Authority Prison or you can purchase EMP Grenades already assembled from a vendor. These hand-thrown weapons function just like HE Grenades—you can even cook them by holding down the quick use button before throwing them. But instead of detonating with shrapnel, these specialized grenades emit a powerful electro-magnetic pulse, frying any electronics within their blast radius. These grenades are the best way to disable the generators found in most Authority installations, like the Authority Prison. EMP Grenades are also very effective at disabling enemy Sentry Bots, Sentry Turrets, and the energy shields carried by some enforcers. The electronic-enhanced body armor worn by enforcers is also vulnerable to EMP attacks. Once exposed to EMP, enforcers are much easier to kill, causing their body armor to quickly fall apart with each hit.
Advanced RC Bomb Car
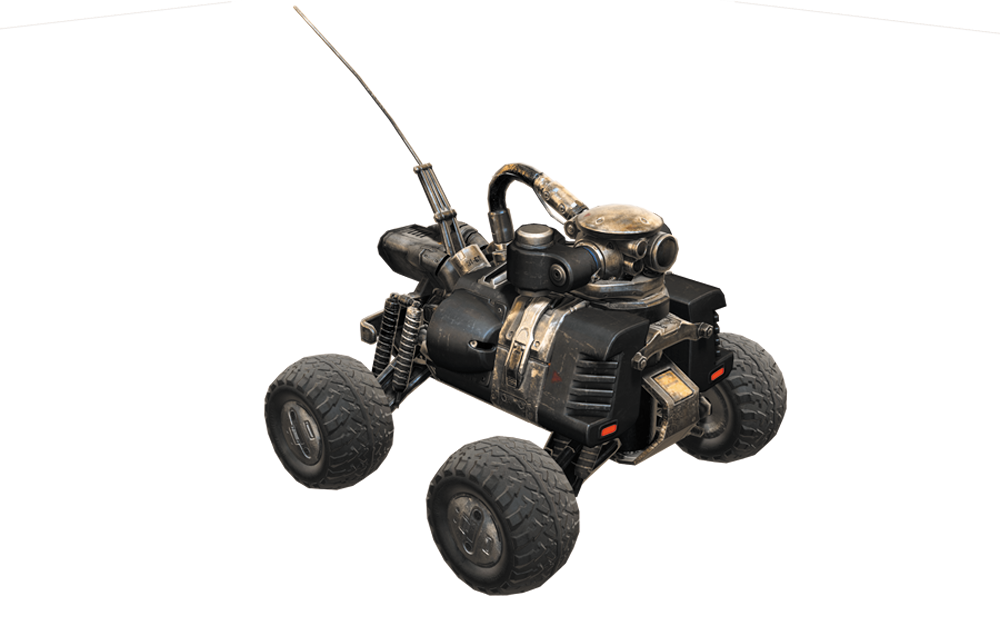
Description:
Best idea a 12-year-old ever had, now with EMP!
Cost:
N/A (Can only be built)
Sell Price:
$65 each
Schematic Cost:
N/A (Provided by Phallinx Hagar)
| Advanced RC Bomb Car Ingredients (Builds 1) | ||||
| Image | Name | Cost | Quantity | Description |
|
|
Explosive Pack | $20 | 1 | Makes things go boom! |
|
|
Nanotrite Conduit | $22 | 1 | The conduit between your Nanotrites and your humanity. |
|
|
Small Battery Pack | $16 | 1 | Perfect for powering mechanized instruments of death. |
|
|
RC Car Kit | $30 | 1 | All the pieces you need to make a remote controlled car. Assembly required. |
Field Notes
If you’re not paying close attention, you can totally miss out on this upgrade. To get the Advanced RC Bomb Car Schematic, you must complete a job from the job boards called, A Proposition—this only appears after you’ve completed the Destroy the Bomb Caches job for Sheriff Black. The job sends you back to the Hagar Settlement where Phallinx Hagar has a side quest (RC Prototype) requiring you to return to the Shrouded Bunker to steal a new RC Bomb Car prototype. Once you come back with the prototype, Phallinx awards you with the upgraded schematic. The Advanced RC Bomb Car works exactly the same as its predecessor. However, when detonated, it emits a powerful EMP blast along with its normal explosion. This makes it very effective against Authority units, particularly the enforcers carrying energy shields. The EMP blast is also strong enough to disable Authority generators. Think of it as a more complex alternative to your EMP Grenades.
Advanced Wingstick
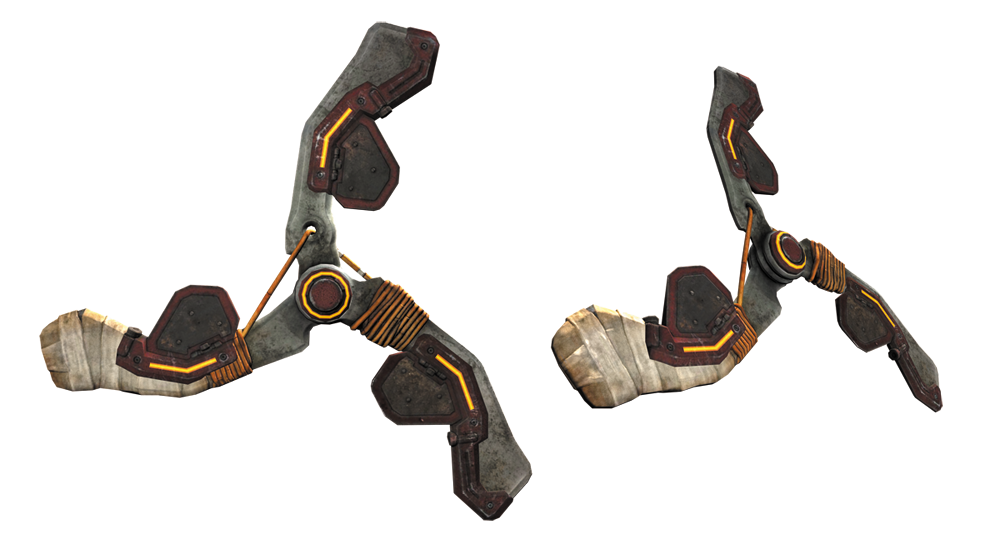
Description:
Smart targeting just got smarter.
Cost:
N/A (Can only be built)
Sell Price:
$2 each
Schematic Cost:
$275
| Advanced Wingstick Ingredients (Builds 15) | ||||
| Image | Name | Cost | Quantity | Description |
|
|
Steel Blades | $15 | 1 | The sharp parts of a Wingstick. |
|
|
Hardware Packet | $20 | 1 | Random collection of nuts and bolts. |
|
|
Electrical Wire Kit | $16 | 1 | Assorted wires, connectors, and other electrical parts. |
Field Notes
Shortly after arriving in Subway Town, you can purchase the Advanced Wingstick Schematic from Jani. Even if you didn’t buy the original Wingstick Schematic, you can buy this one. These upgraded Wingsticks are equipped with an advanced Nano-core capable of targeting up to three separate enemies with one throw. Toss one of these Wingsticks into a crowd of enemies and watch it go to work. Initially the Wingstick flies in the direction you threw it, but after hitting the first target, it seeks out targets of its own before returning to your hand. Advanced Wingsticks are constructed from the same parts as standard Wingsticks. Outside the cost of the schematic, there’s no reason not to upgrade your arsenal. Once you own the schematic, you can only construct Advanced Wingsticks.
Advanced Sentry Turret
Description:
Set it and forget it! Part 2.
Cost:
N/A (Can only be built)
Sell Price:
$80 each
Schematic Cost:
$330
| Advanced Sentry Turret Ingredients (Builds 1) | ||||
| Image | Name | Cost | Quantity | Description |
|
|
Ordnance Pack | $12 | 1 | A collection of bullets and slugs used to cause a whole lot of carnage. |
|
|
Turret Barrel | $18 | 1 | The business end of a lead-spewing turret. |
|
|
Nanotrite Conduit | $22 | 1 | The conduit between your Nanotrites and your humanity. |
|
|
Small Battery Pack | $16 | 1 | Perfect for powering mechanized instruments of death. |
|
|
Electrical Wire Kit | $16 | 1 | Assorted wires, connectors, and other electrical parts. |
Field Notes
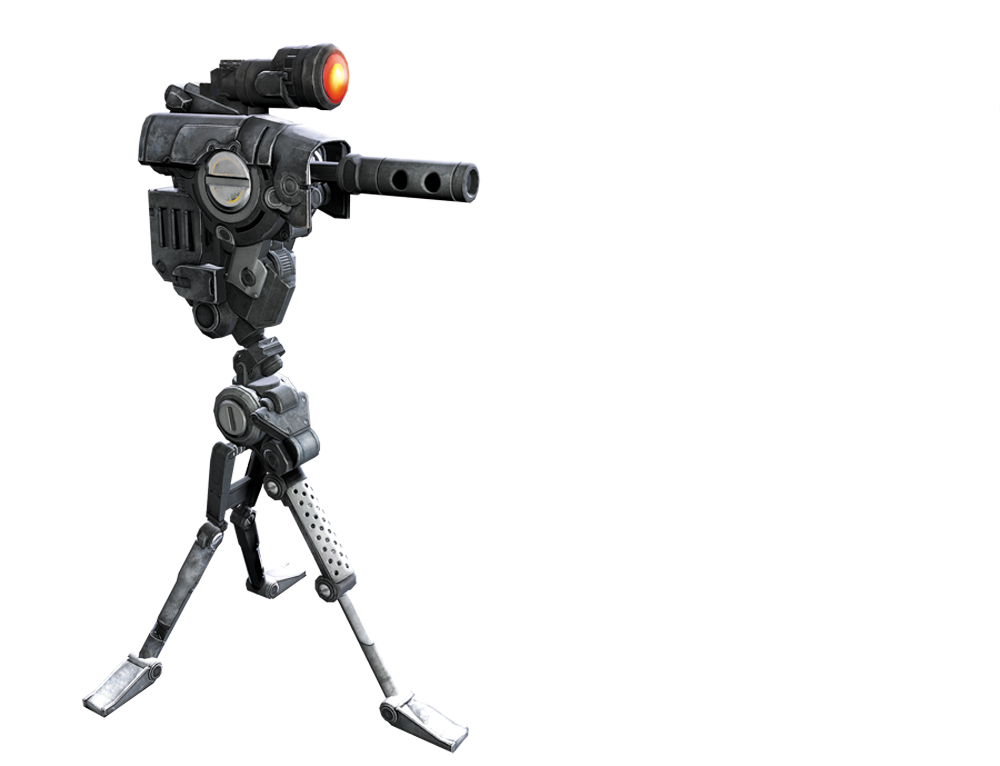
The Advanced Sentry Turret is an upgraded variant of the standard unit, benefiting from a laser sight and a wider field of view. You can purchase the schematic for this devastating weapon from Jani in Subway Town. You do not need to own the Sentry Turret Schematic to buy this one. This weapon can be constructed from the very same parts as the regular Sentry Turret, but this upgrade version is far more effective in combat, capable of acquiring (and killing) enemies faster. The Advanced Sentry Turret also has a wider firing arc, making it harder for enemies to flank it. Still, it’s best to deploy it in a spot where its back is up against a wall, corner, or other object, helping prevent enemies from knocking it over with melee attacks. However, the weapon system still has a rather limited lifespan, even if it goes untouched by enemies. Monitor its energy meter and be ready to deploy a second turret if necessary. At no point do you need to deploy two of these at the same time—one Advanced Sentry Turret can handle just about any job on its own.
Advanced Sentry Bot
Description:
The best walking and shooting robot this side of the apocalypse, now with armor!
Cost:
N/A (Can only be built)
Sell Price:
$85 each
Schematic Cost:
$375
| Advanced Sentry Bot Ingredients (Builds 1) | ||||
| Image | Name | Cost | Quantity | Description |
|
|
Ordnance Pack | $12 | 1 | A collection of bullets and slugs used to cause a whole lot of carnage. |
|
|
Nanotrite Conduit | $22 | 1 | The conduit between your Nanotrites and your humanity. |
|
|
Small Battery Pack | $16 | 1 | Perfect for powering mechanized instruments of death. |
|
|
Electrical Wire Kit | $16 | 1 | Assorted wires, connectors, and other electrical parts. |
|
|
Hardware Packet | $20 | 1 | Random collection of nuts and bolts. |
Field Notes
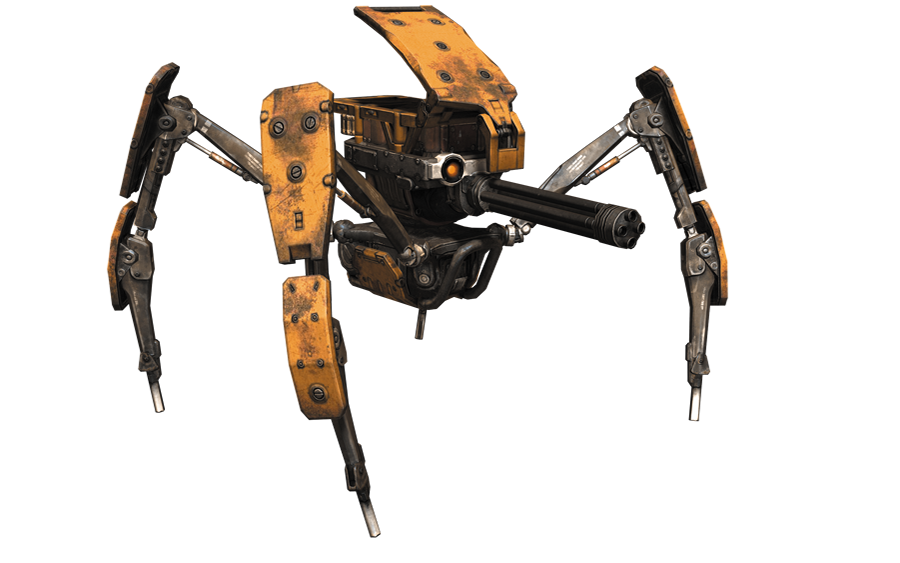
The Advanced Sentry Bot Schematic is available from Jani in Subway Town. You do not have to own the standard Sentry Bot Schematic to buy this upgraded version. Functionally, this Sentry Bot performs the same as its predecessor, attacking with a rapid-firing weapon as well as with its sharp front legs. But this variant is equipped with heavier armor, significantly increasing its lifespan. The Advanced Sentry Bot is constructed from exactly the same parts as the standard version. Outside the steep cost of the schematic, there’s no good reason to pass on this worthwhile upgrade. When you’re facing stiff resistance, deploy a couple of these bots to gain the upper hand. The Advanced Sentry Bot is a true force multiplier, attracting attention away from you. This not only increases your chances of survival, but it also presents new tactical opportunities. While your enemies are focused on the bots, look for ways to flank or advance.
Mechanocide
Like killing things with your devastating creations? Then go for the Mechanocide achievement/trophy. This requires you to kill a total of 100 enemies using Sentry Turrets, Sentry Bots, and RC Bomb Cars. Kills acquired with Advanced Sentry Turrets and Advanced Sentry Bots also apply to the grand total.