
Dragon Age II Guide Walkthrough Act Two
Demands of the Qun
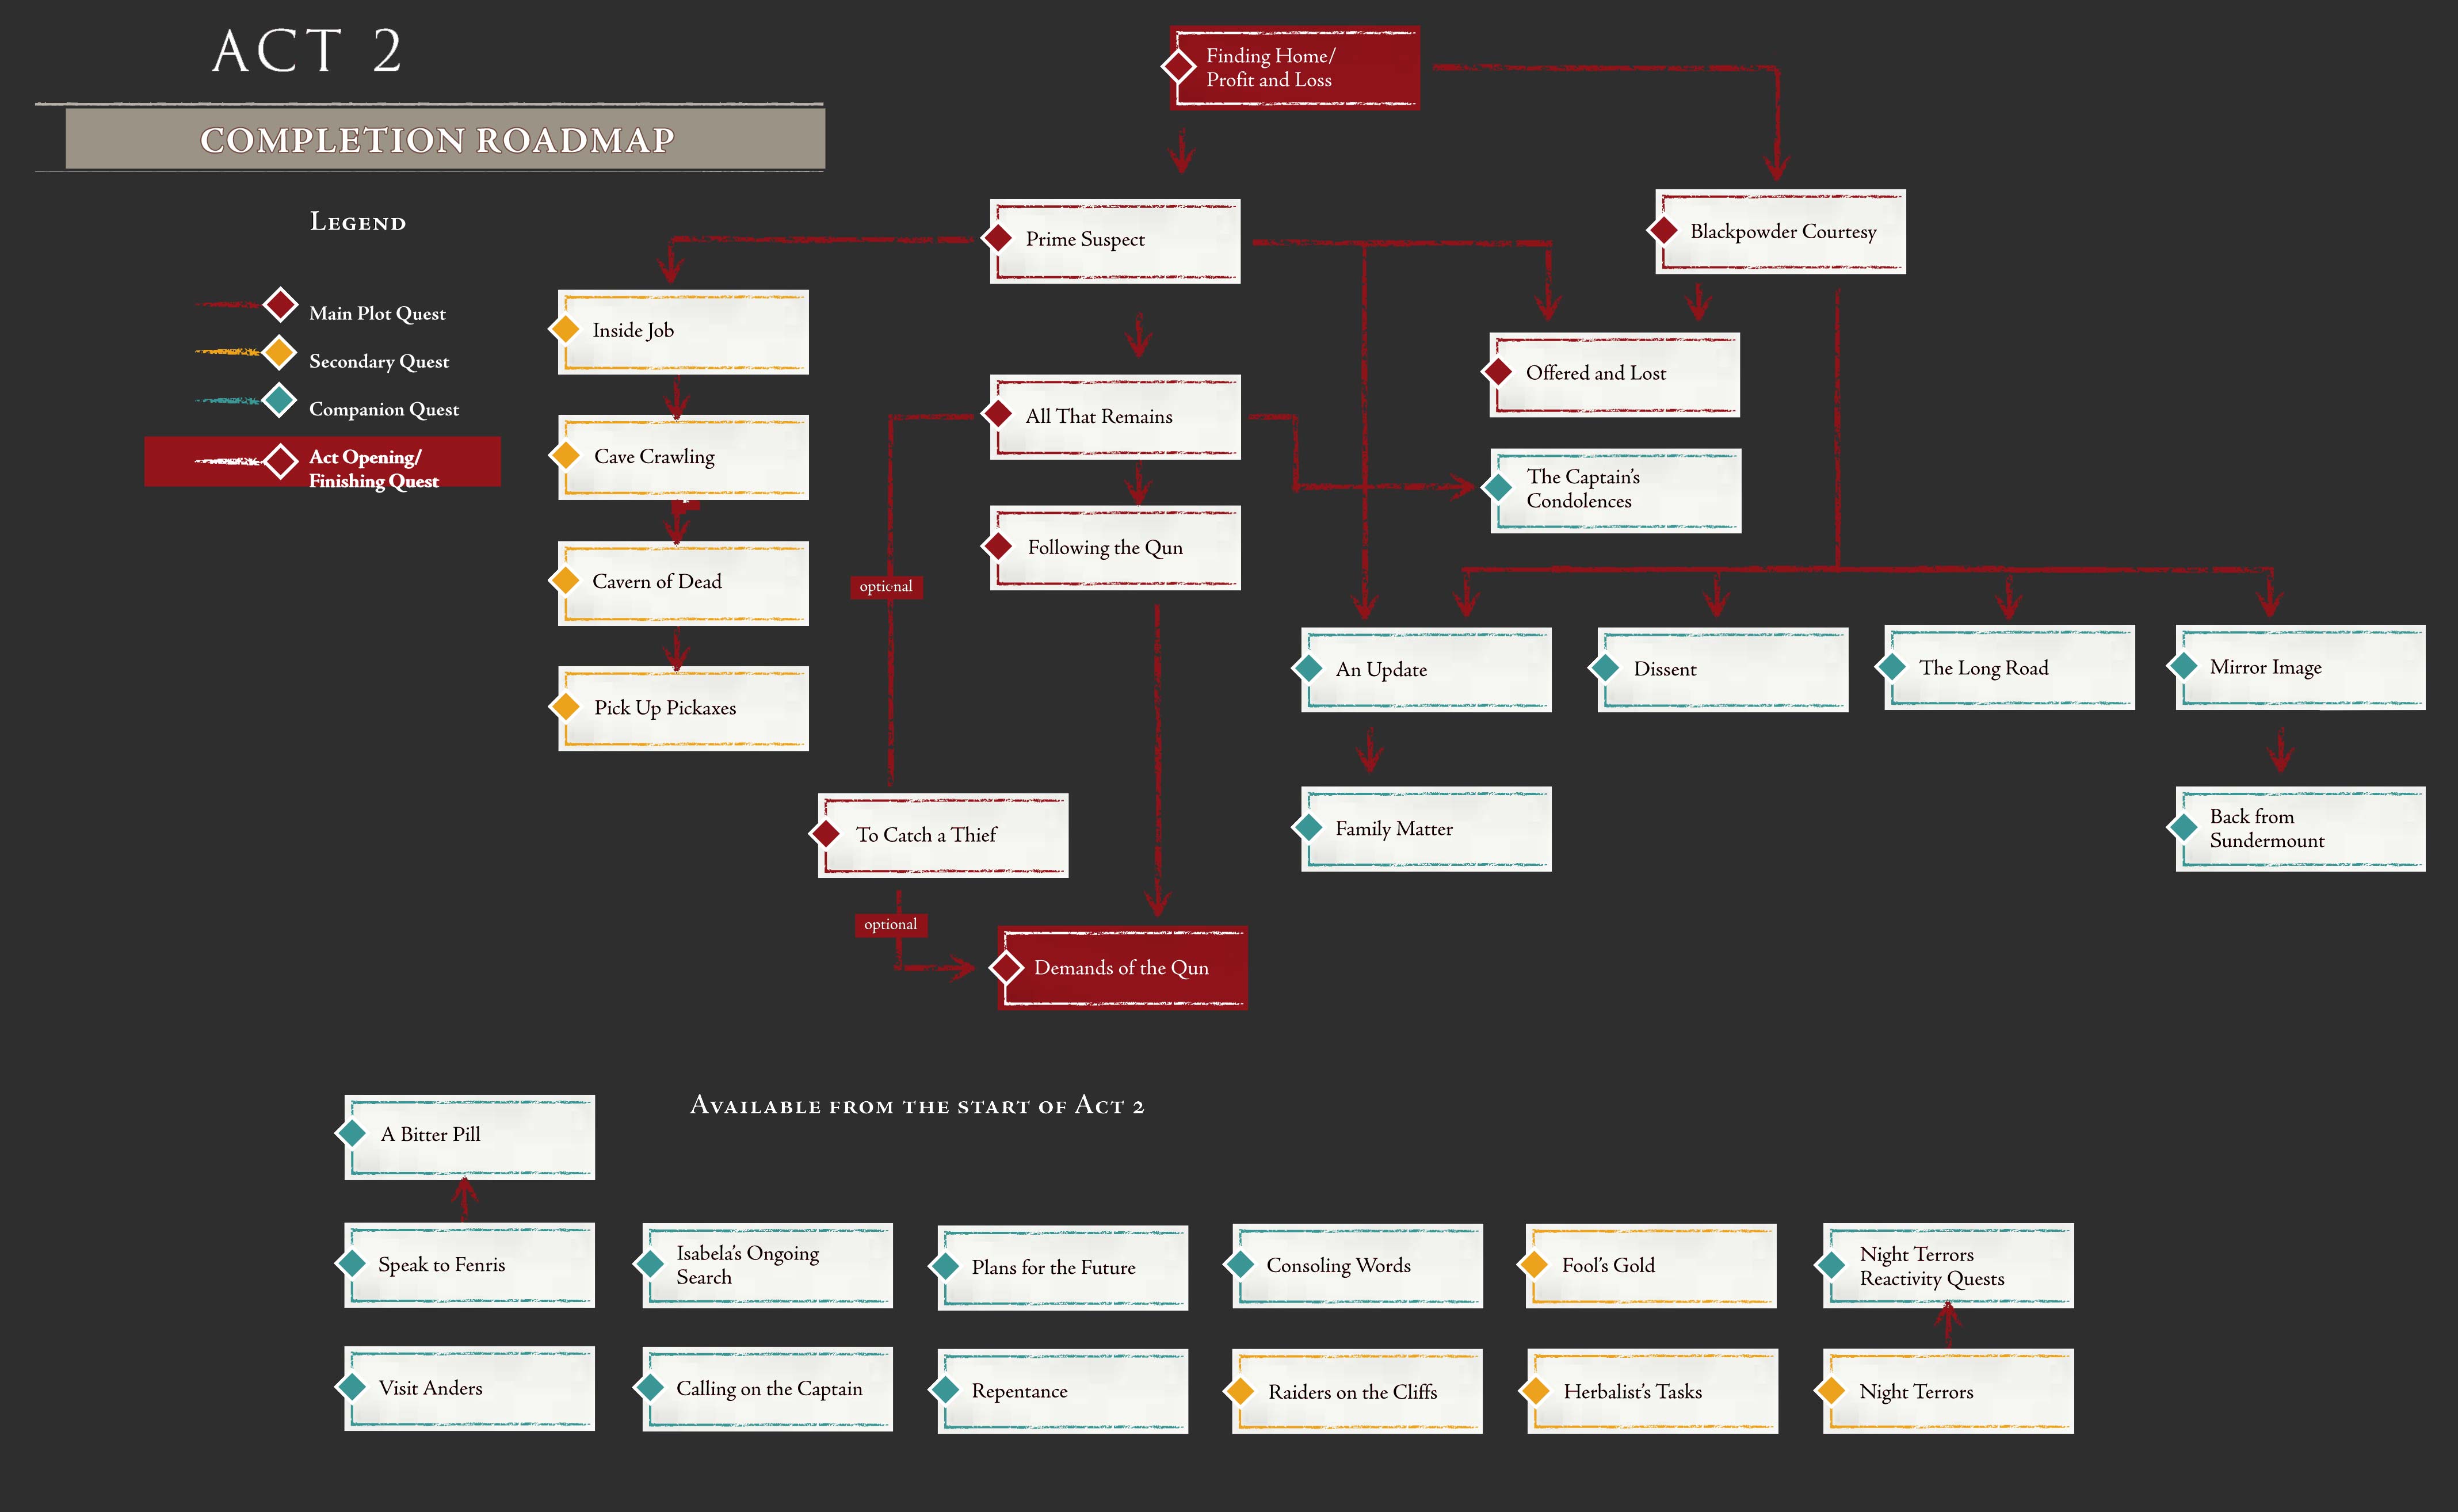
This diagram will help you plan your route through Act 2 by revealing the unlock progression for all main plot, secondary and companion quests.
You will find fact sheets for all of these ventures over the pages that follow, plus guidance for smaller side quests (which usually have their own unique unlock conditions).
1. Finding Home/Profit and Loss
Act 2 begins with an intriguing audience with the ruler of Kirkwall. Use the “Gather your Party” station by the door to assemble your favored companions before you leave. Outside, Bodahn will rush to greet you. The main subject of this conversation is determined by how you funded your participation in the Deep Roads adventure. If you paid Bartrand, the Finding Home quest is triggered. If you accepted Dougal’s offer of a loan, Profit and Loss begins instead. Both are completed by simply entering the Hawke Estate at the bottom of the steps. Finding Home ends at this point, but Profit and Loss has some interesting repercussions.
2. Blackpowder Courtesy
Opponents belonging to the Carta await you in Smuggler’s Cut. These have a high resistance to magic but are susceptible to cold attacks. Thugs are generic, melee-focused troopers, but the Assassins – as ever – necessitate special measures. After defeating the first band, visit the dead-end path to the west to fight a small group of spiders, then continue north. The second Carta battle is rather more substantial than the first. Take up position at the bottom of the wooden steps, and try not to let your party members spread out. Later fights add Mercenary Archers who have moderate resistance to cold, but quail in the face of nature attacks. Loot the area southwest of the northern exit (especially the chest close to the door), then leave.
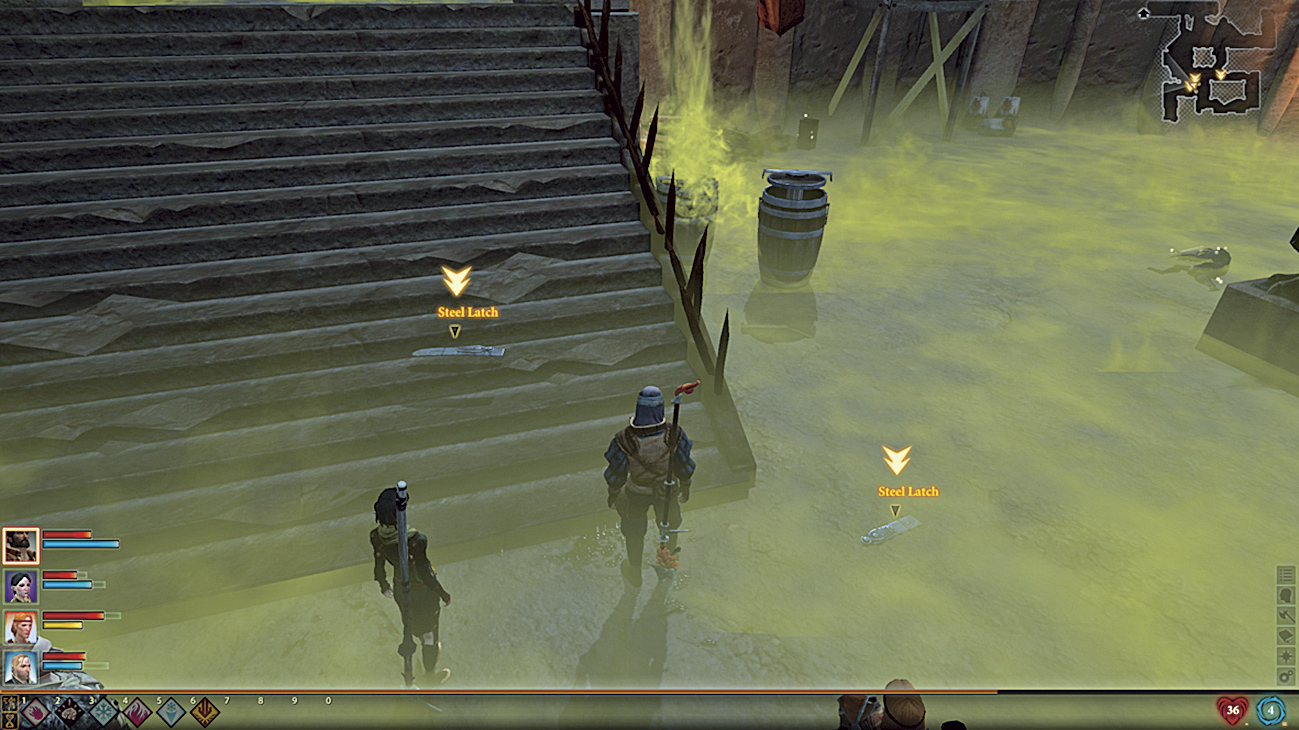
Outside, kill the assorted mercenaries and speak to Javaris. Ensure that your party is suitably prepared for battle, then set off for the Side Alley. Collect the Steel Latch from the ground (Fig. 1), then interact with the barrel directly ahead to stop it from spewing its poison into the air. This triggers a confrontation in which you kill successive waves of mercenaries to obtain further Steel Latches (marked by plot waypoint arrows) that you can use to close each barrel in turn. Each group of enemies features a notable opponent (a commander or an Assassin) before you confront a final wave led by the Elven Fanatic.
3. Offered and Lost
This is a short quest, but one with interesting opportunities – see page 72 for a complete appraisal. Ensure that you have Aveline in your party when you reach The Hanged Man. Approach Orwald the Braggart and have the guard-captain question him. When you arrive at Ser Varnell’s Refuge (by way of Petrice), choose to attack Ser Varnell. Clear the area of Fanatics with an AoE barrage before you focus on the templar, then turn and brace for a second wave of devout assailants attacking from the rear. In the aftermath, advise the viscount to return the Qunari bodies to the Arishok in their existing state. Collect all loot in the area (especially the Shield of the Knight Herself from the crate to the right of the southeast exit – see page 72), then leave the area.
4. Prime Suspect
If you have yet to complete the Ladies’ Lights Out side quest, you will encounter members of the Invisible Sisters gang en route to DuPuis Estate – see page 91 for details. On entering the mansion, your party will be assailed by Shades. Electricity and nature attacks work very well, but they’re immune to the spirit element. Speak to Gascard at the waypoint and offer to help him.
At the Blind Alley, there is a small army of Shades and a Desire Demon who shares the same elemental resistance and vulnerabilities as her cohorts. She also continually heals her allies (unless temporarily incapacitated), so target her first. When Moira arrives, answer “I don’t think so” when she asks if Hawke believes Gascard to be the killer. This allows him to return for the next quest, All That Remains.
5. All That Remains
Even though the quest marker directs you to Lowtown (Night), seeking Gascard’s assistance in Darktown instead leads to a more interesting conclusion to this storyline. Agree to his suggestion that he perform a blood magic ritual to locate Leandra and the party will be transported instantly to the Dark Foundry. Loot the area, then go through the Hidden Trapdoor.
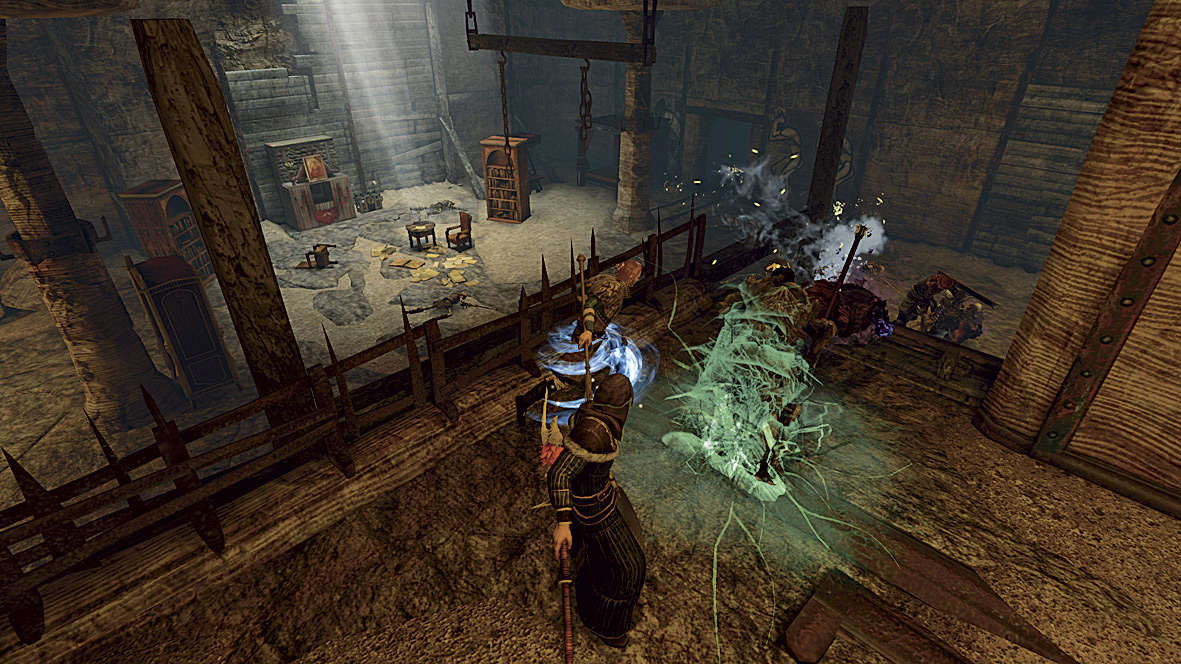
Inside the Killer’s Lair the party will be attacked by numerous Shades and a Rage Demon. You can use the staircase in front of the area entrance to create a choke point for AoE attacks. Smart positioning can also be of service when you reach the northwest room, where further Shades, a selection of Corpses, Abominations and another Rage Demon attack. These arrive in waves, so retreating to the upper level may be prudent on higher difficulty settings (Fig. 2).
After the conversation with Quentin, you will face three separate Desire Demons in turn, each supported by Shades, Corpses and Abominations. The Desire Demons gradually replenish the health of their allies, so concentrate your fire on them; if possible, keep them in an incapacitated state to stall their regenerative powers. With the arrival of a fourth and final Desire Demon, Quentin will enter the fray. As a blood mage, he’s vulnerable to spirit damage, but still incredibly dangerous. You should either micromanage the fight to keep him disabled until the final Desire Demon falls, or target him first with a barrage of your most witheringly potent attacks.
6. Following the Qun
See page 74 for more details on this story-oriented quest. The ambush in the Winding Alley and the Righteous Mob enemies at the Chantry are mere cannon fodder to a well-equipped party, though the Mob Leader is made of sterner stuff. Deal with the former first, and their ringleader will soon perish once isolated.
7. To Catch a Thief
This quest is only available if you recruited Isabela during Act 1; if not, jump straight to . With both Aveline and the rogue requesting your assistance, pledge to help Isabela first. Ensure that she is in your party when you leave Hawke Estate. A group of Qunari awaits your arrival as you approach the Foundry District. The Sten is the most dangerous in this group, but you should find that the small battleground lends itself to a rapid resolution with an AoE barrage. Take out the fighters employing ranged assaults first: your party members will struggle to perform if they are constantly reeling from projectile impacts.
Inside the Lost-End Foundry, concentrate on the Tevinter Mages and Tevinter Enchanter before you turn to the Qunari – and, ideally, use attacks that will impede the mobility of all opponents (such as Cone of Cold) from the very outset. The Qunari Sten is a commander who continually heals his allies, so you should dispatch him once the mages have been disabled. Fighting with only three party members can be a shock to the system, especially once enemy reinforcements arrive. Destroy the Saarebas the moment he appears or disable him while you eliminate lesser foes. If you find the battle too challenging, try moving the party into the entrance room and use the doorway to create a bottleneck.
Before you leave the area, visit the northeast room to collect the Lambswool Insoles – a companion armor upgrade for your erstwhile rogue. Outside, examine Wall-Eyed Sam’s corpse to find a letter from Isabela.
8. Demands of the Qun
This quest marks the point of no return for Act 2, so be sure that you are satisfied with your progression in other adventures: see Optional Activities on the previous spread for further advice. Any weapons (particularly staves) that inflict cold or nature damage will be of benefit during the forthcoming battles; you should also invest in a range of potions if your stocks are low.
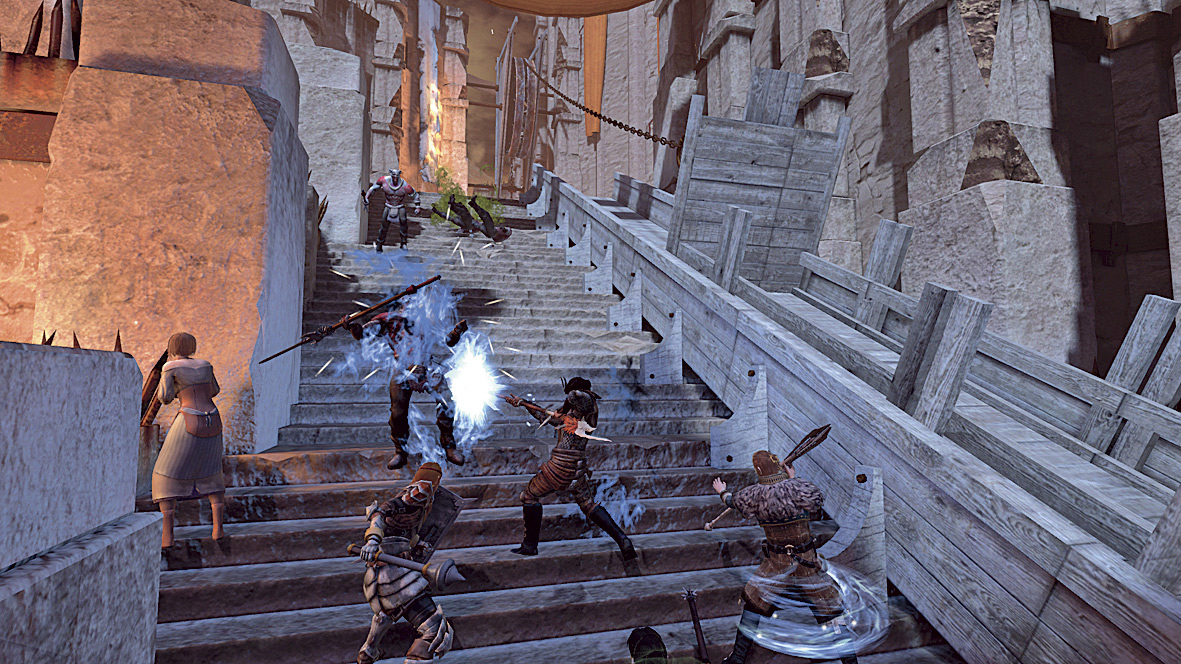
Inside the Qunari Compound, telling the truth remains (as ever) the best policy when you address the Arishok. When play resumes in Lowtown, there is a sizable battle party lying in wait at the top of the steps. Deal with the Saarebas, spear-throwing Ashaad and melee-focused Karashok in that order. A good tactic is to get your party to hold position approximately halfway down the steps, then lure the Qunari to you (Fig. 3). You should be wary of an additional band of Karashok that arrive from behind, but making a stand here definitely makes the battle easier.
Further along the path through the district, you will encounter Grey Wardens and a Qunari battle group similar to the one that you faced moments earlier. This time, pay special attention to the Saarebas and Ashaad on the raised areas. At the area exit, Elven Supporters join the Qunari for another showdown, with the latter bolstered by the presence of a Sten. Kill the weaker archers first, then concentrate fire on the commander while your tank occupies the assembled Karashok. A second wave of opponents will attack from the rear, so be ready to intervene if your ranged fighters are swarmed.
When you reach Hightown, slay the Saarebas when he arrives, and impede the Sten in some fashion while you bring the Ashaad under control. In the northeast area, most of the warring Carta Thugs and Karashok can be slain with a blanket of AoE attacks, though watch out for the Carta Assassin that joins in later. With the last fight south of the Viscount’s Keep, consider pulling your party back into the previous area to break the battle up into more manageable segments.
In the conversation with Meredith and Orsino, you have a choice between accepting a distraction to gain instant access to the Viscount’s Keep, or fighting your way through the amassed Qunari. Your decision rests on whether you wish to gain the additional XP that a fight entails. Inside the Keep, occupying one of the upper balconies and drawing your opponents to your position will make the battle rather less chaotic.
The Arishok
There are a number of different resolutions to Demands of the Qun, all dependant on your current party, your relationship with Isabela, and your previous dealings with the Arishok. These final tips will be of assistance in the most likely outcome (a fight with the Qunari leader and his warriors), but you can find guidance for all eventualities in the roadmap.
- First things first: slay the Saarebas immediately. He usually starts the battle on the upper level, but can teleport around the area at will.
- The Arishok heals his cohorts throughout, so your second objective should be to keep him incapacitated at all times. If this entails step-by-step micromanagement, so be it – left unchecked, he will cause any party member problems. His ability to stab a victim and raise them aloft on his sword makes him an effective “tank-buster”. As your favored meat shield will lose the attention of all enemies that surround them during this process, this can lead to disastrous consequences for your weaker mages. Use any and every ability at your disposal to becalm his fury, no matter how briefly they may hold him.
- Try to keep your party members in one area (preferably elevated) and not far from your tank. You will lose control of this confrontation if you have companions fighting on both the upper and lower levels of this battleground.
8. Demands of the Qun
This quest marks the point of no return for Act 2, so be sure that you are satisfied with your progression in other adventures: see Optional Activities on the previous spread for further advice. Any weapons (particularly staves) that inflict cold or nature damage will be of benefit during the forthcoming battles; you should also invest in a range of potions if your stocks are low.
Inside the Qunari Compound, telling the truth remains (as ever) the best policy when you address the Arishok. When play resumes in Lowtown, there is a sizable battle party lying in wait at the top of the steps. Deal with the Saarebas, spear-throwing Ashaad and melee-focused Karashok in that order. A good tactic is to get your party to hold position approximately halfway down the steps, then lure the Qunari to you (Fig. 3). You should be wary of an additional band of Karashok that arrive from behind, but making a stand here definitely makes the battle easier.
Further along the path through the district, you will encounter Grey Wardens and a Qunari battle group similar to the one that you faced moments earlier. This time, pay special attention to the Saarebas and Ashaad on the raised areas. At the area exit, Elven Supporters join the Qunari for another showdown, with the latter bolstered by the presence of a Sten. Kill the weaker archers first, then concentrate fire on the commander while your tank occupies the assembled Karashok. A second wave of opponents will attack from the rear, so be ready to intervene if your ranged fighters are swarmed.
When you reach Hightown, slay the Saarebas when he arrives, and impede the Sten in some fashion while you bring the Ashaad under control. In the northeast area, most of the warring Carta Thugs and Karashok can be slain with a blanket of AoE attacks, though watch out for the Carta Assassin that joins in later. With the last fight south of the Viscount’s Keep, consider pulling your party back into the previous area to break the battle up into more manageable segments.
In the conversation with Meredith and Orsino, you have a choice between accepting a distraction to gain instant access to the Viscount’s Keep, or fighting your way through the amassed Qunari. Your decision rests on whether you wish to gain the additional XP that a fight entails. Inside the Keep, occupying one of the upper balconies and drawing your opponents to your position will make the battle rather less chaotic.
The Arishok
There are a number of different resolutions to Demands of the Qun, all dependant on your current party, your relationship with Isabela, and your previous dealings with the Arishok. These final tips will be of assistance in the most likely outcome (a fight with the Qunari leader and his warriors), but you can find guidance for all eventualities in the roadmap.
- First things first: slay the Saarebas immediately. He usually starts the battle on the upper level, but can teleport around the area at will.
- The Arishok heals his cohorts throughout, so your second objective should be to keep him incapacitated at all times. If this entails step-by-step micromanagement, so be it – left unchecked, he will cause any party member problems. His ability to stab a victim and raise them aloft on his sword makes him an effective “tank-buster”. As your favored meat shield will lose the attention of all enemies that surround them during this process, this can lead to disastrous consequences for your weaker mages. Use any and every ability at your disposal to becalm his fury, no matter how briefly they may hold him.
- Try to keep your party members in one area (preferably elevated) and not far from your tank. You will lose control of this confrontation if you have companions fighting on both the upper and lower levels of this battleground.