
Prima Games eGuides
primagames.com Browse Redeem a code Help
Dragon Age II eGuide
Sign in My Guides

Sign in or create an account

We'll email you a link. No password needed, and if you don't have an account yet, the link makes one.

By creating an account or signing in, you agree to our Terms of Service and Privacy Policy.

Have a password?

Had an account on the old eGuides site, or a code from a printed guide? Help and troubleshooting

Sign in with a password

By signing in, you agree to our Terms of Service and Privacy Policy.

Check your email

A sign-in link is on its way. It works once and expires in 15 minutes. Open it and you're in, with an account if you didn't already have one.

Contents

  • Maps
    • Maps
      • Introduction to Maps
      • Blightlands
      • Hightown (Day)
      • Hightown (Night)
      • Lowtown (Day)
      • Lowtown (Night)
      • Docks (Day)
      • Docks (Night)
      • Gallows Courtyard
      • Darktown
      • The Hanged Man (Day)
      • The Hanged Man (Night)
      • Houses
      • The Blooming Rose
      • Hawke Estate
      • The Chantry
      • Viscount's Keep
      • Merril's Home
      • The Deep Roads
      • Primeval Ruins
      • Ancient Crypt
      • Sundermount
      • The Wounded Coast
      • Sundermount Caverns
      • The Bone Pit
      • Caves and Mines (1)
      • Caves and Mines (2)
      • Dungeons
      • Sewers
      • Lairs
      • Sanctuary & Hideouts
      • Foundries
      • Alleys (1)
      • Alleys (2)
      • Warehouses
      • Caverns (1)
      • Caverns (2)
      • Mansions (1)
      • Mansions (2)
      • Estates
      • Random Encounters
      • Random Encounters 2
      • Random Encounters 3
      • Templar Hall
      • The Black Emporium
      • Gallows Prison
  • Essentials
    • Strategy & Analysis
      • Useful Features
      • The Dialogue System
      • Friendship & Rivalry
      • Attributes
      • Resistances
      • Elements
      • Status Effects
      • Cross-Class Combos
      • Character Roles
      • Party Builds
      • Tactics
      • Combat Strategy
      • Nightmare Difficulty
      • Threat Management
      • Companion Analysis
    • Abilities
      • Introduction to Abilities
      • Warrior Abilities
      • Rogue Abilities
      • Mage abilities
    • Inventory
      • Introduction
      • Equipment Properties
      • Warrior Weapons
      • Mage Weapons
      • Rogue Weapons
      • Mage Armor
      • Warrior Armor
      • Rogue Armor
      • Armor Sets
      • Generated Equipment
      • Unique Accessories
      • Special Items
      • Shops
      • Crafting
    • Bestiary
      • Introduction
      • Ranks
      • Enemy Identification
      • Enemies
    • Extra Help for Act 1
      • Using the World Map
      • Gamlen’s House
      • Act 1 Companions
      • Act 1 Optional Activities
      • Act 1 Merchants
      • Maximizing Damage
      • Essential Purchases
      • Miscellany
      • Achievements & Trophies
      • Ancient Rock Wraith
    • Extra help for Act 2
      • Companion relationships
      • Essential Purchases
      • Miscellany
      • Optional Activites
      • The Arishok
      • Achievements and Trophies
    • Extra help for Act 3
      • Recommended Purchases
      • Optional Activities
      • Achievements & Trophies
      • Orsino
      • Final Battle
    • Unlockables
      • Achievements and Trophies
    • Dragon Age Encyclopedia
      • Introduction
      • Major Groups & Organizations
      • Dragon Age: Origins
      • Dragon Age II
      • Writing as a Cornerstone
  • Walkthrough
    • Prologue
      • Escape from The Blight
      • Creating Hawke
      • XP & Level Up
      • Companions
      • Quests & Miscellany
    • Act One
      • The Deep Roads Expedition
    • Act Two
      • Demands of the Qun
    • Act Three
      • The Last Straw
    • Act One Quests
      • Main Plot Quests
      • Secondary Quests
      • Companion Quests
      • Side Quests
    • Act Two Quests
      • Main plot quests
      • Secondary Quests
      • Companion Quests
      • Side Quests
    • Act Three Quests
      • Main plot quests
      • Secondary Quests
      • Companion Quests
      • Side Quests
    • Miscellaneous Activities
      • Additional Encoutners
  • DLC
    • Quests
      • The Exiled Prince
  • Extras
    • Extras
      • Achievements & Trophies
      • Dragon Age Encyclopedia
      • Races and Religion
      • Major Characters
      • Story Recap

Dragon Age II Guide › Essentials › Strategy & Analysis

Nightmare Difficulty
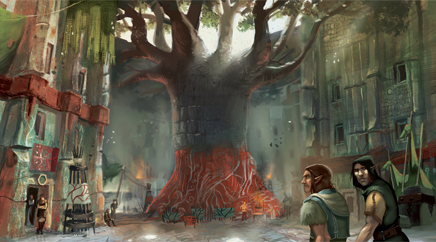
The Nightmare difficulty setting introduces three major differences to combat:
1. Attacks cause friendly fire. This cuts both ways, as not only can you hurt your own companions but enemies can also hurt each other.

2. Enemies now boast elemental immunities. Refer to the Bestiary for details.

3. Enemy toughness is scaled up. They inflict even more damage on you and take more to kill. Assassins have a chance to steal potions from the party and their stealth attacks bypass the victim's armor completely. Commanders are able to direct their troops at party members for a concerted attack.

Playing on Nightmare therefore requires a more careful style of play. The following tips will help you get the right habits:

  • You are your own worst enemy in Nightmare. The friendly fire of your best attacks will wipe out companions who get in the way. AoE spells that only target enemies include Sleep and the electricity attacks of the Primal tree.
  • Micromanagement squeezes the most from your party members, ensuring they work in a coordinated fashion. Pause the game frequently to monitor their status and issue new orders.
  • Cross-class combos are essential for grinding down enemies, which is why it is important that you choose when your companions unleash their talents. The damage multipliers possible against enemies you have deliberately set up with specific status effects make it possible to grind down the toughest enemies.
  • If you have a Spirit Healer with Second Chance, you no longer need to worry about injuries. Otherwise, away from home, use any injury kits to cure as soon as possible: you’ll force the game’s generosity in providing up to the inventory limit of four from loot piles and containers. Such drops come as additional treasures and do not replace money or item loot.
  • Battles remain ongoing while there are still enemies in the vicinity (red dots visible on the minimap). If you can retreat a sufficient distance, you can force the conclusion of the battle and some recovery time, not to mention a save game opportunity.
  • Crafted poisons, potions and bombs are extremely effective combat aids. Imbuing a rogue’s twin blades with slowing effects can turn the tide of a tough battle, and you don’t have to be a mage to swig a Rock Armor Potion for impressive damage resistance.
  • To perform any kind of Area of Effect ability safely, you will need to keep enemies grouped and isolated. The Force Mage specialization sacrifices damage for effects that repel, slow and pull enemies to where they can be hammered and blasted. Warriors can use Scatter to drive back a few enemies at once. Use Hold Position to stop your characters running off into the fray.
  • One-hit kills from enemies can ruin your day. If your mage cannot survive long enough to raise a Barrier or Glyph when an assassin pops into stealth, buy more health with equipment properties and spend some attribute points in Constitution. Note that a character with less than 10% health remaining will bleed out to death unless healed.
  • Crowd control is essential when critters and archers can pose a serious knockdown threat. Enemy damage and force scales with difficulty, and a mage can no longer afford to Mind Blast with allies in the vicinity because of the AoE effect.

Keep reading with a free account

The first 3 sections of Dragon Age II are open to everyone. An account opens the rest of it, and every other guide in the archive. It's free, and there's nothing to buy.

Bought guides on the old Prima Games site? Your account and every guide you own moved here, so there's nothing to buy again. Sign in.

Create a free account Or browse our free guides

PreviousCombat Strategy NextThreat Management