
Dragon Age II Guide Walkthrough Act Two Quests
Main plot quests
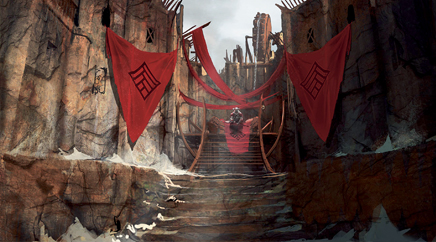
Finding Home
Start Location:
- Hightown
Note: Only activated if Hawke paid Bartrand in full for his part in the Deep Roads Expedition. Unlocks Blackpowder Courtesy and Prime Suspect on completion.
Profit and Loss
Start Location:
- Hightown
Consequences:
- If you accepted Dougal’s loan in the Friends in Low Places quest, he returns here in an attempt to extort additional payment from Hawke. This replaces Finding Home as the opening “quest” of Act 2 and unlocks Blackpowder Courtesy and Prime Suspect on completion.
- If you scoff at Dougal’s attempt at intimidation and send him packing (and you inevitably will), he will later ambush Hawke in a random encounter during your travels through Kirkwall.
Blackpowder Courtesy
Start Location:
- Qunari Compound in the Docks
Note:
Don’t forget to collect the Ship in a Bottle from a chest near the north exit in Smuggler’s Cut. This is a gift for Isabela – see page 86.
Consequences:
- Unlocks the Offered and Lost main plot quest, and the Dissent, Mirror Image, An Update and The Long Road companion quests.
- Certain actions in the Blackpowder Courtesy, Offered and Lost and Following the Qun quests can increase or reduce the Arishok’s respect for Hawke. These actions are flagged throughout this chapter. Gaining a sufficient level of respect has an effect on the climax of Act 2, and will also unlock a reactive side quest in Act 3.
Companion Guidance:
- Both Aveline and Sebastian will disapprove if you choose to kill the hapless Javaris.

Offered and Lost
Requirements:
- Complete Blackpowder Courtesy.
Walkthrough Addendum:
- After speaking with Seneschal Bran, you can make an optional visit to the Arishok to inform him that the Qunari delegates have disappeared. He deeply respects this decision.
- There are a few potential outcomes to the meeting with Orwald the Braggart in The Hanged Man:
- If you have Aveline in your party, you can call on her to resolve the situation without bloodshed (and gain a medium friendship boost).
- Choose to question Orwald yourself, and a fight will start. Having Aveline, Varric or Isabela in your party will reduce the number of opponents you face: their faces are well known at the inn, and so fewer patrons will be foolish enough to join the melee.
- If Isabela is not in your current party and is propping up the bar, she will join the fight as soon as it breaks out.
- If the Forbidden Knowledge side quest is active, an Evil Tome can be found in the south area of the Chantry. Refer to page 88 to learn more about the Tomes before you interact with it.
- You can only fight the Qunari at Ser Varnell’s Refuge if you have been playing as an “aggressive” Hawke (see page 160) and pick the “Here’s your proof” bonus dialogue line. This path influences your future options in Following the Qun.
- In the conversation with Viscount Dumar, select the “Do not hide it. He’ll know” response to gain maximum respect from the Arishok when you return to him. Burning the bodies, however, leads to an optional side quest – see Consequences.
- Collect the Shield of the Knight Herself from the crate in the southeast of the map. This is a gift for Aveline, and will begin the companion quest of the same name.
Consequences:
- Only fighting the Qunari (rather than Ser Varnell) will enable you to side with the fanatics who so revile them later in the Act.
- There are optional follow-up conversations to be had with Petrice and the Arishok if you visit the Chantry or Qunari Compound after the quest ends. The meeting with the Arishok can feature optional reactions based on your earlier decisions.
- If you sided with Varnell, attempting to lie to the Arishok when he asks about the fate of the soldiers he sent to find the delegates will disappoint him. The bald truth, by contrast, will increase his respect for Hawke.
- If you advised the viscount to burn the bodies of the delegates, the Qunari leader will have specific words to say on this subject. Only returning the delegates in a state that does nothing to conceal the tortures they endured (and doing nothing to deny this salient fact) will engender his respect.
- Choosing to burn the bodies before they are sent to the Qunari unlocks a side quest called The Fixer in Act 3.
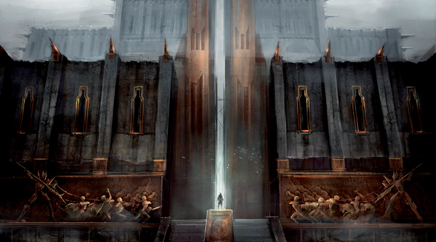
Prime Suspect
Start Location:
Requirements:
- Complete Finding Home/Profit and Loss.
- Accept the letter from the Writing Desk.
Walkthrough Addendum:
- Aveline makes a sizable contribution to the opening conversation with Emeric if included in your party.
- The DuPuis Estate features a collection of plot “clues”, some of which are Codex entries. If Merrill or Anders are present as you explore, they will offer an insight on the Vials of Blood that you find.
- When you meet Gascard, there are two paths you can choose from.
- If you offer to help, he can potentially play a rather significant role in the All That Remains quest.
- If you refuse to believe his explanation, you will be forced to kill him.
- When Moira asks if Gascard is responsible for Emeric’s death, confirming her suspicions will forestall his involvement in All That Remains. Selecting “I don’t think so” is the best choice in terms of story development.
Consequences:
- Unlocks Inside Job, An Update and (with Offered and Lost completed at a prior date) the All That Remains main plot quest.
All That Remains
Requirements:
- Complete Prime Suspect and Offered and Lost.
Walkthrough Addendum:
- You can optionally report Leandra’s disappearance to Moira in the Gallows, though doing so has no lasting effect.
- There are two ways to gain entrance to the Dark Foundry:
- If Gascard is alive, you can find him in Darktown. Tell him to perform the ritual. Perhaps reflecting the gravity of the situation, companions who usually respond badly to blood magic will let this one instance pass without comment or consequence. After the instant transition to the Dark Foundry, Gascard will accompany your party through the area.
- An alternative solution (and the only available path if Gascard was killed during Prime Suspect, or hunted by a vengeful Moira in its aftermath) is to meet Gamlen in Lowtown at night. Speak to the Urchin and either pay or intimidate him to obtain information. Follow the blood trail to the Dark Foundry entrance.
- If Gascard is with you in the Killer’s Lair for the meeting with Quentin, there are three possible outcomes:
- If Varric is in your party, he has a very interesting reaction.
- Without Varric, you can attempt to persuade Gascard to turn away from his current path via a diplomacy option. If successful, he will fight alongside you in the battle with Quentin. Having this blood mage on your side should make the confrontation easier.
- If Gascard feels disinclined to assist Hawke, he will join Quentin for the final battle. In this instance, target him immediately with everything your party has: you do not want him alive when the first Desire Demon spawns.
Consequences:
- Unlocks Following the Qun on completion, and The Captain’s Condolences companion quest.
- Gascard can be found in the south of Darktown if he survived the quest. You can opt to let him go (via a little light retribution from Aveline if present) or exact instant revenge. There is a reward at the start of Act 3 if you spare him.
Following the Qun
Start Location:
Requirements:
- Complete All That Remains.
- Read the letter at the Writing Desk.
Walkthrough Addendum:
- After speaking to the Arishok, you can optionally return to the Viscount’s Keep to update the increasingly despondent Dumar.
- In the Chantry, the events that unfold are determined by your actions in Offered and Lost:
- If you fought Ser Varnell, Petrice’s mob will attack immediately.
- If you sided with Varnell and fought the Qunari, you have the opportunity to side with Petrice. In this eventuality, you will fight Qunari warriors until the Grand Cleric arrives. This is the only path in which Petrice can survive the battle.
- If you sided with Varnell but refuse to support Petrice at this juncture, her Righteous Mob will attack: it’s the same outcome as if Varnell were dead.
- If you are attempting to unlock the related Achievement or Trophy, don’t forget to pick up the “History of the Chantry: Chapter 3” codex item before you leave the Chantry: this is your sole chance to do so. Run straight over to collect it as soon as you arrive in the area. If you cannot pick it up during a lull in the combat (standing right next to it provides this opportunity), load the most recent autosave and try again before the battle ends.
Consequences:
- Unlocks the “optional” To Catch a Thief main plot quest if Isabela was recruited in Act 1. If not, Demands of the Qun will begin.
To Catch a Thief
Requirements:
- You must have recruited Isabela by completing Fools Rush In during Act 1.
- Complete Following the Qun.
Walkthrough Addendum:
- If you choose not to help Isabela first when you arrive at Hawke Estate, she will leave and no longer be available as a companion. The quest will end immediately.
- Collect the Lambswool Insoles armor upgrade for Isabela from the northwest room before you leave the Lost-End Foundry.
Consequences:
- Even if you say all the right things, Isabela will leave the party after you enter the Lost-End Foundry. If she is a favored companion and you still have other quests that you wish to complete, it would obviously make sense to leave this part of the story until later.
Companion Guidance:
- Promising Isabela that you will help her reclaim the relic for her outside the Lost-End Foundry leads to a large friendship boost. Aveline, Merrill and Varric will also approve. If you insist that she return it to the Qunari, the reverse applies.
Demands of the Qun
Requirements:
- Finish To Catch a Thief; if Isabela was not recruited in Act 1, completing Following the Qun will suffice.
Walkthrough Addendum:
- A reminder: entering the Qunari Compound really is the point of no return for Act 2. If you have anything else you wish to attend to, do so beforehand.
- On arrival in Lowtown, the Change Party screen will appear. This is your last opportunity to select your party for the rest of the Act. If you have not sought to gain the Arishok’s respect up to this point, including Fenris in the party is the only way to engineer one of the three possible resolutions.
- You will encounter a party of Grey Wardens while travelling through Lowtown. If you are using an imported save game or preset world background where Alistair remained a Warden in Dragon Age: Origins, he will be the leader of this party; if not, Stroud will greet you. If Hawke’s surviving sibling joined the Grey Wardens at the conclusion of the Deep Roads Expedition, you will also meet them here.
- Rather than going straight for the marked exit in Lowtown, continue south to fight against an army of Looters. The majority of these are pitifully weak, but the Coterie Rogue (an Assassin) that joins partway through the battle is a more noteworthy threat.
- If Bethany joined the Circle, or Carver signed up with the templars, you will cross paths with them in Hightown.
- When you approach the Viscount’s Keep, you have a choice on how to gain entrance:
- If you accept the offer of a distraction, you are transported to the Keep without further conflict.
- If you choose to fight, there is an additional battle with the Qunari warriors assembled in front of the entrance.
- The Arishok’s address to the terrified nobility is where things really become interesting. After the brief aside where you fight the Qunari, there are two possibilities: either Isabela makes a timely return to the fold (which is only possible if you have completed her mid-stage relationship quest: see page 86), or she remains conspicuously absent.
- If Isabela returns, you have two options: defend her, or hand her to the Arishok.
- If you choose to stand by the wayward rogue, you must confront the Arishok – either in a duel, or alongside his Qunari.
- Allowing the Arishok to take Isabela back to his homeland enables you to end this Act without further violence… but at the expense of losing her as a companion.
- If Isabela is not present, or if you opt to defend her, you can resolve the situation in one of two ways.
- If you have gained the Arishok’s respect, select the “On the battlefield” option when he asks how Hawke would resolve the conflict, to begin a one-on-one duel.
- All other dialogue options lead to a more conventional fight against the Arishok and his entourage. However, if Fenris is present, he will put forward a case for a duel. Accept this, and you can battle the Qunari leader alone; refusal leads to the more conventional brawl.
- If you choose the duel, note that this is by far the most difficult conclusion to the Act. Make gradual use of abilities or spells that might incapacitate the Arishok throughout the battle; anything that impedes his mobility is a blessing. Weave around the pillars to avoid his assaults until you are ready to renew your aggression. Another tactic that works well is to wait for him to perform his “rushing” attack (note the distinctive change in stance that foreshadows this), dodge, then attack as he passes. He will periodically heal throughout the confrontation, so be prepared for an extended encounter.
Consequences:
- The manner in which you defeat the Arishok has an effect on the closing cutscene of the Act.
- If Isabela does not return at the eleventh hour, or is taken away by the Qunari, she really is gone for good.
Companion Guidance:
- If you disagree with Aveline’s comment (“That doesn’t excuse murder”) during the opening dialogue with the Arishok, you will experience a rivalry increase with her (and, if present, Sebastian as well).
- Allowing Isabela to be taken by the Arishok will lead to rivalry increases with Aveline, Merrill and Varric. Defending her will, naturally, lead to friendship boosts. Isabela’s reaction to the latter depends on how your relationship has developed: anger for a rivalry, and gratitude in a friendship.
- There is a moderate rivalry increase with Fenris if he intervenes to arrange a duel and you refuse the offer; the opposite applies if you accept.