
Dragon Age II Guide Walkthrough Act One
The Deep Roads Expedition
This chapter covers every unique quest in Dragon Age II, with easy-to-follow advice on what you can accomplish and, over the course of the story, what the consequences of your actions will be. Designed for easy (and, where possible, spoiler-free) reference during your first time through the game, it’s also tailor-made for later playthroughs where you might choose to take an entirely different path
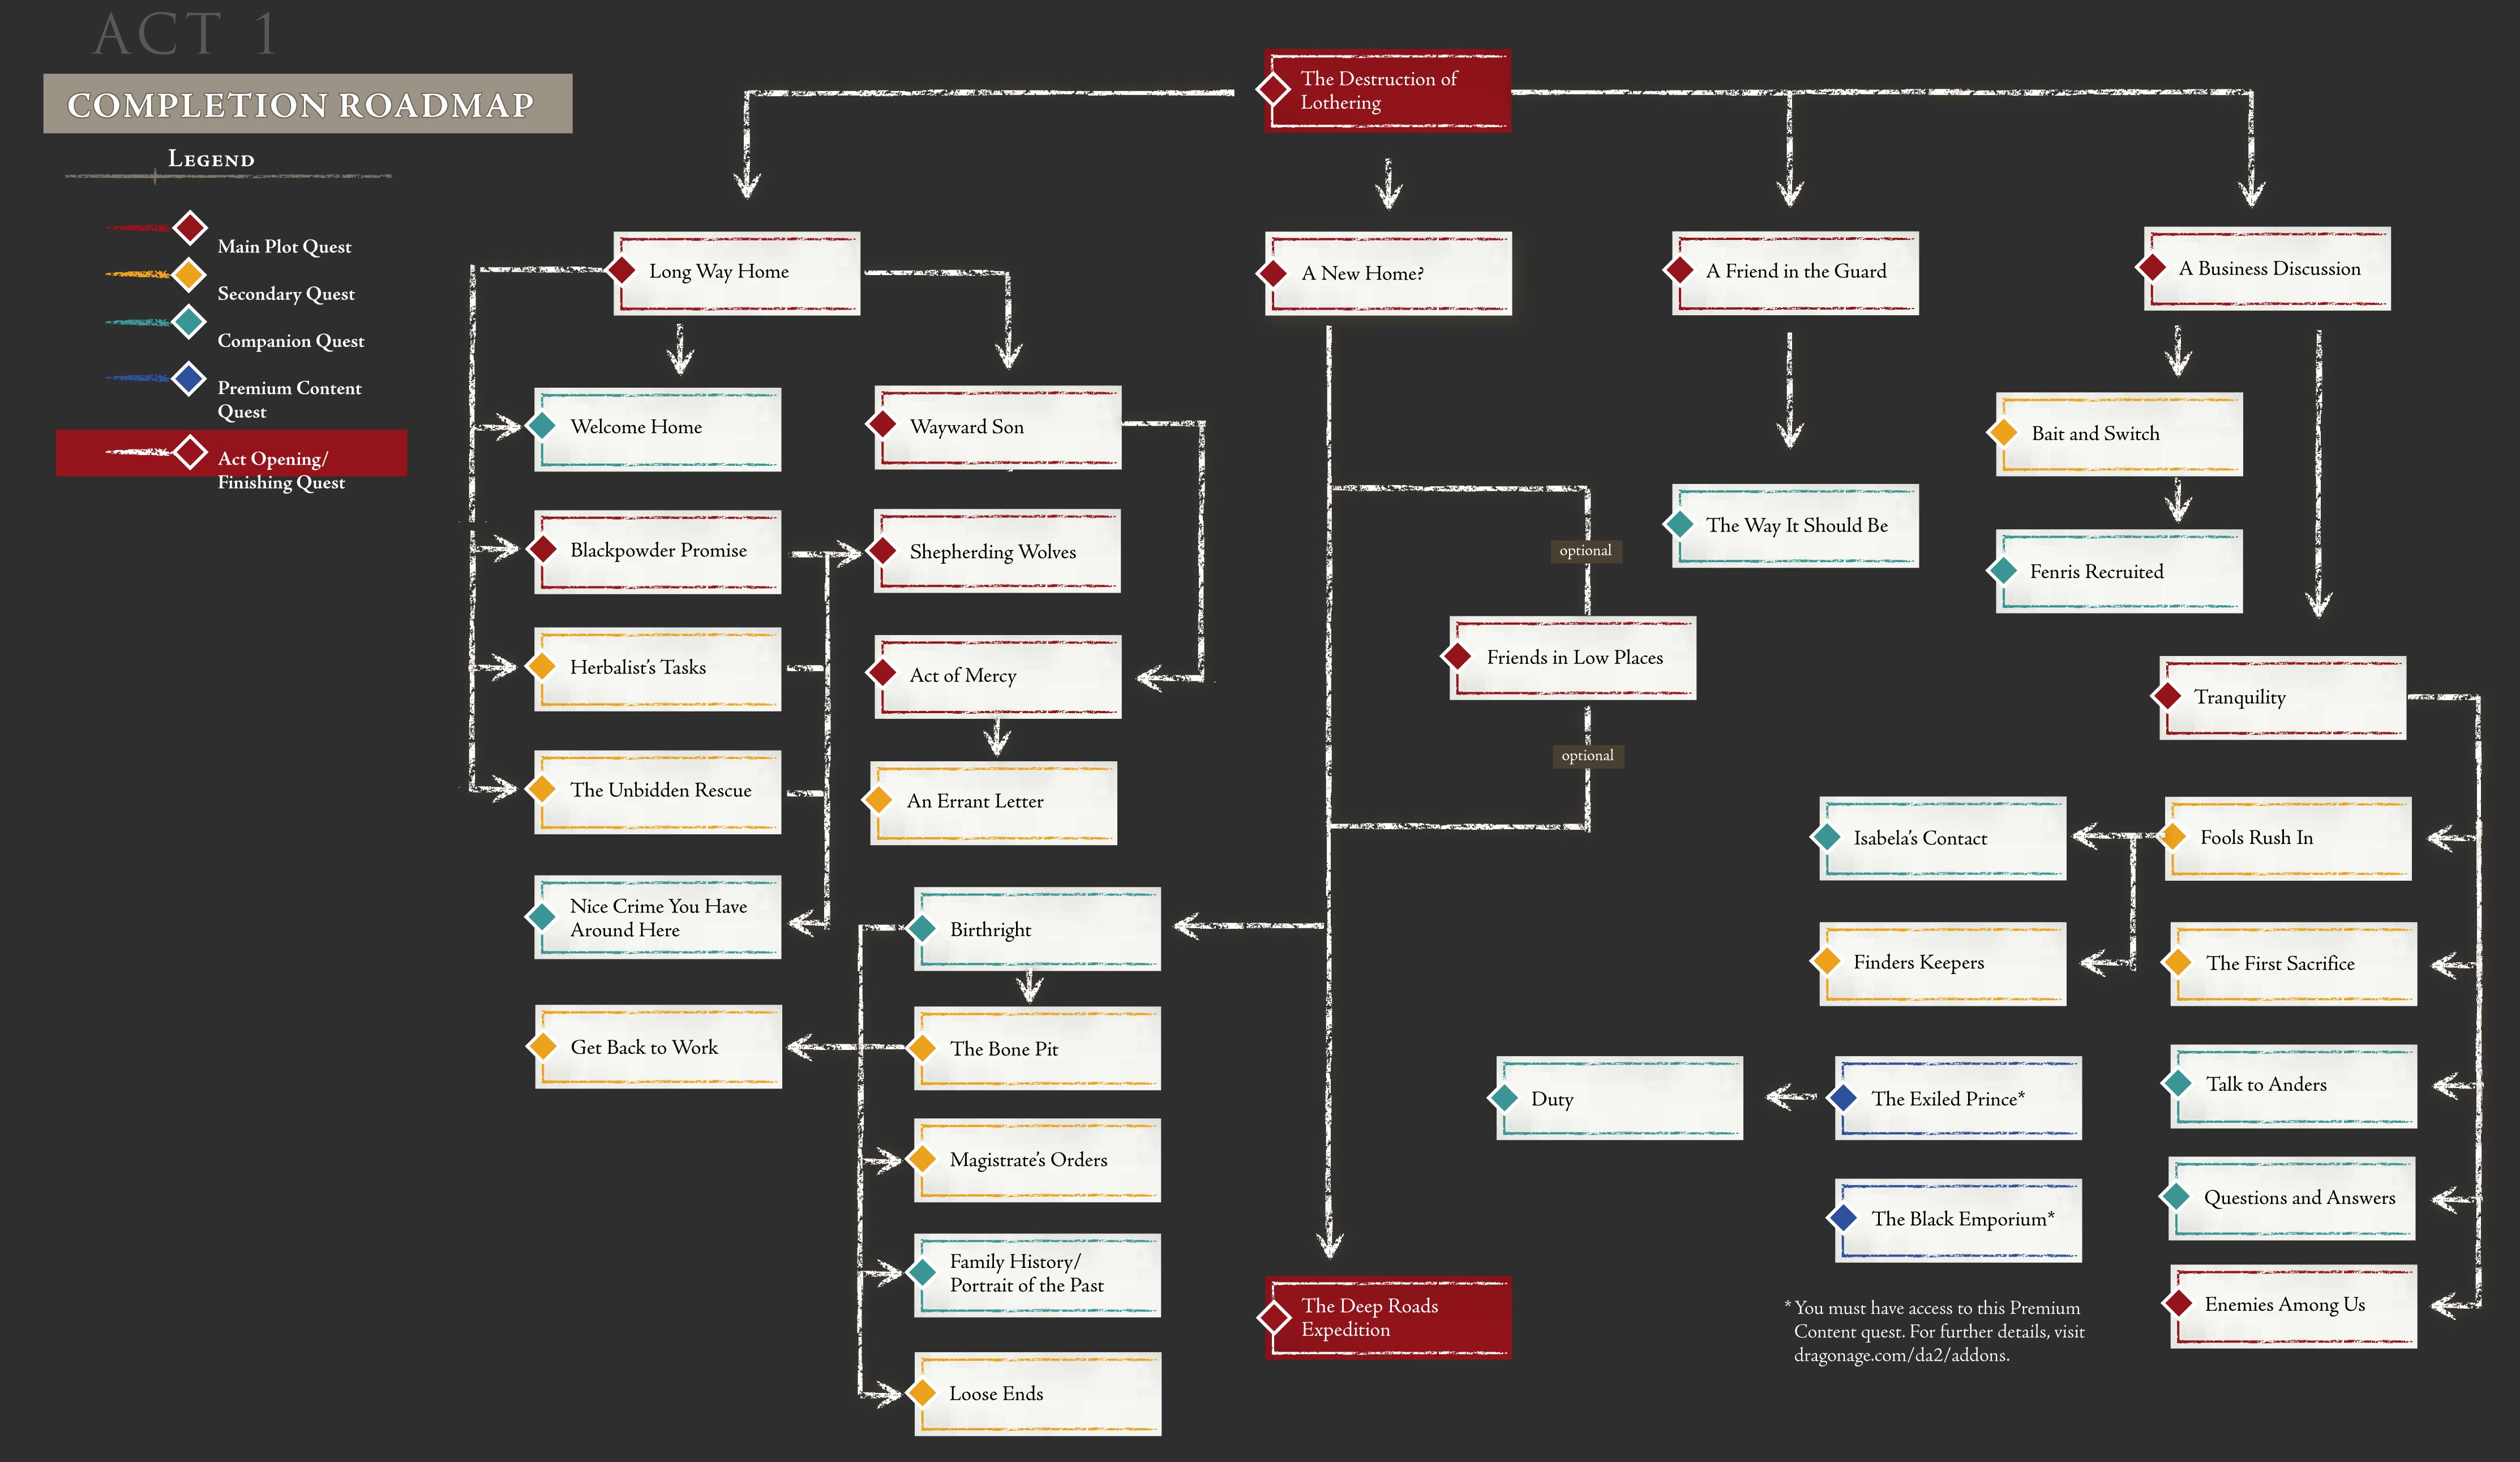
If you do not wish to follow the path set out in the Walkthrough chapter, use this diagram to plan your route through Act 1. This reveals the unlock order for all main plot, secondary and companion quests.
Over the pages that follow we provide fact sheets for all of these ventures, plus guidance for smaller side quests (which usually have their own unique unlock conditions).
1. A Friend in the Guard, A New Home,
A Business Discussion
Though you should feel free to explore Kirkwall, the best way to kick off Act 1 is to complete minor main plot quests to unlock further activities. Bringing Aveline into the fold is a priority: recruiting this steadfast warrior immediately swells your ranks to the maximum party of four. After visiting Gamlen’s House and conversing with Varric in The Hanged Man, you will be ready to start Tranquility, the first main plot quest of note.
2. Tranquility
After conversing with Lirene in her Lowtown shop to learn about Anders, visit the mage and agree to lend your assistance. When you arrive in the Chantry, talk to Karl. In the battle that ensues, focus your energies on defeating Templars and Templar Archers before you direct your party’s aggression towards the more hardy Templar Lieutenant and Templar Hunter. When this confrontation ends, the party is automatically transported to Darktown.
3. Long Way Home
After your meeting with Keeper Marethari, visit the Clan Craftmaster to sell extraneous items, then tell Merrill that you are ready to set off. The Dalish mage acts as a guest party member for the duration of this quest. Though you cannot control her directly, she will contribute to battles as she sees fit. The journey to the Sundermount Passage entrance is punctuated by battles with undead foes; the presence of bodies on the ground is usually a sign of trouble ahead.
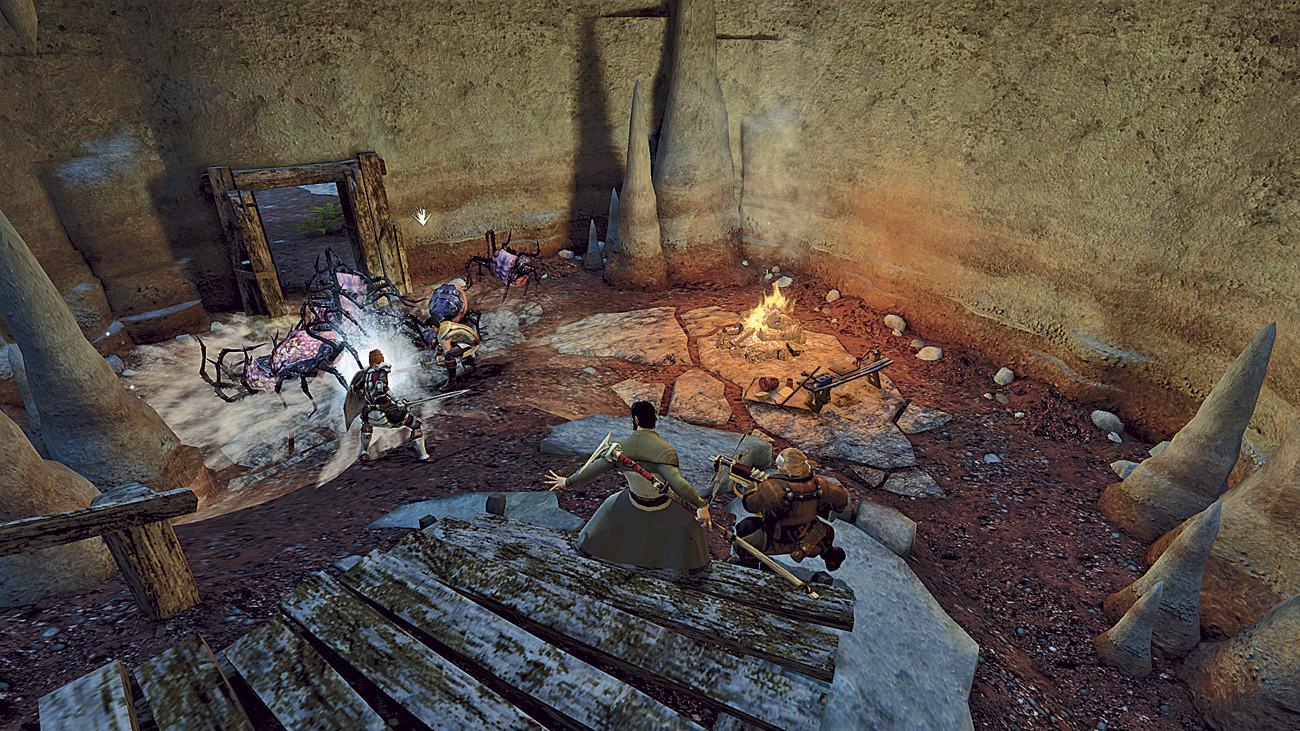
Once in Sundermount Caverns, try to stay close to the entrance when Giant Spiders attack; more enter the fray from the ceiling as the fight progresses. There is a second ambush in close confines (this time featuring Corrupted Spiders) just before the Mountain Graveyard exit. Don’t head up the wooden steps during this battle (Fig. 1): doing so will bring further enemies (including Corpses, Shades and a dangerous Shadow Warrior) into the battle. Tackle these separately afterwards, claim whatever loot you can find, then take the nearby exit.
Approach the barrier to trigger a cutscene; your reaction to Merrill’s magic can lead to rivalry or friendship increments. Once the way forward is clear, a fairly hefty combat encounter will start. Beginning with Skeleton Archers, it will grow to comprise such fiends as an Arcane Horror and a Shadow Warrior. Once again, leave the latter foe until last: its high endurance will enable it to act as a tank while its weaker cohorts inflict great damage. After interacting with the altar (and the resultant conversation), return to the cave entrance. You will be automatically transported first to the Dalish Camp, then to Lowtown for the concluding conversation with your new companion.
4. Wayward Son
This lengthy multi-part quest allows you to resolve situations in different ways, and your decisions will have later repercussions. Our walkthrough here follows the most direct path, but you can consult the Quests chapter to learn about alternative solutions. We recommend that you include Aveline and Varric in your party.
After accepting the quest from Arianni, tell Thrask that you wish to help Feynriel, then have Aveline persuade him to accept your aid. The next lead, Samson, requires no special persuasion to reveal the information you seek. Arthuris’s Private Dock is your next port of call. Switch to Varric and disarm the traps as soon as you enter the main room. Most of the enemies who attack here fall with little encouragement, though the Marine Enforcer is a more demanding adversary; save him until last, then immobilize him by any means at your disposal. The battle with Captain Reiner and the Abomination is much more challenging. AoE attacks work well within the tight confines of the room where it begins, but Reiner is a slippery foe. If you struggle with this fight, try manually directing your party to the main room and draw opponents to your position gradually. Collect Thrask’s Letter from the remains of the Abomination (to start a secondary quest) and the Hideout Location Map from the marked chest, then leave via the area entrance.
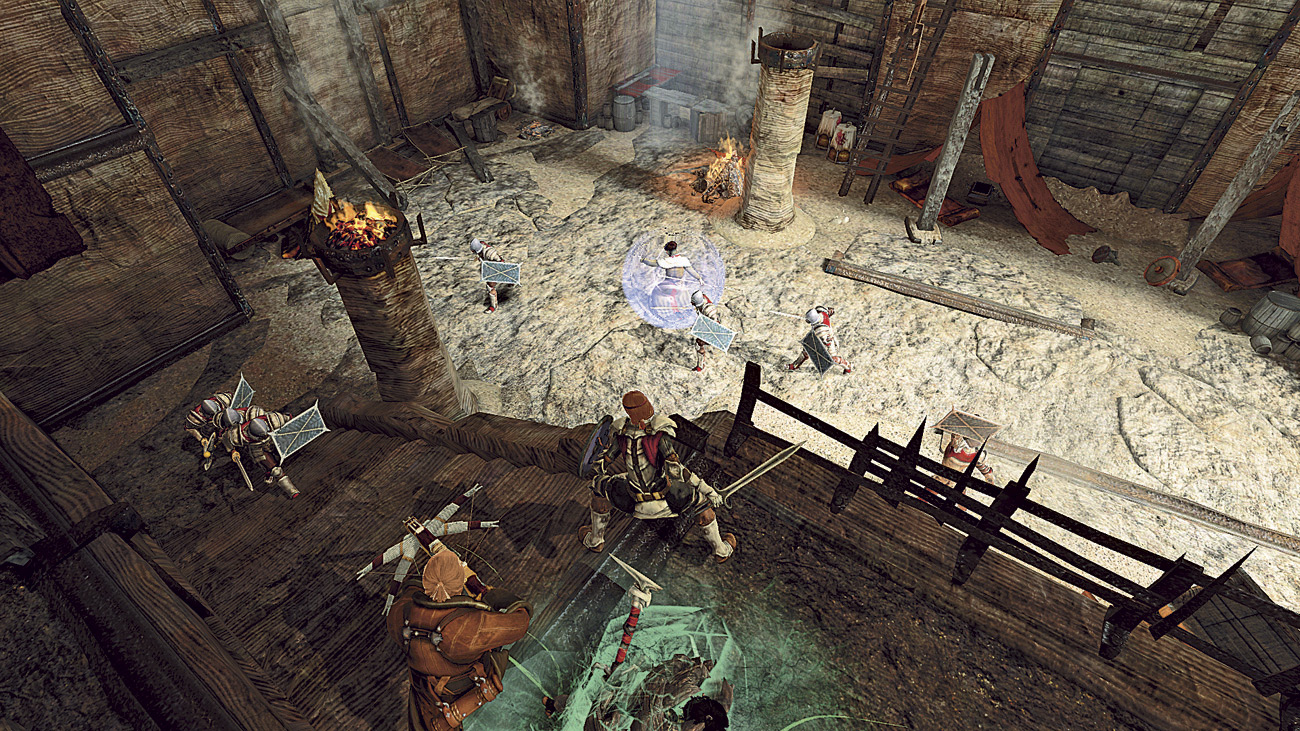
Drop into Darktown and confront Danzig. His initial group of slaver allies can be disabled with a couple of simultaneous AoE attacks, but the reinforcements that arrive are made of sterner stuff. The Slaver Mage is a particular danger. Manually positioning your party at the top of the steps is a tactical approach that works well (Fig. 2). Loot Danzig’s remains for the Map to the Wounded Coast, then set out for that location. You will be waylaid at Dead Man’s Pass during this journey; lend aid to Javaris to begin the Blackpowder Promise quest. Be sure to collect all items on this map (you cannot return here later), then continue on to your original destination. Take the south path to reach the Slaver Caverns. If you encounter a Dalish Assassin on the way there, see Miscellaneous Activities for further details.
Inside the cavern you will encounter a group of slavers – again pay special attention to the Slaver Mage. When you meet Varian, the quickest and easiest solution is to immediately call on Varric to negotiate on your behalf, then resolve the flashpoint peacefully. The final step is to choose whether to send Feynriel to the Circle or (his preference) the Dalish Camp. For the purposes of this walkthrough (and related quests), we suggest you pick the latter resolution. Take the northernmost exit to return to the Wounded Coast. You must relay the news of her son’s whereabouts to Arianni to complete the quest, though you can leave this final task until later if you would rather complete Blackpowder Promise (covered overleaf) while in the vicinity.
5. Blackpowder Promise
At the Wounded Coast, a lone Tal-Vashoth will warn of others of his kind on the path ahead before departing. Fight your way north from this position. The Tal-Vashoth have a moderate resistance to fire and electricity but are extremely susceptible to attacks imbued with cold and nature elements (including staves used by your mages – see Maximizing Damage). Use this knowledge to cut their ambushes short, then enter the cave.
The first battle inside the Tal-Vashoth Cavern is fairly uneventful, but the encounter that follows proves rather more demanding. Try ordering your party to hold at the bottom of the steps, then entice enemies to your position. If you can create a bottleneck centered on Aveline, a mage armed with Cone of Cold (in addition to other AoE attacks) can make a commanding contribution here.
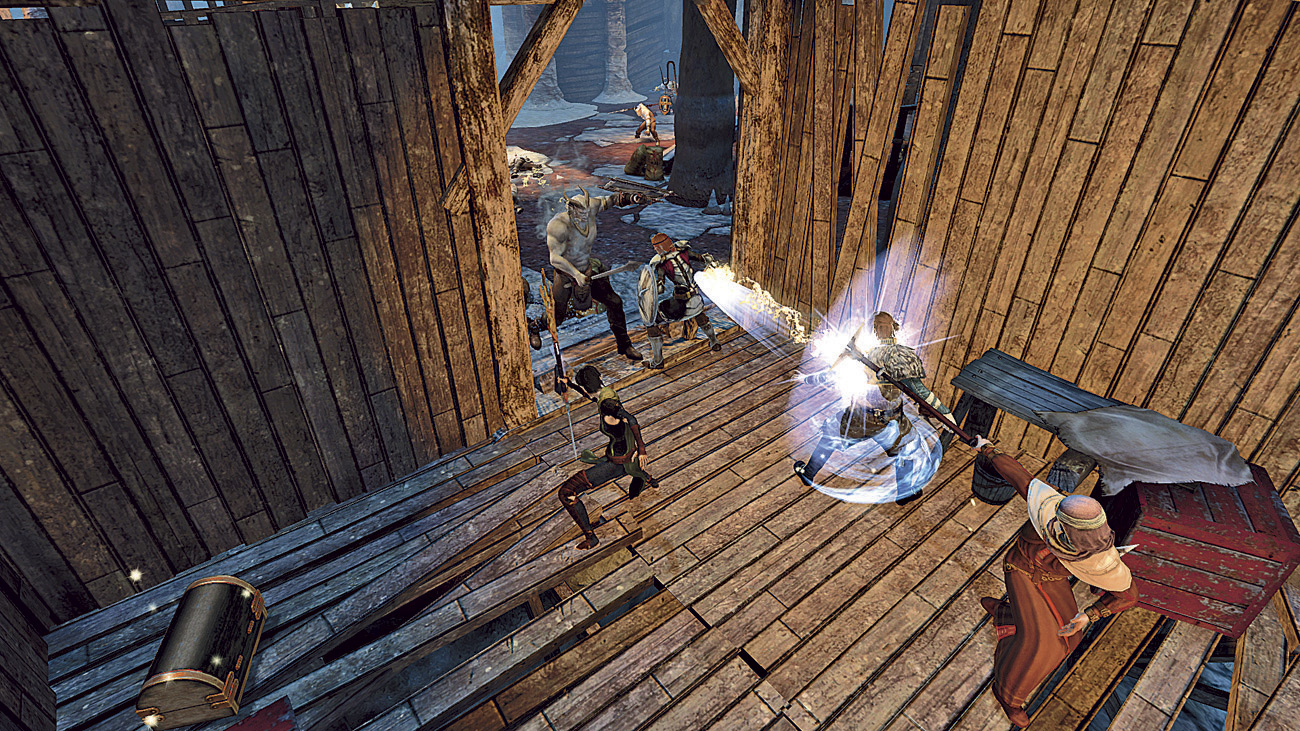
Tactics of a very similar ilk work well for the final confrontation, where the open floor space of the cavern (not to mention waves of reinforcements) puts your party at a distinct disadvantage. It’s advisable, then, to order your party to hold just inside the first wood-lined enclosure (or even the earlier cavern), then draw your opponents to you (Fig. 3). The Tal-Vashoth Leader provides a boost to all his allies while he still breathes (unless briefly incapacitated), so he’s naturally a priority target; a micromanaged assault by all party members can topple him reasonably quickly. Potentially most dangerous of all, though, is the Tal-Vashoth Saarebas (a mage). He can cause enormous problems if ignored (especially if your party is concentrated in a small area), so deal with this foe the instant you set eyes on him.
6. Shepherding Wolves
This quest is entirely straightforward until Sister Petrice makes her offer – just make sure you take a stock of potions to restore health, mana and stamina. The first half of the Undercity Warrens is populated by assorted spiders; note that the poisonous variety can attack from range. The Undercity Thugs fought after the cutscene assail your party in two waves, but both will perish rapidly with a quick succession of Area of Effect attacks.
At the Vimmark Mountain Pass, a confrontation with Arvaarad and his fellows is unavoidable. Due to the additional rewards it brings, we suggest refusing to hand the Tal-Vashoth Saarebas to the Qunari. As a commander (see the
bestiary
) he provides a stat boost to his peers, but focusing on him alone from the start would be ruinous. You first need to reduce the numbers ranged agaitnst you, and fast. Pause the action and direct a succession of big-hitting spells (Walking Bomb could be interesting) and abilities at the pack before they separate. Additional enemies will appear as the battle progresses; at this stage, it’s a good idea to finish off Arvaarad if he’s sufficiently injured. With a little astute micromanagement and timely application of potions, this is a tough but satisfying confrontation. Return to Sister Petrice to bring this episode to a close.
7. Act of Mercy
The Apostate who attacks just inside the Runaways’ Cavern is a blood mage (see
the bestiary
). Ignore other combatants at first and concentrate your party’s ire in his direction. The remaining enemies fought on the path to the waypoint are fairly inconsequential undead opponents.
The confrontation with Decimus includes yet more undead and a handful of Apostates. Deal with the blood mage leader first: his ability to drain health from your party members can annihilate the weaker ones within seconds. Consider using the Move to Point command as the battle begins to position your party on the high ground at the east side of the chamber.
When Grace steps forward at the end of the fight, pledge to help the mages escape, then promise to lie to Thrask. Return to the entrance (there are two further confrontations with undead on the journey back) and leave the cavern. With Varric in your party you can resolve the situation outside without bloodshed, but there’s greater reward to be had by fighting Ser Karras: choose the “I’m a friend of the mages” dialogue option. This battle sees your party assailed from both sides. Manually position your party further along the path (either direction will suffice) to deny your opponents this advantage. Pay attention to the Templar Hunter. As with all assassin-type opponents (see
the bestiary
), he will sneak beyond your front lines and attack your weaker party members.
8. Enemies Among Us
After the short cutscene at Wilmod’s Camp, your party will be attacked by the hideously mutated Wilmod and waves of Abominations. The last opponent to spawn into the fray is a Rage Demon. This dangerous, fast-moving Fade creature belongs to the assassin archetype, and will cause havoc if ignored. Use cold-based spells (and, if available, suitably frosty weapons) to rapidly cool its ardor for murder.
Ensure that your party includes at least one mage before you travel to The Blooming Rose. In the conversation with Idunna, select “You can’t control me” if Hawke is a mage, or otherwise call on Anders, Merrill or Bethany to intervene. Question her, then choose to send her to the templars; you will benefit from this merciful decision later in Act 2 (see
Forbidden Knowledge
).
Inside the Sanctuary, fight the Shades and Abominations from the small set of steps close to the entrance. This reduces their opportunities to flank your party, and forces them into a tight group ripe for AoE devastation. Once again, a Rage Demon will appear late in the fight; use the same strategy as before. The two following battles will almost certainly pass without any cause for concern, but be sure to prepare and save as you near the waypoint.
Tarohne begins the battle at the centre of a pack of blood mages, so this is a good moment to pause and stack up a barrage of AoE attacks before they can separate. An intimidating wave of Abominations will swarm your position, so try to keep your party members concentrated in the east side of the room until these are defeated. You will come under fire from Tarohne and a Desire Demon (see
the bestiary
)– use potions or healing spells as required and leave these two adversaries until last. Speak to Keran, then meet with Cullen in the Gallows and insist that the young templar is fit to continue in his role (choose “Keran’s fine”, or “Keran should keep his status”) to bring about a happy ending.
9. Friends in Low Places
If you cannot possibly raise sufficient funds to pay Bartrand the required 50 sovereigns, this is your only opportunity to begin the Deep Roads Expedition. Accept Dougal’s offer, and he will supply the necessary funds – but at the cost of reduced profits and further repercussions in Act 2. See page 55 for more information.
10. The Deep Roads Expedition
Before you go any further, ensure that you have read the Optional Activities section on the previous page.
It should go without saying that a little advance preparation will make this quest far easier. A good stock of potions and injury kits, for example, will be of obvious benefit, especially on higher difficulty levels or if you do not intend to include a dedicated healer in your party. Weapons that inflict nature or spirit damage will make their users more efficient against the darkspawn you face. Note that Varric is locked into the party for the duration of this quest, but this isn’t a problem: we’d actually recommend a group consisting of three ranged fighters and a single tank.
After delivering the Grey Warden maps and 50 sovereigns to Bartrand, speak to the dwarf again and confirm that you are ready to depart. If you would like to know exactly why (and do not mind spoilers), refer to the Quests chapter (see the Road Map).
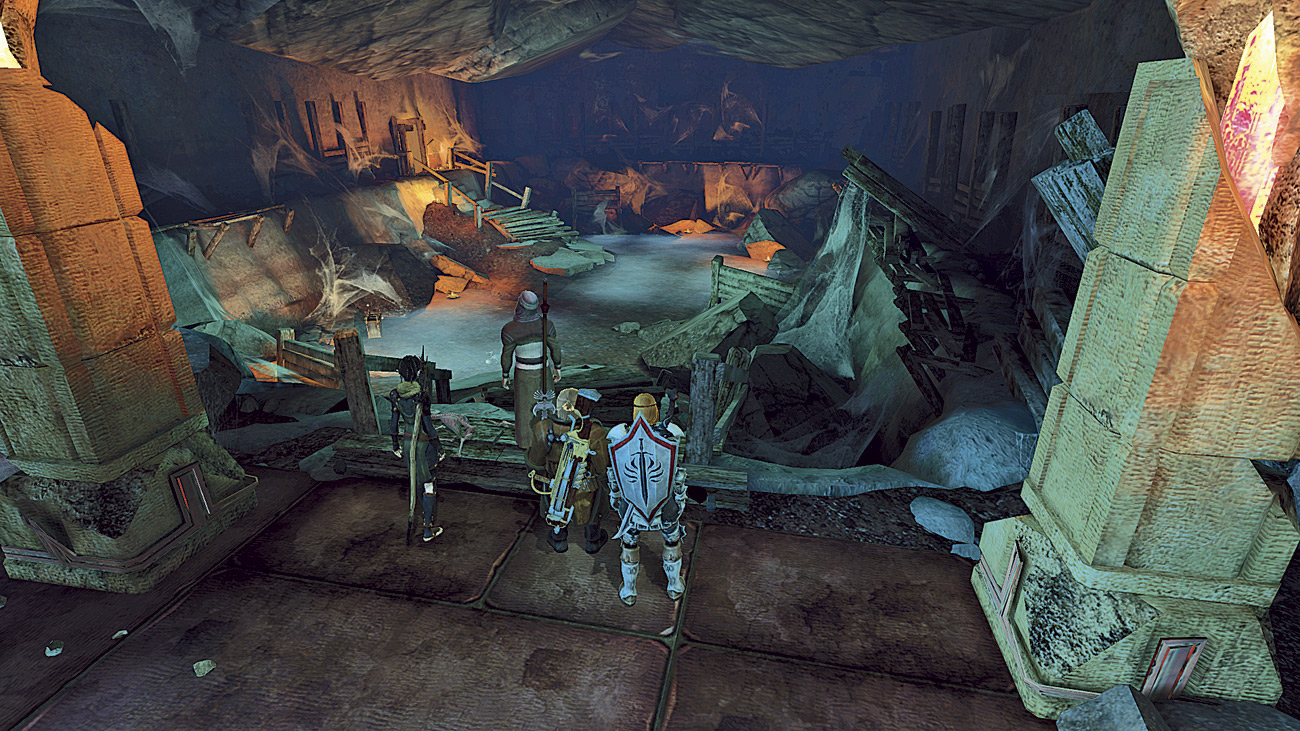
Agree to find Sandal when Bodahn asks, then fight your way through groups of darkspawn until you reach the waypoint. Watch out for Darkspawn Emissaries; they have the capacity to turn a simple encounter into something more fraught if you fail to notice their malignant presence. On the east side of the map, not far from Sandal’s position, you will notice a dead-end to the south (Fig. 5). Though optional, you can fight a huge group of spiders here, followed by an encounter with a Monstrous Spider. Attacks that cause electricity damage will work well, and there’s a good haul of loot to collect by way of recompense.
After you catch up with Sandal, continue north. You will encounter a small collection of darkspawn as you walk alongside the dwarven statues but it’s the larger group that appears behind your party that will cause problems. Be quick to run to the aid of your ranged fighters, or move them manually. The same ambush strategy is employed in the subsequent combat encounter. As you pass through the door to the west, an Ogre attacks: you can use the Move to Point command to help party members avoid its initial charge.
11. The Deep Roads Expedition (continued)
In the far east of the map, your party will face a Dragon supported by waves of Dragonlings. Both are immune to fire attacks; exploit their cold vulnerability to cause maximum harm. Have your tank occupy the larger beast while other party members attack from distance, only breaking to deal with Dragonlings as they appear. Once the confrontation is over, approach the exit to be transported to the Primeval Ruins. You can enchant weapons or armor here, or shop with Bodahn, though he has little to sell. It’s more an opportunity to offload items that you don’t need.
Follow the path leading east to trigger a conversation and, following that, a fight with Shades and a Stone Golem: a foe with high endurance and a resistance to nature damage, but a weakness to cold and electricity. Take the Primeval Thaig exit to reach the Ancient Crypt area. Approach the Lyrium on its pedestal and, once the cinematic ends, head south. The door to the east contains a collection of chests, but is guarded by another Stone Golem and an army of Shades that are replenished at alarmingly frequent intervals. The most effective strategy here is to move everyone back to the northern corridor. Within the confines of the room, there’s really no way to protect your weaker party members.
There are more Shades further south and, at the bottom of the steps, a new opponent: the Profane. These are susceptible to spirit and cold damage and have a moderate resistance to electricity. You’ll encounter two more groups of these enemies as the path turns east. After the second, a Hunger Demon occupying the body of a Profane will intervene. For the best possible return in XP and loot, refuse its offer and fight the ensuing horde of Profane and Shades (and, subsequently, another multitude of the same in the corridor to the east). Stop and prepare your party as you reach the stone steps: a very unique opponent awaits. When the battle ends, loot the chests for treasure and return to Kirkwall.
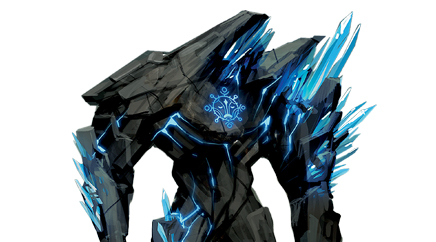
Ancient Rock Wraith
- This opponent possesses a vast array of resistances and immunities, and its health bar will take a long time to whittle away.
- The Ancient Rock Wraith will regularly teleport around the battleground. Pay attention to the position of your weaker cohorts when this occurs, and be ready to move them manually if required.
- Whenever your opponent hovers in the center of the area, seek immediate refuge behind one of the pillars to avoid the ensuing attack. Your party members will dutifully follow. Once the spectacular assault ends, the Ancient Rock Wraith is temporarily disabled and becomes far more susceptible to your attacks, but he is joined by a group of Profane. Micromanage your party for the duration of these moments, dedicating three to pummeling the Rock Wraith, while a fourth attends to the Profane.