
Dragon Age II Guide Walkthrough Act One Quests
Main Plot Quests
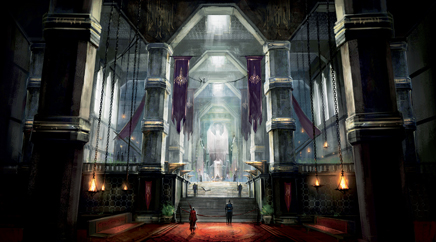
Prologue: The Destruction of Lothering
Start Location:
Note: Though not a part of Act 1, completing The Destruction of Lothering (and, therefore, the Prologue) has a few long-term repercussions.
Consequences:
- If you choose the mage class, Bethany will die in the confrontation with the second Ogre; opt for a rogue or warrior, and Carver will fall instead.
- The decision to work for the smugglers or mercenaries (see page 24) has an impact on the Loose Ends Act 1 secondary quest, in addition to an assortment of comments from people you meet that will acknowledge your choice.
- The most profitable way to end the Prologue is to speak to Meeran first, accept Friedrich’s bribe and fight his hired goons (thus betraying the mercenaries), then complete Athenril’s task with a dialogue selection that leads to a battle with Cavril’s guards. In this instance, Meeran will return in Act 1 seeking revenge.
Companion Guidance:
- For the best possible start to a friendship with Aveline, defer to her judgment when the question of how to end Wesley’s pain is raised. Performing the act of mercy yourself will result in a medium rivalry increase.
A Business Discussion
Start Location:
- The Hanged Man (available from start of Act 1)
Requirements:
- Enter The Hanged Man (ideally during the day) and speak with Varric.
Consequences:
This short conversation unlocks the Tranquility main plot quest – and, if you are amenable, an easy friendship boost with Varric. It also unlocks the Rumor section in the Current Quests page of the Journal. Before you leave The Hanged Man, you may wish to loot the chest in the room south of Varric’s quarters to begin the Shawl of Dalesdottir side quest. This is only available during daylight hours.
A New Home?
Start Location:
- Lowtown (available from start of Act 1)
Requirements:
- Visit Gamlen’s House in Lowtown: the quest is completed as soon as you enter.
Consequences:
- The Birthright companion quest is unlocked on arrival. You can also interact with the Writing Desk to begin the Bait and Switch companion quest and receive a letter from the employer you chose at the conclusion of the Prologue. If you have access to Premium Content, you can attend to The Black Emporium quest here – see page 71 for further details.
Tranquility
Start Location:
- The Hanged Man
Requirements:
- Complete the A Business Discussion main plot quest.
Consequences:
- Completing this quest secures the services of Anders as a companion, fulfills the second key requirement for the Deep Roads Expedition and unlocks other plotlines that you can start elsewhere (including The First Sacrifice, Questions and Answers, Talk to Anders and Enemies Among Us). It’s a relatively short quest, so we would recommend that you deal with it at an early stage in Act 1.
Companion Guidance:
- Sympathize with and encourage Anders after his startling transformation to nurture a burgeoning friendship. It’s worth mentioning that he will deliver the Grey Warden maps (and become a companion) irrespective of how conciliatory or damning your reaction is.
Blackpowder Promise
Start Location:
- Dead Man’s Pass
Requirements:
- Complete Long Way Home.
- Your journey through the Free Marches (usually to Sundermount or the Wounded Coast) will be interrupted by a detour to an area where a dwarven merchant, Javaris, is under attack. The quest begins during the conversation that takes place in the battle’s aftermath.
- The brief visit to the Dead Man’s Pass map (where you meet Javaris) is your only opportunity to collect the Caste Treatise item for the Caste Treatise and House Accounting side quest.
- At the Wounded Coast, a Tal-Vashoth warrior will greet the party as they reach the path leading north to the quest’s waypoint marker. You can gain his assistance in the final battle if you have been playing an “aggressive” version of Hawke by selecting red icon choices for most dialogue opportunities. If this is the case, a bonus conversational option will appear: “You can prove you are better”. Select this to secure his future support.
- After the quest ends, you can converse with the Arishok again to learn more about the Qunari in the city and related topics.
Consequences:
Unlocks the Shepherding Wolves and Nice Crime You Have Around Here quests.
If you persuade the lone Tal-Vashoth to assist your party, he will appear in The Hanged Man during Act 3 under the name of Maraas.
Shepherding Wolves
Start Location:
Requirements:
- Complete Blackpowder Promise.
- Approach Sister Petrice in Lowtown at night.
Walkthrough Addendum:
You encounter a fair number of traps in this quest, so you may wish to take a rogue along to gain XP by disarming them all.
- If you admit that you have a mage in your party when you encounter the Qunari group, Arvaarad and his cohorts will attack immediately.
- Both final decisions lead to combat, but with differing narrative conclusions. Refusing to hand the Saarebas over leads to an extended dialogue with the Qunari mage in the battle’s aftermath, an additional reward, and a side quest in Act 2.
Consequences:
- If you return to speak to the Arishok before the end of Act 1, you can use the unique “I killed some of your qunari” line to access additional dialogue in which you discuss the conclusion of this quest. Boldly admitting this feat of arms will increase the Arishok’s respect for Hawke – a step that will be of benefit later in the story.
Companion Guidance:
- Handing over the Saarebas will meet with disapproval from certain party members (particularly Bethany and Anders) while defending him will lead to friendship increases for all but Varric, Fenris and Isabela.
Enemies Among Us
Start Location:
Requirements:
- Complete the Tranquility main plot quest.
- Speak to Macha in front of the Chanter’s Board.
Walkthrough Addendum:
- Unique dialogue options appear during your conversation with Idunna at The Blooming Rose if there is a mage in the party. These can be employed to resist her blood magic-augmented wiles.
- If Anders or Merrill are in your party, a special dialogue option appears where either one can instantly establish if Keran is possessed or not when you meet him in the Sanctuary. If Carver is present, he has a special reaction to this situation.
- Collect the Grimoire of the Apprentice from a container close to the Sanctuary area exit to start the side quest of the same name. This is your only opportunity to do so.
- When you travel to Cullen at the conclusion of the quest, you can support Keran (either through a standard dialogue choice or a special option if Anders or Merrill declared him clear of possession) or condemn him.
Consequences:
- If Keran is expelled from the Templar Order, the quest A Debt in the Family will be available in Act 2. If he retains his position, How to Frame a Templar is given instead.
- If you spare Idunna, you will receive a letter from her at the start of Act 2. This unlocks Forbidden Knowledge, a side quest that you can also obtain by other means.
Companion Guidance:
- Call on Bethany or Anders to help you during the confrontation with Idunna for a healthy friendship boost with the mage in question.
Wayward Son
Start Location:
Requirements:
- Complete the Long Way Home main plot quest.
-
Speak to Arianni in the Elven Alienage.
- Hawke can actually investigate both leads given by Arianni. Speak to Thrask in the Gallows Courtyard first. You can use a diplomacy option (if possible) to learn the location of Samson or, if Aveline is in your party, call on her to convince the templar that the city guard can be of service in locating Feynriel. If you make enquiries about Vincento while speaking with Thrask, you can learn that he is due to be arrested by the city guard. This opens up an additional dialogue path when (or if) you reach Feynriel’s father.
- Vincento runs a stall in Lowtown’s bazaar. You can try to intimidate him, call on Bethany (if present) to convince him of your good intentions with a display of magic or, as a mage, perform the same feat yourself. If you have previously learned that Vincento is due to be arrested, you can inform him of that fact to discover Samson’s location.
- Collect Thrask’s Letter from the Abomination in Arthuris’s Private Dock to begin the An Errant Letter secondary quest.
- If Fenris is in your party when you confront Danzig in Darktown, you have the option of letting him loose on the slaver for a non-violent solution… unless, that is, you decide to have the elf execute him once you secure the information you need. Sister Plinth’s Remains are located in this area, so be sure to collect them to begin a side quest entitled The Remains of Sister Plinth.
You can resolve the stand-off in the Slaver Caverns in one of four ways:
- If you have Varric in your party you can call on him to fast-talk Varian, who will surrender both prisoner and purse before leaving without further hostilities. This is by far the most profitable resolution, but it comes at the expense of sacrificing potential XP gain.
- Buy Feynriel from Varian: unlikely, but an option nonetheless.
- Fight the slavers: a tough (but not insurmountable) confrontation.
- Rogue characters can also choose an option where they kill Varian with a single knife, removing him from the conflict that ensues.
- You can choose to send Feynriel to the Dalish (his preference) or to the Circle. This has later repercussions.
Consequences:
- This unlocks the Act of Mercy quest.
- If you send Feynriel to the Dalish, speak with the Keeper in her Sundermount camp later in the Act for a reactive event. This also triggers a potential combat encounter (with no Journal entry) at Sundermount at the start of Act 2. If you send Feynriel to the Circle, you can see him in the Gallows Courtyard later in Act 1; you will also be able to obtain the Elves at Large quest from the Chanter’s Board in Act 2.
- Arianni’s reaction at the end of the quest also reflects your decision (she would prefer that her boy be sent to the Circle); it is referenced in the Act 2 quest, Night Terrors.
Companion Guidance:
- Sending Feynriel to the Circle will seriously displease Anders and Bethany, but is met with approval from Fenris and Aveline. Offering to speak to the Dalish Keeper on his behalf, by contrast, will have the opposite effect.
Allowing the boy to choose for himself will lead to friendship increases across the board with the exception of Aveline (low rivalry) and Fenris (moderate rivalry).
Act of Mercy
Start Location:
Requirements:
- Complete Wayward Son.
- Accept the quest via the Writing Desk.
Walkthrough Addendum:
- If you blackmailed Thrask in the An Errant Letter quest, certain aspects of your conversation will reflect this.
- Your dialogue choices when speaking with Grace (after slaying Decimus) play a part in determining how the quest will end.
- If you refuse to help, the apostates will leave the caves voluntarily – but only after Grace threatens to expose any mages in your current party (including Hawke). Certain party members have unique reactions to this. You must fight undead opponents on the return journey to the Wounded Coast Approach. This option potentially enables you to avoid conflict with Karras and his templars outside the cave.
- If you promise to lie to Thrask, the apostates remain in the caves. Again, you fight undead opponents as you travel back to the entrance and may be able to avoid a violent denouement.
- If you pledge assistance and agree to kill Thrask, you will instead fight groups of templars en route to a mandatory confrontation with Karras.
- Once outside, you can make a final decision on the fate of Grace and her companions. Thrask fights alongside the party in all eventualities that result in conflict.
- If you refused to help the mages, Grace will attempt one last appeal to Hawke. Relent, and you must fight Karras and his cohorts; remain resolute, and the mages are led away by the templars to a life in the Circle.
- If you chose to help the mages and agreed to kill Thrask, events will force a battle, and the oblivious templar fighting on your side.
- If you agreed to help Grace by lying to Thrask, players who have predominately selected humorous dialogue options have a “bonus” line to use with Karras: “I’m your best friend”. Varric’s silver tongue can be employed to send the templars away without combat if he is in your party.
- A conclusion where Karras is killed is by far the most profitable outcome in terms of rewards.
Consequences:
- If Karras is killed, a quest entitled The Midnight Meeting will occur in Act 2.
- If the mages are returned to the Circle, you can obtain the Bounty Hunter quest from the Chanter’s Board in Act 2.
- If the mages go free, the Search and Rescue quest can be obtained during Act 2. You may also encounter Grace and her companions in Kirkwall in the Gallows Courtyard during the same Act. This is just a small reactive event – there are no rewards.
Companion Guidance:
- After killing Decimus, pick the “I’m sorry” response while speaking to Grace to win Merrill’s favor.
- If you agree to kill Thrask, you receive a mild friendship boost from Anders, no reaction from Bethany, and rivalry from the rest of your party members, particularly so from Aveline. If you’re keen to get along with your cohorts, the best approach is to pledge to assist the mages but not at the cost of Thrask’s life (low friendship boost or no reaction) or by lying to Thrask (no reaction or friendship boosts with the exception of Fenris).
- If you tell Grace that you intend to turn the mages over to the templars, Bethany, Merrill and Anders will strongly disapprove. Aveline, Carver and Fenris will approve. Outside the cave, ignoring Grace’s final attempt at supplication leads to rivalry increases with Anders and Bethany and friendship boosts for Carver and Fenris; should you have a change of heart, the order is reversed.
Friends in Low Places
Start Location:
Requirements:
- To trigger Friends in Low Places, you need to complete at least 50% of the Act 1 quests and must not have delivered the 50 sovereigns investment to Bartrand to fulfill the Deep Roads Expedition plot requirement.
- The quest begins when you read the letter delivered to the Writing Desk. Travel to Lowtown at night to speak with its author, Dougal, and consider his proposal to fund your party’s involvement in the Deep Roads Expedition in return for a repayment of 100 sovereigns at the start of Act 2.
Consequences:
- If Dougal fronts the money for Bartrand, the Profit and Loss reactive quest will begin at the start of Act 2.
- This quest is primarily designed to address the issue of players amassing a small fortune during Act 1, then opting to spend it all on equipment and consumables. If it becomes effectively impossible for Hawke to pay Bartrand, Dougal’s offer is the only way to advance the plot beyond Act 1.
- Due to the slight reduction in profits from the Deep Roads expedition, you should only accept his offer if you have a burning desire to see the events that transpire (and to obtain the fairly minor resultant XP gain) or if you wish to speed through Act 1 in the shortest possible time.
The Deep Roads Expedition
Start Location:
- Hightown
Requirements:
Complete the following quests:
- A Friend in the Guard, Tranquility, Enemies Among Us, Wayward Son, Long Way Home, Act of Mercy, Blackpowder Promise and Shepherding Wolves.
- Pay Bartrand 50 sovereigns (or, alternatively, accept Dougal’s offer in Friends in Low Places) and deliver the maps acquired from Anders at the end of Tranquility, then agree to depart for the Deep Roads.
Walkthrough Addendum:
- If you attempt to start the expedition and have yet to complete core story quests, party members will comment on outstanding plotlines that must be seen to their conclusion before you can depart. Be sure that you are satisfied with your Act 1 accomplishments before you leave.
- Speak to Bodahn and agree to locate Sandal. You’ll encounter him on the path forward regardless, and the additional XP makes this mildly heroic gesture worthwhile.
- For maximum reward, refuse the Hunger Demon’s proposal. Accepting his offer enables you to skip further battles with the Profane (which might seem an attractive option for a party struggling with the brutality of a Nightmare playthrough) but ultimately results in a reduced haul of both XP and loot.
Consequences:
- If you choose to take Bethany or Carver into the Deep Roads, Hawke’s surviving sibling will suddenly manifest the symptoms of the Blight at the conclusion of the quest.
- If Anders is present, he will suggest that Bethany/Carver join the Grey Wardens. Refuse this (“We’re not doing that.”), and the results will be grave. Agree, and they depart to undertake the Joining ritual.
- If Anders is not in the party, an act of mercy is your sole option.
- If you leave Bethany or Carver behind, you will return home from the Deep Roads to discover that:
- Bethany is poised to join the Circle.
- Carver has resolved to join the templars.
- Irrespective of the outcome, Bethany or Carver permanently leave the party at this stage. If they joined the templars, Circle or Grey Wardens, you will encounter them during pivotal moments during Act 2 and Act 3. From a narrative perspective, taking a sibling into the Deep Roads without Anders at your side is the least attractive option of all. It’s a path best saved, perhaps, until you wish to sate your curiosity in a future playthrough.
Companion Guidance:
- If you bargain with the Hunger Demon, Anders will severely disapprove; Aveline and Fenris will express mild disapproval