
Dragon Age II Guide Walkthrough Act Three Quests
Main plot quests
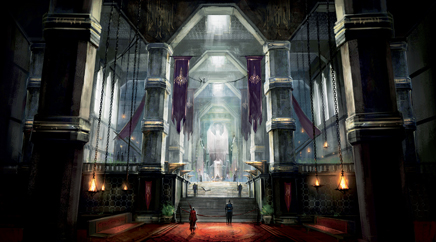
Showdown
Consequences:
- Though it does not appear as a Journal entry, your choices in the opening dialogue of Act 3 have an influence on who will contact Hawke for the Best Served Cold quest (Orsino if you favor the mages, or Meredith if you sympathize with the templars).
- If you pick a strictly neutral path through this conversation, the letter will most likely be sent by Orsino.
On The Loose
Start Location:
Requirements:
- Accept the letter from the Writing Desk.
Walkthrough Addendum:
- If you have started The Lost Swords, you will find one of the ten Qunari blades in the northeast room of the De Launcet Mansion. Even if he’s not a regular travelling partner, it’s worth taking Varric along just to see his brief reaction to the Comtesse.
- When you meet Emile, you can actually let him go free. This counts towards the “Arcane Defender” Achievement and Trophy. The other options are to insist that he returns immediately or to first permit him the night of passion he craves.
- If you chose the option to give money to Walter, it will cost five sovereigns. You can find the Rune of Devastation design in the chest next to the Sewer Passage exit.
- Those who opted to let Emile go free can brazenly admit this to Meredith at the end of the quest for a furious reaction or claim that they killed the misguided mage.
Consequences:
- If you encouraged Emile to return to the Circle, the Comte de Launcet will send gold tokens of his appreciation via a letter at the Writing Desk. Emile will then make a cameo in a later quest.
Companion Guidance:
- If Anders is in your party, he will take umbrage at the knight-commander during the closing conversation. Supporting his argument leads to a moderate friendship increase; telling him to be quiet evokes an equivalent increment in rivalry.
Best Served Cold
Start Location:
Requirements:
- Complete On The Loose.
- Accept the letter from the Writing Desk.
Walkthrough Addendum:
- The quest giver depends on your choices in the Act’s opening set-piece squabble. See Showdown for further information. In all other respects, the actions you perform are identical.
- The Templar Lieutenant you fight in Hightown relinquishes Protection of the Faith, the final armor upgrade for Sebastian.
- After discovering which hostage the conspirators have taken, you can free Keran, threaten to report him, or kill him on the spot. Collect the Blade of Mercy from the nearby chest (a gift for Fenris – see page 104) and the Sigil of the Mage Underground armor upgrade for Anders from the northwest room before you leave.
- The party member who is kidnapped is chosen in the following order of priority:
- If Bethany or Carver survived, they are the conspirators’ primary target.
- If Bethany or Carver died in the Deep Roads, the conspirators will kidnap Anders or Merrill if you are in an active romance with either – but only if they are not in the current party.
- If you are in a romance with Isabela or Fenris, they will be taken if left at home for this quest.
- If none of the above conditions are met, the kidnappers will simply snatch the companion with the highest friendship rating who is not accompanying Hawke when you speak to Keran.
- If you completed the Raiders on the Cliffs quest during Act 2 and the trip to the Wounded Coast is your first of Act 3, an individual named Evets will attack when you arrive.
- All conversations with Thrask lead to the same narrative destination. How you get there is purely a matter of playing the role of Hawke as you see fit.
- Cullen will ask if Hawke has a recommendation for Meredith. “Be merciful” will lead to no further deaths, while “Kill them all” will see the conspirators executed. “Give Samson another chance” will lead to the Fereldan being restored to his position as a templar. If you choose this option, he will appear in a later quest.
The Last Straw
Start Location:
Requirements:
- Complete Best Served Cold.
- Accept the letter from the Writing Desk.
Walkthrough Addendum:
- Be sure to wrap up any outstanding quests before you read the letter as there’s no going back once you arrive at the Gallows. You should also note that any items stashed in the Storage chest at the Hawke Estate can be retrieved at a key stage in this quest. If you are playing on higher difficulty levels, placing extra potions inside may be useful.
- There is a lot of notable loot (including some valuable weapons, armor and accessories) in this quest, so don’t assume that there’s no need to forage for treasures. You may find them useful in future downloadable content, for instance.
- The heated confrontation between Meredith and Orsino in Lowtown places you at a crossroads: no matter which dialogue options you choose, you must commit Hawke to one side or the other. Your decision determines how the next section of the quest will play out and may cause one or more companions to leave Hawke’s side.
- If you side with the mages, Fenris will leave immediately unless you have completed all companion quests and his final-stage relationship conversation, Questioning Beliefs. If Fenris leaves, Aveline will stay no matter what happens. If Fenris stays, Aveline will only depart if her friendship level is below 50%.
- If you side with the templars, Anders will leave the party.
- After choosing a side, you must either ask Anders to come with the party, set him free or execute him on the spot.
- Unless you execute Anders, Sebastian will leave permanently. There is no further negotiation on this issue.
- If you set Anders free, those siding with the mages will have an opportunity to ask him to rejoin later in the quest. Players who favor the templar path will have a very different encounter.
- If you kill Anders, he plays no further part in the story.
- If Bethany or Carver joined the Grey Wardens and you completed the Finding Nathaniel quest during this Act, they will arrive as you make your way east through Lowtown. You can either let the surviving sibling join up or send them away; in the latter instance, they’re gone for good.
- If you side with the templars, you take the same path through Lowtown and the Docks as you would if you sided with the mages, but templars will be your allies, not your foes. This makes the first fight in Lowtown rather easier.
- When you reach the Gallows, there is one last opportunity to persuade companions to stand by you in the final battles.
- Aveline will rejoin if you are on the friendship path, but only if she didn’t resign as captain after the events of Favor and Fault.
- Fenris or Merrill can be swayed to come back if you are on the friendship path.
- After you’ve regrouped with whichever side you are supporting, you have one last chance to speak with Hawke’s friends and rivals before the last part of the quest. If you are in a romance, this is the opportunity to “complete” it by speaking to them (and, if all conditions have been met, unlock the “Romantic” Achievement or Trophy). If Anders was set free earlier, he appears in the Gallows Prison and can be invited to rejoin the party. If Bethany survived the Prologue and joined the Circle, she will also be in attendance (in a pro-templar playthrough, you can then have her killed by Meredith in a special scene after the battle against Orsino).
- There is a special dialogue option available if you side with the templars and Aveline remains captain of the guard after Favor and Fault. Speak to her in the Gallows Courtyard after Meredith has addressed those assembled and select “The guards must fight with us”. This will lead to additional help from allies in battles ahead.
- Mage sympathizers must battle from the Gallows Dungeon to reach the Gallows Courtyard, as detailed in the Walkthrough chapter. If you side with the templars, you must instead fight through the Templar Hall to reach the Gallows Dungeon, where Orsino awaits.
- The first area of the Gallows Dungeon is lined with Circle Mages who snipe at your party from raised vantage points as you fight numerous Fade creatures. Unless you reduce the number of mages quickly, this becomes one of the most difficult battles in the game – far harder than the equivalent confrontation if you sided with Orsino.
- The first area of the Gallows Dungeon is lined with Circle Mages who snipe at your party from raised vantage points as you fight numerous Fade creatures. Unless you reduce the number of mages quickly, this becomes one of the most difficult battles in the game – far harder than the equivalent confrontation if you sided with Orsino.
- After the confrontation ends, you can choose to kill or spare certain mages. Even on a pro-Meredith playthrough, it’s worth allowing these to live just to see the look in her eyes…
- There are more Circle Mages, Blood mages and Fade denizens in the east room, though the confined area makes this an easier fight.
- No matter which side you pick, the Templar Hall has a selection of optional battles. The two small rooms on the east side of the map both contain enemies to fight; the one to the north is a trap. To escape, have a rogue pick the lock on the door or defeat the Rage Demon. The area on the west of the map has two discretionary battles, including one where you face two Pride Demons simultaneously. You can collect some very fine rewards in these areas.
- You can also be confronted by Fenris, Aveline, Merrill or Anders at the Templar Hall if they left the party earlier. Though Aveline will leave, unwilling to draw her blade in anger, the others will attack.
- On a templar playthrough, Orsino is a more demanding foe. Unlike a mage playthrough, you have fewer allies to keep him occupied, so you’ll need to micromanage your party and keep them in good working order. Also pay more attention to the Corpses that appear: they’re more than a mere nuisance here, and dispatching them swiftly is essential. Perhaps acknowledging the greater challenge that this fight poses, you can shop with Sandal before you return to the Gallows.
- You can have up to eight allies active in the final battle against Meredith:
- Hawke and the three members of the active party, plus Cullen: a mandatory fixture.
- Dog counts towards the total, so you might wish to send him away in order to see other cameos.
- As Meredith’s health falls throughout the battle, additional companions can join the fray. In order of priority, these are Bethany, Carver, Varric, Anders, Aveline, Fenris, Isabela and Sebastian.
- Finally, there are three additional cameos that can occur if you have completed specific quests: Donnic (if you completed The Long Road and have Aveline in the party), Zevran (A Murder of Crows) and Nathaniel (Finding Nathaniel).
Consequences:
- After the final credits, Dragon Age II creates a “Post-Campaign” autosave. If you have just completed an optimal playthrough, it may be a good idea to load this and save a manual backup in anticipation of future downloadable content adventures.