
Dead Space 2 Guide Essentials Cast of Characters
The Necromorphs
The Necromorphs
As Isaac, you will encounter many of the Necromorphs you fought against on the Ishimura. Necromorphs reproduce by reanimating and transforming dead flesh. They act like a virus as they mutate dead bodies into different types of Necromorphs, which in turn will kill living beings in order to create more corpses so they can continue to multiply. Each Necromorph has its own type of attacks and unique vulnerabilities. In order to survive, you must know how best to defeat each of these terrors.
Infector
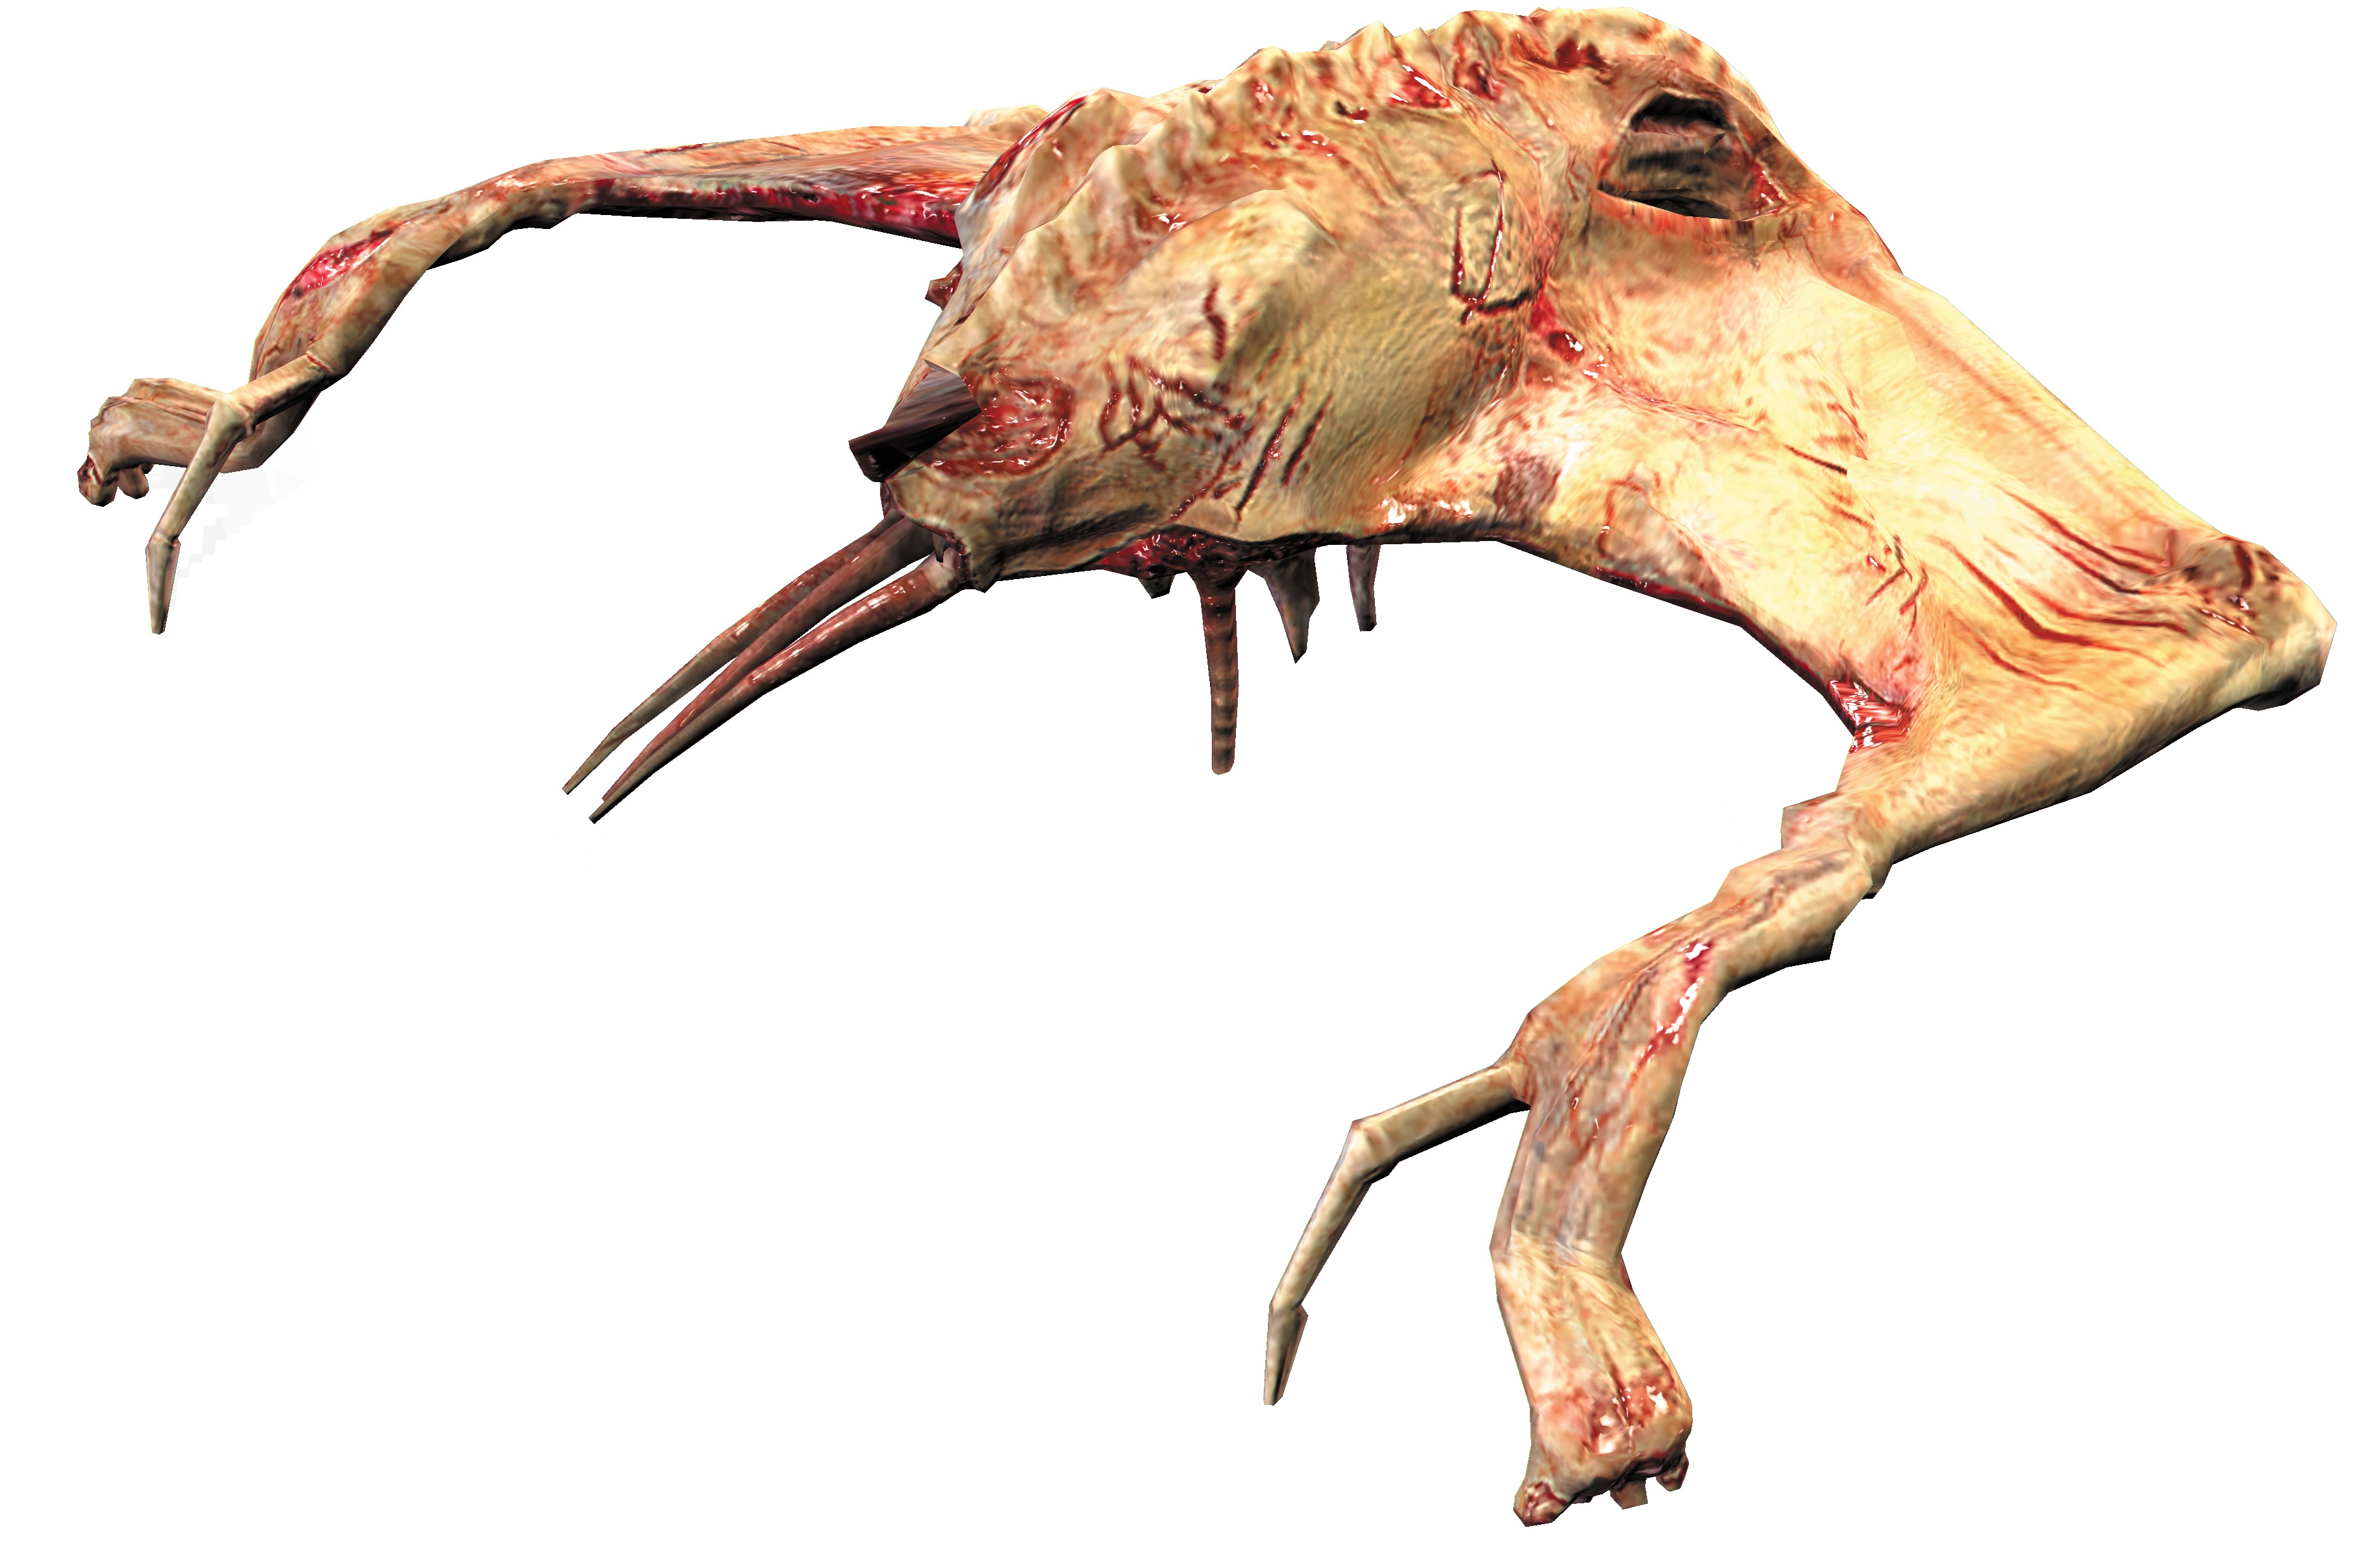
The main purpose of these winged Necromorphs is to create new Necromorphs by infecting dead bodies. Therefore, whenever you see them, take them out as quickly as possible. The sooner you get rid of Infectors, the fewer Necromorphs you will have to deal with. Infectors use their wings to float around the area and to hold on to bodies as they infect them. They can take a lot of damage, so wait for these to grab a corpse and then shoot off the proboscis (which they use to infect corpses) to kill them. Infectors usually won't attack you until they have infected all of the corpses in an area.
Slasher
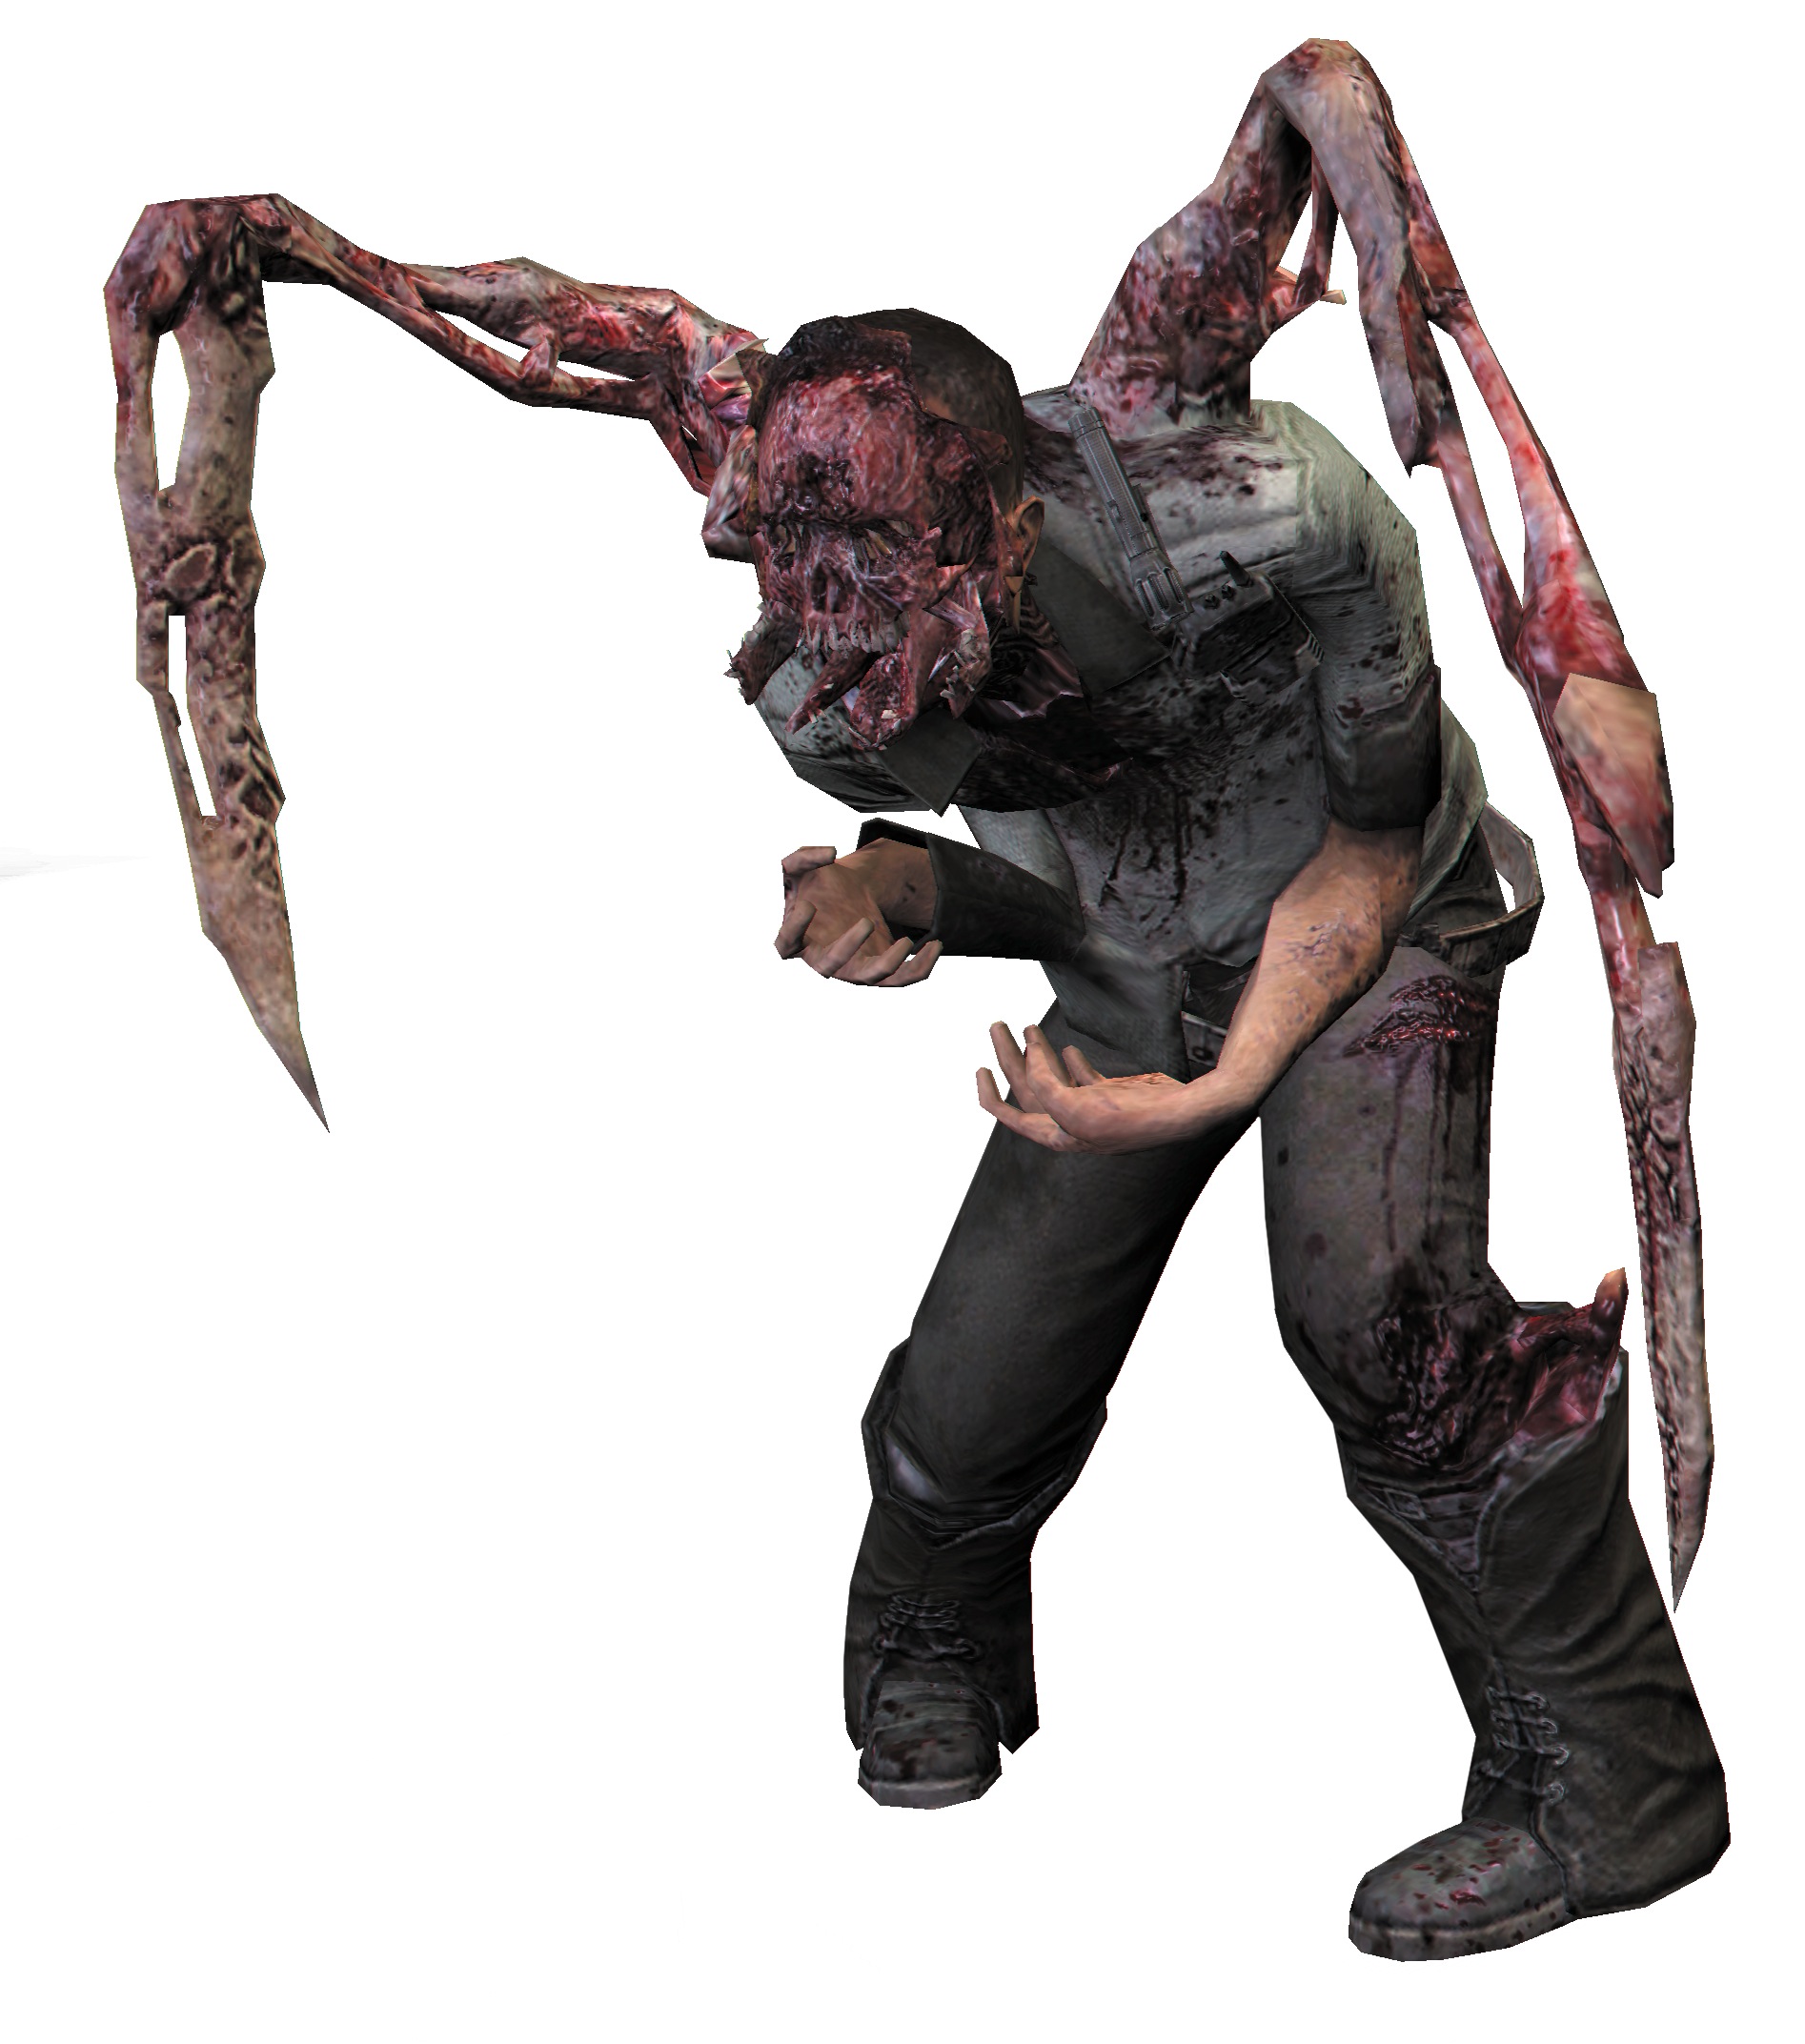
Slashers are one of the first Necromorphs you encounter, and you will face them throughout the Sprawl. They have long, scythelike arms that are razor-sharp and can easily cut through flesh. Once you have the kinesis module, you can kill Slashers by using kinesis to pick up metal rods and then launch them at the Necromorphs. A rod right through the body will do the job. Once you get the plasma cutter, you can dismember them piece by piece. Use the horizontal beam to shoot off both legs. Then sever the arms with vertical beams. This will usually kill the Slasher. However, if it survives dismemberment, stomp on it with your foot to finish the job.
Super Slasher
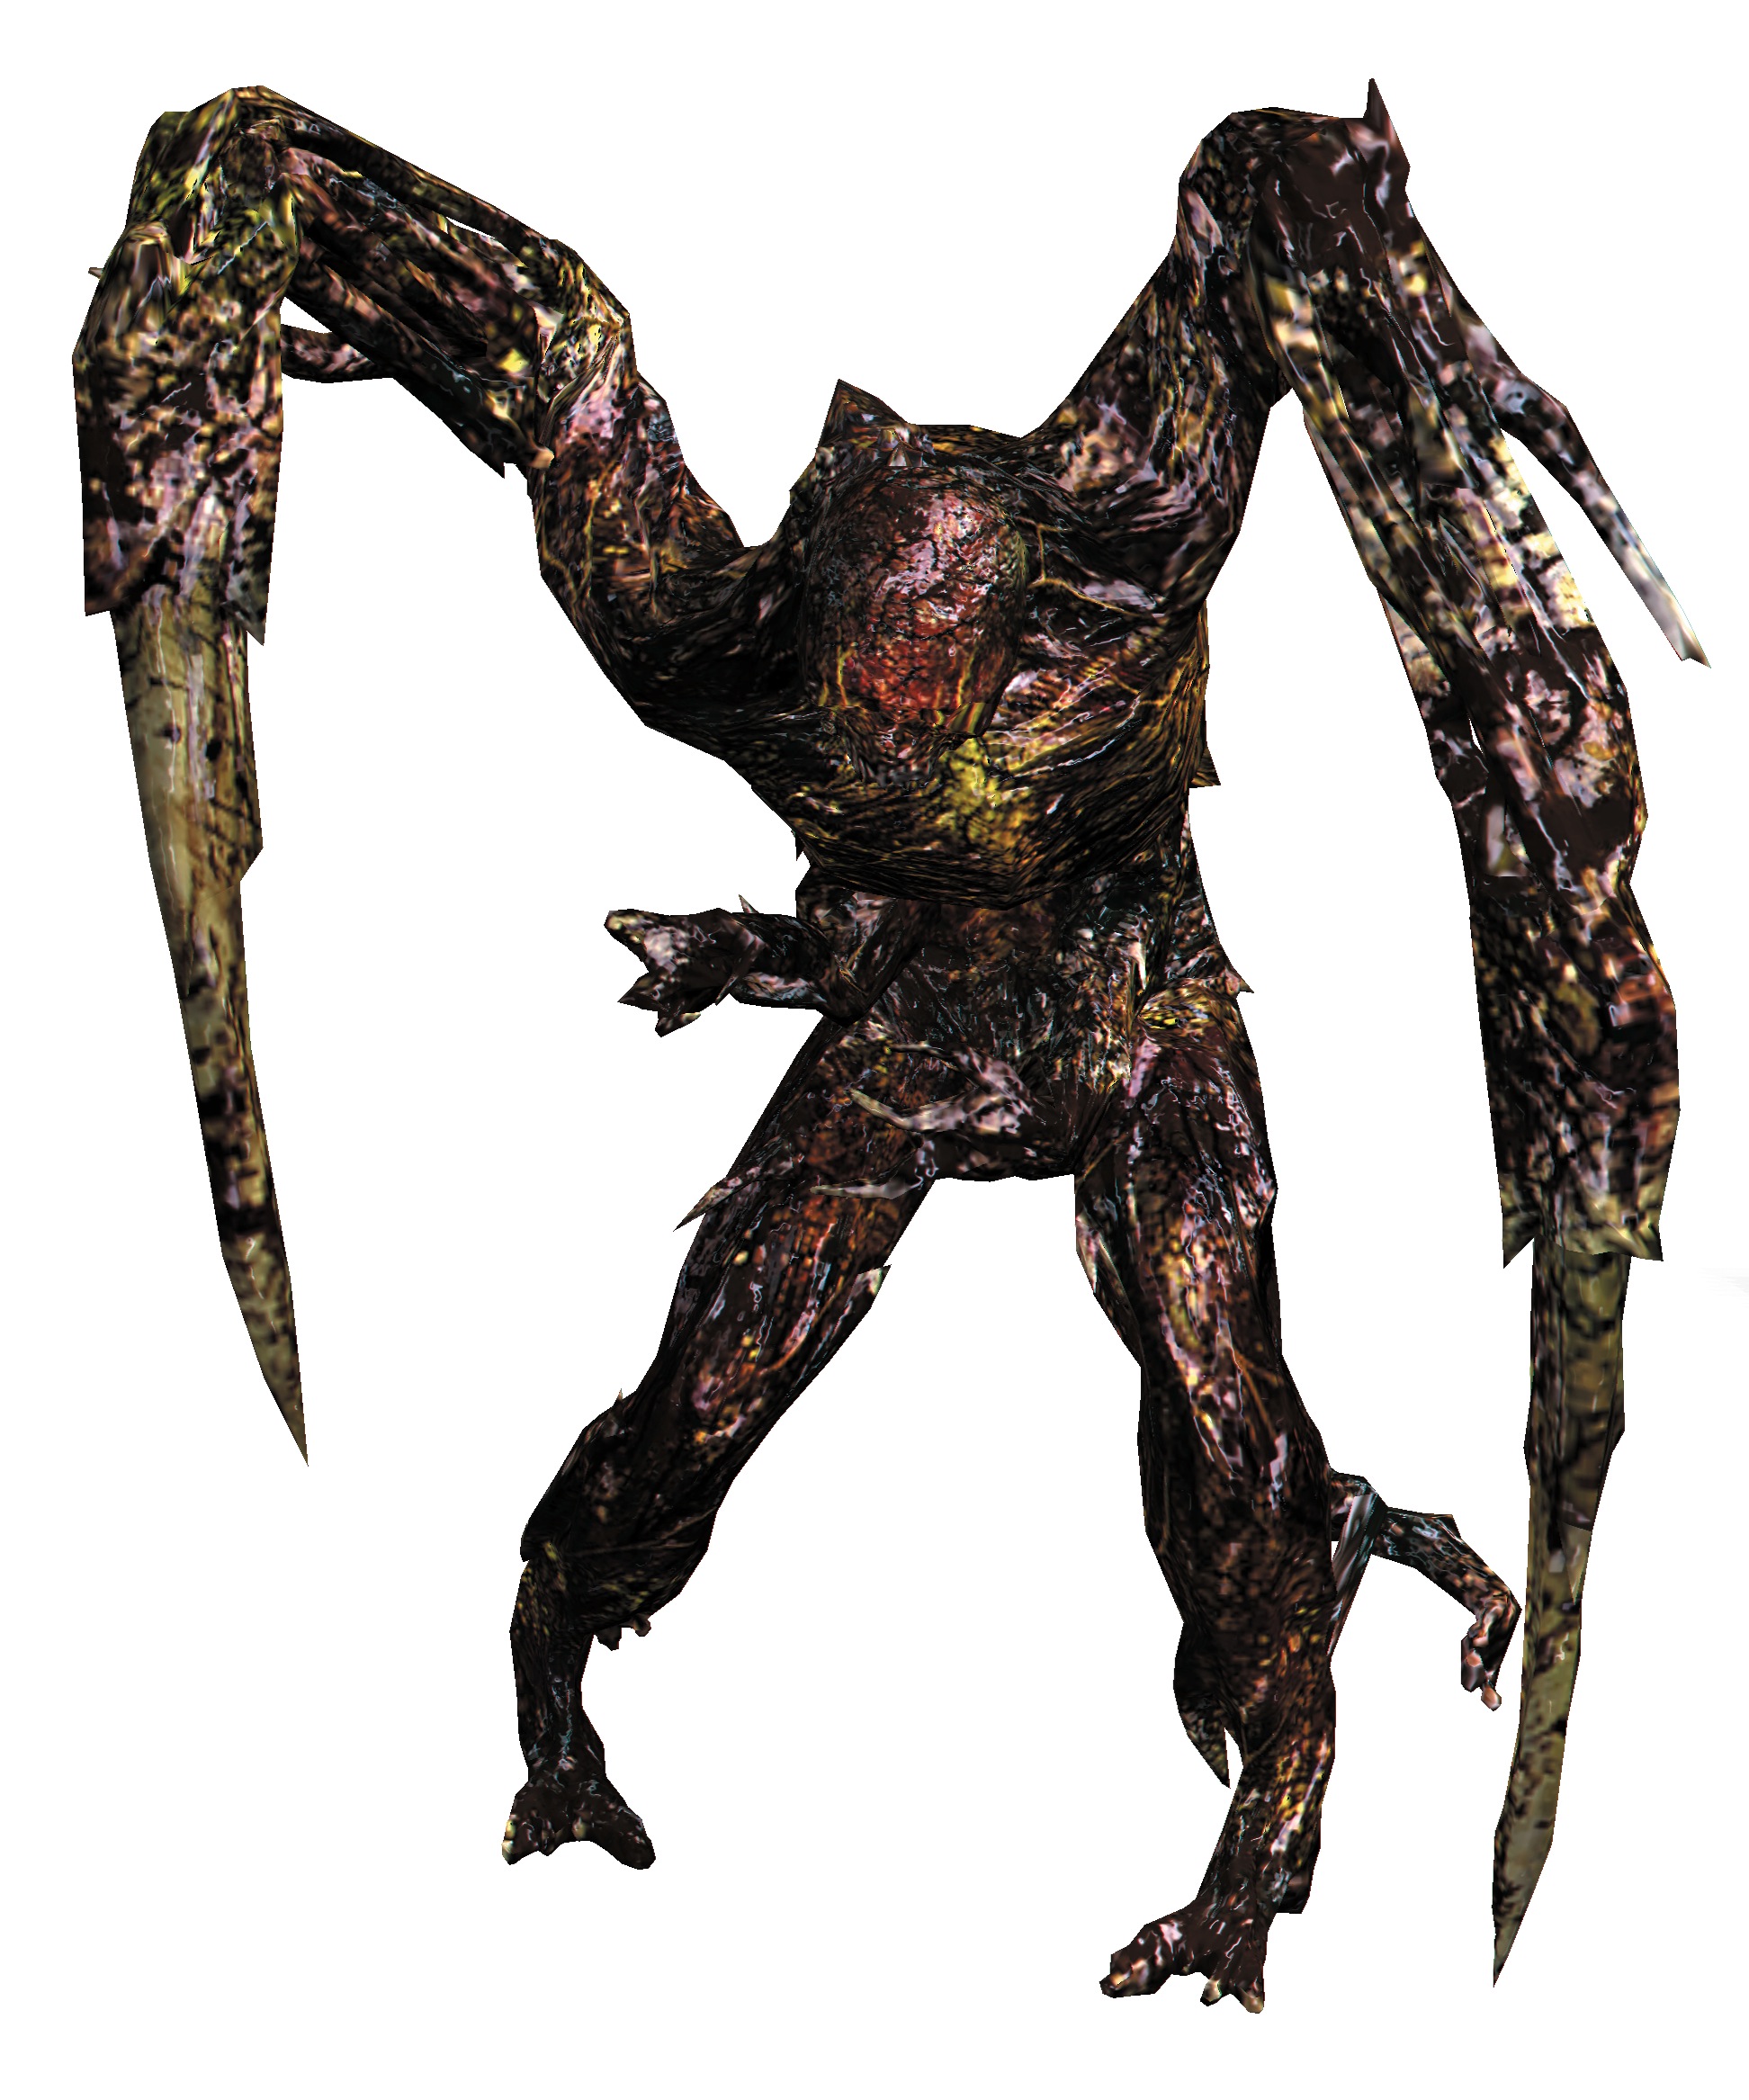
Later in the game you will come across Super Slashers. These Necromorphs no longer have any human skin or features and are instead covered in a dark, crusty, armorlike skin. These are much tougher to kill, since it takes several shots to blow off a limb. Use a powerful weapon such as the contact beam to kill these with a single shot or hit them with stasis and then quickly dismember them. The ripper is another good option when these Super Slashers get in close to you.
Leaper
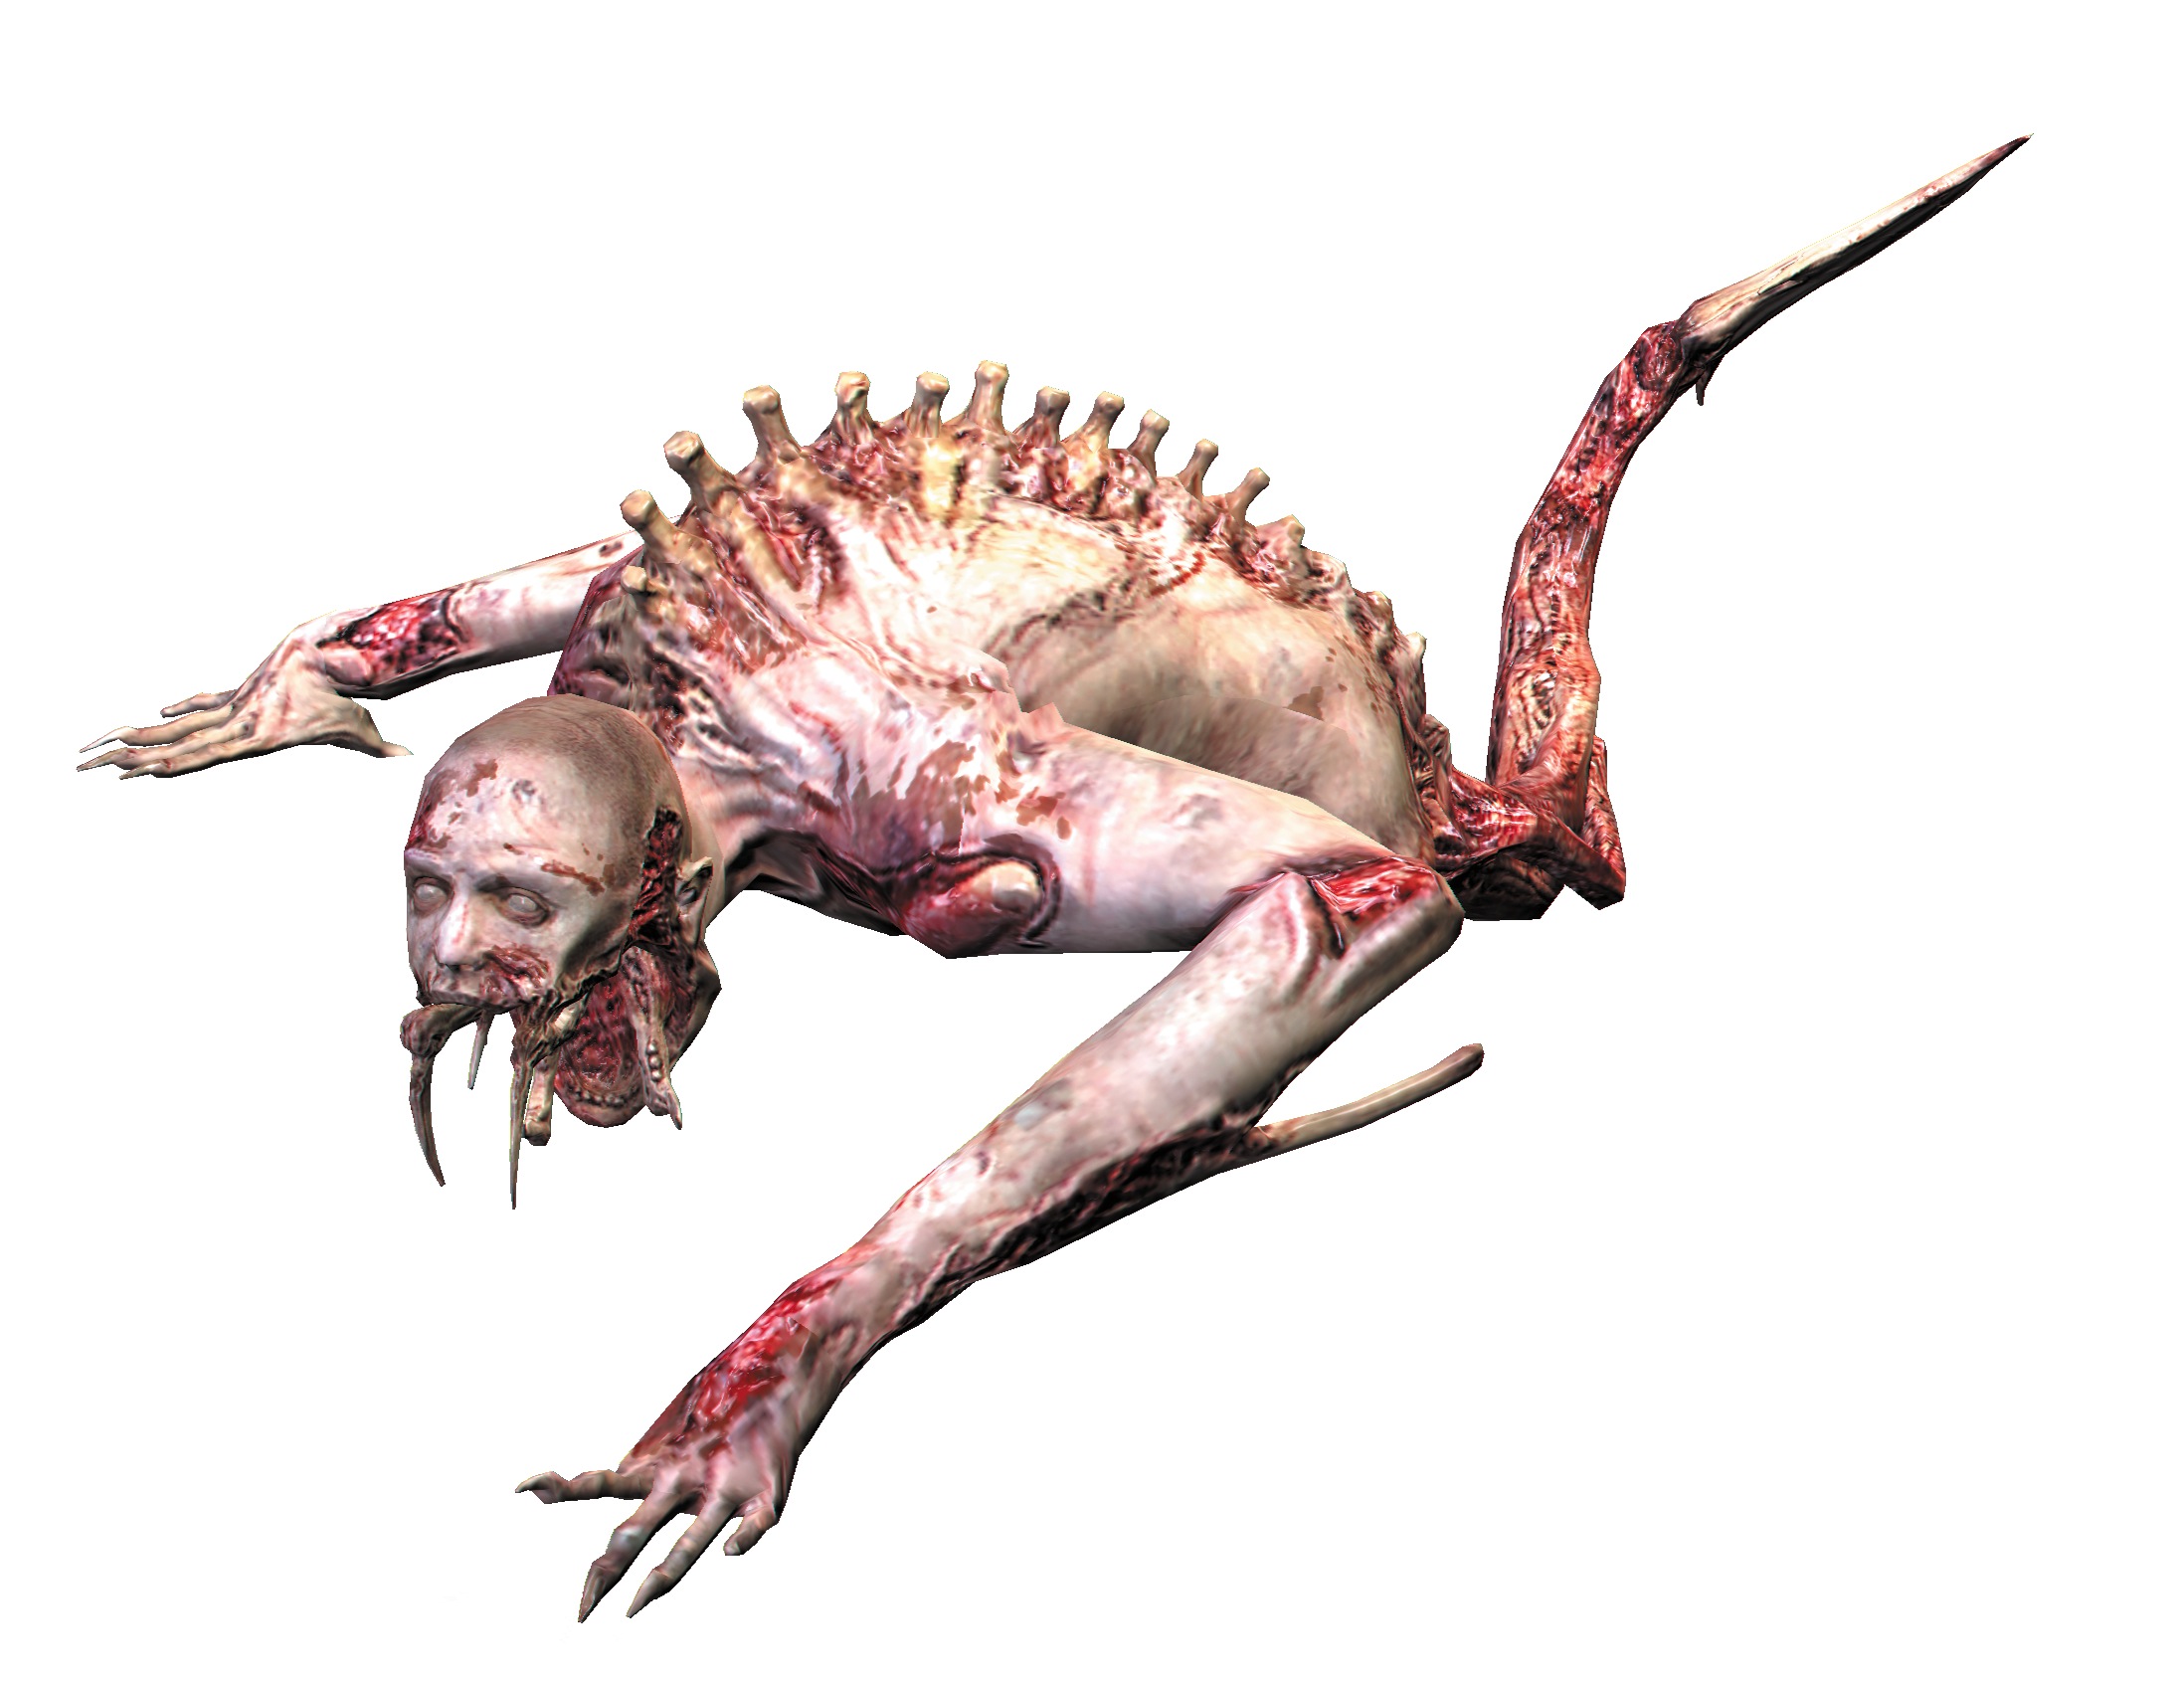
This Necromorph has no legs; instead, it has a long, slender body that ends in a tail with a stinger. Leapers can crawl up walls and move across ceilings with great speed before they leap toward you to attack. When not jumping, they use their arms to crawl along the ground. They can be tough to hit with your weapons, so slow them down with stasis and then shoot off their arms. Super Leapers have more bluish gray skin than regular Leapers. They are also tougher to eliminate. Use the ripper to kill them if they get in close. Otherwise, dispose of them at a distance.
Cyst
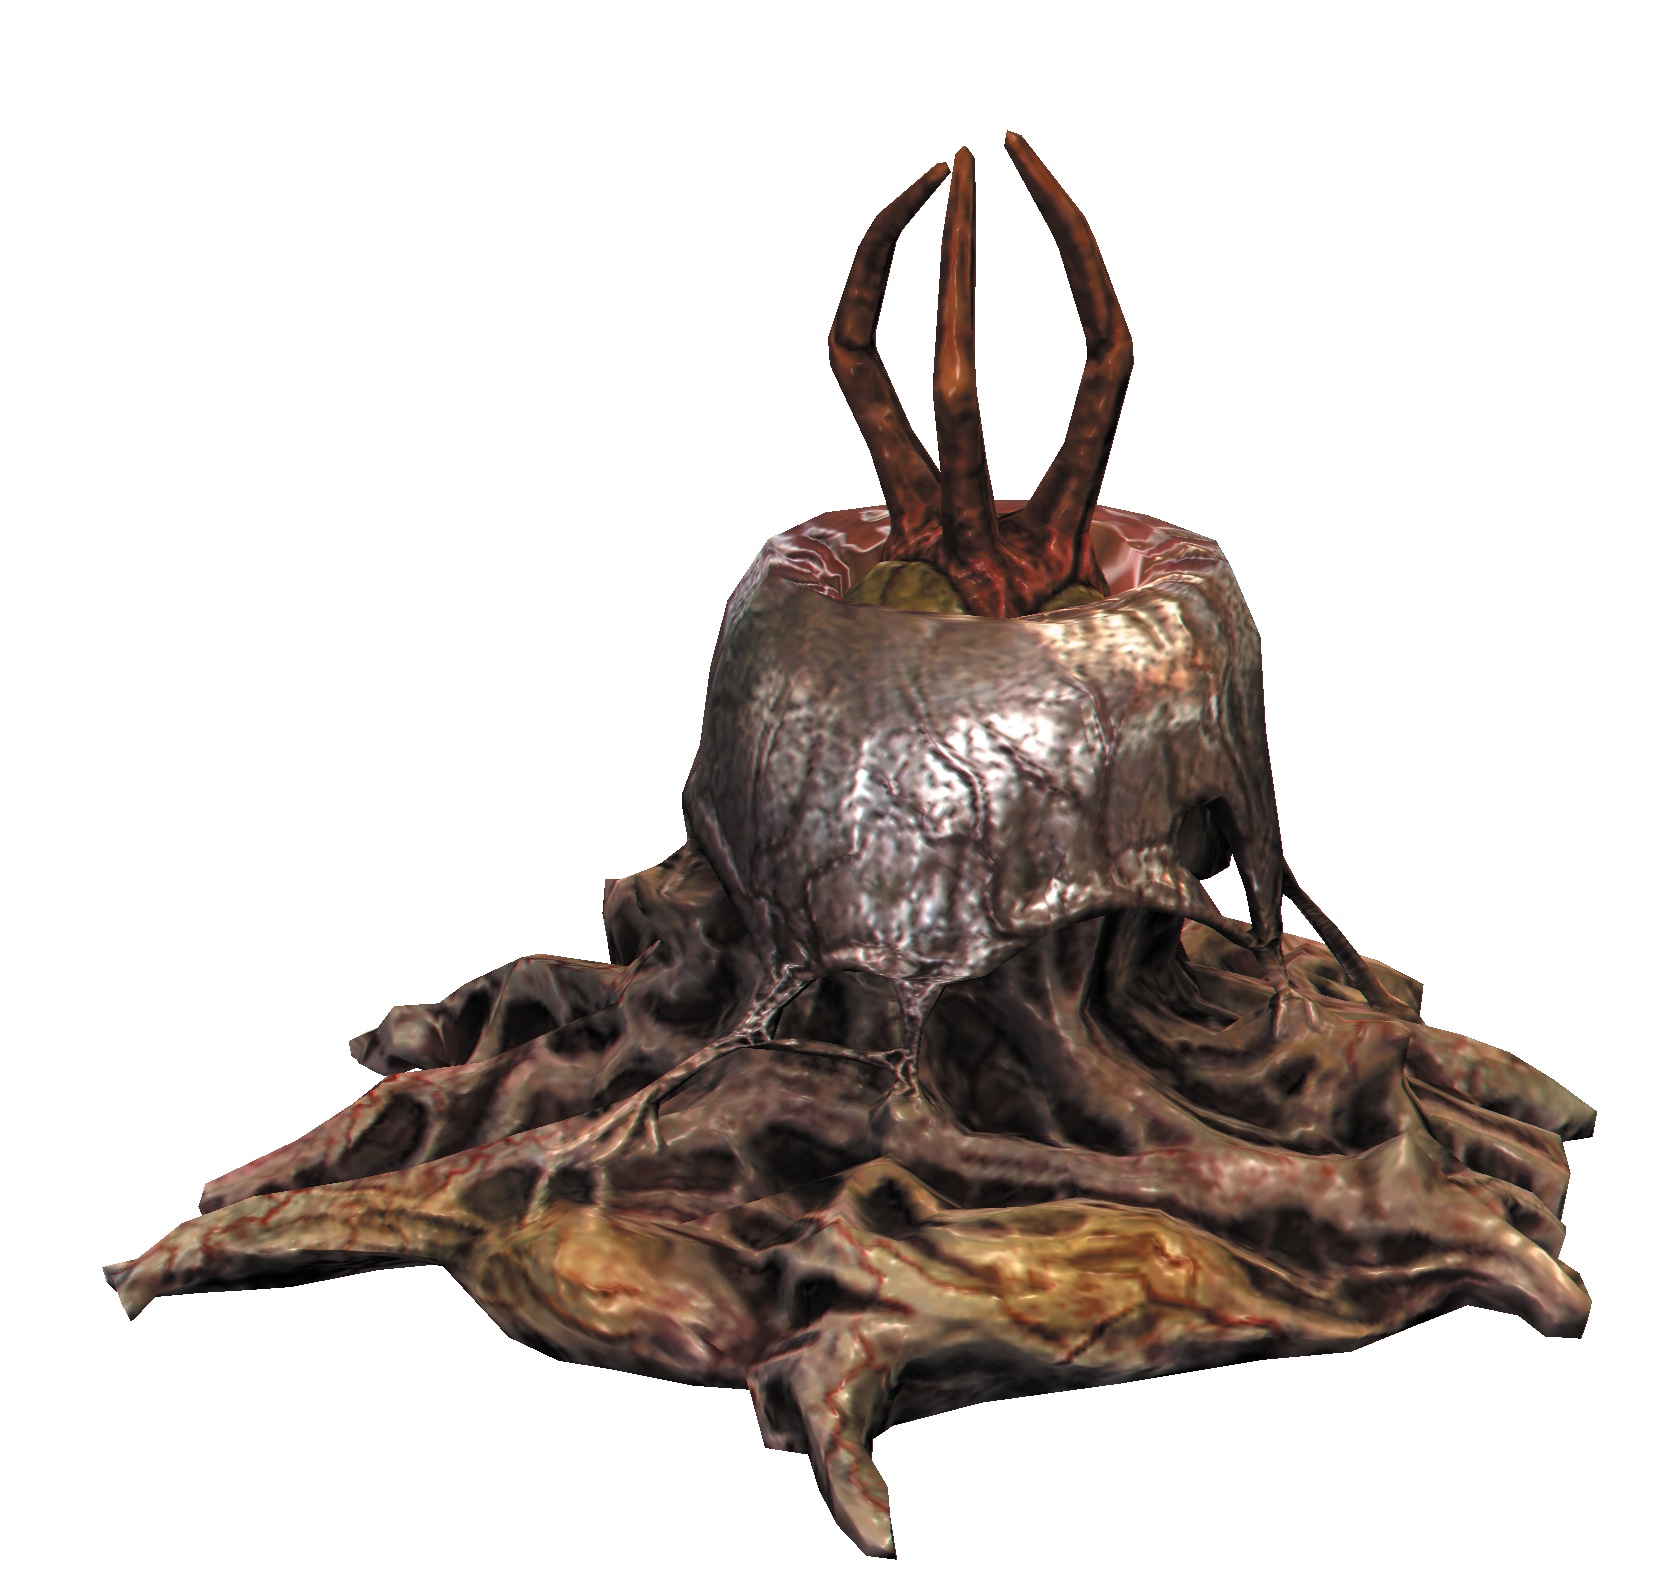
You can often hear the groans of these Necromorphs long before you see them. Cysts like to attach themselves to floors, walls, and ceilings—usually hiding in shadows where they are difficult to see. Cysts are only activated by your proximity to them. When the sack opens and the short tentacles come out, it means it is ready to fire. You have a few options here: If it is on the floor, shoot it from a safe distance, which will trigger the explosive pod. The pod will fly straight up, then back down and kill the Cyst. Or, if there are objects around, use kinesis to throw those instead; this will save ammo. If you are low on ammo, approach the Cyst to trigger it, then immediately run backward to avoid the explosion. If the Cyst is on the wall or the ceiling, trigger it to see if the pod's explosion will still hit it. If it won't, then use standard fire to kill it.
Puker
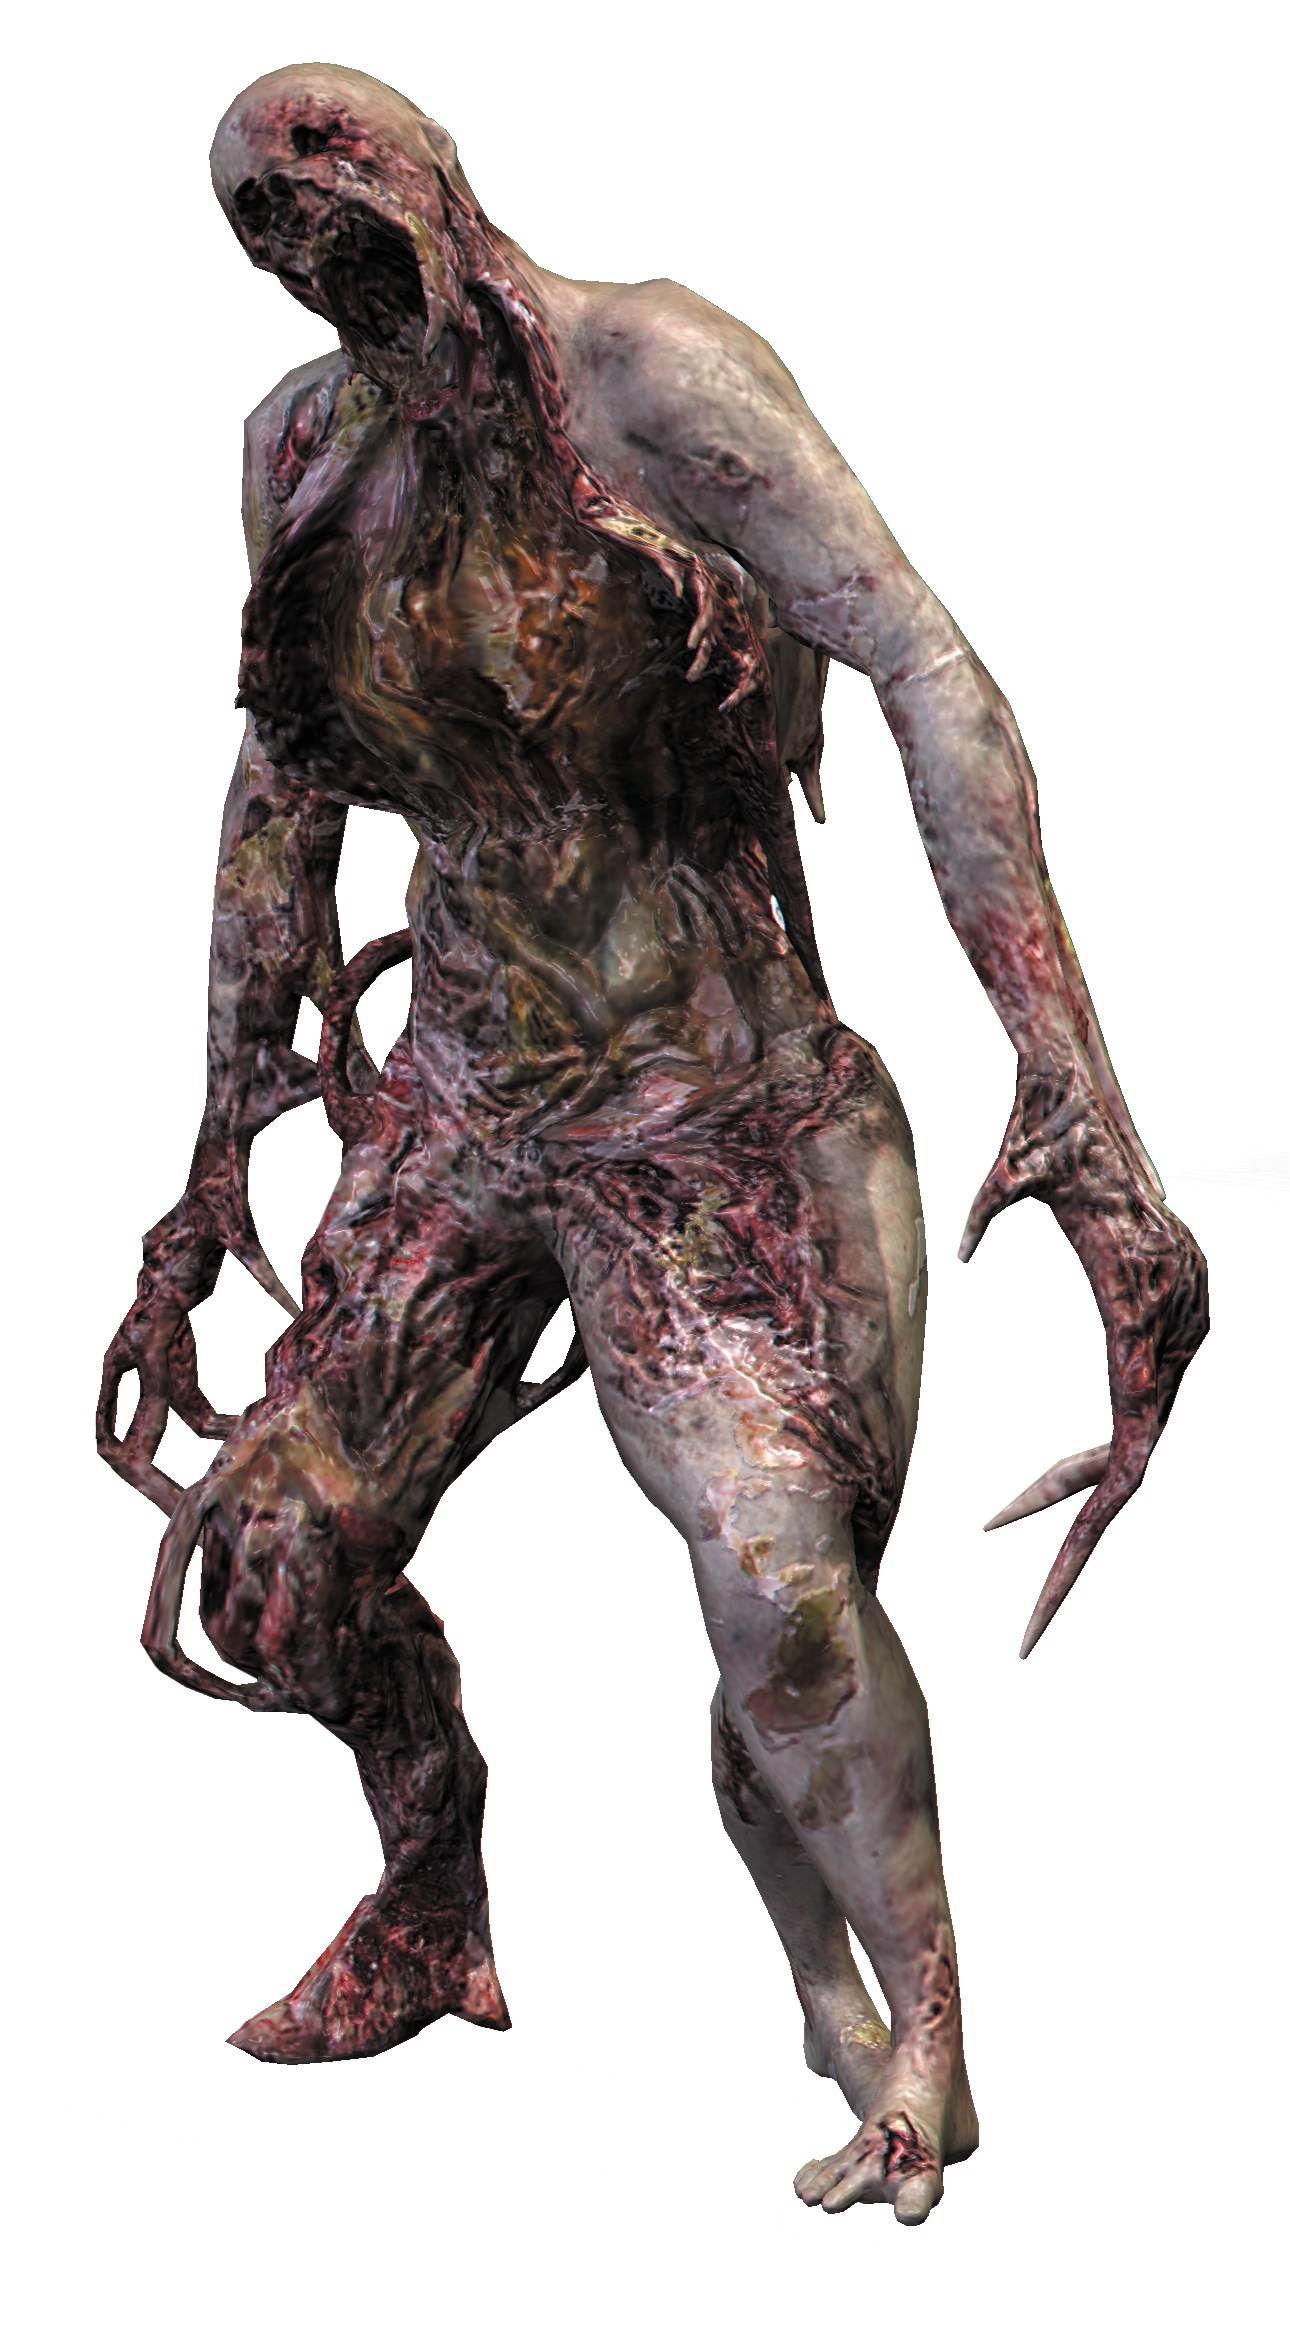
Pukers are dangerous and should usually be a priority target. The key to killing this Necromorph is keeping your distance. Never stay in one spot, as the Puker has two attacks. The standard puke attack spits acid and will damage you from several feet away. If the Puker is far away, it will target you with a sticky attack that slows your movement. It telegraphs this attack with a big inhale; this has a much longer windup than the standard puke attack. This attack doesn't do any damage on its own, but in a large battle, the loss of mobility can be a game changer. To defeat the standard attack, use strafing tactics and go for the limbs. Keep your distance as you do this, because the fluid that spurts out as the Puker dies will still hurt you. Later in the game, Super Pukers will come after you. Hit these with stasis since it takes quite a bit of damage to take off their legs to slow them down. Once in stasis, blow them apart with a powerful weapon such as the contact beam.
Pack
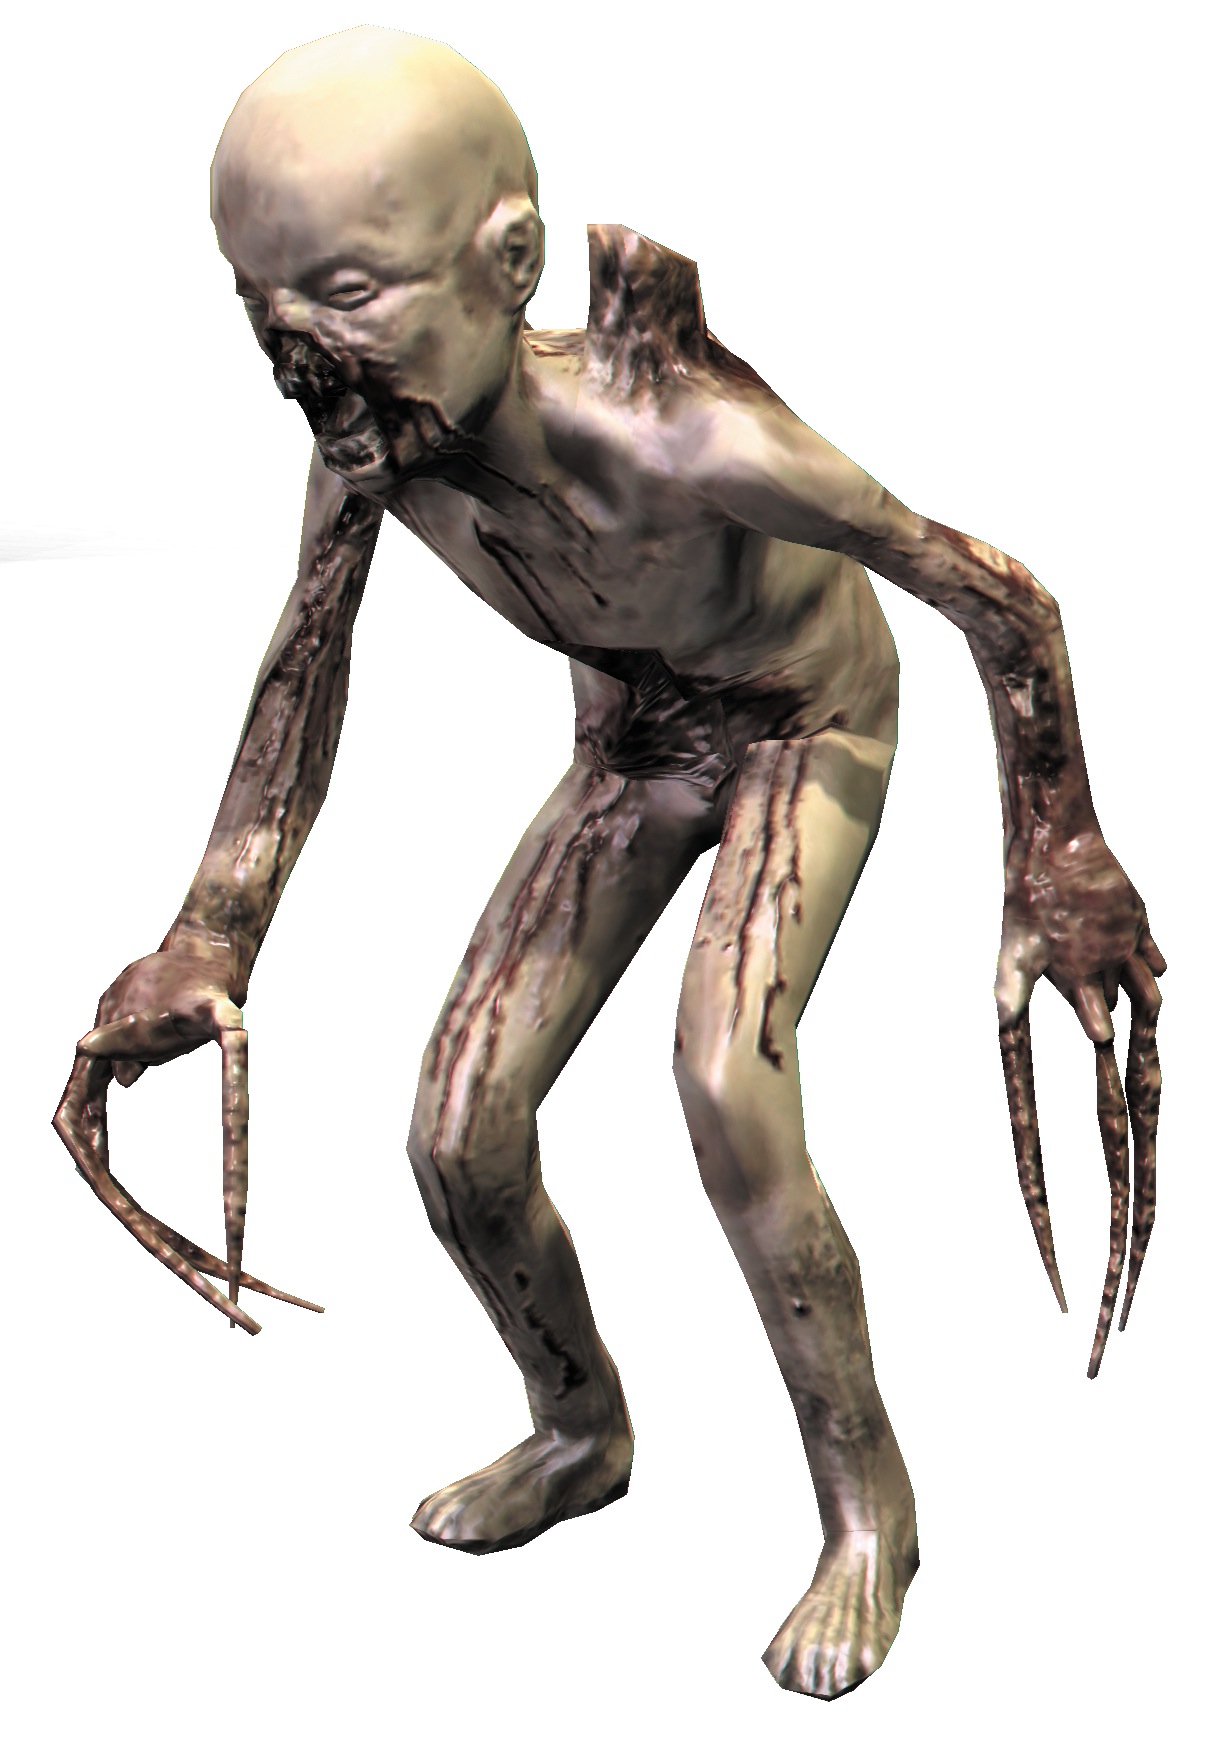
Pack are small, humanoid Necromorphs that charge at you and jump on you, using their claws to kill you. They almost always move around in groups. If there are only a few Packs, use melee on them, as they are usually a quick one-hit kill. However, don't try this if there are enough to surround you—they'll interrupt your melee swing before you can connect. They tend to run after you in a straight line, bunching up as they go. If space permits, run away from them for a few seconds to get a string of them following you. Then turn around, use stasis on the one in the lead, and then shoot it with a javelin shot. As it flies back in slow motion, trigger the alt-fire, and you'll electrocute all of them in a row. A line gun's primary shot also works well in this situation, as it will mow through them like grass.
Pregnant
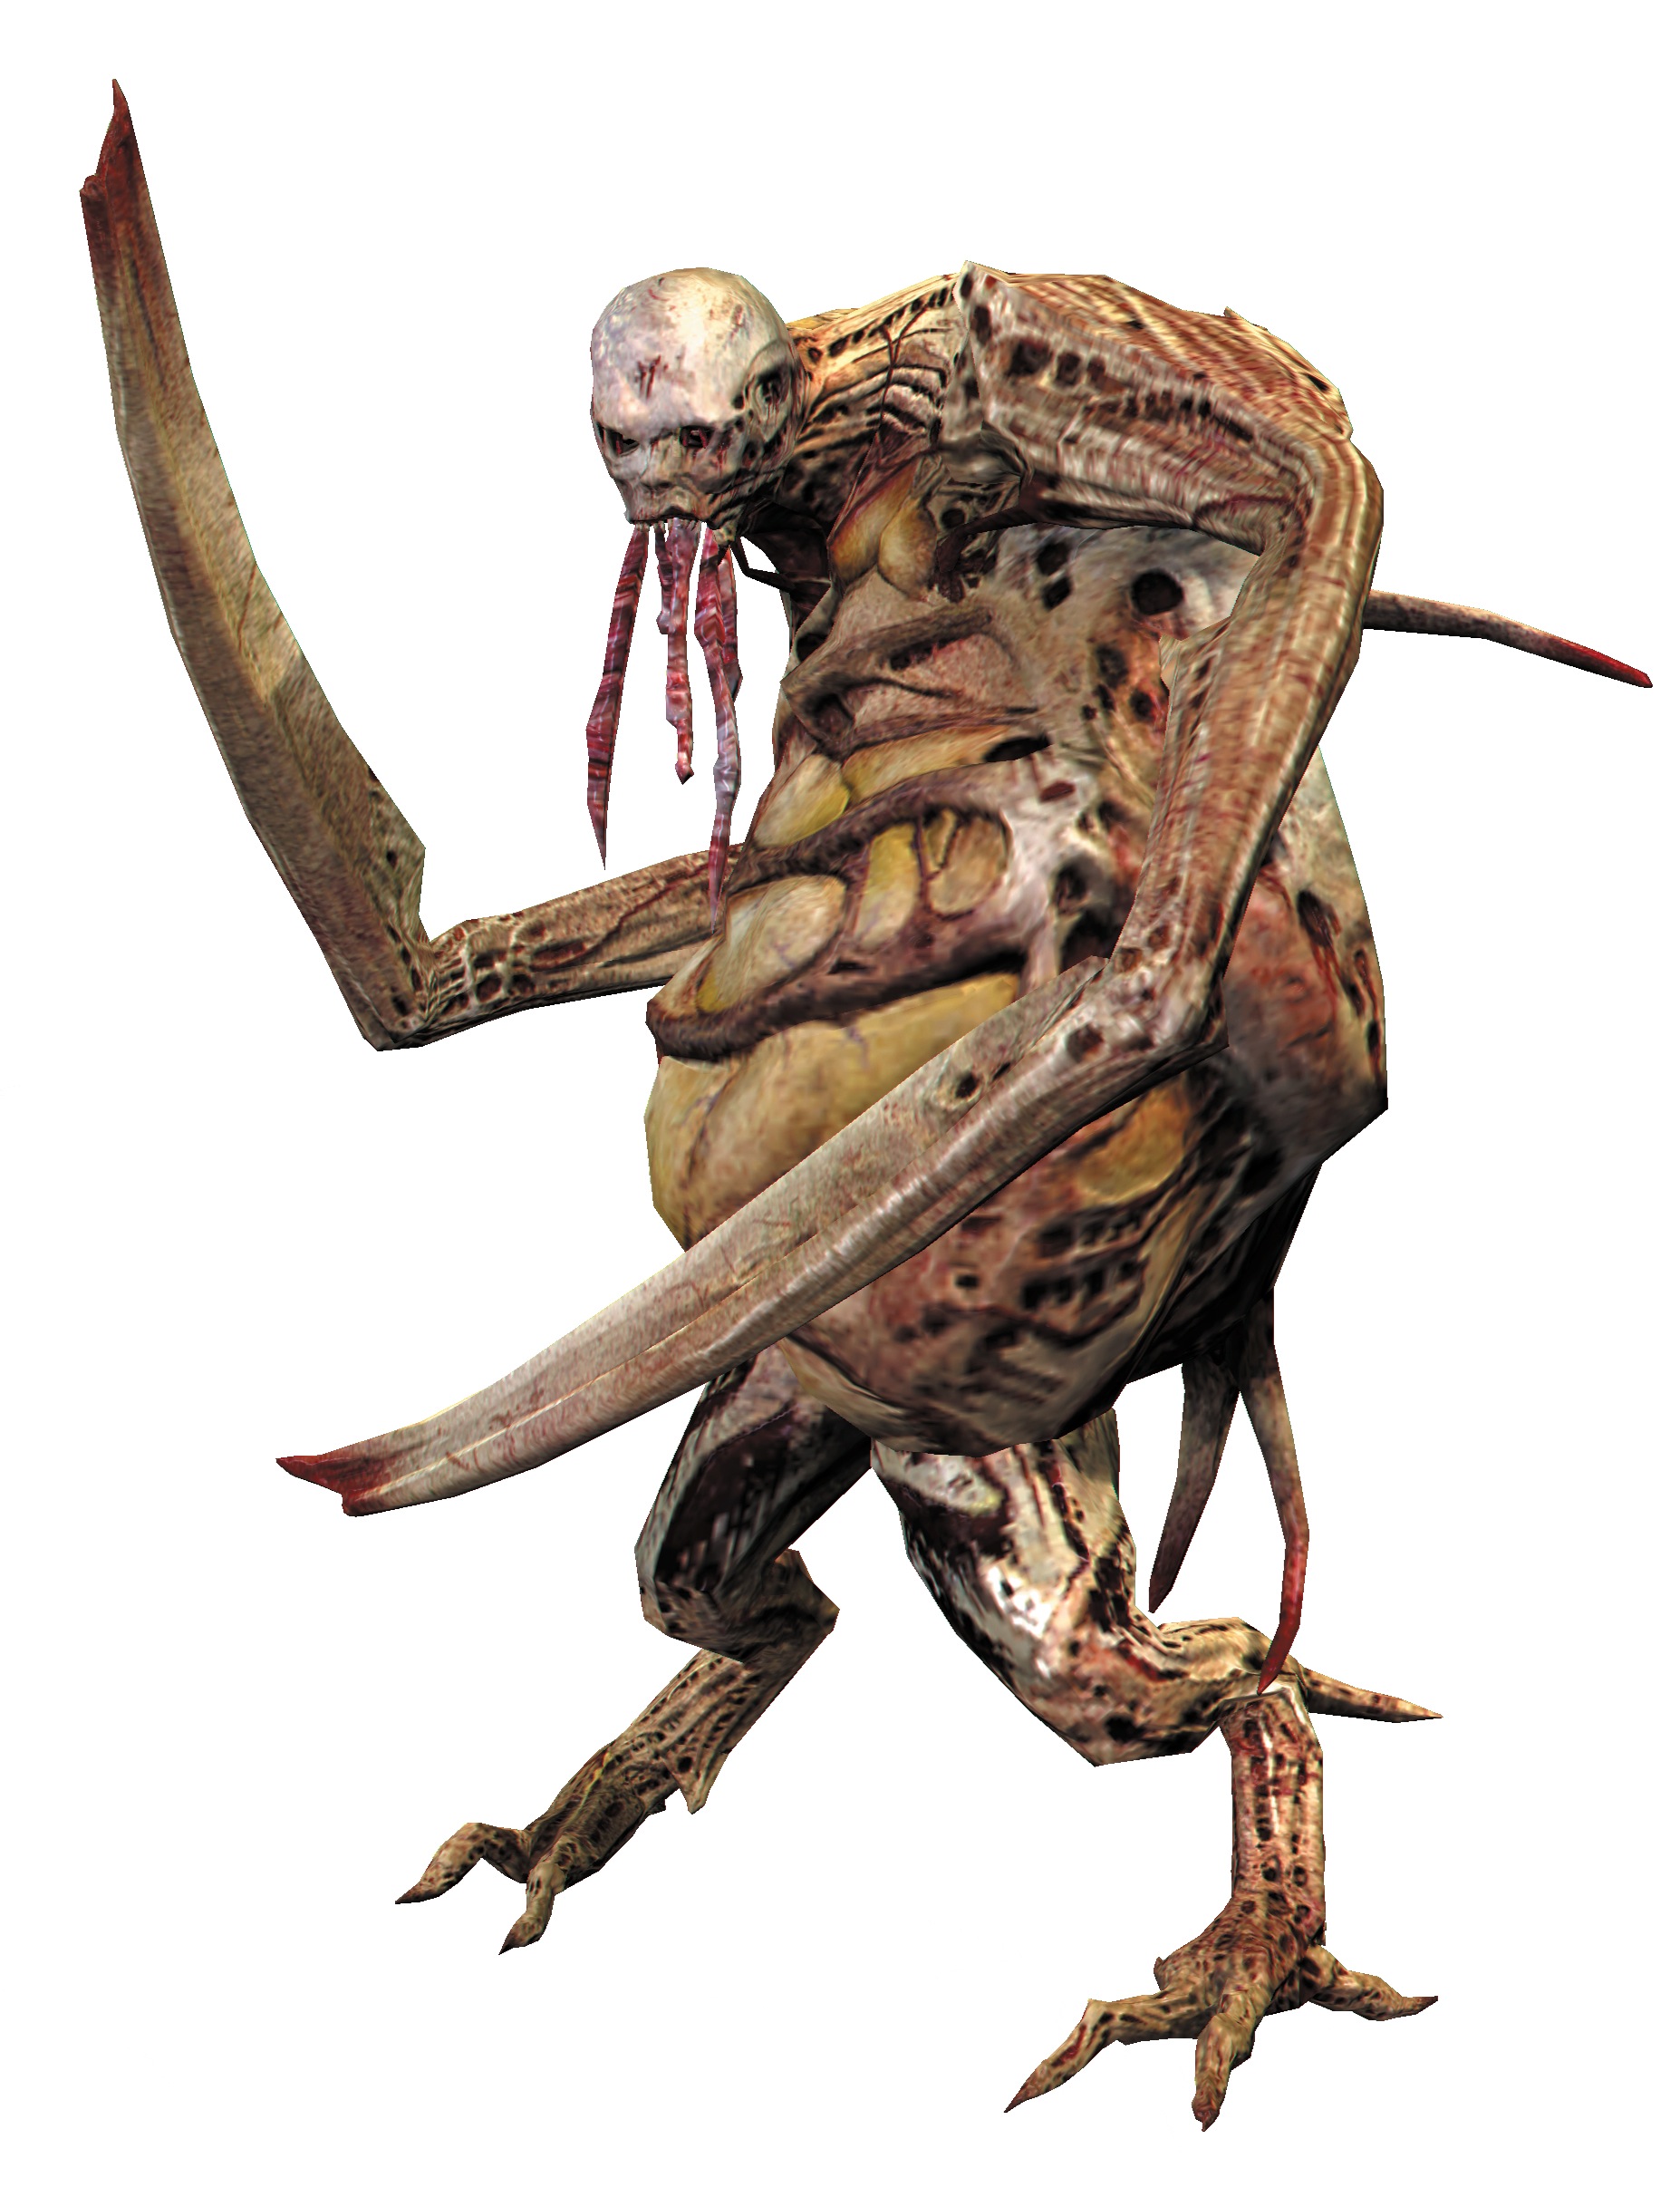
These Necromorphs have long blades at the ends of their arms. They will try to get in close to attack like a Slasher. While they look large and clumsy, they actually move quite fast. The first rule is to never shoot the sack in the belly. Doing so will release the Swarm, which will make any fight more difficult. Even worse, it won't kill the Pregnant, which will still crawl after you. Going for the leg shot is tricky, because you might hit the belly. Try hitting the Pregnant with stasis and then take off the blades and the head to kill it.
Swarm
These tiny Necromorphs will rush at you and try to jump on you to attack. Although they are weak on their own, a group of them crawling around can kill you and will definitely tip the fight in the Necromorphs' favor during a bigger confrontation. Use weapons that inflict area damage such as the alternate attacks for the contact beam, line gun, flamethrower, javelin gun, or pulse rifle; these weapons will let you kill several Swarm once. When dealing with only a few (four or less), it's sometimes easier to let them jump on you; then quickly mash the Action button to get them off, rather than wasting the ammo.
Spitter
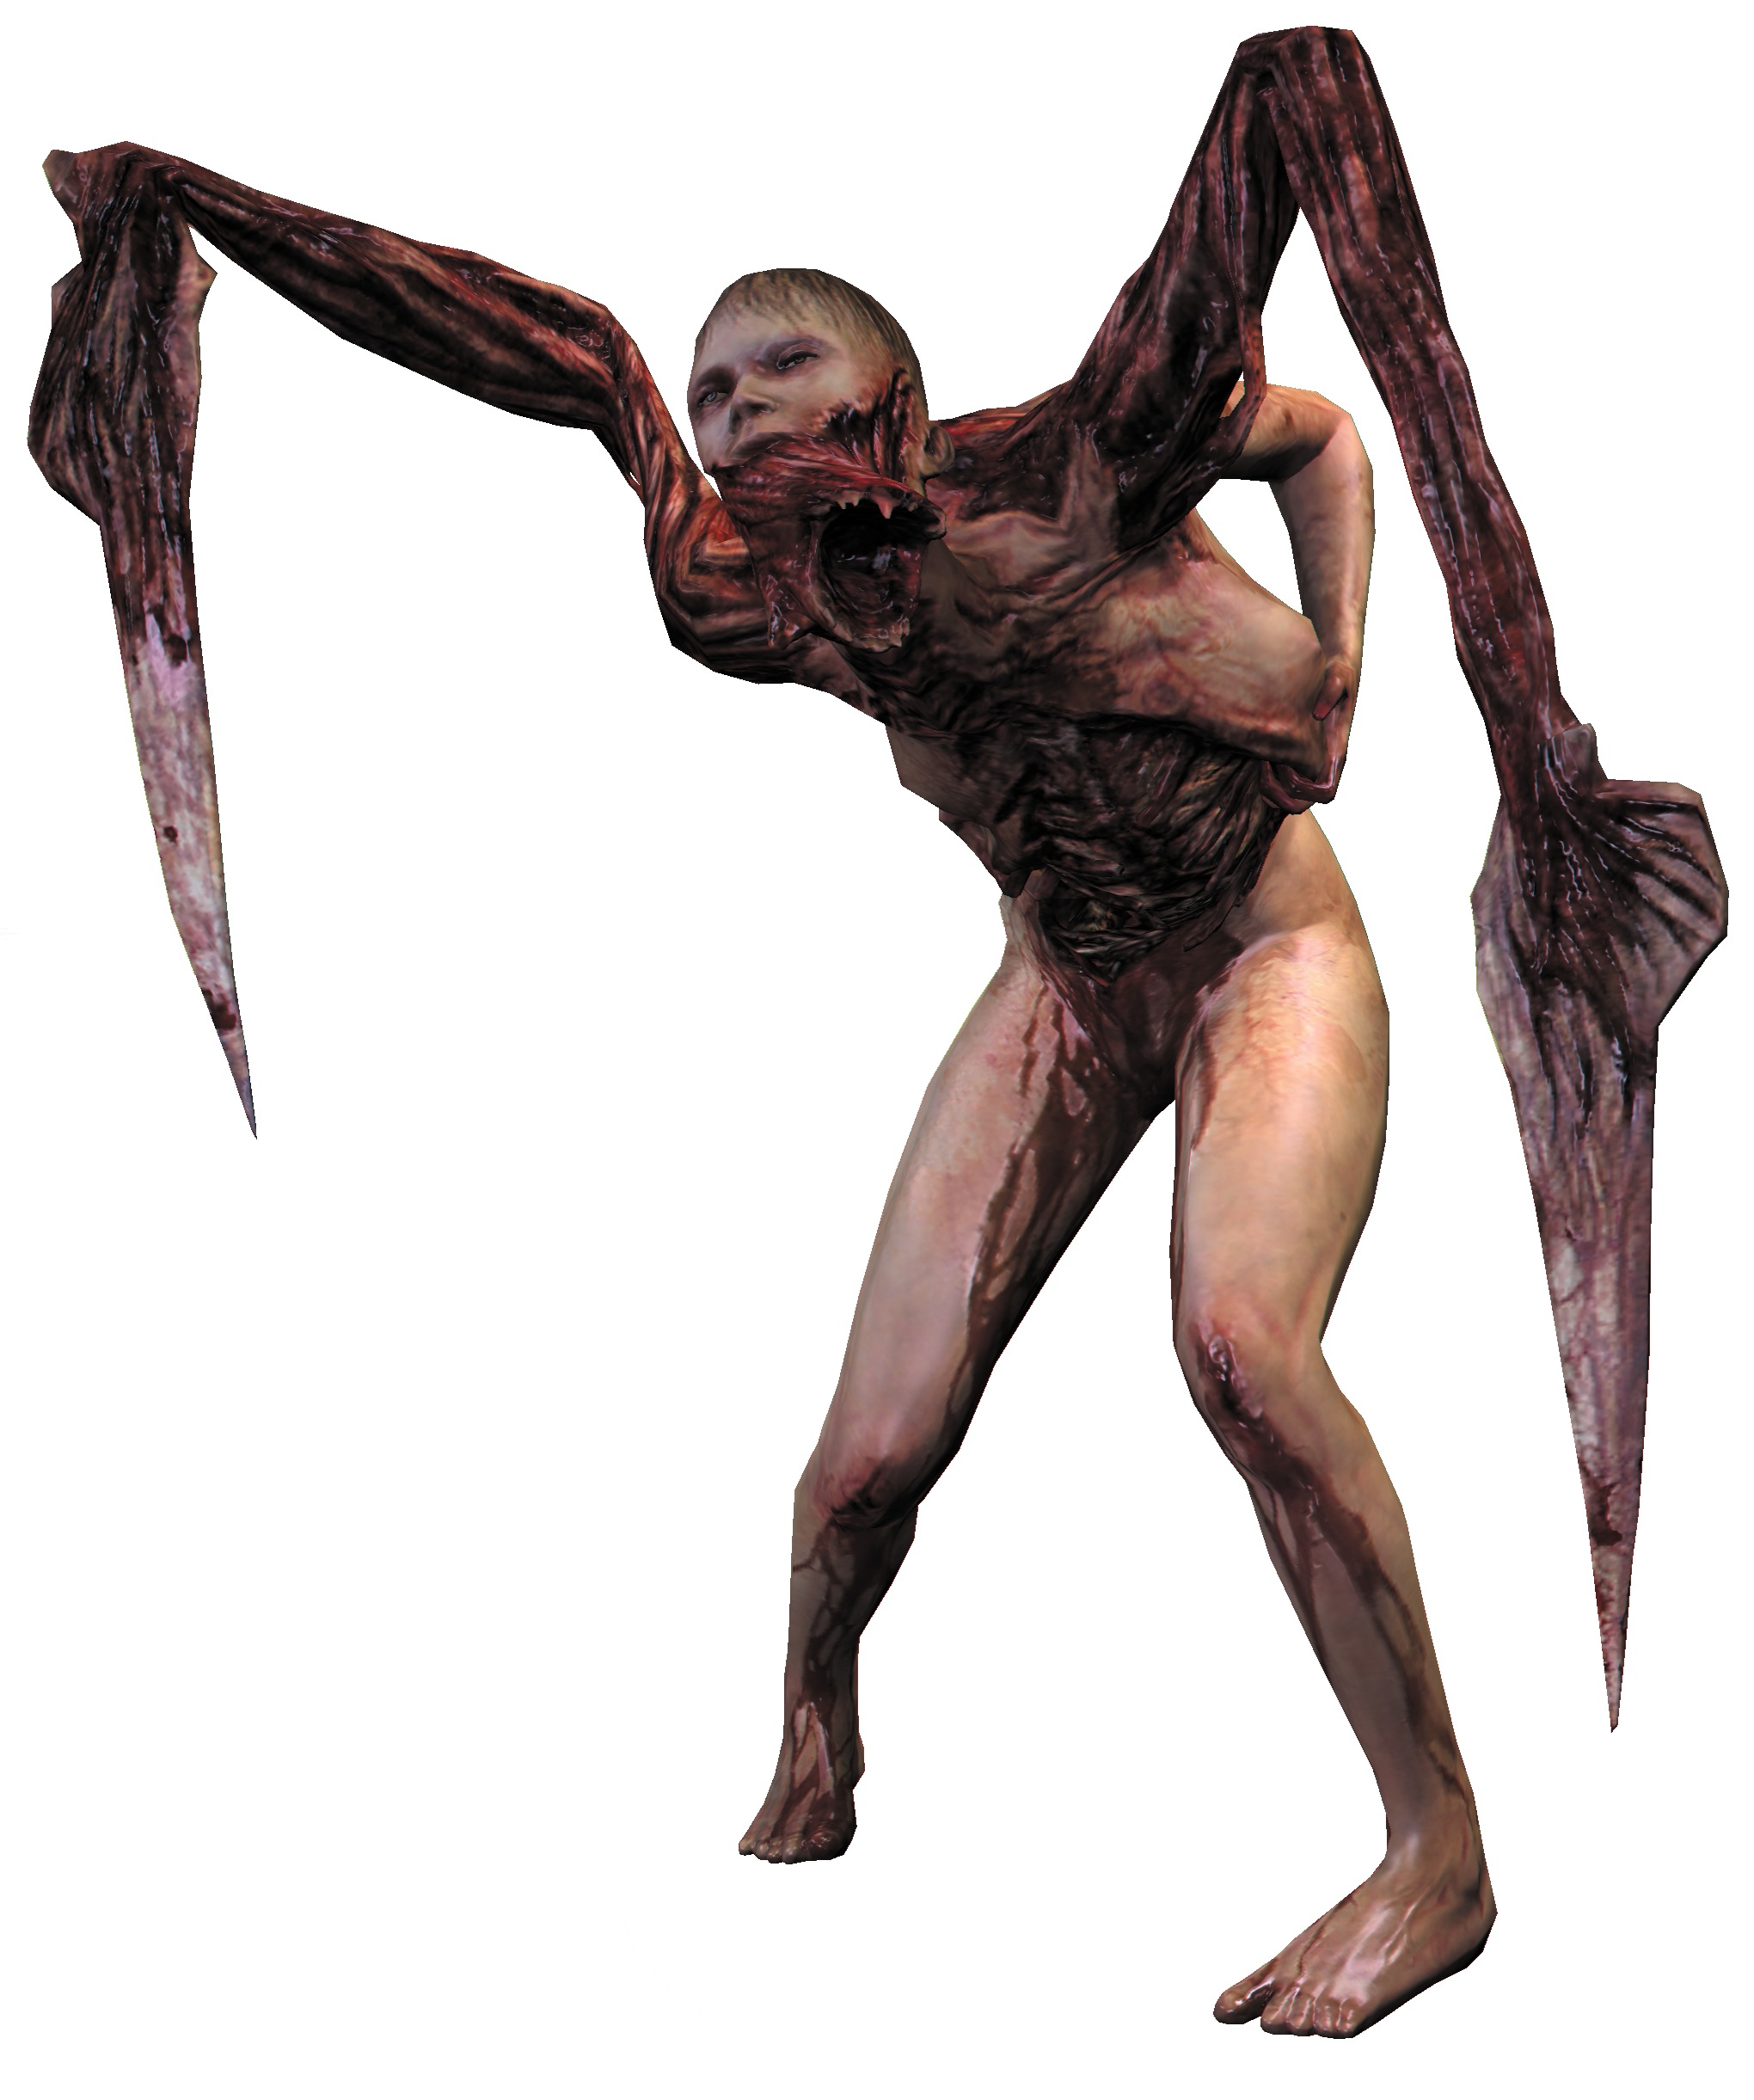
The Spitter is very similar to a Slasher. In fact, when you first see them, you may mistake them for Slashers. However, they have a ranged projectile attack that can cause damage to you, unlike the Puker's long-range attack. You can dispatch Spitters using the same methods as the standard Slasher—take off its arms to kill it. Spitters move fast and if they get in close, they will use their long spikes to attack rather than spitting at you.
Lurker
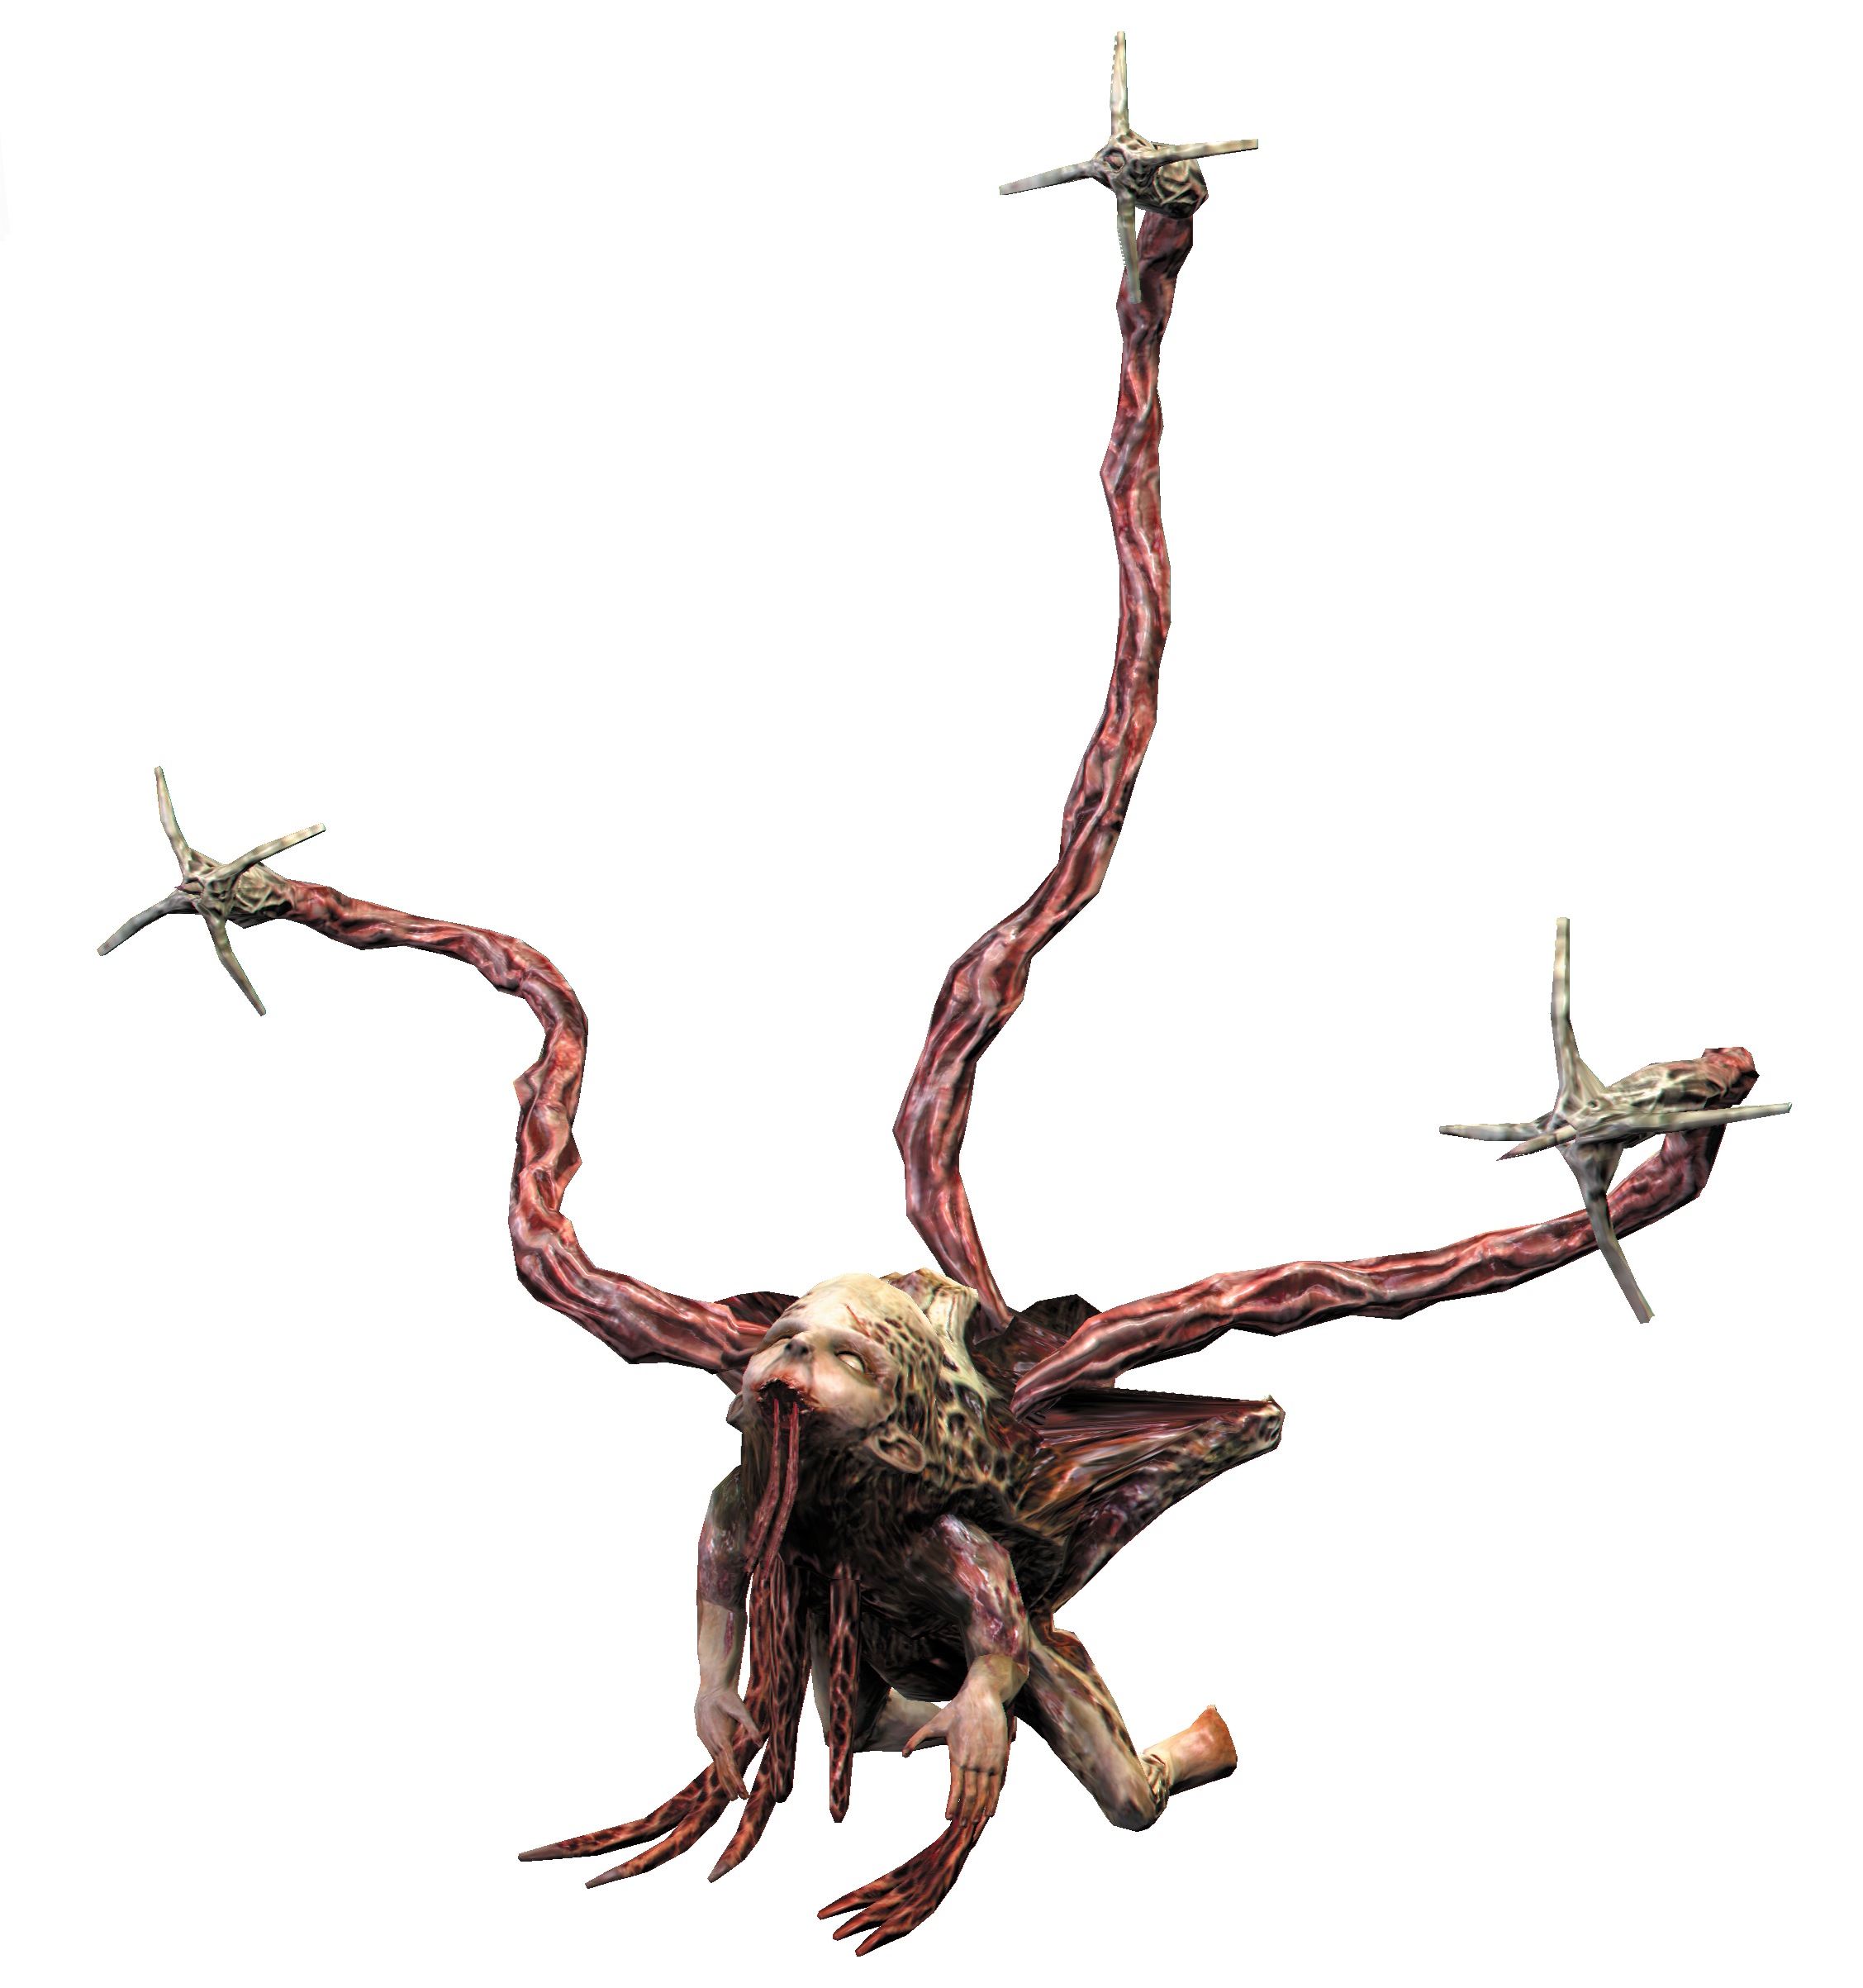
These small Necromorphs can walk up walls and even across ceilings. Once they find a spot, they stop and extend three tentacles above their body. These tentacles will each fire a projectile at their target. If you see a line of three projectiles headed your way, follow their trajectory back to find the Lurker. The Lurker's body can absorb a lot of damage; don't fire here unless you have to. Instead, take your time and dismember the tentacles. Shooting off all three will kill the Lurker. If you try to move around a corner to escape the Lurker's field of fire, they will usually come after you so they can continue firing.
Crawler
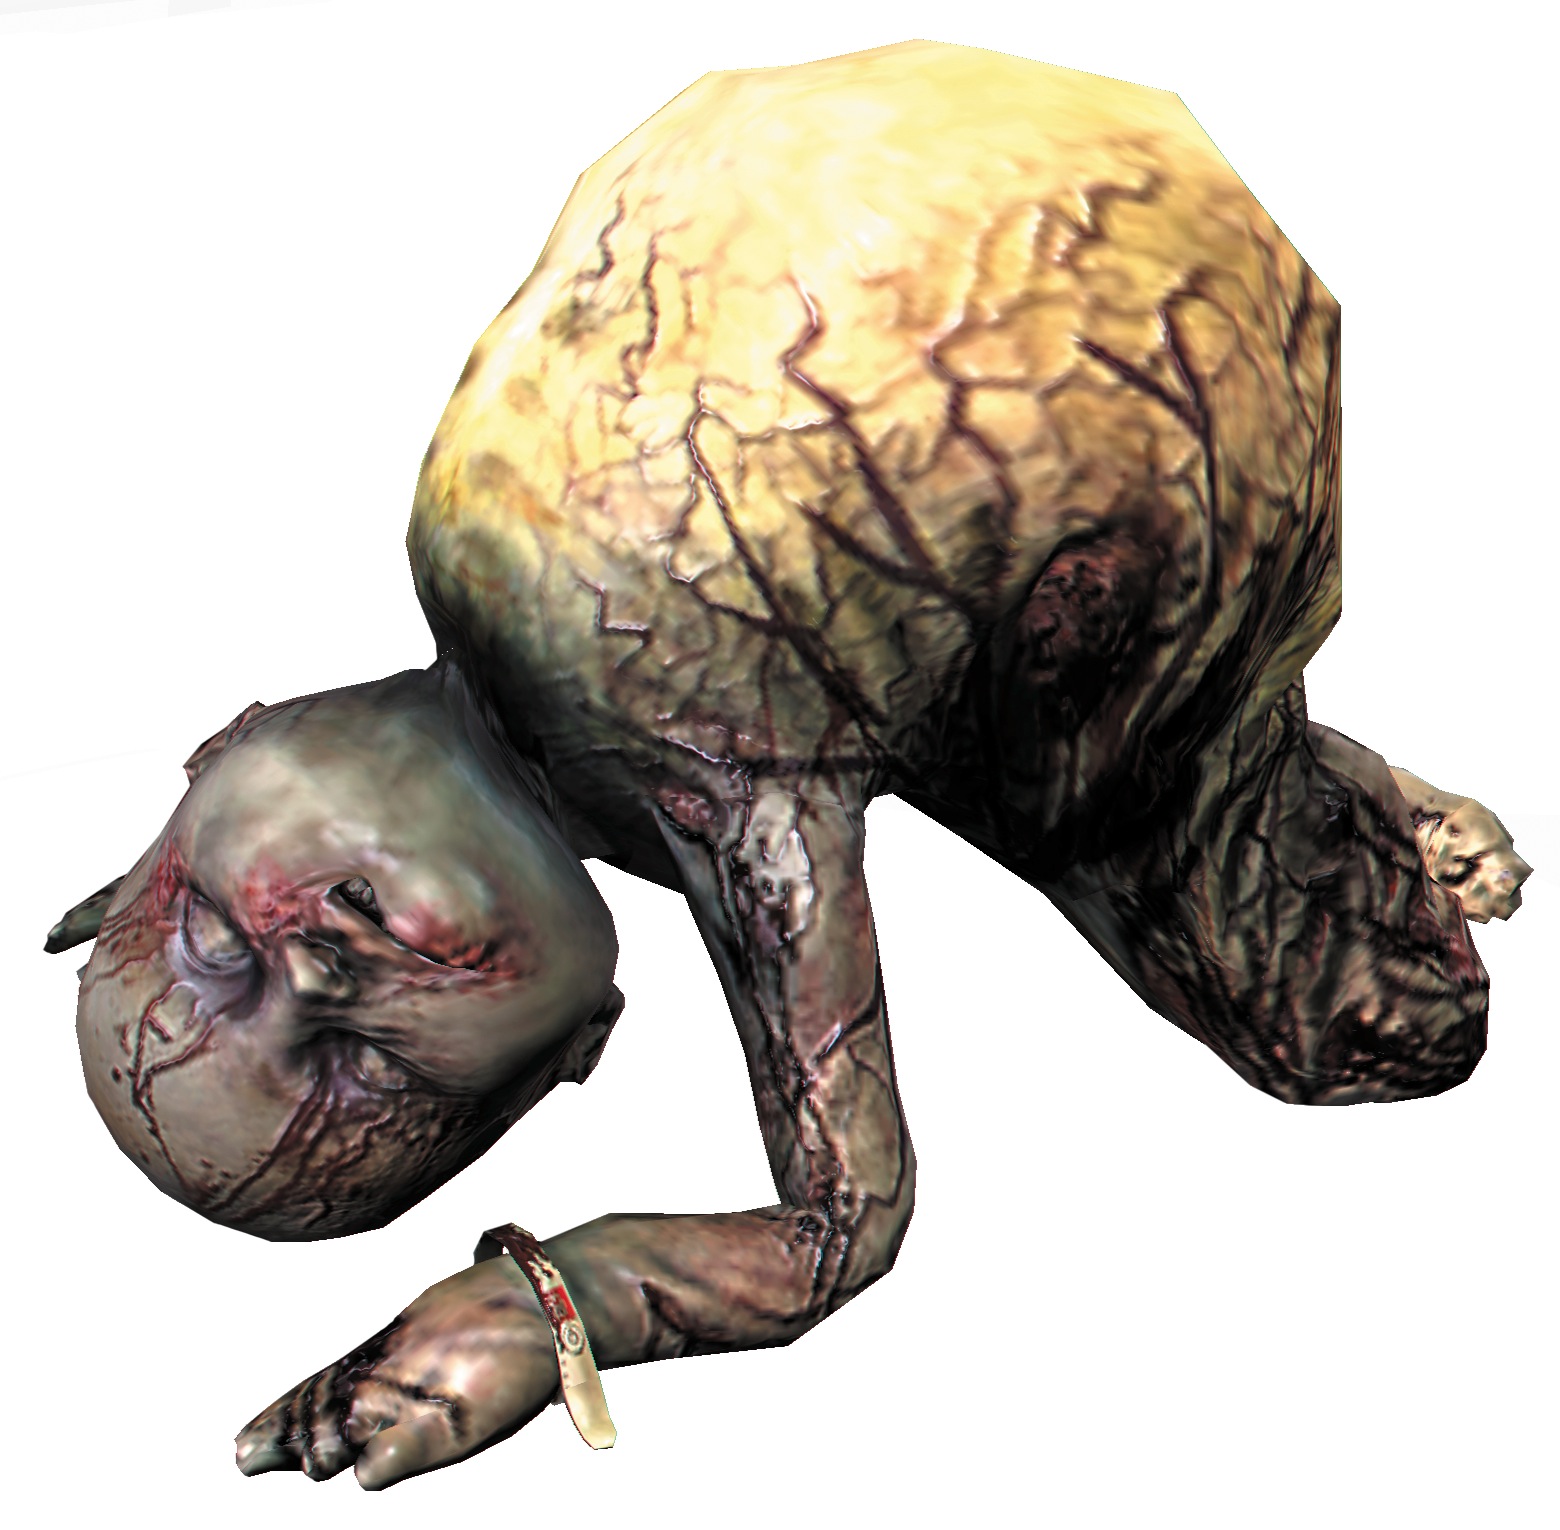
As their name implies, these small Necromorphs crawl toward you to attack. They can crawl down walls and out of holes in the wall. When they get close, their yellowish explosive sack will blow up and injure you. Keep your distance, as most points on this Necromorph are weak spots that will trigger an explosion. Use it to kill other enemies in the vicinity. If you can, shoot off the head, which will leave the explosive sack intact. Use kinesis to pick this up and throw it. Using kinesis to throw a blunt object into the Crawler can also sometimes kill it and leave the sack intact.
Exploder
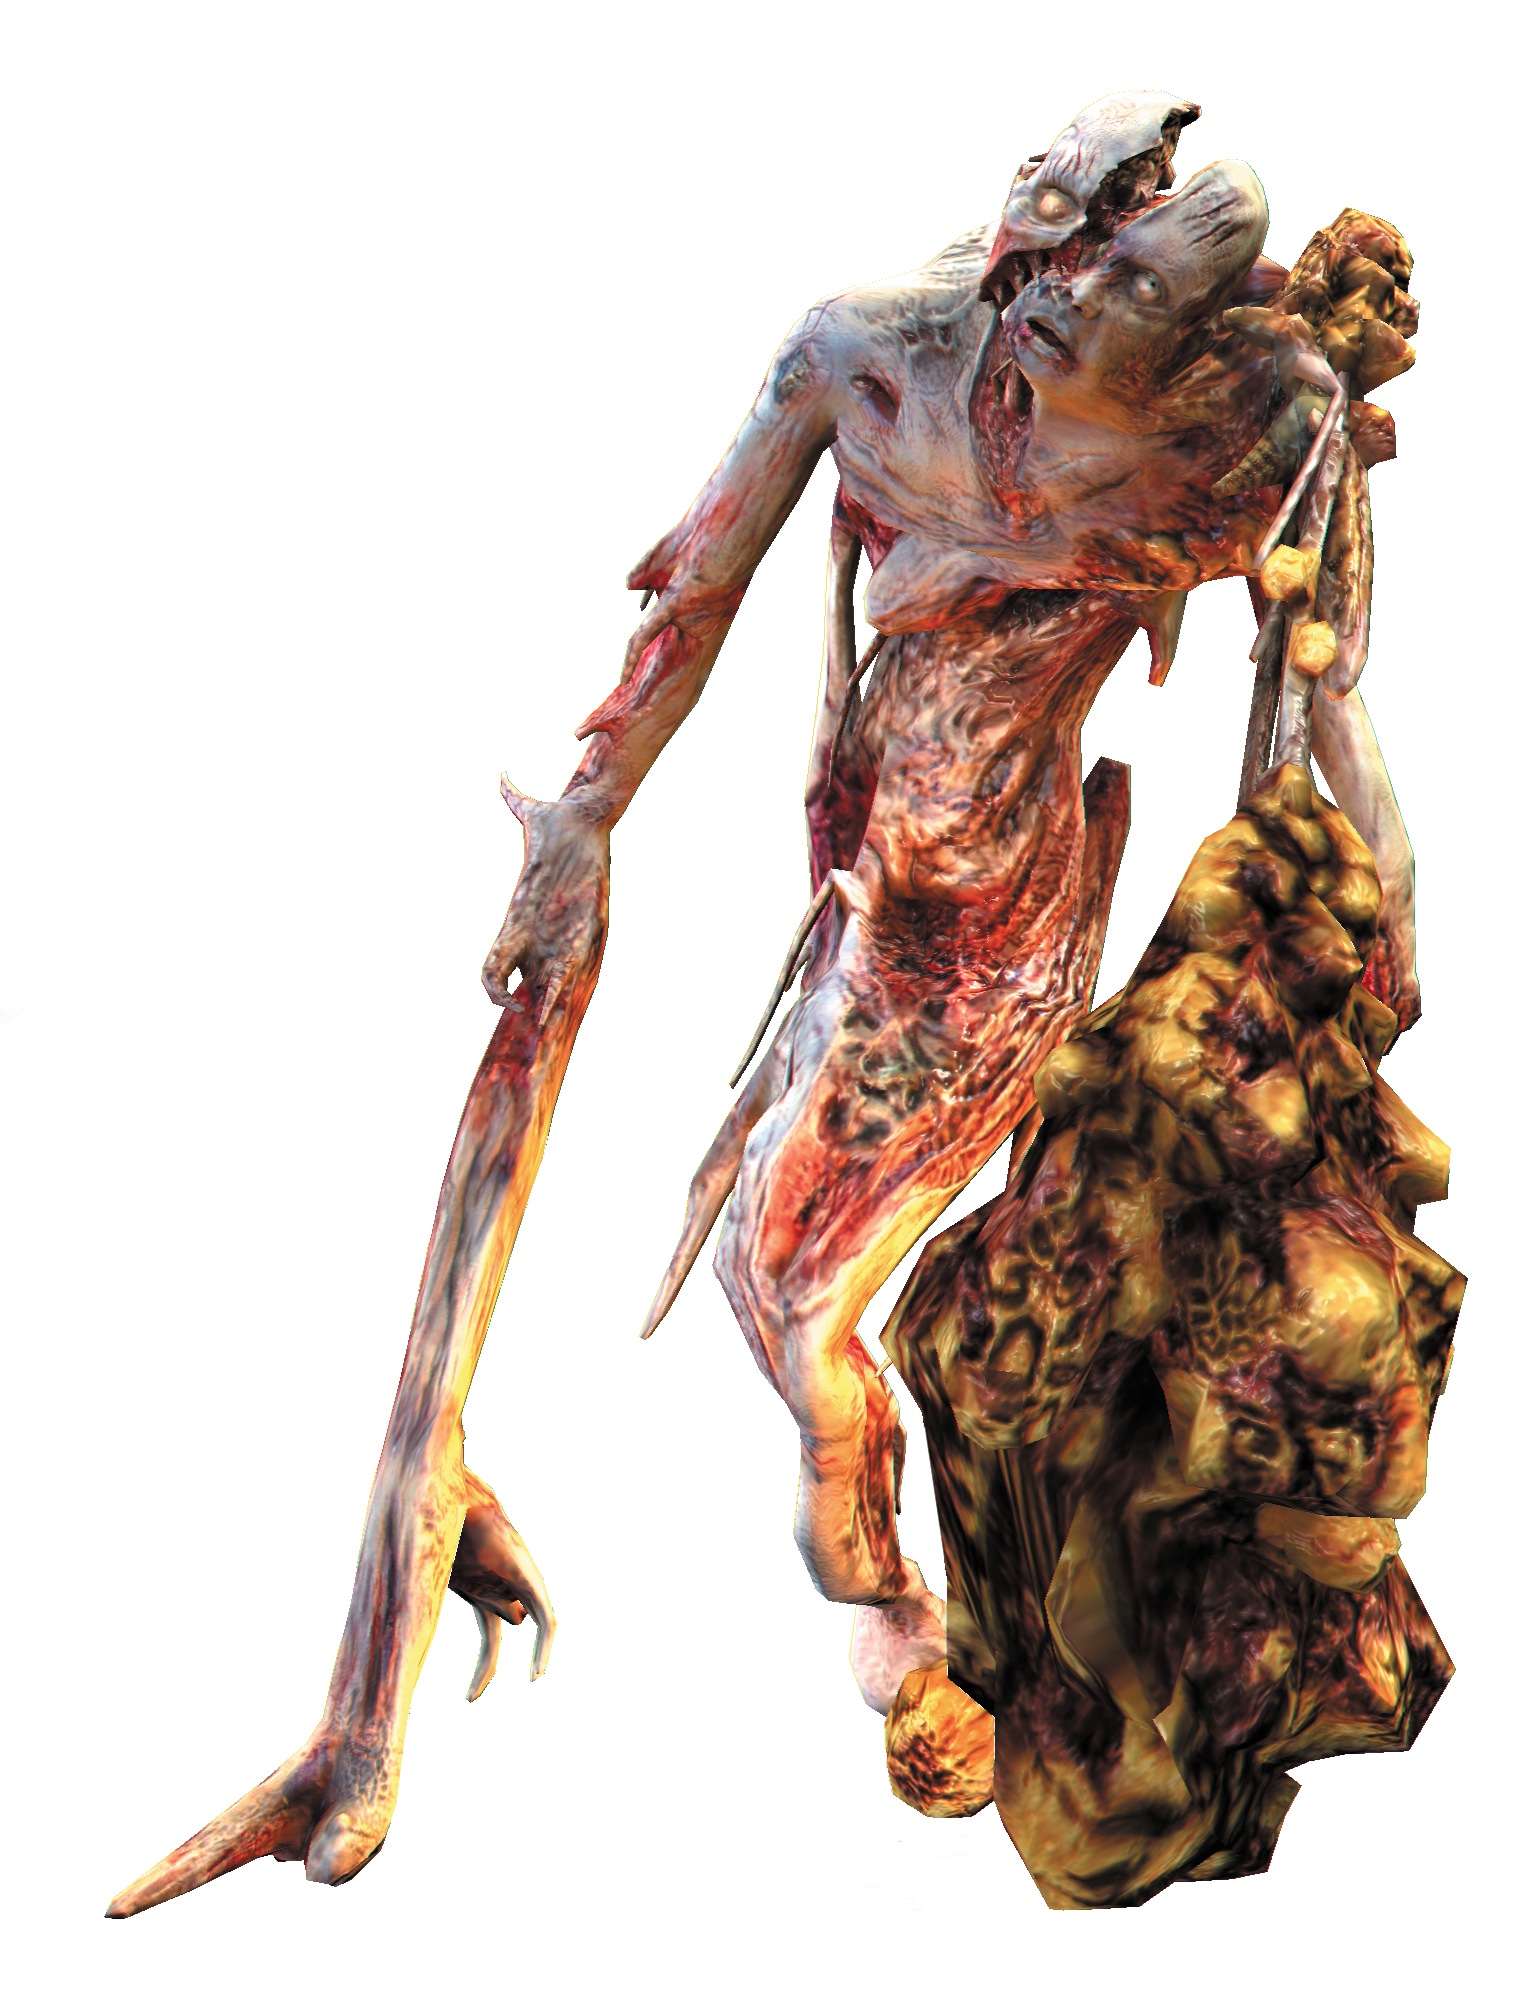
This suicidal Necromorph will shuffle toward you with a yellowish sack. This glowing sack will trigger a huge explosion that will instantly kill the enemy. This is great when it happens near a bunch of other Necromorphs, as it will deal huge damage to them. It's not so great when it happens next to you or next to a decompression window. If you hear the telltale scream that signals it's about to use its explosive attack, don't try to shoot it. Even if you do hit the sack, you'll be damaged by the explosion. Instead, run—or better yet, hit it with stasis and then run.
Stalker
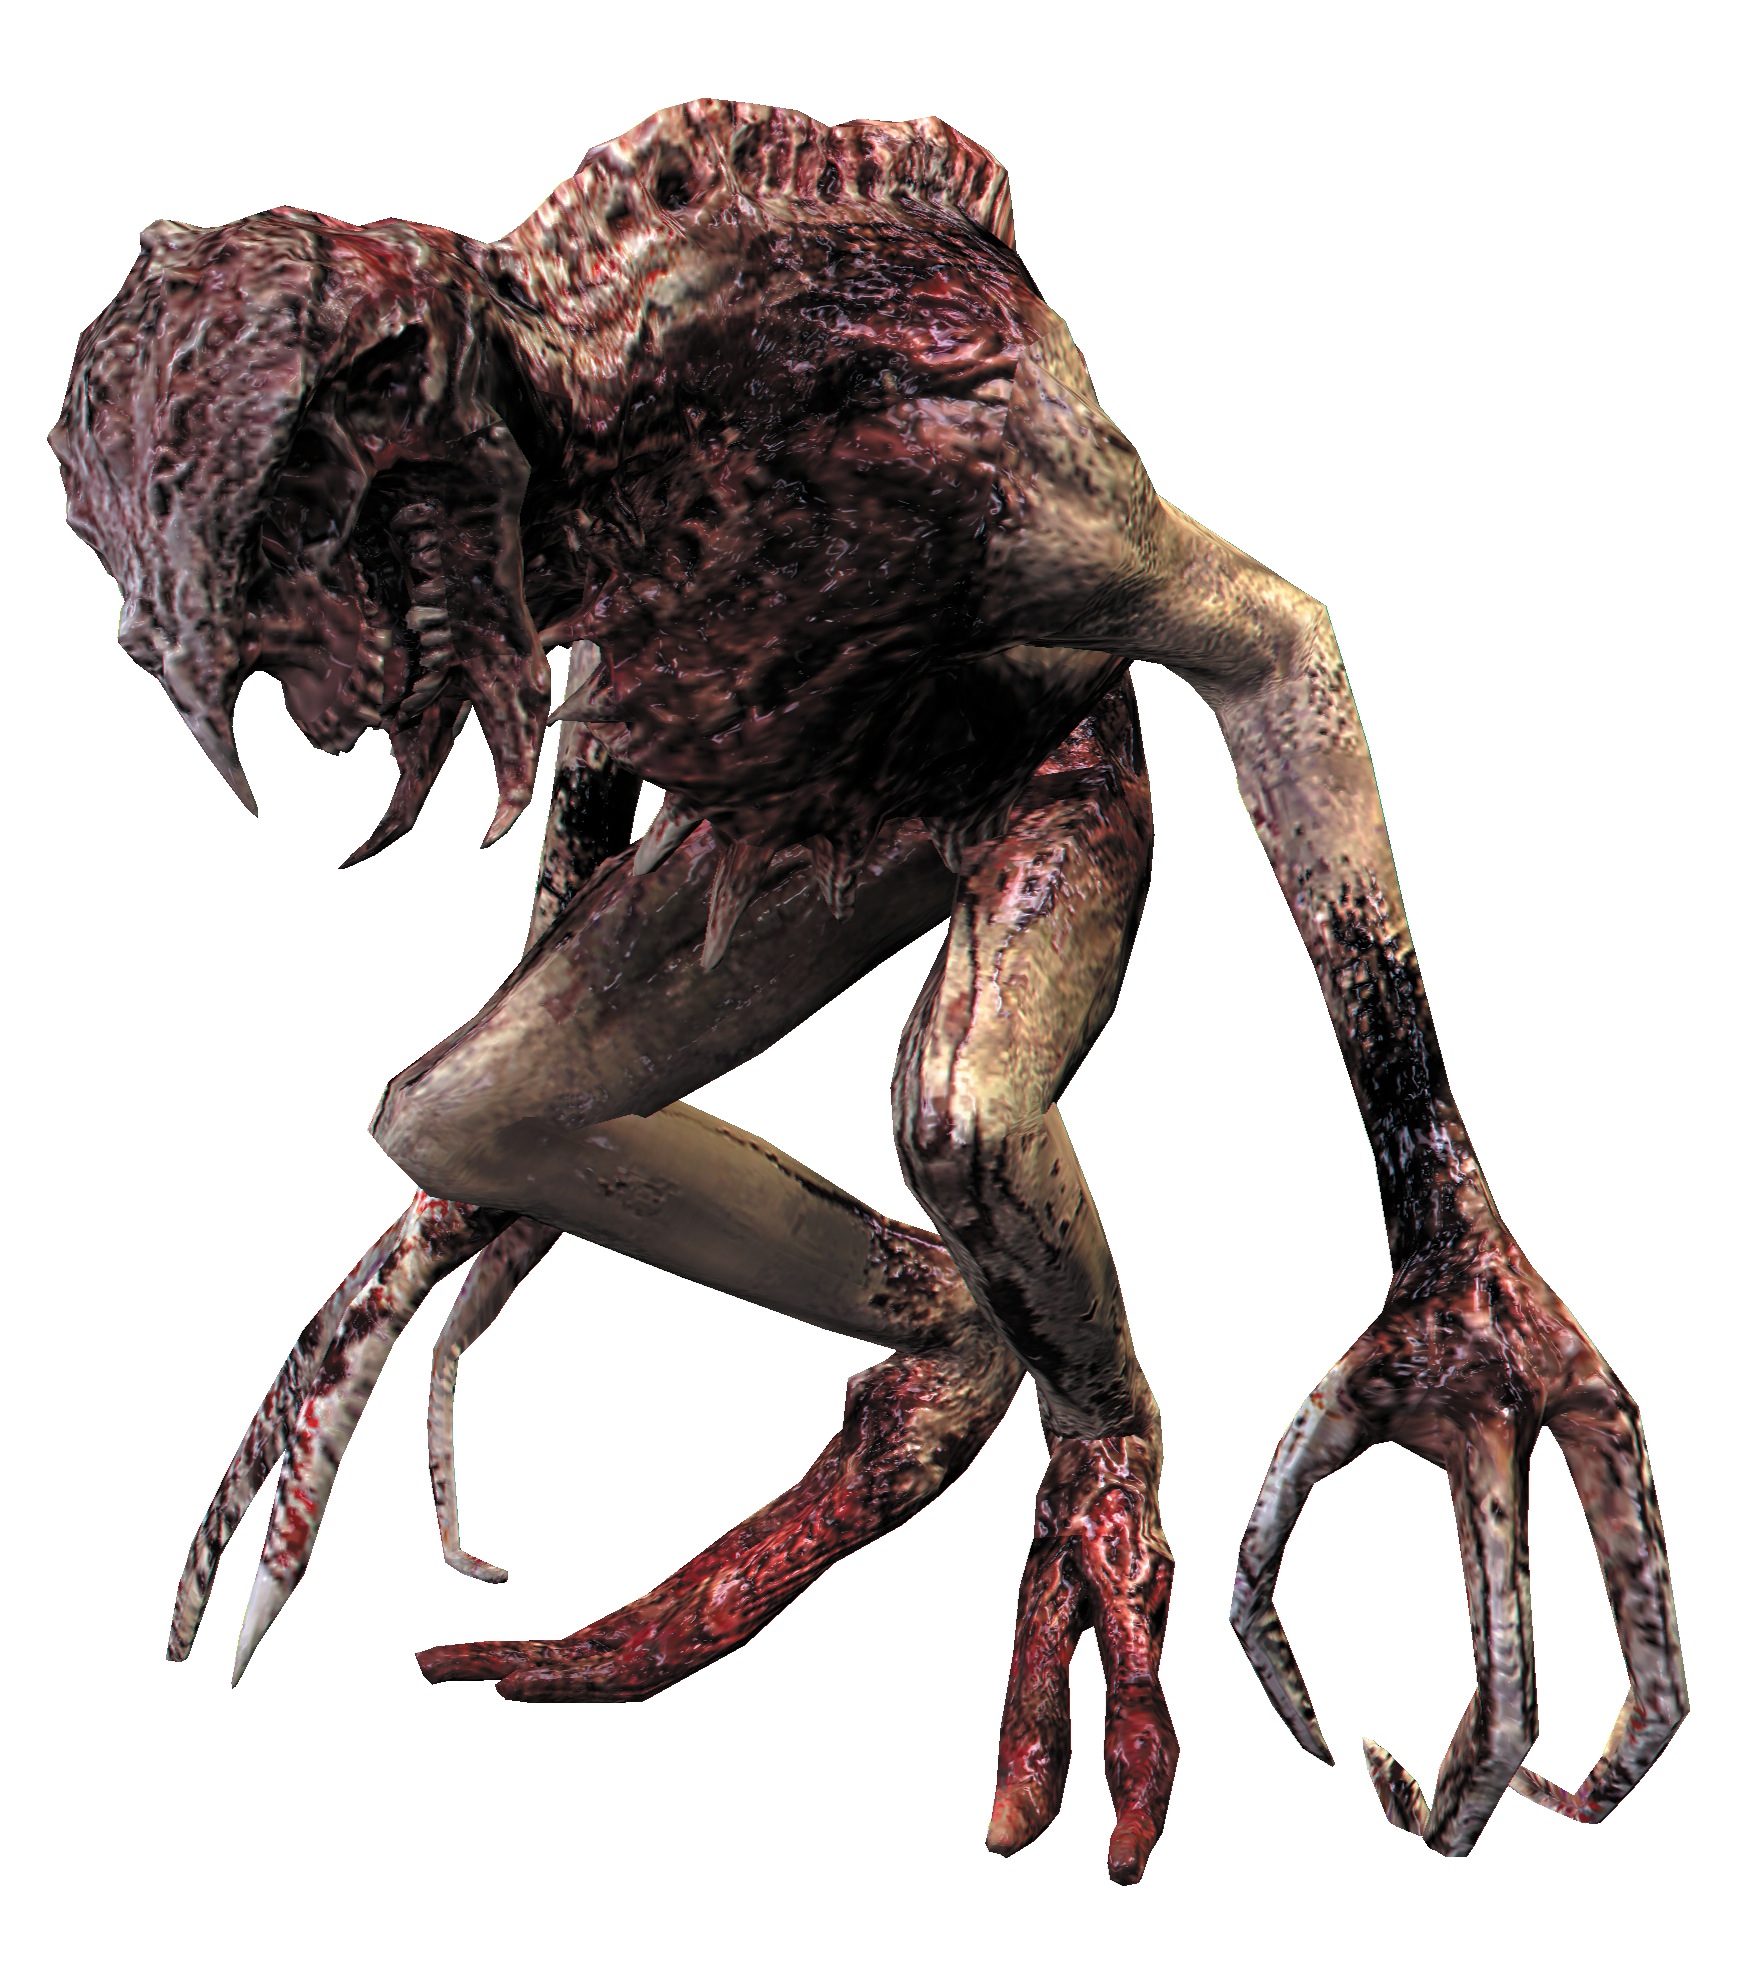
Stalkers are intelligent Necromorphs that work together to try flanking you. Your first glance of them is usually them moving around behind cover and then peeking around a corner at you. When you see this, the Stalker is usually getting ready to charge. Try to back up to a wall so they don't surround you. Rarely will they charge while you are looking right at them. Instead, they wait until you look away. If you have a seeker rifle, put it in zoom mode and then shoot for the head. A single hit will usually kill a Stalker. If one starts to charge, hit it with stasis and then shoot off the arms to kill it. Later you will have to deal with Super Stalkers. They are tougher to kill. Hit them with stasis to slow them down and then cut them up with a ripper. While they are in stasis, use the contact beam to blast them away.
Divider
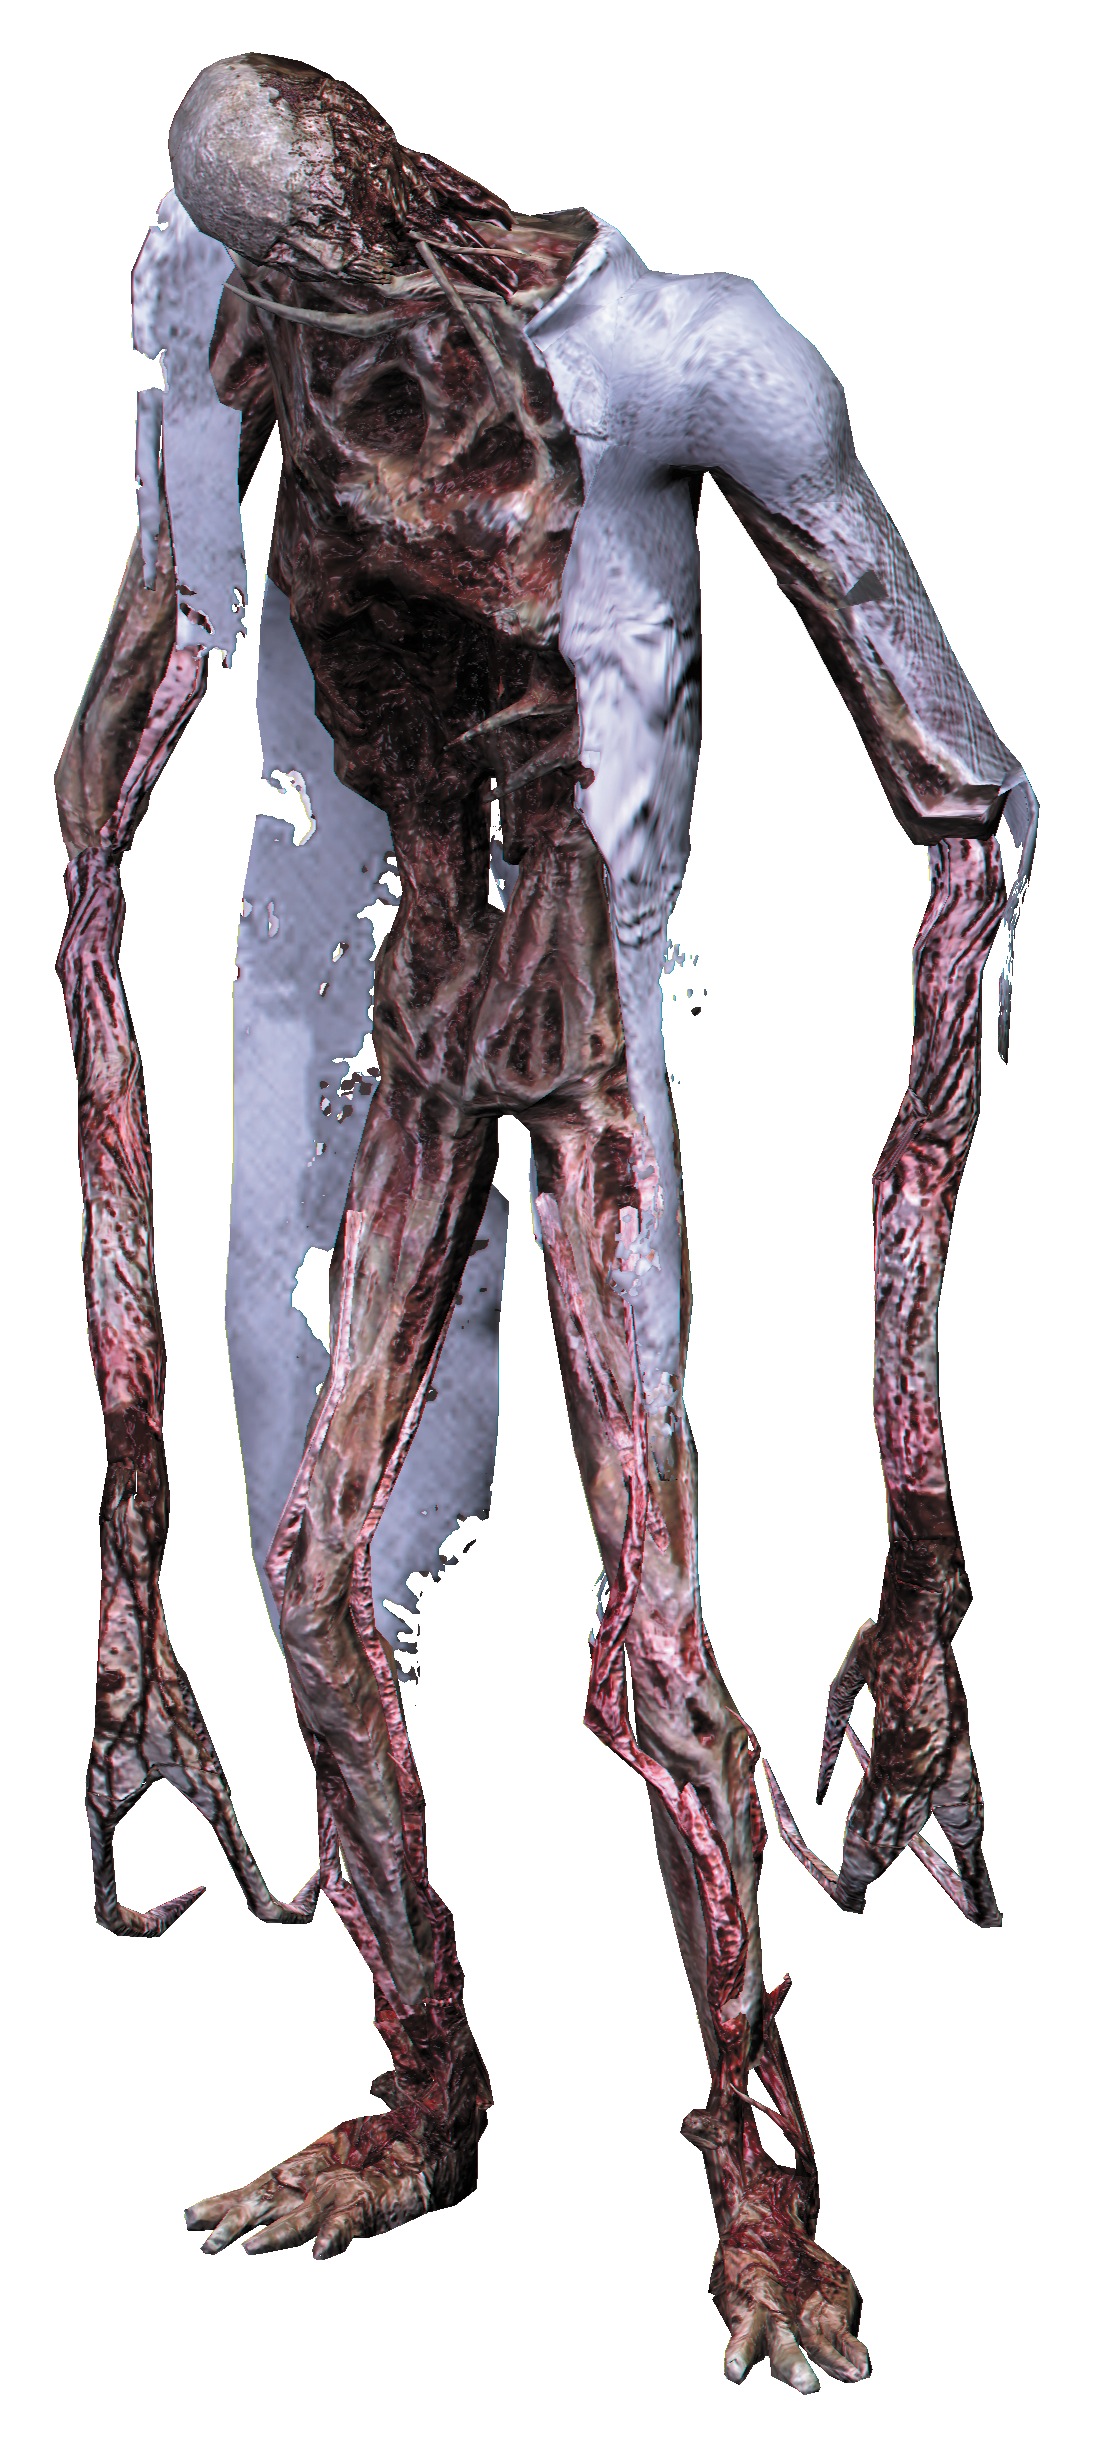
This tall Necromorph will come at you to attack. When you shoot it enough to kill it, the Divider splits into its smaller parts called Divider Spawn. Hit the Spawn with stasis while they are all bunched up. Then use a weapon whose alt-fire causes damage over an area such as grenades or mines. If the Spawn spreads out, get your back to a wall so you can see where the attacks are coming from; then use the flamethrower or force gun to attack an area through which the pieces are coming at you.
Brute
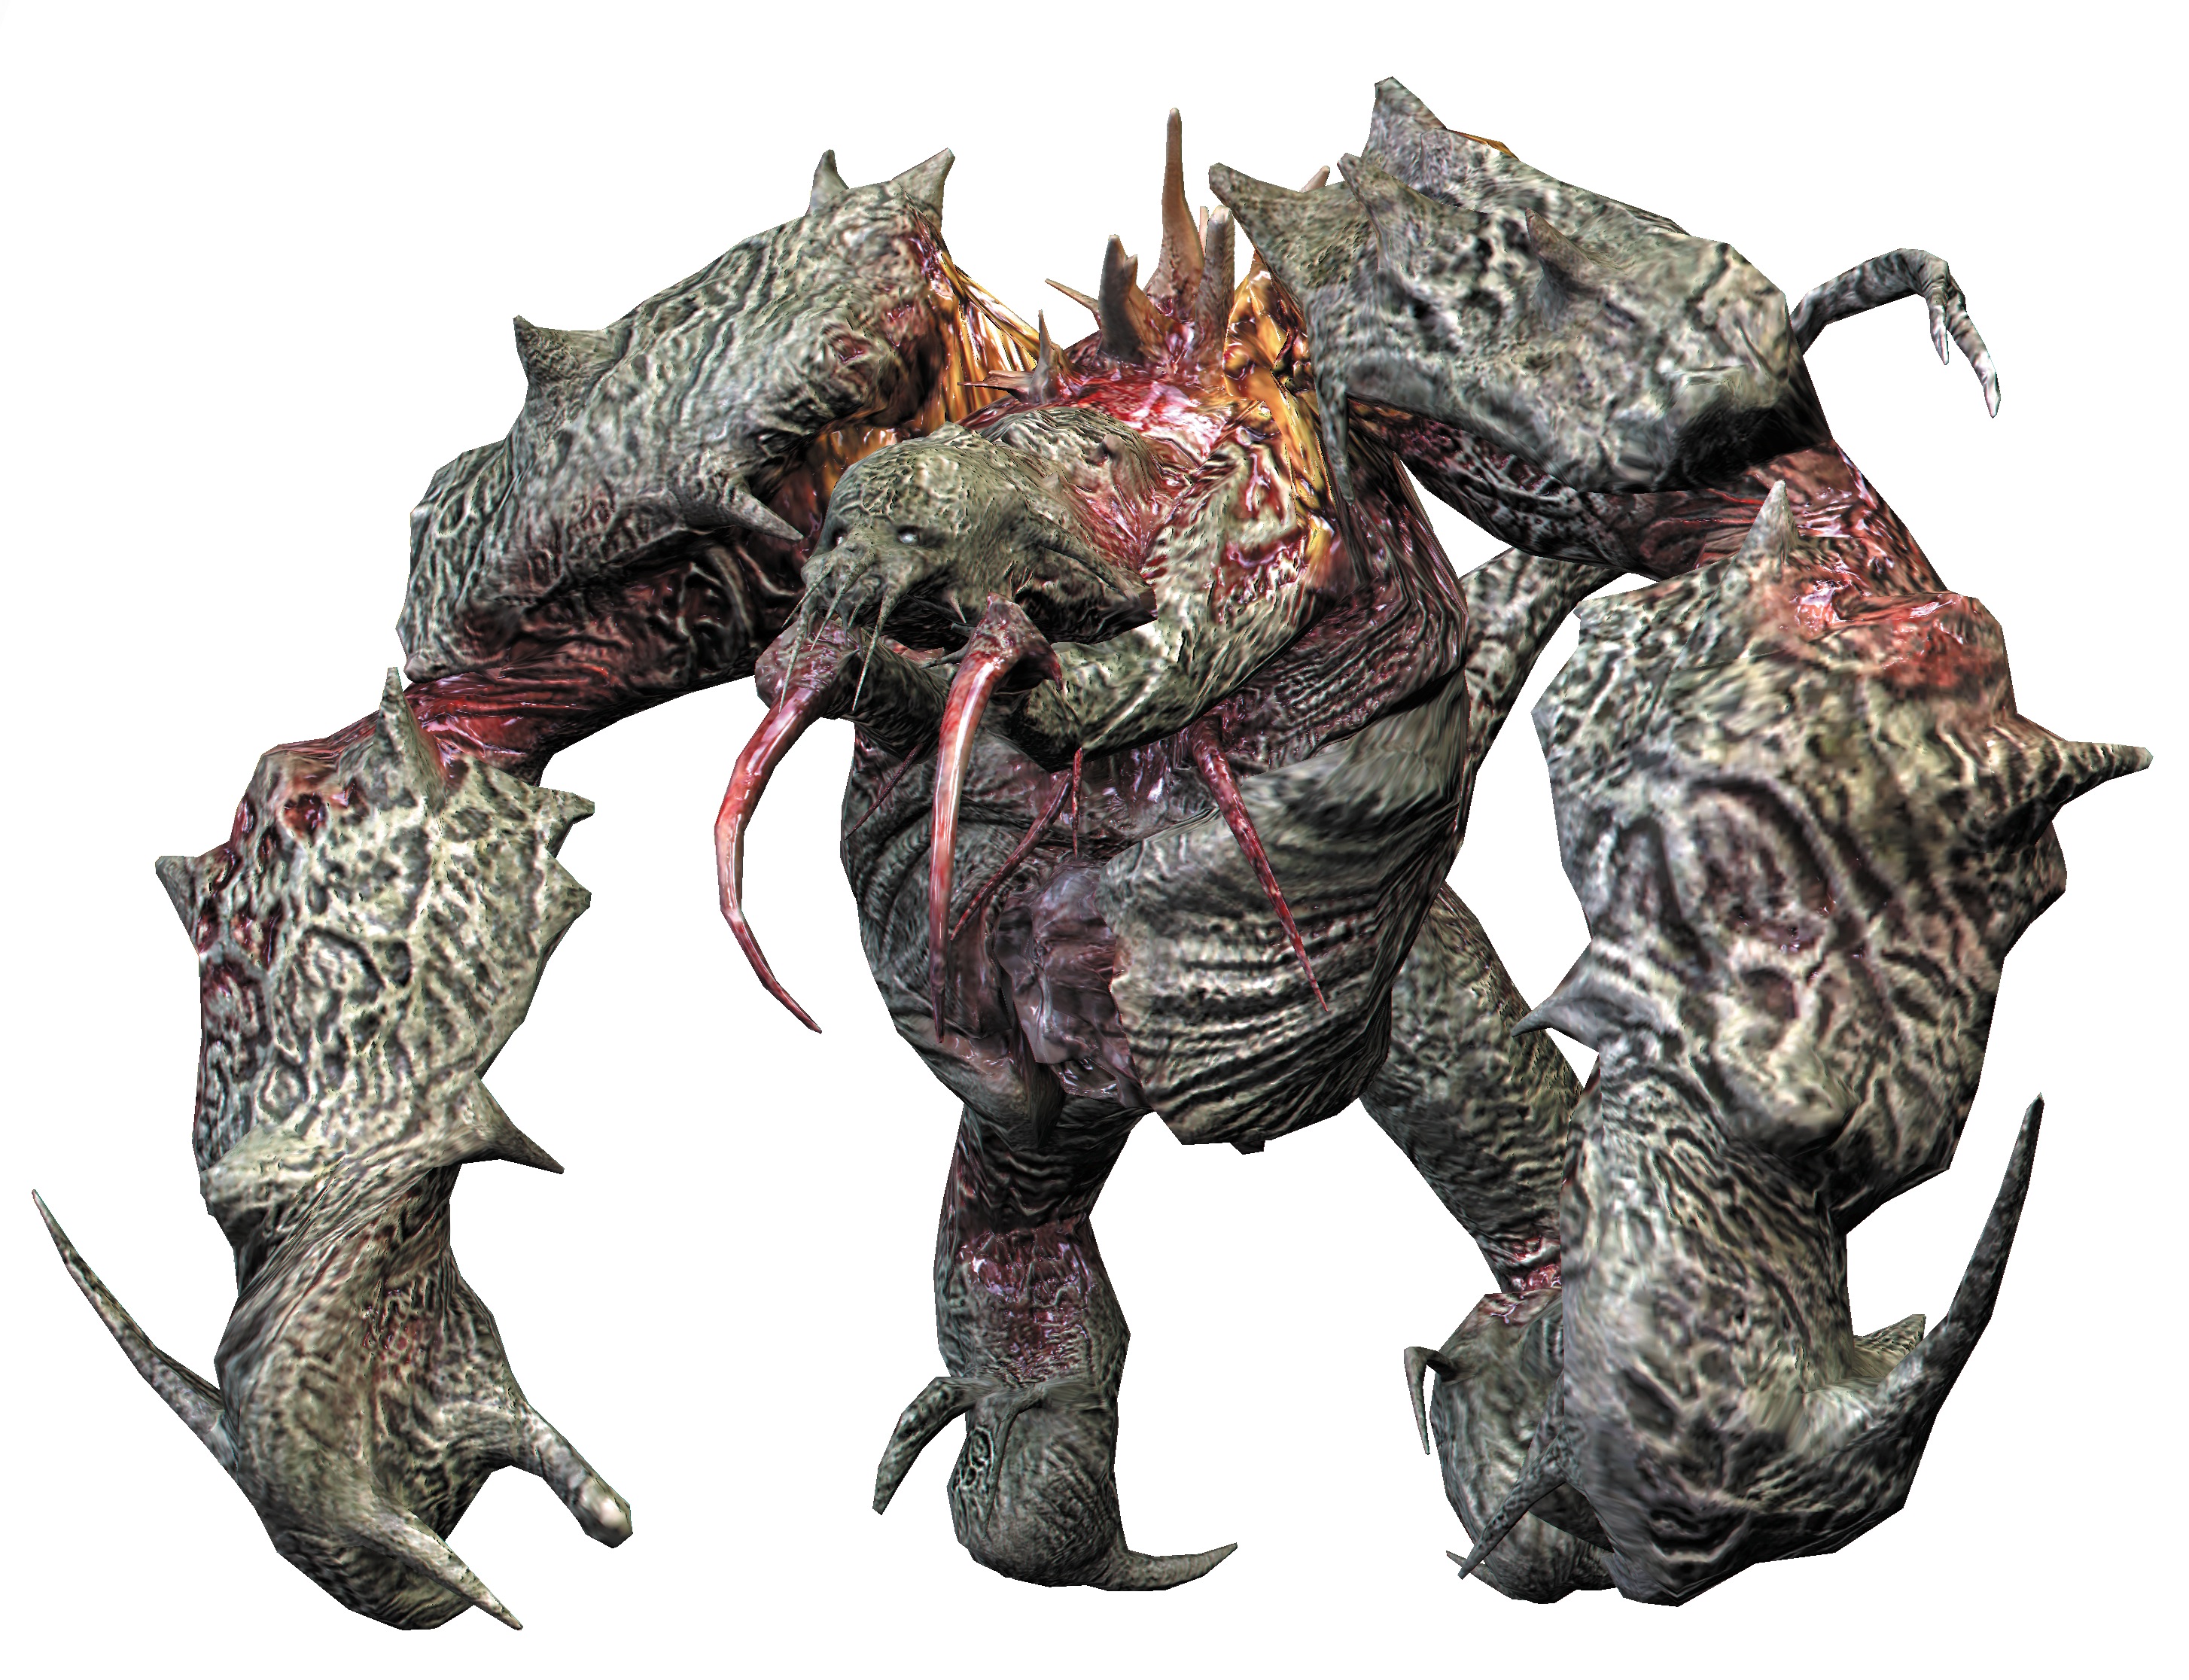
These large Necromorphs are tough to kill. They are essentially bosses with whom you must spend some time dueling. The glowing weak points at the shoulders and knees are the obvious targets. Wait for the charge, then strafe and fire at the exposed areas. Don't try to strafe while firing; the Brute can adjust enough to still hit you. If you don't have a lot of room to strafe, hit it with stasis and concentrate fire on the weak points. Taking out the legs will slow the Brute down, but it still has a nasty bite attack and a projectile that fires from its belly. Catch this projectile with kinesis and throw it back to save ammo.
Guardian
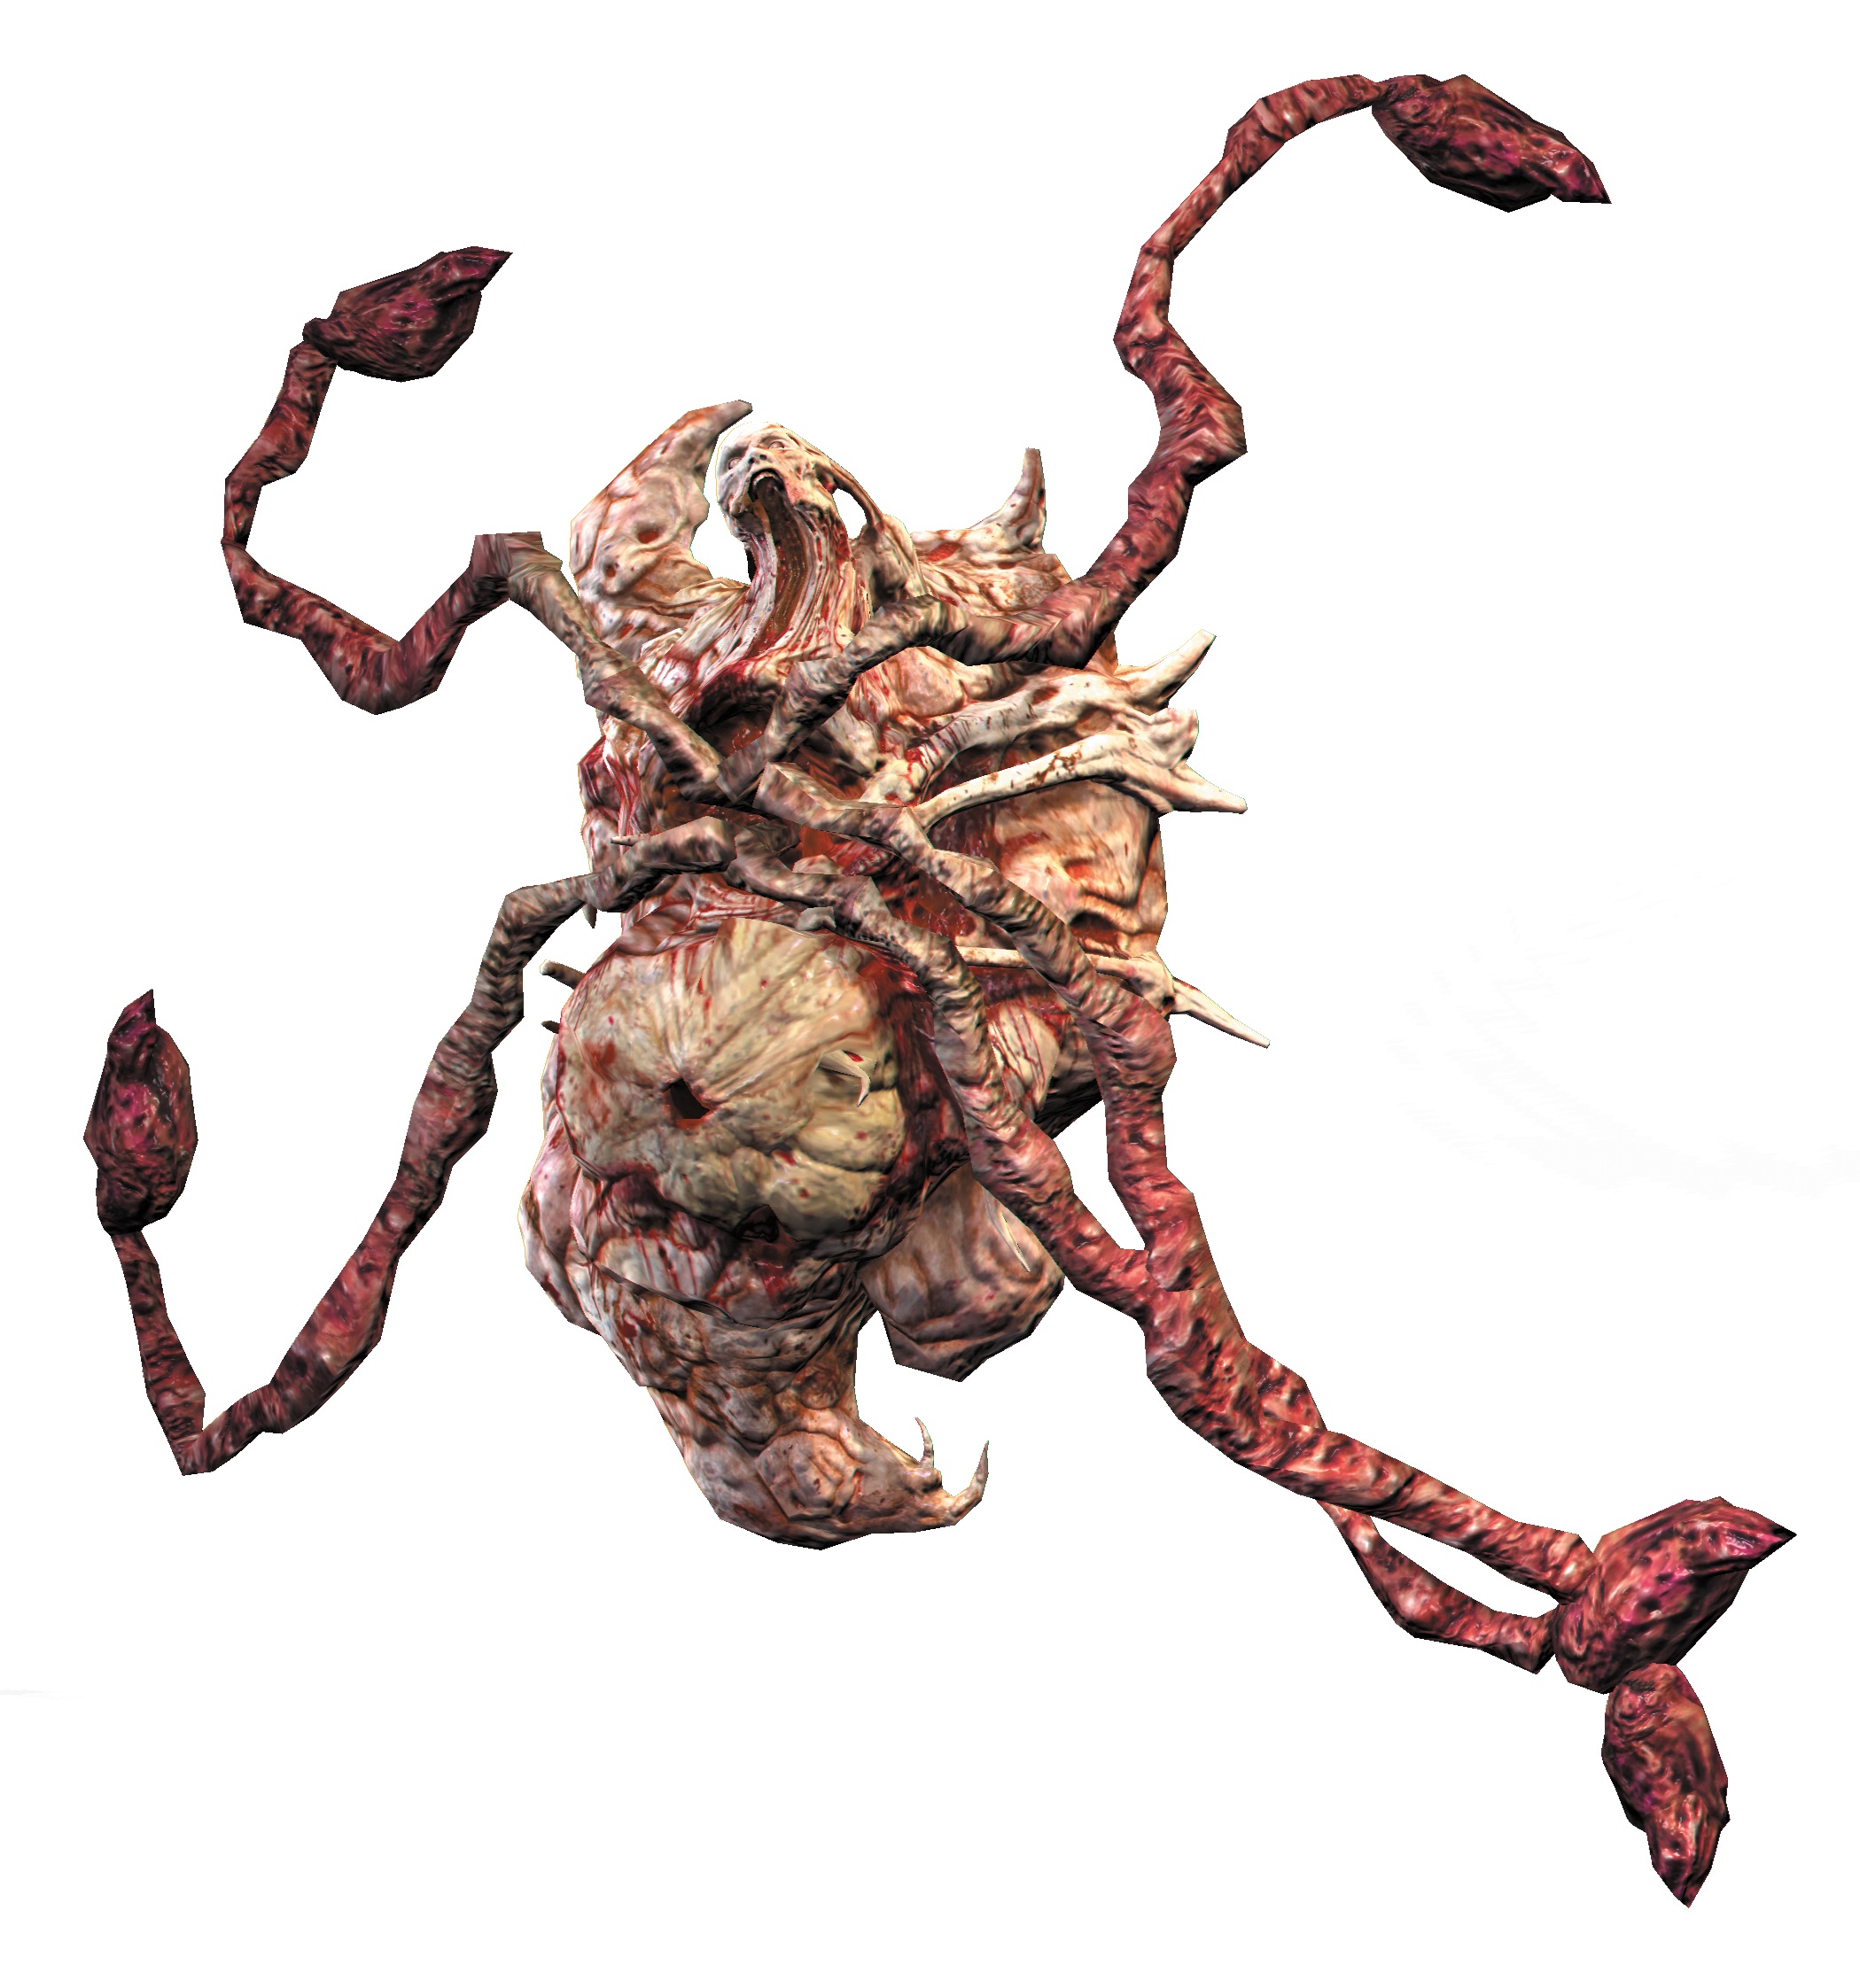
Guardians are large Necromorphs that attach themselves to walls and block corridors. Don't try to run past them, since they have an instant-kill attack. As soon as it detects you, the Guardian start throwing out its pods; these pods will launch projectiles from a single tentacle. Don't worry about them unless you have to. Take out the Guardian first, then deal with the pods. If an explosive canister is around, use it to kill it with one shot. Otherwise, go for the tentacles that come out and attach to the wall. There are a lot of them, and they can retract, so using stasis will let you take out several in a row. Afterward, shoot the tentacles to kill the pods.
Tripod
The Tripod is another boss-type Necromorph. You face it at the end of Chapter 1. It is fast and can cause a lot of damage. Slow it down with stasis and then shoot at the yellowish infected flesh on one of its arms. Keep shooting at one arm until you shoot it clean off. Then work on the other arm to finally kill it. As long as you keep this enemy in stasis and focus on its weak spots, these are not too tough to kill.
Nest
This giant Necromorph can be tough to kill unless you know what to do. As with all Necromorphs, the glowing sacks are the weak spots. The Nest is stationary; however, its arms wave around, making the weak spot a more difficult target. In addition, it will fire projectiles at you. After it launches its projectiles, the waving arms will remain motionless for a few seconds. This is your time to attack. Dodge the projectiles and then shoot at the glowing sacks. When you destroy all three, the Nest dies.
Ubermorph
The Ubermorph appears late in the game and cannot be killed. As soon as you dismember it by shooting off all its arms and legs, its body will quiver on the floor and then regenerate all of its limbs and begin coming after you again. Weapons such as the contact beam will only push it back; it won't dismember it. However, the contact beam's alt-fire is a good option, especially if you have the special upgrade that puts nearby enemies in stasis as it blows them back. Stick to weapons that will take off limbs. Since you can't kill the Ubermorph, shoot it to stop it temporarily, and then keep moving.