
The Sims 3 World Adventures Guide Essentials The Sims 3 Primer
Creating a House
Now that you have created a new Sim (or a new household of Sims), it is time to give them a place to hang their hat. A Sim’s home is a Sim’s castle—in some cases, a clever player can deliver on that adage literally.
Much like working with Create a Sim, you have nearly limitless tools for putting up a personal paradise for your Sim. You are limited only by your initial bank account.
However, as your Sim earns more Simoleons, you can keep building onto a house and eventually put together a real dream house.
That same budget also prevents you from an initial spending spree in Buy Mode, which is where you shop for the objects that fill a house.
But like building on to a house, as your Sim rakes in the Simoleons, you can amass quite a treasure trove of items and goodies.
Now, you do not have to build a house. You can choose from plenty of pre-built houses or buy a furnished joint with all of the objects you need for a basic existence (toilet, shower, fridge, etc.).
And, you can even take a pre-built life a step further by assuming a pre-made scenario with one of the many families already living in either Sunset Valley or Riverview.
Building Basics
Building a basic house with the tools provided by The Sims 3 is easy. Using Build Mode and Buy Mode, you access a series of tools and cursors that let you drop new objects and building components on to your lot. The tools are the same in each mode.
 Hand Tool (H):
The Hand tool is used to move objects around your house or property. To grab an object, left-click on it. To drop the object, left-click again. To rotate an object, click and hold the left mouse button on the object and move the mouse around.
Hand Tool (H):
The Hand tool is used to move objects around your house or property. To grab an object, left-click on it. To drop the object, left-click again. To rotate an object, click and hold the left mouse button on the object and move the mouse around.
The object will spin to face the cursor as you drag the mouse.
 Create a Style (R):
This tool enters the Create a Style menu, which allows you to customize objects. Personalize objects with new colors and textures. The Create a Style tool is fully explained later in this chapter.
Create a Style (R):
This tool enters the Create a Style menu, which allows you to customize objects. Personalize objects with new colors and textures. The Create a Style tool is fully explained later in this chapter.
 Eyedropper Tool (E):
The Eyedropper tool copies the color or texture of an object so you can easily place it on another object. You can also use this tool to copy decorations, such as wallpaper.
Eyedropper Tool (E):
The Eyedropper tool copies the color or texture of an object so you can easily place it on another object. You can also use this tool to copy decorations, such as wallpaper.
Click on the tool and then click on the object/surface you want to replicate. Then, click on the object/surface you want to copy the texture or color set to.
 Sledgehammer Tool (K):
Want to destroy an object, wall, or floor? Click on the Sledgehammer tool. Once the cursor turns into a hammer, click on an object to immediately destroy it. Simoleons are instantly returned to your bank, minus any depreciation.
Sledgehammer Tool (K):
Want to destroy an object, wall, or floor? Click on the Sledgehammer tool. Once the cursor turns into a hammer, click on an object to immediately destroy it. Simoleons are instantly returned to your bank, minus any depreciation.
Build Mode
Build Mode is the tool set for actually constructing a house. There are multiple building elements available in Build Mode, such as a foundation, floor coverings, walls, windows, and doors.

1 Foundation
2 Floor Covering
3 Walls
4 Wall Covering
5 Doors
6 Windows
7 Roof
8 Stairs
9 Arches
10 Columns
11 Fences
12 Gates
13 Pool
14 Fireplaces
15 Trees/Flowers/Shrubs/Rocks
16 Terrain Tools
17 Water Tool
18 Terrain Paints
Buy Mode
Now that you have built your house and laid out the general floor plan, it is time to outfit the place with appliances, furniture, and other objects.
You can view the catalog of objects by room or by function.
The top icon (1) sorts by room—which lets you click on the Room tabs along the top of the tool. The small chair icon (2) sorts by function.
After selecting an object category, such as a chair or table, you can look at the individual objects.
Each object is accompanied by a photo of the object, a description, price, and any related properties, such a comfort rating or how the object addresses a need.

1 Sort by Room
2 Sort by Function
3 Household Inventory
4 Object Buy Field
5 Kitchen
6 Bathroom
7 Bedroom
8 Living Room
9 Dining Room
10 Study
11 Kids Room
12 Outdoor
13 Objects
Build Mode
If you decide to build your own house, then you need to understand the basics of construction. The tools in Build Mode make this process smooth and simple, but let’s go through the process of building a single-story house with a small backyard pool.
Before breaking ground, you need to know about an essential pair of tools that makes building easier and helps you see inside not only your house, but also community lots when your Sim is on the premises: Change Wall Mode and Change Floors.
 Change Wall Mode
(Home
) and (
End
):
Toggle through three different views of your house—walls down, cutaway walls, and walls up.
Change Wall Mode
(Home
) and (
End
):
Toggle through three different views of your house—walls down, cutaway walls, and walls up.
 Change Floors
(Pg Up)
and (
Pg Up)
:
Scroll up and down the different floors of your house with these two buttons.
Change Floors
(Pg Up)
and (
Pg Up)
:
Scroll up and down the different floors of your house with these two buttons.
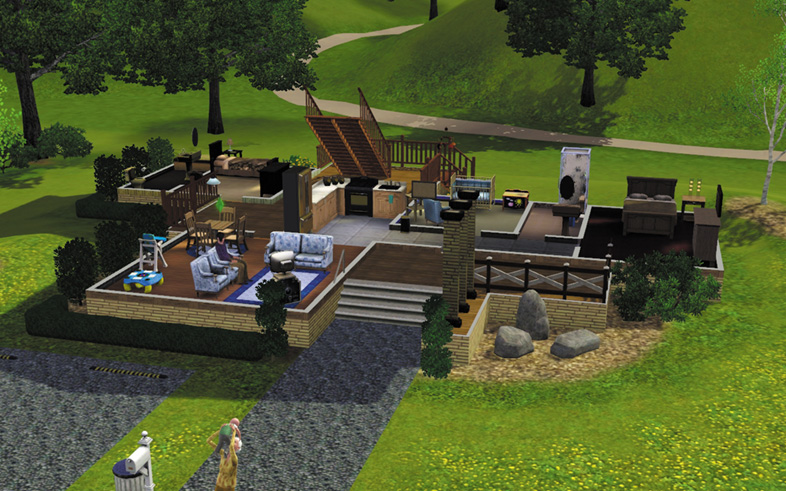
Walls down view
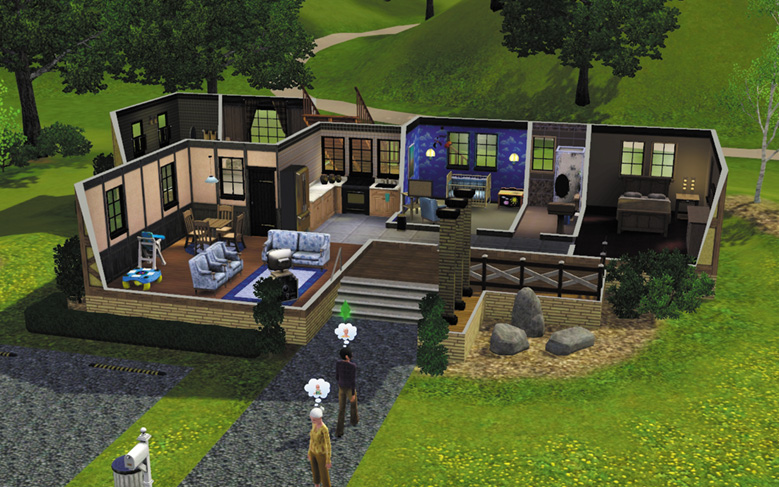
Cutaway walls view
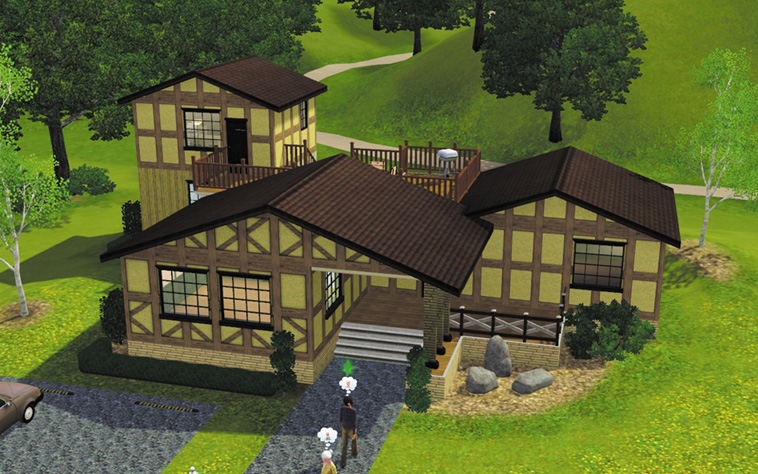
Walls up view
Foundation
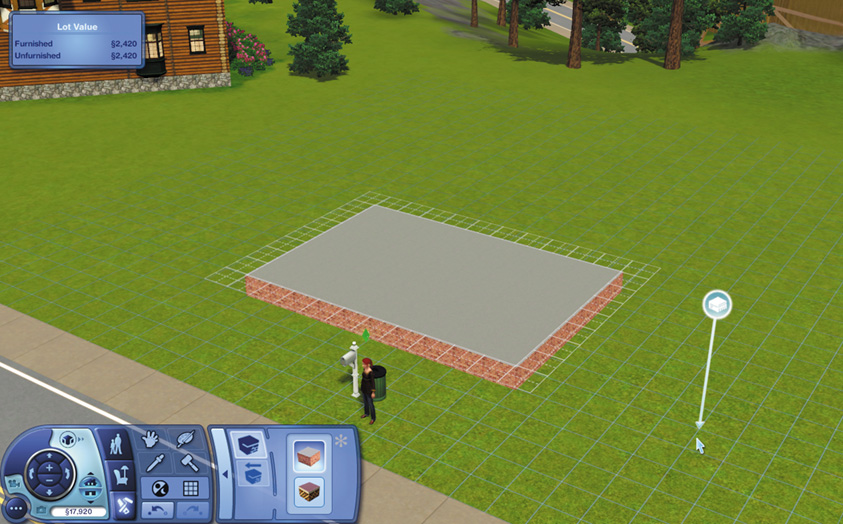
The first step to building a house is laying down the foundation. The foundation is what supports your house and is especially useful for deciding on a general layout.
If you are building your first house after just starting a new game, then you need to think small.
Be frugal with the foundation (it’s §4 per square) and build a house that encapsulates the essential rooms: bathroom, bedroom, kitchen, and some kind of living area. If you spend all of your Simoleons on a huge foundation, you will run out of money way too soon.
To lay down a foundation, click on the Foundation tool in Build Mode and then stretch the cursor across your purchased lot to create a rectangle. When you release the left mouse button, the foundation is filled.
If you want to make a house that is not a rectangle, then attach different pieces of foundation to make your new shape.
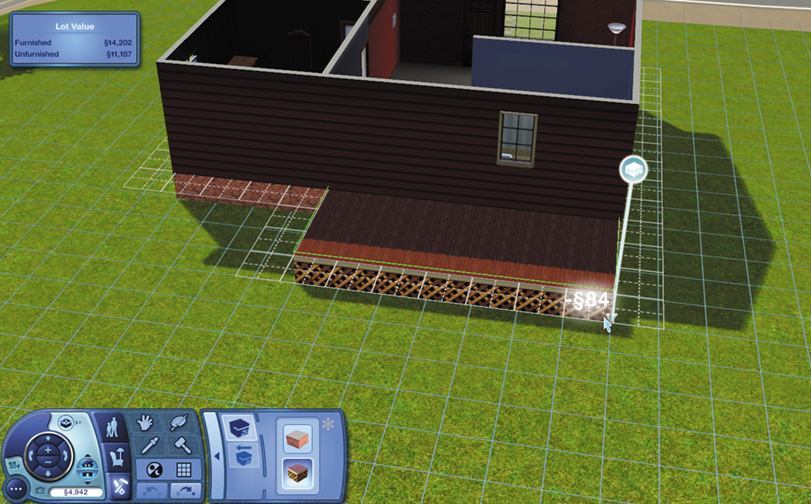
There is a second type of foundation: deck. If you want to create a deck for your house, switch to the deck option in the Foundation tool from Build Mode and then follow the same steps with dragging the cursor to lay down the planks.
Walls
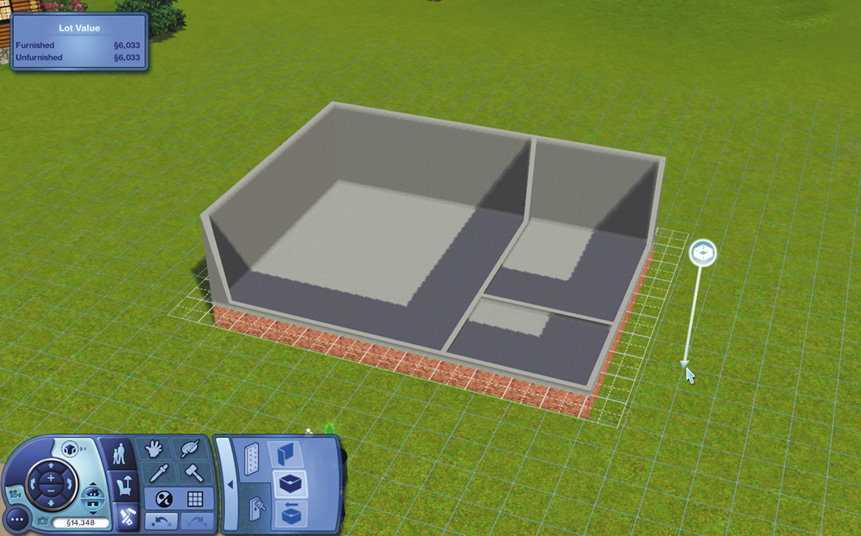
After laying the foundation, it is time to erect some walls. Left-click on the wall in Build Mode to switch to the wall tool. The cursor changes to an arrow with a small wall symbol over it.
You now have three ways to put up walls:
 Create Wall:
Create walls manually by dragging the cursor along the edges of a foundation or directly across it.
Create Wall:
Create walls manually by dragging the cursor along the edges of a foundation or directly across it.
 Create Room:
Erect four walls to instantly create a room. Drag the cursor across the foundation to expand the pre-made room.
Create Room:
Erect four walls to instantly create a room. Drag the cursor across the foundation to expand the pre-made room.
 Create Diagonal Room:
This option creates a whole room, but does so along the diagonal of the square grid. Use this option to create unique rooms.
Create Diagonal Room:
This option creates a whole room, but does so along the diagonal of the square grid. Use this option to create unique rooms.
There is no limit to the number of walls you can create—that is dictated by your household funds because walls cost §70 per panel.
While you definitely need to enclose your house, you do not need to enclose all of the rooms inside the house.
You should, of course, enclose the bathroom. The bedroom needs to be enclosed, too, to keep out sound from the rest of the house. Otherwise, noises can wake your Sim and put them in a bad mood.
Wall and Floor Coverings
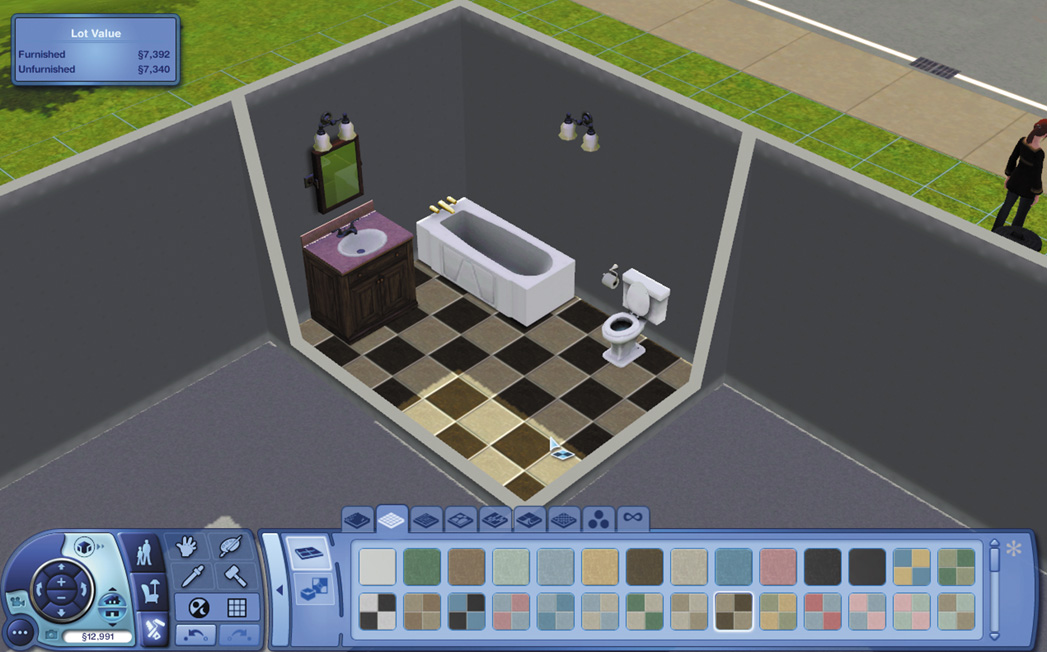
Who wants to live in a house with exposed dry wall or concrete floors? Decorate these flat surfaces with coverings, such as carpet and wallpaper.
There are hundreds of wall and floor coverings for a variety of prices, ranging from §4 to §21 per unit of area.
Wall coverings are divided into the following categories:
Paint
Wallpaper
Tile
Paneling
Masonry
Rock & Stone
Siding
Misc.
There are many floor covering categories, such as carpet, tile, and stone.
Carpet
Tile
Wood
Stone
Doors and Windows
Masonry
Linoleum
Metal
Misc.
Doors and Windows
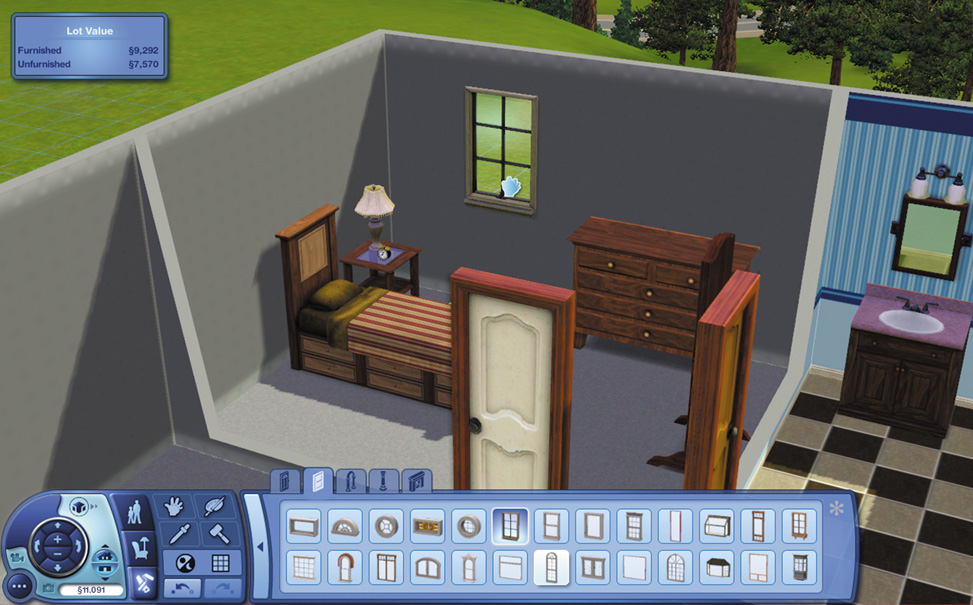
Naturally, once you create walls for your house and the individual rooms, you need windows and doors. You can also install an arch as an alternative to a door, although that does not block noise like a door does.
You always need to install a door on the exterior of your house instead of an arch. An arch just invites Burglars and curious neighbors.
There are many types of doors for your house, from exterior to interior doors. There are also glass doors that serve two purposes.
Not only are they access points for a house, but they also let in sunshine, which many Sims find pleasing.
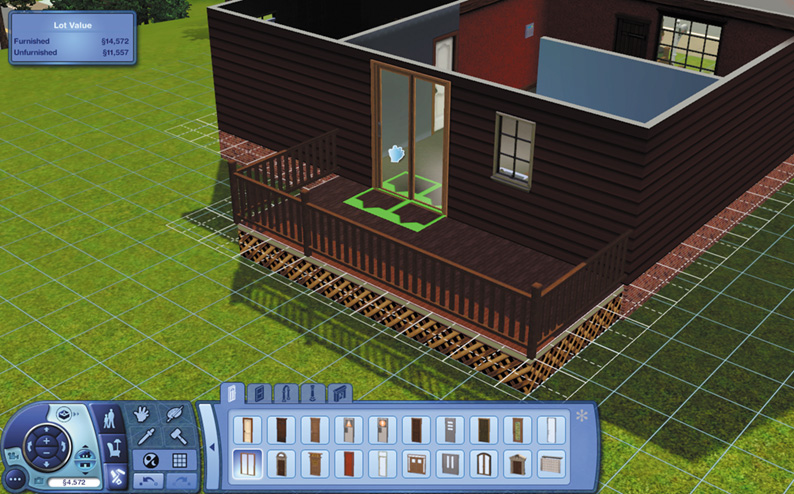
Windows are important not just as decoration, but also to allow daylight into a house. Sims can read by daylight instead of always needing a lamp or artificial light source.
There are many window options in Build Mode across a spectrum of prices. Many windows also accommodate drapes and curtains, which can be purchased through Buy Mode.
Stairs and Railings
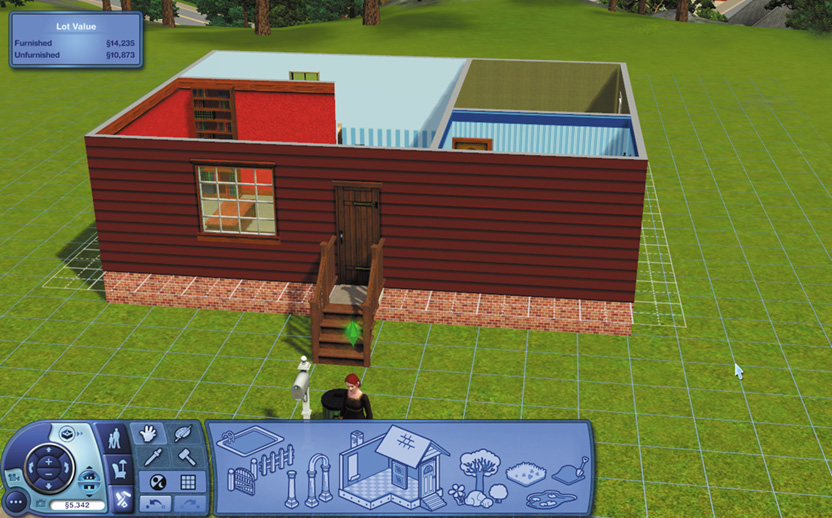
The primary function of stairs is to connect two stories of a house either inside the house or provide access to an upper story (or balcony) from outside. Stair prices range from §10 to §120 per segment, which can get quite costly.
When creating stairs, select the type of stairs you want from Build Mode and then drag them into the house. The stairs automatically “clamp” to the next story, however, only if you have sufficient room for the stairs.
While you may adjust the width of the stairs, you cannot adjust the incline. If the marker around the base of the stairs is red, then the stairs will not fit.
Columns
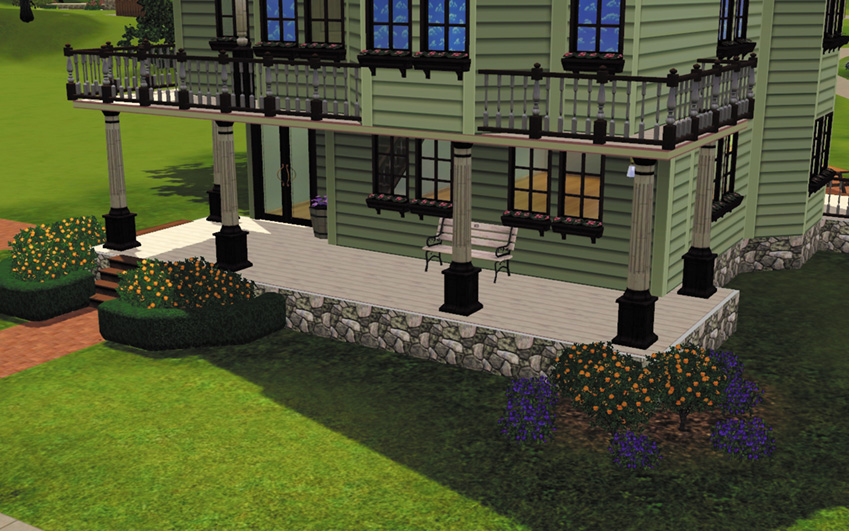
Columns serve dual purposes in Build Mode. Not only are they attractive features when artfully placed around a house, but they also bear the load of upper stories. If you want to create an outdoor balcony for your house, use columns to support it.
You can also use columns inside to support an upper floor when you do not want to extend a load-bearing wall across a room. Different columns support different amount of area of an upper floor.
The cheapest column, for example, supports a 4x4 grid of floor.
Roof
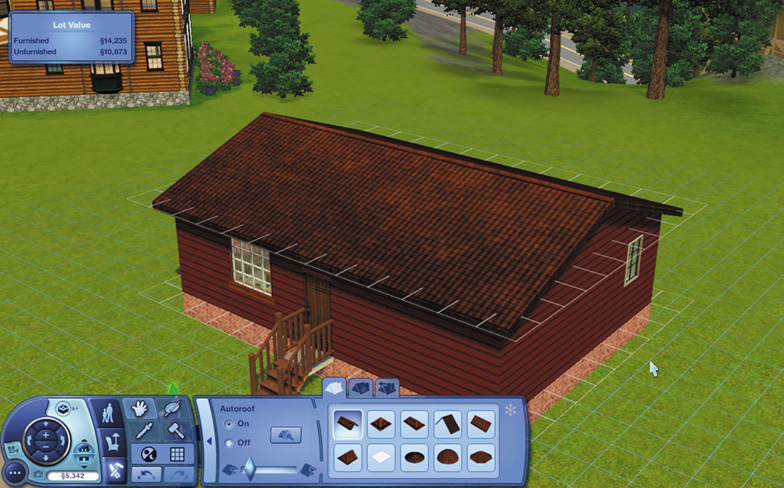
No house is complete without a roof. When you initially select the Roof tool from Build Mode, you are dropped into the Autoroof function, which stretches a roof across the structure as soon as you select a style.
You can turn Autoroof off and opt for topping your dwelling on your own, which is a fun way to design such features as gables. Roofs are free, so feel free to experiment without any hit to your household funds.
Fireplaces
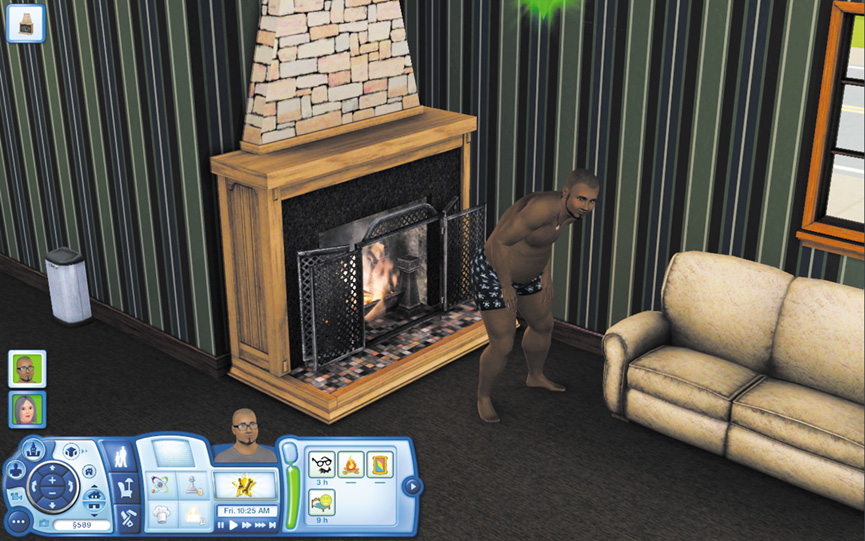
Like columns, fireplaces are both decorative and functional. There are several types of fireplaces to choose from. Some are freestanding and some must be “locked” onto a wall.
When you install a fireplace, a chimney is automatically extended up to the roof‑even if it has to go through additional floors above it.
However, you can share a chimney with multiple fireplaces on multiple floors by installing them directly above and below each other. Fireplaces can also be installed outside.
Fireplaces add fun to a house. Sims can also warm themselves by a fireplace, which results in a mood boost. After lighting a fire, your Sim can poke at it, which they find amusing.
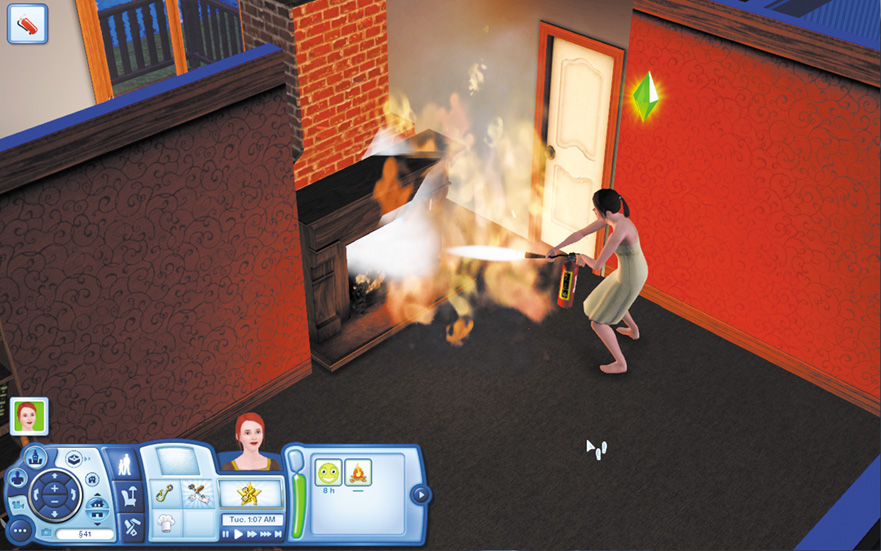
Always extinguish a fire before the last Sim leaves the house, though, to avoid catastrophe. When a house catches fire, the Fire Fighter Service Sims arrive—but only if you have a smoke alarm in the room. Without this alarm, you risk extensive damage to your house.
Gates and Fences
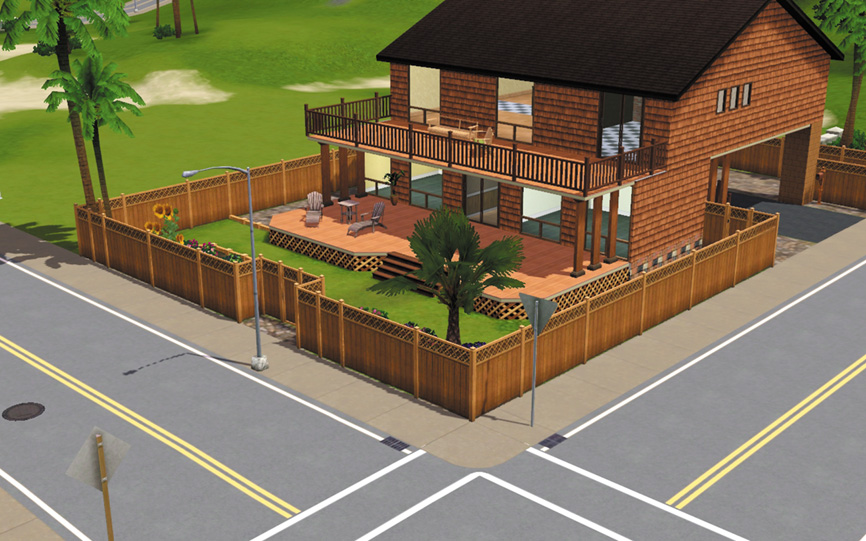
Fences make good neighbors. To add a fence to your lot, choose the Fence tool from Build Mode and then stretch it along the ground just as if you were extending a wall.
There is a Create Yard option that lets you stretch a rectangle of fencing across your lot, just like creating a room inside with the Wall tool.
You can also add gates to fences to give access to outdoor features, like gardens.
Swimming Pools
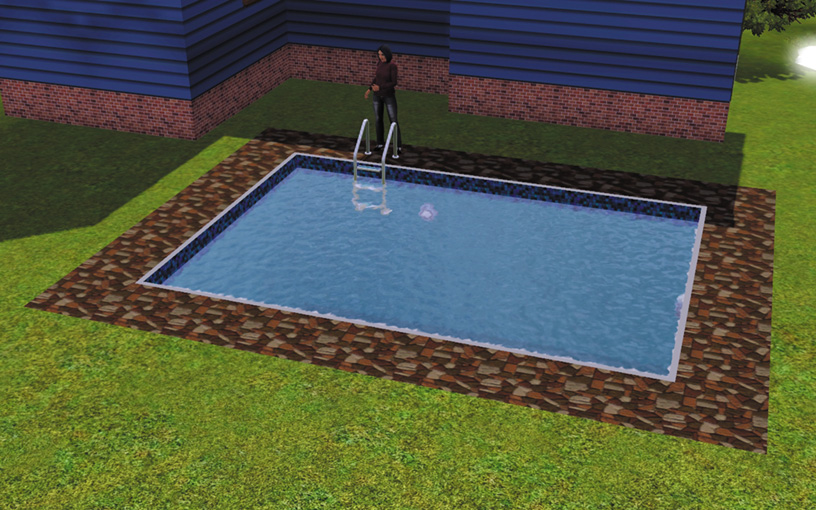
Sims love to swim—unless they have the Hydrophobic trait. Swimming is fun and good exercise. Plus, if a Sim likes the outdoors, swimming in an outdoor pool gives a nice little mood boost.
Select the Pool tool from Build Mode to dig a pool on your lot, just like laying down a foundation.
Terrain Tools
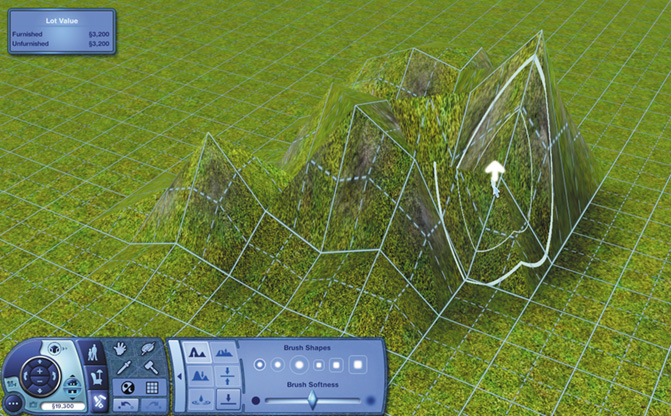
The Terrain tools allow you to perform effortless landscaping on your lot. These tools let you sink the ground, install ponds, build mounds, and smooth rough surface edges. To access the Terrain tools, just select them from Build Mode.
Foliage
Beautify the exterior of your house with trees, flowers, and shrubs. Sims love a landscaped lot complete with trees, artfully placed rocks, and fresh blossoms.
Unlike harvestables, which must be tended to grow, the trees and plants you install in Build Mode do not require any upkeep. They are gorgeous year-round.
Buy Mode
Sims love stuff and Buy Mode is how you give it to them. Buy Mode is like an insta-catalog where you purchase objects and items and then immediately install them in a house or on a lot.
When you enter Buy Mode, the game is paused so no time passes while you consider the hundreds of shopping options.
When you select an object from Buy mode and place it on your lot, the funds are immediately deducted from your household account.
While you are still in Buy Mode, you can return an object for a full refund. Just use the Sledgehammer tool to dismiss the object and the Simoleons reappear in the household funds.
However, if you exit Buy Mode and then go back into it to remove an object, you are dinged for object depreciation.
You can have as many rooms in your house as your Simoleons allow, but there are some essential rooms that your Sim cannot function without: bedroom, bathroom, and kitchen.
Your Sims would certainly appreciate any other rooms in their new digs, but let’s just go over the required areas and the critical objects you must place in those rooms.
Bathroom
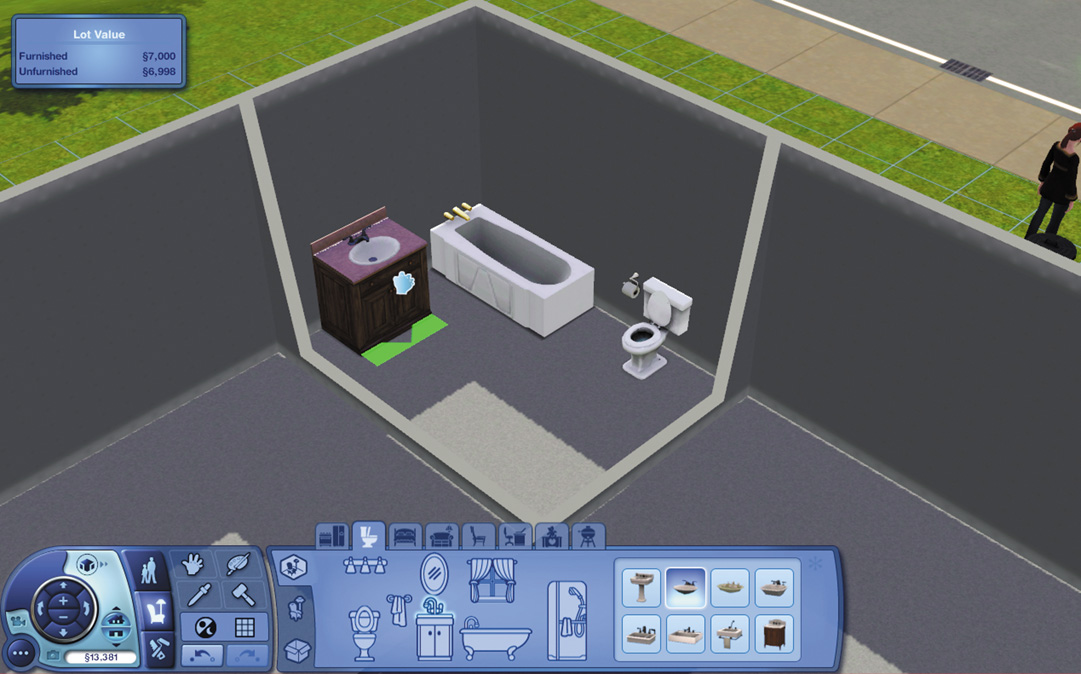
The bathroom is positively critical for your Sims’ well-being. Without a place to attend to hygiene and bladder needs, your Sims will not be able to function properly in polite society.
You must install a toilet so your Sims can relieve themselves in a timely manner. A bathtub or shower is also essential for keeping clean. If your Sims do not wash on a regular basis, not only with their overall mood suffer, but relationships with friends and work will also take a hit.
Install a sink and mirror in the bathroom, too, so your Sim can brush teeth as well as primp and pose. Looking good is often akin to feeling good, you know.
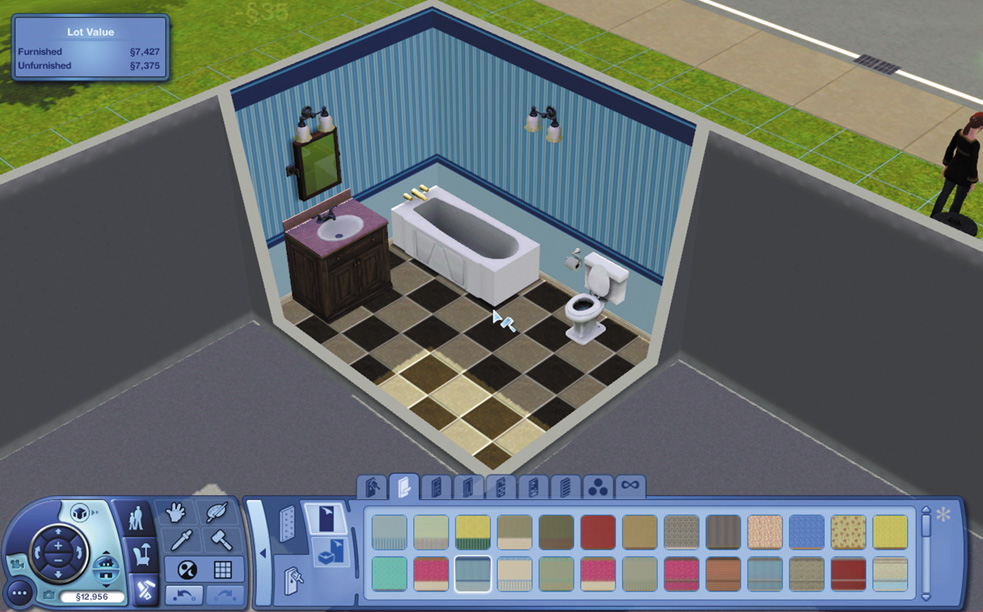
When you create a bathroom, make sure you leave enough room along the side of the bathtub for a Sim to bend over and turn on the faucet. If you put something too close, like a counter, just use the Hand tool to move it over and create the needed space.
Bedroom
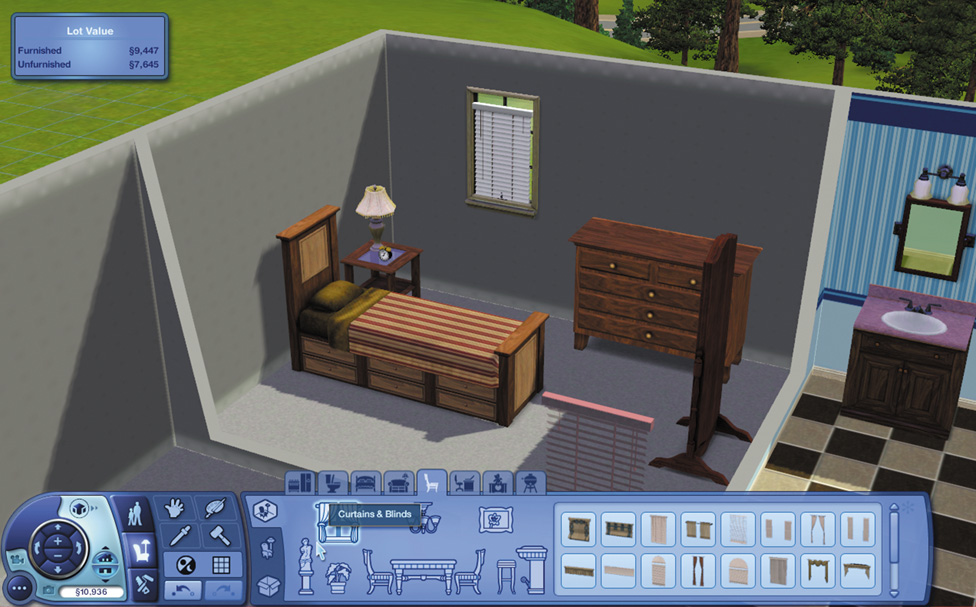
Sims need their beauty rest. After a long day of work or play (or, hopefully, a nice combination of both), Sims get sleepy.
While a Sim can take a catnap on a couch, to get the kind of rejuvenating rest needed to greet a whole new day and effectively perform at work, Sims need a bed.
A modest bed will do the trick at first. You can place other useful objects in the bedroom, such as a dresser, but the bed is your top priority.
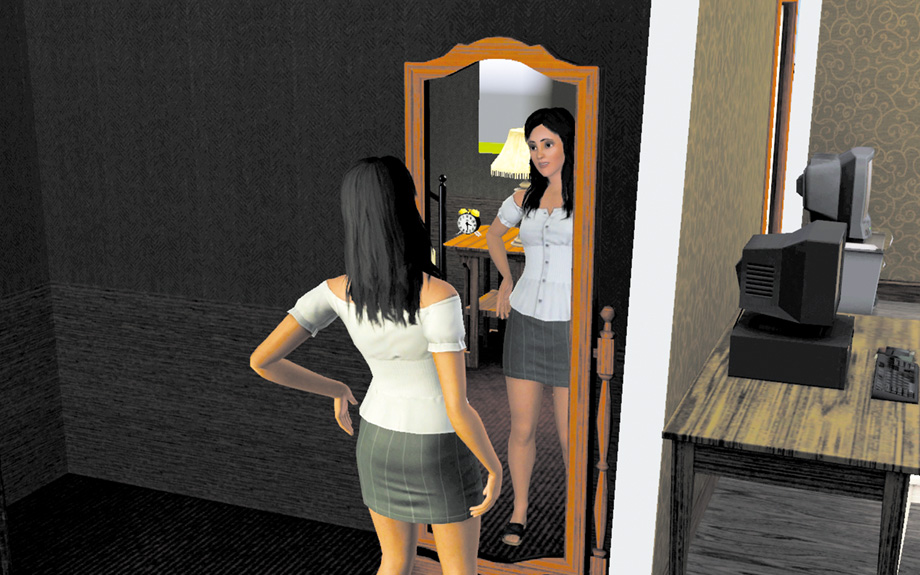
Sims do fancy checking themselves out. If you have a little money to spare, put a mirror in the bedroom. A dresser is useful, too, because it lets Sims change their outfits.
Kitchen
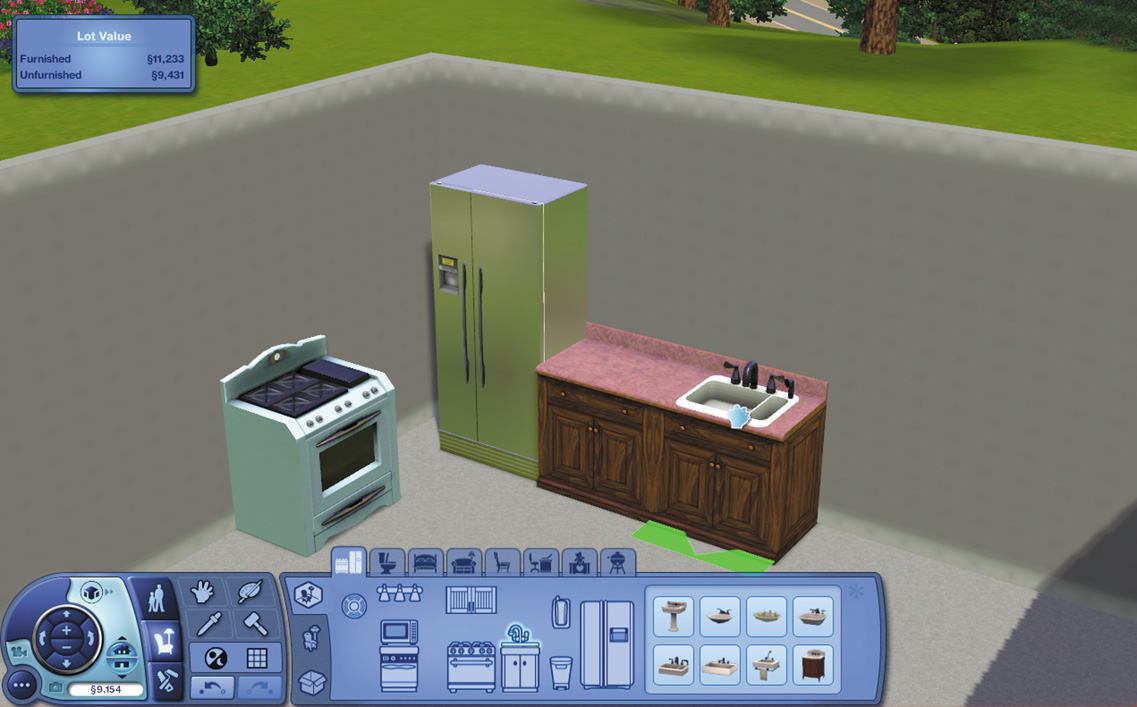
Sims need to keep hunger at bay to function, and that means they need to eat food. If Sims get too hungry, not only does their mood greatly suffer, but they can eventually pass out and lose valuable time recovering.
Build a small kitchen for starters, with a refrigerator, stove, and sink. A dishwasher is useful to be sure, but dishes can be easily cleaned in the sink at first.
A fridge by itself is not exactly helpful after a few days, so make sure you hit up the grocery store for food, especially if you plan on being a cook. You can also dine out, but it is much cheaper to eat at home.
The kitchen does not need to be its own room with a door. It can just be a small nook off the living room to save money and space. However, noise from the kitchen will wake Sims within earshot, especially Sims who are light sleepers.
Create a Style
So, you just bought a bed for your house, but you want to change the color of the duvet cover? It’s easy to accomplish this design feat with the Create a Style tool.
The Create a Style tool for changing the appearance of an object works quite similar to making adjustments to a Sim’s clothes in Create a Sim. To change the colors or textures, left-click on the Create a Style button (the palette).
Now, left-click on the object you want to alter.
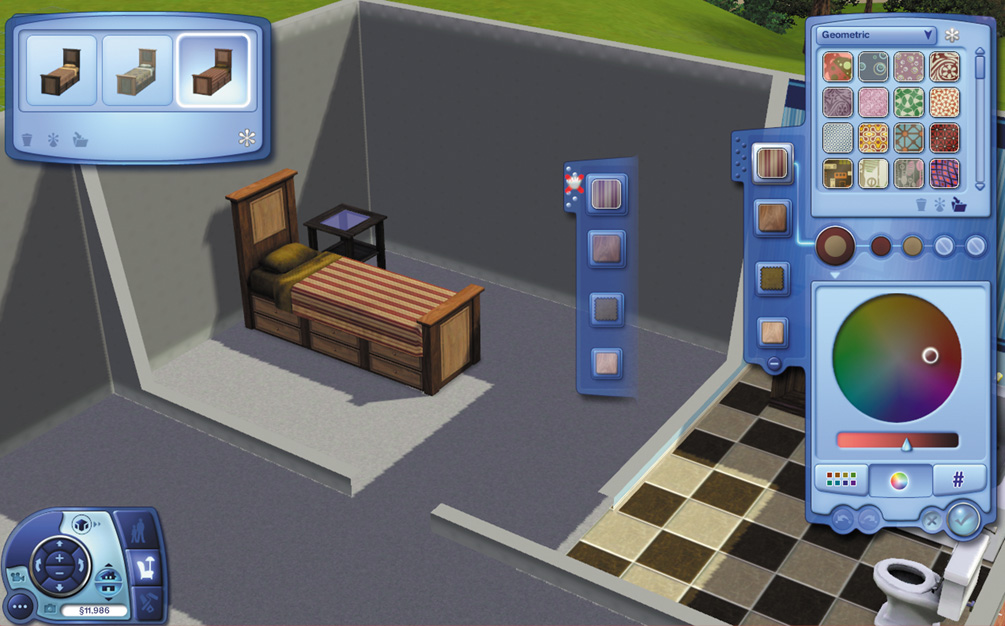
When the Create a Style toolkit appears on the screen’s right side, you see the current colors and textures used in the currently selected object.
In the case of this bed, the pattern for the duvet cover, the wooden frame textures, and the metal knobs on the bed all appear on the pane to the right.
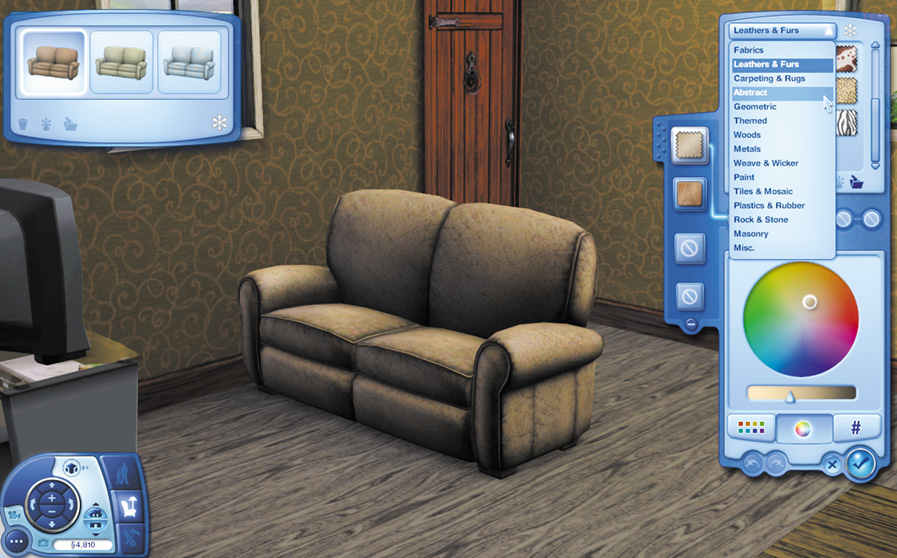
To make changes to any of the textures, left-click on the desired texture. Now, you can either adjust the color with the color wheel or color palette or select a different texture from the texture box in the top-right corner.
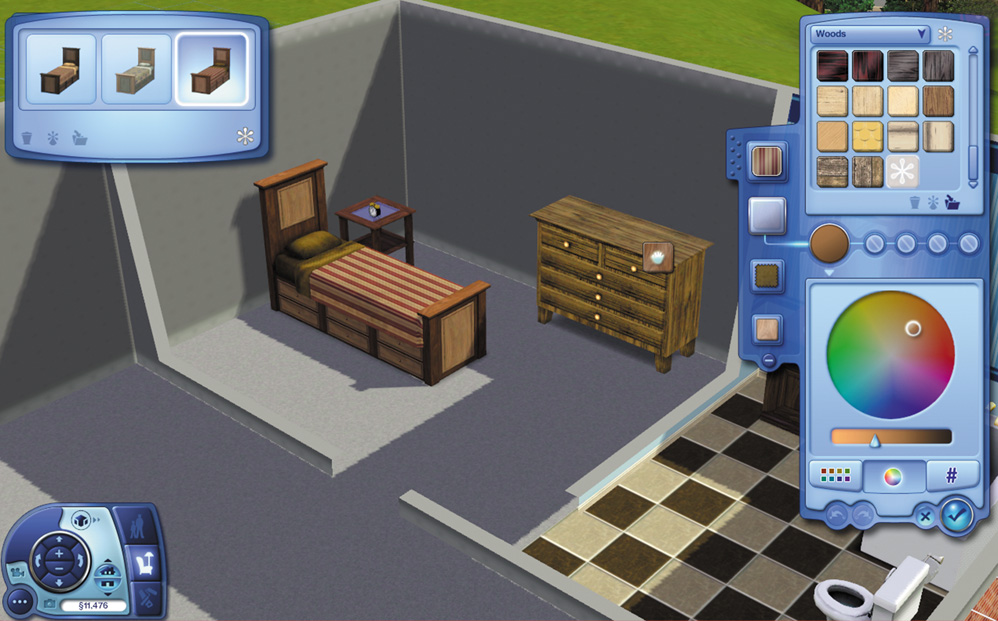
The textures are divided into several categories, such as wood, metal, abstract, and geometric.
If you want to make objects in a room match, you can easily apply the same textures and patterns from one object to another by grabbing the texture pane and dragging it on to the object you want to match.
You can either pull the entire set of textures on to the new object or grab a single texture (such as the wood from the bed frame) and then drag it on top of the piece of furniture you want to match.
In this case, pulling the wood texture from the bed onto the dresser changes the pattern so the set now matches.
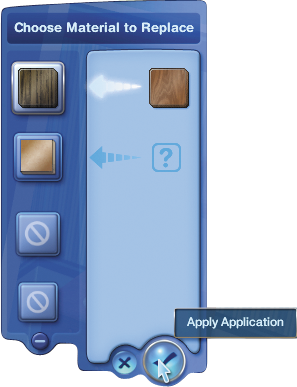
When you drag a pattern onto another object with multiple textures, you must designate which pattern you want to replace.