Prima Games eGuides
primagames.com Browse Redeem a code Help
LEGO Star Wars: The Force Awakens eGuide
Sign in My Guides

Sign in or create an account

We'll email you a link. No password needed, and if you don't have an account yet, the link makes one.

By creating an account or signing in, you agree to our Terms of Service and Privacy Policy.

Have a password?

Had an account on the old eGuides site, or a code from a printed guide? Help and troubleshooting

Sign in with a password

By signing in, you agree to our Terms of Service and Privacy Policy.

Check your email

A sign-in link is on its way. It works once and expires in 15 minutes. Open it and you're in, with an account if you didn't already have one.

Contents

  • Changelog
    • Updates
  • Game Basics
    • Overview
    • How the Game Flows
    • Fighting for the Fate of the Galaxy
    • Rewards
    • Getting 100% Completion
  • Console Characters
    • Unlocking Characters
    • Character Abilities
    • Character Class
    • Character List
  • Console Walkthrough
    • Prologue: Battle of Endor
      • Battle of Endor Objectives
      • Endor Shield Generator
      • Death Star Interior
      • Death Star Escape
    • Free play: The Battle of Endor
      • Endor Shield Generator
      • Death Star Interior
      • Death Star Escape
    • HUB: D’Qar
      • D’Qar Objectives
      • Resistance Base
    • Chapter I: Assault on Jakku
      • Assault On Jakku Objectives
      • Village Retreat
      • First Order Assault
      • Water Tower Washout
    • Free Play: Assault on Jakku
      • Village Retreat
      • First Order Assault
    • HUB: Jakku (First Visit)
      • Jakku (First Visit) Objectives
      • First Order Staging Area
    • Chapter II: Escape from the Finalizer
      • Escape from the Finalizer Objectives
      • Finalizer Hangar
      • Star Destroyer Exterior
      • Jakku Graveyard Part 1
    • Free play: Escape from the Finalizer
      • Finalizer Hangar
      • Star Destroyer Exterior
      • Jakku Graveyard Part 2
    • HUB: Jakku (Second Visit)
      • Jakku (Second Visit) Objectives
      • Jakku Sands
    • Chapter III: Niima Outpost
      • Niima Outpost Objectives
      • Niima Outpost
      • Niima Bombardment
      • Jakku Graveyard Flight
    • Free play: Niima Outpost
      • Niima Outpost
      • Niima Bombardment
      • Jakku Graveyard Flight
    • HUB: Millennium Falcon (First Visit)
      • Millennium Falcon (First Visit) Objectives
      • Millennium Falcon Interior
    • Chapter IV: The Eravana
      • The Eravana Objectives
      • Freighter Battle
      • Freighter Chase
      • Freighter Shutdown
    • Free play: The Ervana
      • Freighter Battle
      • Freighter Chase
      • Freighter Shutdown
    • HUB: Millennium Falcon (Second Visit)
      • Millennium Falcon (Second Visit) Objectives
      • Forward Maintenance Bay
    • Chapter V: Maz’s Castle
      • Maz’s Castle Objectives
      • Castle Approach
      • Castle Hall
      • Castle Basement
    • Free Play: Maz’s Castle
      • Castle Approach
      • Castle Basement
    • HUB: Takodana (First Visit)
      • Takodana (First Visit) Objectives
      • Outside Maz’s Castle
    • Chapter VI: Battle of Takodana
      • Battle of Takodana Objectives
      • Castle Corridors
      • Takodana Skies
    • Free Play: Battle of Takodana
      • Castle Corridors
      • Takodana Skies
    • Hub: Takodana (Second Visit)
      • Takodana (Second Visit) Objectives
      • Ruins of Takodana
    • Chapter VII: The Resistance
      • The Resistance Objectives
      • Resistance Base
      • Resistance Hangar
    • Free Play: The Resistance
      • Resistance Base
      • Resistance Hangar
    • Hub: Millennium Falcon (Third Visit)
      • Millennium Falcon (Third Visit) Objectives
      • Millennium Falcon Interior
    • Chapter VIII: Starkiller Sabotage
      • Starkiller Sabotage Objectives
      • Starkiller Crash Site
      • Starkiller Wall
      • Starkiller Shield Room
    • Free Play: Starkiller Sabotage
      • Starkiller Crash Site
      • Starkiller Wall
      • Starkiller Shield Room
    • Hub: D’Qar (Second Visit)
      • D’Qar (Second Visit) Objectives
      • Resistance Base
    • Chapter IX: Destroy Starkiller Base
      • Destroy Starkiller Base Objectives
      • Assault on Starkiller
      • Rey’s Escape
      • Oscillator Interior
    • Free Play: Destroy Starkiller Base
      • Assault on Starkiller
      • Rey’s Escape
      • Oscillator Interior
    • Hub: Starkiller Base
      • Starkiller Base Objectives
      • Outside Starkiller Base
    • Chapter X: The Finale
      • The Finale Objectives
      • Oscillator Bombing Run
      • Starkiller Showdown
    • Free Play: The Finale
      • Oscillator Bombing Run
      • Starkiller Showdown
    • Hub: D’qar (Third Visit)
      • D’qar (Third Visit) Objectives
      • Resistance Base
    • Epilogue: Luke’s Island
      • Luke’s Island Objectives
      • Luke’s Island
    • Free Play: Luke’s Island
      • Luke’s Island
  • Console New Star Wars Adventures
    • Poe to the Rescue
      • Poe to the Rescue Objectives
      • Trash Compactor
      • Hangar Battle
      • Asteroid Escape
    • Free Play: Poe to the Rescue
      • Trash Compactor
      • Hangar Battle
      • Asteroid Escape
    • Lor San Tekka’s Return
      • Lor San Tekka’s Return Objectives
      • Kelvin Ravine
    • Free Play: Lor San Tekka’s Return
      • Kelvin Ravine
    • Rathtar Hunting
      • Rathtar Hunting Objectives
      • Rathtar Caverns
      • Loading Area
    • Free Play: Rathtar Hunting
      • Rathtar Caverns
      • Loading Area
    • The Crimson Corsair
      • The Crimson Corsair Objectives
      • Landing Site
    • Free Play: Crimson Corsair
      • Landing Site
    • Trouble over Taul
      • Trouble over Taul Objectives
      • Corvette Interior
    • Free Play: trouble over taul
      • Corvette Interior
    • Ottegan Assault
      • Ottegan Assault Objectives
      • Ottegan Pursuit
      • Ottegan Surface
    • Free Play: Ottegan Assault
      • Ottegan Pursuit
      • Ottegan Surface
  • Console Hubs
    • Hub: D’Qar (Hub)
      • Points of Interest
      • Carbonite
      • Gold Bricks
      • Quests
    • Hub: Jakku (Hub)
      • Points of Interest
      • Carbonite
      • Gold Bricks
      • Quests
    • Hub: Takodana (Hub)
      • Points of Interest
      • Carbonite
      • Gold Bricks
      • Quests
    • Hub: Millennium Falcon (Hub)
      • Points of Interest
      • Carbonite
      • Gold Bricks
      • Quests
    • Hub: Starkiller Base (Hub)
      • Points of Interest
      • Carbonite
      • Gold Bricks
      • Quests
  • Console Collectibles Checklists
    • Story Mode Collectibles
      • Minikits
      • Red Bricks
      • Vehicles
    • Hub Collectibles
  • Console Achievements & Trophies
    • Achievements & Trophies
  • Handheld Characters
    • Characters
  • Handheld Walkthrough
    • Chapter 1: Assault on Jakku
      • Village Retreat
      • First Order Assault
      • Jakku Graveyard
    • Chapter 2: Escape from the Finalizer
      • Finalizer Hangar 1
      • Finalizer Hangar 2
      • Star Destroyer Exterior
    • Chapter 3: Niima Outpost
      • Niima Outpost
      • Niima Bombardment
      • Jakku Graveyard Flight
    • Chapter 4: The Eravana
      • Freighter Battle
      • Freighter Chase
      • Freighter Shutdown
    • Chapter 5: Maz’s Castle
      • Castle Approach
      • Castle Hall
      • Castle Basement
    • Chapter 6: Attack on Takodana
      • Castle Corridors
      • Castle Escape
      • Takodana Skies
    • Chapter 7: Starkiller Sabotage
      • Starkiller Crash Site
      • Shield Room Approach
      • Phasma
    • Chapter 8: Destroy the Starkiller
      • Assault of Starkiller
      • Rey’s Escape
      • Oscillator Interior
    • Chapter 9: The Finale
      • Oscillator Bombing Run
      • Starkiller Forest
      • Starkiller Showdown
    • Epilogue: Luke’s Island
      • Epilogue: Luke’s Island
  • Handheld New Star Wars Adventures
    • Prologue: The Battle of Endor
      • Endor Shield Generator
      • Death Star Interior
      • Death Star Escape
    • Poe to the Rescue
      • Trash Compactor
      • Asteroid Escape
    • Rathtar Hunting
      • Rathtar Caverns
      • Loading Area
    • Ottegan Assault
      • Ottegan Pursuit
      • Ottegan Surface
  • Handheld Hubs
    • Resistance Base Hub
      • Resistance Base Hub Overview
      • Resistance Base Hub Characters
    • Jakku Hub
      • Jakku Hub Collectibles
      • Jakku Hub Characters in Carbonite
    • Takodana Hub
      • Takodana Hub Collectibles
      • Takodana Hub Characters in Carbonite
    • Starkiller Hub
      • Starkiller Hub Collectibles
      • Starkiller Hub Characters in Carbonite
    • Starkiller Arena
  • Handheld Collectibles Checklists
    • Red Bricks
    • Gold Bricks
    • Minikits
    • Characters in Carbonite
    • Vehicles
    • Trophies
  • Credits
    • Legal

LEGO Star Wars: The Force Awakens Guide › Handheld New Star Wars Adventures › Poe to the Rescue

Trash Compactor

Characters

Poe Dameron (Flight Suit)

Admiral Ackbar (Episode VII)

BB-8

C-3PO (Episode VII)
Unlocks

Fitness General Hux Complete All Collectibles challenge.

Gym Stormtrooper Complete Sayonara Dianoga challenge.

Hot Tub Stormtrooper Complete Load of Rubbish challenge.
Gold Brick Challenges
Name Mode Notes
Level Complete Any Complete the level.
True Jedi Any Collect 20,000 studs.
All Collectibles Free Play Find 2 Minikits and the Red Brick.
Sayonara Dianoga Any Build each Multi-Build variant to defeat the dianoga 4 times.
Load of Rubbish Any Destroy the 3 strange piles of rubbish.
Collectibles
Type Mode Notes
Minikit Any Move through toxic waste.
Minikit Free Play Pull on strength handles.
Red Brick (Infinite Torpedoes) Free Play Use the Force near the end of the level.

Activate the Pressure Maintenance Hatch

The First Order has kidnapped Admiral Ackbar. Poe Dameron has been sent to rescue him. After breaking out of the detention level, the characters jumped down a garbage chute to escape from Captain Phasma and the stormtroopers. Now you must get them out of the trash compactor. Begin by moving from one pile of garbage to another. However, a dianoga in the water prevents your crossing. Break up the nearby object and then assemble the pieces of the Multi-Build into either object. After your build causes the dianoga to withdraw under the water, quickly cross over to the chamber’s right side.
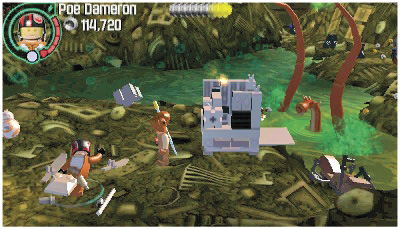
Challenge: Sayonara Dianoga

This challenge requires you to use Multi-Builds four times to get the dianoga to go under the water. Each time, you must use a different build. In the first area, build one object and use it. Then break it up and build the second object. Later, when you must deal with the dianoga again, build two different objects with the Multi-Build. This earns the Gold Brick and unlocks the Gym Stormtrooper.

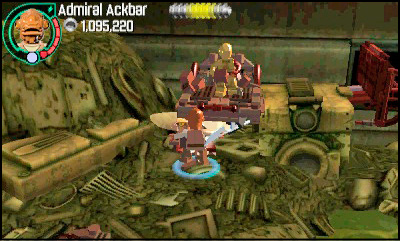
When you reach the chamber’s right side, use Poe’s grapple gun to pull on a hook to reveal a water access. Switch to Admiral Ackbar and jump into the water to find some bricks and assemble them into a rotary control switch.
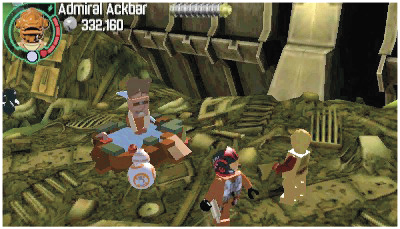
Challenge: Load of Rubbish

There are three strange piles of rubbish spread throughout this level. They all have a stormtrooper helmet on top. Destroy them all to earn a Gold Brick and unlock the Hot Tub Stormtrooper.

Switch to BB-8 and use the rotary control switch to launch the droid across the chamber and onto a catwalk. Roll to the left and use the astromech terminal to activate the pressure maintenance hatch.
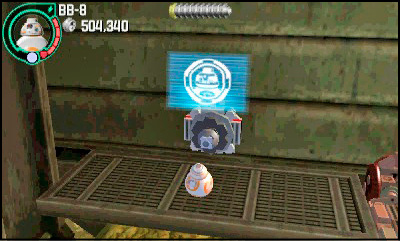
Minikit

After launching BB-8 onto the catwalk, and before going to the left, drop down from the catwalk and get the Minikit inside a cloud of toxic gas (the gas does not affect BB-8). Then roll back to the rotary control switch and launch again to continue.

Pull on the Handle

The trash compactor has moved, making the chamber smaller. As BB-8, roll to the top of the trash pile and use the small access hatch to move across the chamber to where the rest of the characters are located.
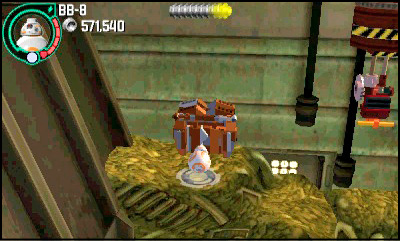
Several small dianogas attack. Defeat them all, and then use Poe’s grapple gun on the hook to break up pieces for a Multi-Build. Construct either object to deal with the larger dianoga. Both require BB-8 to power up the charge panel so you can get across the water to the center of the chamber.

Now switch to Admiral Ackbar and use the water access to get him to the chamber’s far side. Once there, walk up the pile of garbage and then jump and grab onto the handle to make the walls of the trash compactor move outwards and increase the size of the chamber.
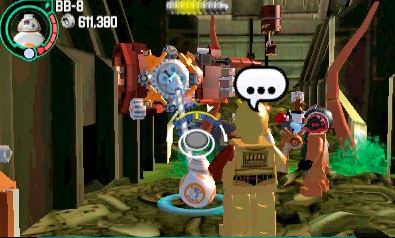
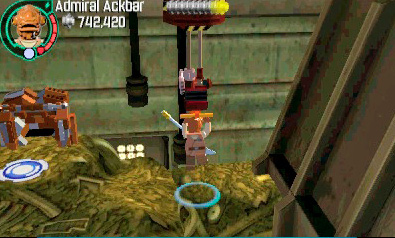
Get C-3PO to the Protocol Droid Terminal

After fighting off some small dianogas, have Ackbar use the staff switch. Rotate the switch to raise a bridge out of the water so the rest of the group can get to this side of the chamber.
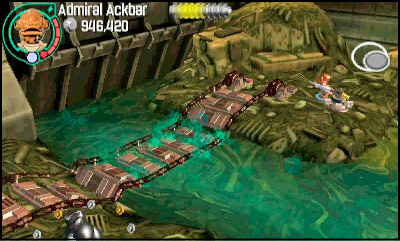
Minikit

After raising the bridge, find a stove on the lower part of the chambers. Switch to a character who can pull on the strength handles to get this Minikit.

Take control of BB-8 and use the rotary control switch on the chamber’s right side. This moves the walls a bit and also drops some bricks for a Multi-build in the middle of the area. You will need to build different objects to help C-3PO reach the catwalk where the protocol droid terminal is located. Assemble the pieces into a jump switch on the right. Then jump on the red button to activate a lift so C-3PO can get to the elevated walkway.

Break up the switch and then reassemble the pieces into a magnetic device in the center. This lowers the small draw bridge so C-3PO can walk across to the left.

Destroy the magnetic device and now assemble the pieces into a winch on the left side. This will lower a lift so C-3PO can walk onto it. Then destroy the winch to allow the lift to rise to the catwalk.
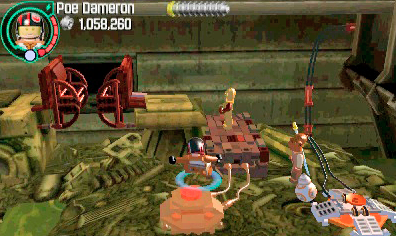
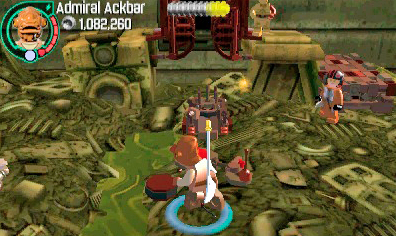
Take control of C-3PO and walk to the right. Use the protocol droid terminal and repeat the code back in order to open the hatch so you can escape from the trash compactor and complete the level.
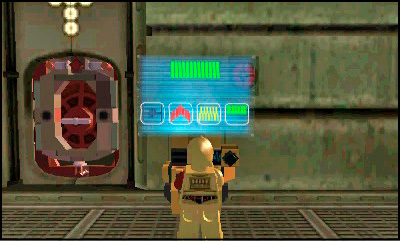
Red Brick

(Infinite Torpedoes)

Before using C-3PO to activate the protocol droid terminal, switch to a character who can use the Force to pull a Red Brick down from the catwalk on the right side. The Red Brick is off-screen and you won’t see it until you move a Force user to that side of the catwalk.
Keep reading with a free account

The first 3 sections of LEGO Star Wars: The Force Awakens are open to everyone. An account opens the rest of it, and every other guide in the archive. It's free, and there's nothing to buy.

Bought guides on the old Prima Games site? Your account and every guide you own moved here, so there's nothing to buy again. Sign in.

Create a free account Or browse our free guides

PreviousDeath Star Escape NextAsteroid Escape