
Disney Infinity Originals Guide Toy Box Games Brave Forest Siege strategy and tips
DunBroch Forest 8
Area A
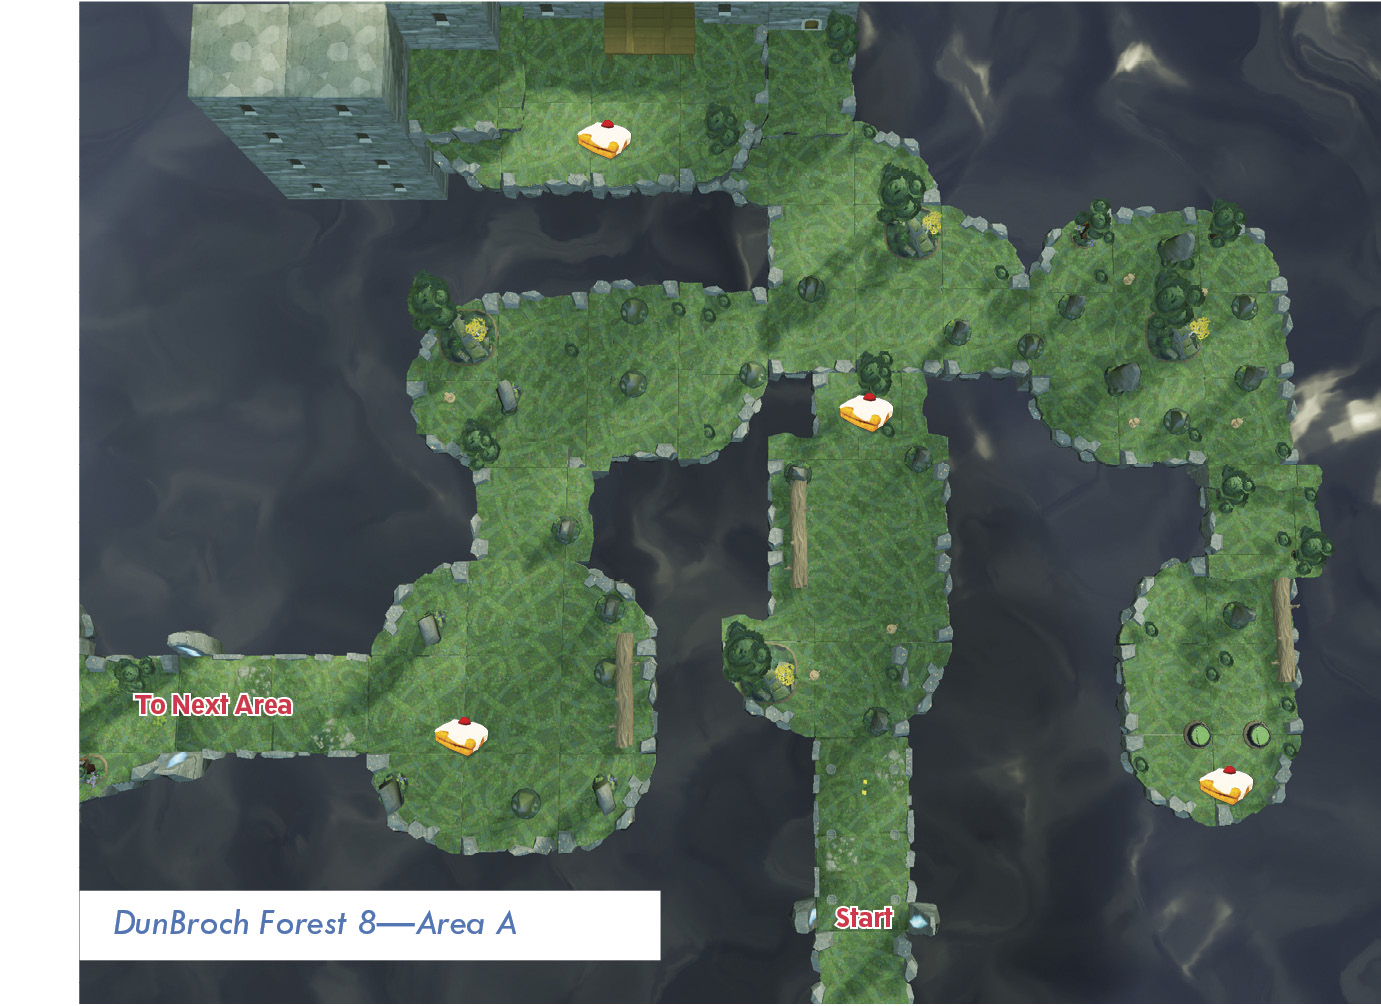
As you enter this area, be prepared to defeat a couple Bear Catapults that wait to ambush you. Then fight against some Pine Bears that are guarding pressure plates linked to a cake. Pick up your sidekick once the bears are gone and clear those plates to get the cake. Then clear away some more Pine Bears and Bear Catapults protecting the second cake, which is located near the exit from the area. Now step on the pressure plates to clear them and break the spell so you can collect another cake.

Don’t forget to pick up your sidekick when stepping on the pressure plates. If you don’t, the sidekick often steps on them again and brings the design back.

The second cake is connected to lots of pressure plates on several levels of terrain.
Follow the yellow objective marker to the next cake. It is linked to four doors through which you need to throw your sidekick to break the spell. In addition, there are three Mahogany Bears protecting the cake. Use a special move to help defeat them so you can get your sidekick to the last three doors and then get to the cake.

A special move is a great way to inflict a lot of damage on large, powerful enemies. You may need to use it twice to clear out these three bears.
The last cake is defended by two cauldrons that spawn enemies. However, you only have to throw your sidekick through three doors to break the spell on the cake. It is easier to do this if you first destroy the two cauldrons, though it is not necessary. After you have collected the final cake, the magical barrier is removed and you can then head towards the next area.

The way to the last cake is defended by Bear Catapults.

Destroy the two cauldrons that are spawning bears so that it is easier to get your sidekick into the doors to break the spell on the cake.
Area B
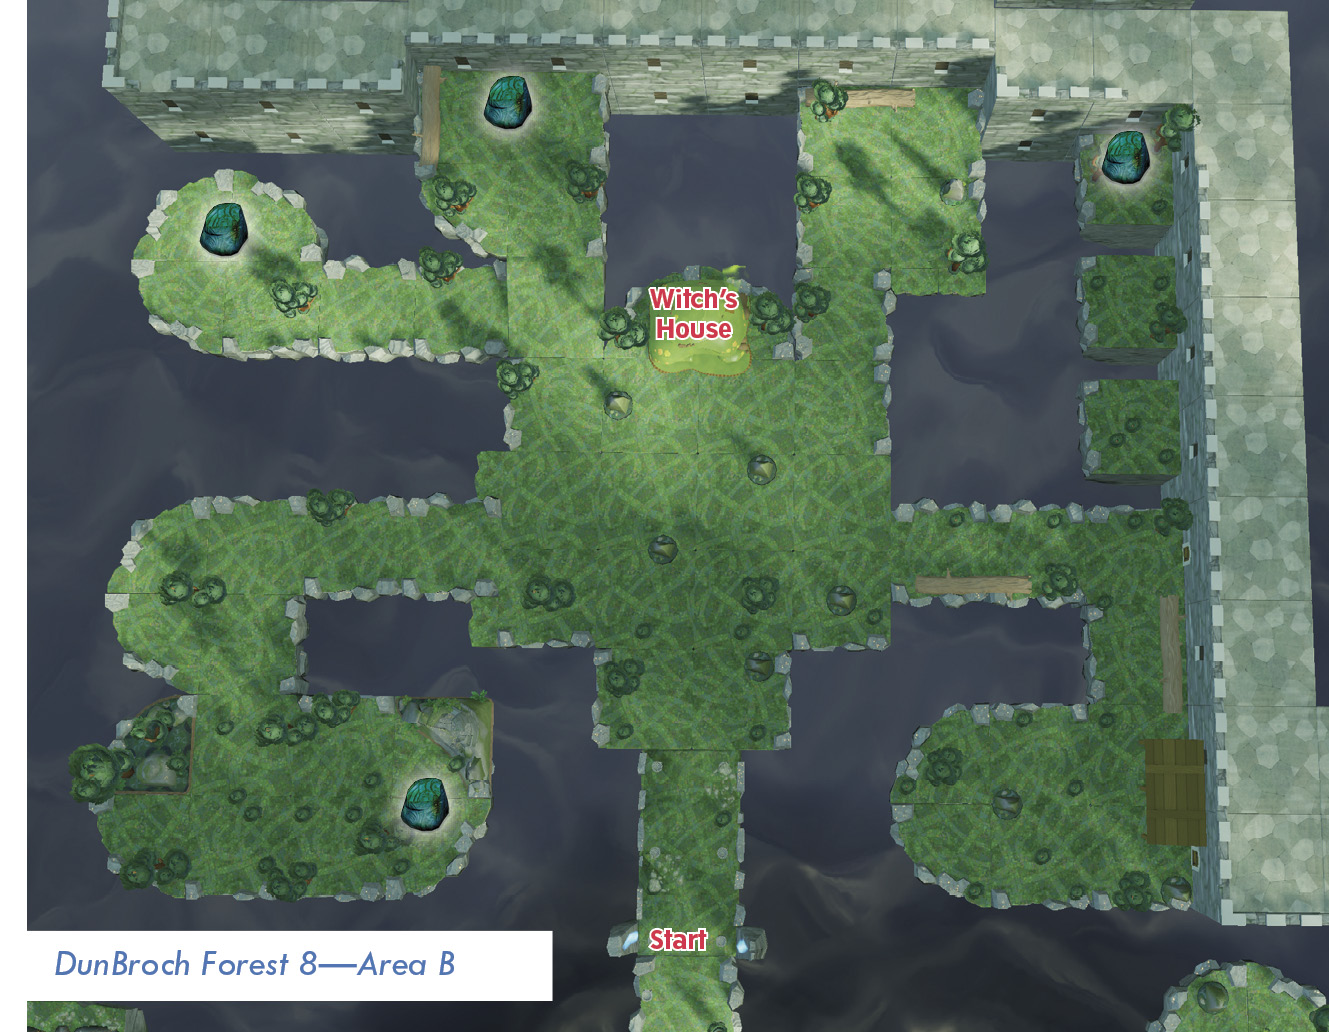
You have reached the final area of the DunBroch forests. The Witch’s house is in a protective spell that is linked to five pressure plates. While they look like the kind you just need to step on, you must place a rock on each to break the link and the spell. Watch for Bear Catapults in this area that launch projectiles at you and your sidekick.

The Witch’s house is in a spell that you must break.
The first rock is protected by a couple cauldrons and lots of bears. Focus on destroying the cauldrons first and then clear out the bears. You may need to swap out characters if you take too much damage. After the enemies are all defeated, pick up the rock, carry it back to the house, and place it on one of the pressure plates.

Destroy these two cauldrons or they will keep spawning enemies.
Now go after the second rock. It is located to the left of the house. There are several Catapults along the way, and when you get near the rock, some Pine Bears spawn in the area. Defeat them all and then carry the rock back to the house and place it on another plate. The third rock is near the second. It is guarded by some more Catapults and a Mahogany Bear. Clear them out and then carry the rock back to the house.

Defeat the Bear Catapults and other bears near the next rock. You don’t want to be carrying a rock while under attack.

This rock’s defenses are not as tough as some of the others. Just keep hitting the big bear until it is defeated.
The last rock is on the right side of the area. Move all the way to the far wall and then jump across a couple gaps to get to it. Defeat the Pine Bears along the way and then pick up the rock. You will have to carry it across the gaps as you jump and get it back to the house. Once four rocks are in position, step onto the fifth pressure plate to remove the spell on the Witch’s house and complete the game.

Jump across these platforms to get to the last rock and clear away the Pine Bears defending it.

All of the cakes have been returned to the Witch.
Exploration Survival Mode
After you complete DunBroch Forest 1, a door appears in the Hub. The Exploration Survival door takes you to the survival mode of this game. It offers you a chance to explore new locations and defeat enemies that are randomly generated each time. As a result, you never get the same game twice.

The doorway to the Exploration Survival Mode is located next to the Tutorial doorway.

When you begin this game, the levels are generated while you wait and watch.
In this mode, there is only one objective—search for and destroy all enemies. There is a timer at the top of the screen keeping track of how long it takes to accomplish this. Unlike in the forest levels, there are no loot chests and your sidekick is only needed to help you defeat the enemies.

Search for enemies and then defeat them. Use the mini-map in the lower left corner to see in which direction the remaining enemies are located.
Once you clear a level of all enemies, the game is not over. Another level is randomly generated and then populated with enemies. Go find them and defeat them.
