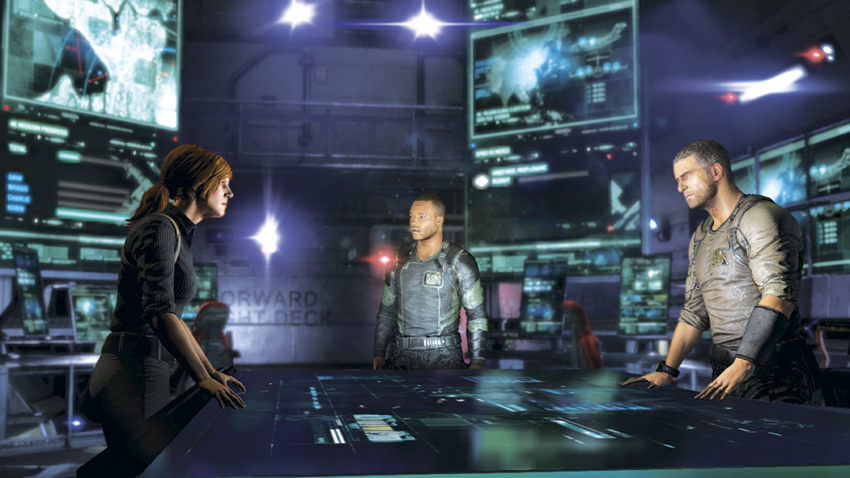
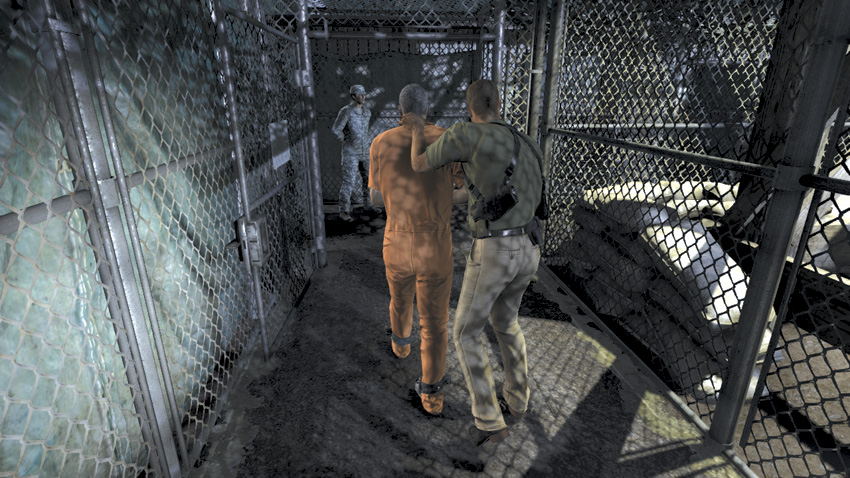
Unexpectedly, Reza Nouri has been hauled into Gitmo for questioning by the CIA about Iran’s role in the Blacklist attacks. It looks as though he’s exchanging intel for clemency, but you don’t know his angle. And even though the data you recovered from Iran clears them of any Blacklist involvement, Nouri could relay false statements, resulting in America starting a war with the wrong enemy. It seems as if Sadiq is behind Nouri’s arrival in Cuba. Because of your actions in Benghazi and Chicago, you’ve burned too many bridges, and now the CIA is locking you out of what’s going on. The only way to know what Nouri is telling the feds is for you to break into Gitmo and question him yourself. And Briggs is going to help you.
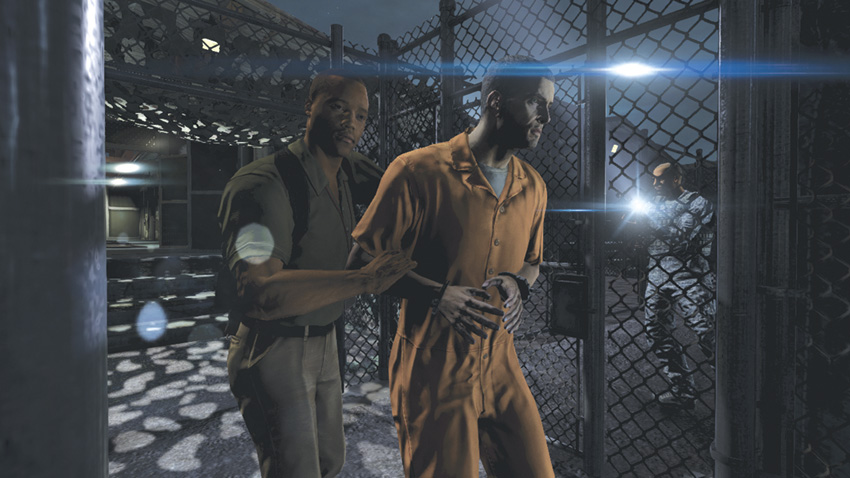
Briggs leads you outside and through an outdoor containment area. Like before, you’re walking near fenced-in holding cells containing other detainees; guards and dogs are all around you.
Briggs tells you that your gear is in a field office just past the rec area. Once you’re done interrogating Nouri, Briggs will kill the power to give you some shadows for cover to aid in your escape. Nouri is with special CIA interrogators; fortunately they’re on break so you have some time. Briggs will arrange for a boat to take you back to the Paladin after the mission is complete.
We Meet Again, Nouri
Going to cell block A-2, a guard buzzes you both in. Once out of view, Briggs kneels down and removes your restraints. Before he leaves, you take a pair of handcuffs from him, and then head into cell 103, where you find Nouri sitting on a folding metal chair.
He’s obviously surprised to see you, and at first thinks Sadiq asked you to voluntarily get locked up, just like him. You make it clear that’s not the case by jamming the handcuff clasps under his chin. You want to know about the next Blacklist attack. Nouri refuses to talk, so you throw him on the ground, fold the chair, place his hands between its legs, and then press down.
Now in excruciating pain, Nouri begins to talk. Sadiq wants to hijack a ship, and he provided the men to operate it. You want to know the names of who Sadiq’s working for, but Nouri tells you something more revealing. Sadiq knows all about you, and he’s planning on targeting you, your team, and your plane, 4th Echelon.
Nouri asks for mercy, begging you to kill him now. He knows Sadiq will have no mercy, and Nouri would rather die quickly than painfully. It’s up to you whether you knock him out or kill him. After you decide if he lives or dies, the power goes out—right on queue.
INTEL
After leaving the interrogation, you are armed with a Stun Gun.
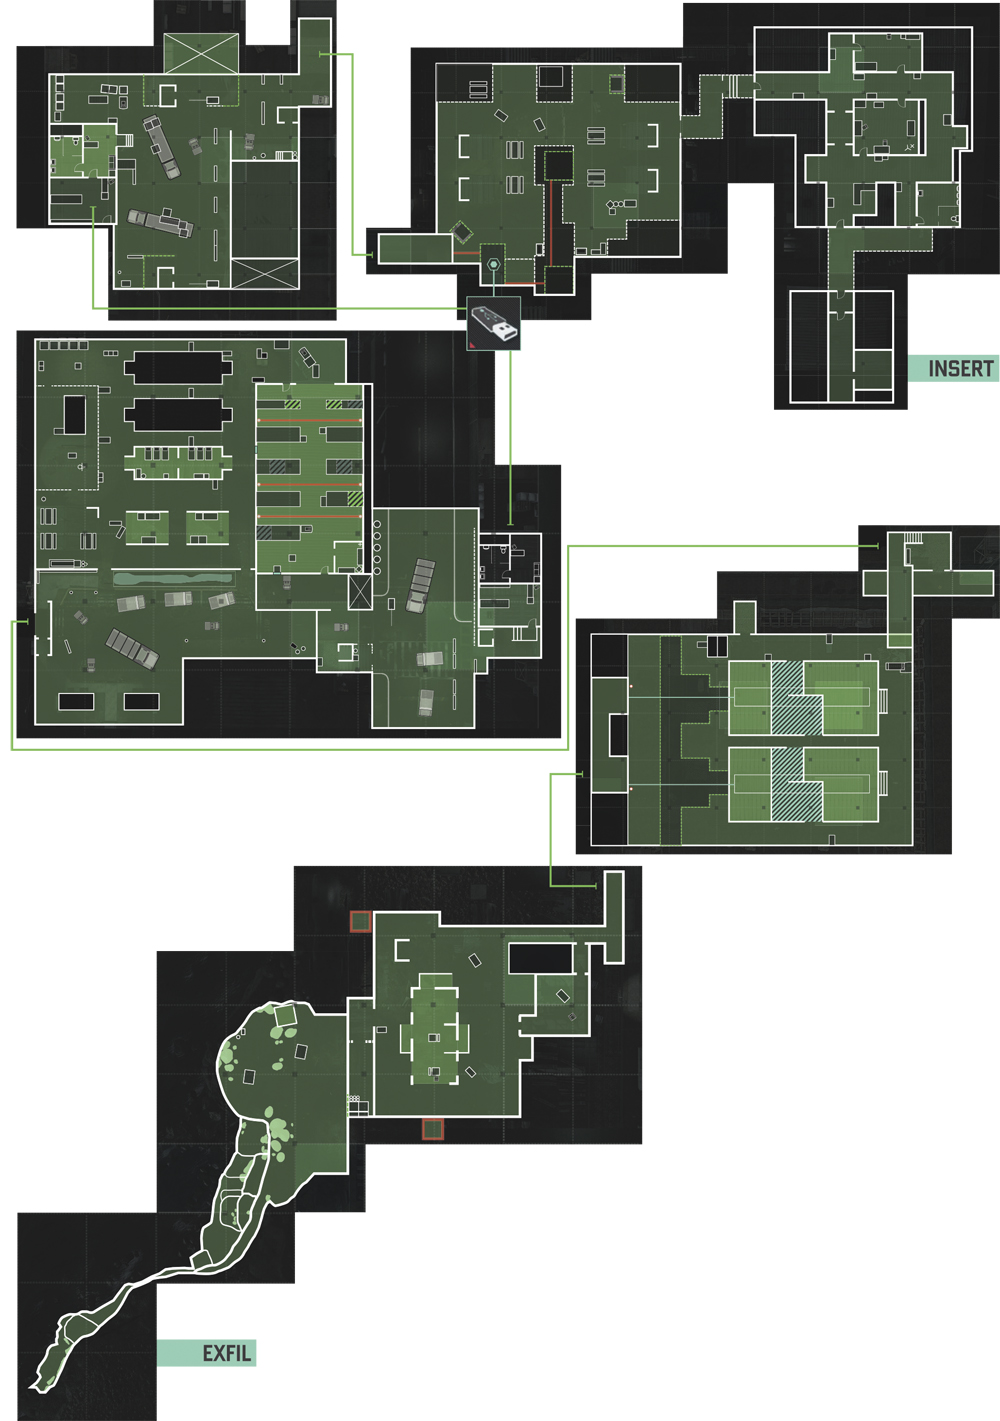
Go to the Barracks to Retrieve Your Gear
Walking forward, go through the next two doors. Once outside, quickly run up behind the soldier about to enter an office building. Incapacitate him using a Stealth Knockout, and then move to your right and enter the building through the open window.
Crouch and move straight ahead, taking cover at the next corner. Peek around it to spot another soldier. Sneak up behind him and silence him with another Stealth Knockout. Now, enter the room next to you and take cover near the doorway in front of you. Look to your left to spot another solider. Incapacitate him and leave through the door marked with a red emergency light above it.
INTEL
Through the remainder of the mission, it is vital that you move slowly and quietly to avoid detection by the soldiers at the prison. Their hearing and awareness are heightened compared to that of the enemies you have previously encountered
Once outside, head toward the recreation area. Pass through the first opening and take cover behind the low wall. Check your Radar to see four soldiers in the immediate area, including two snipers surveying the area above you. Remain in cover and move to your left to the opposite end of a similarly shaped wall.
Make sure the sniper isn’t looking in your direction, and quickly move to cover behind the bins in front of you. Still crouched, move around them to your left and approach the fence in front of you. Go to the right and climb up the pipe underneath the watchtower.
At the top, move around to your left and grab hold of the horizontal pipe right above you. Move along it, away from the tower, making sure the sniper isn’t looking in the direction you’re headed. At the other end, grab hold of the bottom of another tower, move around to the right, and then drop down into the area below to pick up a Dead Drop. Once it’s secured, hop up the pipe above you and slowly move all the way around to your right to a gangway where the other sniper awaits. Move to the far end and drop to the ground.
Crossbow
As part of your gear, Briggs has included a Crossbow. It’s a non-lethal device, similar to the Stun Gun. Since you can’t use your Pistol or Alternate Weapon, the Crossbow will be handy should you need to get out of a tough spot.
Quickly and quietly go to the end of the corridor and take cover to the right. A soldier is standing right near you; go up behind him and perform a Stealth Knockout. Climb over the fence in front of you and continue to the guard station just beyond and take cover behind it, avoiding the soldier inside. As the power comes back on, proceed to hop another fence in front of you. On the other side, stay crouched and use the row of port-a-potties for cover. Turn to your left and climb up to the window on the side of the barracks. Peek inside and wait until the coast is clear before entering. Follow the waypoint marker to your gear.
Suit Up
While suiting up, you check in with Briggs for a status update. Even though it took some doing, he was able to secure a CRRC, or Combat Rubber Raider Craft. He tells you that after you escape the prison you should head south along the shoreline, where he will be waiting. Briggs warns you to be careful, as emergency power is now live. He also advises that you make a fast escape. It won’t take long before the guards find what’s left of Nouri.
Escape with Briggs
After retrieving your gear, it’s time to meet up with Briggs and leave Gitmo. Before heading out, refresh your ammo and gadgets at the Supply Cache. Exit the locker room, then crouch, curl around to the right, and move forward to take cover near the orange barricade to your left. Be careful that the soldier nearby doesn’t see or hear you, and then wait for him to turn his back to you. Move to cover using the stone barricade behind the soldier. Make sure his back is still to you and move to your left, using a stretch of stone barricades for cover. At the end of the last one, move to the front of the assault vehicle near you to shield you from view. Inch toward the left-side headlight and carefully look to your right to where two soldiers stand guard.
When they are not looking in your direction, quickly move forward and hop over the railing. Move to your right very slowly, toward the two soldiers. When they walk away, quickly leap over the railing in front of you and go through the opening to your left. Staying to the left, maneuver around the guard station, making sure that you’re not spotted by the nearby patrolling soldier. When the coast is clear, go through the opening in front of you, and then head to your left to the warehouse. Enter the building through the open window, and then quickly take cover behind the nearby crate.
Warehouse
The warehouse is divided on two sides, with a pathway in the middle. Each side contains five rows of tall, industrialized shelves that stretch almost to the ceiling, with room to walk in between them. A corner office enclosed by two low walls, well below the ceiling, is a short distance away from your cover point. More importantly, there are three soldiers milling about working in the warehouse.
Move out of cover and climb up the side of the office wall closest to you, then maneuver to your left to the other side. Make sure none of the soldiers are nearby, drop to the ground, and climb to the top of the shelf behind you. Walk through the clearing at the top, drop to the ground on the other side, and then scoot through the opening in the middle of the adjacent shelf. Climb to the top of the next shelf and move hand-over-hand all the way around it to the other side. Drop down to the ground, go through the opening on the far right side, and then exit the warehouse through the doorway.
Use the nearby forklift for cover, and then quickly move to the crates in front of you, next to a solider standing guard. Silently approach him from behind and incapacitate him. With the warehouse on your left and troop quarters on your right, sprint down to the opening at the far end, and crouch down on the right side. Move to cover near the hood of the assault vehicle in front of you, right next to another soldier. When he’s not looking, sneak up to him and subdue him with a Stealth Knockout. Head to the fence line in front of you and follow it all the way around to the right, using the waypoint marker as a guide.
Go through the door at the guard station and head to your left. Stop to replenish your supplies at the Supply Cache, and then go up the staircase. To your left is a watch station and a sniper with his rifle trained at the ground. Sneak up behind him and drop him using a Stealth Knockout. Directly across from you in the distance is a watchtower with a sniper. Make sure he isn’t scanning in your direction and climb over the railing. Below to your left and in front of you are two soldiers and a lone patrol, respectively. Zap the lone solider with a charged crossbow bolt, and then drop to the ground. Move forward 15 meters or so, into an enclosure, and then quickly climb up and over the fenced-in holding cell in front of you. On the other side is a roaming dog. Before it can alert anyone to your presence, grab ahold of the metal pole in front of you and climb up to the railing of another watch station, where a solider stands guard. Pop up and drop him with a Stealth Knockout, and then climb over the railing on the other side and drop to the ground.
Camp X-Ray
Continue forward, through the next opening in the fence, and then head left through the gate marked “C Block.” Crouch and walk along the fence to your left, and follow it all the way around to the right. Pause at the next opening to get a look at your surroundings. In the distance, slightly to your left, is a watchtower with a sniper. Make sure he isn’t looking in your direction and quickly move to your left through the opening. Follow the fence line all the way around, toward the sniper. When you are near him, be mindful that there’s a dog patrolling the area below. If necessary, subdue him using your Crossbow. Continue following the fence around to your right, hopping a crate along the way, and then go through the next opening on your left. Cut through the tarp, climb over the fence, and leave the camp.
Extract
Head right to the metal pylons overlooking the ocean and go over the edge to find a Hidden Path. Descend to the shoreline below, and then follow the waypoint marker. To reach Briggs you must work your way around the side of a sea cliff that stands about 30 feet above the ocean. You gradually get closer to the water below until you reach ground level. After reuniting with Briggs, you hop into a CRRC and prepare to leave Gitmo behind.
Sadiq’s Other Target
After entering the boat, Briggs tells you to wait for a moment before taking off as patrol boats are in the area. Grim will signal when the coast is clear to proceed. While holding tight, you inform Briggs that Nouri was a plant by Sadiq to misdirect the United States while he hijacked a ship, apparently to use in the next Blacklist attack: American Fuel. You also tell Briggs that Sadiq is targeting your team as well. After a momentary pause, Briggs apologizes for his outburst aboard the Paladin. You tell him to let it go; you both just broke in and out of Guantanamo in a single night—not that you can ever tell anyone about it. Grim finally lets you know there’s a narrow break in the patrols, so it’s now or never.
Mexico Airstrip
Yucatan Province, Mexico
Approaching the loading bay of the Paladin, Briggs asks you if he can get a little shuteye before the next mission. You chide him about having just spent some “downtime” lounging on a beach in Cuba, and now he’s in Mexico. What does he need with sleep? Briggs points out getting strafed by a patrol boat isn’t his idea of R & R.
Walking up the ramp, you both see Grim coming toward you, chambering a round in a pistol. You’re hoping she has information regarding the ship the Engineers hijacked, but it’s something a bit more alarming. The airfield staff just packed up and left five minutes ago—no warning, no word. Sounds like there’s a fight headed your way. Grim was unable to get the UAV Drone out for aerial surveillance because someone’s jamming the video feed.
Out of nowhere, shots pierce the air, striking the interior of the plane. Whoever replaced the staff, they aren’t keen on making light conversation. As it turns out, hostiles are converging on your location, taking cover inside an old airplane hangar behind you, its front and back wide open. You arrange for the crew aboard the Paladin to provide cover fire and drop as many men as they can. Before you can leave, you have to kill all of them.
Clear the Airfield of Hostiles
Head down the ramp and exit the plane, moving quickly to the right side of the hangar in front of you. Check your Radar; the first hostile is a High Value Target. Tag him and bag him, and then circle around behind the hangar and attack the other hostiles from behind. Start with the one on your left, and then systematically work your way through the hangar interior. The last hostile is outside the hangar to your right, taking cover behind a wooden crate.
From your position, move along the outside wall to the rear of the hangar, checking your Radar. The second wave of enemies will be coming from the back. Half will take cover inside the hangar, while the rest will take cover outside the hangar to the left, where you originally started. Wait for the hostiles to get settled, and then flank the enemies in the hangar from behind, moving from right to left, as you kill them. Move to the rear of the hangar and around to the left to the outside. Check your Radar to pinpoint the enemies in the area and start eliminating them.
The third wave of hostiles will also come from behind the hangar. Two will come to your position, and two others will head inside. A flare illuminates the area and makes it easier for the hostiles to see you. Kill the two near you, and then take cover next to the doorway nearby and take down the two inside.
As you’re eliminating the last two threats, a fourth and final wave comes in from your right, on the other side of the hangar. Five hostiles join the fight, with three taking cover inside the hangar and two running to take cover near your position. Eliminate the two near you, and then finish off the remaining three. Once that’s done, head to the plane and get on board.
Clear the Runway
Reprising your daring escape out of Iran, you have to clear the runway of hostile vehicles using the UAV Drone so that you can get airborne. Sadiq’s men will try to knock out the Paladin’s engines and disable the plane; you must ensure that this does not happen. Grim gives assistance by alerting you which direction the vehicles are coming from, so you will always have the upper hand. As they come into view, steadily target each one and destroy them. After you’ve eliminated all the vehicles in pursuit, the Paladin can take off and head toward the next Blacklist target: American Fuel.
Mission Wrap-Up
After your daring escape from Mexico, the team begins looking for the ship that’s carrying out the American Fuel attack. Briggs gets intel by tracking tanker movements in the Gulf of Mexico; the coast guard there had to fly in a replacement crew on one of the vessels because of food poisoning. Excitedly, Charlie announces he was able to hack into the guts of the server the Engineers used for their U.S. operations to obtain valuable information, including IDs and addresses of those involved. Briggs interjects that the information is nothing but white noise and doesn’t tell them anything about what Sadiq wants from the Blacklist. You thought it was to force American troops off foreign soil, but that’s never going to happen, and Sadiq knows this. So what’s his real play?
Unbeknownst to you, Charlie’s little hack job allowed a virus to infect your plane, giving Sadiq’s men full access to the 4th Echelon, including a video feed that enables him to see where you are and what you’re doing. As he initiates the go ahead to begin American Fuel, Sadiq also wants to give you a hint as to what he’s after. And it starts by taking control of your plane.