
Left 4 Dead Guide Essentials Survival Basics
Gameplay Fundamentals
In terms of physical gameplay, Left 4 Dead plays similarly to other first-person shooters, but there are some minor differences in the control scheme and health system that you should be aware of before jumping into action.
Default Controls
| Action | Xbox 360 | PC |
|---|---|---|
| Move | Left Stick | W, S, A, D |
| Aim/Look | Right Stick | Mouse |
| Jump | A | Space |
| Reload | B | R |
| Use | X | E |
| Cycle Weapons | Y | Mouse Wheel |
| Fire/Special Attack | RT | Mouse Button 1 |
| Melee | LT | Mouse Button 2 |
| Crouch | LB | Left Ctrl |
| 180-Degree Spin | RB | N/A |
| Flashlight | D Pad Up | F |
| Molotov/Pipe Bomb | D Pad Left | Mouse Wheel |
| First Aid Kit | D Pad Right | Mouse Wheel |
| Pills | D Pad Down | Mouse Wheel |
| Sniper Rifle Zoom | Right Stick Click | Mouse Button 3 |
| Vocalize | Left Stick Click | K |
| Main Menu/Vote Yes | Start | 1 |
| Status Screen/Vote No | Back | 2 |
Interface
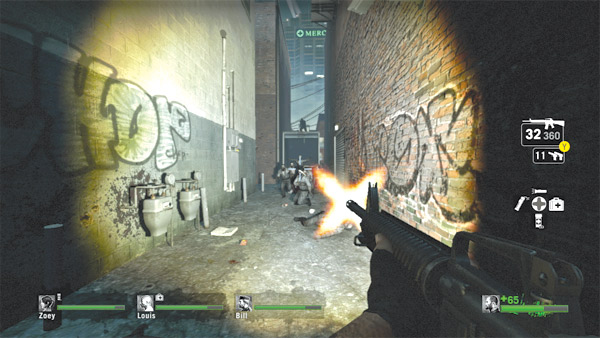
Aiming Reticle: This crosshair icon is superimposed on the HUD and shows where your weapon is aiming—place the icon over a target to shoot it. The size of the reticle differs based on the weapon currently selected, indicating accuracy.
Rifles are more accurate than shotguns and thus have a tighter reticle. The reticle also expands during movement and as a result of recoil, indicating a decrease in accuracy.
For optimal accuracy, fire from a stationary position, preferably while crouched, and go easy on the trigger when firing automatic weapons.
Avatar Portrait: This image shows which survivor you’re playing as: Bill, Francis, Louis, or Zoey.
Health Bar: This bar indicates how much health your character has. If the bar is green, your character is healthy, but if the bar is orange or red, your character is injured and requires medical assistance. A movement penalty is applied to characters with low health, reducing their maximum speed.
Hit Points: This is a numerical representation of how much health your character has.
Inventory: These four icons show what items your character is carrying.
Flashlight: You always have access to a flashlight regardless of which weapon you’re carrying. It can be toggled on and off—if on, the flashlight icon is white. The flashlight can agitate and startle some infected, so use it sparingly.
First Aid Kit: Each survivor can carry one first aid kit. If you have one, this white icon appears; otherwise it’s grayed out. First aid kits can be used to heal yourself or other survivors.
Pills: Survivors can each carry one bottle of pills, too. These painkillers replenish hit points but don’t completely heal like first aid kits. They can be consumed by yourself or handed to other survivors in need of health.
Pipe Bomb/Molotov: Only one hand-tossed weapon can be carried at a time, represented by a white icon in this inventory slot.
Primary Weapon: The silhouette icon represents which primary weapon your character is carrying.
Ammo in Magazine: This number indicates how many rounds remain in the weapon’s current magazine. When the number reaches zero, a new magazine must be loaded to resume firing.
Total Ammo Count: This number represents how much surplus ammo your character is carrying. It does not include rounds loaded into an active magazine. When this number reaches zero, you must find more ammo before reloading.
Secondary Weapon: This icon represents which backup weapon you’re equipped with: a single pistol or dual pistols.
Ammo in Magazine: This number represents how much ammo is left in your secondary weapon’s magazine(s).
A single pistol can hold 15 rounds; dual pistols carry 30 total. When the number reaches zero, the weapon(s) must be reloaded. The pistol has unlimited ammo and can be reloaded anytime.
Teammate Health Bars: The health status of all three of your teammates is visible along the bottom of the screen, along with their names and associated avatar portrait.
Teammate Health Supplies: If your teammates are carrying first aid kits or pills, small icons of each appear next to their avatar portraits, just above their health bars. Consider asking them for help if you need to heal.
Movement
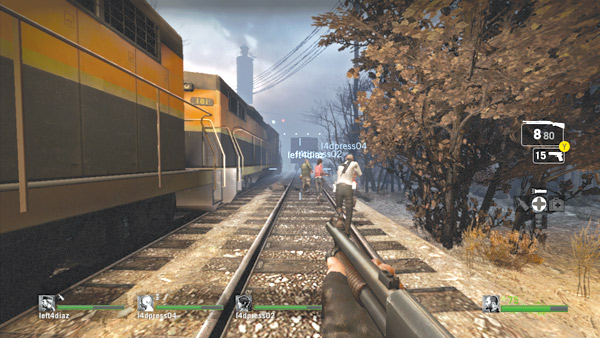
Speed is critical, so make sure you don’t lag too far behind your teammates.
All major methods of transportation have been either destroyed or rendered useless. Streets are littered with abandoned cars effectively serving as roadblocks. Train lines are blocked by derailed cars. Airport runways are littered with the wreckage of crashed aircraft. So escaping on foot is the only option.
Walking and running are the primary forms of movement and function as in any other first-person shooter—look in the direction you want to move and use the proper inputs (based on your platform) to advance in that direction.
Walking is obviously slower than running, but it is also stealthier and less likely to draw unwanted attention from the infected.
For even stealthier movement, drop to a crouch. Crouched movement is incredibly slow but is by far the best way to sneak around, particularly when attempting to slip past a Witch. In rare circumstances you may be forced to swim.
This sometimes occurs in Death Toll during the riverfront finale. Movement in the water is identical to movement on land, so swim to the shore as quickly as possible.
Ranged Combat
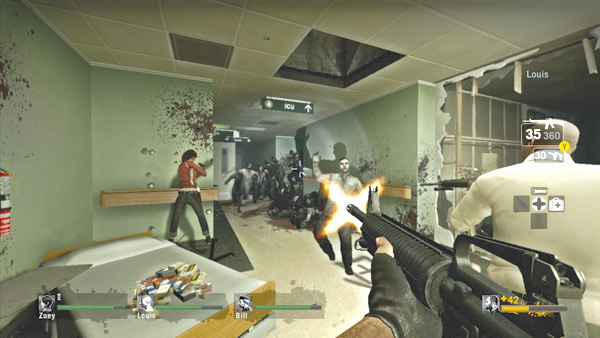
Watch your fire when shooting around teammates. Friendly fire incidents can be just as deadly as the infected.
Firearms have been proven the most effective method of neutralizing the infected, so all survivors must be well versed in how these weapons operate. Although each weapon in Left 4 Dead has its own characteristics, they all function similarly.
The crosshair icon in the center of the HUD is the weapon’s aiming reticle. Simply place this over a target and squeeze the trigger. The size of the reticle indicates how accurate you are based on weapon selection and the stability of your current firing position.
If the crosshair icon is small, your shots are quite accurate, but if the crosshair icon is spread out, it indicates poor accuracy.
Accuracy can be improved by firing from a stationary or crouched position—watch as the crosshair icon constricts as you halt movement.
So where do you shoot a zombie? Don’t believe the rumors stating a headshot is the only way to kill the common infected. This simply isn’t true. While headshots always prove fatal, zombies can be killed by shooting them in the torso or limbs—severing limbs with shotguns, sniper rifles, or assault rifles is just as lethal as a headshot.
Because of the zombies’ speed, scoring headshots can be difficult to pull off, so simply aim for center mass. It may take more rounds to stop a zombie in this fashion, but the torso presents a much larger target, helping ensure your bullets find their mark.
When using automatic weapons, holding down the trigger fires off a continuous stream of rounds. The increased rate of fire can come in handy during chaotic swarm attacks, but this benefit is offset by a lack of accuracy (due to recoil) and increased ammo consumption. Therefore, exercise extreme restraint when using automatic weapons.
To maintain accuracy and conserve ammo, never fire more than 3–4 rounds per burst. Ammo is often hard to come by, so the more you waste with automatic bursts the more you put your team at greater risk if your stores run dry.
Another way to conserve ammo is by equipping your pistol. Pistols never run out of ammo and should be used regularly, particularly when engaging individual common infected. Save your automatic weapons for engaging larger groups.
Melee Combat
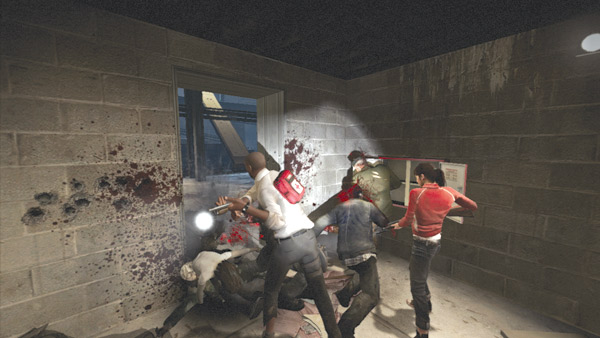
If you're reloading, shove infected away with quick melee strikes until you can fire your weapon.
All firearms can be used as melee weapons during close encounters with the infected. Simply aim at a target and press the melee attack button or key. Melee attacks are rarely fatal, but they’re useful for knocking zombies backward, often allowing you a better chance to take aim and kill them with a head or torso shot.
Melee attacks can be performed anytime, even while reloading a firearm. This is particularly useful when performing a lengthy reload on a shotgun or sniper rifle.
When confronting gassy, bile-filled Boomers, melee attacks are essential. If you shoot a Boomer at close range, you and your teammates will get slimed with bile as the grotesque threat explodes, prompting a swarm attack.
To avoid this, always melee Boomers first and shoot them only when you’re a safe distance away. Melee attacks are also the preferred method of knocking a Hunter off a pinned teammate or freeing a buddy ensnared by a Smoker’s tongue.
It may take some practice, but performing melee attacks should become second nature when encountering threats at point-blank range.
Health Management
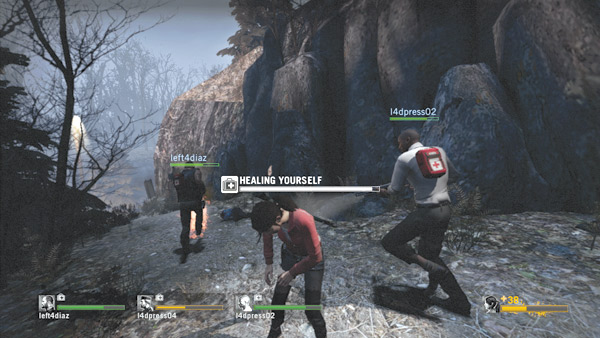
You're vulnerable to attacks while using a first aid kit, so make sure a teammate watches your back as you heal.
Health is governed by a basic hit point system. Every player starts out with 100 hit points and loses health while taking damage from infected attacks, friendly fire, or by falling from a great height. If you have 50 hit points or more, you’re considered healthy, as indicated by a green health bar, and can move at full speed.
But as your health dips below 50 hit points you’re considered wounded (indicated by an orange health bar) and suffer a slight movement penalty, causing your character to limp.
If your health drops below 15 hit points the health bar turns red, indicating your character is in critical condition and in need of first aid.
At this point movement is slowed even more, making it difficult to keep up with healthy teammates. So heal up or at least ask your teammates to slow down to prevent being left behind.
First aid kits are the best way to heal. You can either heal yourself with a first aid kit or have a teammate heal you. Pills are another way to gain health, but they are more of a temporary solution.
While pills recover hit points they do not completely heal, as indicated by the dashed vertical lines in the health bar. For example, if you use pills while your health bar is in the orange zone, it will remain orange after using pills even if your hit point level is above 50. As a result, you still suffer from a movement penalty.
Incapacitation
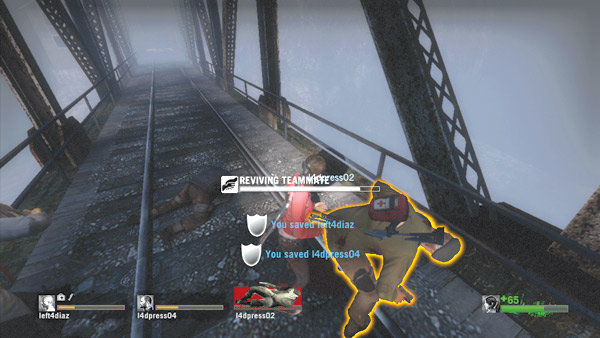
If a teammate is incapacitated, neutralize any infected nearby, then revive your buddy with the use command.
When characters lose all their hit points, they fall to the ground, incapacitated. The avatar portrait and health bar in the bottom-right corner of the screen is replaced with a new interface during this phase, with an icon showing your character on his or her back and a new health bar filled with red dashed vertical lines.
At the start of incapacitation your character has 300 hit points in this new health bar. These hit points slowly melt away over time and can disappear rapidly if you’re attacked.
Fortunately, you can still look around and fire your pistol(s) while lying on your back, providing some self defense. But you must rely on a teammate to revive you before you can get back on your feet—to revive a fallen teammate, stand over him or her and press and hold the use button/key.
If all teammates are incapacitated at once, there’s nobody left to revive, bringing the round to an end. Once you’ve been revived you’re given 30 temporary hit points, as indicated by red dashed lines in your health bar—you must heal quickly before you run out of health.
A player can be revived three times per map; after the third time, you can still heal to full health, but if your health bar/hit points are depleted again, you simply die instead of becoming incapacitated. If you die in the co-op campaign or single-player, your character respawns in a “spawn closet.
These are small rooms scattered throughout the map. To be released from a closet a teammate must open the door, at which point you can rejoin your team. In versus mode, there are no respawns.